Deploy SSL Certificate on Baidu Cloud Compute - Nginx
This document introduces the method (including operation guidance video) for deploying SSL certificates in Nginx Service on Baidu AI Cloud. You can refer to the key steps in the following video to use Baidu AI Cloud products or troubleshoot independently. Click here to watch the video Install Nginx Service on CentOS and Deploying SSL Certificates
Description:
If the interface elements or operation methods shown in the video guidance are updated, please rely on the AI Cloud console interface for the most accurate information. The video aims to demonstrate the functional operation process, and minor interface changes will not affect the overall functionality or presentation.
Based on the Nginx environment built in the CentOS 7.2 LNMP Deployment, configure an SSL certificate for the Web service (you need to prepare the domain name in advance). The following steps are the complete process of configuring and deploying the certificate.
Download and unzip the certificate
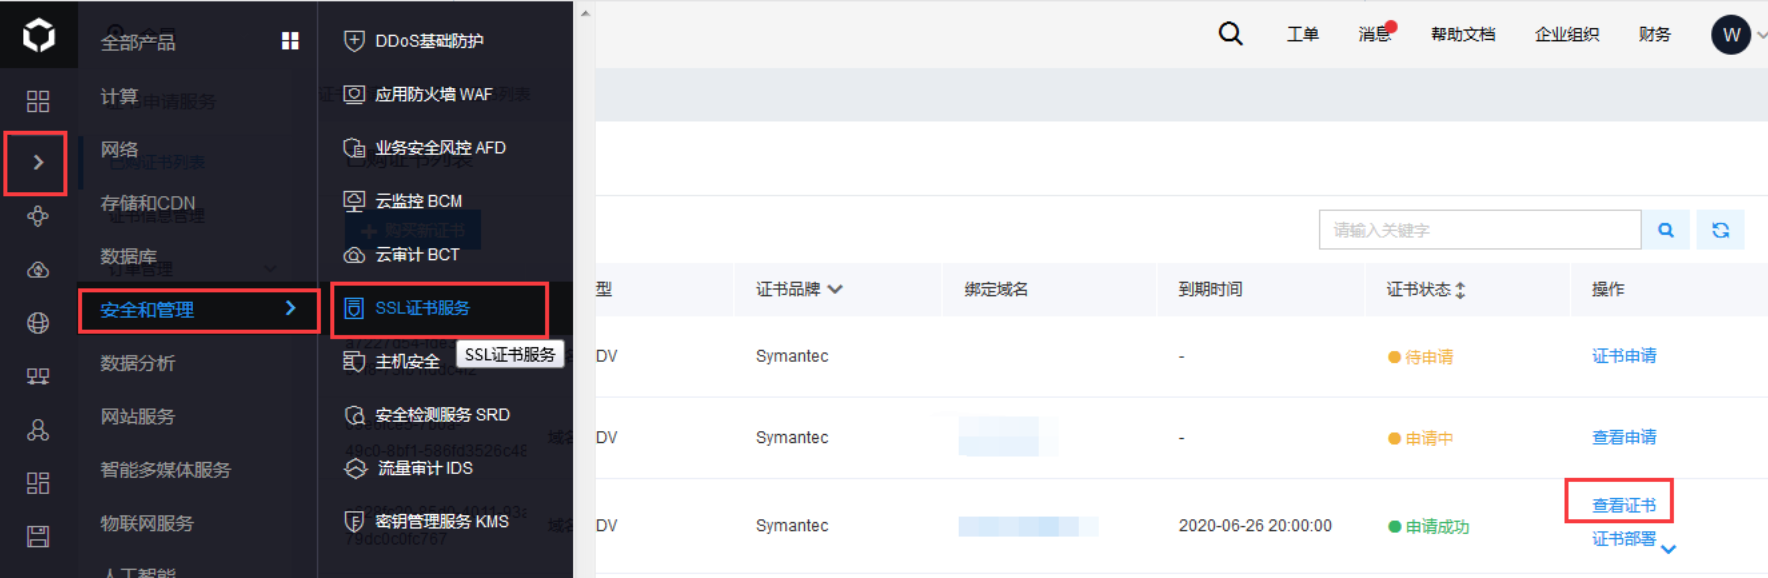
Navigate to Baidu AI Cloud Console - Security and Management - SSL Certificate Service - List of Purchased Certificates. Click on the certificate associated with the domain name of this server, then select "View Certificate.\
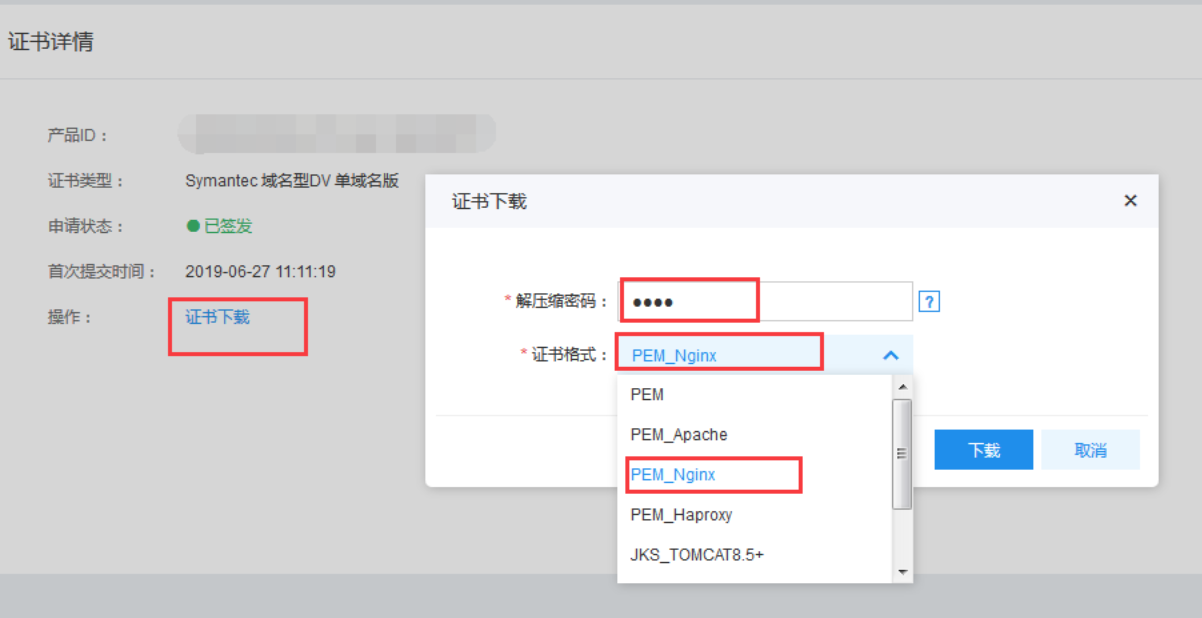
Click on "Download Certificate," choose the PEM_Nginx format, and set a four-digit unzip password.
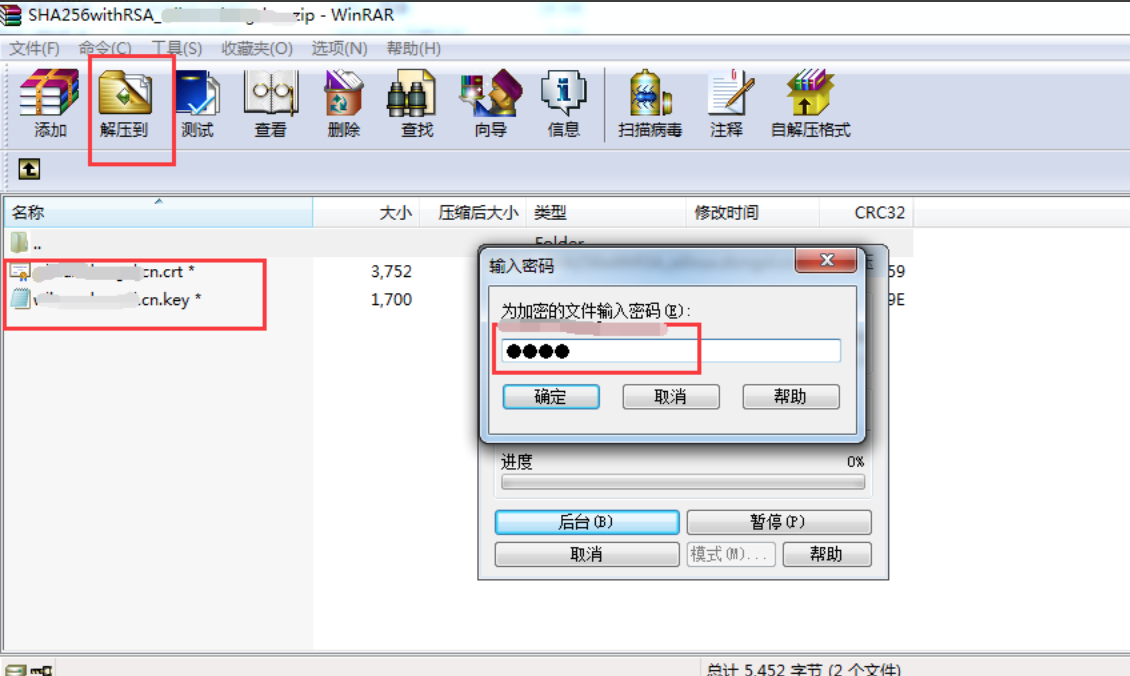
After downloading the files locally, double-click to open them. You will find three files: crt and key. Choose "Unzip To," specify a path, and enter the four-digit password you set in the console.
Upload the certificate file to the server
Use FTP or another tool to upload the crt and key files extracted in the previous step to the nginx configuration directory at /etc/nginx/ on the server.

Modify configuration files
1vim /etc/nginx/nginx.confAdd the virtual host configuration below, or uncomment the HTTPS host.
1server {
2    listen       443;
3 server_name  ********.com;    #Replace with the bound domain name, for which a certificate must be registered
4 ssl                  on;     #This line is additionally added, used for enabling SSL function, so it must be added.
5 ssl_certificate      /etc/nginx/********.com.crt;  #This is the path to the downloaded Nginx certificate (crt file), which can be absolute or relative
6 ssl_certificate_key  /etc/nginx/*********.com.key;   # Same as the crt rule
7    ssl_session_cache    shared:SSL:1m;
8    ssl_session_timeout  5m;
9    ssl_ciphers  HIGH:!aNULL:!MD5;
10    ssl_prefer_server_ciphers  on;
11    location / {
12        root   html;
13        index  index.html index.htm;
14    }
15}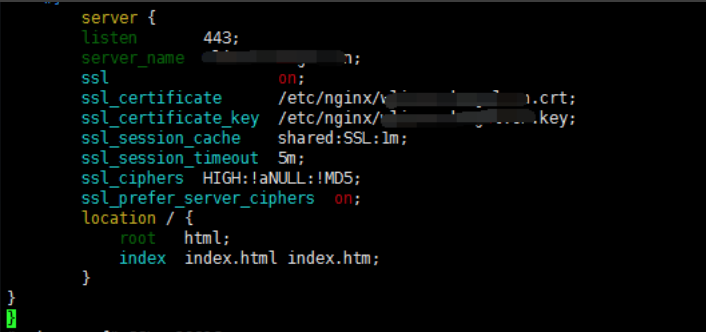
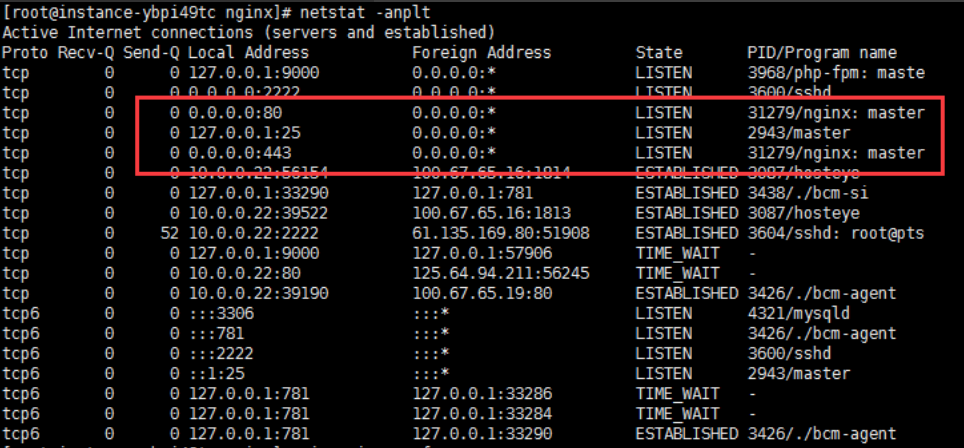
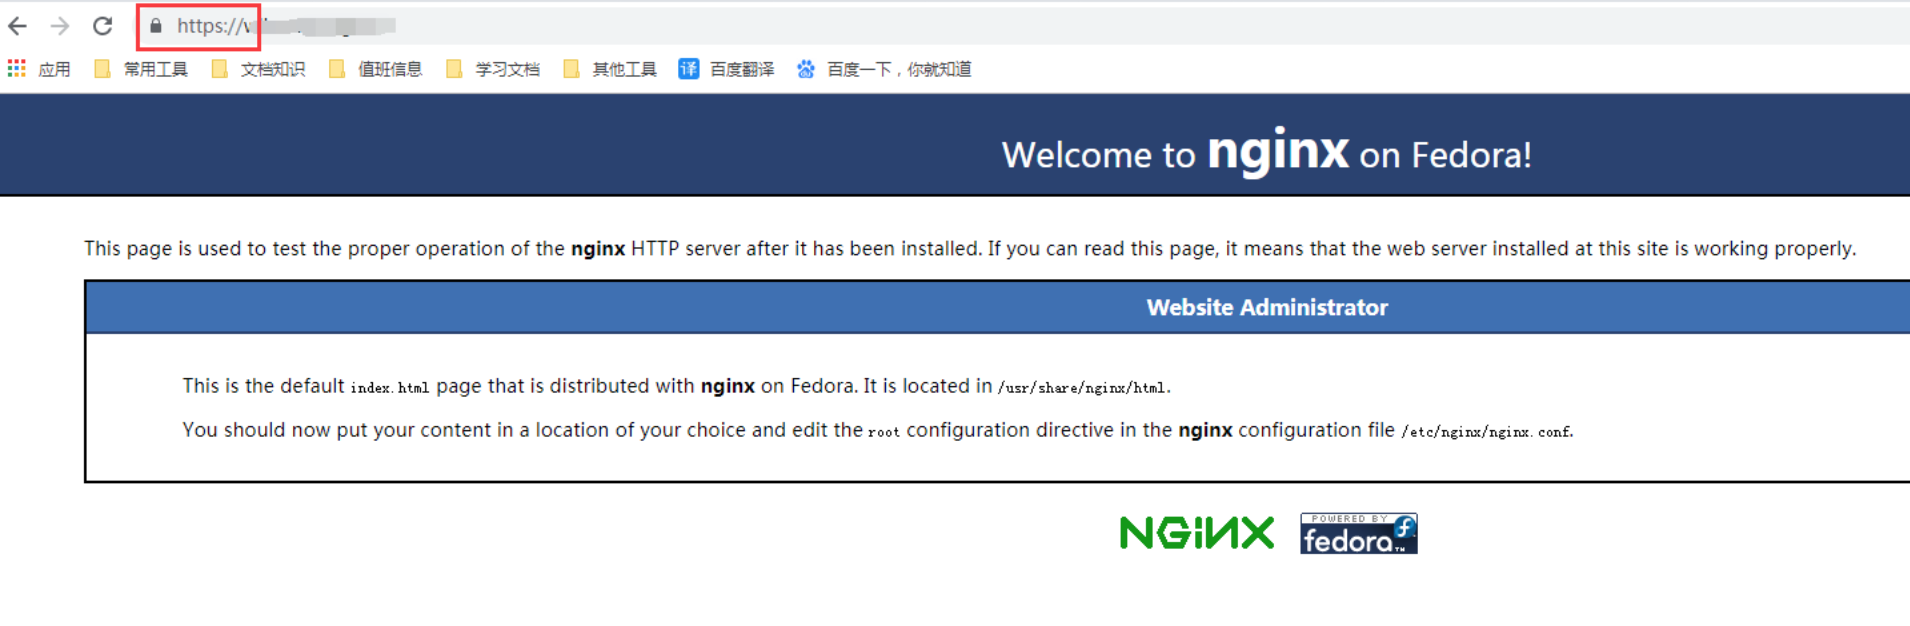
After saving the configuration, restart the nginx service
1systemctl restart nginxUsing netstat -anplt, check that port 443 is open. You can then access the website via https:// followed by the domain name.
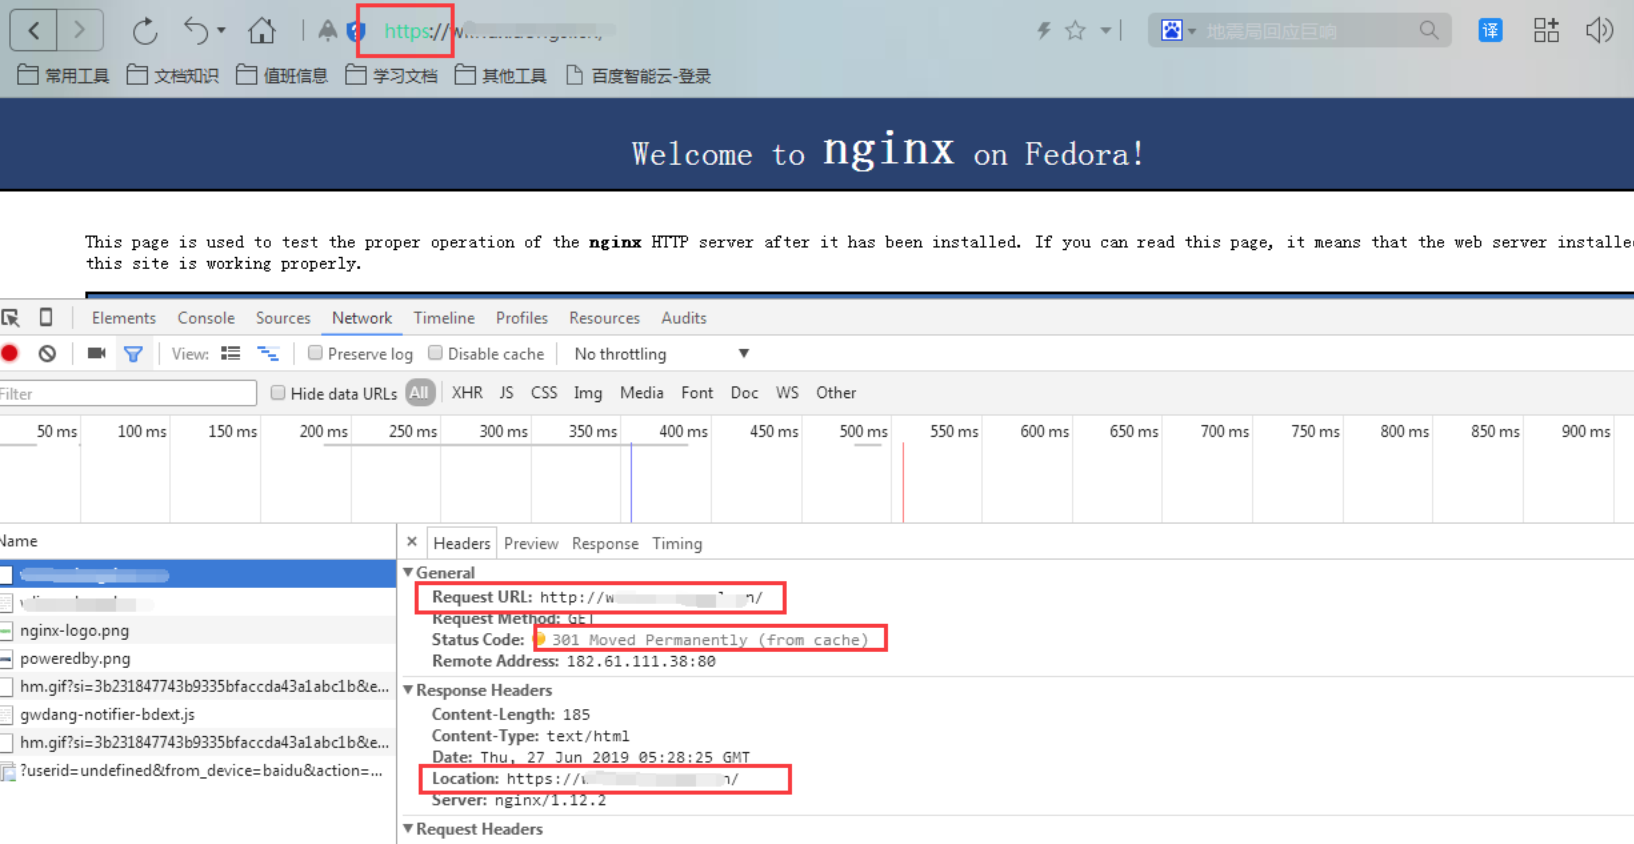
Set HTTP to HTTPS forced redirection
1vim /etc/nginx/nginx.confIn the server block for port 80, replace "localhost" after server_name with your certificate domain name, then add the following line beneath it:
1rewrite ^(.*)$ https://${server_name}$1 permanent;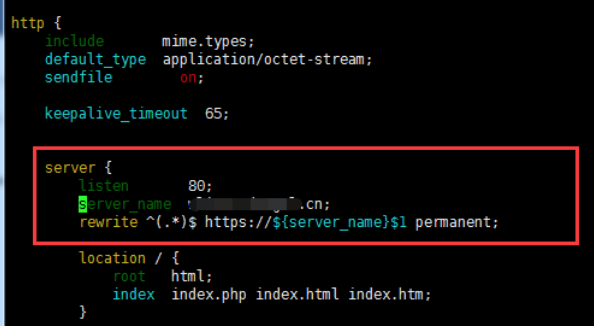
After saving, restart Nginx:
1systemctl restart nginxFrom this point onward, when the domain name is accessed directly, all requests will be 301 redirected to HTTPS.