Connecting to Windows Server Using Xshell
Updated at:2025-10-20
This tutorial explains how to use Xshell to connect to a Windows server, using Windows Server 2008 as an example.
Step 3: Remotely sign in to the server
[Sign in to the server](BCC/Operation guide/Instance/Sign in to instance/Login Method Overview.md)
Step 2: Download the corresponding server software, unzip it and install it on the BCC
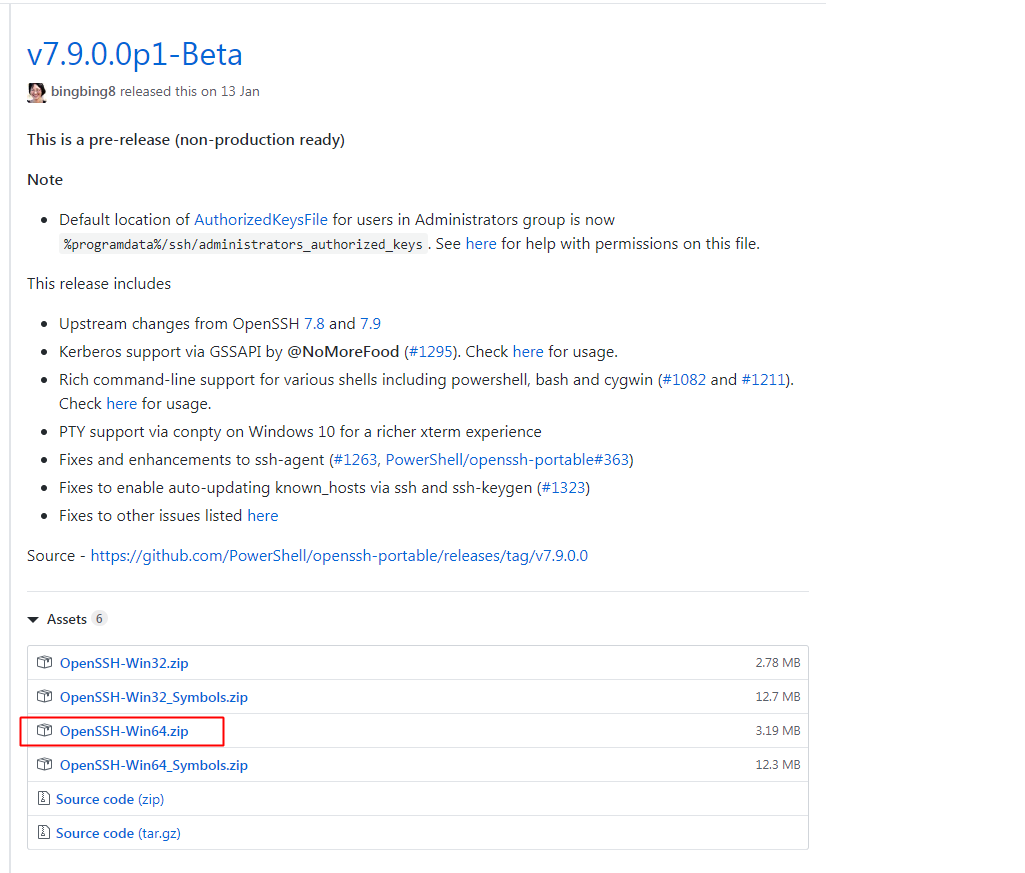
- Sign in to this website to download the corresponding version of OpenSSH. Download address: https://github.com/PowerShell/Win32-OpenSSH/releases.
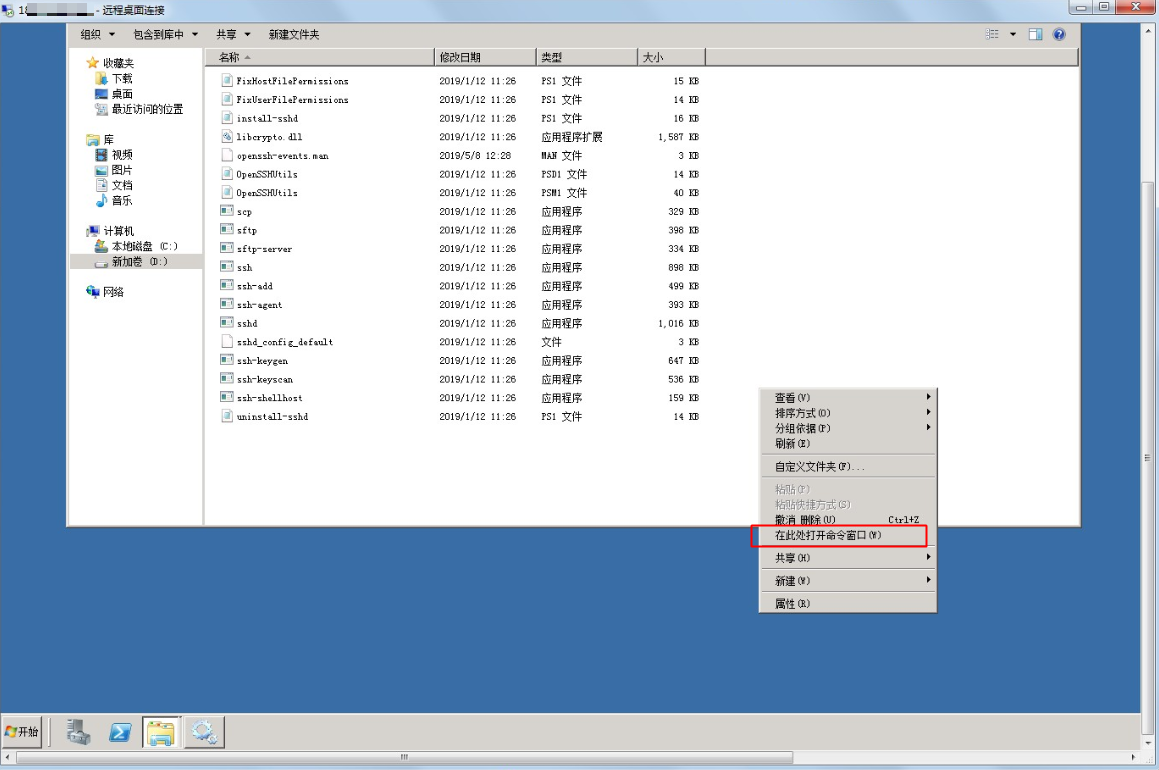
- Upload the file to the Windows server and extract its contents.
-
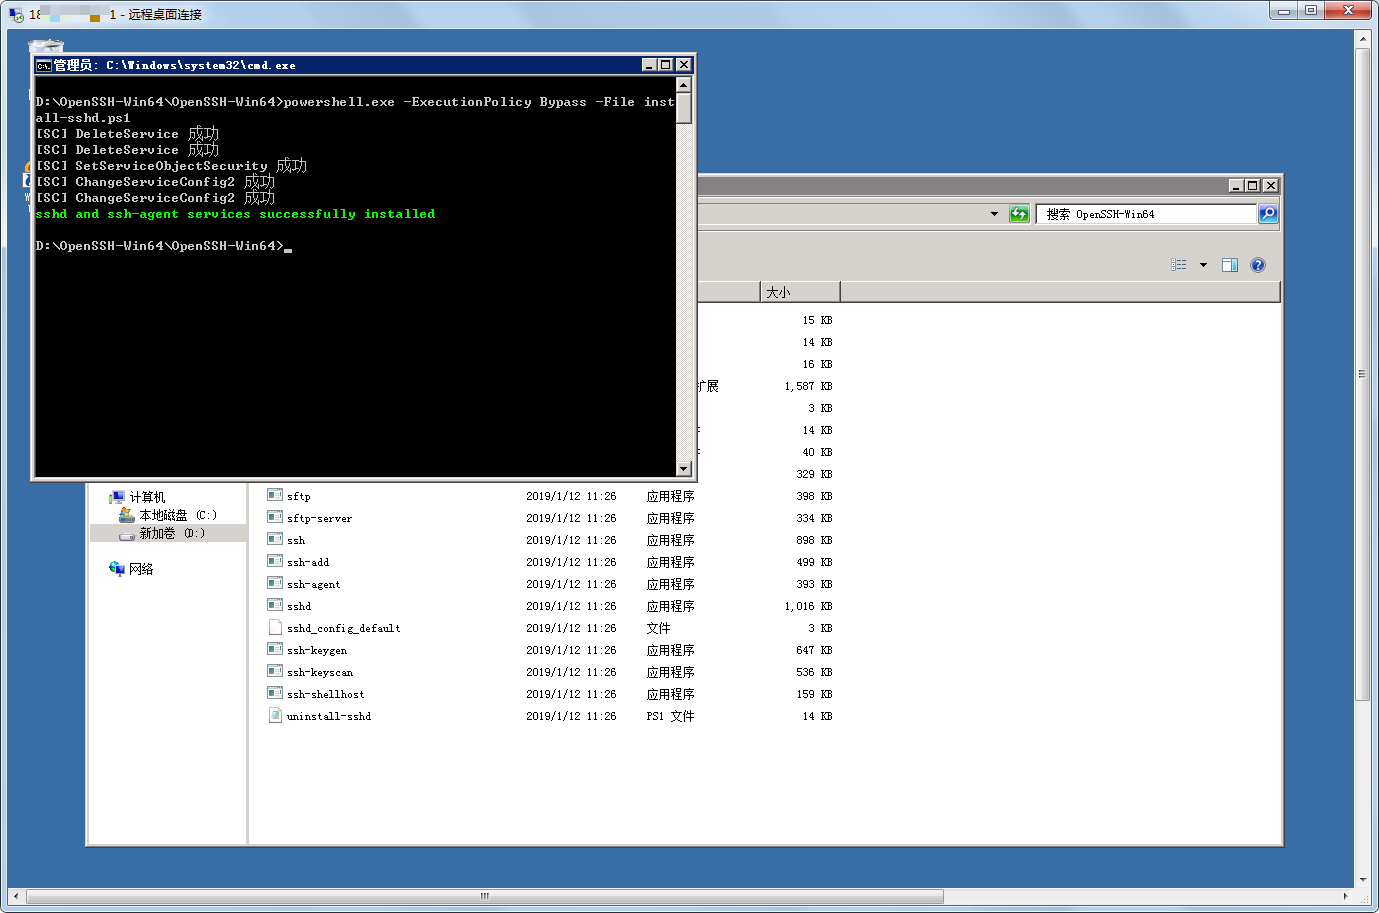
In the unzipped folder, press and hold the Shift key while right-clicking to enable cmd and execute:
powershell.exe -ExecutionPolicy Bypass -File install-sshd.ps1
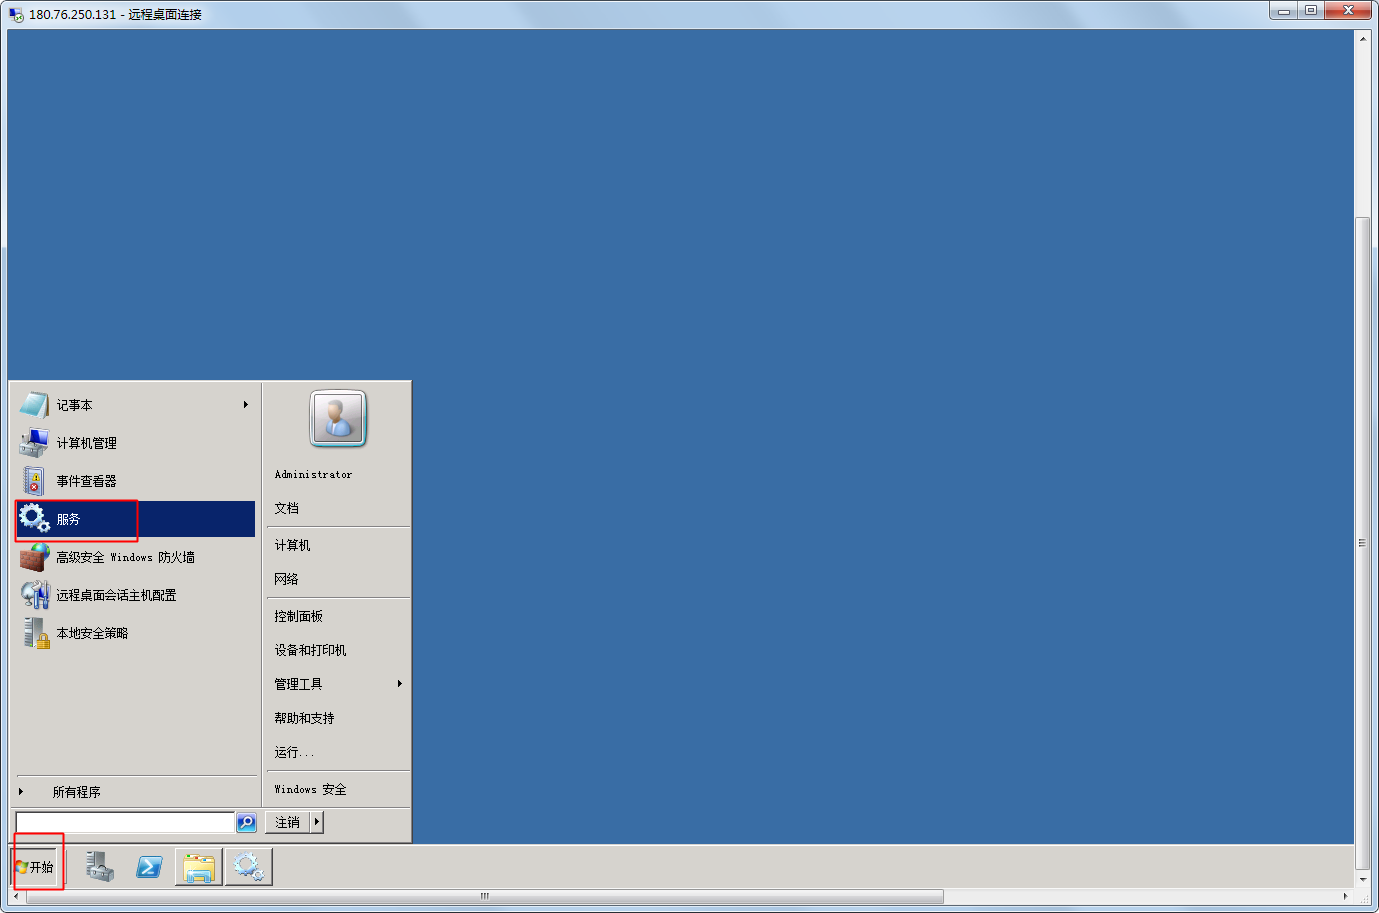
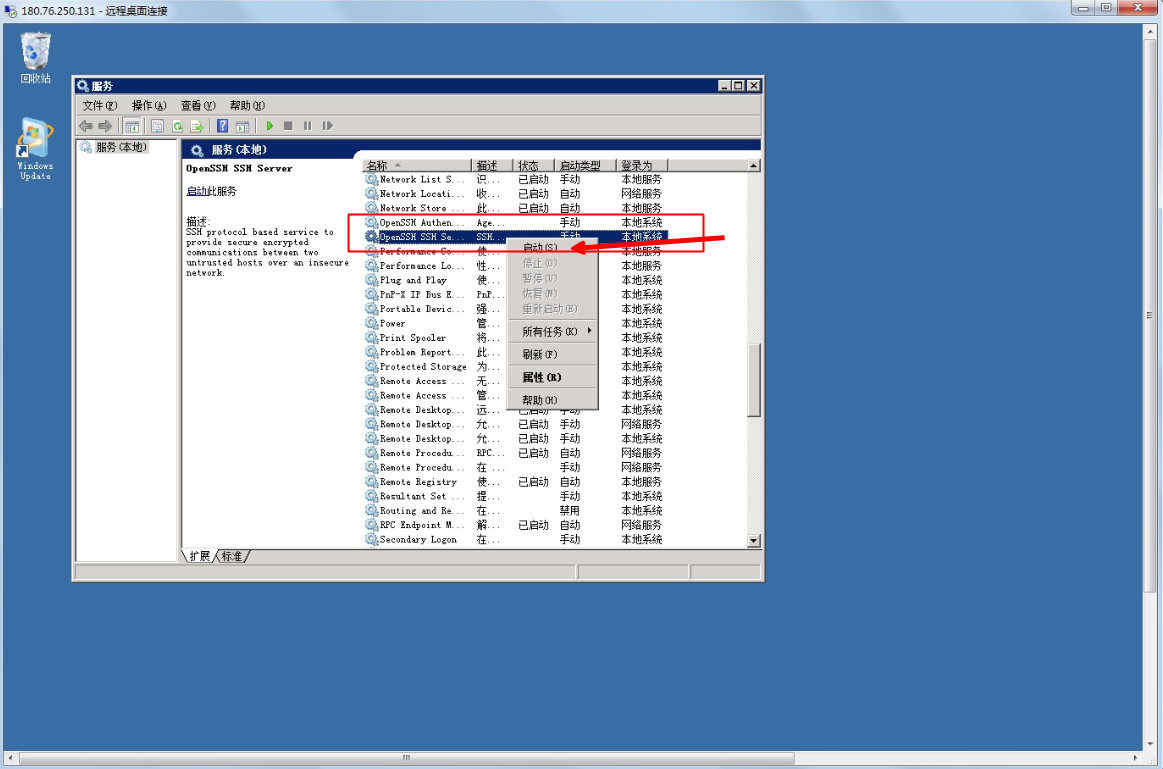
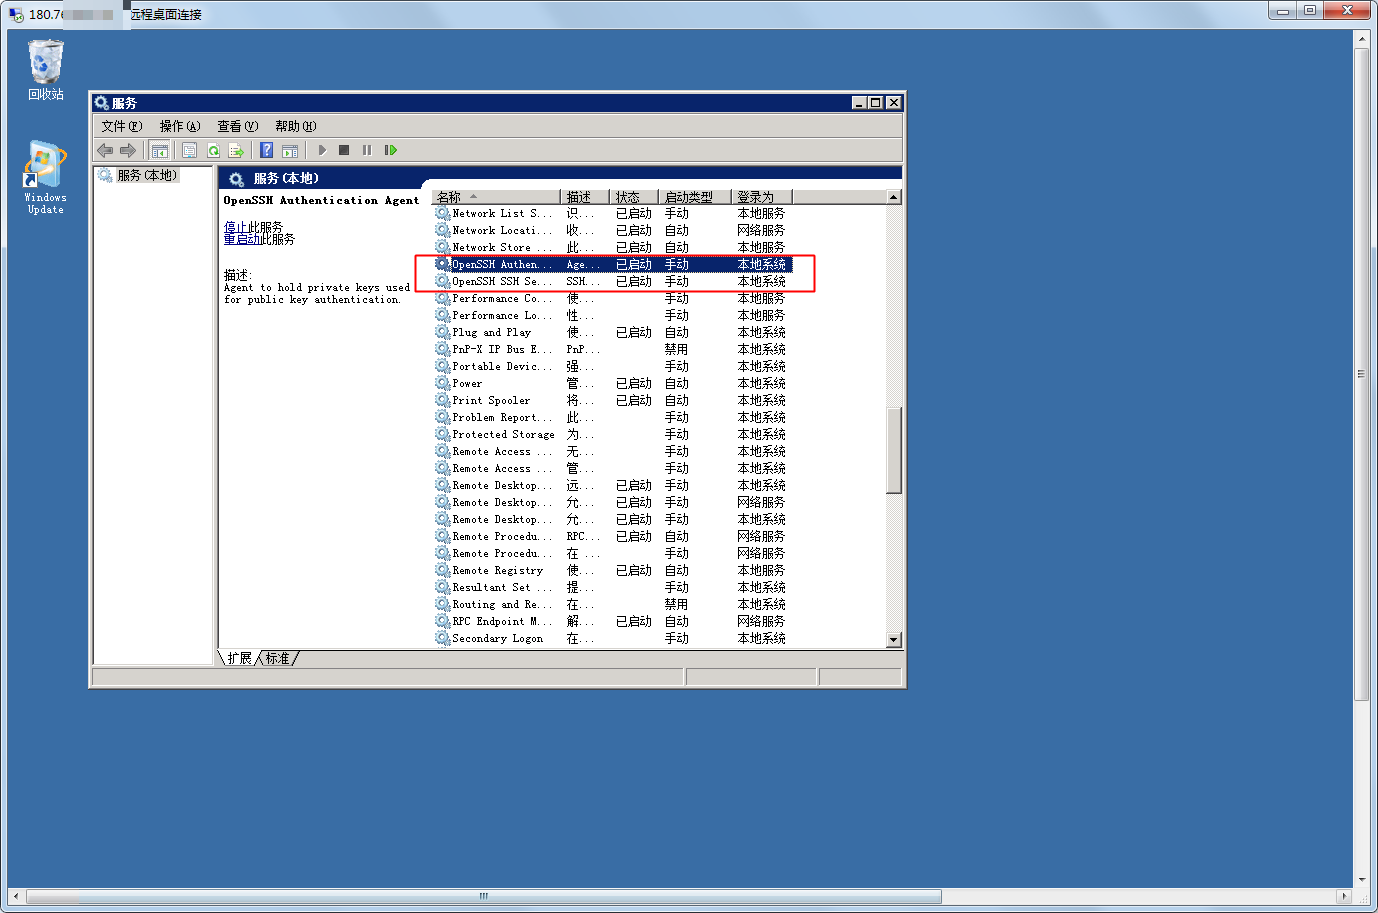
- Click Start - Services, locate the two services named "OpenSSH Authentication Agent" and "OpenSSH SSH Server," then right-click and start them.
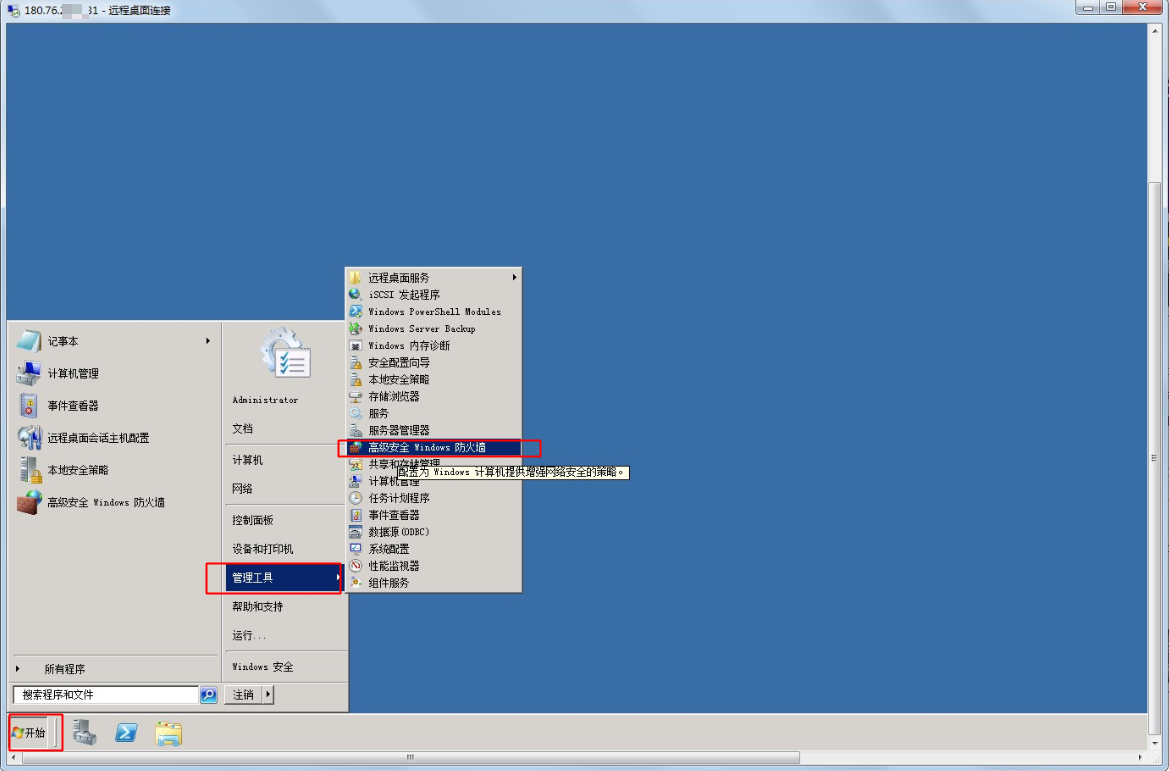
Step 3: Allow Port 22 through the firewall
- On the server, go to Start - Administrative Tools - Windows Firewall with Advanced Security.
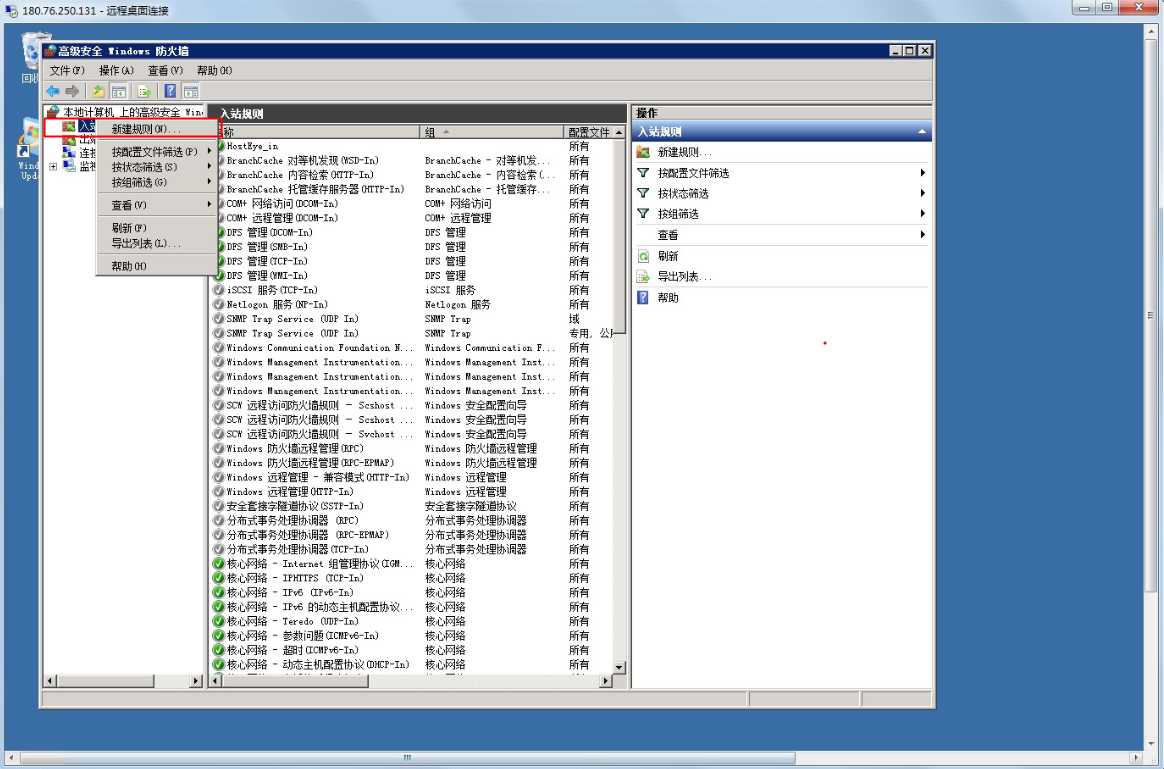
- Right-click on Inbound Rules and select "New Rule.\
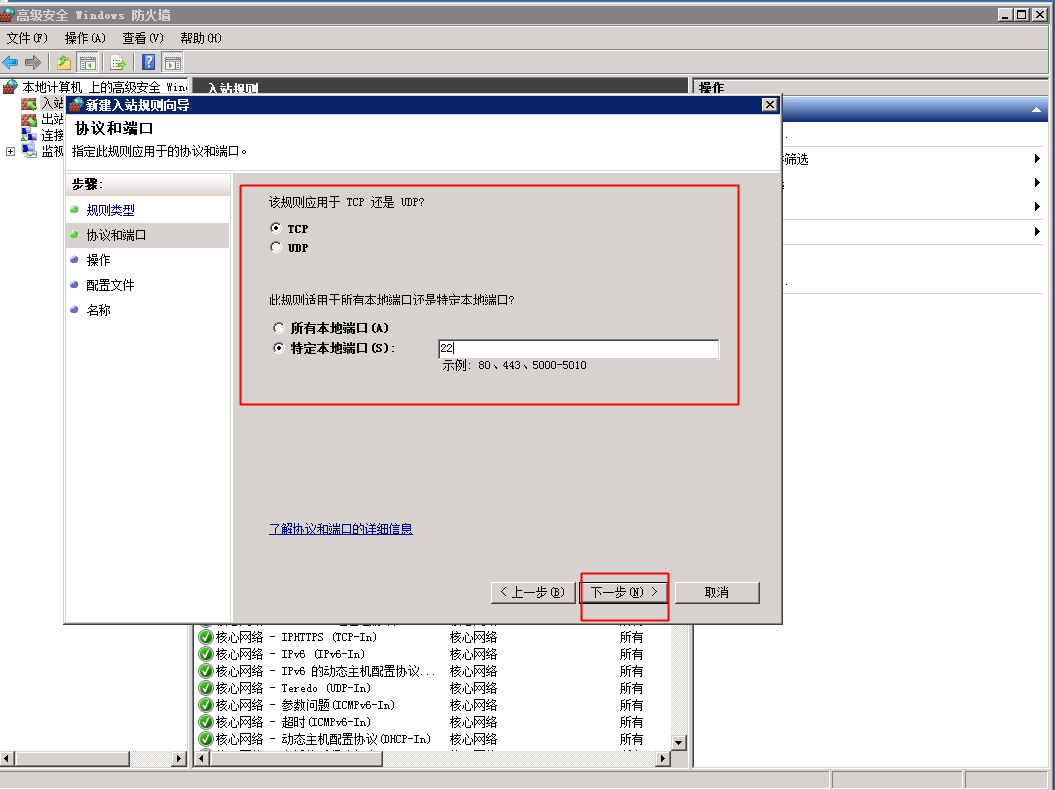
- Choose "Port" and click "Next.\

- Select "TCP," choose "Specific Local Port," enter 22 in the port field, and click "Next.\
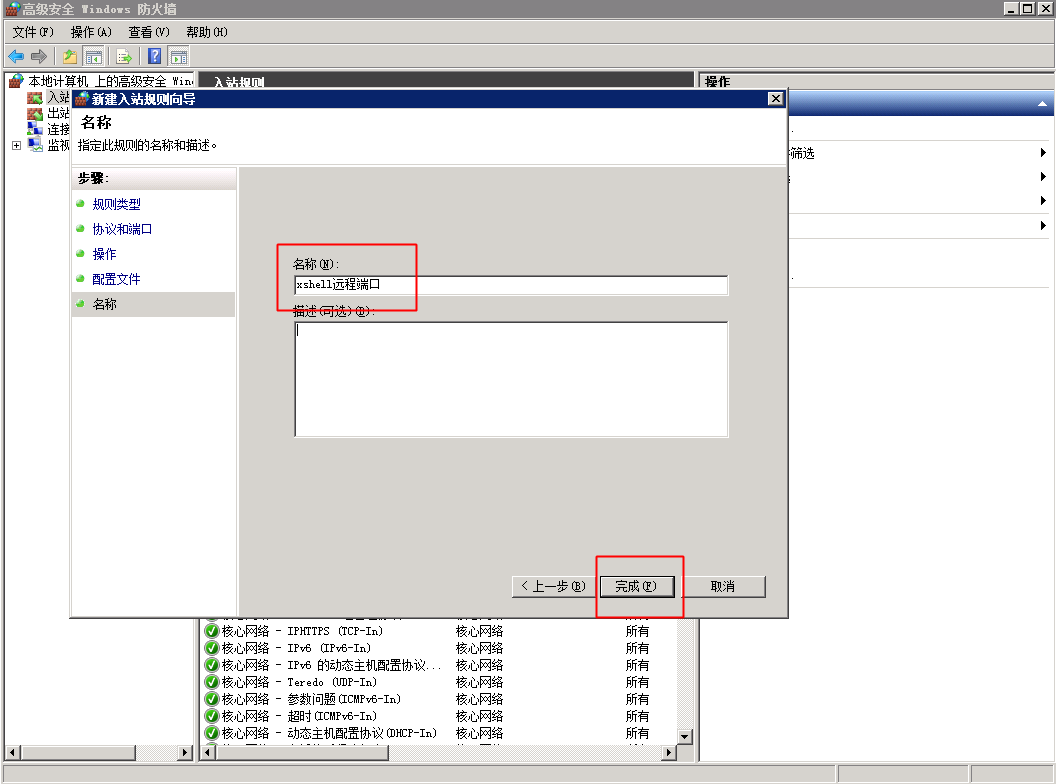
- Continue clicking "Next" until you reach the "Name" section, then enter "Xshell Remote Port" in the name field and click "Finish.\
Step IV: Use Xshell to connect to the Windows server
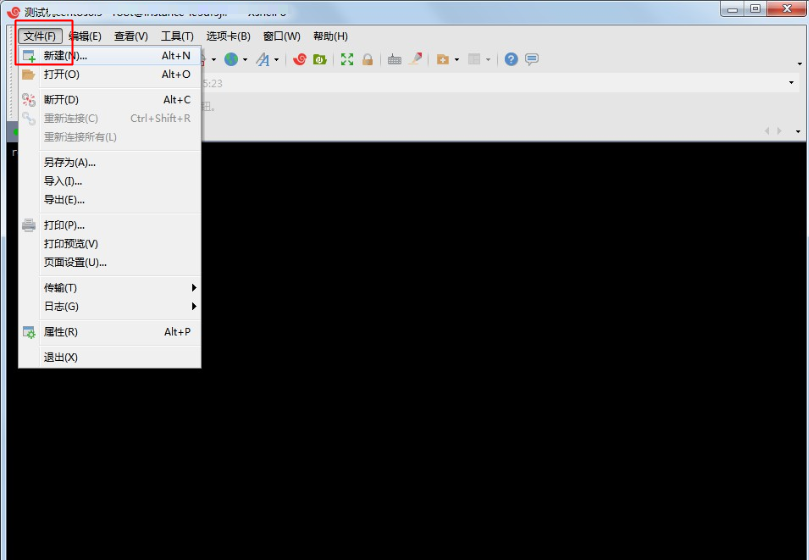
- In the top-left corner of Xshell, click File - New to create a session.
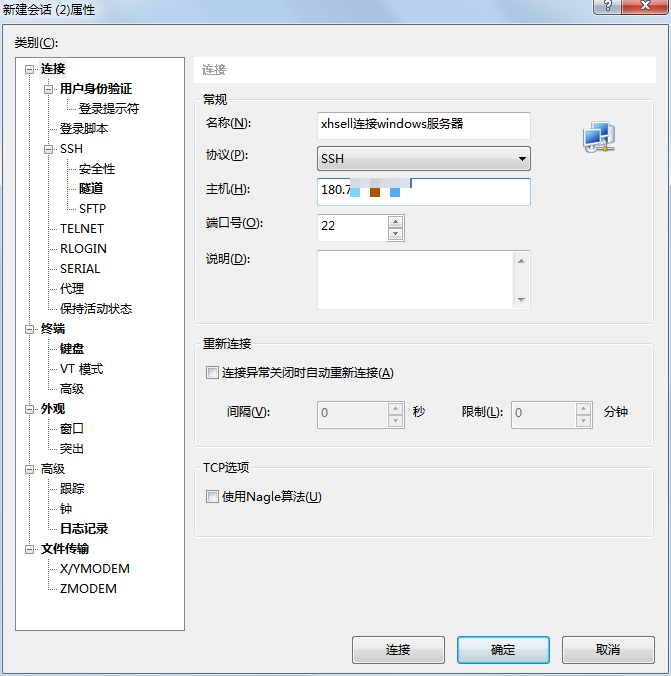
- Set the desired name and host IP (i.e., the server's IP address) in the session settings.
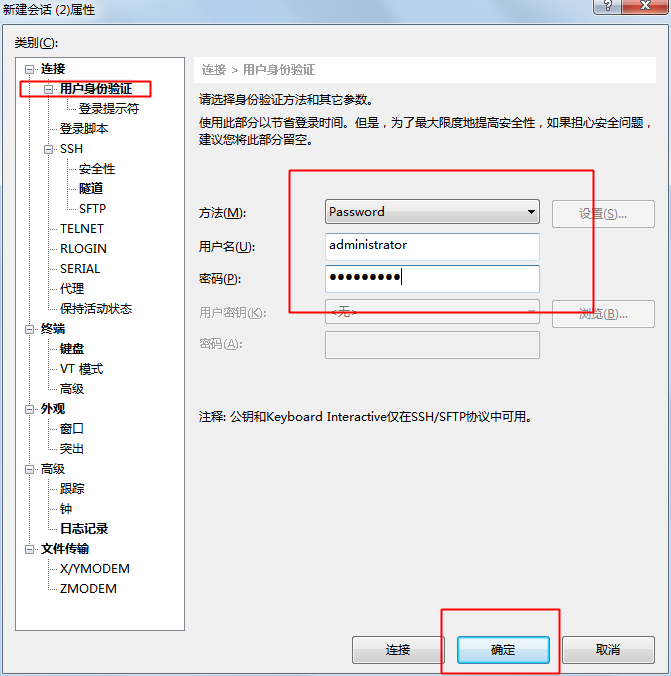
- Under User Authentication, input the remote connection account credentials and click "OK.\
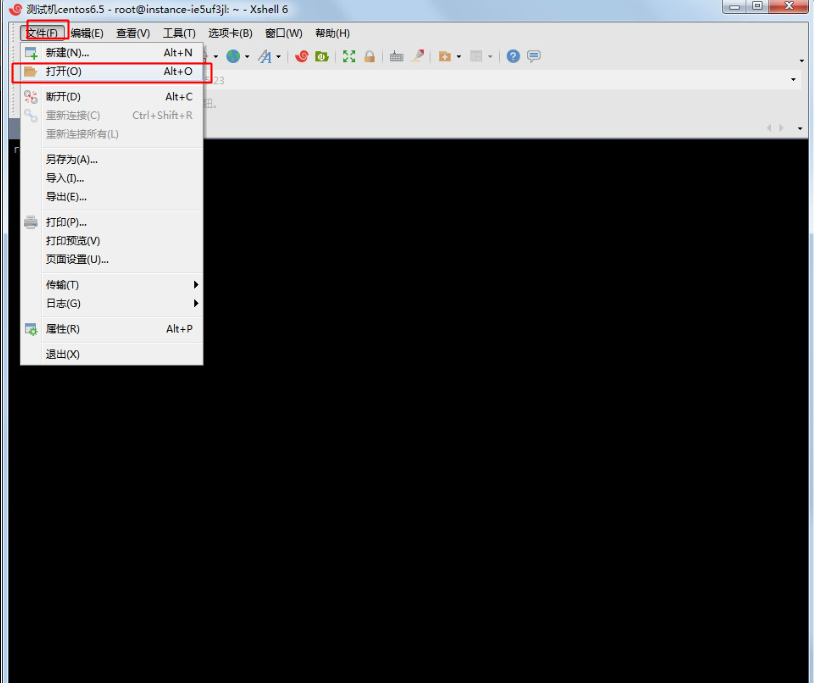
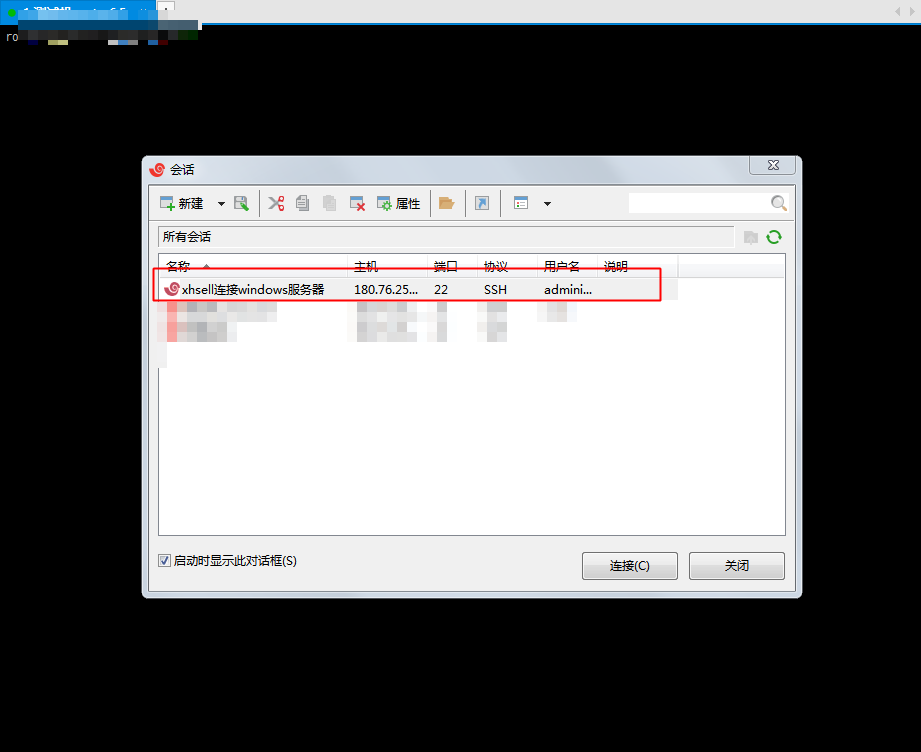
- Go to File - Open to access the Session page.
- Double-click the session connection you previously created.
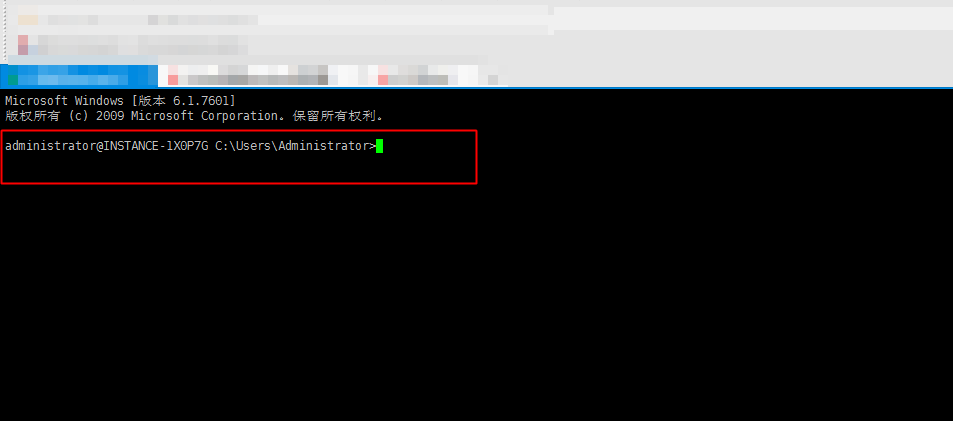
- Verify that the connection is successful.