Creating Instance Using Imported Custom Image
Create instances with custom images
After importing the image successfully, access the BCC console, click "Images" on the left side, and view your imported custom image in the list. You can create instances using this custom image.
After creating an instance successfully, if your images are pre-configured images supported by the Baidu AI Cloud Platform, further customization is recommended.
Imported custom images cannot be used to create EBC instances.
Linux system customization
Linux system software repository settings (recommended)
If your cloud server runs an operating system supported by Baidu AI Cloud, it is recommended to configure the software repository to use Baidu repositories.
Download the Software Repository Settings script to your server, then execute the command: bash setrepo.sh, to set the software repository.
Linux system NTP settings (recommended)
If the NTP service is enabled on your Linux cloud server, it is advised to add Baidu NTP server addresses to your server configuration.
- Edit /etc/ntp.conf file and add the following line at the end:
server ntpsr.baidubce.com
- Edit the file: /etc/ntp/step-tickers (if it exists), and modify its content as follows:
ntpsr.baidubce.com
Windows system customization operation
Modify and update server address
Taking Windows Server 2008 R2 as an example:
- Open the Local Group Policy Editor by running gpedit.msc on the virtual machine.
- Navigate to Local Computer Policy → Computer Configuration → Administrative Templates → Windows Components → Windows Update.

Open the "Specify Intranet Microsoft Update Service Location" option on the right.
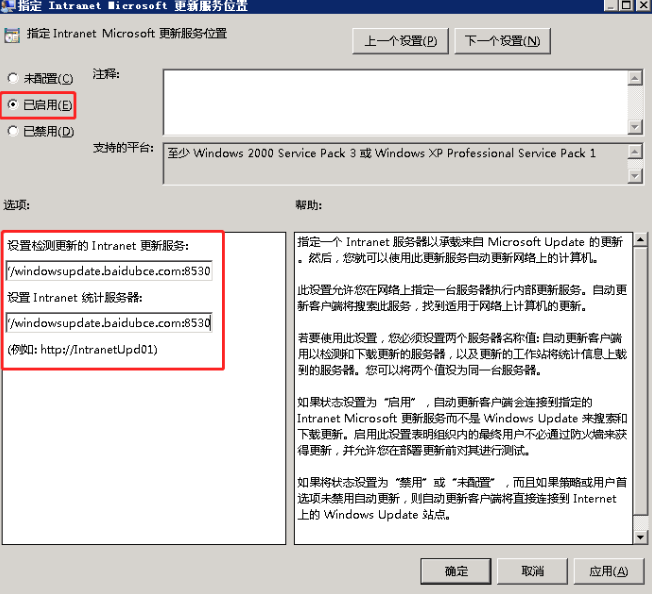
- To define the intranet Microsoft update service location, select "Enabled."
- In the following fields: Set intranet update service for detecting updates and set intranet statistics server, enter http://windowsupdate.baidubce.com:8530 and then click OK.
- Once configured, you can use Baidu AI Cloud's update servers for Windows system patch updates.
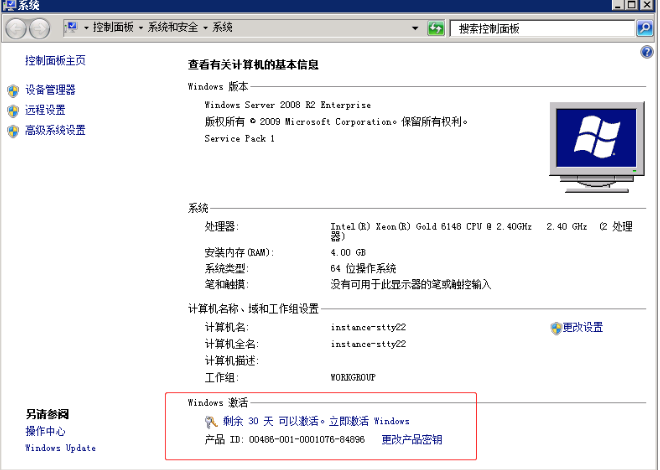
Modify activation service
If a Windows server created with a custom image remains unactivated on the Baidu AI Cloud Platform, modify the server activation settings of the virtual machine to activate the operating system.
Locate the command prompt and run the following command:
1.slmgr /ckms # Clear KMS server settings
2.slmgr /rearm # Reset the server status. The system will reboot after executing this command
3.slmgr /skms kms.baidubce.com # Set the IP address of the KMS server
4.slmgr /ato # Activate Once successful execution of this command, the system will prompt that the OS has been successfully activated
Install Baidu bcm-agent on Windows system (recommended)
- Download bcm-agent to your cloud server;
- Double-click the installation file and follow the default installation process.
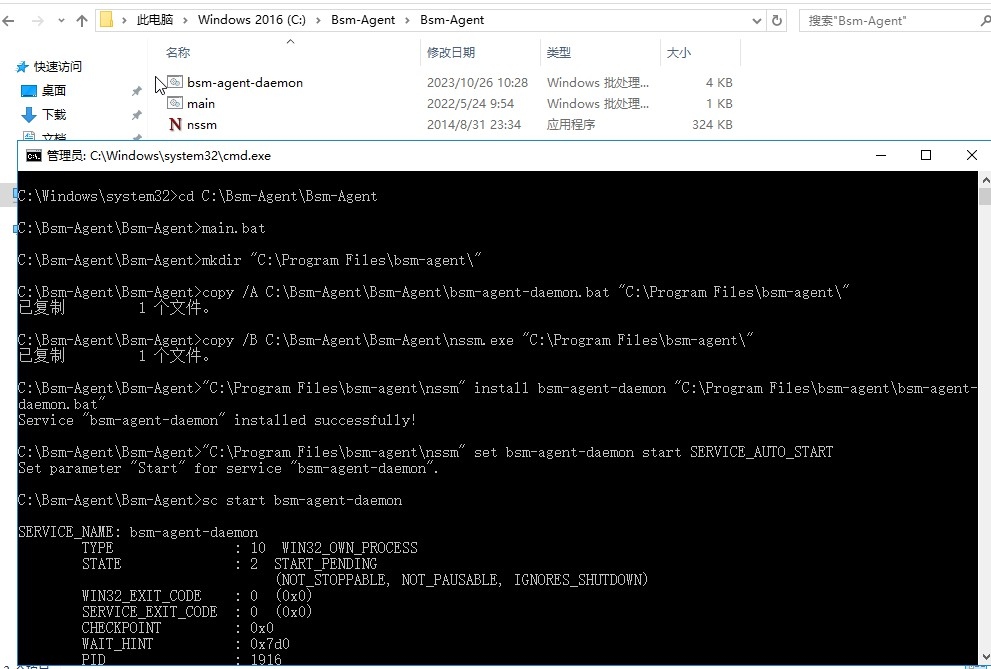
Install Baidu bsm-agent on Windows system (recommended)
- Download bsm-agent to your cloud server;
- After unzip the files, navigate to the directory in the cmd command line, execute the installation command, and start the service:
cd C:\Bsm-Agent\Bsm-Agent
main.bat
sc start bsm-agent-daemon
Install Baidu HostEye on Windows system (recommended)
- Download HostEye to your cloud server;
- Double-click the installation file and follow the default installation process.