Linux Format and Mount Instance Mount Local Disk
Background
This document explains how to format a local disk in an instance and mount it to a directory.
- Supported images: Baidu AI Cloud CentOS and Ubuntu series public images.
- Supported instance configurations: Instances equipped with local disks, such as the bcc.l5 series.
Operation steps
This document demonstrates formatting and mounting a local disk with the device name nvme0n1 in the public image Linux Centos 8u4:
- Sign in to BCC console, remotely connect to the cloud server OS, and download the partitioning tool with the following command.
1yum install -y partedIf you are using an Ubuntu system, download it using the command below.
1apt-get install parted-
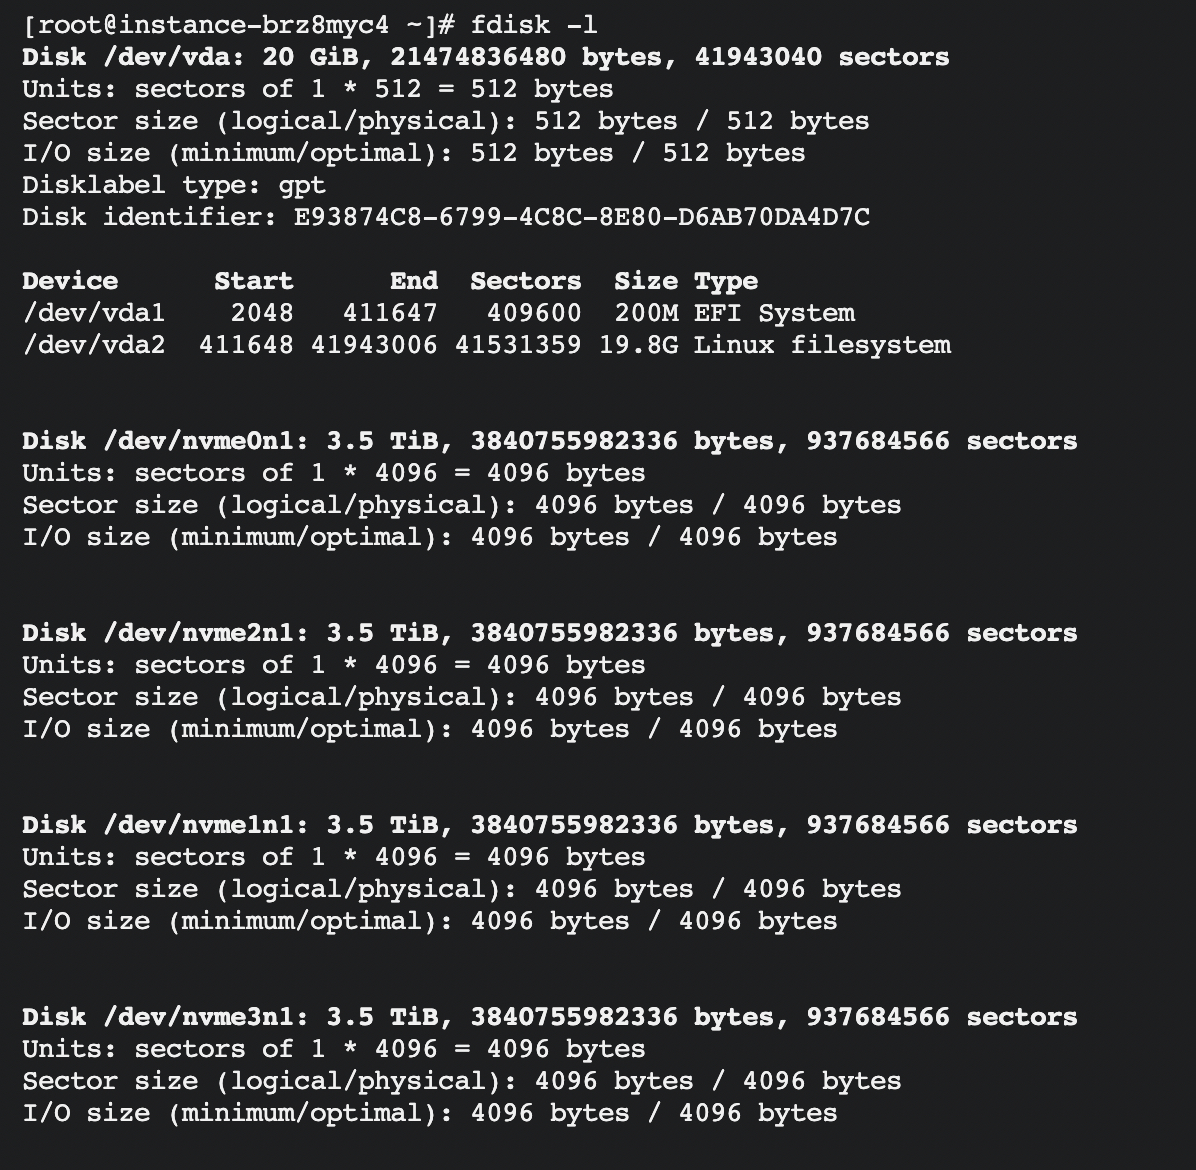
Retrieve the device name of the data disk using the following command:
fdisk -l
The example result indicates that the current BCC instance has 4 local data disks: /dev/nvme0n1- /dev/nvme3n1, and the system disk CDS (Cloud Disk Server)/dev/vda1, /dev/vda2
.
- Partition the data disk with the following command.
1parted /dev/nvme0n1Follow the instructions step-by-step as outlined below.
- Use the following command to switch to the GPT partition format.
1mklabel gpt- Create a primary partition using the following command, and set its start and end positions.
1mkpart primary 1 100%If you intend to create multiple partitions, you can use appropriate commands to allocate specific percentages of the disk capacity for each partition. For instance, to create two partitions, you could allocate 30% to the first partition and 50% to the second partition with the following code.
1mkpart primary 0% 30%
2mkpart primary 30% 80%- Verify partition alignment using the following command. If the output returns 1, the partition is properly aligned.
1align-check optimal 1- View the current disk's partition table using the following command.
1print- Exit the partitioning tool with the following command.
1quit 
- Make the system reread the partition table with the following command.
1partprobe- Check the disk partition using the following command.
1lsblk 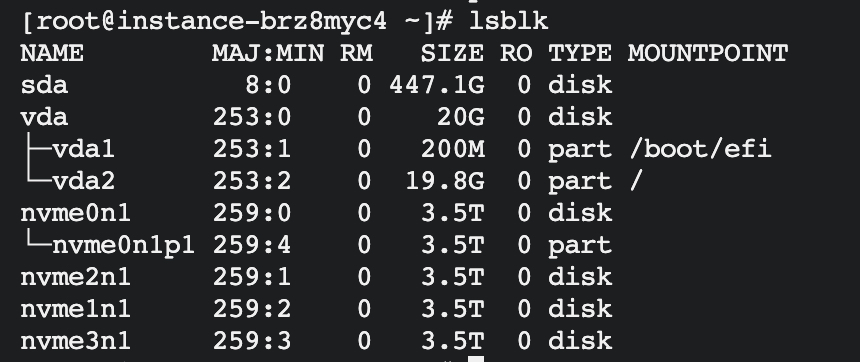
- Create a file system using the following command. This document uses ext4 as an example.
1mkfs -t ext4 /dev/nvme0n1p1 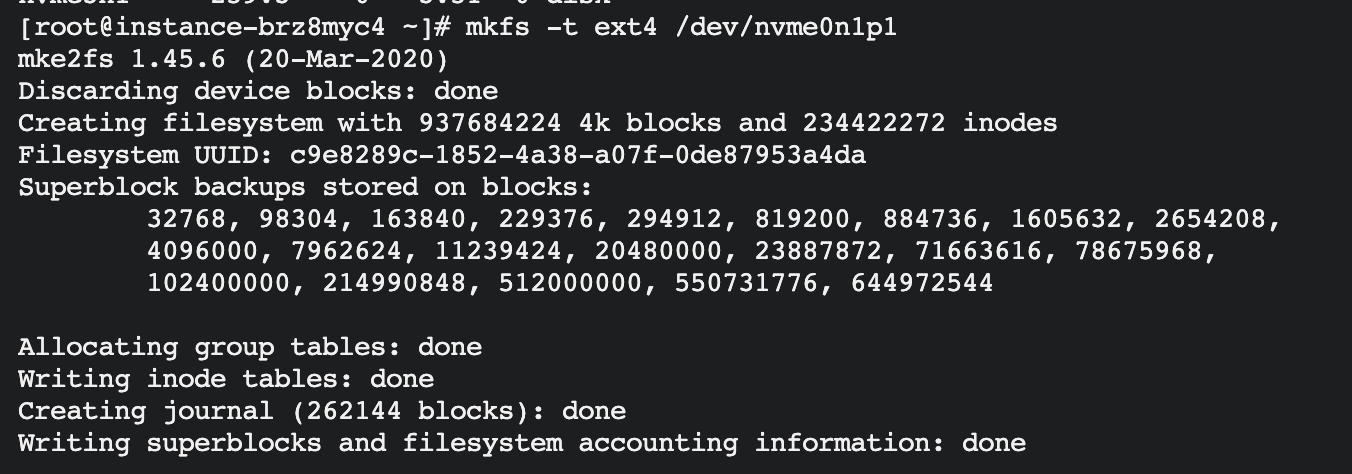
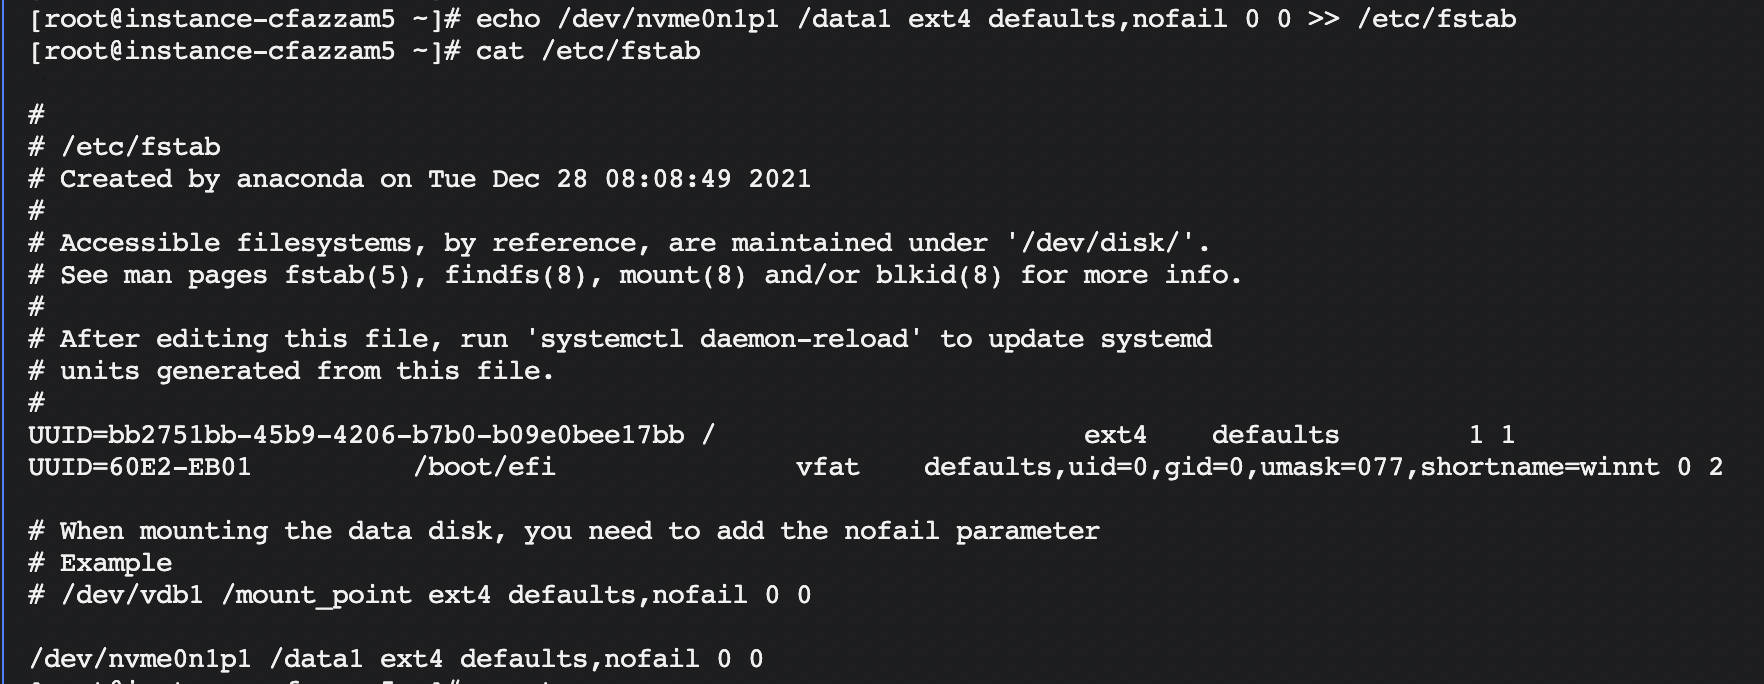
- Configure automatic mounting at boot with the following command. If you need to set automatic mounting of cloud disk at boot, write the new partition information in /etc/fstab and start the automatic mounting of partition at boot.
Create a mount directory, such as /mnt/data1 in this example, or replace it with your desired mount target.
1mkdir /mnt/data1 Back up the fstab file using the following command.
1cp /etc/fstab /etc/fstab.bak Edit the fstab file using the following command.
1echo /dev/nvme0n1p1 /mnt/data1 ext4 defaults,nofail 0 0 >> /etc/fstab nvme0n1p1 is the specified disk partition, /mnt/data1 is the mount target, ext4 is the file system type of the partition, which can be modified according to the created file system, and defaults and nofail are the mount parameters for the file system.
- Mount the file systems configured in /etc/fstab with the following command.
1mount -a If no error messages are displayed, your /etc/fstab configuration has been successfully applied.
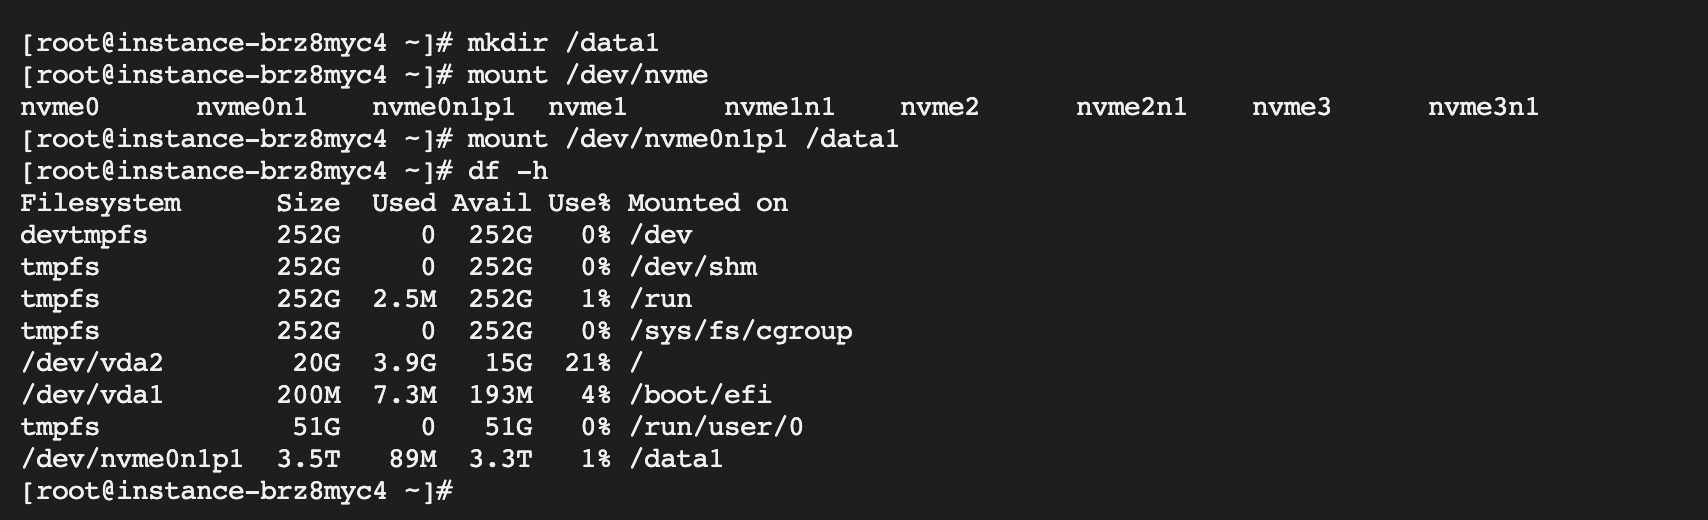
- Use the following command to check the current disk space and usage.
1df -h