
Installing and Configuring Nginx Environment on Windows
- Disable IE enhanced security mode
The IE browser that comes with Windows servers has the IE enhanced module enabled by default. To facilitate subsequent resource downloads and test access, disable this function now. For operation steps, refer to the document link: https://cloud.baidu.com/doc/BCC/s/pjxlpzqce After disabling it, you can continue to use the IE browser as needed or download other browser tools, such as the Chrome browser used in the following steps.
- Download nginx
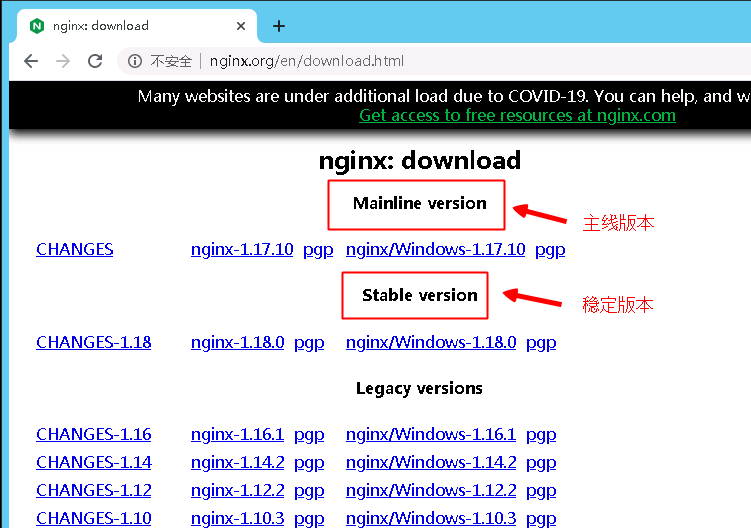
Enter the official nginx download address: http://nginx.org/en/download.html and download the stable version. The following figure takes nginx/Windows-1.18.0 as an example
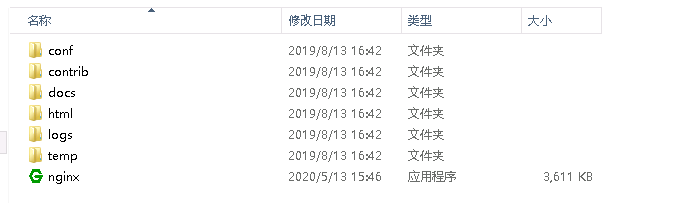
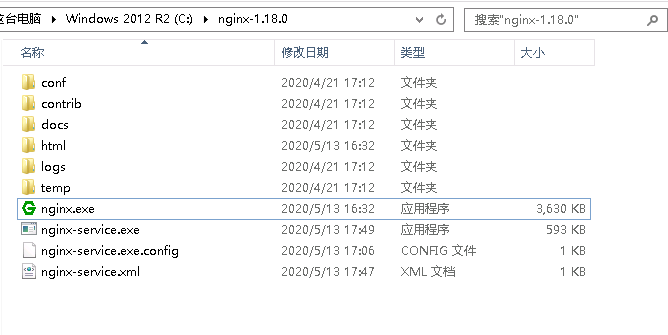
After downloading, unzip it to retrieve the following file
- Install and start nginx
Double-click nginx.exe directly. After double-clicking, a black pop-up window flashes by; or open the cmd command window, switch to the nginx unzip directory, and enter the command nginx.exe or start nginx, then press Enter; Since starting and stopping nginx through commands is cumbersome and inconvenient for later maintenance, you can also add nginx directly to the Windows services list for starting and stopping. Refer to step 4
- Add nginx to Windows service
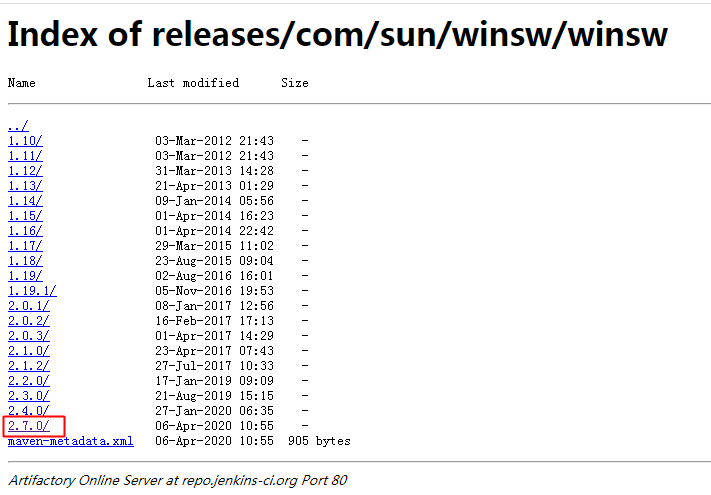
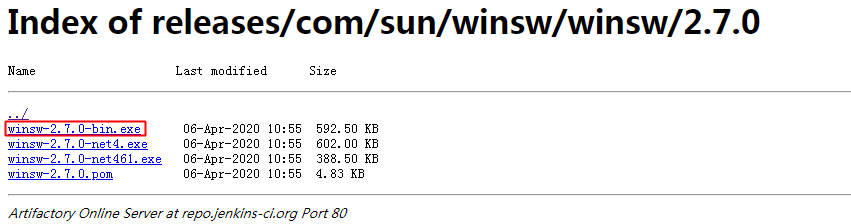
Download Wrapper service: http://repo.jenkins-ci.org/releases/com/sun/winsw/winsw/. This tool can set nginx as a Windows service. Select the appropriate version. Here, the latest 2.7.0-bin version is selected. The download page is shown in the following figure:
Place the downloaded winsw-2.7.0-bin.exe file in the nginx installation directory (here: C:\nginx-1.18.0) and rename it to: nginx-service.exe Then create the nginx-service.exe.config and nginx-service.xml files and place them in the Nginx installation directory, as shown in the following figure
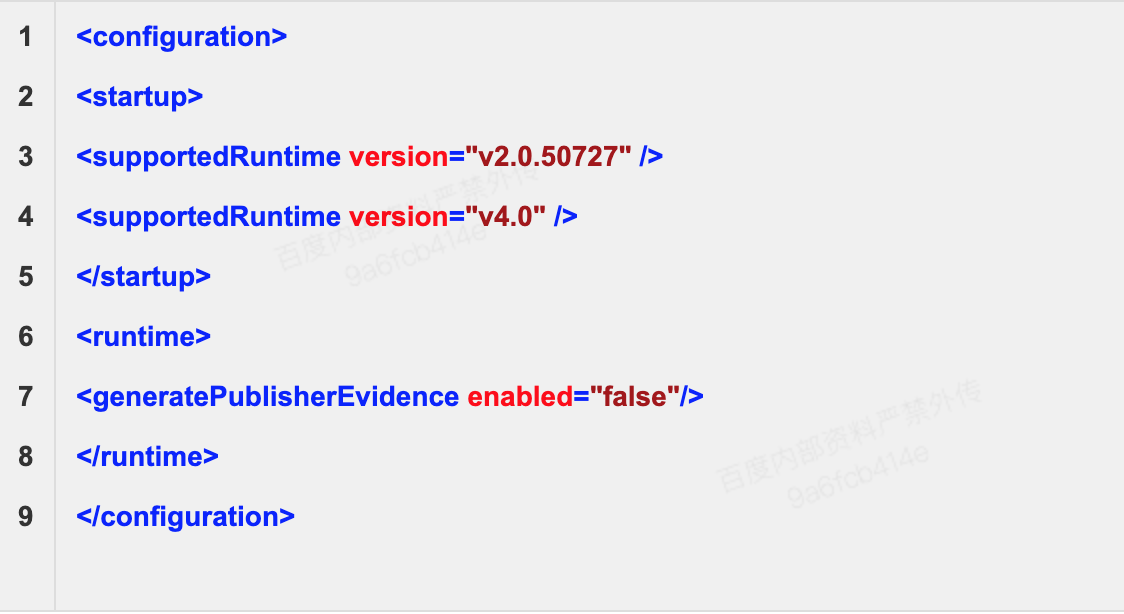
The content of nginx-service.exe.config is as follows:
The content of nginx-service.xml is as follows:

Note: Replace C:\nginx-1.18.0\ in the nginx-service.xml file with your nginx installation directory address
- Install NET4+ environment
The winsw program requires the NET environment to run. Windows 2012 has NET 4.5 installed by default, so this step can be skipped
- Execute winsw to add nginx service
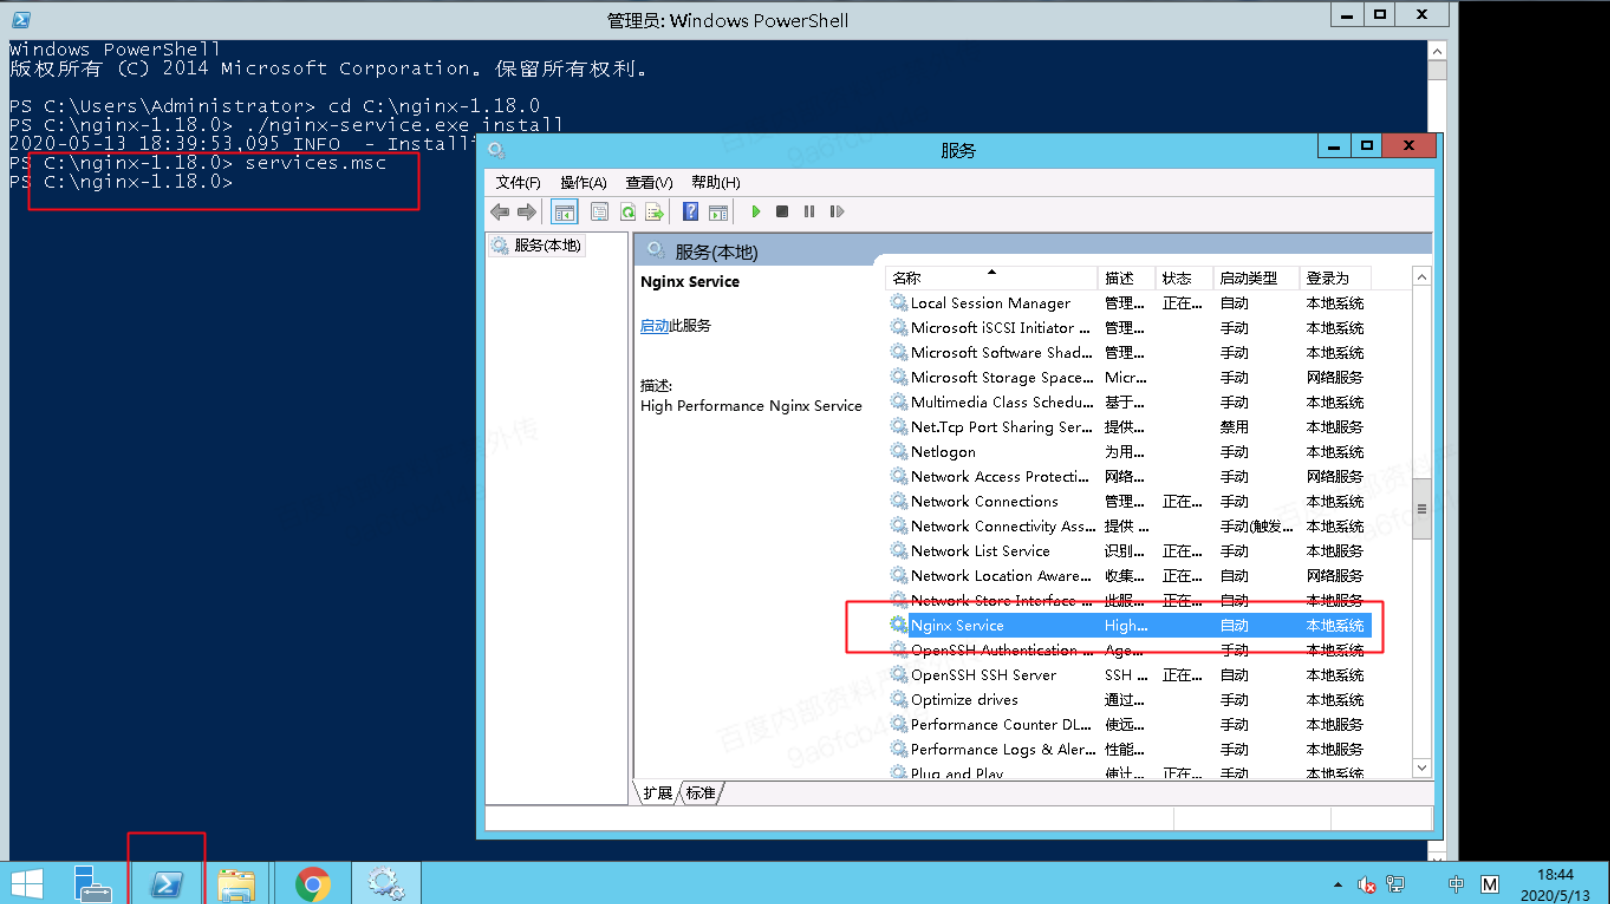
Enter cmd command line mode, or click Powershell in the taskbar to enter command line mode, then go to the nginx installation directory "cd C:\nginx-1.18.0" and execute "nginx-service.exe install" to install the program. The result is as follows:

- Start Nginx and access it
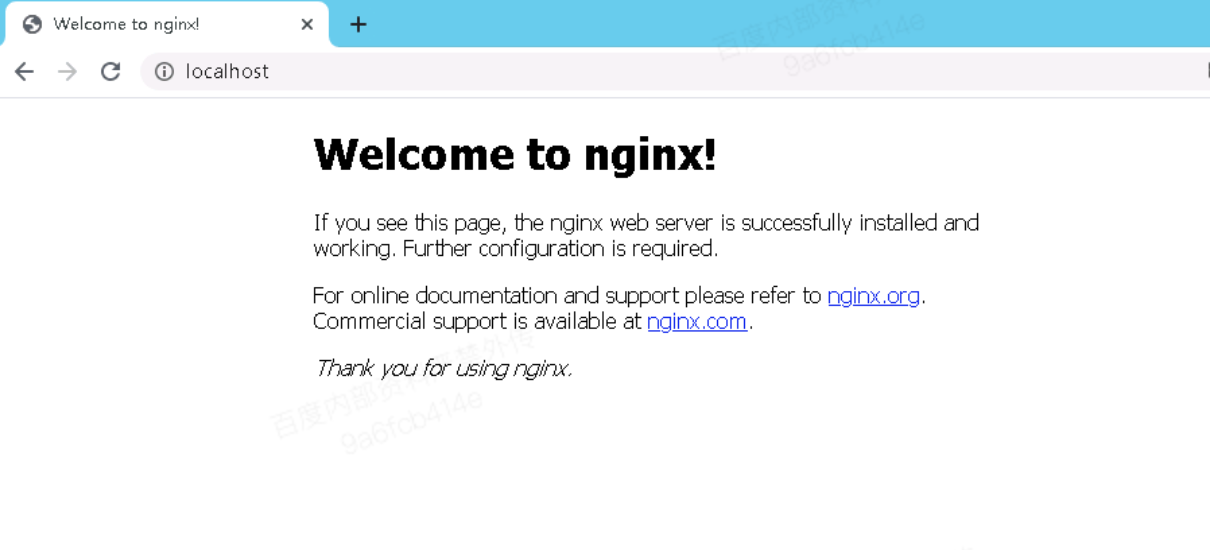
Right-click the nginx service, and you can see the Start option. Select Start, and the nginx service will automatically start. The status will change to Running. Open a browser and directly access http://localhost to view the default page of nginx, indicating that nginx has been deployed
- Enable ingress rules in the advanced firewall on the server
Windows servers have the advanced firewall enabled by default. After setting up the services, you also need to open the corresponding ports in the firewall's ingress rules or disable the firewall. For steps to disable the firewall, refer to the document: https://cloud.baidu.com/doc/BCC/s/bjxlq3hzn