
Reclaim instance
The recycle bin is a cloud service that facilitates the recycling of instances. This document explains the recycling mechanism for instances and the procedures for restoring them.
Which instances are eligible for the recycle bin?
- Pay-as-you-go instance.
-
Subscribed instances are automatically released during the 7-day renewal grace period after their expiration.
Note:
Postpaid instances in the case of no charge for stop do not enter the recycle bin
Postpaid instances do not enter the recycle bin when they are scheduled for release.
Financial refunds for subscribed instances before expiration do not directly result in the instances entering the recycle bin.
Spot instances, auto scaling (AS) nodes, and Dedicated Computing Cluster (DCC) instances do not support entering the recycle bin.
Subscribed instances enter the recycle bin
- Retention period: Instances in the recycle bin are preserved for 7 calendar days.
- Expiration policy: If renewal is not completed within 7 calendar days, the system will release the resources, and they will no longer be recoverable.
- Operation restrictions: Only specific operations such as Resume Billing and Delete Instance can be performed on instances in the recycle bin.
Postpaid instances enter the recycle bin
- Retention period: Instances in the recycle bin are preserved for 2 hours.
- Expiration policy: If renewal is not done within the 2-hour period, the system will release the resources, and they will no longer be recoverable.
- Associated instances: If a cloud server instance is bound to a subscribed EIP or subscribed CDS, the instance will be automatically unbound before entering the recycle bin. The subscribed EIP and CDS will not be recycled.
- Operation limitations: Instances in the recycle bin can only undergo operations such as "Resume Billing" and "Delete Instance".
Note
- When releasing an instance into the recycle bin, you must enter a verification code to confirm the release operation.
- While releasing an instance, you can choose to simultaneously release any associated pay-as-you-go public IPs, cloud disk servers, and snapshots.
- Once an instance is released, the attached CDS disk will automatically be detached, but the snapshots based on this CDS disk will be retained.
- After the instance is released, snapshots of the original system disk will be deleted automatically, but custom images created from the original system disk will remain available.
Steps for instances to enter the recycle bin
- Sign in to BCC Console and enter the Instance List page.
-
Select the instances you want to release into the recycle bin according to your needs.
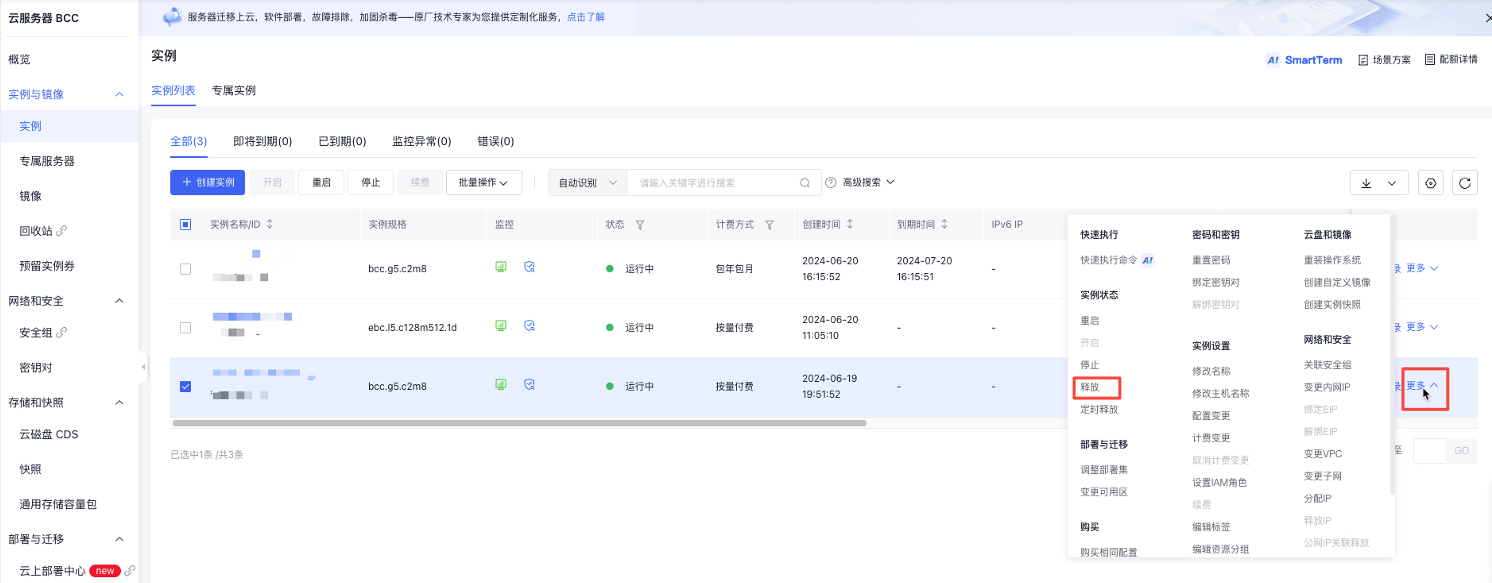
- To release a single pay-as-you-go instance, select the instance to be released, then click More - Instance Status - Release in the right-hand operations menu, as illustrated in the figure below.
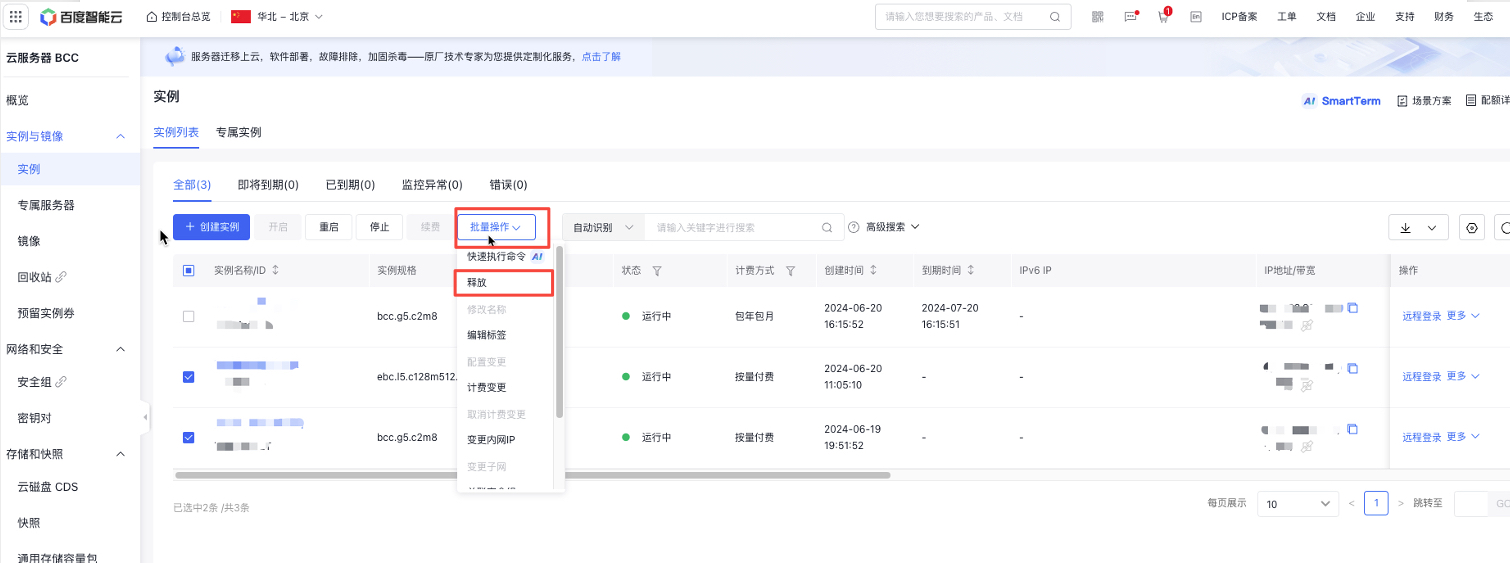
- To release multiple instances, select the instances you want to release, then click on "Batch Operation - Release" at the top of the page, as illustrated in the following figure.
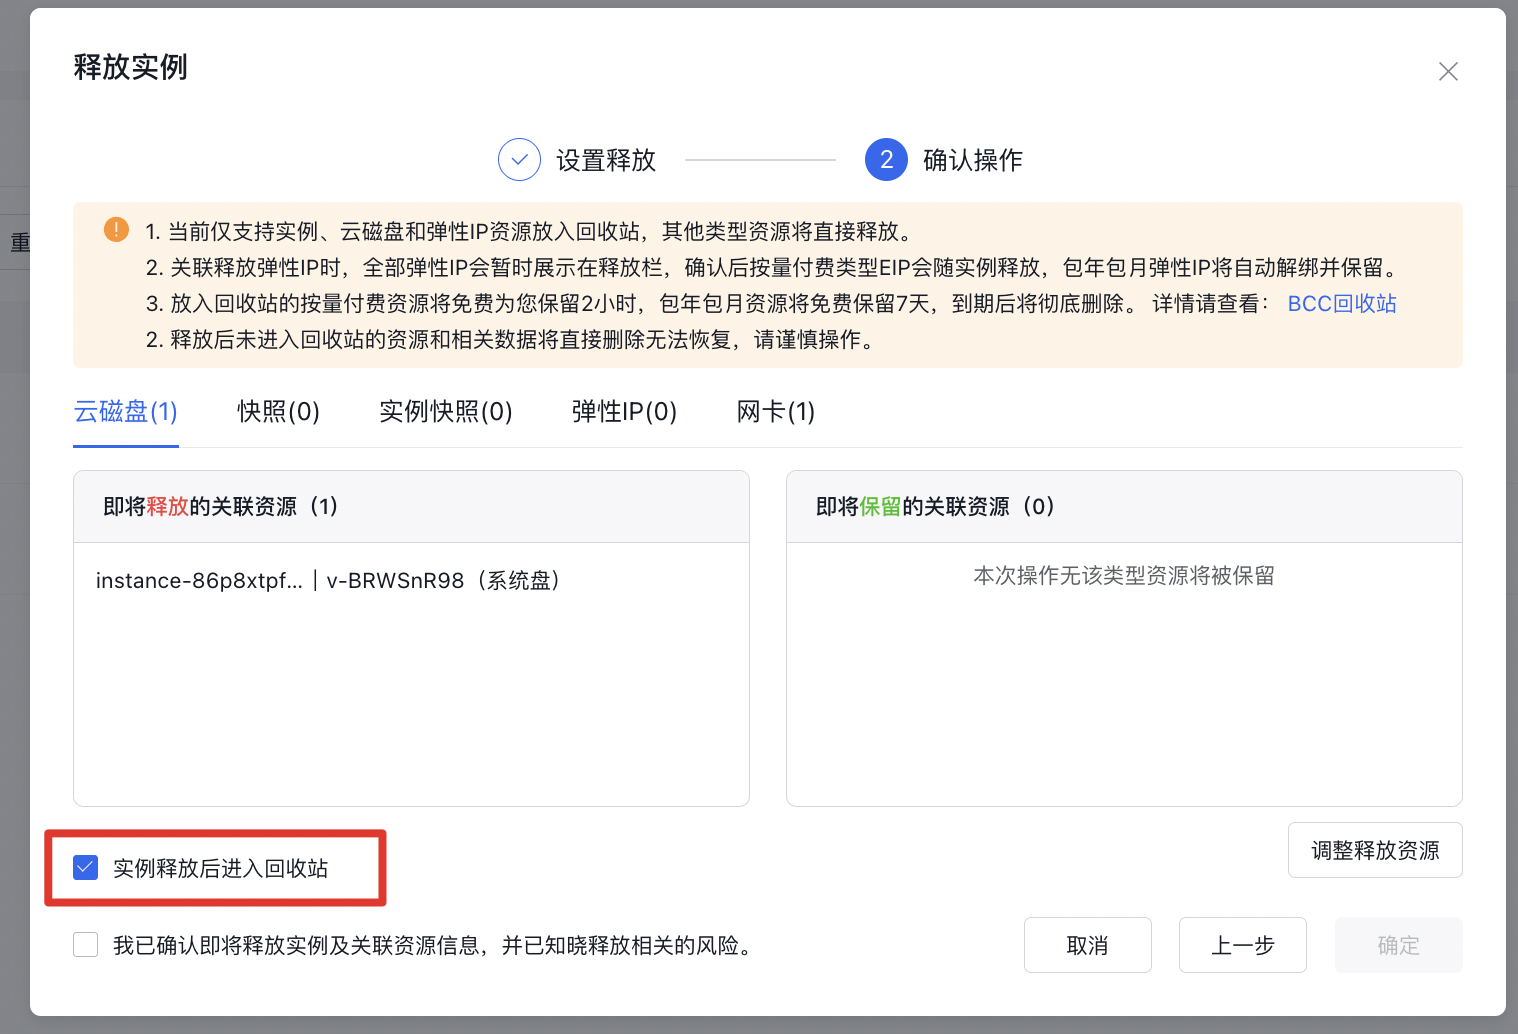
- Confirm the instance to be released in the OK box before release. After selecting the associated resources to be released, click Next. Confirm the operation. The option that instances will enter the recycle bin after release will be checked by default. After checking and confirming the risk information, click the OK button, as shown in the following figure.
- Send a mobile verification code, click OK, and the instance will be immediately released after completing the security verification.
Recycle bin list
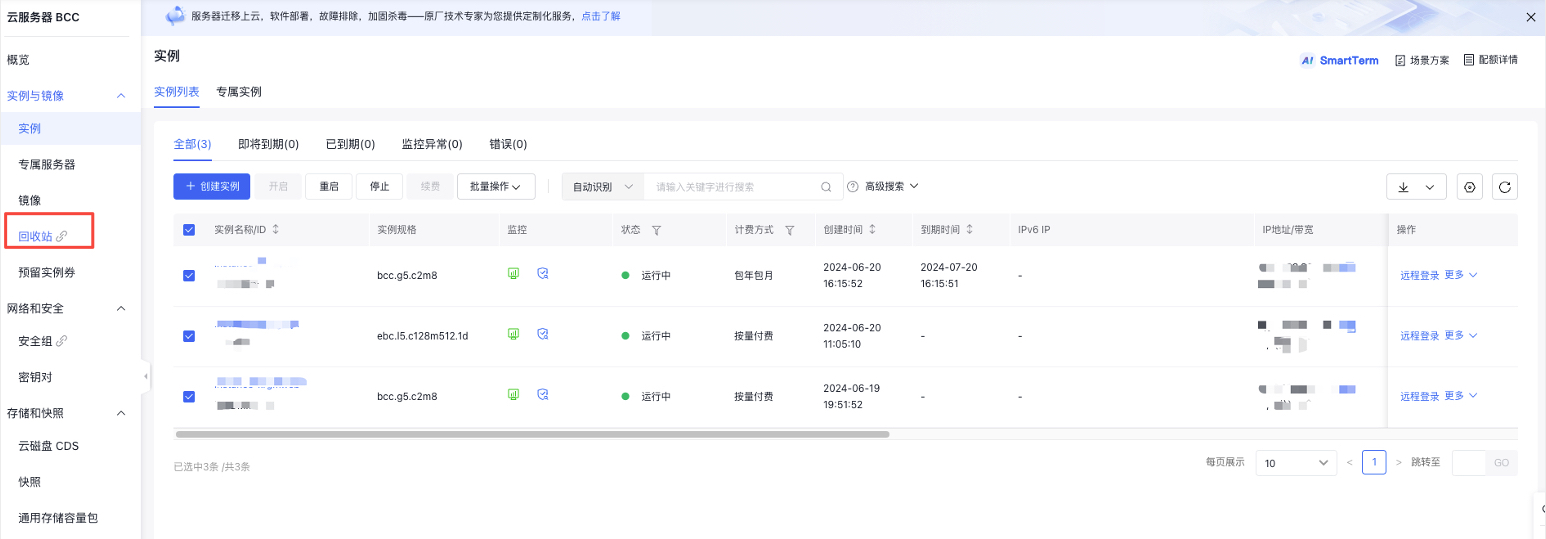
- Sign in to Baidu Cloud Compute (BCC) Console and enter the Instance List page.
-
Select the Recycle Bin tab on the left navigation bar and click to enter.
- On the redirected Recycle Bin List page, as shown in the following figure, you can see the BCC instances currently in the recycle bin.
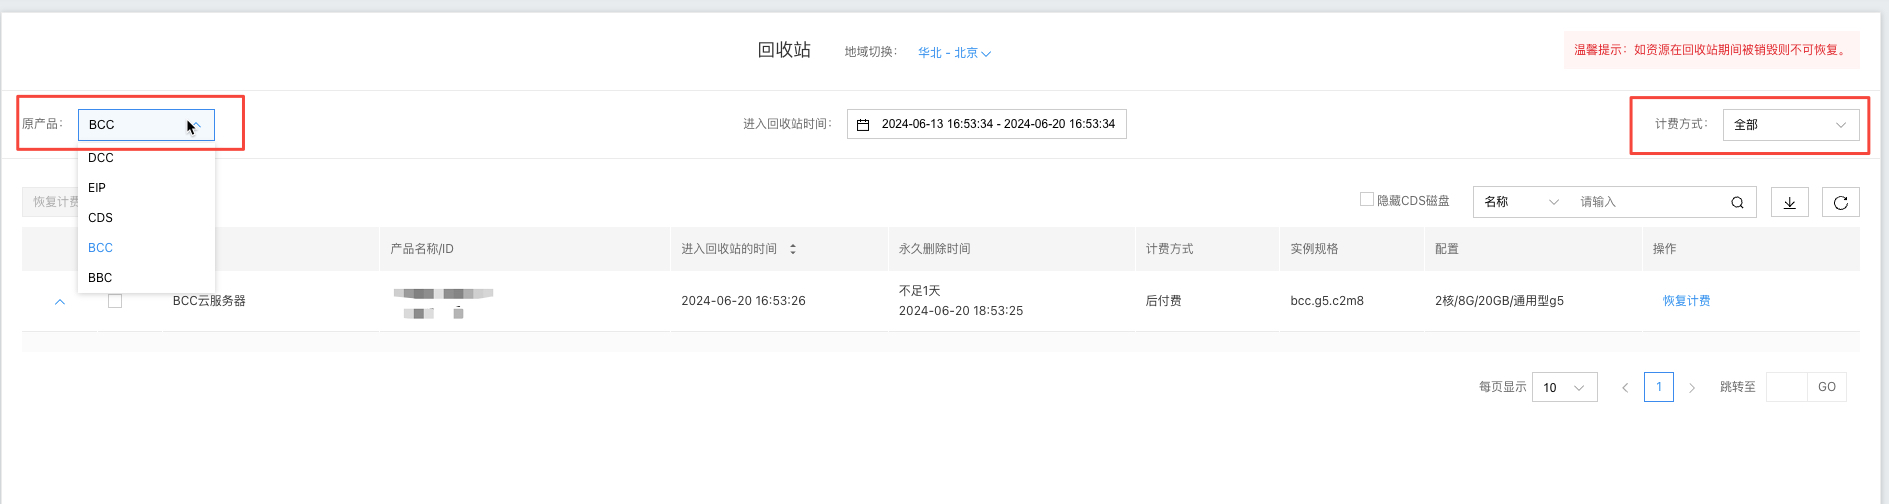
1> **Note: Check the corresponding option under Original Product at the top left of the page to view a specific type of products in the recycle bin**.Restore instances from the recycle bin
- Sign in to BCC Console and enter the Instance List page. Select the Recycle Bin tab on the left navigation bar and click to enter the Recycle Bin List page. Click the Resume Billing button behind the corresponding instance, as shown in the following figure.
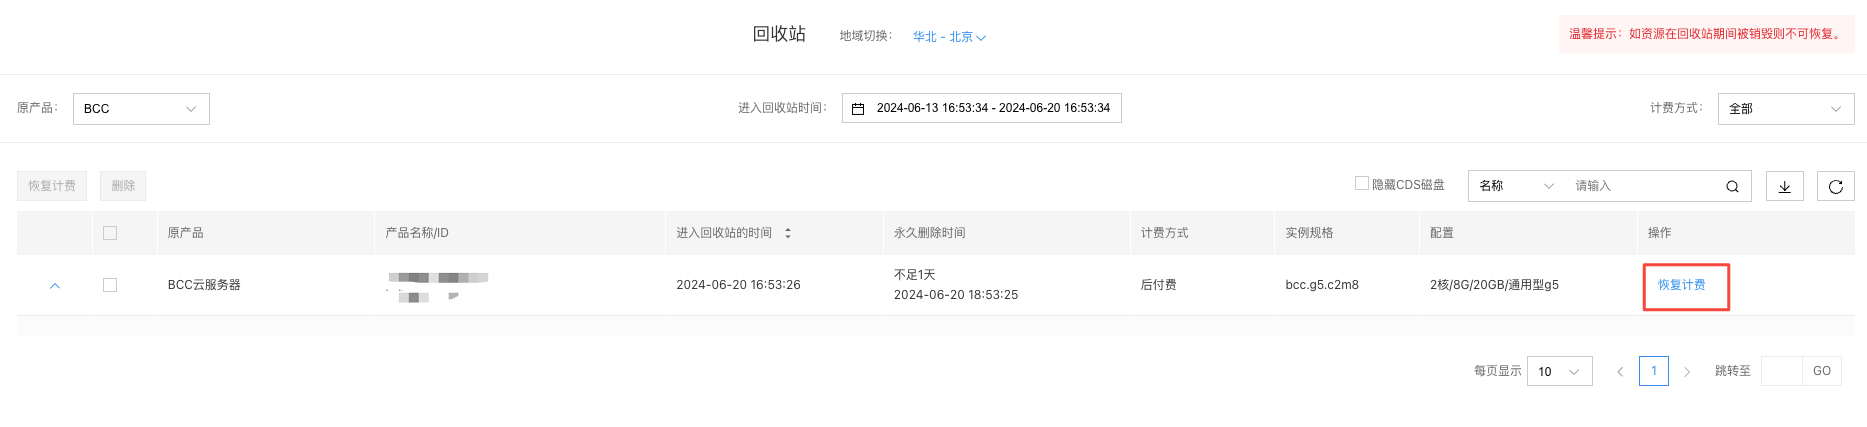
- In the Resume Billing pop-up window, click OK to resume billing, as shown in the following figure.

- Once the previous step is completed, the BCC instance with resumed billing will be removed from the recycle bin list and will reappear in the BCC instance list.
FAQs
Will the bound IP and CDS be released when a cloud server instance enters the recycle bin?
- Custom Images: Once created, custom images will remain available indefinitely unless deleted.
- Snapshots: Snapshots created from the original system disk will be automatically deleted. If snapshots of an attached CDS disk are not released simultaneously, those snapshots will remain.
Insufficient quota reported when releasing multiple postpaid instances
The recycle bin can hold a maximum of 50 instances at a time. If you encounter a quota issue while releasing instances, you can deselect the option to move them to the recycle bin and release them directly. Alternatively, you can clear unnecessary instances in the recycle bin before proceeding further.