One-Click Setup for Windows Palworld Server
Overview
Palworld's official server is highly popular and often faces lag issues. Why not set up your own dedicated server for a smoother gaming experience with your friends?
Environment preparation
- Client: A computer with Steam installed
- Server: A BCC with a bound public IP, with a minimum disk size of 40 G, leaving approximately 20 G of space after installation
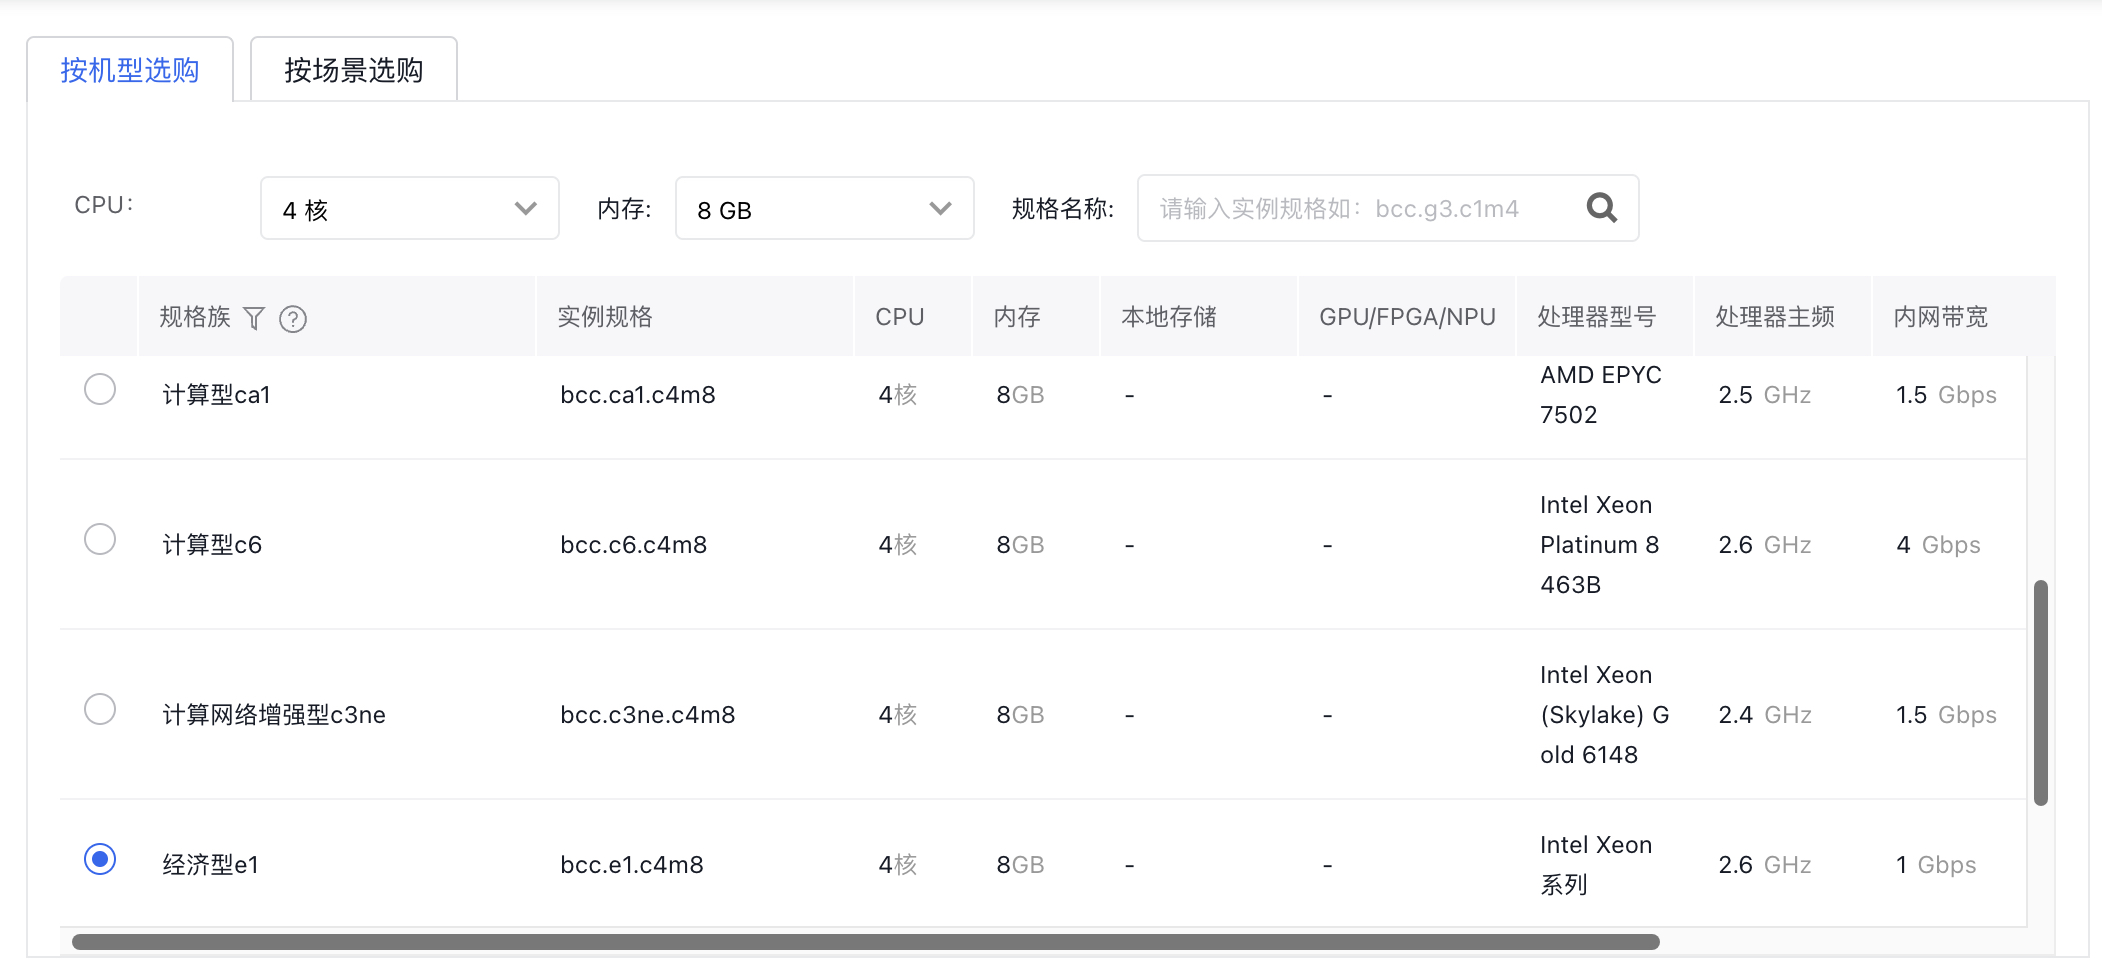
- Server configuration recommendation: The official recommendation for Palworld is a minimum configuration of 4 cores and 8GB of memory. You can use the bcc.e1.c4m8 package machine
Note: The EIP bandwidth can be adjusted flexibly based on your actual needs. For multiplayer games, we suggest using higher-specification instances to avoid OOM issues that could disrupt the game service and affect the experience.
Server configuration example
- Sign in to the console, purchase a cloud server as needed and select the Windows public image.
- On the purchase page, users should also select "Purchase EIP" and determine the charge type and desired bandwidth peak based on their requirements.

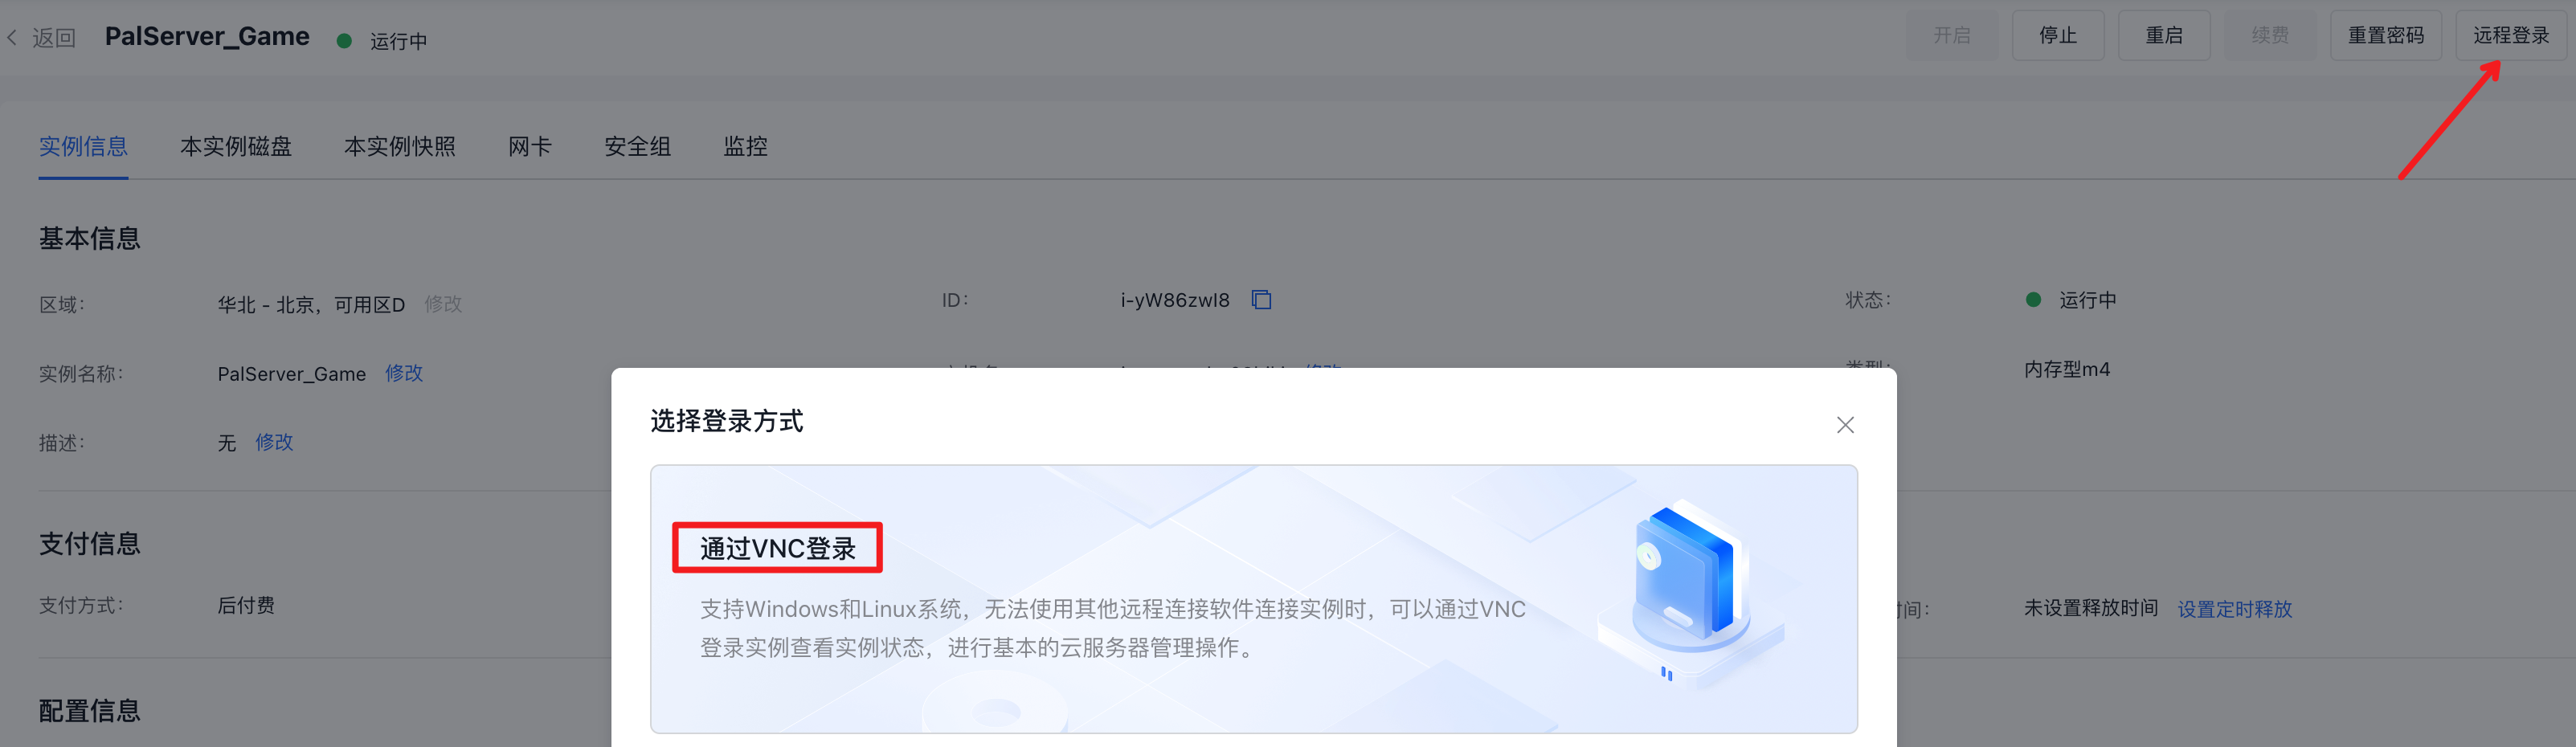
- Sign in to the server via VNC or remote desktop and record the server's EIP address here.
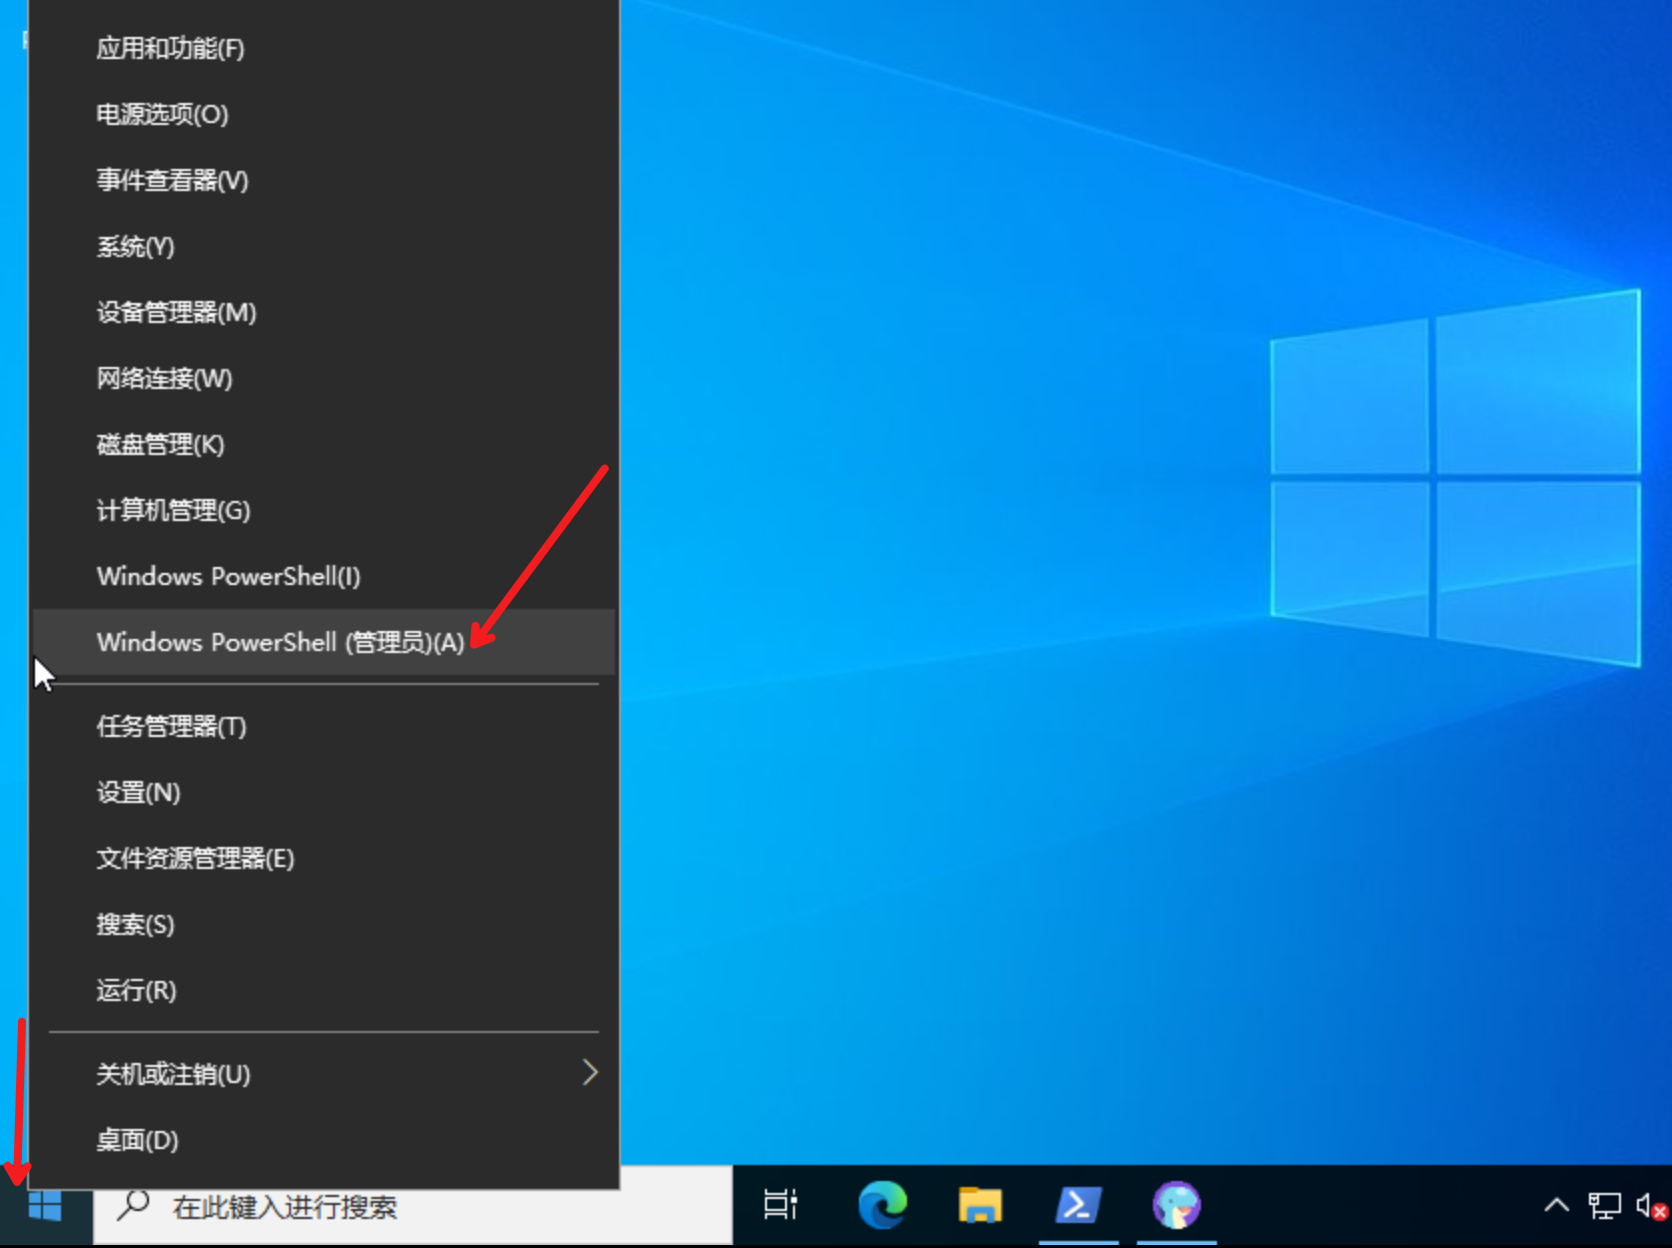
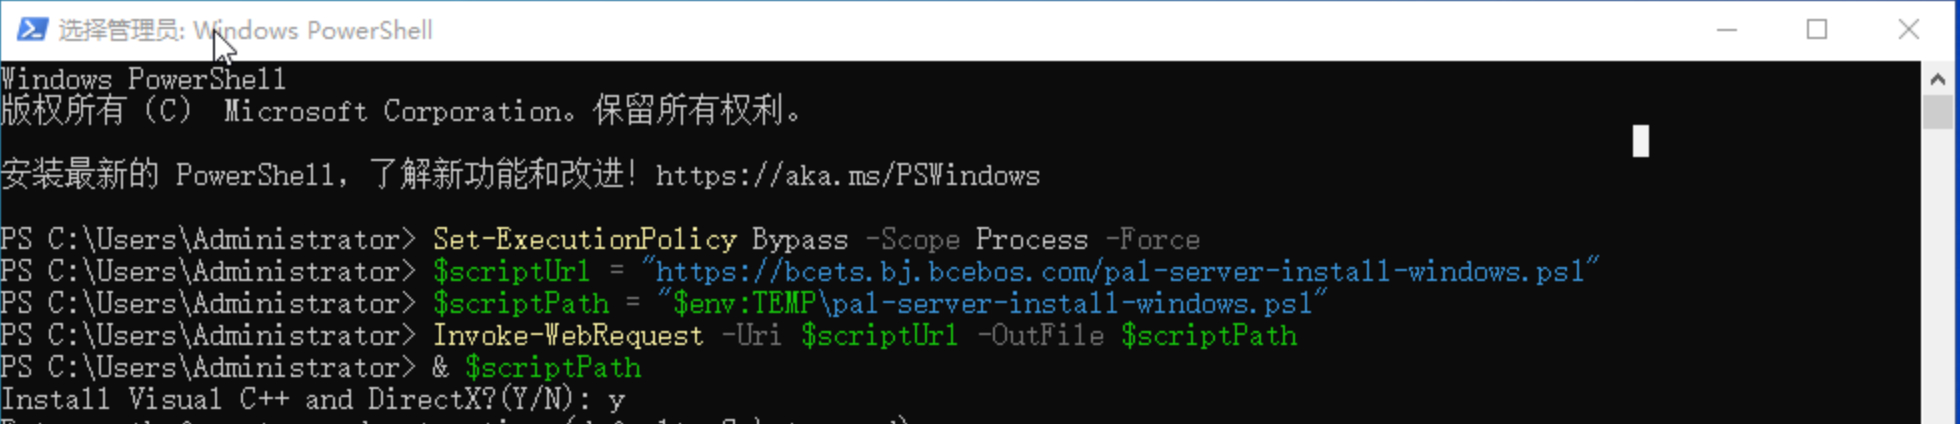
- Right-click on the Windows logo in the bottom-left corner and select Windows Powershell (Administrator) to open it
- Execute the installation script and wait for the installation to complete
1Set-ExecutionPolicy Bypass -Scope Process -Force
2$scriptUrl = "https://bcets.bj.bcebos.com/pal-server-install-windows.ps1"
3$scriptPath = "$env:TEMP\pal-server-install-windows.ps1"
4Invoke-WebRequest -Uri $scriptUrl -OutFile $scriptPath
5& $scriptPath
During this period, you will be asked whether to install the VC++ and DirectX components necessary for running the game. If they have not been installed, enter Y to install them; otherwise, enter N to skip this step
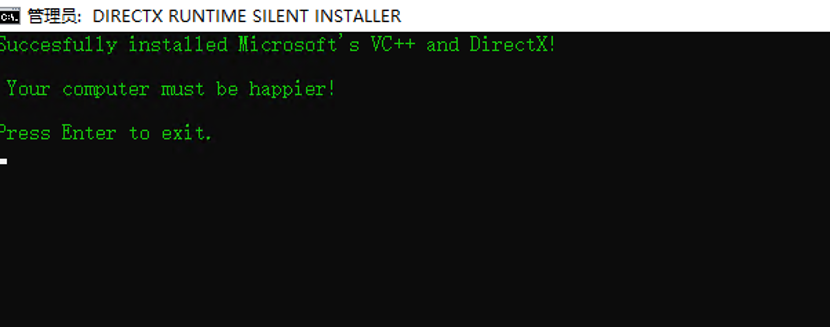
Seeing the following prompt indicates that the VC++ and DirectX components have been successfully installed. Close the pop-up window, and the script will continue to install the game service
At this stage, the user will be asked to specify the installation path, which defaults to C:\steamcmd. If no changes are needed, simply press Enter. Once installed, a new window will automatically open to run the game service.
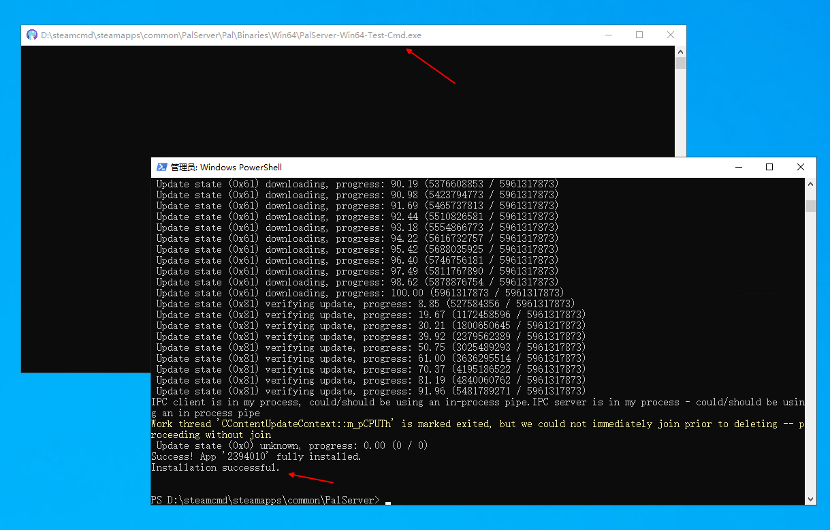
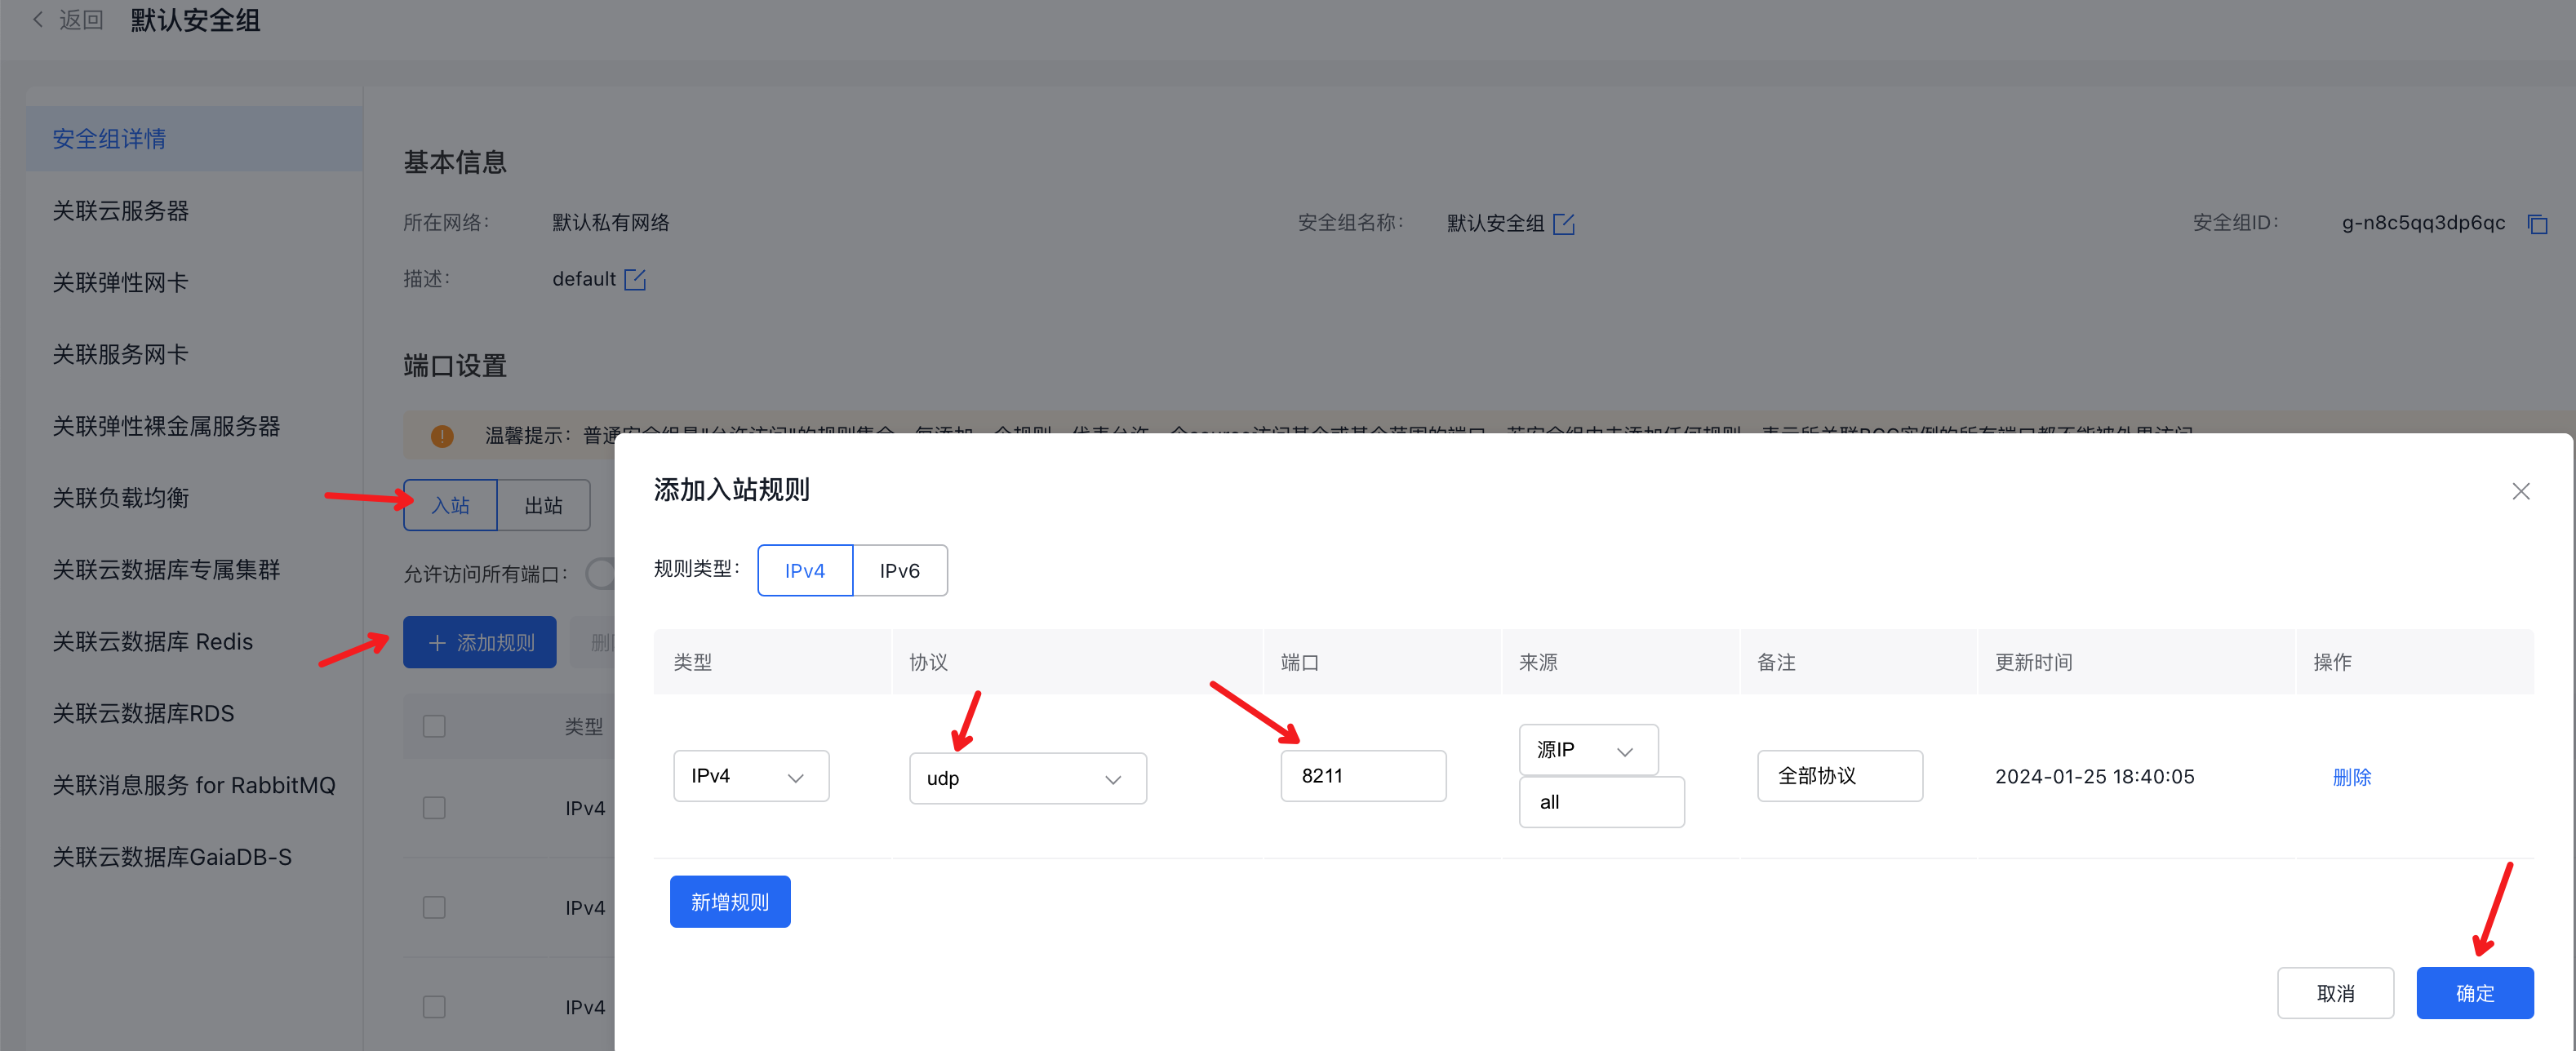
Firewall rules within the server will be automatically added to allow ingress traffic on UDP port 8211
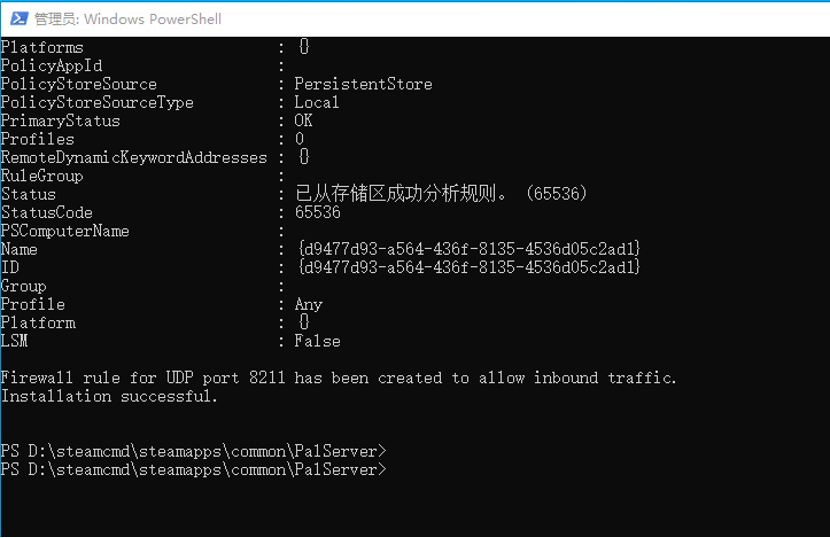
After installation, a shortcut will be automatically generated on the desktop to quickly start the game server

- Configure the security group's inbound rules to allow traffic on UDP port 8211
Server version update
If you see the error message when entering the game: "You are attempting to join a match running an incompatible game version. Please try upgrading your game version," follow the steps below to update your Palworld server.
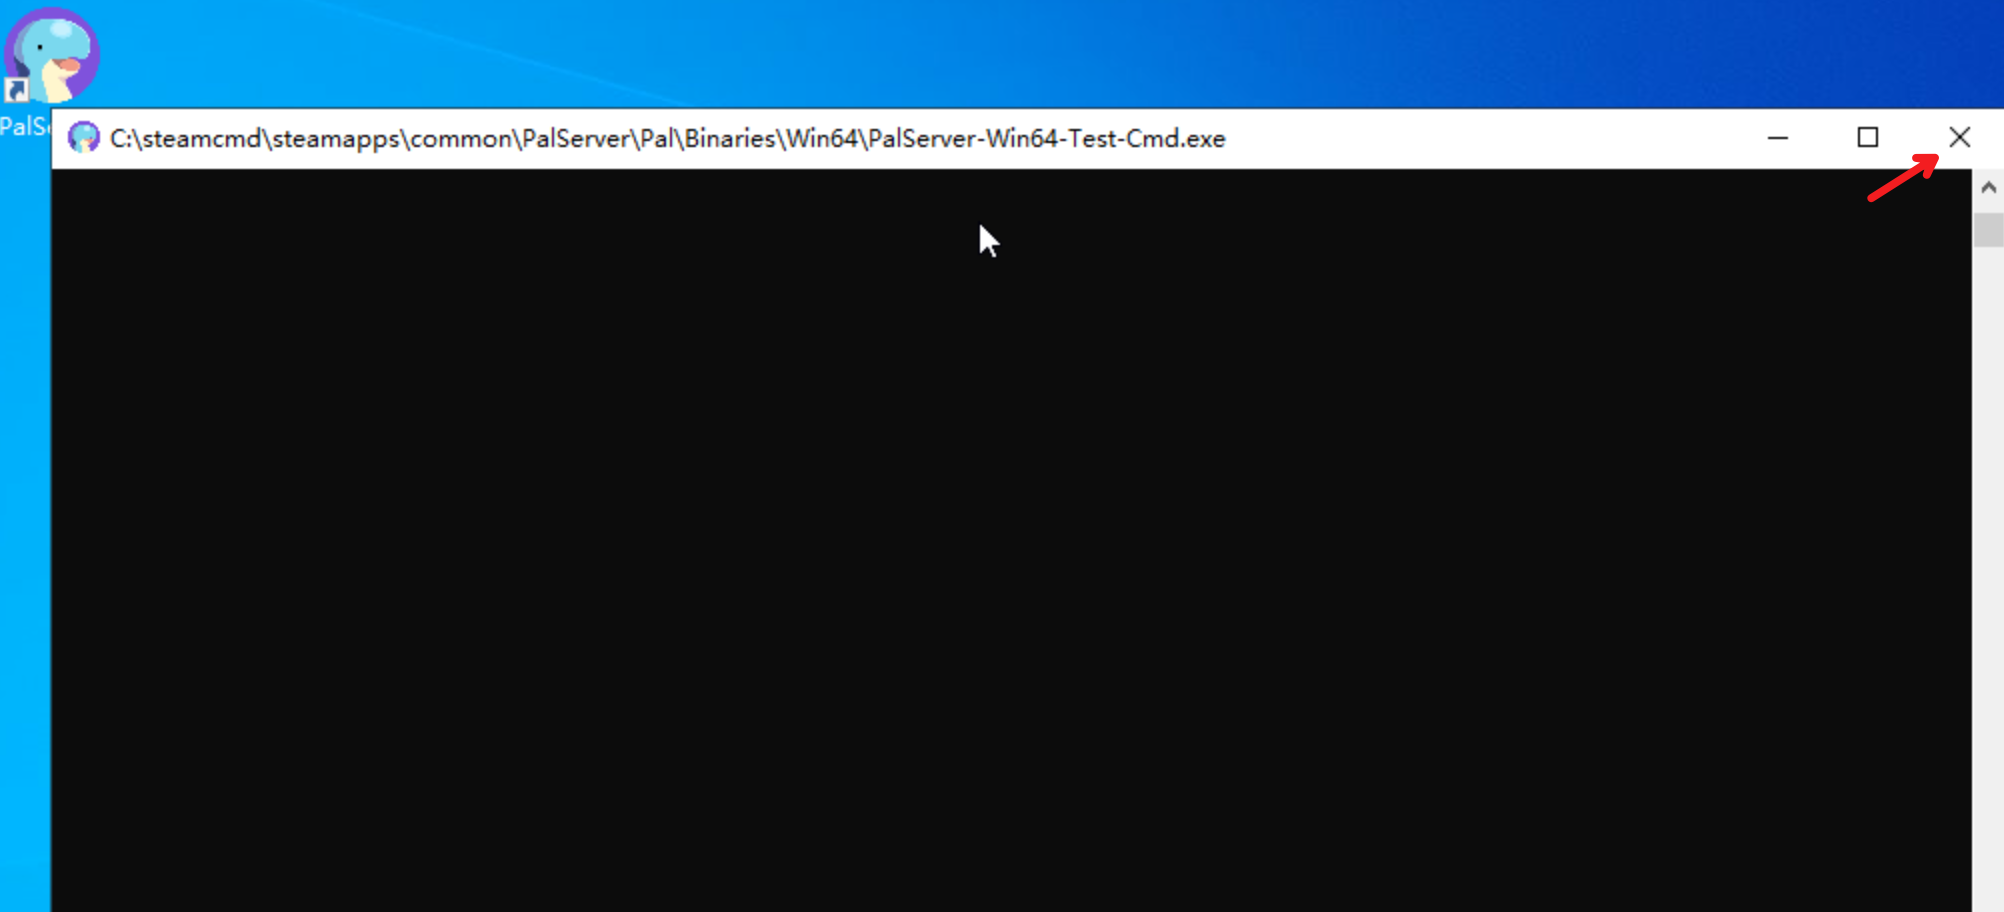
- Sign in to the server via VNC or remote desktop and close the server window.
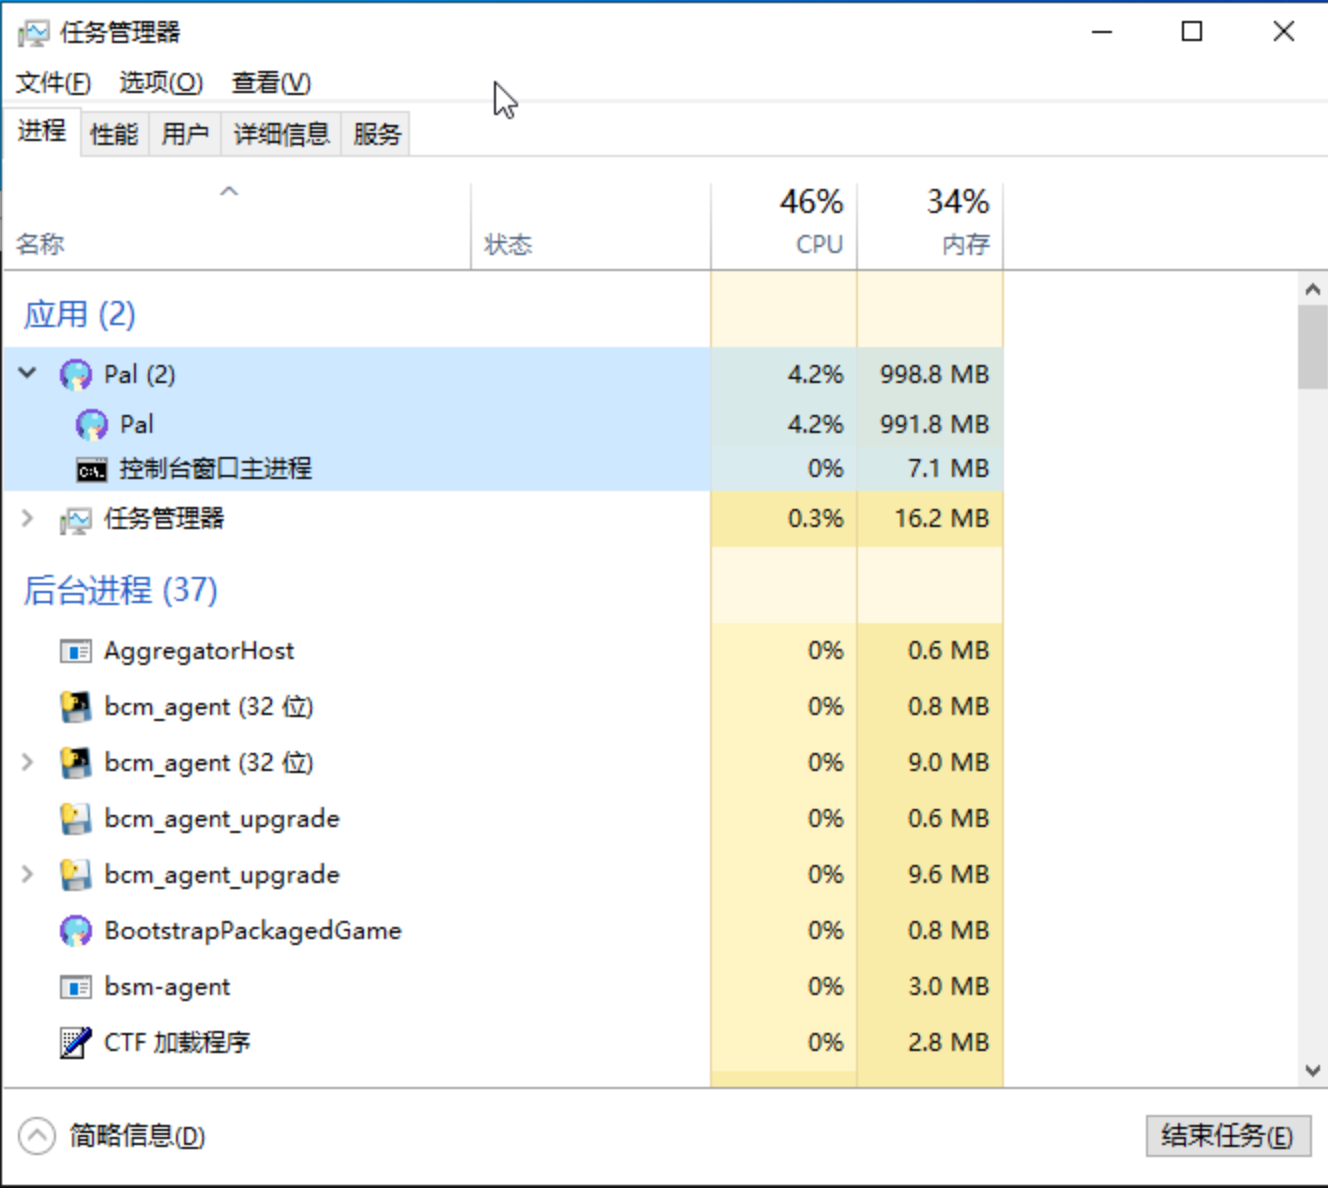
Alternatively, launch Task Manager, locate the Pal application, right-click on it, and select End Task.
-
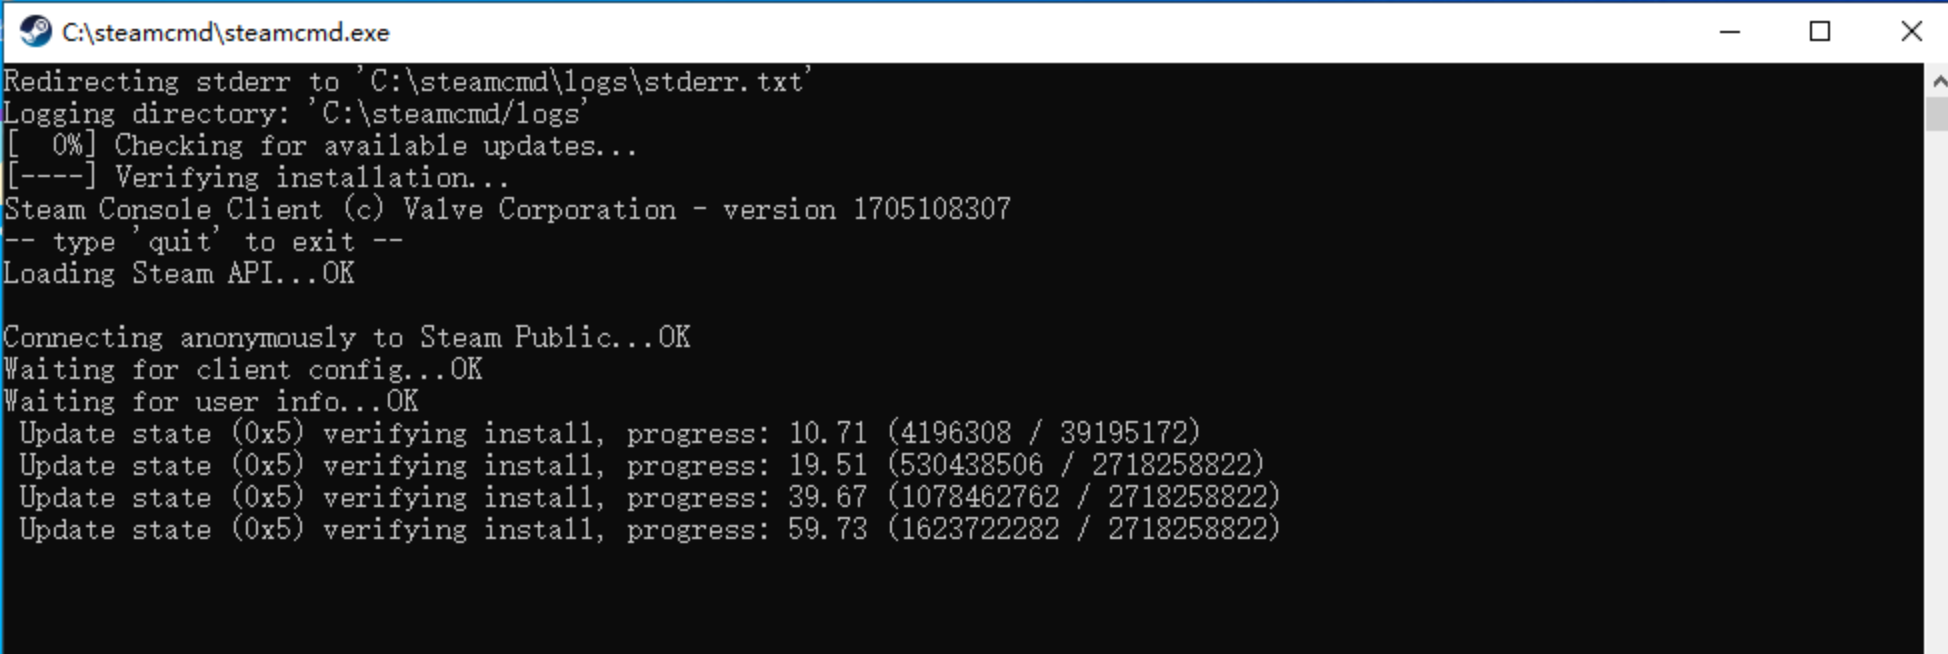
Open Windows PowerShell (administrator) and run the command provided to update the Palworld server program. This will download the necessary game server files, so please wait for the process to complete.
Please note that "C:\steamcmd" is the default installation path for the server. If needed, replace it with your actual installation path.
Plain Text1Start-Process "C:\steamcmd\steamcmd.exe" -ArgumentList "+login anonymous +app_update 2394010 validate +quit" -Wait
- Once the server update is complete, double-click on the game shortcut icon located on the desktop to restart the game server.

Steam client configuration example
- Enter the game and select Join Multiplayer Game (Dedicated Server)

- Enter the EIP and port bound to the above cloud server and click Connect

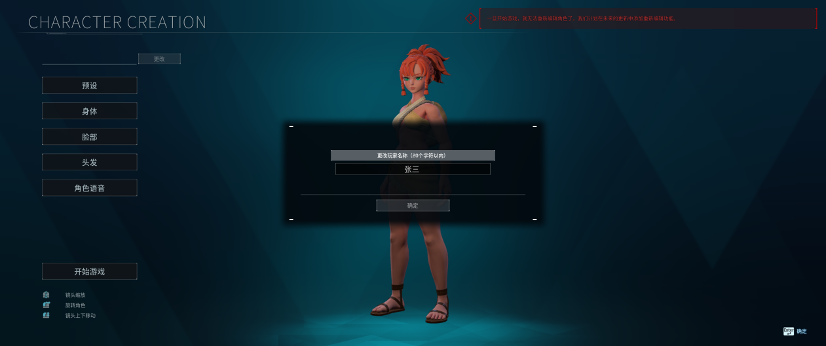
- If you reach the character creation interface, it indicates a successful connection to the server