Set Up FTP Service on Linux
Set up an FTP service on Centos
This tutorial takes the Baidu AI Cloud public images for CentOS 6.5 and CentOS 7.5 64-bit OSs as examples to explain how to install and configure vsftpd on a Linux instance.
- Step 1: Install vsftpd.
-
Step 2: Configure vsftpd.
- Method 1: Set up file upload permissions for anonymous users.
- Method 2: Configure login access for local users.
- Step 3: Configure the security group.
- Step 4: Perform client testing.
Step 1: Install vsftpd
- Connect remotely and log in to the Linux instance.
- Use the command
yum install -y vsftpdto install vsftpd. -
Execute the following commands to navigate to the /etc/vsftpd directory and list the files in this directory.
cd /etc/vsftpd ls
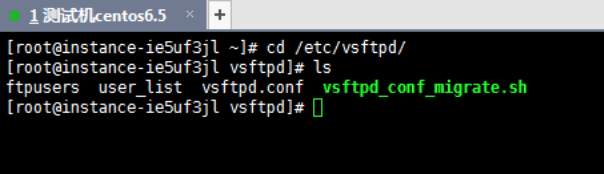
Note:
- The /etc/vsftpd/vsftpd.conf file serves as the main configuration file for vsftpd.
- The /etc/vsftpd/user_list file acts as an allowlist. Users listed here are permitted to access the FTP server.
- The /etc/vsftpd/ftpusers file functions as a blocklist. Users in this file are denied access to the FTP server.
- Execute the following commands to configure the FTP service to automatically start at system boot.
Centos6.5: chkconfig vsftpd on
Centos7.5: systemctl enable vsftpd.service
- Run the following commands to start the FTP service.
Centos6.5:/etc/init.d/vsftpd start
Centos7.5:systemctl start vsftpd.service
- Use the following commands to check the network ports the FTP service is listening on.
netstat -antup | grep ftp
Step 2: Configure vsftpd.
By default, after installation, vsftpd allows anonymous access to the FTP server. With anonymous access, users can log in to the FTP server without providing a username or password; however, they won't have permissions to modify or upload files.
This tutorial introduces two methods for configuring vsftpd and provides relevant parameter explanations for reference based on specific requirements.
- Configure file upload permissions for anonymous users
- Configure local user login
Method 1: Configure file upload permissions for anonymous users.
Anonymous FTP server access is an insecure mode that allows anyone to log in without password verification. It is typically used only for storing unimportant public files and is not recommended for production environments. If you need to configure permissions for anonymous users to upload files, follow these configuration steps:
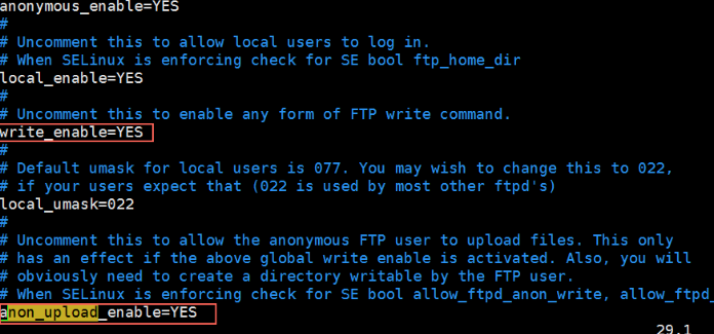
- Modify /etc/vsftpd/vsftpd.conf.
a. Run vim /etc/vsftpd/vsftpd.conf.
b. Press the i button to enter edit mode.
c. Modify the write permission to write_enable=YES.
d. Modify the anonymous upload permission to anon_upload_enable=YES.
e. Press the Esc key to exit edit mode, and then enter :wq to save and exit the file.
- Execute the following commands to modify the permissions of the /var/ftp/pub directory, grant write access to FTP users, and reload the configuration file.
Centos6.5:
1chmod o+w /var/ftp/pub/
2/etc/init.d/vsftpd restart
CentOS7.5:
1chmod o+w /var/ftp/pub/
2systemctl restart vsftpd.service
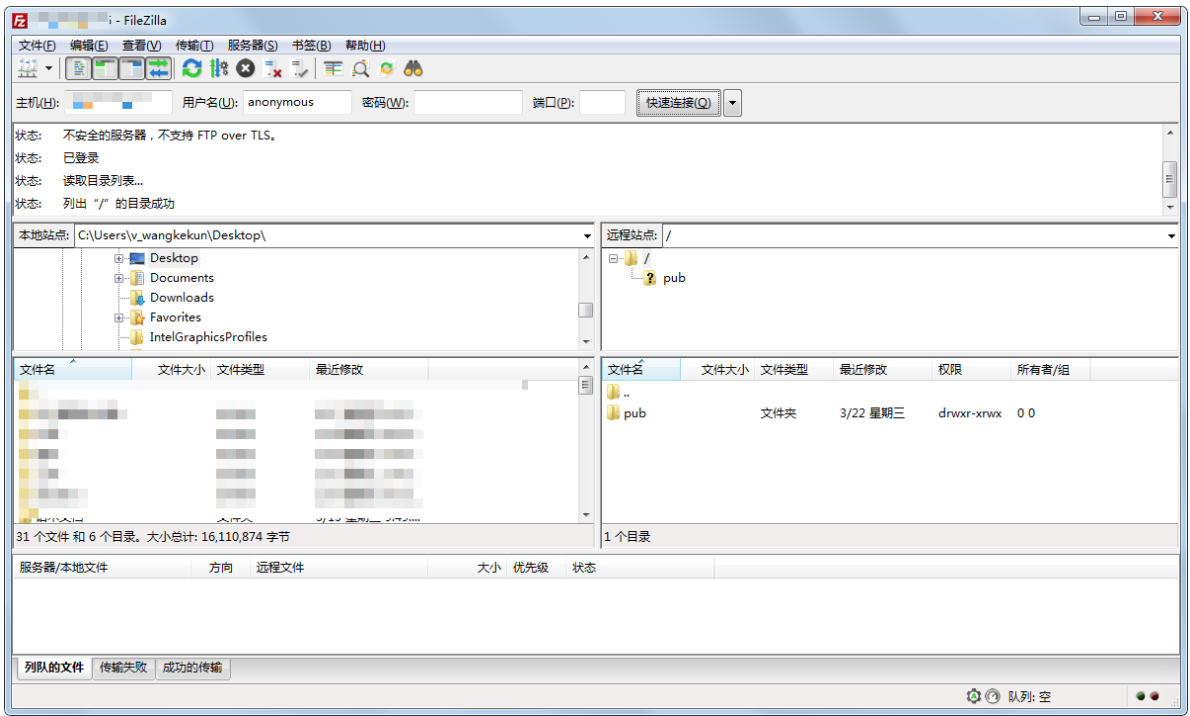
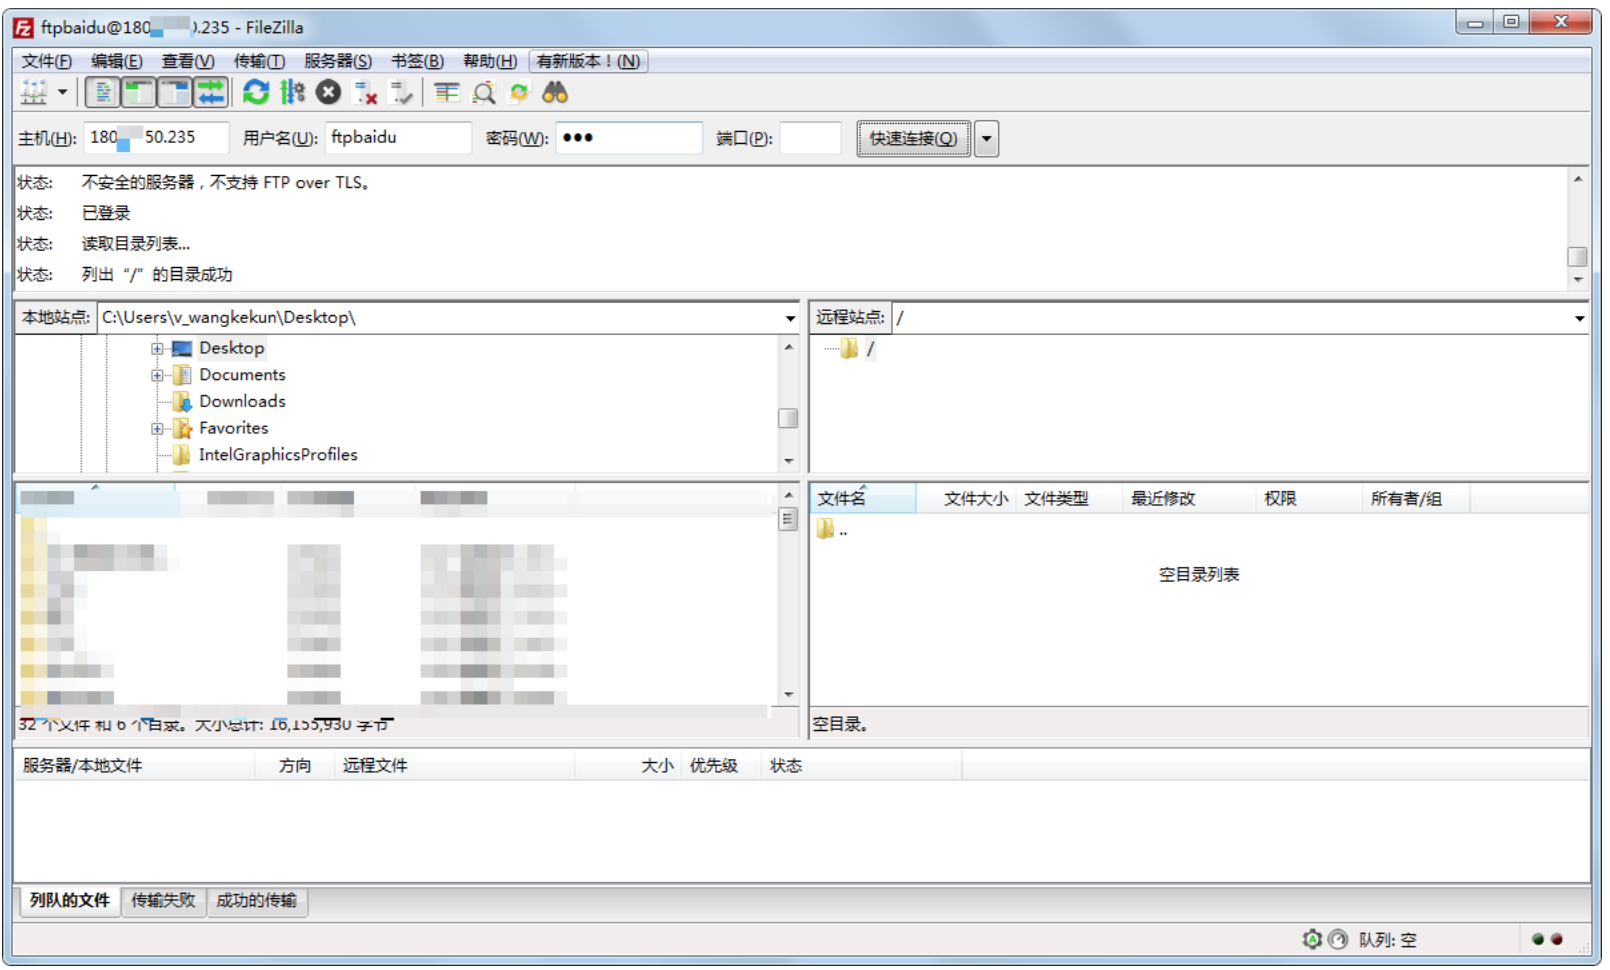
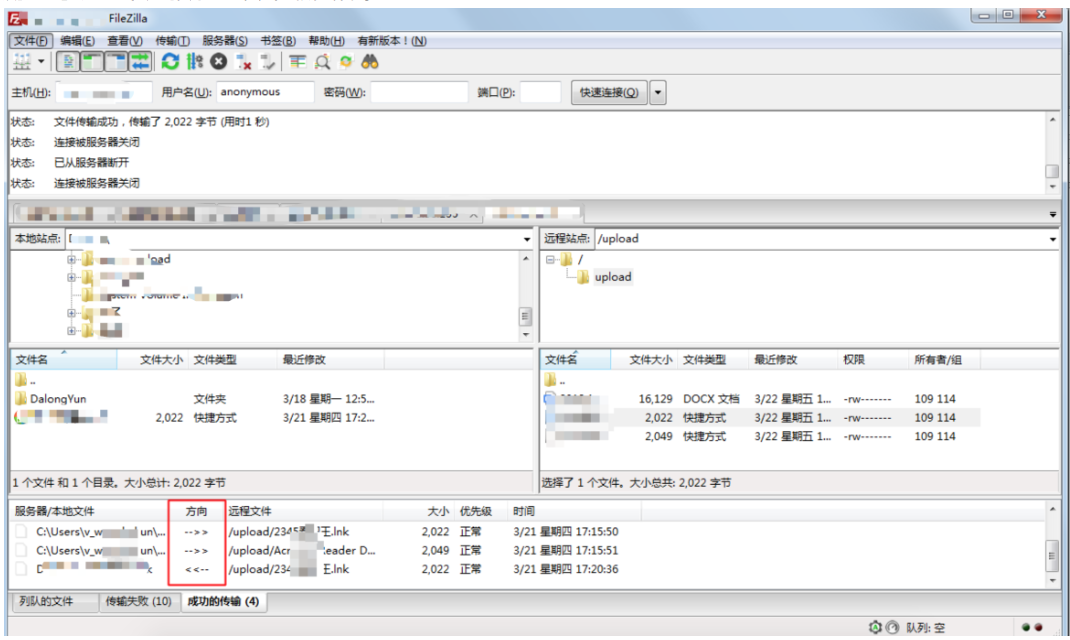
At this point, testing with FileZilla shows that normal connection to the FTP server can be achieved without requiring the account password (under anonymous access)
Method 2: Configure local user login
Local user login allows users to sign in to the FTP server using their Linux OS account and password.
By default, after installation, vsftpd supports only anonymous access to the FTP server. If you try to log in using a Linux OS account, the vsftpd service will deny access. Follow these steps to configure the vsftpd service to allow access using a Linux account and password.
- Execute the following command to create a Linux user for the FTP service, for example, a user named ftpbaidu.
useradd ftpbaidu

- Use the following command to set a password for the ftptest user.
passwd ftpbaidu
- Create a directory for use by the FTP service.
mkdir /var/ftp/baidu
- Change the owner of the /var/ftp/baidu directory to ftpbaidu.
chown -R ftpbaidu:ftpbaidu /var/ftp/baidu
- Execute the command vim /etc/vsftpd/vsftpd.conf to open the vsftpd.conf configuration file, and press the i key to enter edit mode.
- Update the vsftpd.conf configuration file as needed.
The FTP server can operate in either active mode or passive mode.
In the active mode, the client sends data port information to the server, and the server actively connects to the data port specified by the client for data transmission. The parameters for configuring FTP in active mode are as follows:
1# Disable anonymous login to the FTP server
2anonymous_enable=NO
3 # Allow local users to sign in to the FTP server
4local_enable=YES
5 # Set the directory where local users will be located after login
6local_root=/var/ftp/baidu
7 # Limit all users to their home directories
8chroot_local_user=YES
9 # Enable an exception user list
10chroot_list_enable=YES
11 # Specify the exception user list; these users are not restricted to their home directories
12chroot_list_file=/etc/vsftpd/chroot_list
13
14 # Configure other parameters
15allow_writeable_chroot=YES
16local_umask=022
17dirmessage_enable=YES
18xferlog_enable=YES
19connect_from_port_20=YES
20xferlog_std_format=YES
21listen=YES
22pam_service_name=vsftpd
23userlist_enable=YES
24tcp_wrappers=YES
(1) Press the Esc key to leave edit mode, then enter :wq to save and close the file.
(2) Use the touch /etc/vsftpd/chroot_list command to create the chroot_list file and add the list of exception users who are not restricted to their home directories.
Note: The chroot_list file must exist even if there are no exception users; it can be empty.
(3) Press the Esc key to leave edit mode, then enter :wq to save and close the file.
(4) Execute the following command to restart the vsftpd service: /etc/init.d/vsftpd restart
This concludes the configuration for active mode.
In the passive mode, the server opens and sends data port information to the client, and the client connects to the data port opened by the server, which passively accepts the connection. In the passive mode, you need to configure the range of data ports that the server can open. The parameters for configuring FTP in passive mode are as follows:
1# Disable anonymous login to the FTP server
2anonymous_enable=NO
3 # Allow local users to sign in to the FTP server
4local_enable=YES
5 # Set the directory where local users will be located after login
6local_root=/var/ftp/baidu
7 # Limit all users to their home directories
8chroot_local_user=YES
9 # Enable an exception user list
10chroot_list_enable=YES
11 # Specify the exception user list; these users are not restricted to their home directories
12chroot_list_file=/etc/vsftpd/chroot_list
13 # Enable passive mode
14pasv_enable=YES
15 # Public IP address of the FTP server
16 pasv_address=<Public IP address of the FTP server>
17 # Set the minimum value of the port range that can be used for data transmission in the passive mode
18pasv_min_port=50000
19 # Set the maximum value of the port range that can be used for data transmission in the passive mode
20pasv_max_port=50010
21 # Configure other parameters
22local_umask=022
23dirmessage_enable=YES
24xferlog_enable=YES
25xferlog_std_format=YES
26tcp_wrappers=YES
27allow_writeable_chroot=YES
28listen=YES
29listen_ipv6=NO
30pam_service_name=vsftpd
31userlist_enable=YES
Note: It is recommended to configure the port range in higher values, such as 50,000–50,010, to enhance the security of FTP server access.
(1) Press the Esc key to leave edit mode, then enter :wq to save and close the file.
(2) Use the touch /etc/vsftpd/chroot_list command to create the chroot_list file and add the list of exception users who are not restricted to their home directories.
Note: The chroot_list file must exist even if there are no exception users; it can be empty.
(3) Press the Esc key to leave edit mode, then enter :wq to save and close the file.
(4) Execute the following command to restart the vsftpd service: /etc/init.d/vsftpd restart
This concludes the configuration for passive mode.
Parameter description for the vsftpd.conf configuration file
Use the command cat /etc/vsftpd/vsftpd.conf to inspect the contents of the configuration file.
User login control:
| Parameters | Description |
|---|---|
| anonymous_enable=YES | Accept anonymous users |
| no_anon_password=YES | Do not ask for a password when anonymous users sign in |
| anon_root=(none) | Home directory for anonymous users |
| local_enable=YES | Accept local users |
| local_root=(none) | Home directory for local users |
User permission control:
| Parameters | Description |
|---|---|
| write_enable=YES | Upload is possible (global control) |
| local_umask=022 | umask for file uploads by local users |
| file_open_mode=0666 | File upload permissions are used in conjunction with umask |
| anon_upload_enable=NO | Anonymous users can upload files |
| anon_mkdir_write_enable=NO | Anonymous users can create directories |
| anon_other_write_enable=NO | Anonymous users can modify and delete files |
| chown_username=lightwiter | Username for files uploaded by anonymous users |
Step 3: Set security group
After setting up the FTP site, add inbound security group rules to allow the following FTP ports.
For FTP in active mode: Port 21.
For FTP in passive mode: Port 21, as well as all ports between the parameters pasv_min_port and pasv_max_port in the configuration file /etc/vsftpd/vsftpd.conf.
For specific steps on adding security group rules, please refer to [Add Security Group Rules](BCC/Operation guide/Security/Security group/Edit security group.md).
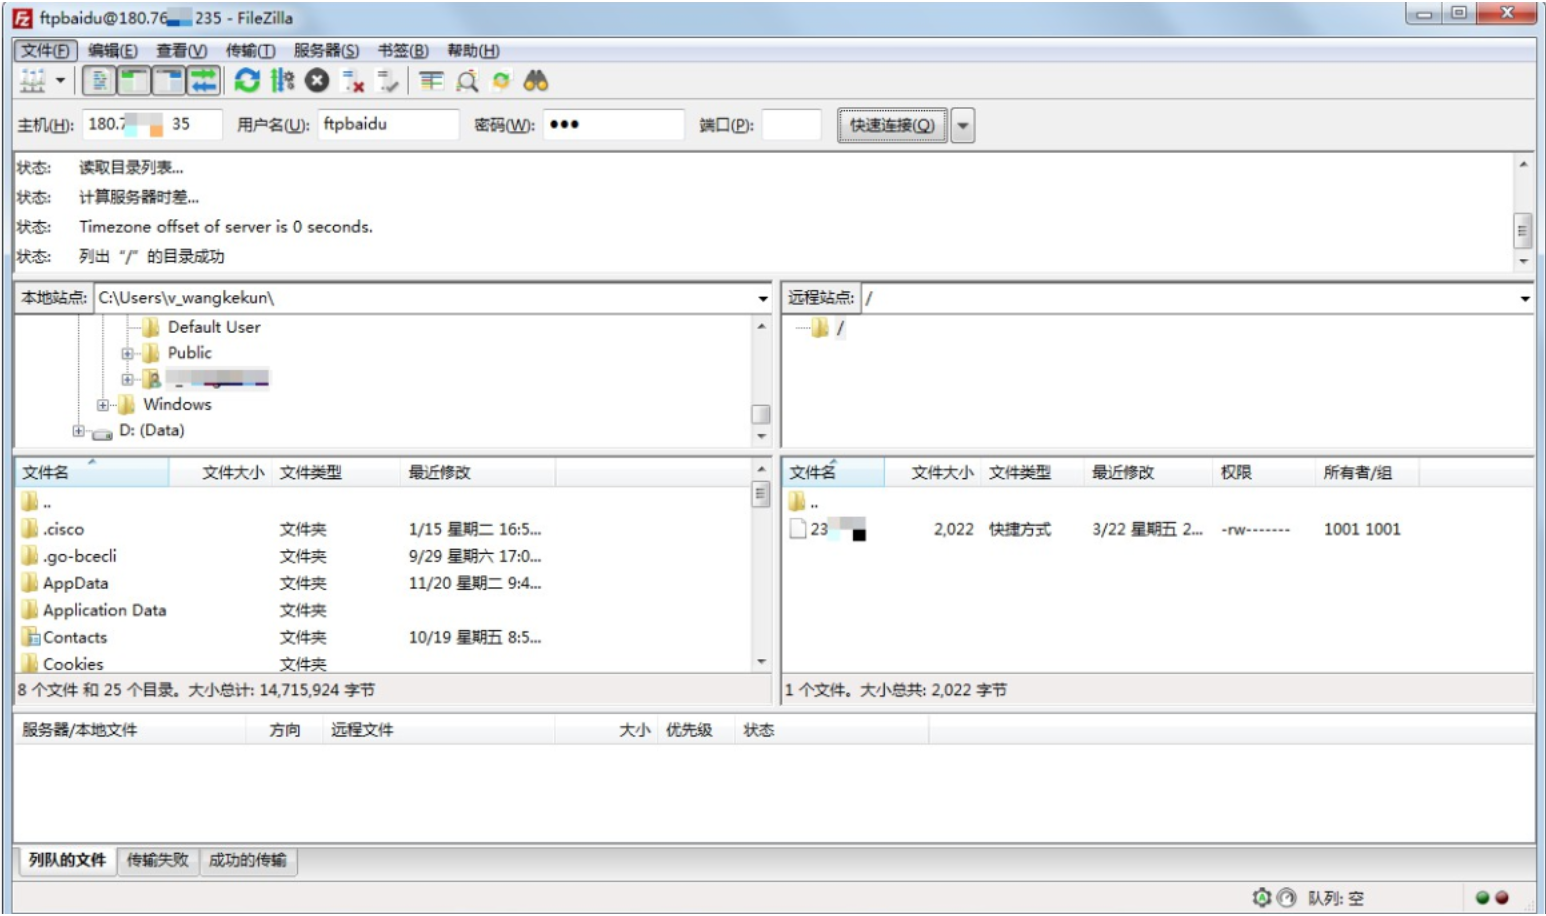
Step 4: Client testing
You can test access to the FTP server with an FTP client or a browser. This tutorial takes the FileZilla tool as an example:
Set up an FTP service on ubuntu
This tutorial uses the Baidu AI Cloud public image of Ubuntu 14.01 64-bit OS as an example to demonstrate how to install and configure vsftpd on a Linux instance.
- Step 1: Install vsftpd
-
Step 2: Configure vsftpd.
- Method 1: Configure file upload permissions for anonymous users.
- Method 2: Configure local user login
- Step 3: Set security group
- Step 4: Client testing
Step 1: Install vsftpd
- Connect remotely and log in to the Linux instance.
Run the command sudo apt-get install vsftpd -y to install vsftpd.
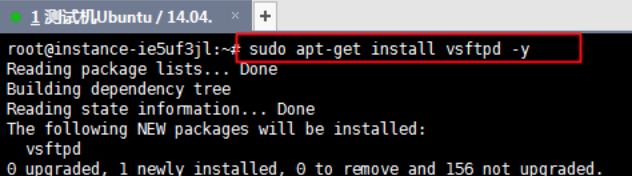
- After installation, VSFTPD will start automatically and enable automatic startup at boot by default. You can see that the system is listening through the netstat command.

Step 2: Configure vsftpd.
vsftp can be divided into anonymous mode (no account credentials required for login) and local user mode
This tutorial introduces two methods for configuring vsftpd and provides relevant parameter explanations for reference based on specific requirements.
- Anonymous mode
- Local user mode
Method 1: Configure file upload permissions for anonymous users
Anonymous access to an FTP server is an insecure method that lets anyone log in without a password. This mode is typically used for storing unimportant public files and is not recommended for production environments. If you must allow anonymous users to upload and download files, follow these configuration steps:
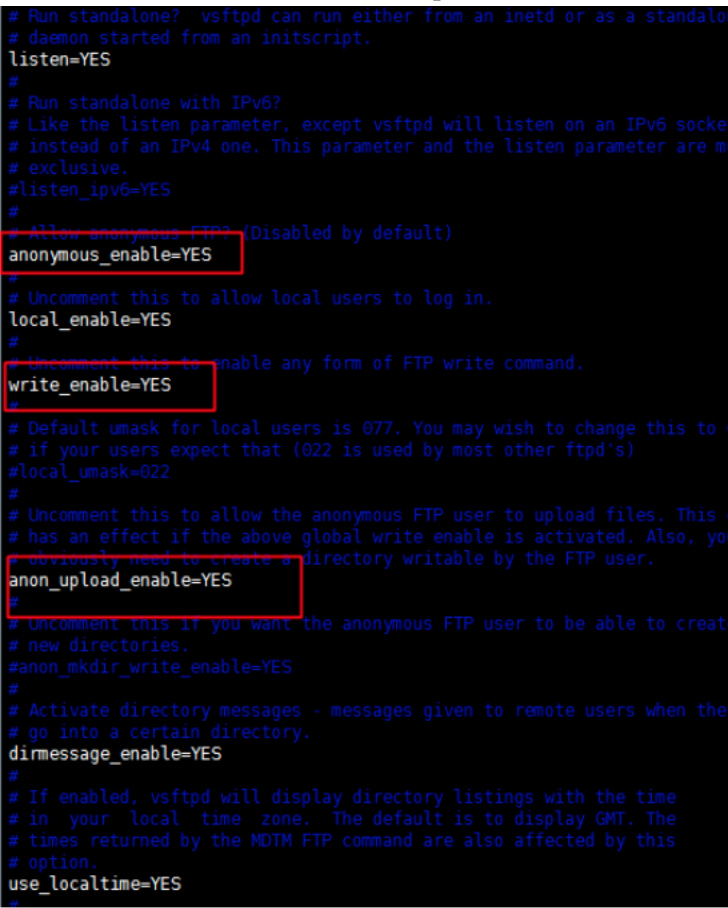
- Execute the command: vim /etc/vsftpd.conf

a. Press the i button to enter edit mode. b. Modify the write permission to write_enable=YES. c. Modify the anonymous upload permission to anon_upload_enable=YES. d. Modify whether to allow anonymous login to anonymous_enable=YES e. Press the Esc key to exit edit mode, and then enter :wq to save and exit the file.
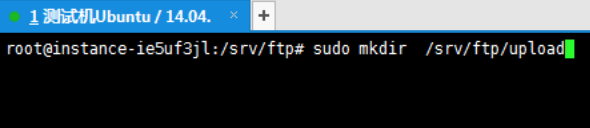
Create an FTP subdirectory.
Execute the command: sudo mkdir /srv/ftp/upload
The default root directory for the FTP set up on Ubuntu is /srv/ftp/, but anonymous users are not allowed to upload files to the root directory by default, so a subdirectory must be created for uploads.
Set the permissions of this directory to 755 and assign the appropriate group.
Execute the command: sudo chown root:ftp /srv/ftp/upload
Then execute: sudo chmod 755 /srv/ftp/upload
Restart the service to apply the changes.
Execute the command: sudo service vsftpd restart
Test the connection to ensure file uploads and downloads are functioning properly.
Method 2: Configure local user login
Local user login allows users to sign in to the FTP server using their Linux OS account and password.
Follow these steps to configure the vsftpd service for FTP server access using a Linux account and password.
- Execute the following command to create a Linux user for the FTP service, for example, a user named ftpbaidu.
sudo useradd ftpbaidu

- Use the following command to set a password for the ftptest user.
sudo passwd ftpbaidu
Run the commands below to create a file directory for the FTP service.
sudo mkdir /srv/ftp/baidu
Run the commands below to change the ownership of the /srv/ftp/baidu directory to ftpbaidu.
sudo chown -R ftpbaidu:ftpbaidu /srv/ftp/baidu
Enter the command vim /etc/vsftpd.conf to open the vsftpd.conf configuration file, then press i to switch to edit mode.
- Update the vsftpd.conf configuration file as needed.
The FTP server can operate in either active mode or passive mode.
Configure active mode: In the active mode, the client sends data port information to the server, and the server actively connects to the data port specified by the client for data transmission. The parameters for configuring FTP in active mode are as follows:
1# Disable anonymous login to the FTP server
2anonymous_enable=NO
3 # Allow local users to sign in to the FTP server
4local_enable=YES
5 # Set the directory where local users will be located after login
6local_root=/var/ftp/baidu
7 # Limit all users to their home directories
8chroot_local_user=YES
9 # Enable an exception user list
10chroot_list_enable=YES
11 # Specify the exception user list; these users are not restricted to their home directories
12 chroot_list_file=/etc/chroot_list # Writable permission for home directory allow_writeable_chroot=YES
13 # Configure other parameters
14allow_writeable_chroot=YES
15local_umask=022
16dirmessage_enable=YES
17xferlog_enable=YES
18connect_from_port_20=YES
19xferlog_std_format=YES
20listen=YES
21pam_service_name=vsftpd
22userlist_enable=YES
23tcp_wrappers=YES
(1) Press the Esc key to exit edit mode, and then press key :wq to save and exit the file. (2) Run the touch /etc/chroot_list command to create the chroot_list file and write the list of exception users who are not restricted to accessing only their home directories. Note: The chroot_list file must exist even if there are no exception users; it can be empty
(3) Press the Esc key to leave edit mode, then enter :wq to save and close the file.
Run the command sudo service vsftpd restart to restart the vsftpd service.
The above is the configuration method for active mode
Configure passive mode, In the passive mode, the server opens and sends data port information to the client, and the client connects to the data port opened by the server, which passively accepts the connection. In the passive mode, you need to configure the range of data ports that the server can open. The parameters for configuring FTP in passive mode are as follows:
1# Disable anonymous login to the FTP server
2anonymous_enable=NO
3 # Allow local users to sign in to the FTP server
4local_enable=YES
5 # Set the directory where local users will be located after login
6local_root=/var/ftp/baidu
7 # Limit all users to their home directories
8chroot_local_user=YES
9 # Enable an exception user list
10chroot_list_enable=YES
11 # Specify the exception user list; these users are not restricted to their home directories
12chroot_list_file=/etc/chroot_list
13 # Enable passive mode
14pasv_enable=YES
15 # Public IP address of the FTP server
16 pasv_address=<Public IP address of the FTP server>
17 # Set the minimum value of the port range that can be used for data transmission in the passive mode
18pasv_min_port=50000
19 # Set the maximum value of the port range that can be used for data transmission in passive mode pasv_max_port=50010 # Writable permission for home directory allow_writeable_chroot=YES
20pasv_max_port=50010
21 # Configure other parameters
22local_umask=022
23dirmessage_enable=YES
24xferlog_enable=YES
25xferlog_std_format=YES
26tcp_wrappers=YES
27allow_writeable_chroot=YES
28listen=YES
29listen_ipv6=NO
30pam_service_name=vsftpd
31userlist_enable=YES
Note: It is recommended to configure the port range in higher values, such as 50,000–50,010, to enhance the security of FTP server access.
(1) Press the Esc key to exit edit mode, and then press key :wq to save and exit the file.
(2) Run the touch /etc/chroot_list command to create the chroot_list file and write the list of exception users who are not restricted to accessing only their home directories. Note: The chroot_list file must exist even if there are no exception users; it can be empty
(3) Press the Esc key to exit edit mode, and then press key :wq to save and exit the file.
(4) Run the following command to restart the vsftpd service. sudu service vsftpd restart
The above is the configuration method for passive mode
Parameter description for the vsftpd.conf configuration file
Run the command cat /etc/vsftpd.conf to view the contents of the configuration file.
User login control:
| Parameters | Description |
|---|---|
| anonymous_enable=YES | Accept anonymous users |
| no_anon_password=YES | Do not ask for a password when anonymous users sign in |
| anon_root=(none) | Home directory for anonymous users |
| local_enable=YES | Accept local users |
| local_root=(none) | Home directory for local users |
User permission control:
| Parameters | Description |
|---|---|
| write_enable=YES | Upload is possible (global control) |
| local_umask=022 | umask for file uploads by local users |
| file_open_mode=0666 | File upload permissions are used in conjunction with umask |
| anon_upload_enable=NO | Anonymous users can upload files |
| anon_mkdir_write_enable=NO | Anonymous users can create directories |
| anon_other_write_enable=NO | Anonymous users can modify and delete files |
| chown_username=lightwiter | Username for files uploaded by anonymous users |
Step 3: Set security group
After setting up the FTP site, add inbound security group rules to allow the following FTP ports.
- For FTP in active mode: Use Port 21.
- For FTP in passive mode: Use Port 21 as well as all ports defined between the parameters
pasv_min_portandpasv_max_portin the/etc/vsftpd.confconfiguration file.
Step 4: Client testing
You can test FTP server access using an FTP client or a browser. This tutorial uses the FileZilla tool as an example: