
Using Container Image to Build Services
Starting from February 1, 2021, the Cloud Container Engine (CCE) image registry will only support read-only mode (existing image can still be pulled, but new image cannot be pushed). Thus, the image build function will become unavailable, and only historical build configurations can be viewed.
Please migrate to the Cloud Container Registry (CCR) as soon as possible (refer to Image Migration Documentation). CCR will provide you with more secure, reliable, and fast services. For other requests or questions, please Submit a Ticket.
Overview
Baidu AI Cloud Image Service allows users to configure image building rules based on code repositories or Dockerfiles on the page. Image building can be triggered manually by users or automatically when code repositories change, connecting the intermediate link from user code changes to container deployment, so that users can deploy containerized services more efficiently and conveniently. Note: Dockerfile can record a series of commands and parameters required for building docker images. For Dockerfile format and writing methods, please refer to Docker Official Documentation.
Key functions
- Support automatic build triggering upon code changes It can be enabled in the Build Configuration. Once enabled, image build can be automatically triggered upon code commit/tag addition.
- Support overseas build The code build process may depend on foreign sources. The image build service provides overseas build function by default.
- Support multi-phase build Support the Multi-Phase Build feature introduced in the new docker version.
Build image based on GitHub code registry
- Add GitHub account authorization On the Image Registry - My Image page, click Source Code Authorization Management in the upper left, add GitHub authorization, and follow the website prompts to complete GitHub account authorization. The code registry under this GitHub account can then be used as image build sources.
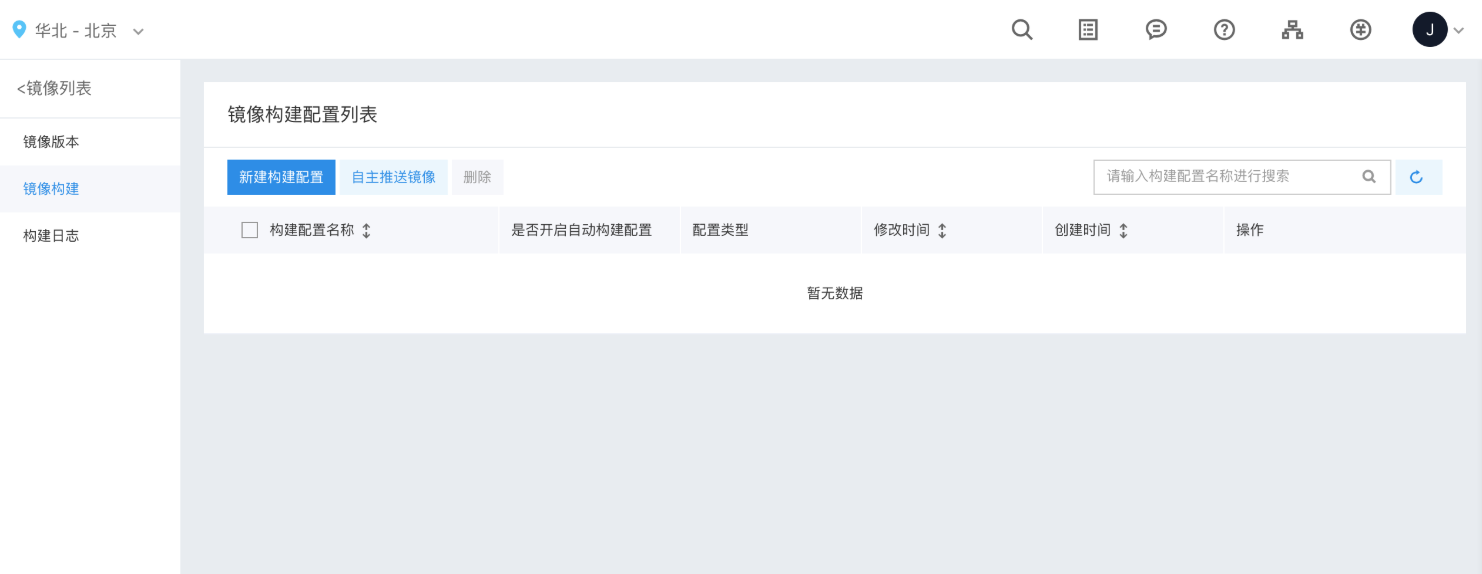
- Add image build configuration based on GitHub code registry Select an existing image or create a new one as the target image for post-build push. Click the image name, select the Image Build tag on the left, and create a new image build configuration.
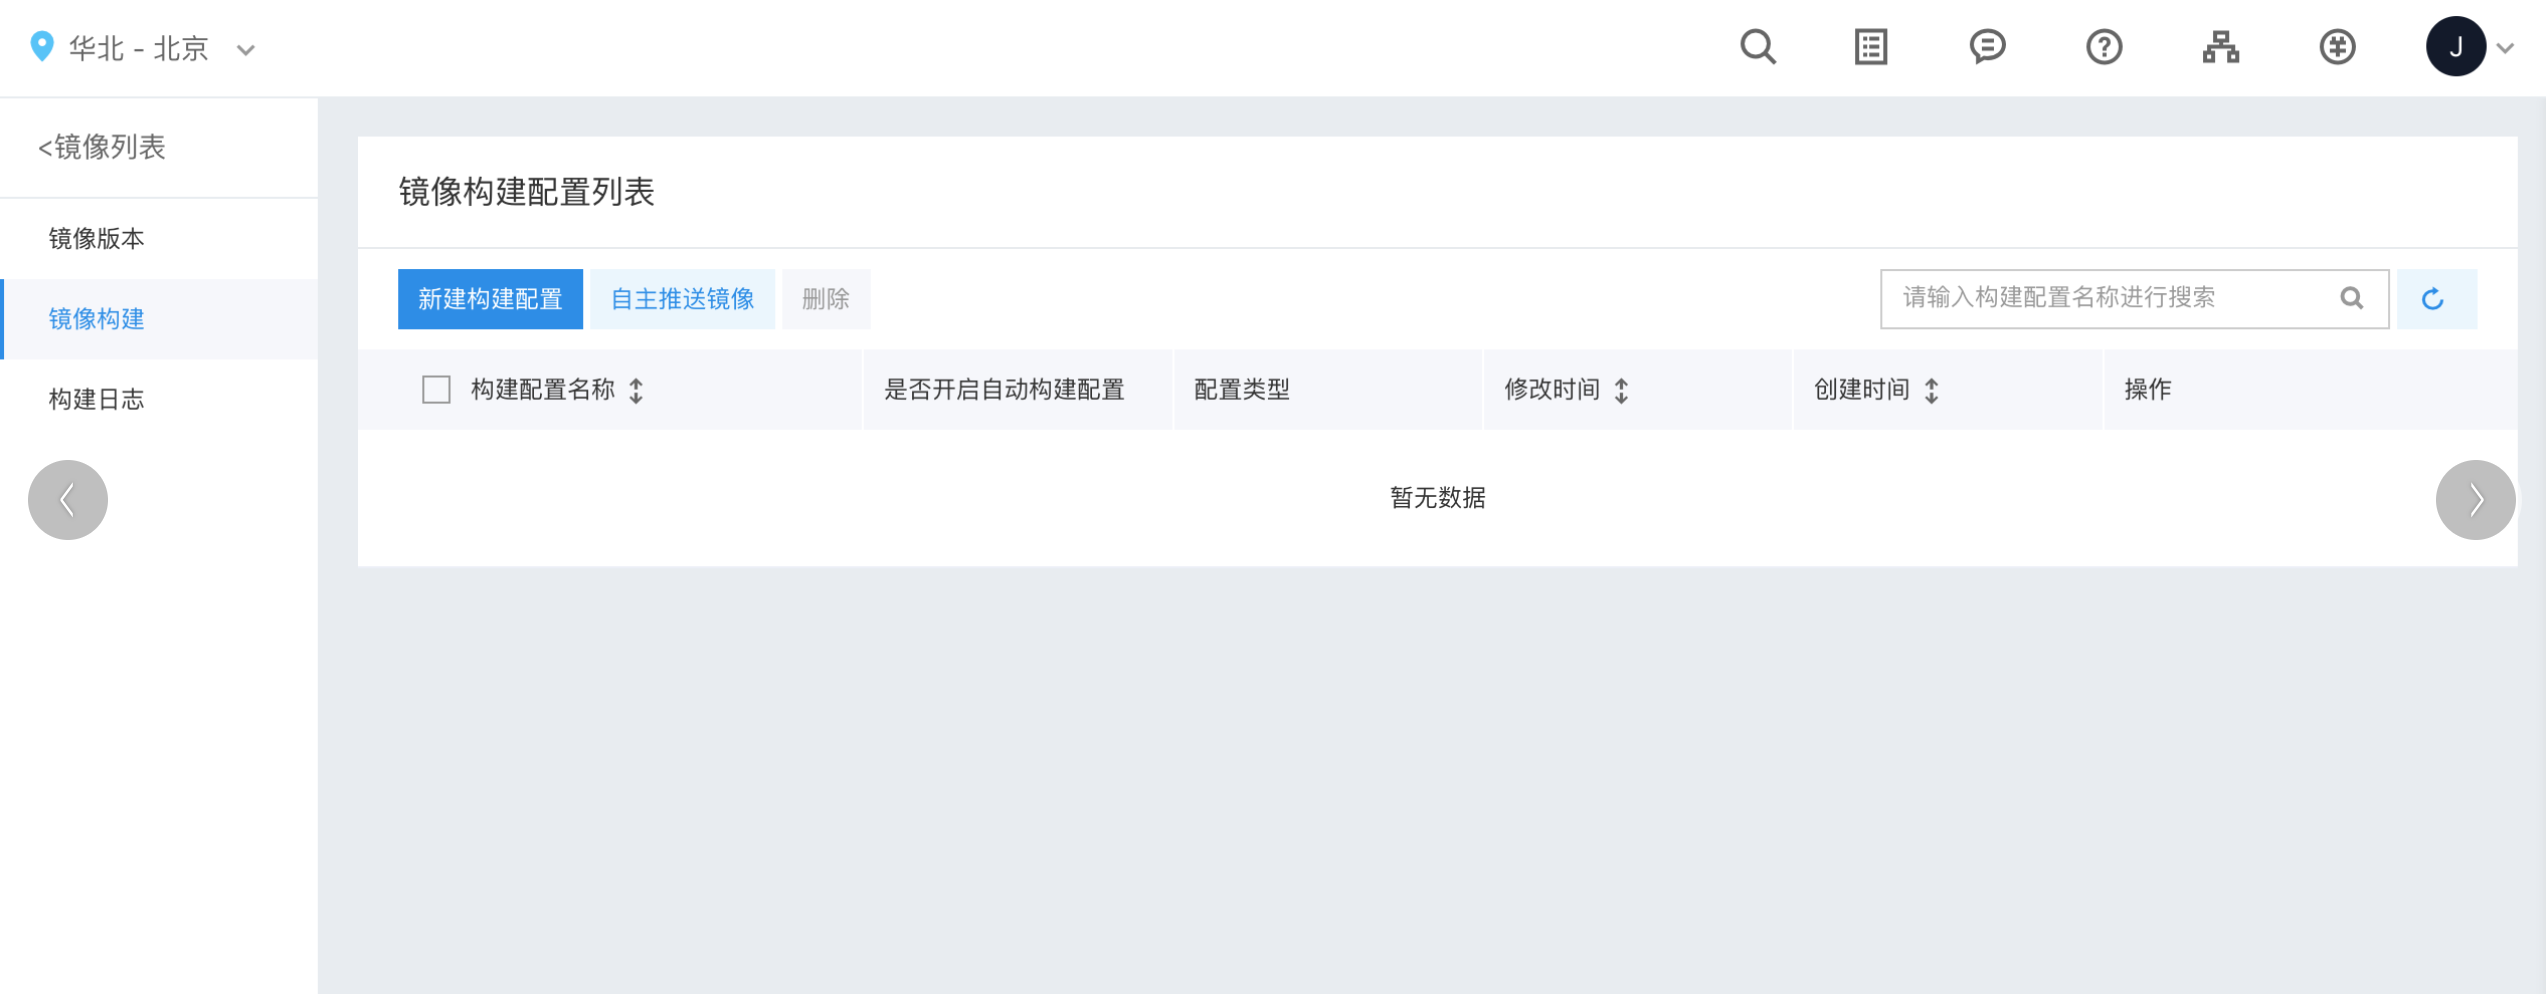
Click Create New Build Configuration and select Create from GitHub Source Code.
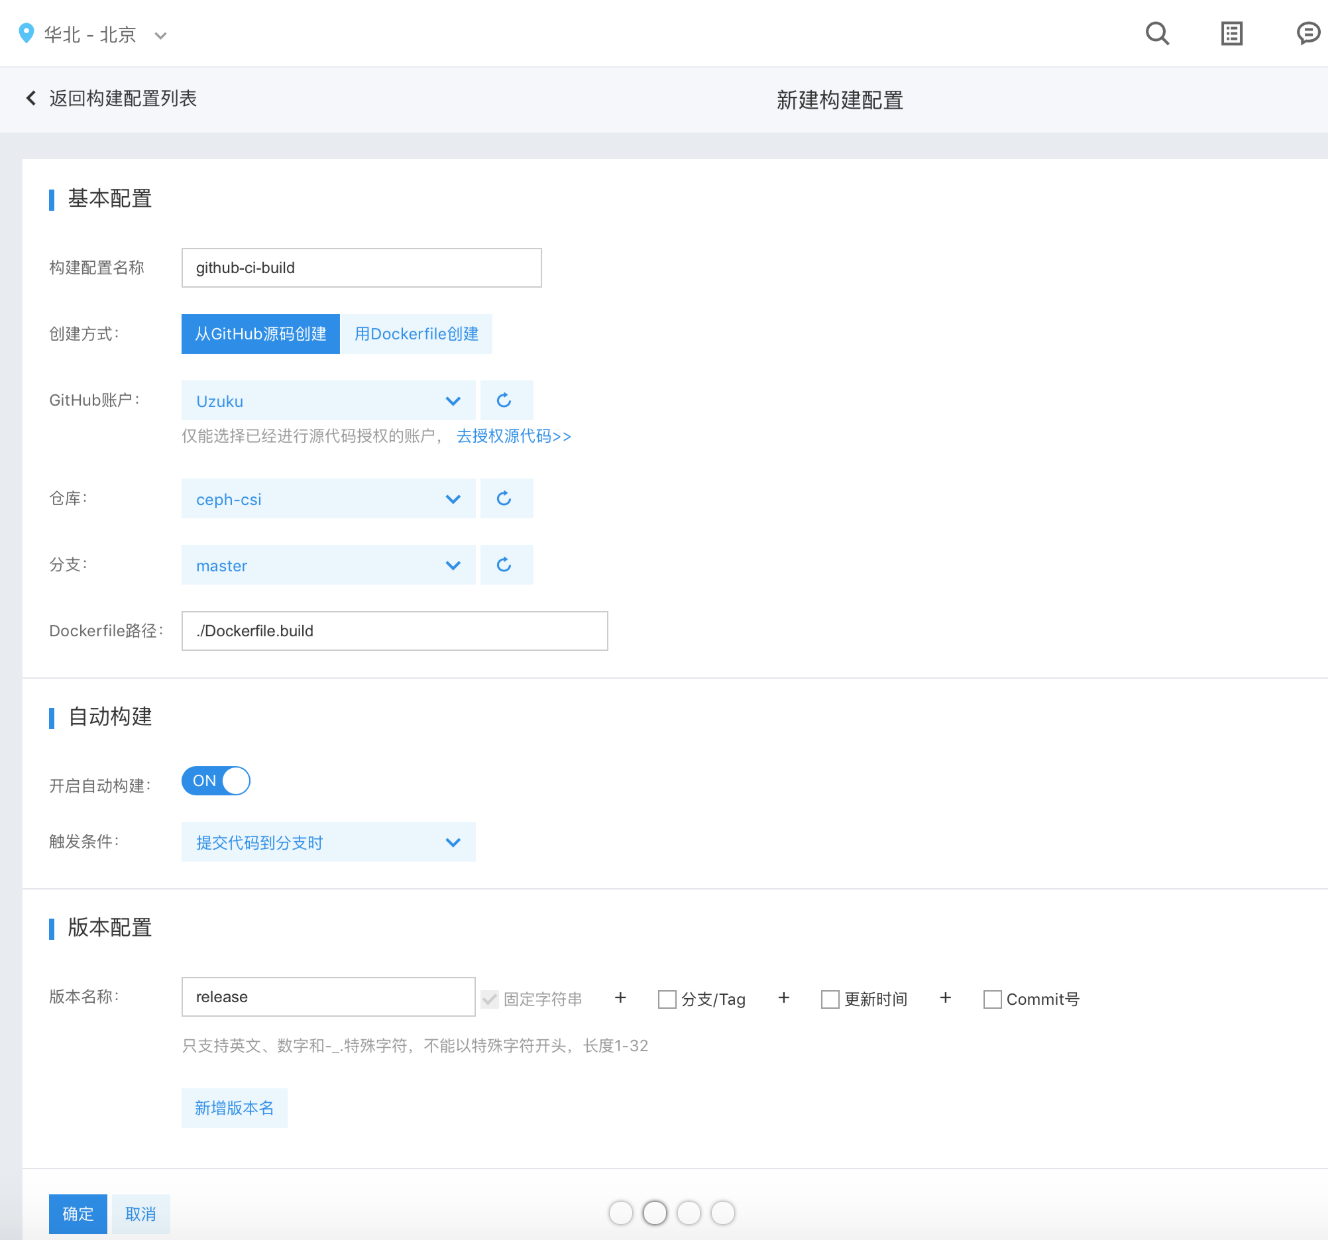
- Build configuration name: Specify a name for this build configuration
- GitHub account: You can select a GitHub account that the user has already authorized
- Registry: You can select a code registry under a GitHub account as the build source
- Branch: Select the code branch for build
- Dockerfile path: Path of the Dockerfile relative to the root directory of the code registry. For example, if the Dockerfile is in the code root directory named Dockerfile.build, enter
./Dockerfile.build. - Enable auto build: Whether to automatically trigger image build upon code registry changes
-
Trigger conditions: Choose specific conditions to automatically initiate the image build process.
- When adding a new tag Refer to automatically triggering image build based on the commit where a new tag is added to the code registry
- When submitting code to the branch When code changes in the branch selected by the user, the image build is automatically triggered using the latest commit of the branch.
- Version name: When naming image versions generated by a build, you can include the related branch/tag name, the image build time, or the commit hash in the version name. You can specify multiple target version names, with each build rule allowing up to 5 version names.
- After configuration, users can manually start the image build or enable automatic triggering when changes are made to the code repository (requires enabling auto-build and setting up auto-build rules). Build logs provide records of the process, with detailed outputs available in the log details.
- If the image is successfully built and pushed using the configuration, the Creation Method column in the image version list will indicate whether the source was an automatic build or a manual build, aligning with the specific image build configuration used. This differentiates it from direct user uploads (user push).
Build an image using Dockerfile
Users have the option to directly upload or write a Dockerfile on the page and build the image based on it.
- On the Image Registry - My Image page, either select an existing image or create a new one as the target image for pushing after the build. Click on the image name, choose the Image Build tab on the left, and create a new image build configuration.
Click on New Build Configuration and choose the Create with Dockerfile option.
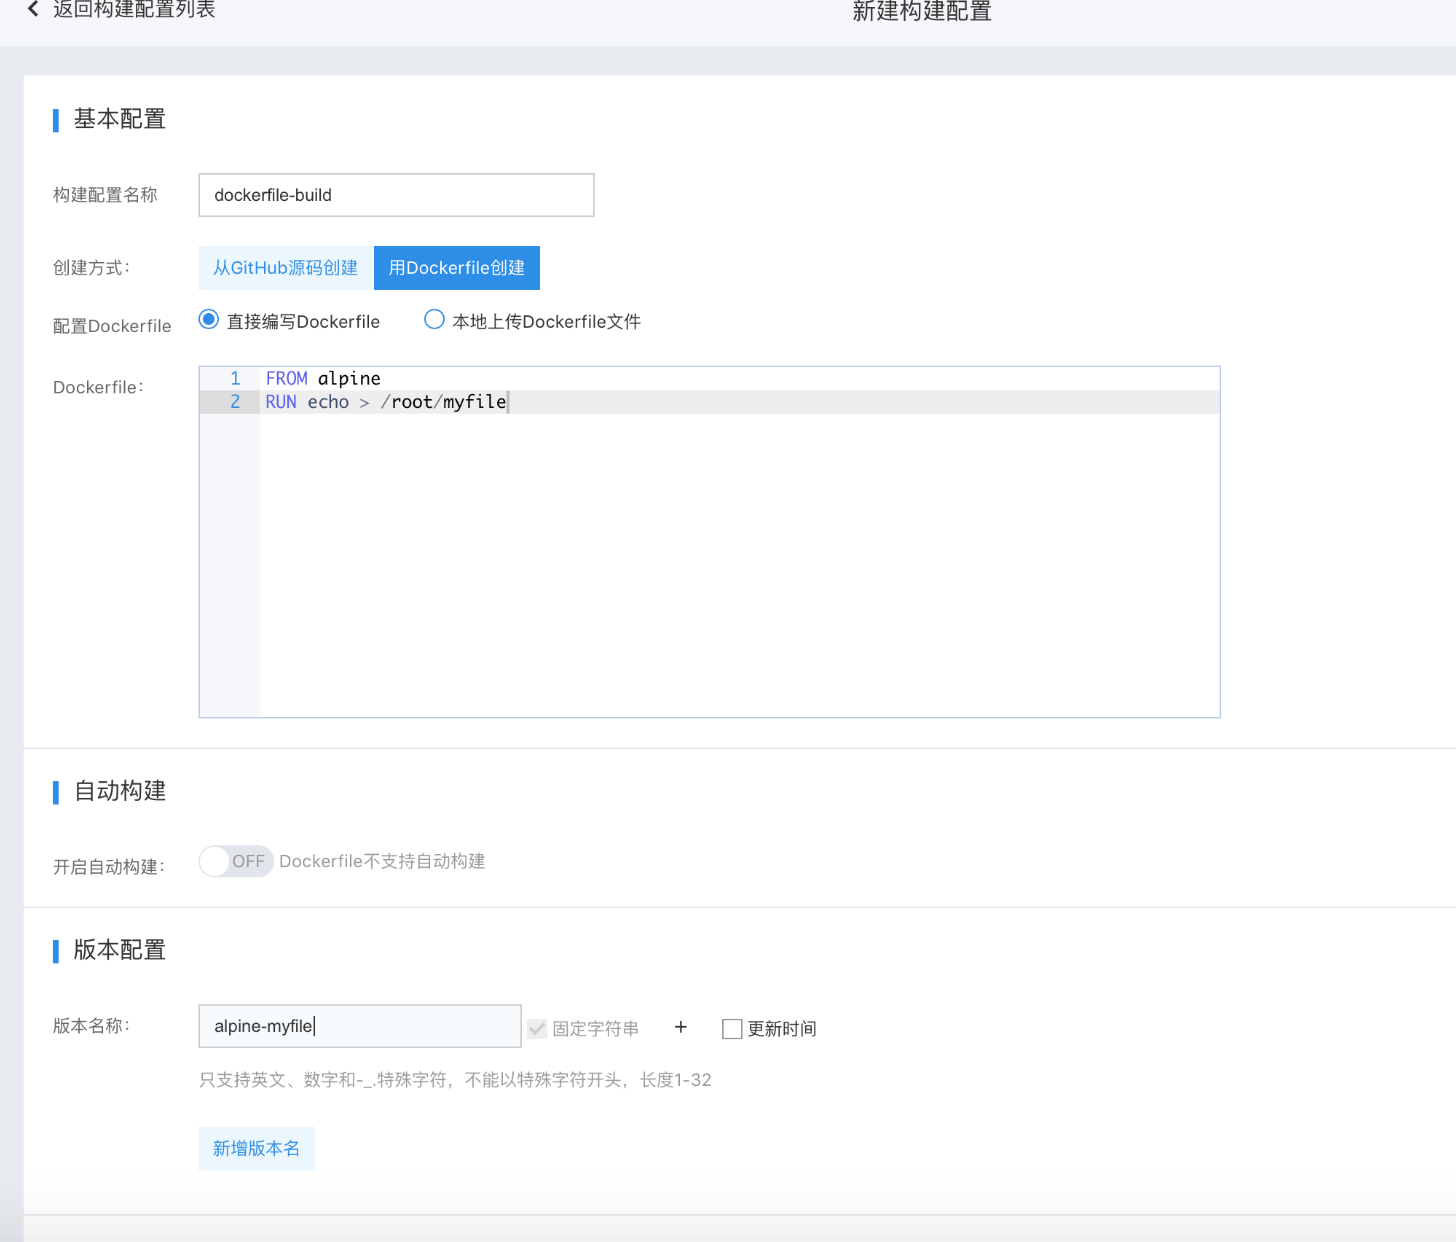
- Build configuration name: Specify a name for this build configuration
- Configure Dockerfile: You can either write the Dockerfile directly on the page or upload a local Dockerfile file. If you upload a file, the content will be displayed in the text box below, allowing further edits if needed.
- Version name: When naming image versions generated by a build, you can use the image build time as part of the version name. Multiple target version names can be specified, with each build rule supporting up to 5 version names.
- After configuration, users can manually trigger the image build. Build logs will show records detailing the process, with specific outputs available in the log details.
- If the image is successfully built and pushed using the configuration, the Creation Method column in the image version list will label the source as a manual build, based on the configuration. This is distinct from direct user uploads (user push).