
Image Registry Basic Operations
Starting from February 1, 2021, the Cloud Container Engine (CCE) image registry will only support read-only mode (existing image can still be pulled, but new image cannot be pushed). Please migrate to the Cloud Container Registry (CCR) as soon as possible (refer to Image Migration Documentation). CCR will provide you with more secure, reliable, and fast services. For other requests or questions, please Submit a Ticket.
Introduction
The image registry delivers secure, dependable, and user-friendly container image management services, minimizing the setup and maintenance overhead of the registry while improving the delivery capacity and user experience of cloud-native applications.
You can use the image registry function provided by the Cloud Container Engine (CCE) Cloud Container Engine - Image Registry
You can also use the more function-rich and user-friendly Cloud Container Registry (CCR) Container Image Registry Console
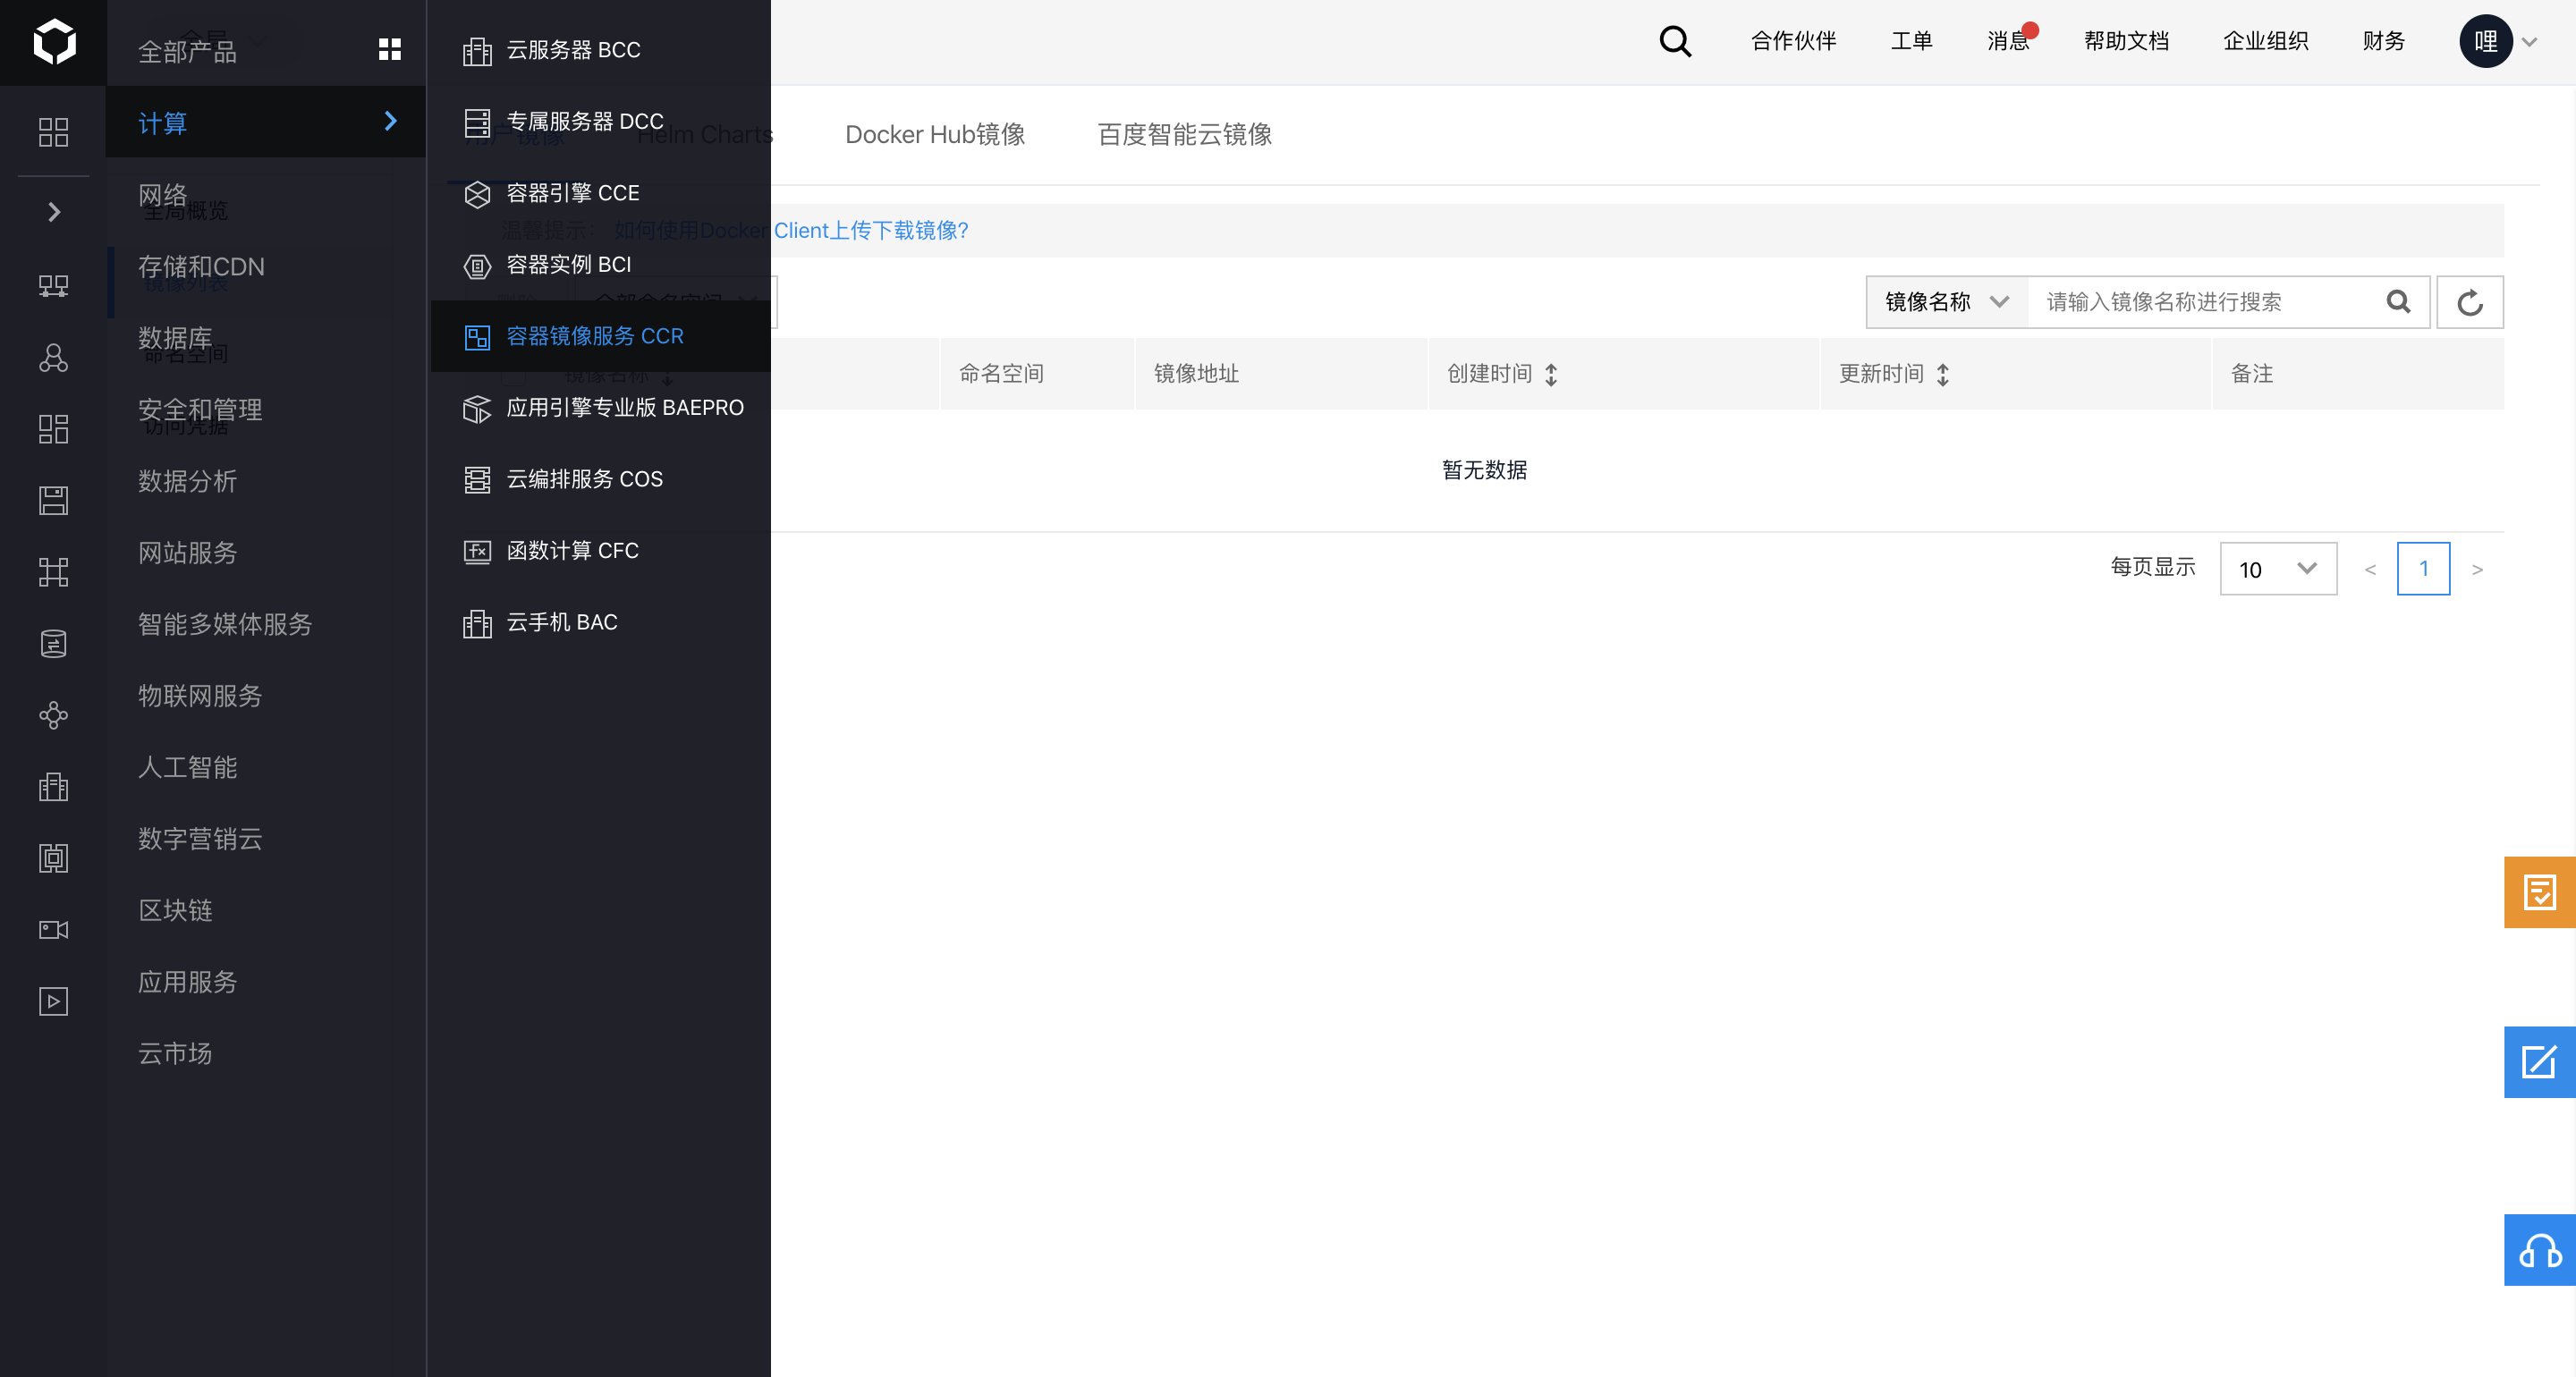
Note: This document is specific to the image registry in the Cloud Container Engine (CCE), with the image registry domain name of hub.baidubce.com. To refer to this document to use the Cloud Container Registry (CCR), replace the image registry domain name with registry.baidubce.com.
Enable image registry
When accessing the image registry for the first time, a setup page will appear. Enter the username and set a password as prompted.
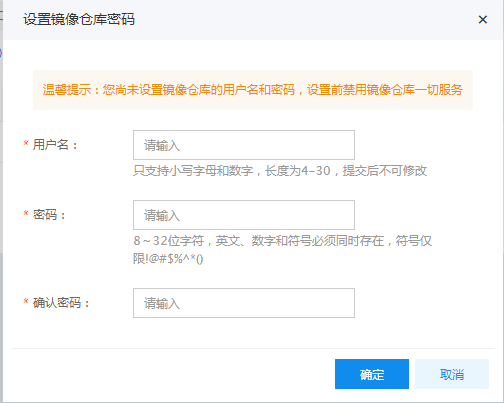
Note:
Username: Naming rules of image registry username: lowercase letters and numbers only, with a length of 4-30, unmodifiable after submission.
Password: This is the credential for users to sign in to the docker image registry. Password creation rules: 8-32 characters; it must contain English letters, numbers, and symbols (limited to !@#^*()) simultaneously
Create namespace
- Within the image registry section, choose a namespace, then click Create Namespace in the namespace list.
- Provide the new namespace name, select the namespace type, and click OK to finish creating the namespace.
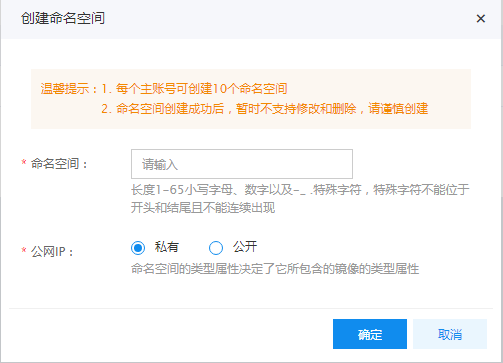
Note:
Namespace naming rules are as follows: Names must be between 1 and 65 characters long, using lowercase letters, numbers, and the special characters -\_. Special characters cannot begin or end the name, nor appear consecutively.
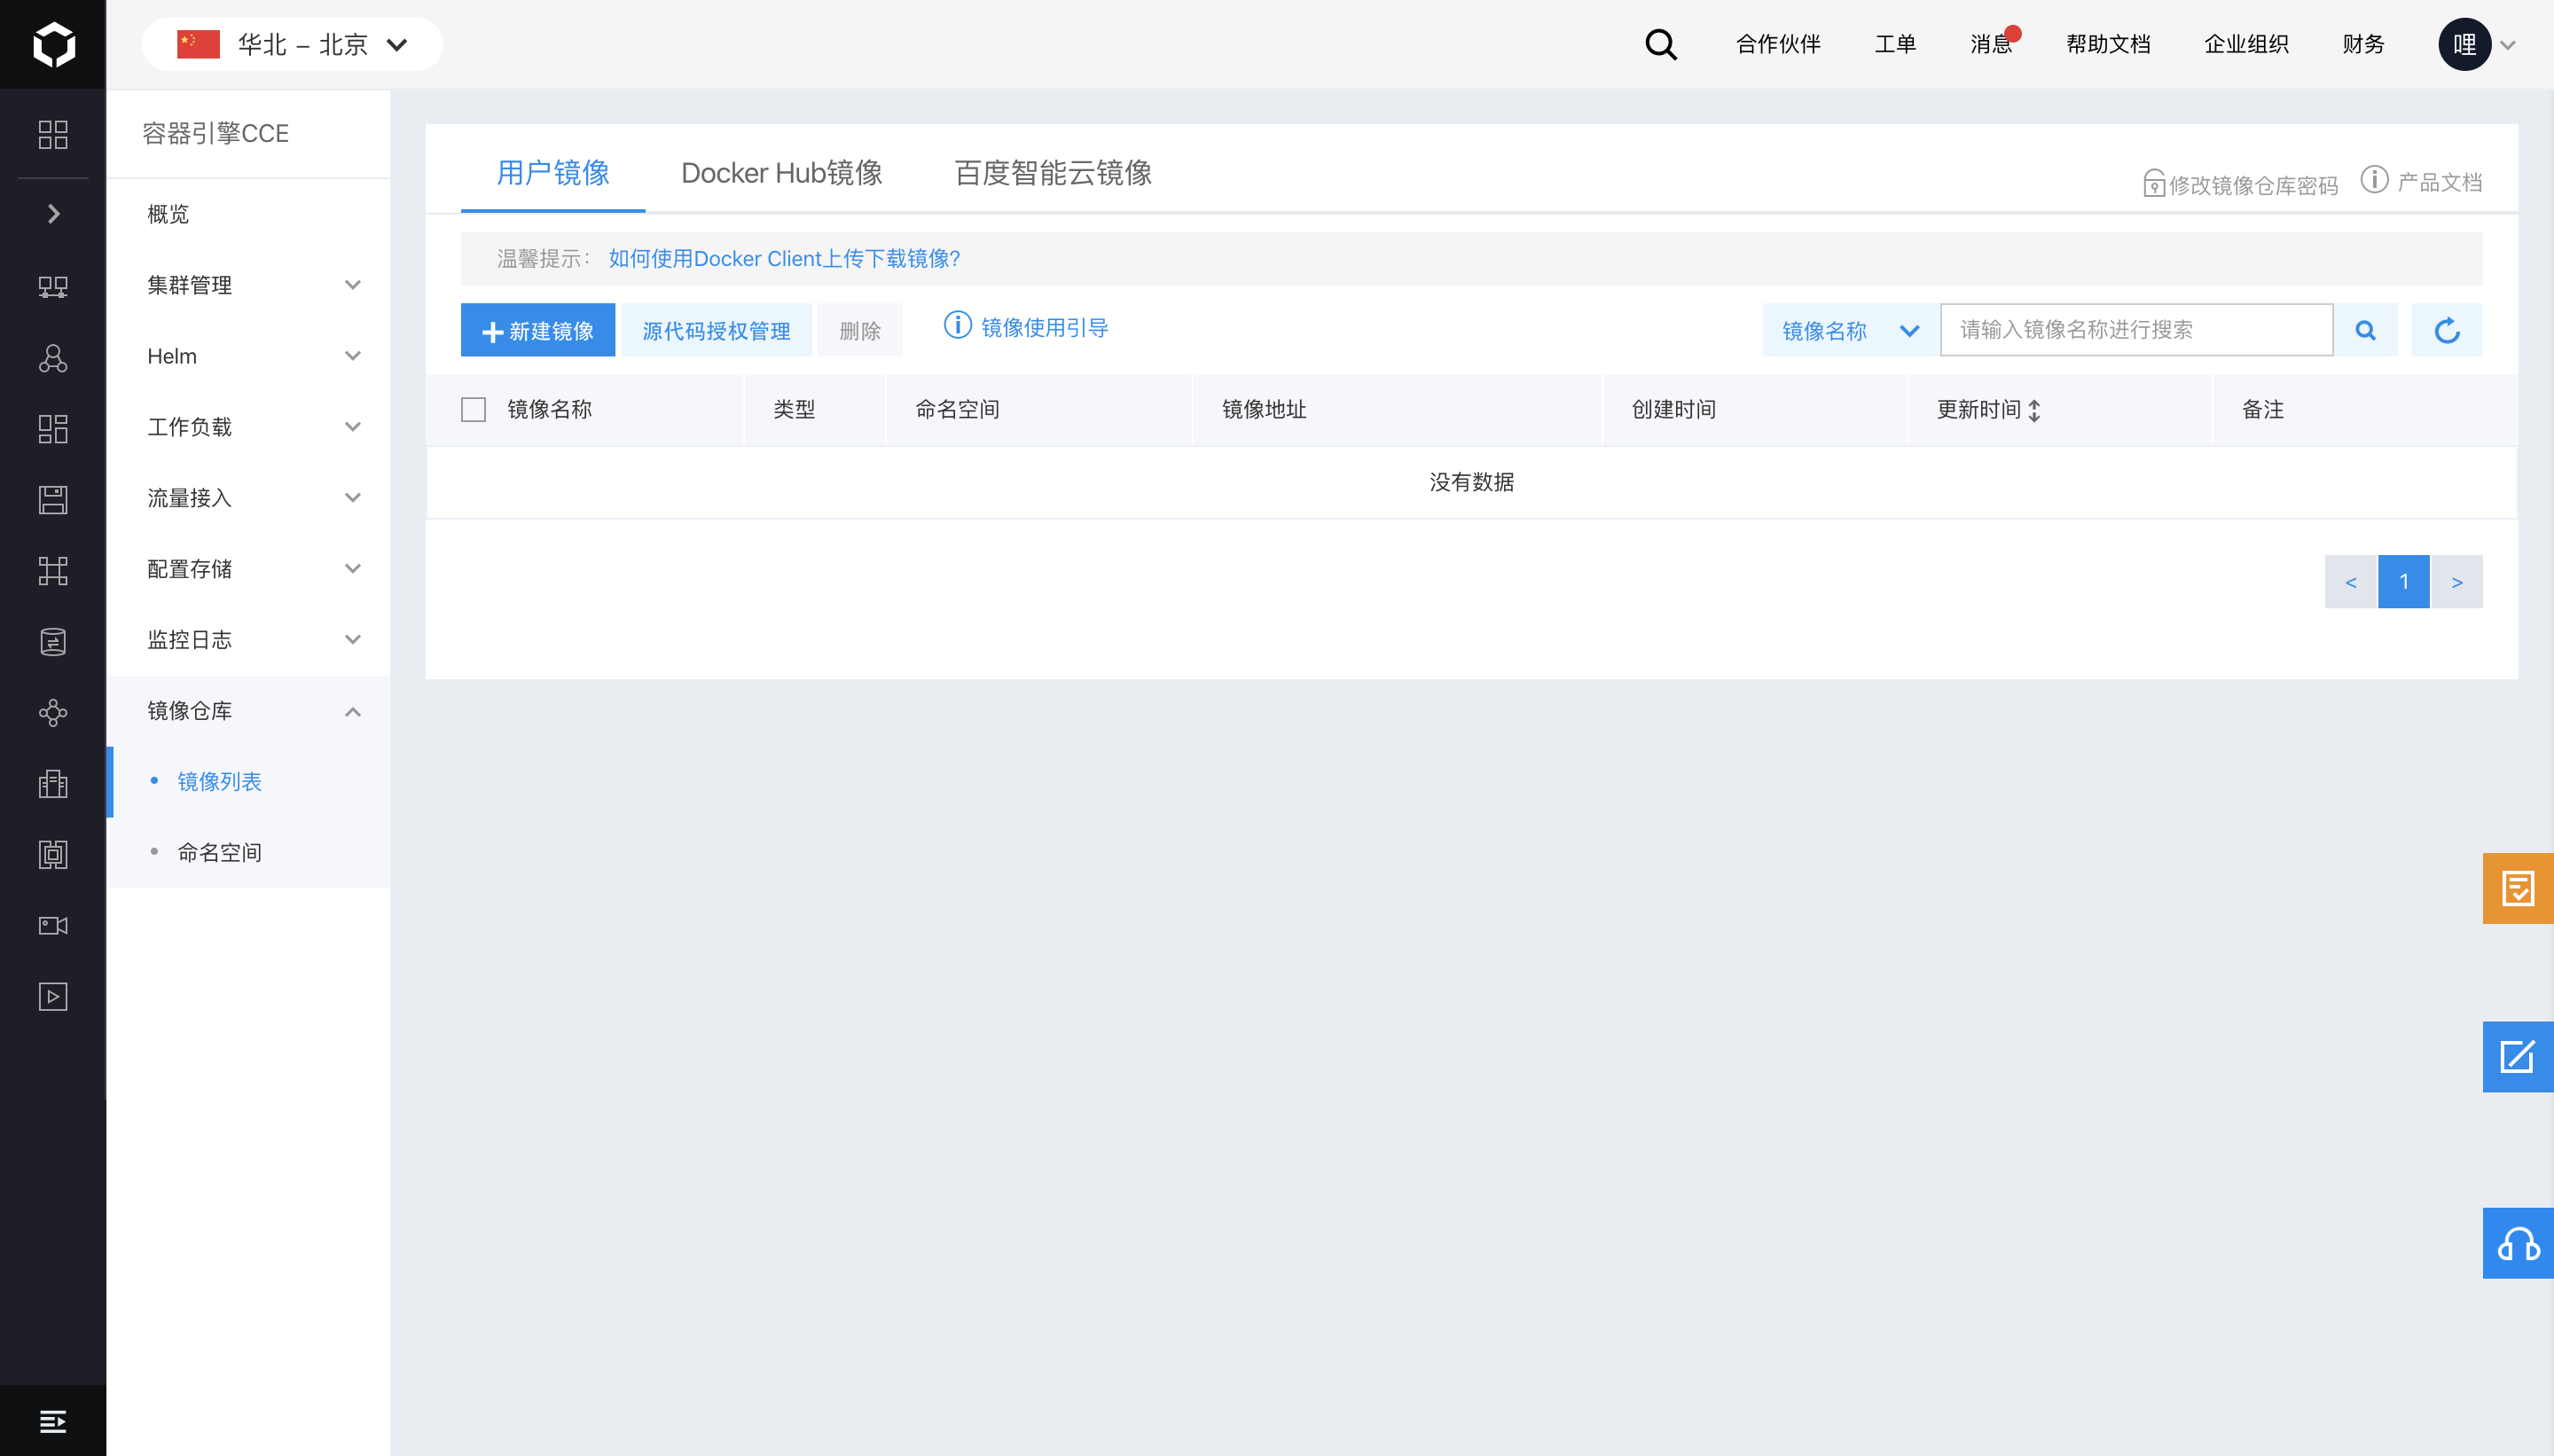
Create an image
- On the Image List page, click the Create button.
- Select the namespace, enter the image name and version number, then click OK.
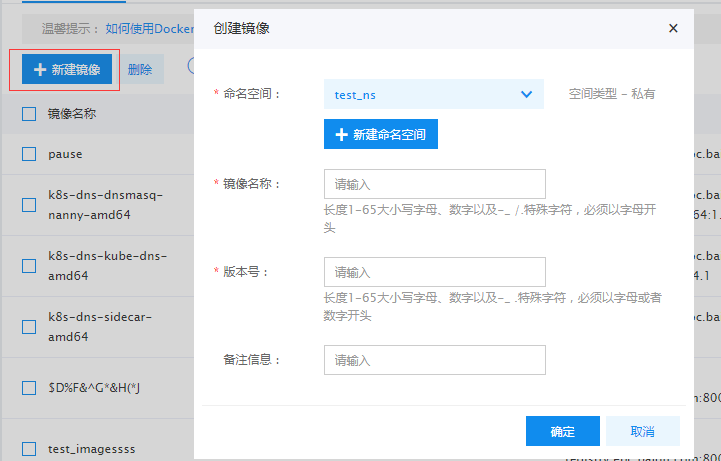
Note:
- The image name must consist of lowercase letters, numbers, and the special characters -_ /., with a length of 1-65 characters. Special characters cannot start or end the name, nor appear consecutively.
- The version name must consist of lowercase letters, numbers, and the special characters -_ ., with a length of 1-65 characters. Special characters cannot start or end the name, nor appear consecutively.
- If the user opts not to create a new image, the above basic details will also be generated automatically upon completing the image push to the corresponding namespace.
Delete image
Select the image name to delete, click the Delete button, and confirm the action in the pop-up deletion window.
Note: Deleted image cannot be recovered or used.
Push the image to the image registry
Starting from February 1, 2021, the Cloud Container Engine (CCE) image registry will only support read-only mode (existing image can still be pulled, but new image cannot be pushed). Please migrate to the Cloud Container Registry (CCR) as soon as possible (refer to Image Migration Documentation). CCR will provide you with more secure, reliable, and fast services. For other requests or questions, please Submit a Ticket.
Note: This document is specific to the image registry in the Cloud Container Engine (CCE), with the image registry domain name of hub.baidubce.com. To refer to this document to use the Cloud Container Registry (CCR), replace the image registry domain name with registry.baidubce.com.
Sign in to Baidu AI Cloud Image Registry
1 >$ sudo docker login --username=[username] hub.baidubce.comUsername: The image registry name corresponds to the username input during registry activation. Complete the login process by entering the password.
Upload images
1    $ sudo docker tag [ImageId] hub.baidubce.com/[namespace]/[ImageName]: [Image Version No.]
2 $ sudo docker push hub.baidubce.com/[namespace]/[ImageName]:[Image Version No.]- Fill in the ImageId and image version No. based on the image information
- Namespace refers to the namespace entered when activating the image registry
- ImageName refers to the image name created in the console
Download Image
To sign in to the Image Registry, you need to enter the password
1 $ sudo docker pull hub.baidubce.com/[namespace]/[ImageName]:[Image Version No.]Use DockerHub accelerator
How to use the DockerHub image accelerator
Docker software repository address: https://mirror.baidubce.com
CCE Cluster Baidu Cloud Compute
No manual configuration is required. The docker service will be automatically installed when creating a node, and the mirror image will be configured as follows:
1    [root@VM_1_2_centos ~]# cat /etc/systemd/system/docker.service
2    IPTABLES="--iptables=false"
3    STORAGE_DRIVER="--storage-driver=overlay2"
4    IP_MASQ="--ip-masq=false"
5    LOG_LEVEL="--log-level=warn"
6    REGISTRY_MIRROR="--registry-mirror=https://mirror.baidubce.com"
BCC and server configuration
Linux:
- Applicable to Ubuntu14.04, Debian, CentOS6, Fedora and OpenSUSE. Other versions may have slight differences
Modify the docker configuration file /etc/default/docker as follows:
1 DOCKER_OPTS="--registry-mirror=https://mirror.baidubce.com"-
For CentOS7: Modify docker configuration file vi /etc/sysconfig/docker by adding the following
Plain Text1OPTIONS='--registry-mirror=https://mirror.baidubce.com'
Note
The DockerHub mirror mechanism is supported only in Docker version 1.3.2 or higher. If Docker is not installed or if the version is outdated, please install Docker or upgrade to a newer version.
Windows
If Boot2Docker is used, the configuration command is: Enter the Boot2Docker Start Shell and execute
1    sudo su echo "EXTRA_ARGS=\"–registry-
2 mirror=http://https://mirror.baidubce.com"">> /var/lib/boot2docker/profile  exit #  RebootBoot2Docker
Start docker
Execute the following commands to start docker
1 sudo service docker startBuild docker image
DockerHub has provided developers with a vast collection of high-quality available images. For details, visit the DockerHub Official Website.
Given the variety of practical scenarios, not all applications can find suitable images for use on DockerHub. You can follow the tutorial below to learn how to build custom Docker images.
Docker currently supports two methods for generating images:
- Automatically build an image using Dockerfile;
- Create and generate an image by running the commit command on an existing container.
Automatically compiled and generated by Dockerfile
Take Dockerhub's official WordPress as an example. Refer to GitHub for details
The relevant Dockerfile source code is as follows:
1        FROM php:5.6-apache
2
3        # install the PHP extensions we need
4        RUN apt-get update && apt-get install -y libpng12-dev libjpeg-dev && rm -rf /var/lib/apt/lists/* \
5            && docker-php-ext-configure gd --with-png-dir=/usr --with-jpeg-dir=/usr \
6            && docker-php-ext-install gd mysqli opcache
7
8        # set recommended PHP.ini settings
9        # see https://secure.php.net/manual/en/opcache.installation.php
10        RUN { \
11                echo 'opcache.memory_consumption=128'; \
12                echo 'opcache.interned_strings_buffer=8'; \
13                echo 'opcache.max_accelerated_files=4000'; \
14                echo 'opcache.revalidate_freq=2'; \
15                echo 'opcache.fast_shutdown=1'; \
16                echo 'opcache.enable_cli=1'; \
17            } > /usr/local/etc/php/conf.d/opcache-recommended.ini
18
19        RUN a2enmod rewrite expires
20
21        VOLUME /var/www/html
22
23        ENV WORDPRESS_VERSION 4.6.1
24        ENV WORDPRESS_SHA1 027e065d30a64720624a7404a1820e6c6fff1202
25
26        RUN set -x \
27            && curl -o wordpress.tar.gz -fSL "https://wordpress.org/wordpress-${WORDPRESS_VERSION}.tar.gz" \
28            && echo "$WORDPRESS_SHA1 *wordpress.tar.gz" | sha1sum -c - \
29        # upstream tarballs include ./wordpress/ so this gives us /usr/src/wordpress
30            && tar -xzf wordpress.tar.gz -C /usr/src/ \
31            && rm wordpress.tar.gz \
32            && chown -R www-data:www-data /usr/src/wordpress
33
34        COPY docker-entrypoint.sh /usr/local/bin/
35        RUN ln -s usr/local/bin/docker-entrypoint.sh /entrypoint.sh # backwards compat
36
37        # ENTRYPOINT resets CMD
38        ENTRYPOINT ["docker-entrypoint.sh"]
39        CMD ["apache2-foreground"]
The Dockerfile above explains how to set up the basic environment needed for a WordPress application.
Open a terminal, create a folder to store the Dockerfile, and use the docker build command to create the image.
1    [root@instance-hlf45x1g-1 worldpress]# docker build ./
2    Sending build context to Docker daemon 3.072 kB
3    Step 1 : FROM php:5.6-apache
4    Trying to pull repository docker.io/library/php ...
5    5.6-apache: Pulling from docker.io/library/php
6    386a066cd84a: Pull complete
7    269e95c6053a: Pull complete
8    ......
Use the docker images command to check the created image.
1    [root@instance-hlf45x1g-1 worldpress]# docker images
2    REPOSITORY                                     TAG                 IMAGE ID            CREATED             SIZE
3    worldpress                                     latest              9f0b470b5ddb        13 minutes ago      420 MB
4    docker.io/php                                  5.6-apache          eb8333e24502        7 days ago          389.7 MB
The following recommendations apply when using Dockerfile to build images:
- It is recommended to use official Docker base images as the starting point.
- The initial instructions in the Dockerfile should focus on general and versatile commands for installing and managing dependencies to improve cache efficiency.
- Install only the necessary packages to minimize the image size.
- Use multiple RUN commands linked with '\' to improve readability and simplify maintenance.
- Use the -t tag when building images to make managing the created images easier.
- Clear annotations help improve readability.
- After building, run a local startup to verify functionality.
Execute commit to package and generate the image
The Dockerfile allows for fast image creation, while the commit command helps convert an existing container into an image.
The steps to build an image via commit are as follows:
-
Run and access the container based on the base image.
Plain Text1[root@instance-hlf45x1g-1 ~]# docker run -i -t centos -
Install the required software and apply configurations.
Plain Text1 [root@c4f1basa4w76 /]# yum update && yum install openssh-server 2 Loaded plugins: fastestmirror, ovl 3 base | 3.6 kB 00:00:00 4 extras | 3.4 kB 00:00:00 5 updates | 3.4 kB 00:00:00 6 (1/4): base/7/x86_64/group_gz | 155 kB 00:00:00 7 (2/4): extras/7/x86_64/primary_db | 166 kB 00:00:00 8 (3/4): base/7/x86_64/primary_db | 5.3 MB 00:00:00 9 (4/4): updates/7/x86_64/primary_db 10 ...... 11 ...... 12 ...... 13 Dependency Installed: 14 fipscheck.x86_64 0:1.4.1-5.el7 fipscheck-lib.x86_64 0:1.4.1-5.el7 openssh.x86_64 0:6.6.1p1-25.el7_2 tcp_wrappers-libs.x86_64 0:7.6-77.el7 -
Once configuration is complete, open a new terminal to save the image.
Plain Text1[root@instance-hlf45x1g-1 ~]# docker ps 2 CONTAINER ID IMAGE COMMAND CREATED STATUS PORTS NAMES 3 c4f1basa4w76 centos "/bin/bash" 13 minutes ago Up 13 minutes fashion_surl 4[root@instance-hlf45x1g-1 ~]# docker commit c4f1basa4w76 my_centos:1.0 5 sha256:65325ffd2af9d574afca917a8ce81cf8a710e6d1067ee611a87087e1aa88e4a4 6[root@instance-hlf45x1g-1 ~]# docker images 7 REPOSITORY TAG IMAGE ID CREATED SIZE 8 my_centos 1.0 65325ffd2af9 16 seconds ago 307.8 MB