
CCE Best Practice-Guestbook Setup
Overview
Baidu AI Cloud Container Engine (CCE) is a scalable and highly reliable container cluster service based on Kubernetes and Docker, designed to simplify the deployment of business applications on purchased clusters.
This document uses the classic front-end application "GuestBook" as an example to showcase the complete process of setting up a cluster and deploying an application, helping you quickly create the simplest web application using Baidu AI Cloud Container Engine (CCE).
Operation steps
General operation flow

Guestbook setup steps
- [Baidu AI Cloud account registration and real-name certification](Building a Simple Web Application with CCE (Using Guestbook as an Example).md#1. Baidu AI Cloud account registration and real-name certification)
- [Create a CCE container cluster](Building a Simple Web Application with CCE (Using Guestbook as an Example).md#2. Create CCE container cluster)
- [Create CCR image registry](Building a Simple Web Application with CCE (Using Guestbook as an Example).md#3. Create image registry)
- [Configure kubectl command-line interface](Building a Simple Web Application with CCE (Using Guestbook as an Example).md#4. Configure kubectl command-line interface)
- [(Optional) Configure Kubernetes-dashboard](Building a Simple Web Application with CCE (Using Guestbook as an Example).md#5. (Optional) Configure Kubernetes-dashboard)
- Creating GuestBook via Kubernetes-Kubectl
- Bind domain name to provide service
1. Baidu AI Cloud account registration and real-name certification
To register a Baidu AI Cloud account, please refer to [Register a Baidu Account](UserGuide/Register an account.md) and sign up.
Please complete "Enterprise Certification" or "Personal Certification" based on your situation. For details, please refer to [Certification Process](UserGuide/Certification/Basic Introduction to Real-name Verification.md).
If you have not completed real-name authentication when creating a CCE cluster, click the Authentication prompt button on the page to complete the relevant operations on the real-name authentication page.
2. Create CCE container cluster
A container cluster is a resource collection composed of servers, incorporating Kubernetes cluster capabilities. You can build highly available business applications on top of the cluster. The specific container cluster creation process is as follows; for details, please refer to Create Cluster.
- Sign in to Baidu AI Cloud official website.
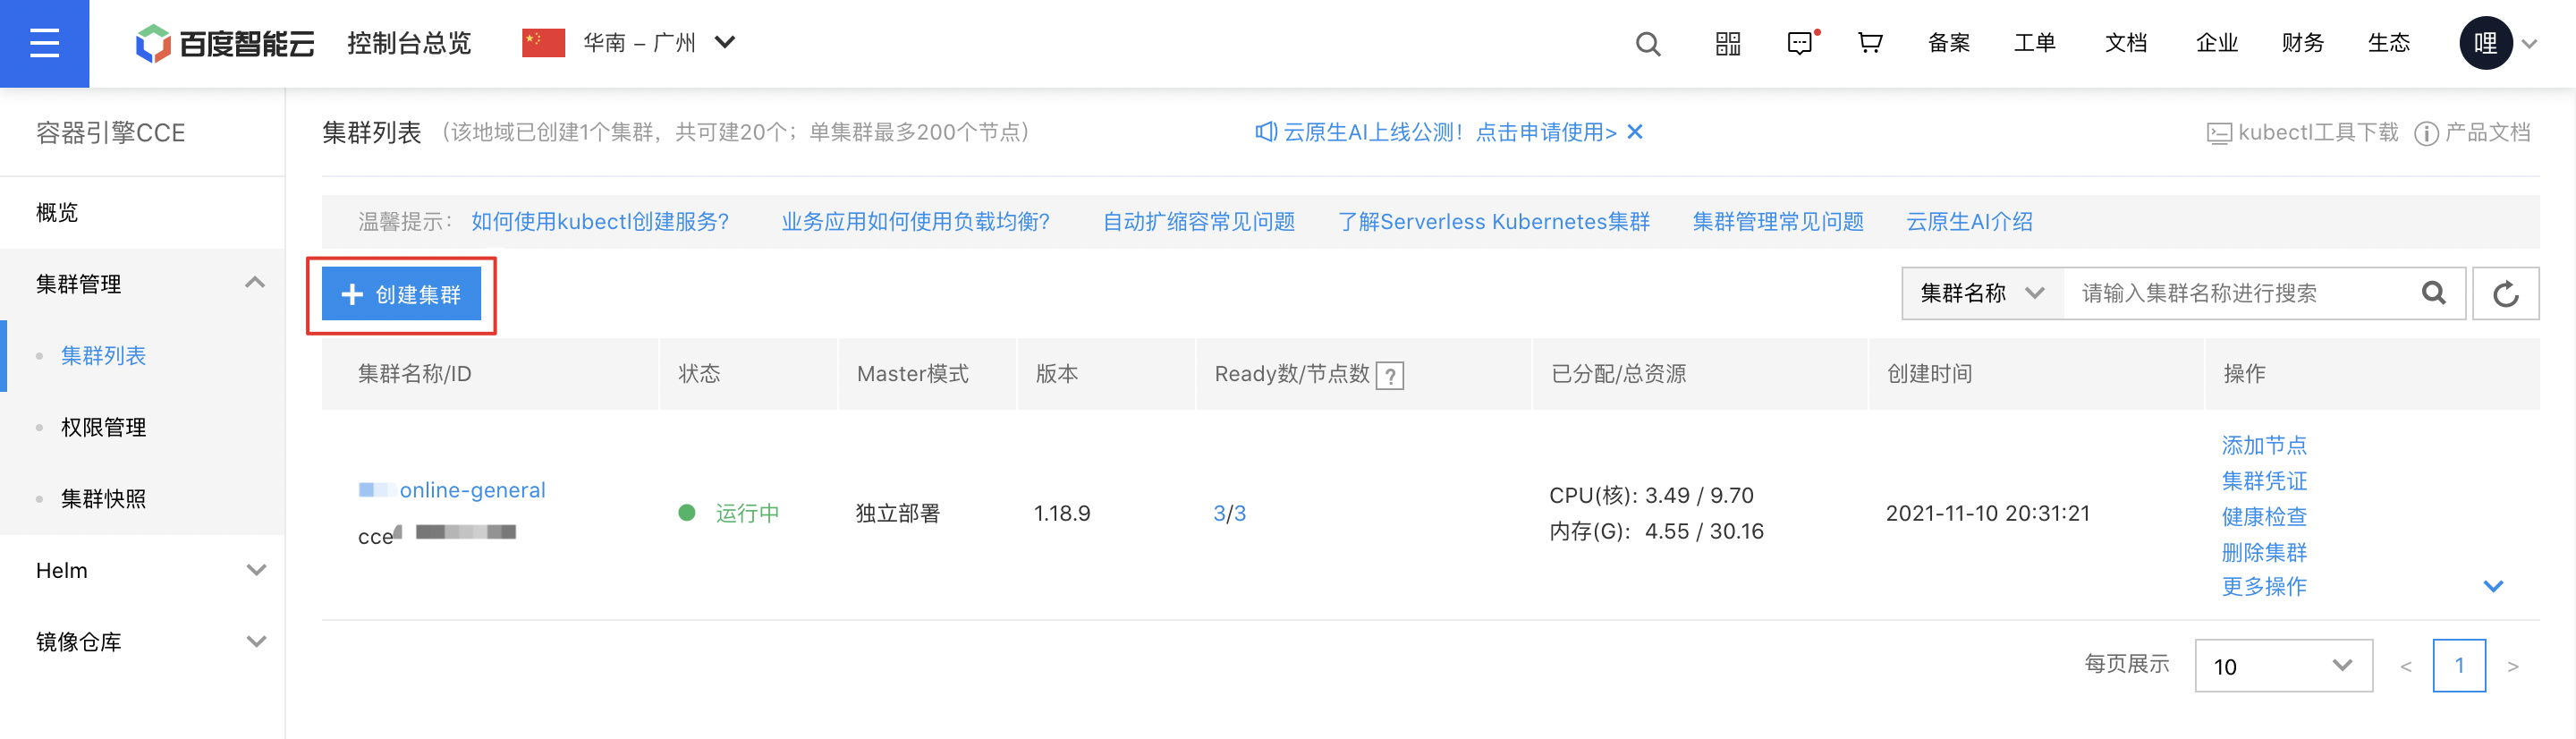
- After successfully logging in, go to Product Services > Cloud Container Engine (CCE) to access the Cluster List page.
- (Optional) The Cluster List page provides an overview of all created K8S Cluster CCE names/IDs, statuses, regions, and more, allowing users to search for clusters by name.
-
(Optional) You can select a region and switch it as needed.
- The cluster is a global operation. Users may select different regions as needed. For multi-region cluster creation, please refer to [Region Selection Guide](Reference/Region Selection Instructions/Region.md).
- Clusters created in different regions work independently of one another.
- Click Create Cluster to open the Create Cluster interface, where you can configure the cluster settings as required.
Cluster configuration
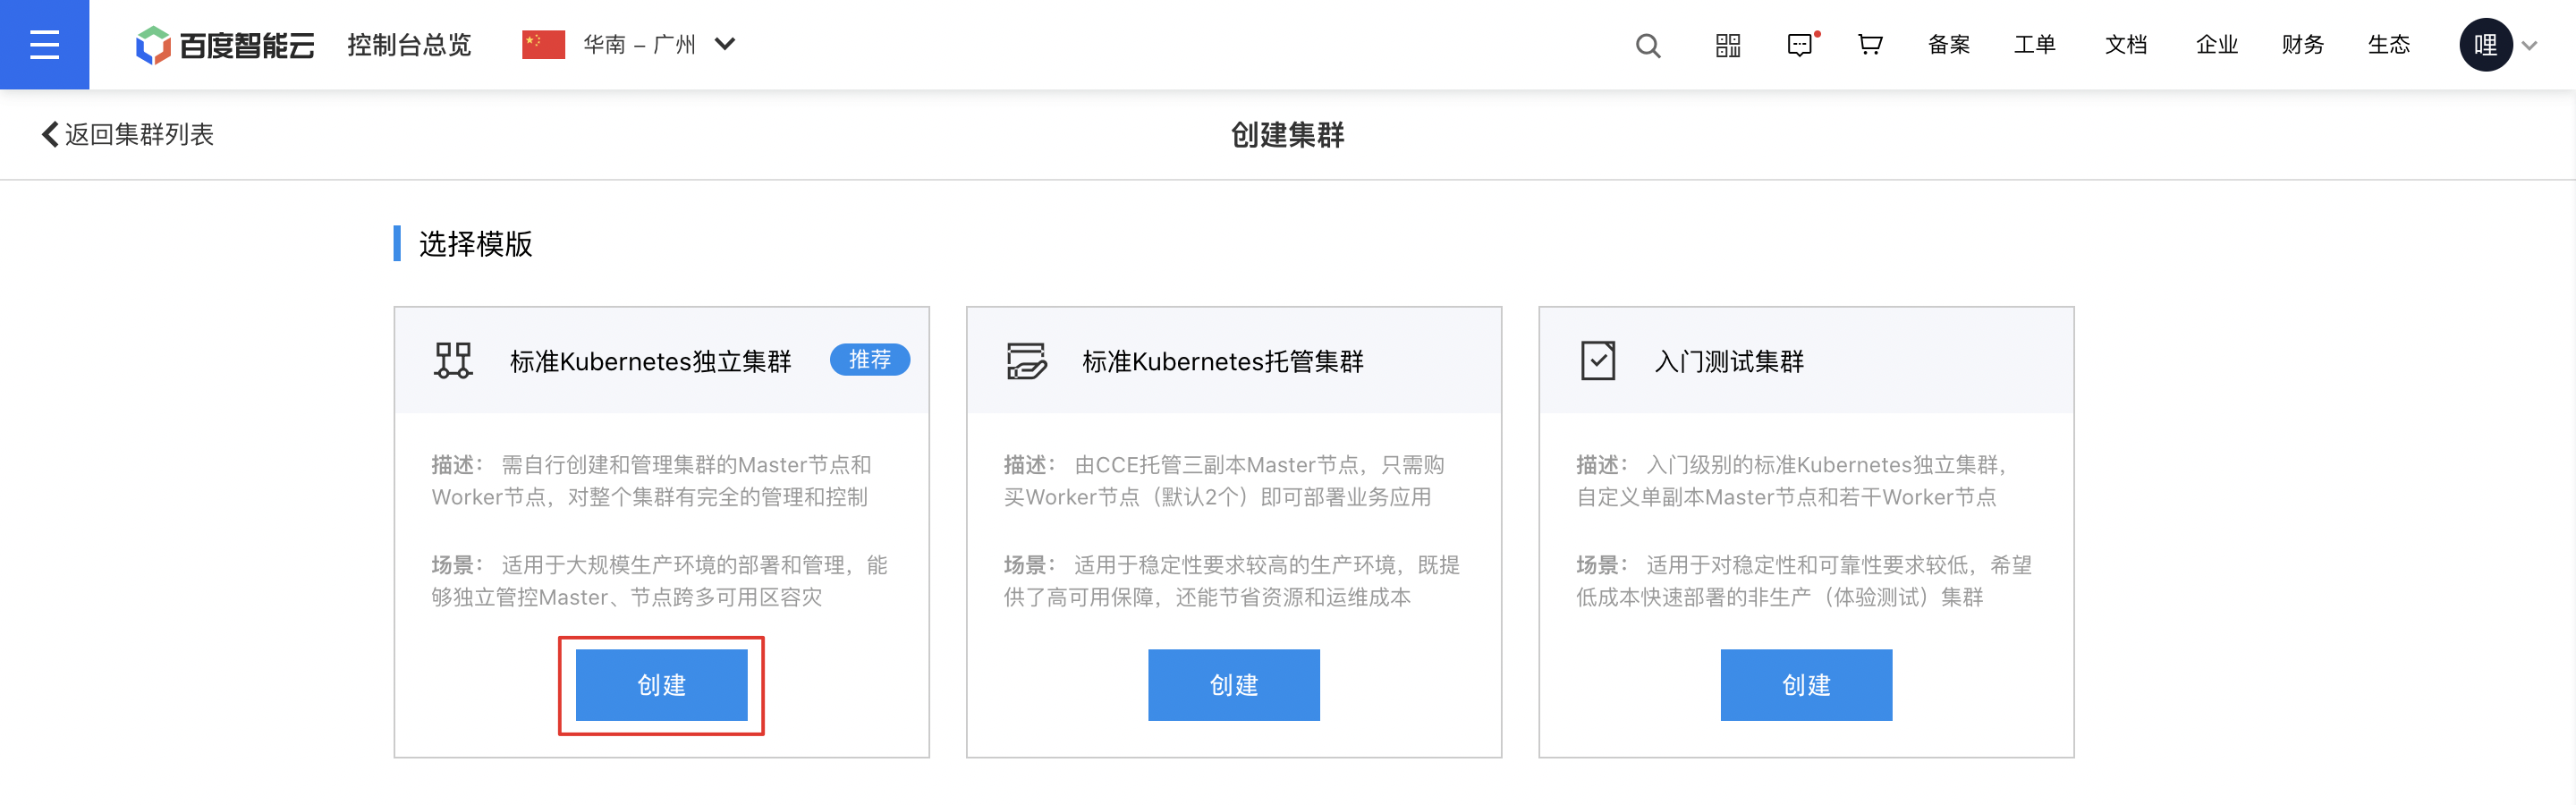
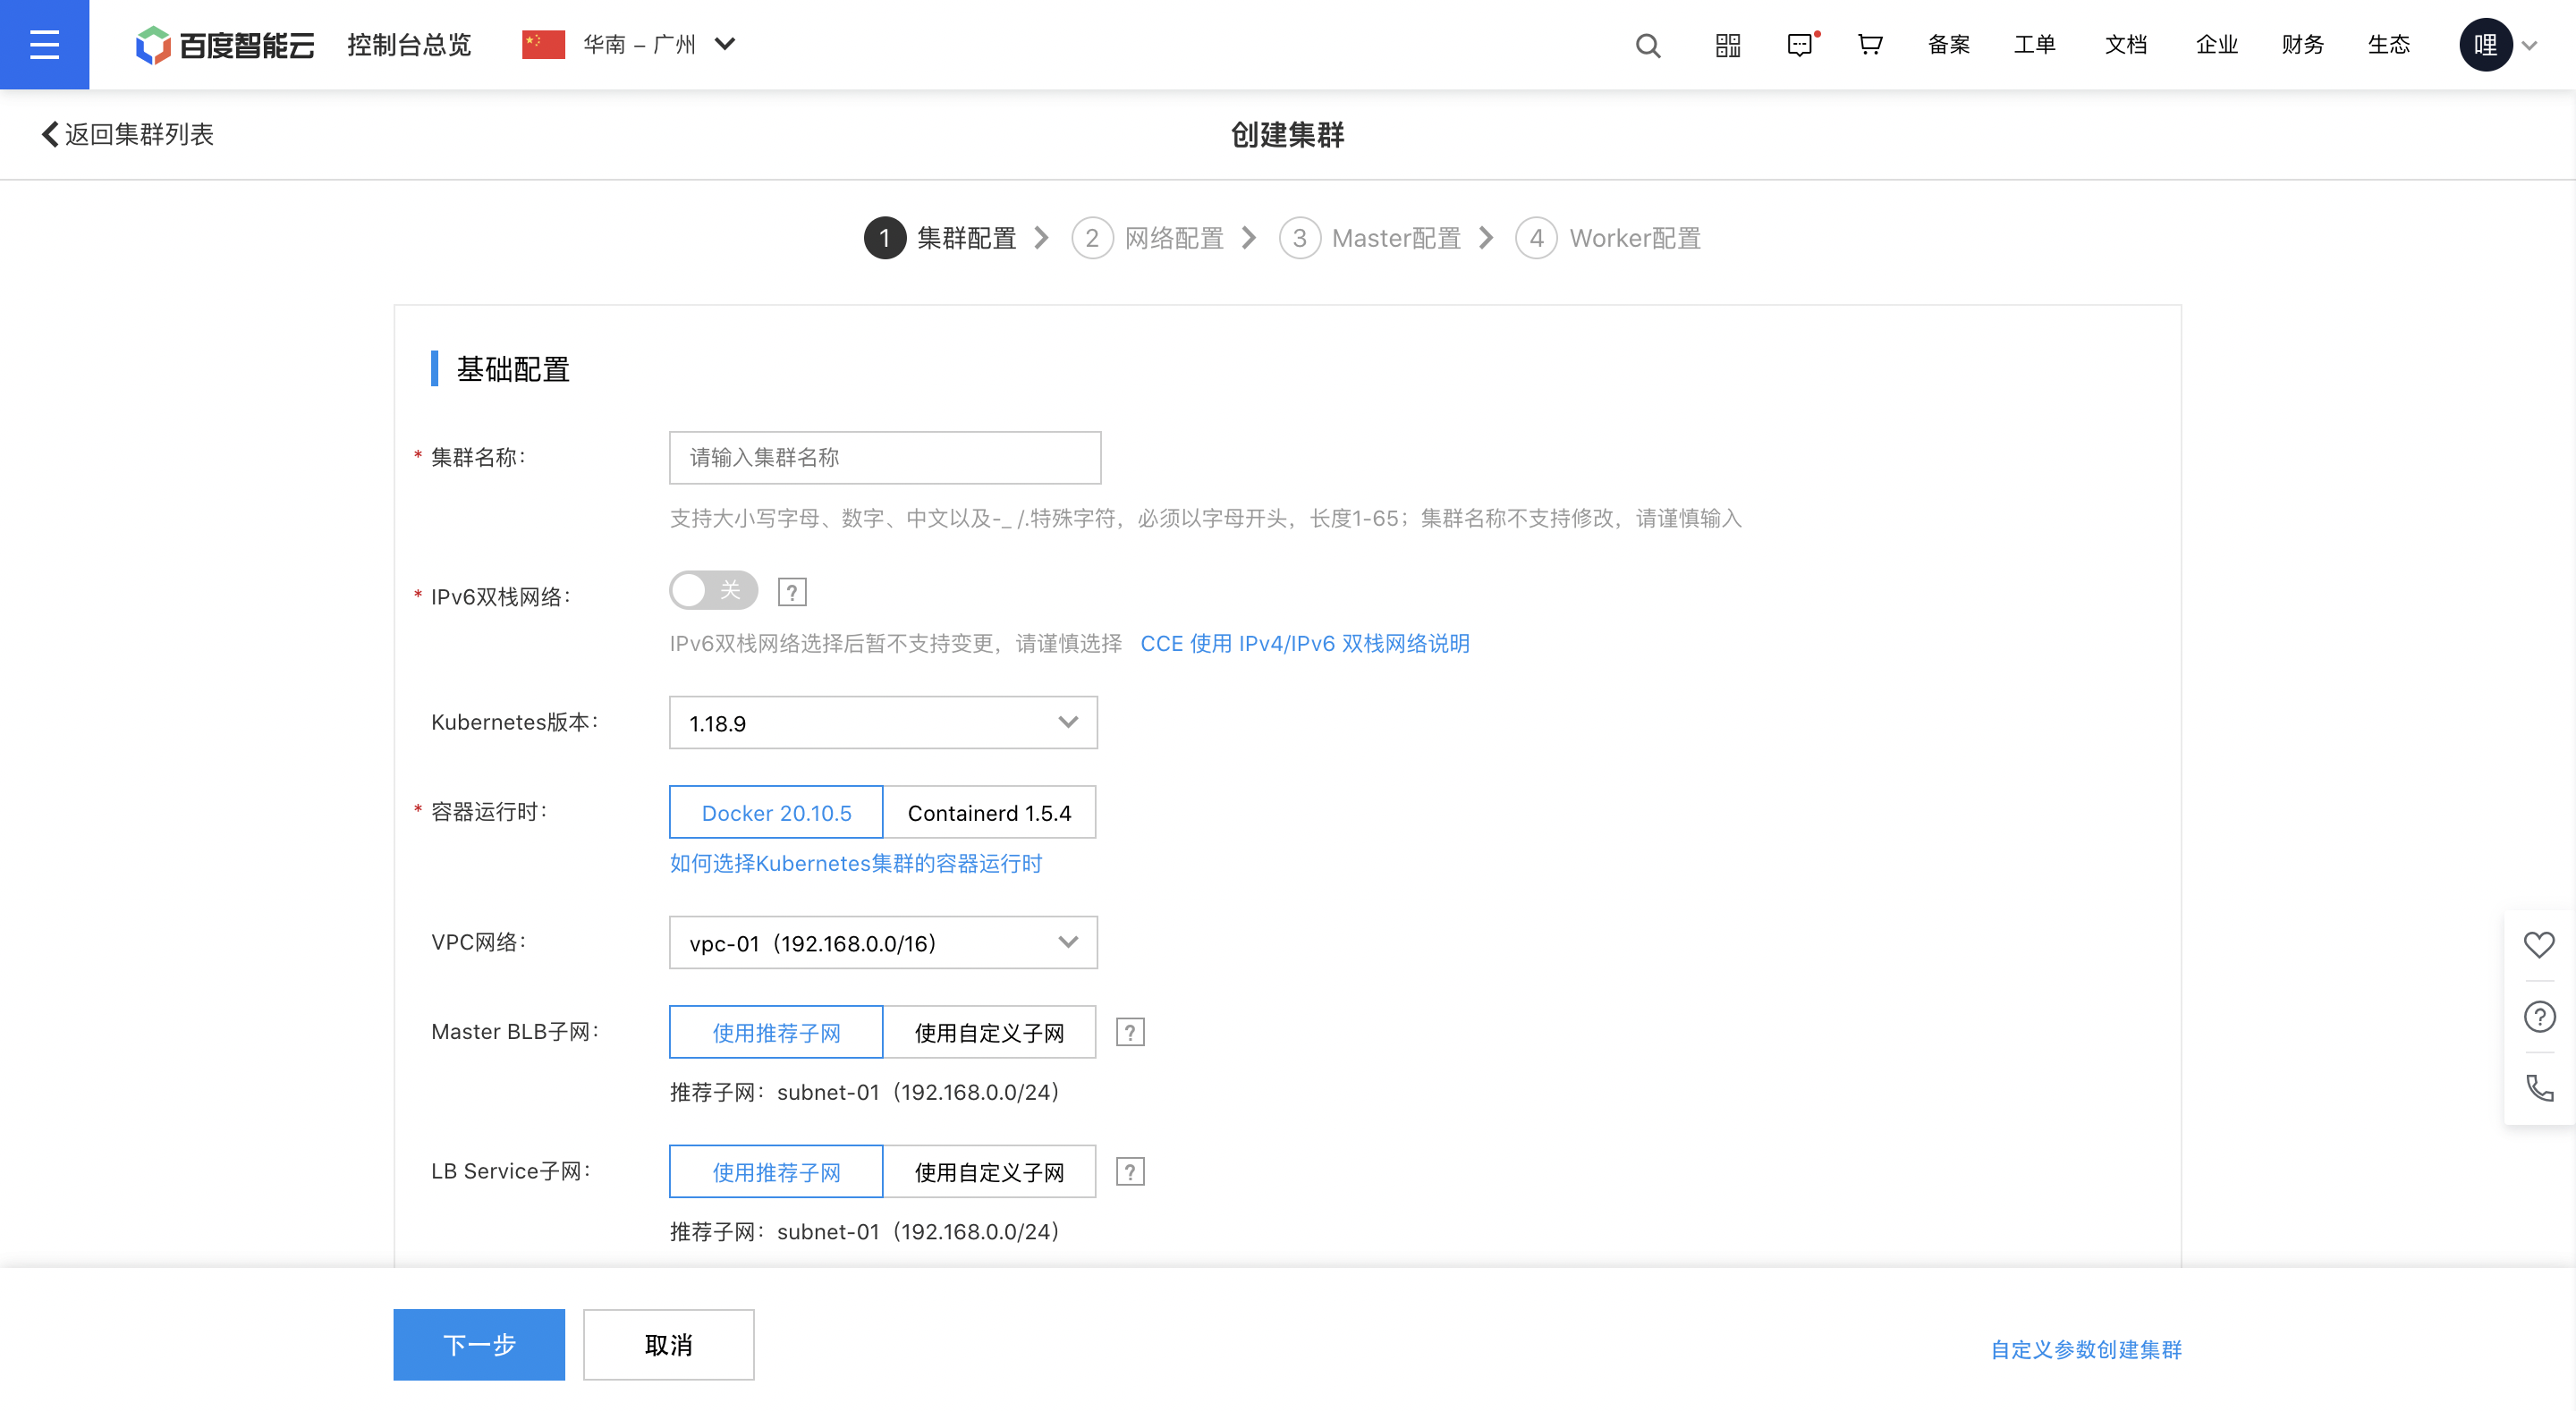
Configuration descriptions:
- Each region has a default limit of 20 clusters, with each cluster allowing a maximum of 200 nodes. To request an increased limit, you can submit a support ticket.
- Cluster names cannot be changed after creation. Please choose carefully. Users may customize the cluster name, adhering to the following rules: "Alphabetic characters, numbers, and special symbols like -\_ /. are allowed, starting with a letter, with a total length of 1-64 characters."
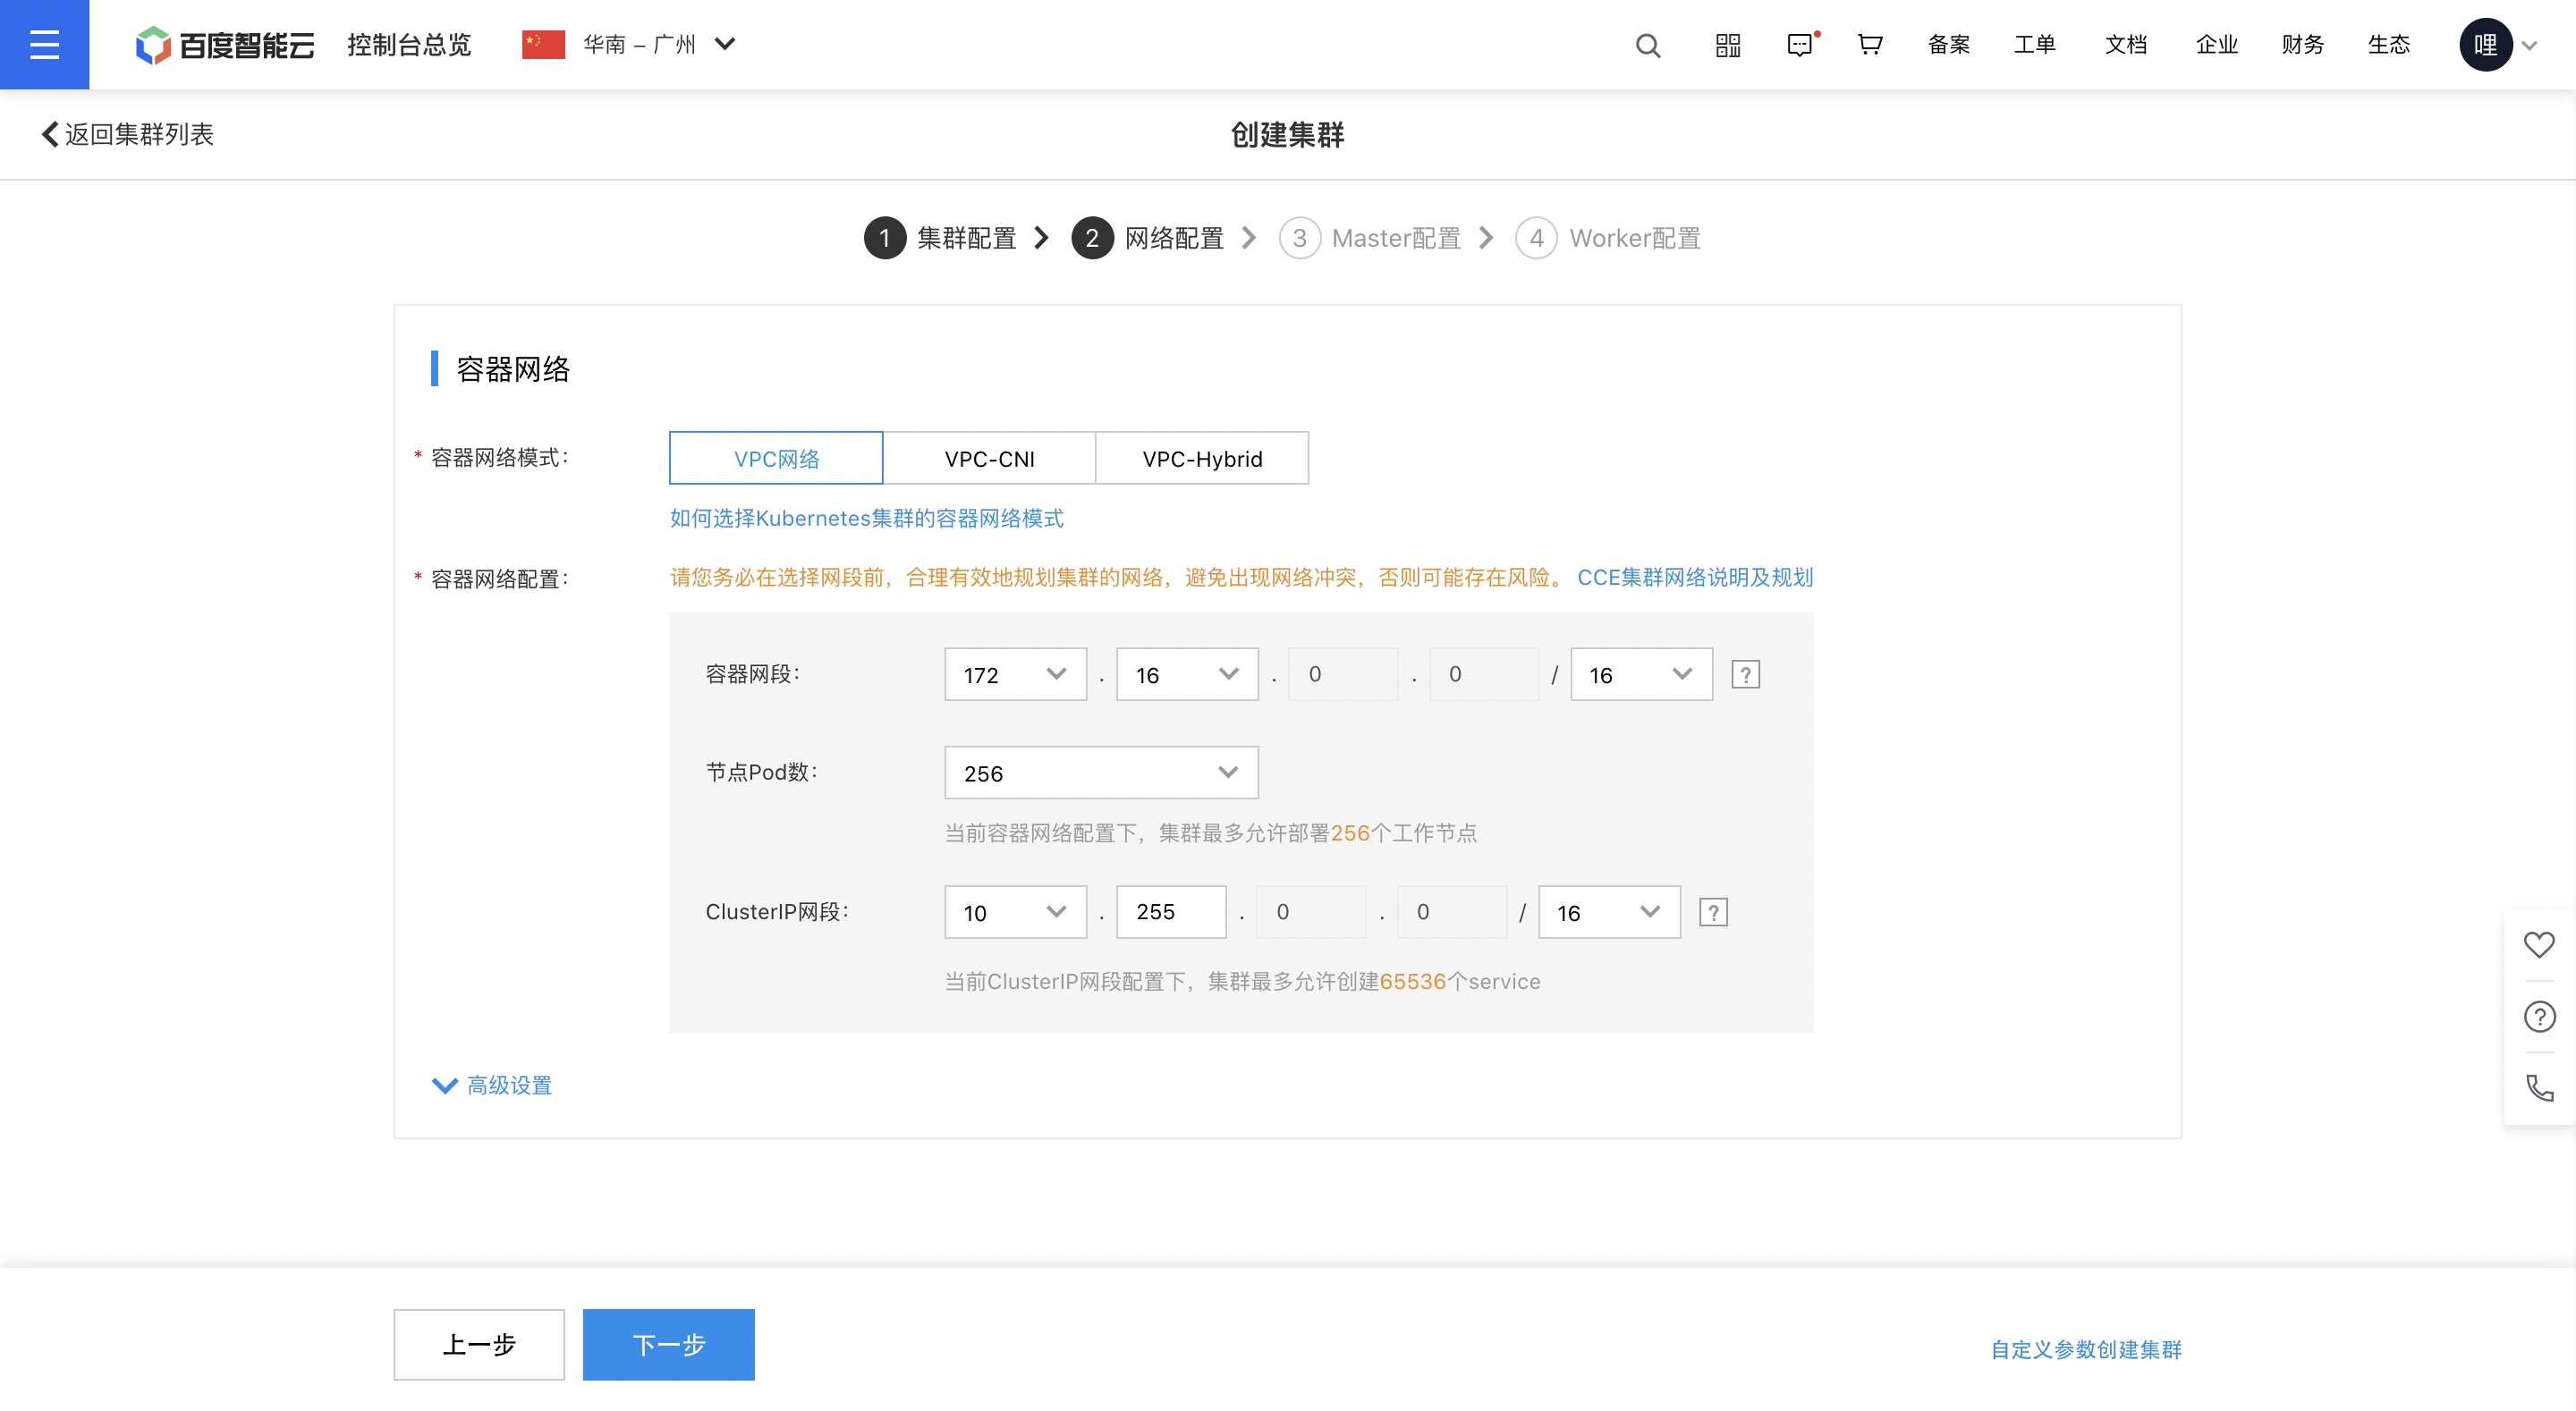
Network configuration
Node configuration
A node represents a single server resource within a cluster, supporting various types such as CPU and GPU. Containers needed for your business applications are distributed across these nodes to establish a highly available environment.
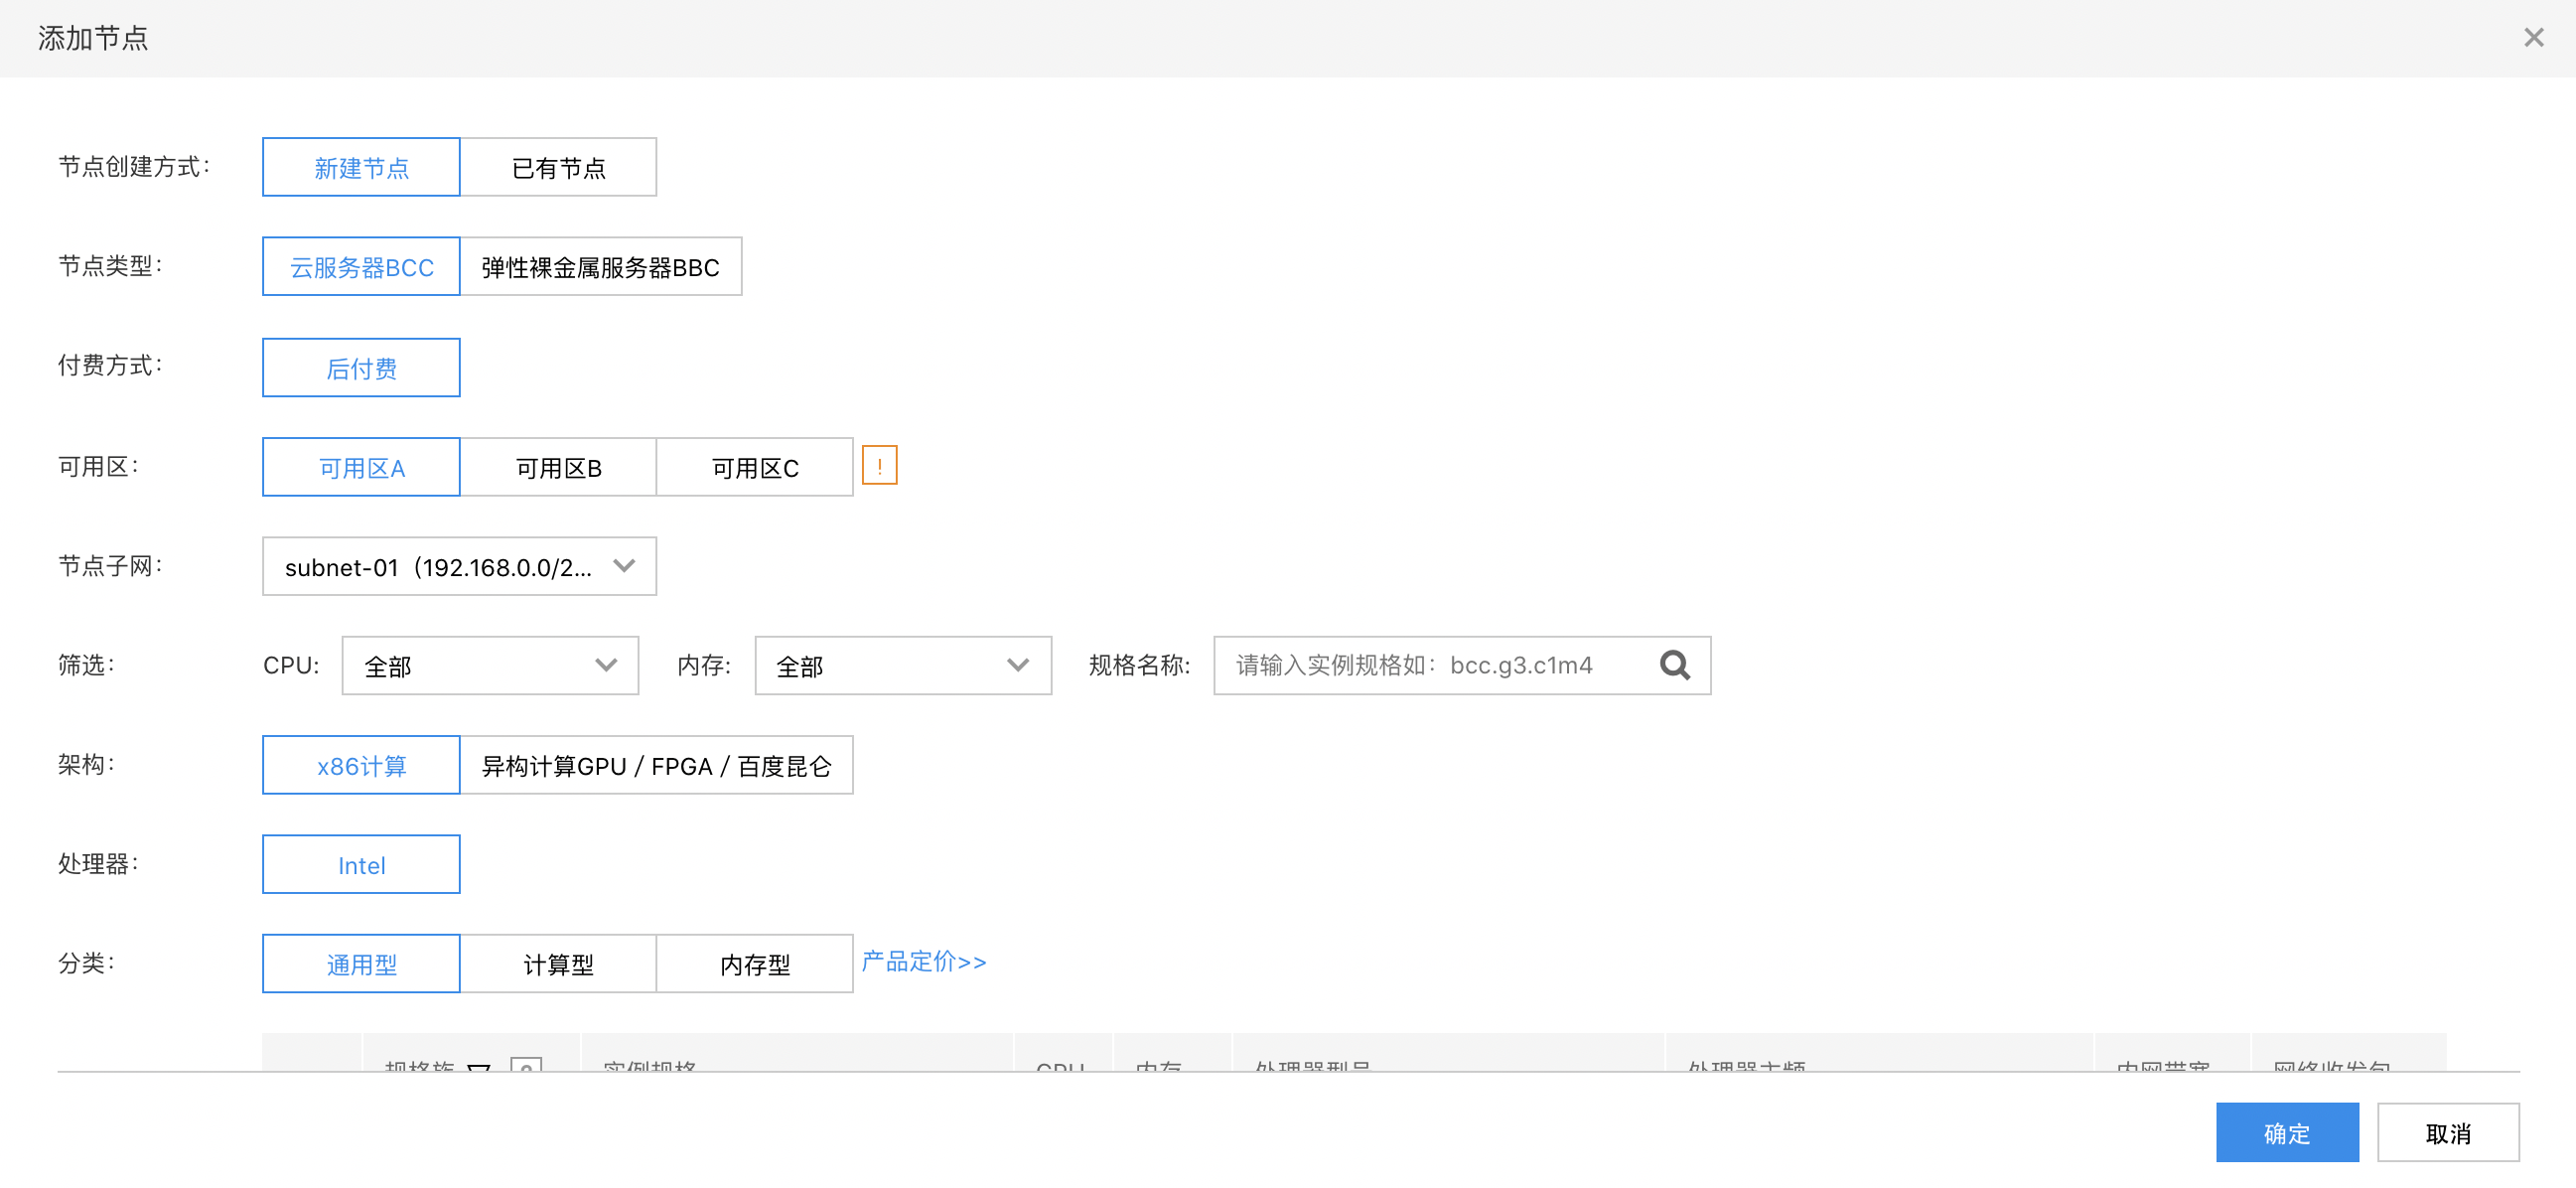
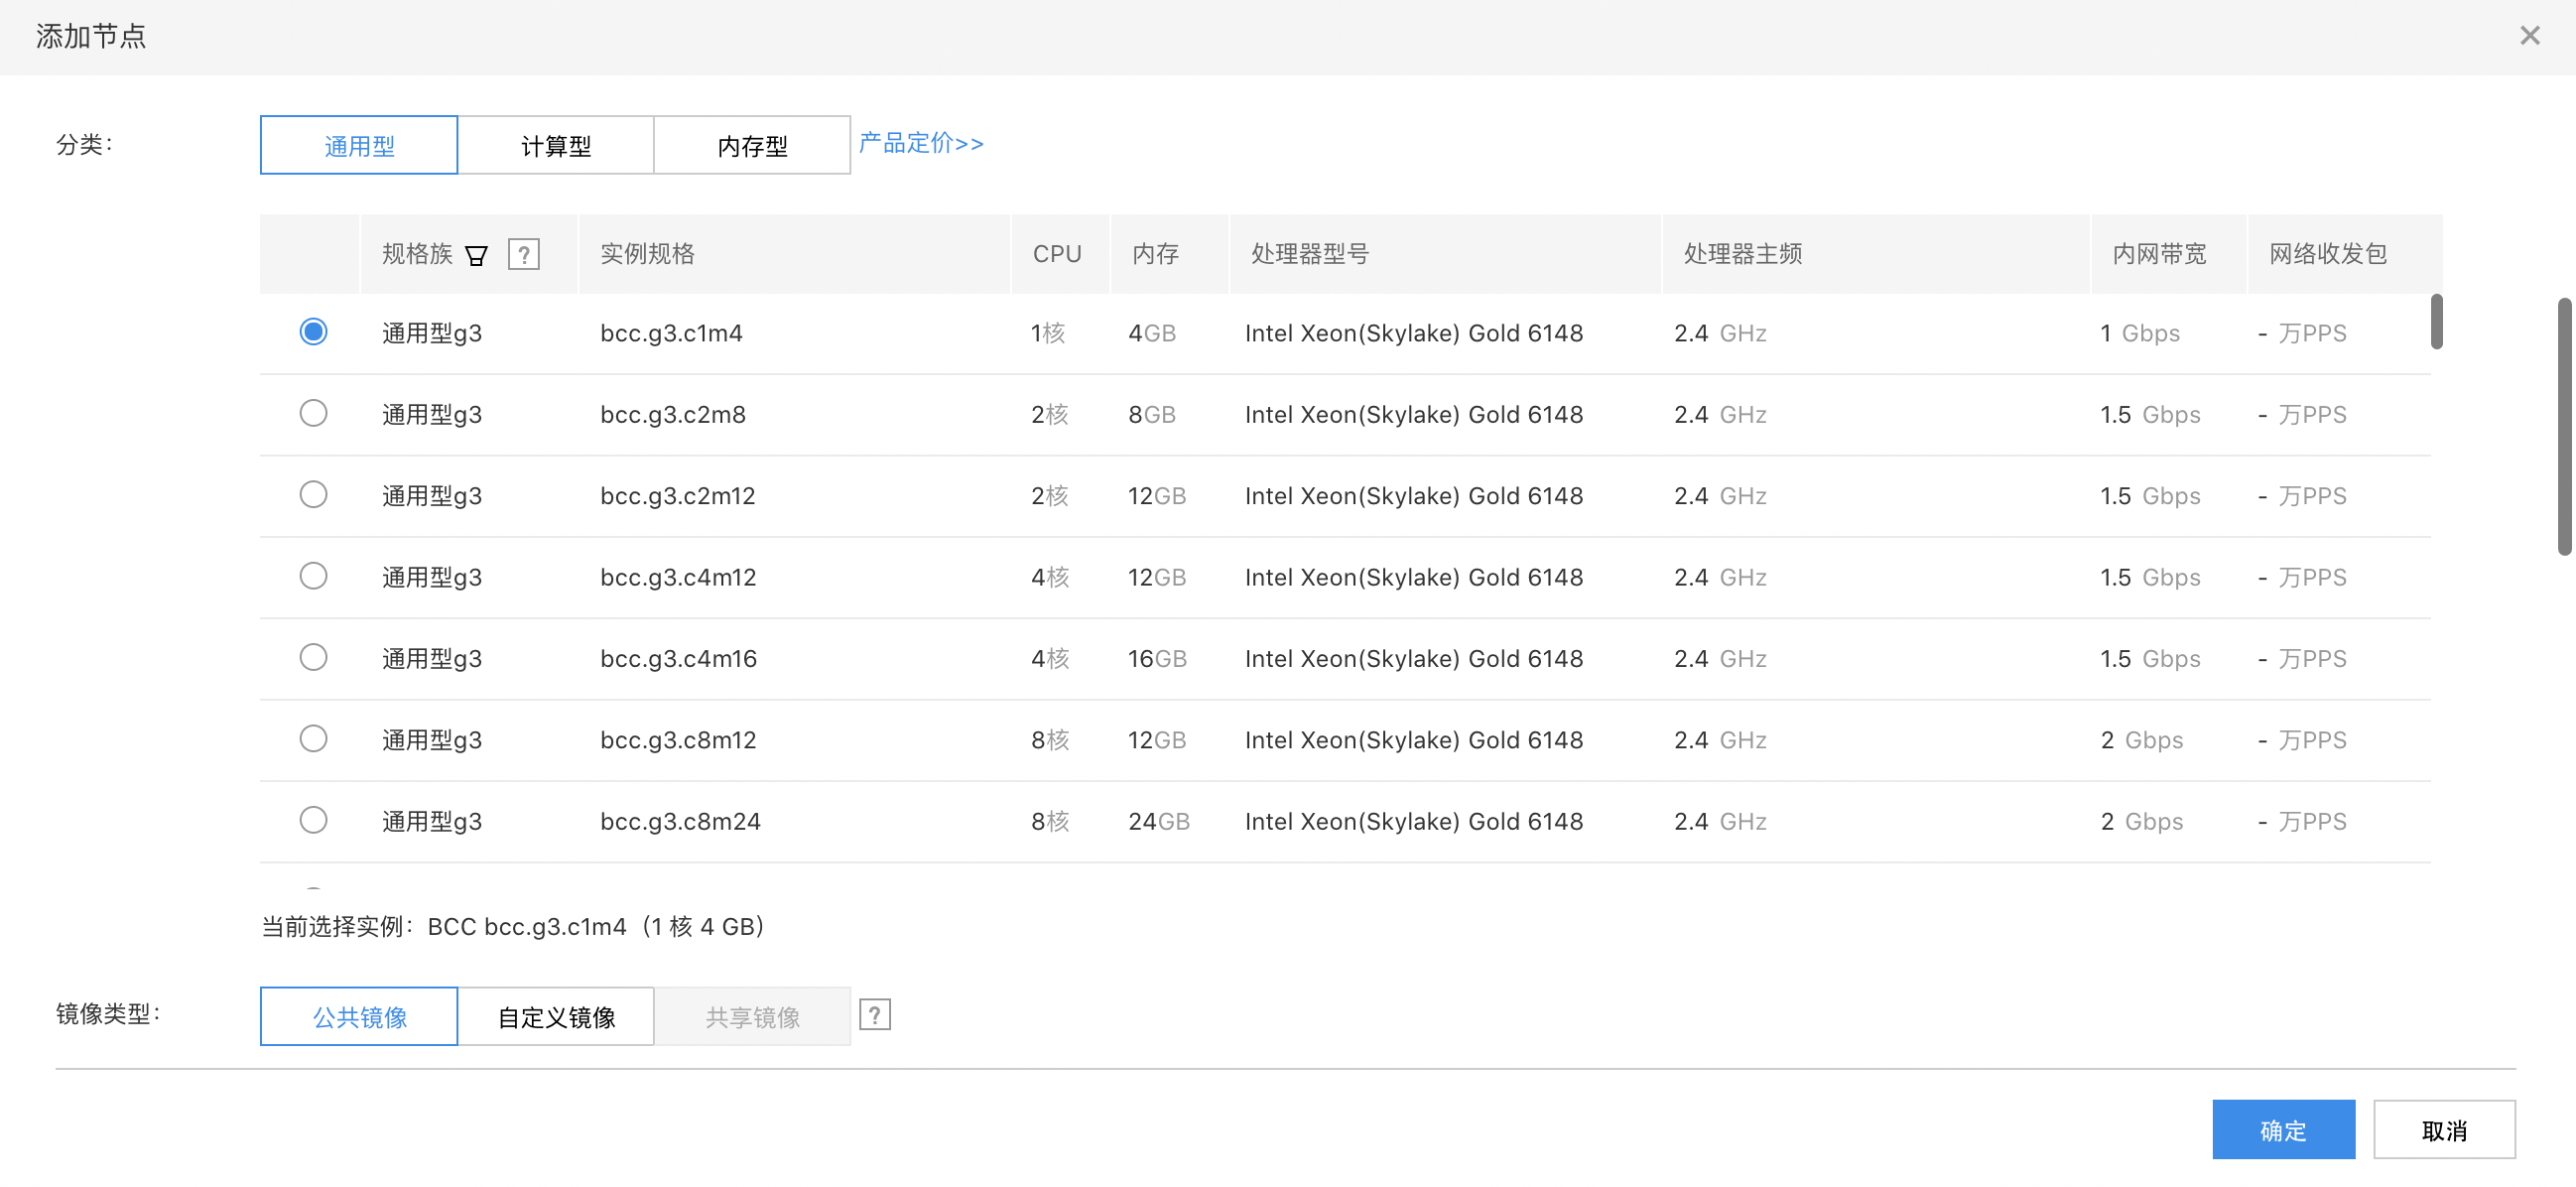
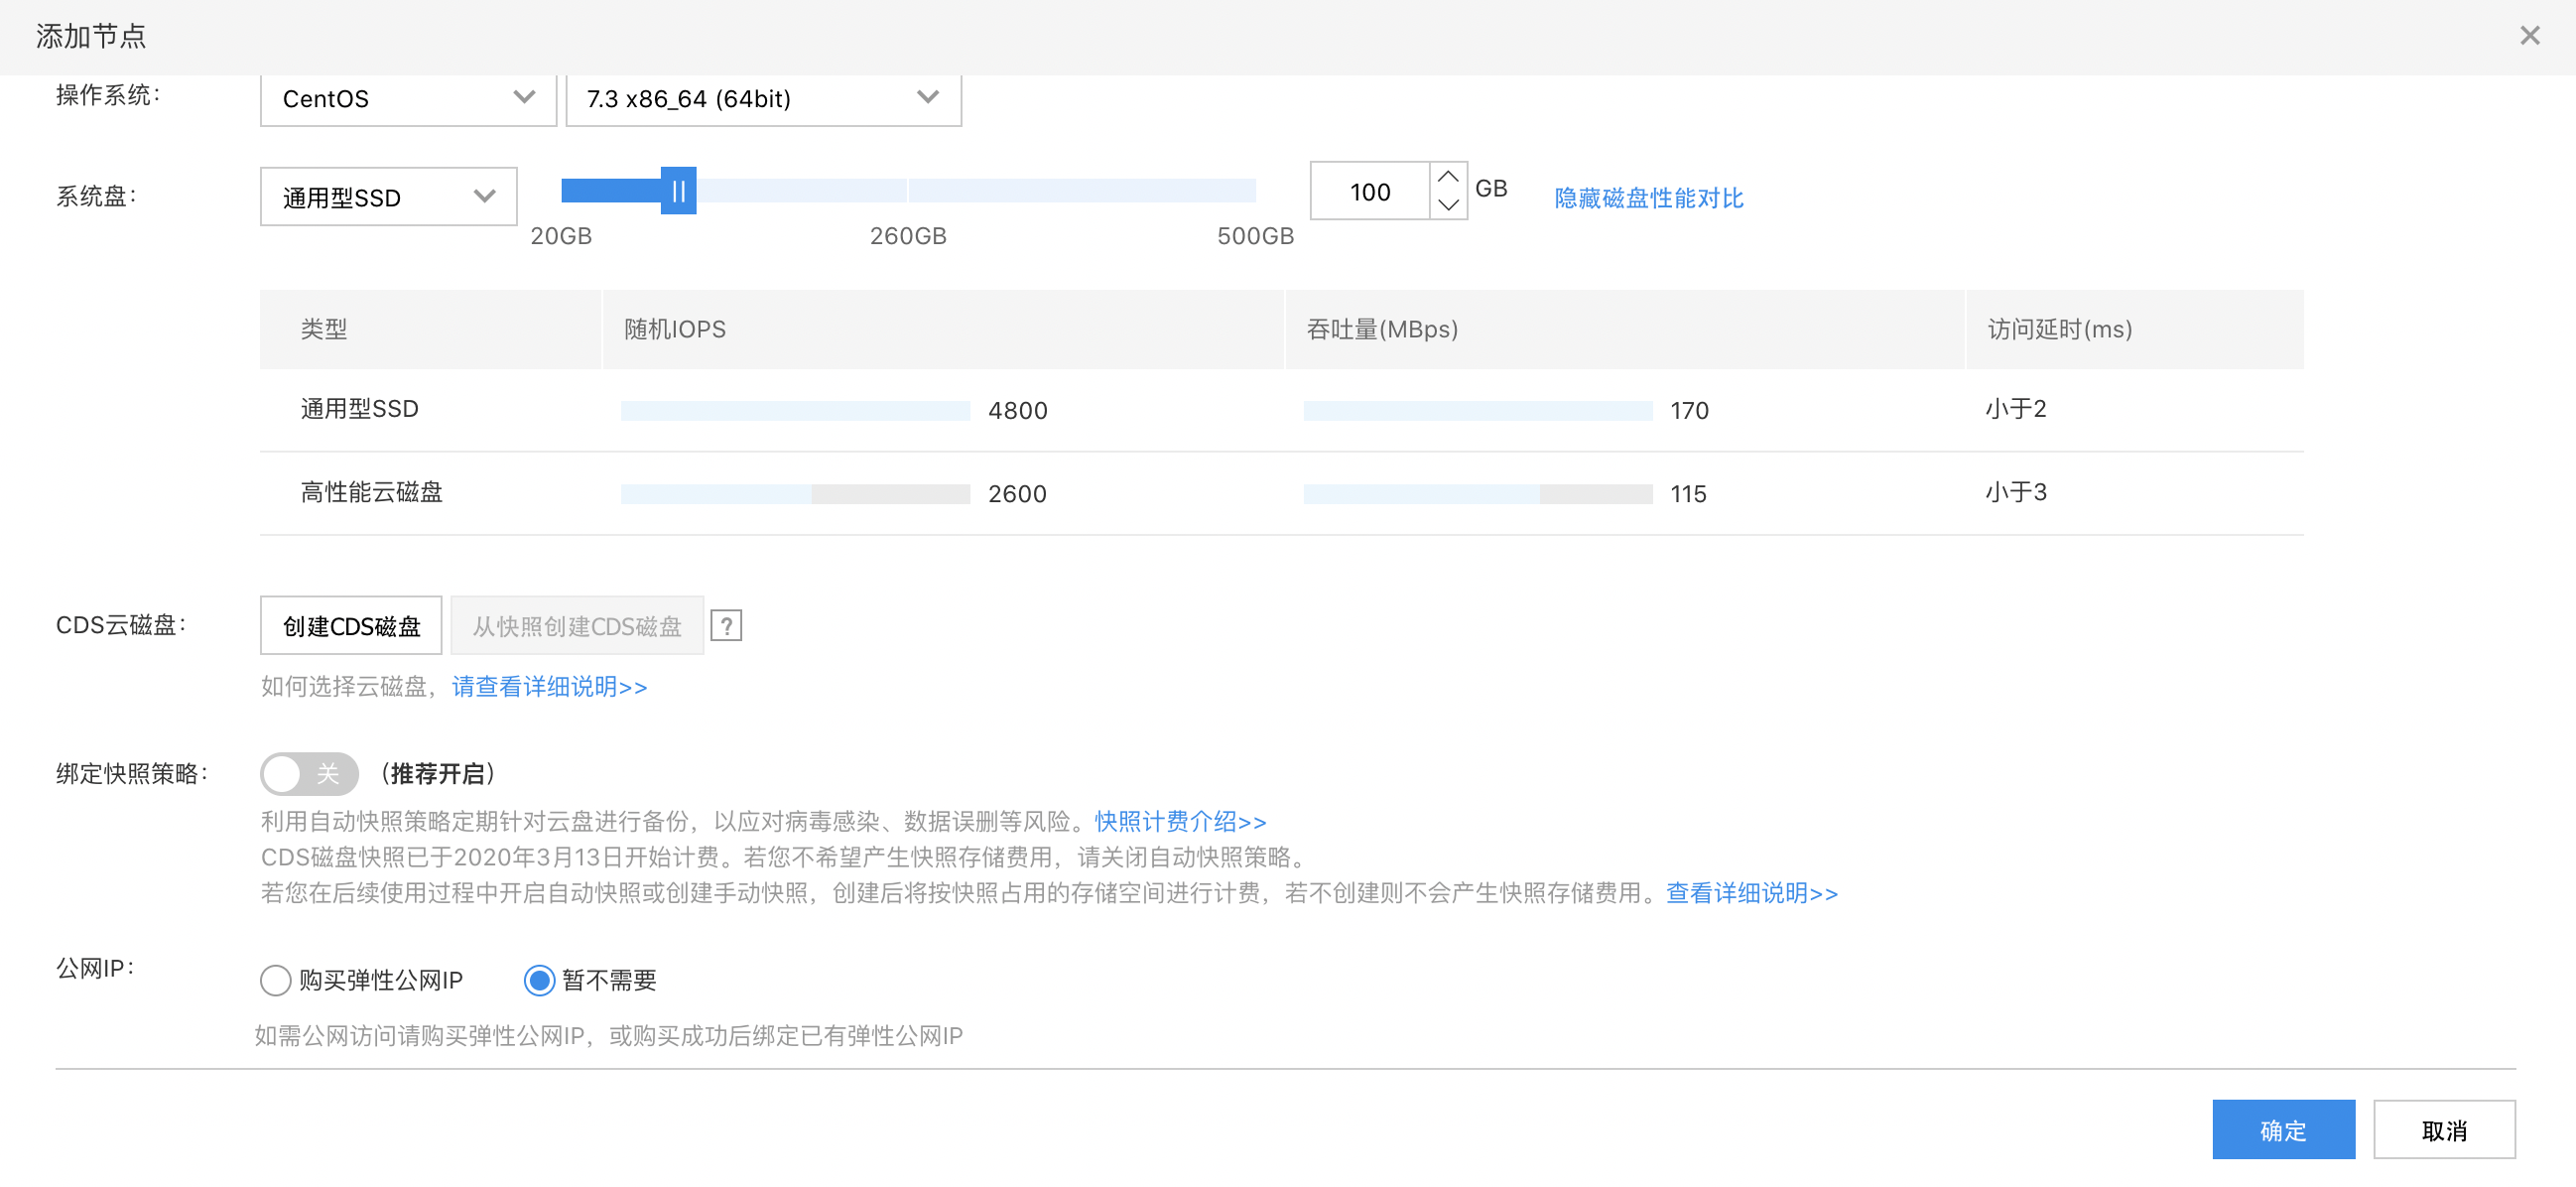
Configuration descriptions: The OS supports Baidu AI Cloud-configured versions integrated with GPU drivers. If users create GPU custom image in their BCC, the image support GPU customization. Users employing custom image must [manually set integrated GPU drivers](GPU/Operation guide/Use of image.md#Steps for Using Public Images).
- After clicking Finish, the system begins creating the cluster in the backend.
- Click the Management Console link to access the Cluster List interface. Once the creation is successful, the cluster status will display as "Running."
3. Create CCR image registry
Cloud Container Registry (CCR) provides dedicated docker image storage space, serving as a template for container running. It supports user-built image, DockerHub, and Baidu AI Cloud image for business application creation. For details, please refer to Basic Operations of Container Image Registry
3.1 Enable image registry
The first time you access the image registry, a setup page will appear. Enter a username and set a password as instructed.
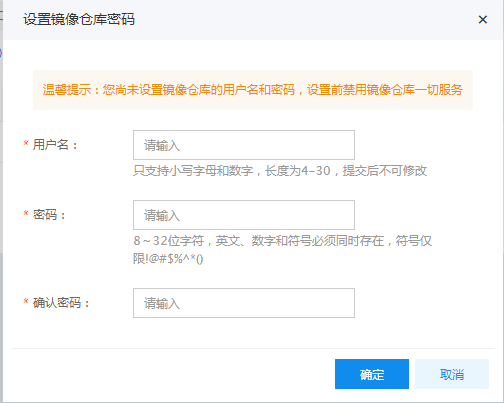
Note:
Username: The naming rule for image registry usernames requires 4-30 lowercase English letters and numbers. Password: This is the credential for users to sign in to the docker image registry.
3.2 Create a namespace.
- Within the image registry section, choose a namespace, then click Create Namespace in the namespace list.
-
Provide the new namespace name, select the namespace type, and click OK to finish creating the namespace.
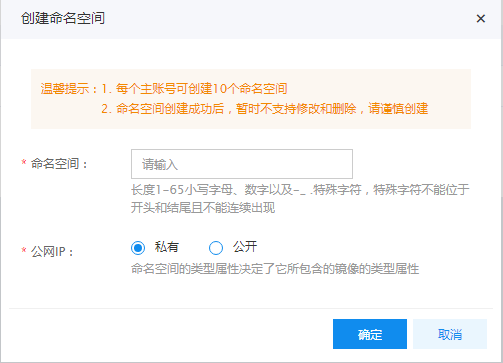
Note:
Namespace naming rules are as follows: Must consist of lowercase letters, numbers, and . \_ -, start and end with lowercase letters or numbers, and have a length of 1-65 characters.
3.3 (Optional) Create new image
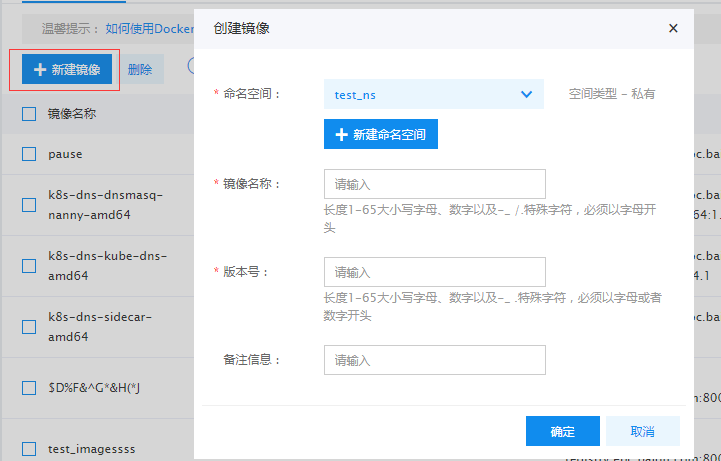
- On the Image List page, click the Create button.
- Select the namespace, enter the image name and version number, then click OK.
Note:
- The naming of image names and version No. must adhere to the following rules: "Composed of lowercase letters, numbers, and . _ -, starting and ending with lowercase letters or numbers and a length of 1-65." Chinese characters are not supported. The combination of namespace, image name, and version No. must not be duplicated.
- If the user does not choose to create a new image, the above basic information will also be automatically generated after completing the image push to the corresponding namespace.
3.4 Push the image to the image registry
Sign in to Baidu AI Cloud Image Registry
1 >$ sudo docker login --username=[username] hub.baidubce.comUsername: The image registry name serves as the username entered during the activation of the image registry service. Enter the corresponding password to complete the login.
Upload images
1    $ sudo docker tag [ImageId] hub.baidubce.com/[namespace]/[ImageName]: [Image Version No.]
2 $ sudo docker push hub.baidubce.com/[namespace]/[ImageName]:[Image Version No.]- Fill in the ImageId and image version No. based on the image information
- Namespace refers to the namespace entered when activating the image registry
- ImageName refers to the image name created in the console
4. Configure kubectl command-line interface
Kubernetes is an open-source container cluster management system by Google, representing the open-source version of large-scale container management technology Borg of Google. As one of CNCF's most critical projects, its main functions include:
- Container-based application deployment, maintenance, and rolling dilatation
- Load balancer and service discovery
- Cross-machine and cross-region cluster scheduling
- Auto scaling
- Deployment service and StatefulSet services
- Extensive volume support
- Plugin mechanism ensures scalability
At present, the Baidu AI Cloud container service is based on kubernetes v1.8.6. To connect to Baidu AI Cloud Kubernetes Cluster from a local personal computer, use the Kubernetes command-line client kubectl. The installation steps are as follows:
Download the corresponding kubectl client from the Kubernetes Version Download Page. For additional kubectl information, please refer to the official Kubernetes Install and Set up Kubectl Documentation.
Note: Before downloading kubectl, users need to sign in to their server and use the command
kubectl versionto check the version No. of their created cluster, and then select the corresponding kubectl version to download. For example, if the user's cluster version is 1.8, the kubectl to be downloaded should also be version 1.8.
4.1 Operation steps for Windows environment
-
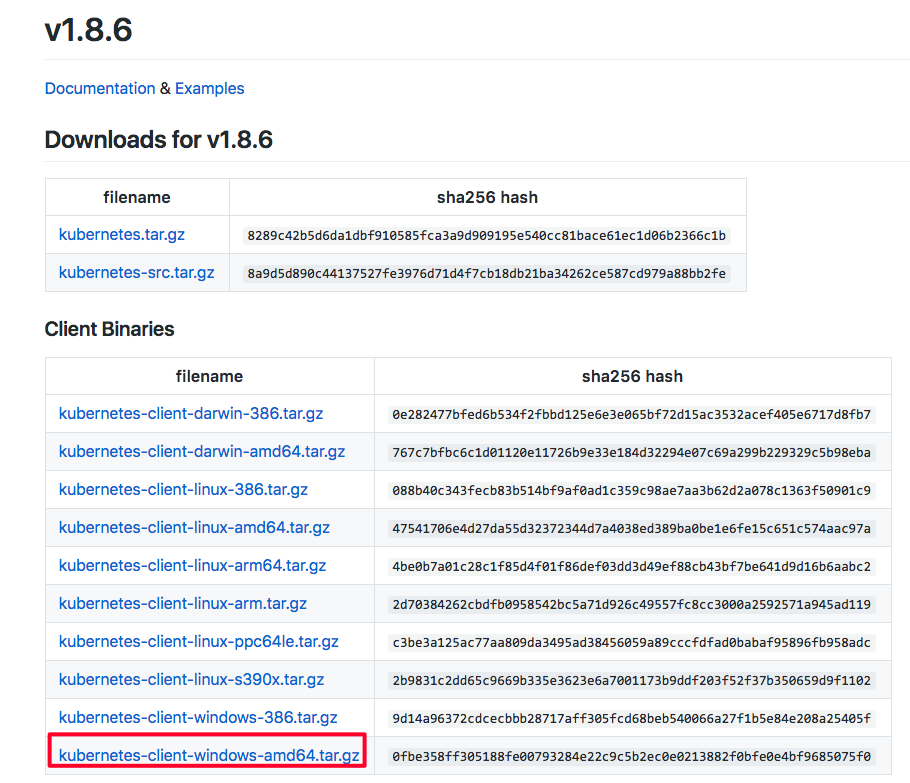
After creating a cluster, download the Windows version of the kubectl tool, such as the 64-bit tool as follows:
Note: Before downloading kubectl, users need to sign in to their server and use the command
kubectl versionto check the version No. of their created cluster, and then select the corresponding kubectl version to download. For example, if the user's cluster version is 1.8, the kubectl to be downloaded should also be version 1.8. The download link is https://github.com/kubernetes/kubernetes/blob/master/CHANGELOG.md?spm=5176.app53755.3.2.2uYdIN&file=CHANGELOG.md#client-binaries-17. Users should download the corresponding version of the tool based on their cluster version. -
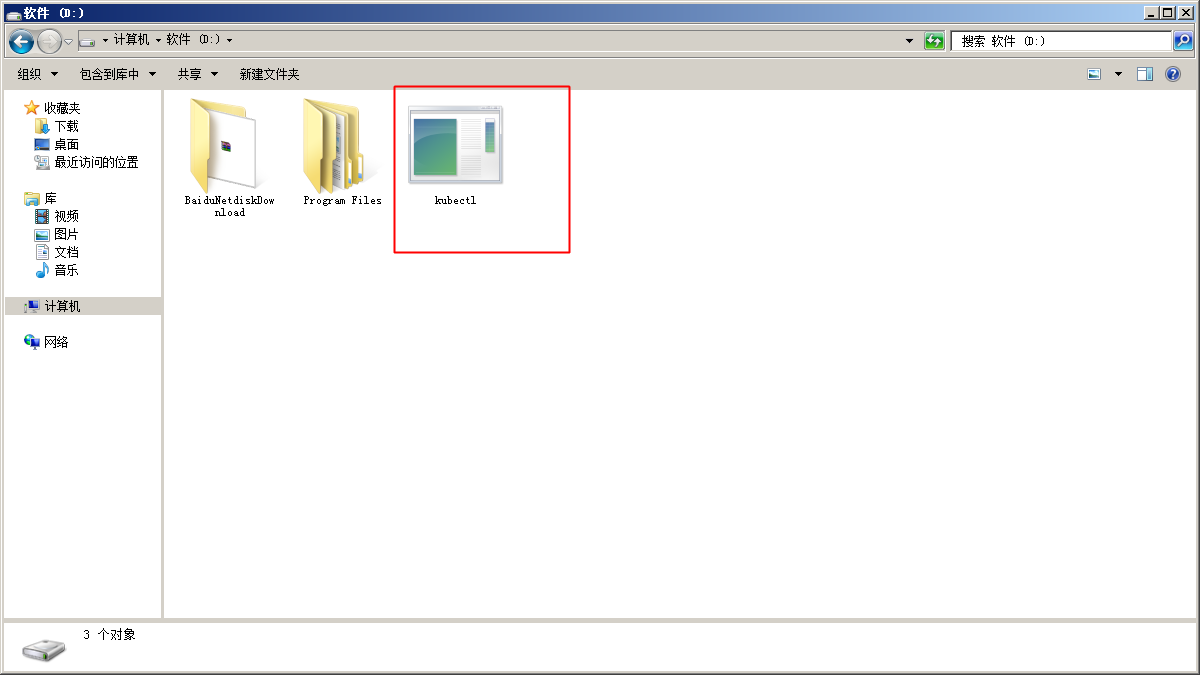
After downloading, extract it to any directory, such as placing it under the D drive
-
Navigate to the user folder under the directory
C:\users\. For example, if the user name is foo, the folder should beC:\users\foo. And then, enter this directory and create the folder.kube
-
On the cluster list page, download the cluster configuration file, place it in the
.kubefolder created in the previous step, and rename it toconfig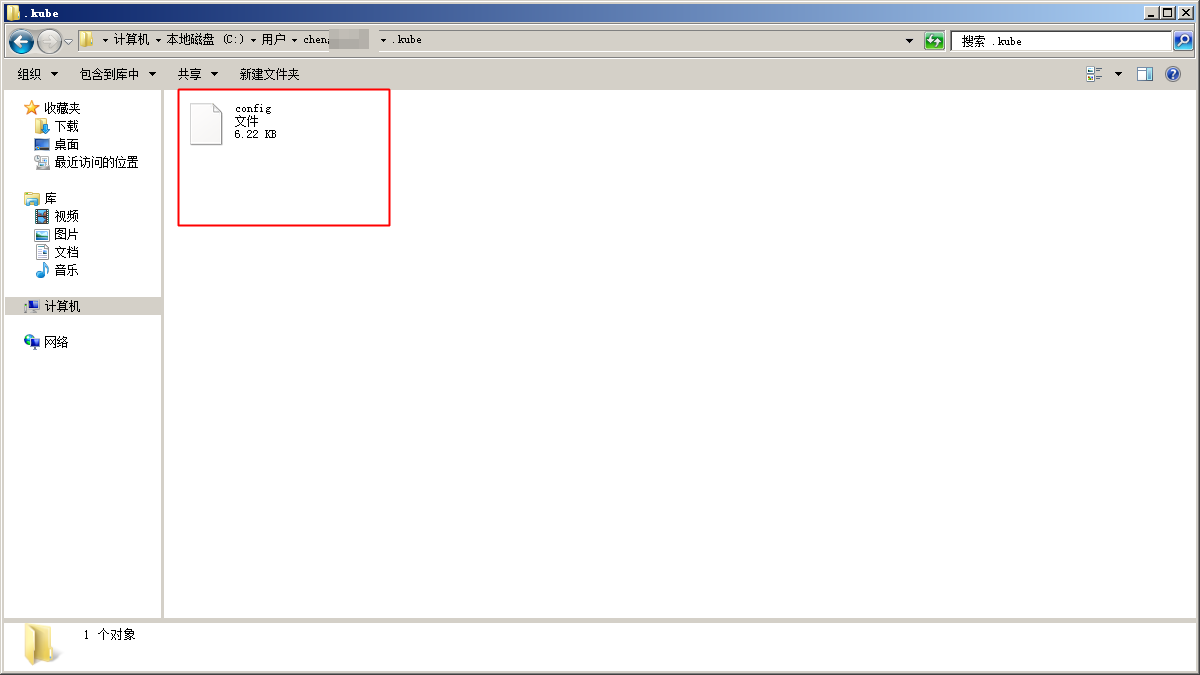
-
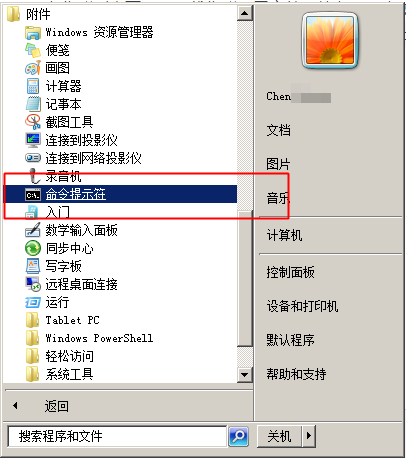
Open the Windows command prompt
-
Navigate to the directory containing kubectl files and run
kubectl.exe get nodeto view cluster nodes.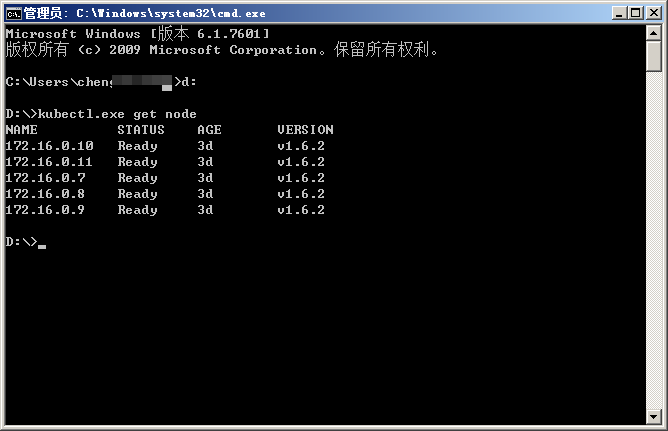
4.2 Operation steps for Linux environment
-
Extract the downloaded file, grant execution permission to kubectl, and place it under PATH
chmod +x ./kubectl sudo mv ./kubectl /usr/local/bin/kubectl
-
Configure kubectl and download cluster credentials. Retrieve the cluster configuration file from the cluster interface and place it in the default configuration path of kubectl.
mv kubectl.conf ~/.kube/config
-
After configuration is complete, you can use kubectl to access the Kubernetes cluster from your local computer
kubectl get node
5. (Optional) Configure Kubernetes-dashboard
The Kubernetes dashboard is a web-based graphical user interface designed to help users deploy, monitor, and manage business applications.
5.1 Prerequisites
Before using the Kubernetes dashboard locally, users must configure kubectl to connect to the Baidu AI Cloud Kubernetes cluster.
Using the kubectl tool, create a dashboard application locally within the Kubernetes cluster. Follow these steps:
5.2 Creating a dashboard service in Windows environment
-
First, create a dashboard.yaml file in the same directory where kubectl.exe is extracted, for example, using text editor:
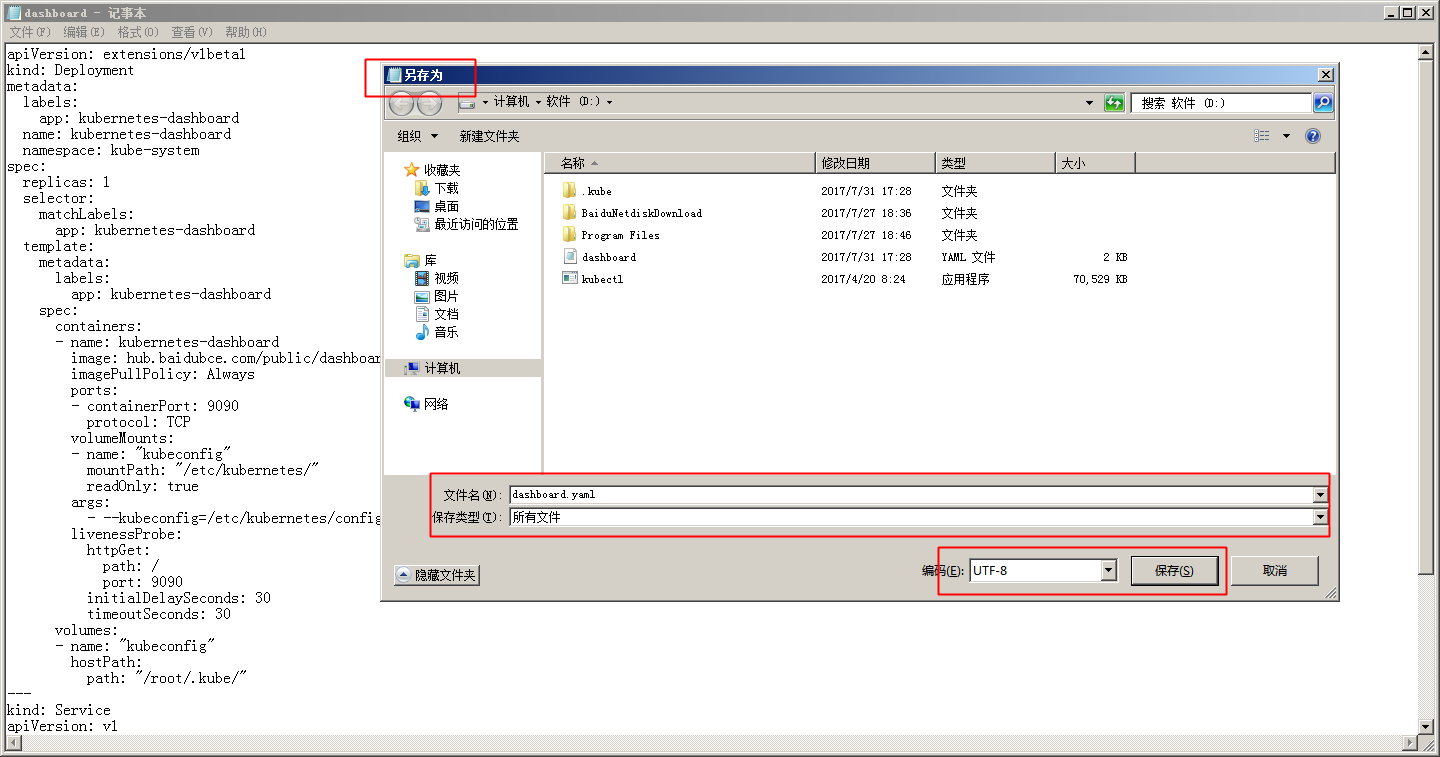
The corresponding
dashboard.yamlfile is:Plain Text1 apiVersion: apps/v1 2 kind: Deployment 3 metadata: 4 labels: 5 app: kubernetes-dashboard 6 name: kubernetes-dashboard 7 namespace: kube-system 8 spec: 9 replicas: 1 10 selector: 11 matchLabels: 12 app: kubernetes-dashboard 13 template: 14 metadata: 15 labels: 16 app: kubernetes-dashboard 17 spec: 18 containers: 19 - name: kubernetes-dashboard 20 image: hub.baidubce.com/public/dashboard:v1.5.0-caas 21 imagePullPolicy: Always 22 ports: 23 - containerPort: 9090 24 protocol: TCP 25 volumeMounts: 26 - name: "kubeconfig" 27 mountPath: "/etc/kubernetes/" 28 readOnly: true 29 args: 30 - --kubeconfig=/etc/kubernetes/config 31 livenessProbe: 32 httpGet: 33 path: / 34 port: 9090 35 initialDelaySeconds: 30 36 timeoutSeconds: 30 37 volumes: 38 - name: "kubeconfig" 39 hostPath: 40 path: "/root/.kube/" 41 --- 42 kind: Service 43 apiVersion: v1 44 metadata: 45 labels: 46 app: kubernetes-dashboard 47 name: kubernetes-dashboard 48 namespace: kube-system 49 spec: 50 type: NodePort 51 ports: 52 - port: 80 53 targetPort: 9090 54 selector: 55 app: kubernetes-dashboard -
And then enter
kubectl.exe create -f dashboard.yamlto create dashboard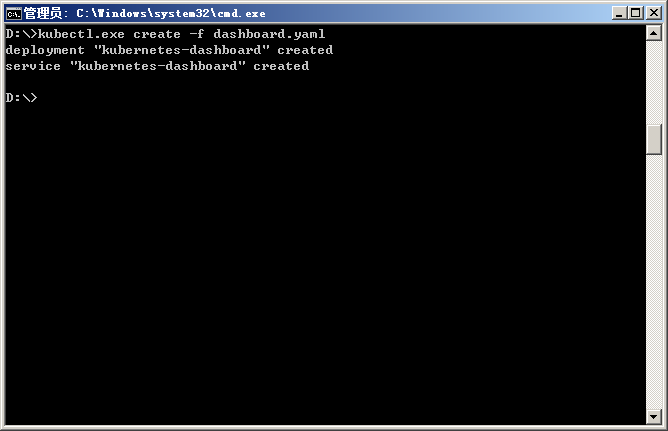
-
Use the
kubectl.exe get pod --all-namespacescommand to check if the creation is successful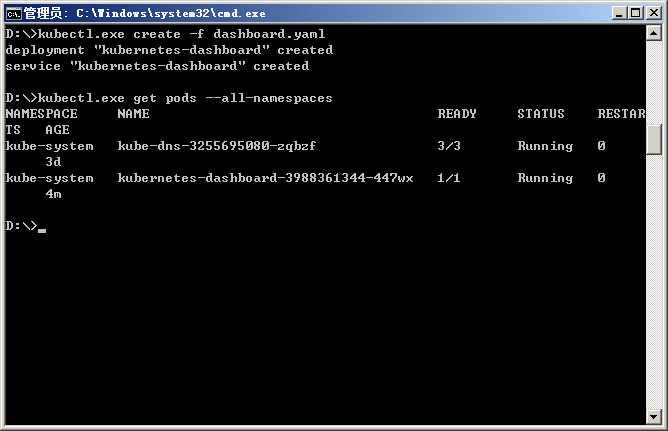
-
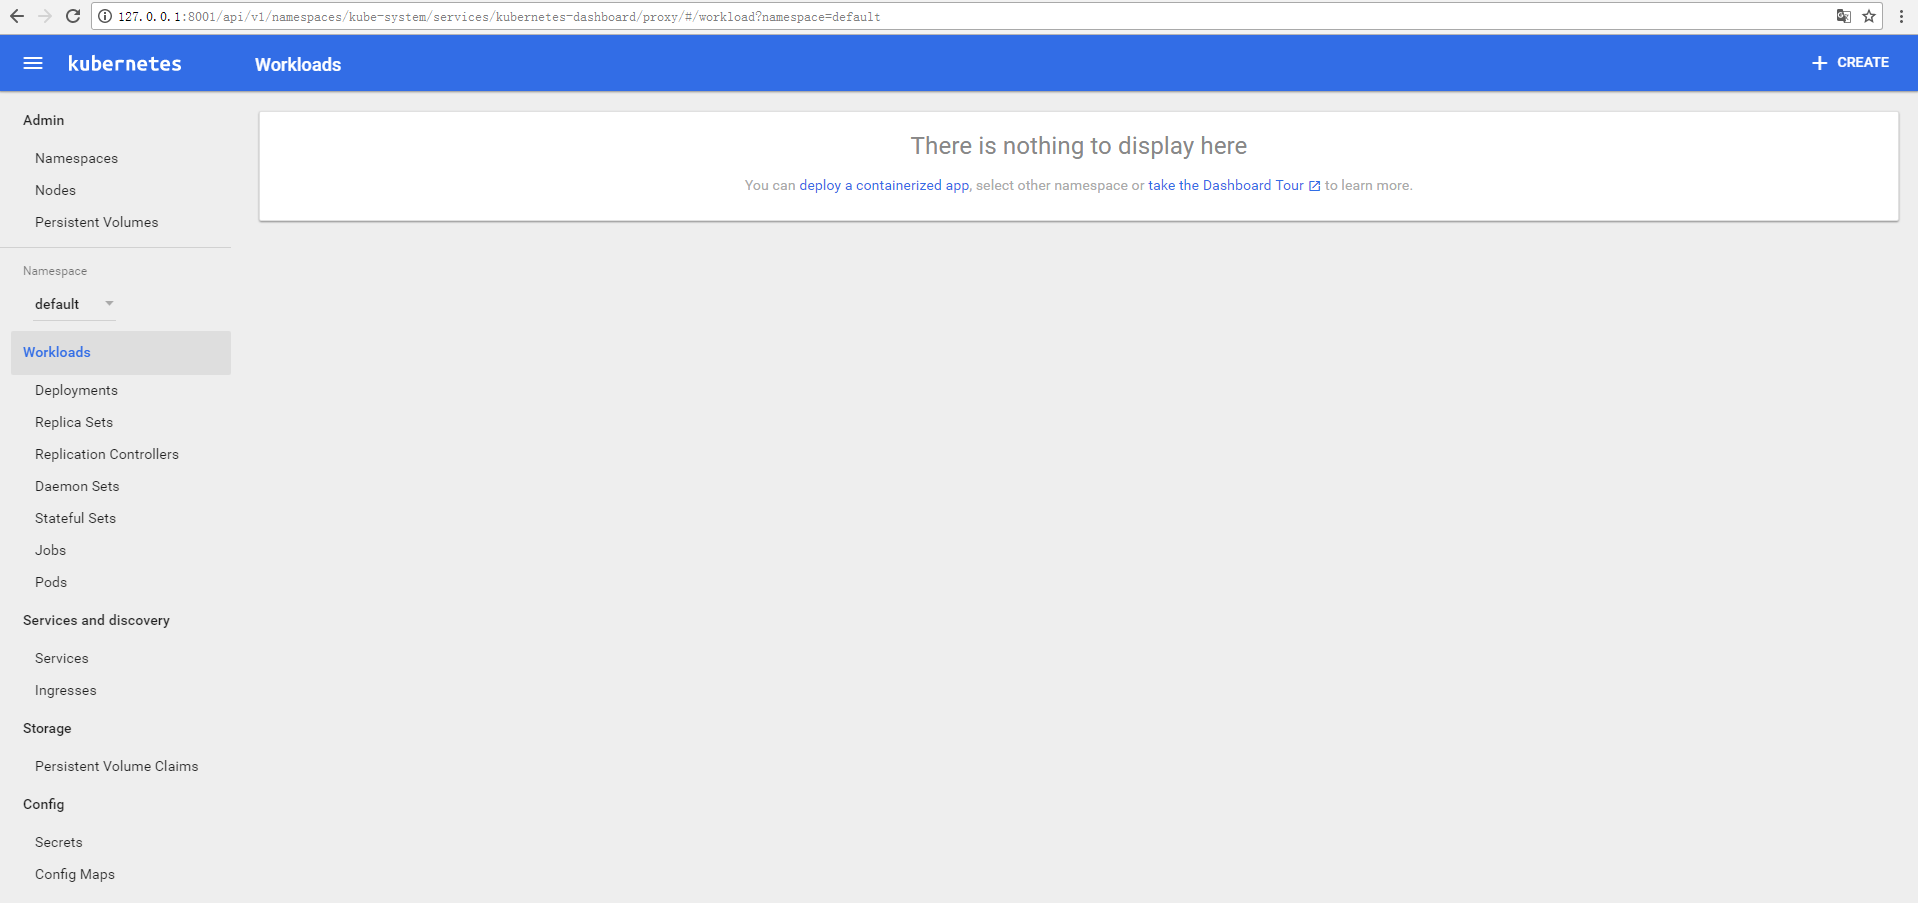
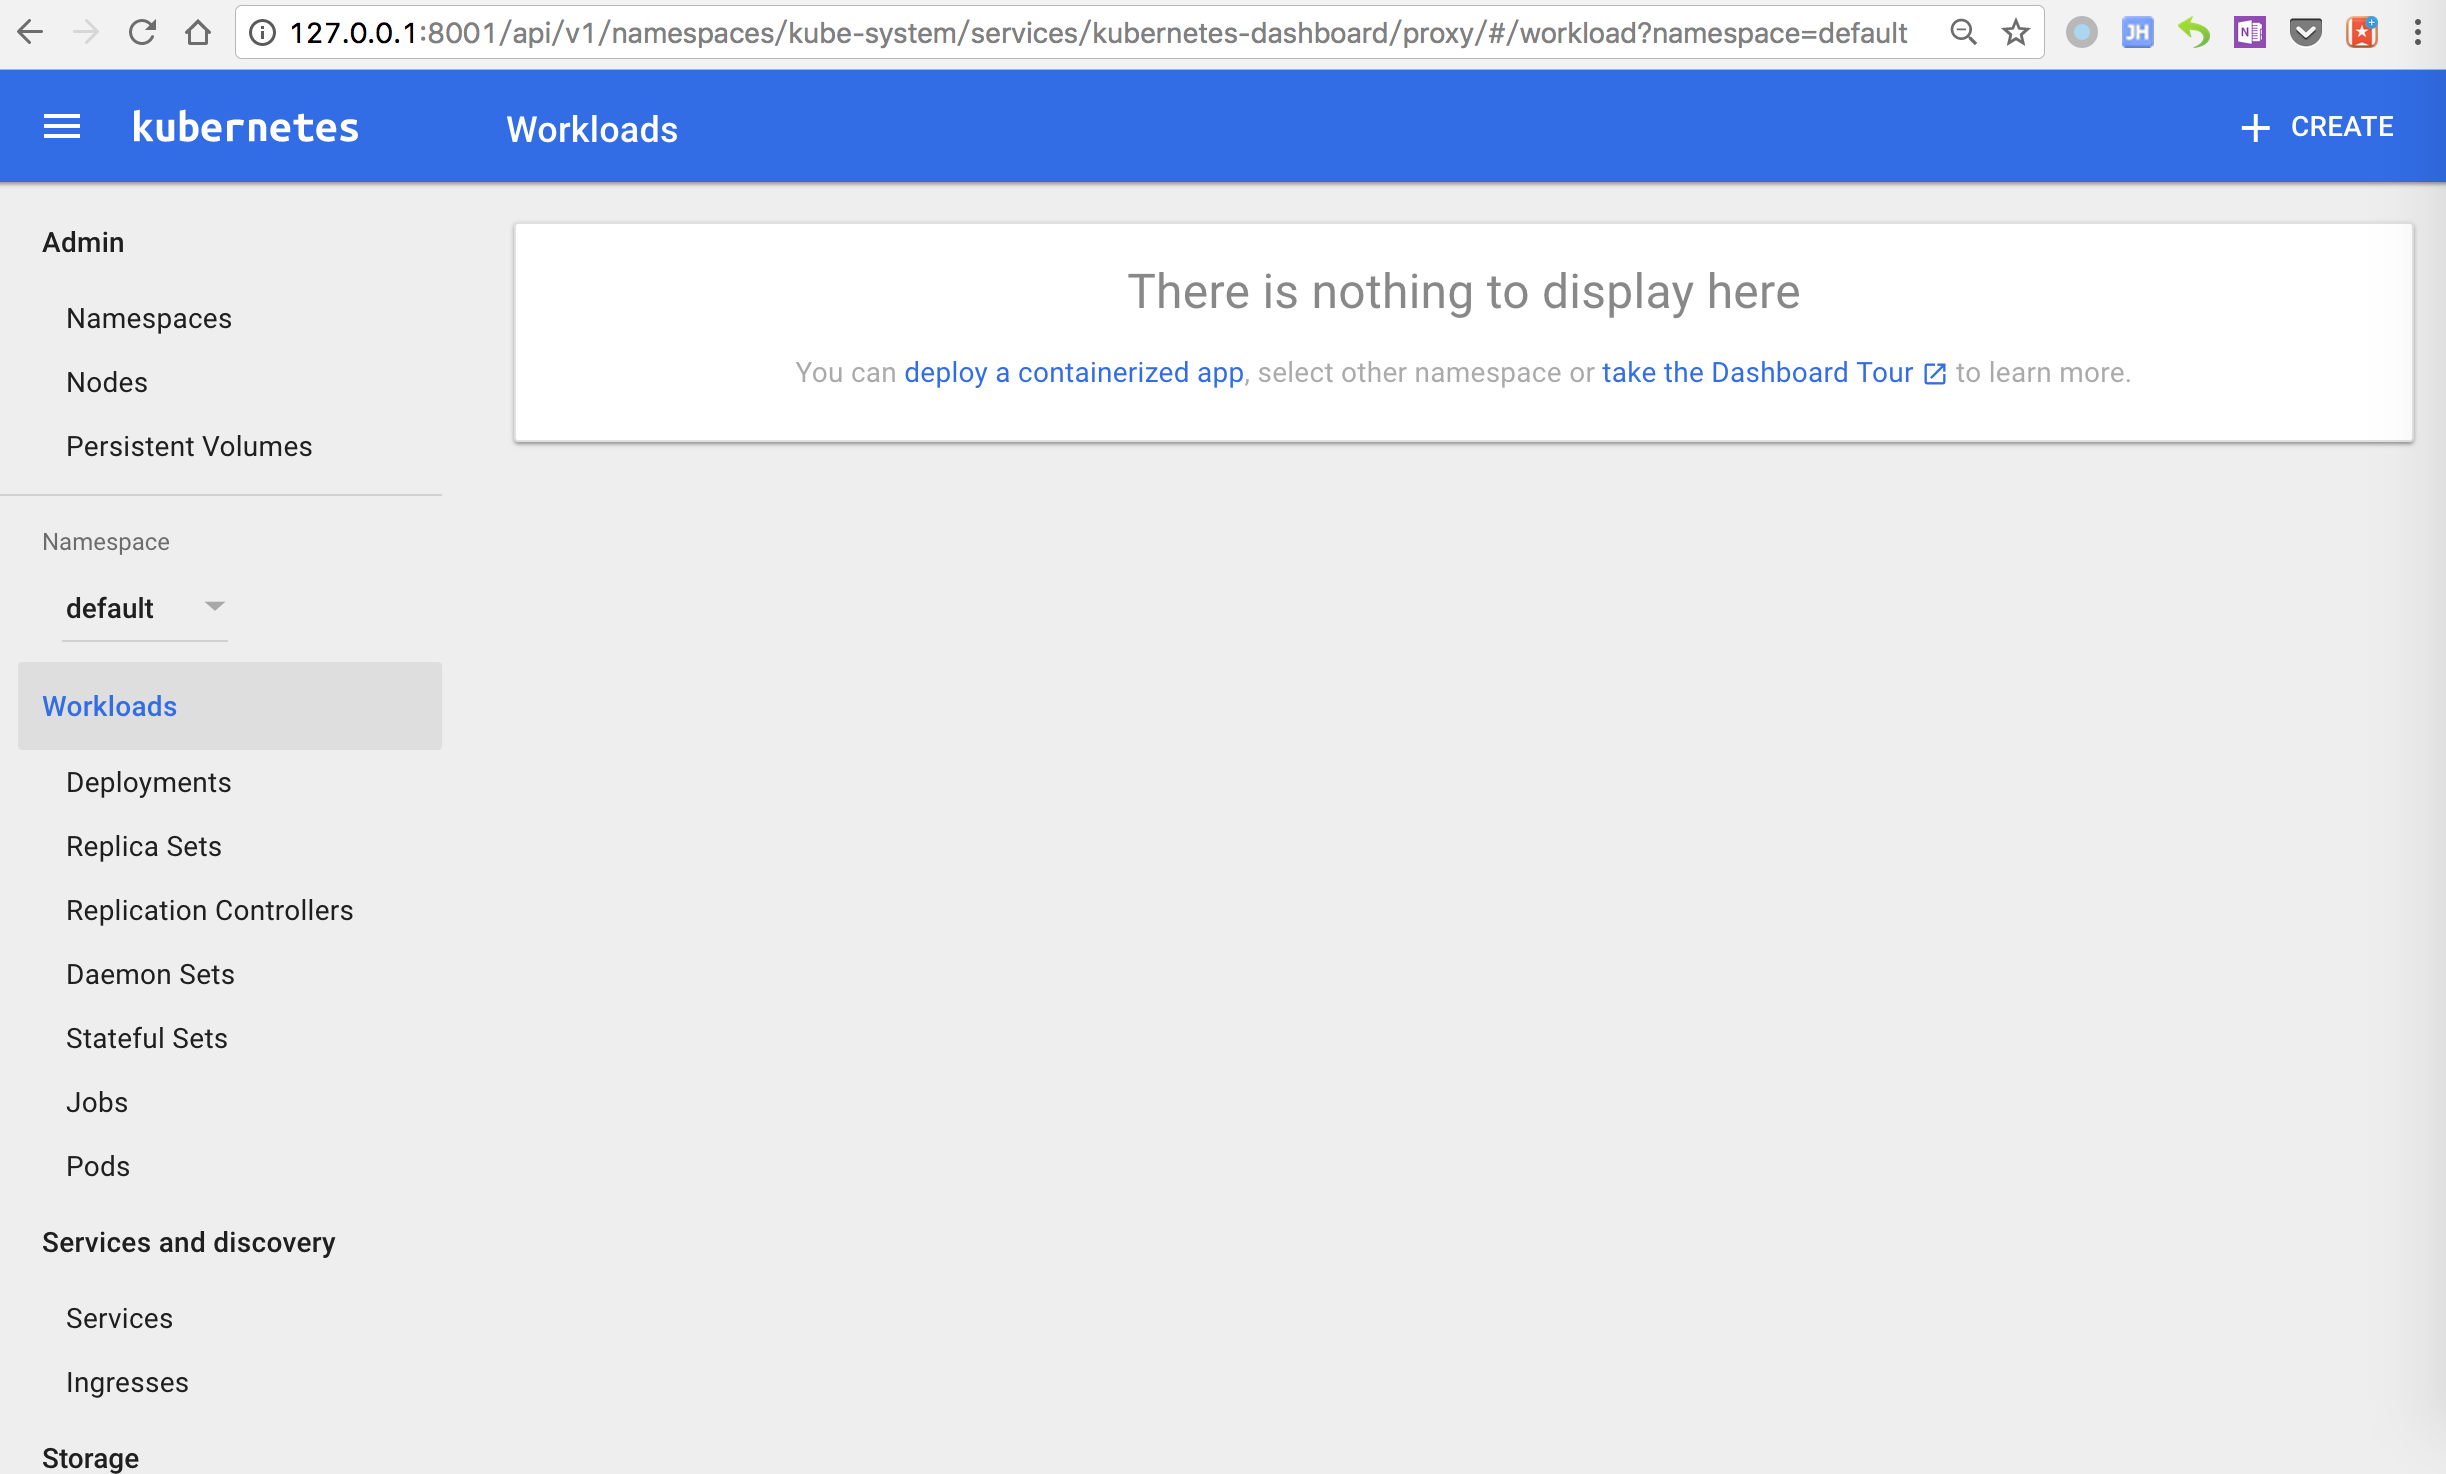
Enter
kubectl.exe proxyto open proxy, and then access dashboard via127.0.0.1:8001/uiin browsers
5.3 Creating a dashboard service in Linux environment
Enter the following commands to complete the creation of the dashboard service
1$ kubectl create -f dashboard.yaml
2deployment "kubernetes-dashboard" created
3service "kubernetes-dashboard" createdThe corresponding dashboard.yaml file is:
1	apiVersion: apps/v1
2	kind: Deployment
3	metadata:
4	  labels:
5	    app: kubernetes-dashboard
6	  name: kubernetes-dashboard
7	  namespace: kube-system
8	spec:
9	  replicas: 1
10	  selector:
11	    matchLabels:
12	      app: kubernetes-dashboard
13	  template:
14	    metadata:
15	      labels:
16	        app: kubernetes-dashboard
17	    spec:
18	      containers:
19	      - name: kubernetes-dashboard
20	        image: hub.baidubce.com/public/dashboard:v1.5.0-caas
21	        imagePullPolicy: Always
22	        ports:
23	        - containerPort: 9090
24	          protocol: TCP
25	        volumeMounts:
26	        - name: "kubeconfig"
27	          mountPath: "/etc/kubernetes/"
28	          readOnly: true
29	        args:
30	          - --kubeconfig=/etc/kubernetes/config
31	        livenessProbe:
32	          httpGet:
33	            path: /
34	            port: 9090
35	          initialDelaySeconds: 30
36	          timeoutSeconds: 30
37	      volumes:
38	      - name: "kubeconfig"
39	        hostPath:
40	          path: "/root/.kube/"
41	---
42	kind: Service
43	apiVersion: v1
44	metadata:
45	  labels:
46	    app: kubernetes-dashboard
47	  name: kubernetes-dashboard
48	  namespace: kube-system
49	spec:
50	  type: NodePort
51	  ports:
52	  - port: 80
53	    targetPort: 9090
54	  selector:
55 app: kubernetes-dashboardAfter creating the dashboard, use the kubectl proxy command to start a proxy and establish a connection to the Kubernetes API Server.
1 kubectl proxyAfter successfully enabling the proxy, you can access http://localhost:8001/ui in a local browser to connect to the dashboard.
Note:
Localhost refers to the user's local machine (not a virtual machine), with the corresponding IP address of 127.0.0.1
6. Creating GuestBook via Kubernetes-Kubectl
The GuestBook application in this practice consists of two components:
- Web frontend service.
- Redis storage system, comprising both redis master and redis slave nodes.
6.1 Create redis master pod
Redis-master: Refers to the redis service used by the frontend web application for handling "write" message operations.
*Note: All YAML files in this operation are saved in the same directory as kubectl.
Execute the following commands on the master node to deploy the redis-master-deployment.yaml file to the Kubernetes cluster, completing the redis-master creation.
1 kubectl apply -f redis-master-deployment.yamlThe corresponding redis-master-deployment.yaml file is:
1	apiVersion: apps/v1
2	kind: Deployment
3	metadata:
4	  name: redis-master
5	spec:
6      selector:
7        matchLabels:
8          app: redis
9          role: master
10          tier: backend
11	  replicas: 1
12	  template:
13	    metadata:
14	      labels:
15	        app: redis
16	        role: master
17	        tier: backend
18	    spec:
19	      containers:
20	      - name: master
21	        image: hub.baidubce.com/public/guestbook-redis-master:e2e  # or just image: redis
22	        resources:
23	          requests:
24	            cpu: 100m
25	            memory: 100Mi
26	        ports:
27	        - containerPort: 6379
After creation, use the following commands to verify if the pod is running:
1kubectl get podsThe response similar to the following information will be returned:
1NAME                            READY     STATUS    RESTARTS   AGE
2redis-master-1068406935-3lswp   1/1       Running   0          28s
When STATUS shows as "Running," it indicates the pod is operating normally.
6.2 Create a redis master service
A service consists of a group of identical containers and includes rules for accessing them. It acts as the deployment unit within a microservice architecture and represents the smallest runnable component of a user's application.
Enter the following commands to create a service associated with the redis-master pod.
1kubectl apply -f redis-master-service.yamlThe corresponding redis-master-service.yaml file is:
1	apiVersion: v1
2	kind: Service
3	metadata:
4	  name: redis-master
5	  labels:
6	    app: redis
7	    role: master
8	    tier: backend
9	spec:
10	  ports:
11	  - port: 6379
12	    targetPort: 6379
13	  selector:
14	    app: redis
15	    role: master
16	    tier: backend
Note: The tarPort attribute specifies the port number that the container application in the pod listens on.
After completion, use the following commands to verify whether the redis master service is running:
1kubectl get serviceThe response similar to the following information will be returned:
1NAME           CLUSTER-IP   EXTERNAL-IP   PORT(S)    AGE
2kubernetes     10.0.0.1     <none>        443/TCP    1m
3redis-master   10.0.0.151   <none>        6379/TCP   8s
6.3 Create a redis slave pod
Redis-slave: Refers to a Redis service used by the frontend web application for "read" operations, ensuring data synchronization with Redis-master.
Deploy the redis-slave-deployment.yaml file to the Kubernetes cluster to complete the creation of redis-slave.
1 kubectl apply -f redis-slave-deployment.yamlThe corresponding redis-slave-deployment.yaml file is:
1	apiVersion: apps/v1
2	kind: Deployment
3	metadata:
4	  name: redis-slave
5	spec:
6	  selector:
7	    matchLabels:
8	      app: redis
9	      role: slave
10	      tier: backend
11	  replicas: 2
12	  template:
13	    metadata:
14	      labels:
15	        app: redis
16	        role: slave
17	        tier: backend
18	    spec:
19	      containers:
20	      - name: slave
21	        image: hub.baidubce.com/public/guestbook-redis-slave:v1
22	        resources:
23	          requests:
24	            cpu: 100m
25	            memory: 100Mi
26	        env:
27	        - name: GET_HOSTS_FROM
28	          value: dns
29	          # Using `GET_HOSTS_FROM=dns` requires your cluster to
30	          # provide a dns service. As of Kubernetes 1.3, DNS is a built-in
31	          # service launched automatically. However, if the cluster you are using
32	          # does not have a built-in DNS service, you can instead
33	          # instead access an environment variable to find the master
34	          # service's host. To do so, comment out the 'value: dns' line above, and
35	          # uncomment the line below:
36	          # value: env
37	        ports:
38	        - containerPort: 6379
After completing the above steps, execute the following code to query the pods list and verify whether the redis slave pods are running:
1kubectl get podsThe response similar to the following information will be returned:
1NAME                            READY     STATUS              RESTARTS   AGE
2redis-master-1068406935-3lswp   1/1       Running             0          1m
3redis-slave-2005841000-fpvqc    1/1       Running             0          6s
4redis-slave-2005841000-phfv9    1/1       Running             0          6s
6.4 Create a redis slave service
Run the following commands to start two replicas of Redis-slave. Each replica's Redis instance will sync data with Redis-master, forming a Redis cluster with both read and write capabilities.
1kubectl apply -f redis-slave-service.yamlThe corresponding redis-slave-service.yaml file is:
1	apiVersion: v1
2	kind: Service
3	metadata:
4	  name: redis-slave
5	  labels:
6	    app: redis
7	    role: slave
8	    tier: backend
9	spec:
10	  ports:
11	  - port: 6379
12	  selector:
13	    app: redis
14	    role: slave
15	    tier: backend
After completing the above steps, use the following commands to query the service list and verify whether the redis slave service is running:
kubectl get services
The response similar to the following information will be returned:
1NAME           CLUSTER-IP   EXTERNAL-IP   PORT(S)    AGE
2kubernetes     10.0.0.1     <none>        443/TCP    2m
3redis-master   10.0.0.151   <none>        6379/TCP   1m
4redis-slave    10.0.0.223   <none>        6379/TCP   6s
6.5 Create frontend pod
Deploy the frontend-deployment.yaml file to the Kubernetes cluster to complete the creation of redis-slave.
1kubectl apply -f frontend-deployment.yamlThe corresponding frontend-deployment.yaml file is:
1	apiVersion: apps/v1
2	kind: Deployment
3	metadata:
4	  name: frontend
5	spec:
6	  selector:
7	    matchLabels:
8	      app: guestbook
9	      tier: frontend
10	  replicas: 3
11	  template:
12	    metadata:
13	      labels:
14	        app: guestbook
15	        tier: frontend
16	    spec:
17	      containers:
18	      - name: php-redis
19	        image: hub.baidubce.com/public/guestbook-frontend:v4
20	        resources:
21	          requests:
22	            cpu: 100m
23	            memory: 100Mi
24	        env:
25	        - name: GET_HOSTS_FROM
26	          value: dns
27	          # Using `GET_HOSTS_FROM=dns` requires your cluster to
28	          # provide a dns service. As of Kubernetes 1.3, DNS is a built-in
29	          # service launched automatically. However, if the cluster you are using
30	          # does not have a built-in DNS service, you can instead
31	          # instead access an environment variable to find the master
32	          # service's host. To do so, comment out the 'value: dns' line above, and
33	          # uncomment the line below:
34	          # value: env
35	        ports:
36	        - containerPort: 80
After completing the above steps, use the following commands to query the pods list and verify whether the three frontend replicas are running:
1 kubectl get pods -l app=guestbook -l tier=frontendThe response similar to the following information will be returned:
1NAME                        READY     STATUS    RESTARTS   AGE
2frontend-3823415956-dsvc5   1/1       Running   0          54s
3frontend-3823415956-k22zn   1/1       Running   0          54s
4frontend-3823415956-w9gbt   1/1       Running   0          54s
6.6 Create frontend service
The purpose of setting up the frontend service is to use its nodeport to map an internet-facing port for the Redis-master and Redis-slave services in the Kubernetes cluster.
Note: If you use the Baidu Load Balance provided by Baidu AI Cloud, annotate the type: NodePort and cancel the type: LoadBalancer.
Enter the following commands to complete the creation of the frontend service
1 kubectl apply -f frontend-service.yamlThe corresponding frontend-service.yaml file is:
1    apiVersion: v1
2	kind: Service
3	metadata:
4	  name: frontend
5	  labels:
6	    app: guestbook
7	    tier: frontend
8	spec:
9	  # comment or delete the following line if you want to use a LoadBalancer
10	  type: LoadBalancer
11	  # if your cluster supports it, uncomment the following to automatically create
12	  # an external load-balanced IP for the frontend service.
13	  ports:
14	  - port: 80
15	  selector:
16	    app: guestbook
17	    tier: frontend
After completing the above steps, use the following code to query the service list and verify whether the frontend service is running:
1 kubectl get servicesThe response similar to the following information will be returned:
1	NAME           CLUSTER-IP   EXTERNAL-IP   PORT(S)        AGE
2	frontend       10.0.0.112   <nodes>       80:32372/TCP   6s
3	kubernetes     10.0.0.1     <none>        443/TCP        4m
4	redis-master   10.0.0.151   <none>        6379/TCP       2m
5	redis-slave    10.0.0.223   <none>        6379/TCP       1m
6.7 View frontend service load balancer
Execute the commands below to retrieve the IP address of the frontend service.
1 kubectl get service frontendThe response similar to the following information will be returned:
1 NAME CLUSTER-IP EXTERNAL-IP PORT(S) AGE
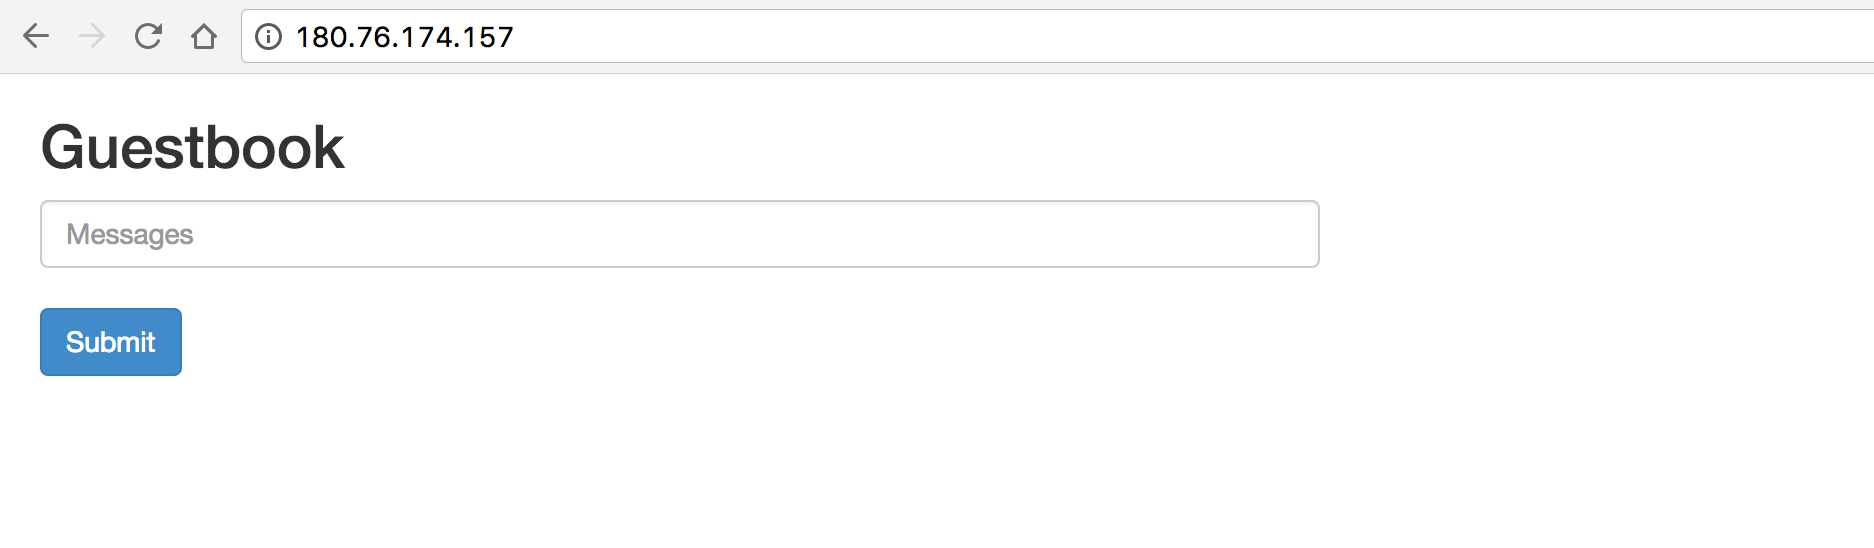
2 frontend 10.0.0.112 180.76.174.157 80:32372/TCP 1mCopy the internet IP address and open it in your browser to access your Guestbook page.
7. Bind domain name to provide service
7.1 Purchase a domain name
If a user already has a registered domain name, proceed directly to the next step of domain name binding. If not, please refer to Domain Name Purchase
7.2 Binding a domain name
- Sign in to the management console and navigate to Domain Name Management
-
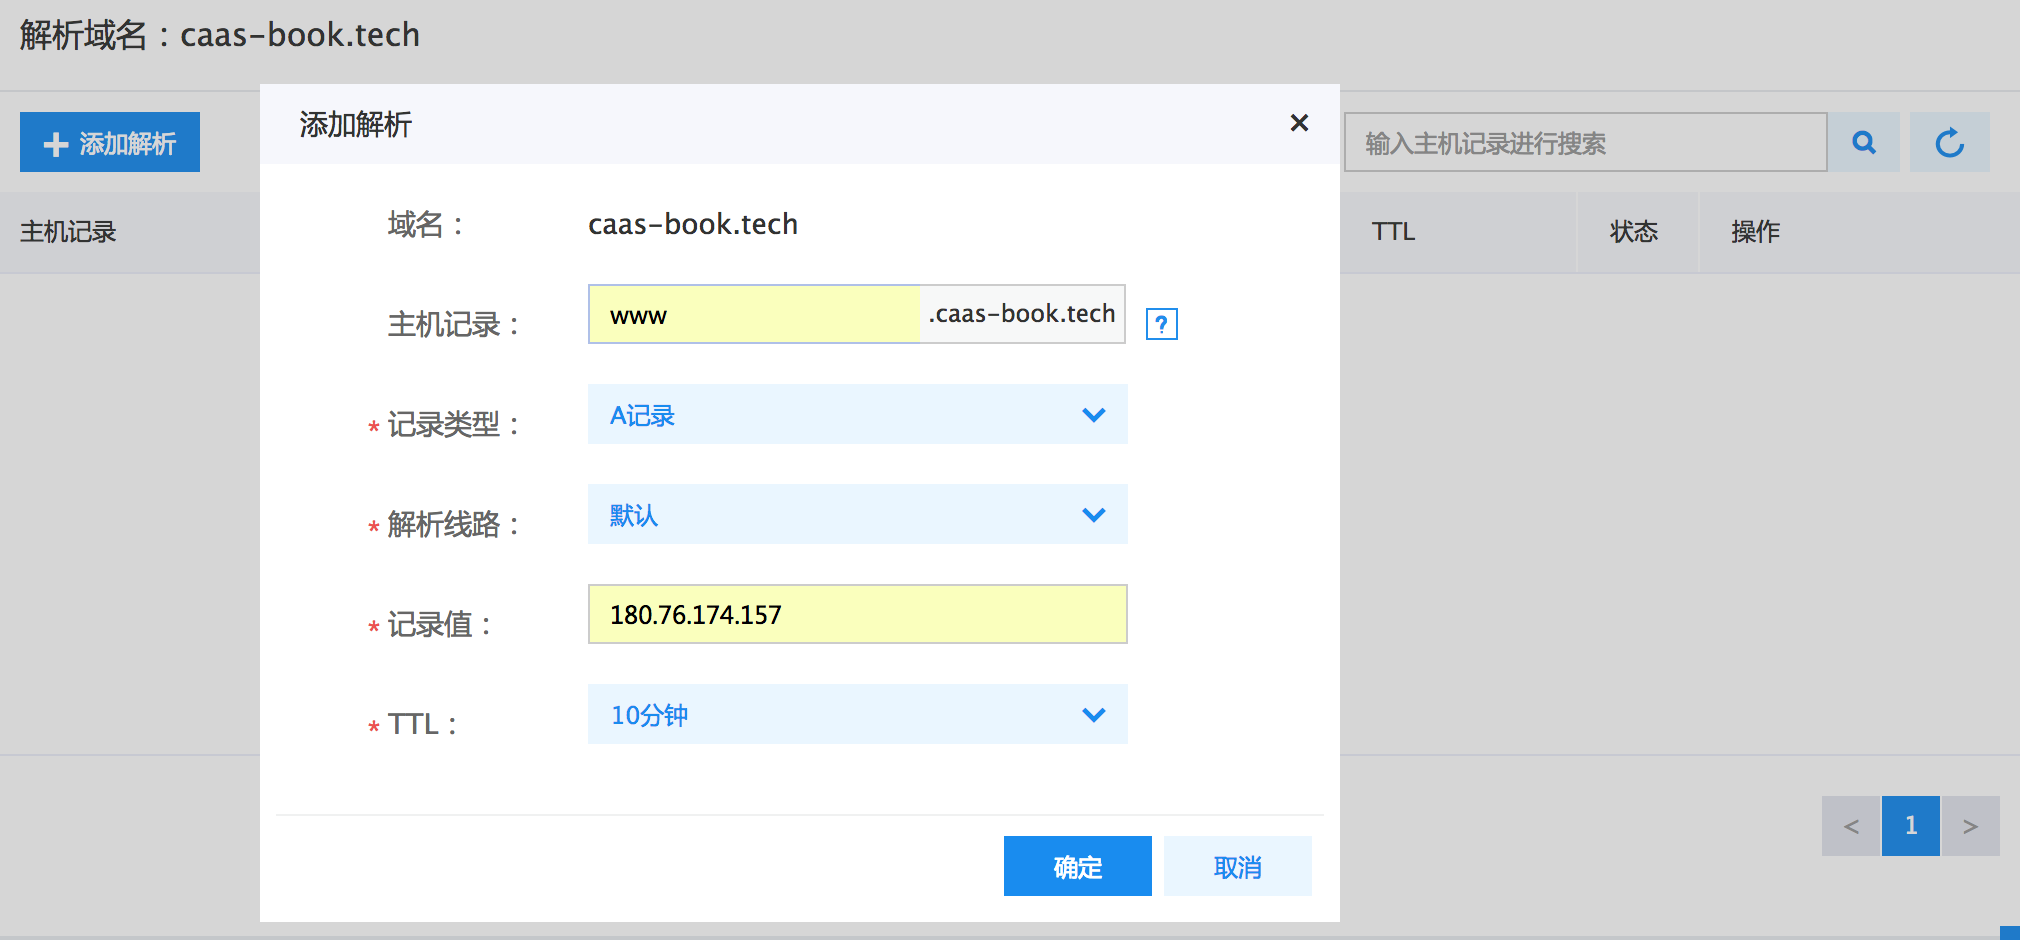
Select the domain name to bind to the frontend service's public IP, and then click Resolution in the operation bar.

-
In the pop-up Add Resolution menu, select A records for Record Type, and enter the internet IP of the frontend service in Record Value.
-
Access the service using the domain name, with the result shown below:
