
Elasticsearch Snapshot Data Storage to BOS
Tool overview
Elasticsearch is a distributed search and data analysis engine that efficiently stores, retrieves, analyzes, and processes massive datasets. It supports backing up snapshot data to object storage systems like S3. This document details how to use ES’s S3 Repository plugin to securely back up snapshots to BOS remote storage.
Configuration guide
-
Download Elasticsearch installation package, unzip and start ES.
Shell1 wget https://artifacts.elastic.co/downloads/elasticsearch/elasticsearch-8.15.0-linux-x86_64.tar.gz 2 tar zxvf elasticsearch-8.15.0-linux-x86_64.tar.gz 3 cd elasticsearch-8.15.0 4 bin/elasticsearch -
The latest version of Elasticsearch has integrated the S3 Repository plugin and can be used directly. When starting ES, the log will show that the s3 plugin has been loaded, as shown below:
Shell1…… 2[2024-08-26T17:36:49,356][INFO ][o.e.p.PluginsService ] [instance-oaxggkck] loaded module [repository-s3] 3[2024-08-26T17:36:49,365][INFO ][o.e.p.PluginsService ] [instance-oaxggkck] loaded module [repository-azure] 4[2024-08-26T17:36:49,365][INFO ][o.e.p.PluginsService ] [instance-oaxggkck] loaded module [repository-gcs] 5……Some older versions of ES can be provided with this plugin as required. Please refer to the Official Guide
-
Configure the Access Key ID and Secret Access Key used by BOS to ES by executing the following command:
Shell1bin/elasticsearch-keystore add s3.client.default.access_key 2bin/elasticsearch-keystore add s3.client.default.secret_key
Backup steps
-
First, create a role user with permission to create snapshot repositories, such as superuser, by executing the following command:
Shell1bin/elasticsearch-users useradd my_super_user -p my_pwd -r superuser -
Create a snapshot repository named test. If the following command is executed successfully, it will print
{"acknowledged":true}:Shell1curl -u my_super_user:my_pwd -k -XPUT 'https://localhost:9200/_snapshot/test' -H 'Content-Type: application/json' -d '{ "type": "s3", "settings": { "bucket": "bos-bkt", "endpoint": "s3.bj.bcebos.com"} }'Accessing ES requires HTTPS by default; the -k parameter ignores SSL certificate verification (it is applicable in development environments but not recommended in production environments); for BOS endpoint, refer to Official Website
-
Use the following command to confirm whether the repository is successfully created:
Shell1curl -u my_super_user:my_pwd -k -XGET 'https://localhost:9200/_snapshot/test?pretty' 2{ 3 "test" : { 4 "type" : "s3", 5 "settings" : { 6 "bucket" : "bos-bkt", 7 "endpoint" : "s3.bj.bcebos.com" 8 } 9 } 10} -
Create the test_index by executing the following command:
Shell1curl -u my_super_user:my_pwd -k -XPUT "https://localhost:9200/test_index" -H 'Content-Type: application/json' -d' 2{ 3 "settings": { 4 "number_of_shards": 1, 5 "number_of_replicas": 0 6 } 7} 8' -
View current ES cluster index information by executing the following command:
Shell1curl -u my_super_user:my_pwd -k -XGET 'https://localhost:9200/_cat/indices?v' 2# Output result: 3health status index uuid pri rep docs.count docs.deleted store.size pri.store.size dataset.size 4green open test_index kwVZOtQ-RoWvuNxpgeIZ2w 1 0 0 0 227b 227b 227b -
Back up the test_index to BOS by executing the following command:
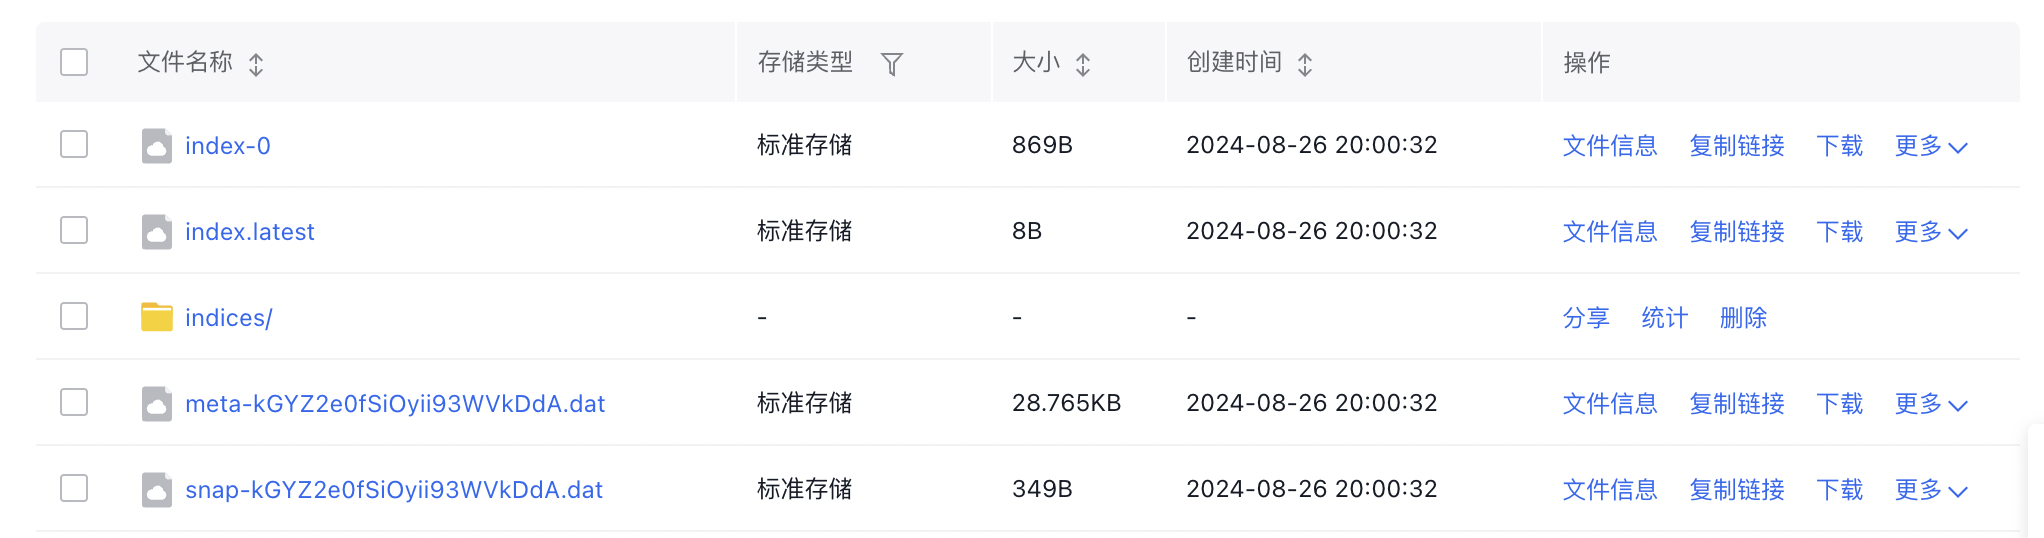
Shell1curl -u my_super_user:my_pwd -k -XPUT 'https://localhost:9200/_snapshot/test/test_index' -H 'Content-Type: application/json' -d '{ "indices": "test_index" }' - Then, we can view the backup results from the BOS console:
-
Then, you can use the backup snapshots stored in BOS to restore the index. First, close the index, then restore from the snapshots already backed up to BOS by executing the following command:
Shell1 curl -u my_super_user:my_pwd -k -XPOST 'https://localhost:9200/test_index/_close' 2# Output: {"acknowledged":true,"shards_acknowledged":true,"indices":{"test_index":{"closed":true}}} 3 curl -u my_super_user:my_pwd -k -XPOST 'https://localhost:9200/_snapshot/test/test_index/_restore?pretty' 4# Output: {"accepted" : true} - Recheck the current ES cluster’s index information, and find that it is consistent with the backup status:
1curl -u my_super_user:my_pwd -k -XGET 'https://localhost:9200/_cat/indices?v'