Usage rules
Overview
Image Processing V1.0 is the legacy protocol for image handling in BOS. Currently, new BOS functionalities, such as adaptive format handling and advanced image compression, are only supported through the V2.0 protocol.
Rules and limitations
- Supported original image formats include jpg, png, bmp, webp, gif, and tiff.
- Supported target image formats include jpg, png, bmp, and webp.
- Supports image sizes up to 100 MB, with a maximum length and width of 4096 pixels.
- A single bucket can be bound to up to 200 domain names (including image domain names), with a limit of 1 image domain name.
- For the same domain name, only one binding method is allowed: either as a regular domain name or an image domain name. Dual binding is not permitted.
- Parameters in the same group of processing commands follow an unordered principle. For example,
@w_250,h_380,q_90is equivalent to@h_380,w_250,q_90. - If an Object name contains an "@" symbol, all characters following it will be interpreted as processing commands. Users must replace the "@" symbol in the Object name beforehand.
- Supports up to 4 pipelines.
- The signature calculation for Authorization is similar to that of regular Object processing. However, the image name with parameters must be used as a complete URL path during signature calculation. For instance, the URL for signing a watermarked image would be as follows:
1http://test.gz.bcebos.com/IMG_5974.JPG@!shuiyin1?authorization=...Image access rules
Images can be accessed in three ways: direct access to display the original image, access via processing commands, or access via custom styles.
Direct access and original image display
Displaying the original image follows the same domain name binding method as access mode. The URL format is: http://${userdomain}/${objectkey}
userdomainis the domain name bound by the user.objectkeyis the name of the original image stored in BOS.
Example: http://www.myhost.com/pic.jpg
Access via commands
The URL format is:http://${userdomain}/${objectkey}@${commands}
userdomainis the domain name bound by the user.objectkeyis the name of the original image stored in BOS.\commandsis[processing commands](#Basic concepts).
Example: http://bucket-A.bj.bcebos.com/sample.jpg@w_200,q_80
Delimiter
The image processing V1.0 protocol includes the following delimiters:
| Delimiter name | Delimiter | Order on both sides | Description |
|---|---|---|---|
| Processing delimiter | @ | Fixed order | The delimiter between the object and the processing command |
| Parameter delimiter | _ | Fixed order | The delimiter between parameter abbreviation commands and parameter values |
| Command delimiter | , | Unrelated | The delimiter between multiple processing parameter items |
| Pipeline delimiter | | | Related | The delimiter between two sets of processing commands; for pipeline, please refer to the following "Pipeline” |
Pipeline
For images requiring multiple processing steps, such as cropping followed by resizing, operation commands need to be connected using a pipeline "|" and executed sequentially from left to right.
In a pipeline, execution proceeds from left to right, where the result of the left command serves as the input for the right command.
1http://${userdomain}/${objectkey}@${cropcommands}|${scalecommands}Command example:
1(1) Crop the image first, then scale it. First, crop starting from the top-left coordinate (10, 20), with the specified cropping width of 600 and height of 300. Then, resize it to a width of 200 and a height of 200. Additionally, set the absolute quality of the target image to 60 and the target image format to png.
2https://doc.bce.baidu.com/bce-documentation/BOS/image.jpg@c_1,x_10,y_20,w_600,h_300|s_1,w_200,h_200,q_60,f_png
3 (2) Scale and rotate the image first, then crop it. First, resize proportionally to a width of 200 and rotate 90° clockwise; then crop starting from coordinates (50, 100), with the cropping width and height defaulting to the image’s width and height.
4https://doc.bce.baidu.com/bce-documentation/BOS/image.jpg@w_200,a_30|c_1,x_50,y_100>
5 (3) Mixed text-image watermark: Watermark image is bce-documentation/BOS/bce.jpg, located at the bottom-left corner, with a horizontal distance of 15 and a vertical distance of 20 from the anchor point, and an opacity of 50; the text content is "hello world", located directly above, with a vertical distance of 100, and the font color is lavender.
6https://doc.bce.baidu.com/bce-documentation/BOS/image.jpg@wm_1,k_YmNlLWRvY3VtZW50YXRpb24vQk9TL2JjZS5qcGc=,g_7,x_15,y_20,o_50|wm_2,t_aGVsbG8gd29ybGQ=,g_2,y_100,fc_aa88aa-
For mixed text-image watermarking: The watermark image located at bce-documentation/BOS/bce.jpg is placed in the bottom-left corner, 15 units horizontally and 20 units vertically from the anchor point, with 50% opacity. The text "hello world" is positioned directly above, 100 units vertically, in lavender font color.

Access via styles
When images require multiple processing steps, the resulting URL can become complex and lengthy, making it cumbersome to manage and read. To simplify the URL, hide processing parameters, and protect the original image, the image style function can be utilized.
Image style allows saving a set of common image processing operations under a single alias, or style. This enables you to achieve the same effect with a concise URL.
The style format of image processing V1.0 is as follows:
1http://${userdomain}/${objectkey}@!${stylename}Where:
- userdomain: domain name bound by the user.
- objectkey: name of the original image stored in BOS.
- stylename: style name
If you create a style named mystylename, access it in the following way:
1http://bucket-A.bj.bcebos.com/sample.jpg@!mystylenameAdd and delete a style
Add a style
You can define image styles via the console and preview the effects in real time during the configuration process.
- Log in to the BOS console and navigate to the bucket with image services enabled. On the left navigation bar, click Image Service and then select Style Management on the right page.
-
Click the Add Style button to open the style configuration page. Here you can set image processing parameters for the style as required and preview the effects in real time on the right.
Image styles can be configured in two ways: Basic Settings and Advanced Settings.
- Basic Settings: Manually configure each processing parameter on the interface.
- Advanced Settings: Directly input image processing command parameters in the text box.
Click "Save" after creating the style.
Scaling
-
Restrict the proportions of width and height, among others.
Enter a width to serve as the reference value, and the height will adjust proportionally. If the input width exceeds the original image's width, the original image will be retained.
For instance, if the original image dimensions are 400 × 320, limiting the width to 200 with a proportional height results in a thumbnail size of 200 × 160. If the width is limited to 500 with a proportional height, the thumbnail size becomes 400 × 320.
-
Restrict the proportions of height and width, among others.
Enter a height to serve as the reference value, and the width will adjust proportionally. If the input height exceeds the original image's height, the original image will be retained.
For instance, if the original image dimensions are 400 × 320, limiting the height to 160 with a proportional width results in a thumbnail size of 200 × 160. If the height is limited to 500 with a proportional width, the thumbnail size becomes 400 × 320.
-
Restrict both width and height.
Enter the desired width and height, and the image will be scaled proportionally until both dimensions fit within the specified limits without cropping.
For instance, if the original image dimensions are 400 × 320, limiting the width and height to 100 × 100 results in a thumbnail size of 100 × 80. If the width and height are set to 500 × 500, the thumbnail size becomes 400 × 320.
-
Set fixed width and height.
Enter the desired width and height, and the image will first be scaled down proportionally. Any parts exceeding the specified dimensions will be centrally cropped.
For instance, if the original image dimensions are 400 × 320, setting a fixed width and height of 100 × 100 (scaling the image down and cropping it) results in a thumbnail size of 100 × 100. Setting a fixed width and height of 500 × 500 (scaling the image up and cropping it) produces a thumbnail size of 500 × 500.
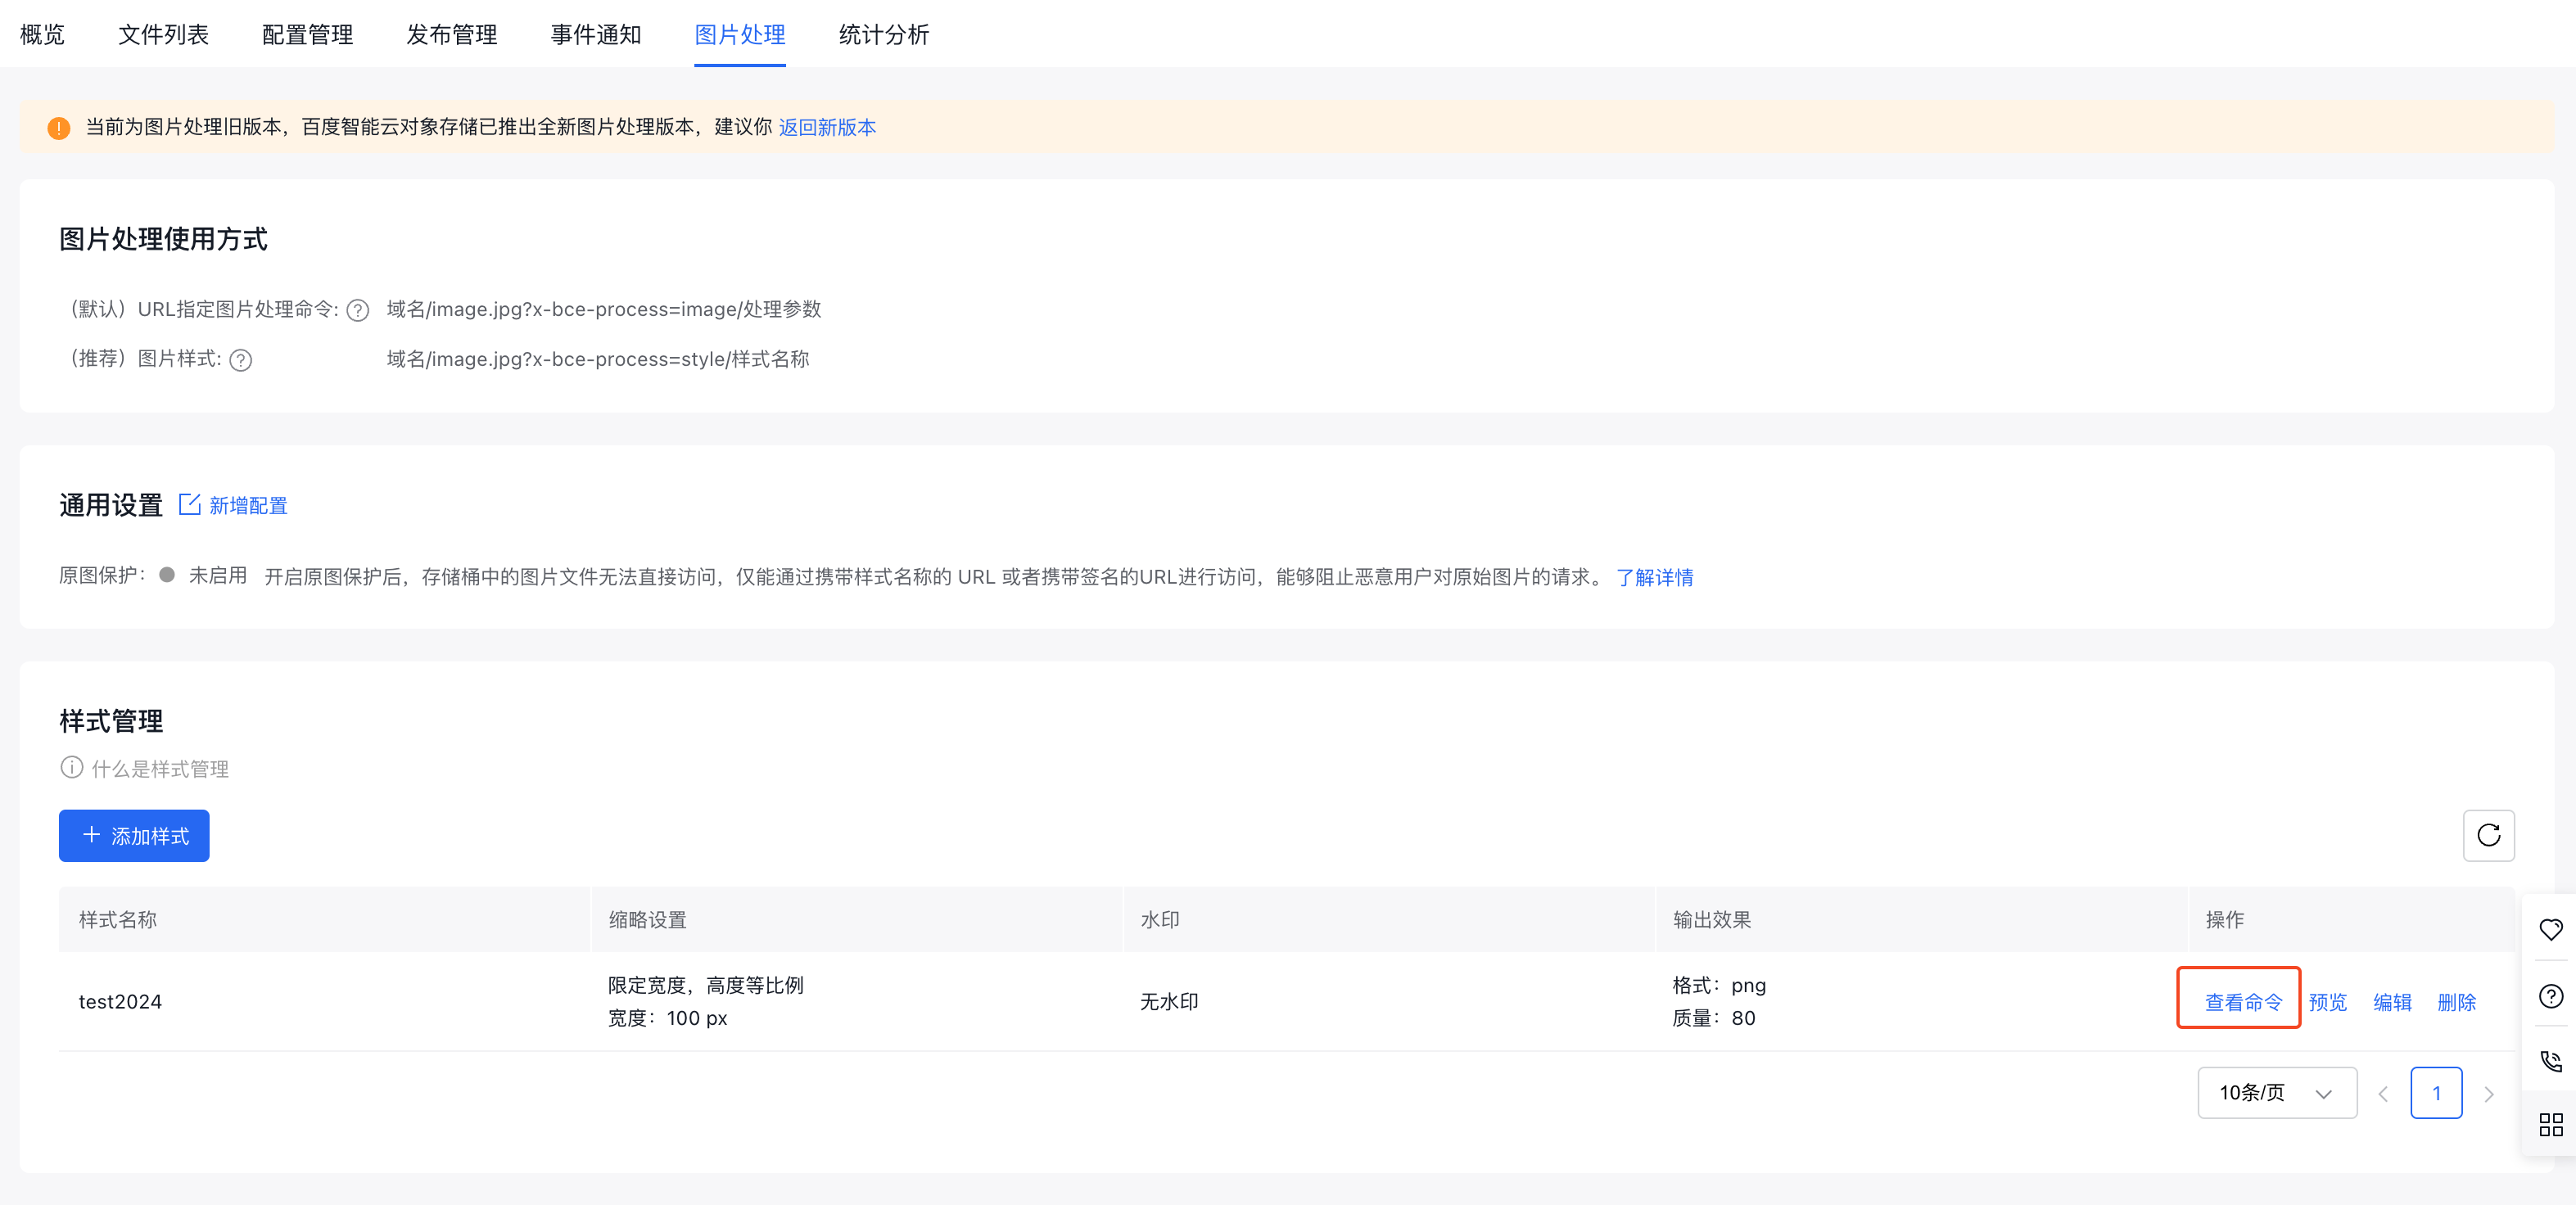
-
Once the style is saved, the added style information will appear in the list. Click "View Commands" to see the parameter commands associated with the style.
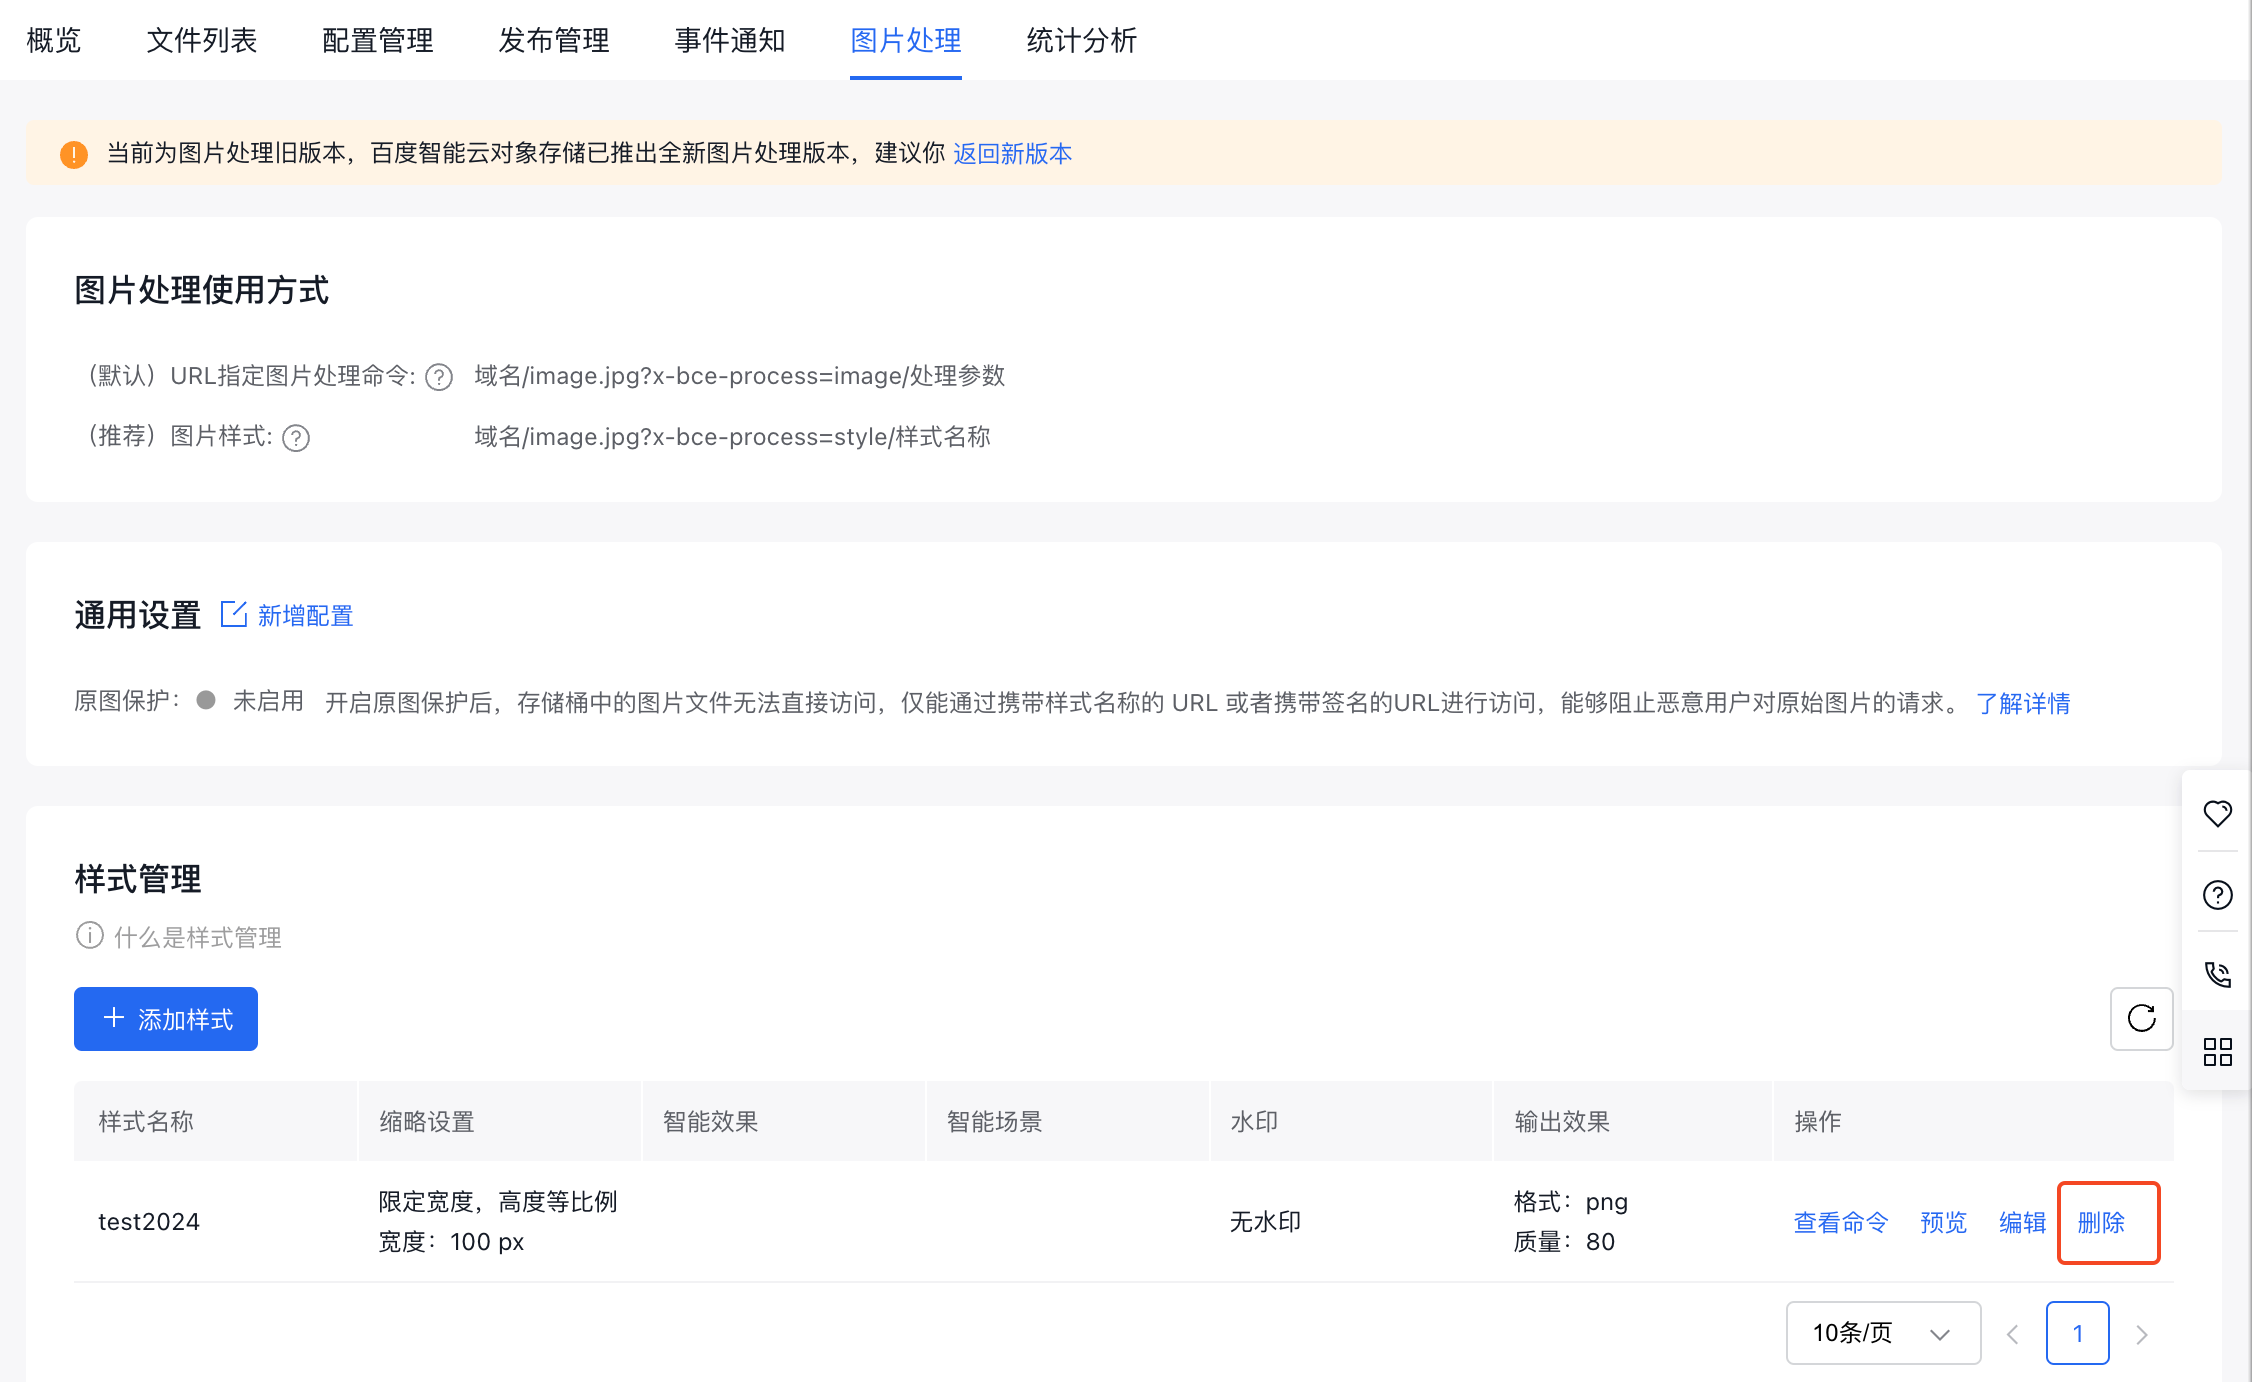
Deleting a style
In the style management list, click "Delete" in the Operation column to remove a style.