
Create bucket
Updated at:2025-11-03
Overview
Once the BOS service is activated, users can start utilizing object storage in BOS. The first step is to create a storage container, called a bucket.
Note
- A bucket is region-specific and must belong to one designated region. Since the bucket's name and its region cannot be changed after creation, it’s recommended to select a region close to your business operations to enhance upload/download efficiency and improve access speeds.
- Each user can create a maximum of 100 buckets.
- If you have enabled multi-region services, please select the region where the bucket is located as needed. For reference, see [Region Selection Instructions](Reference/Region Selection Instructions/Region.md).
- You can select the default storage class of the bucket when creating it. If the storage class of an object uploaded by the user using API, CLI, or SDK is not specified, it will inherit the default storage class of the bucket. On the management console, the uploaded object is by default of standard storage class. If the storage class of the object differs from the storage class of the bucket, the storage class of the object shall apply. Storage classes include standard storage, infrequent access storage, cold storage, and archive storage. For specific usage scenarios and performance, refer to Tiered Storage.
- Bucket names must be globally unique. To ensure uniqueness, you can use a prefix such as your organization’s name. Once a bucket is created, its name cannot be modified.
- Corresponding read-write permissions can be set when creating a bucket, including three types: private, public-read, and public-read-write. If you need to set advanced permissions, please create the bucket first and then set them in the corresponding Details page. For specific content, please refer to [bucket permission control](BOS/Developer Guide/Data Security/Permission control/Bucket permission control.md).
Use management console to create a bucket
- Sign in to the Baidu AI Cloud Object Storage (BOS) Management Console.
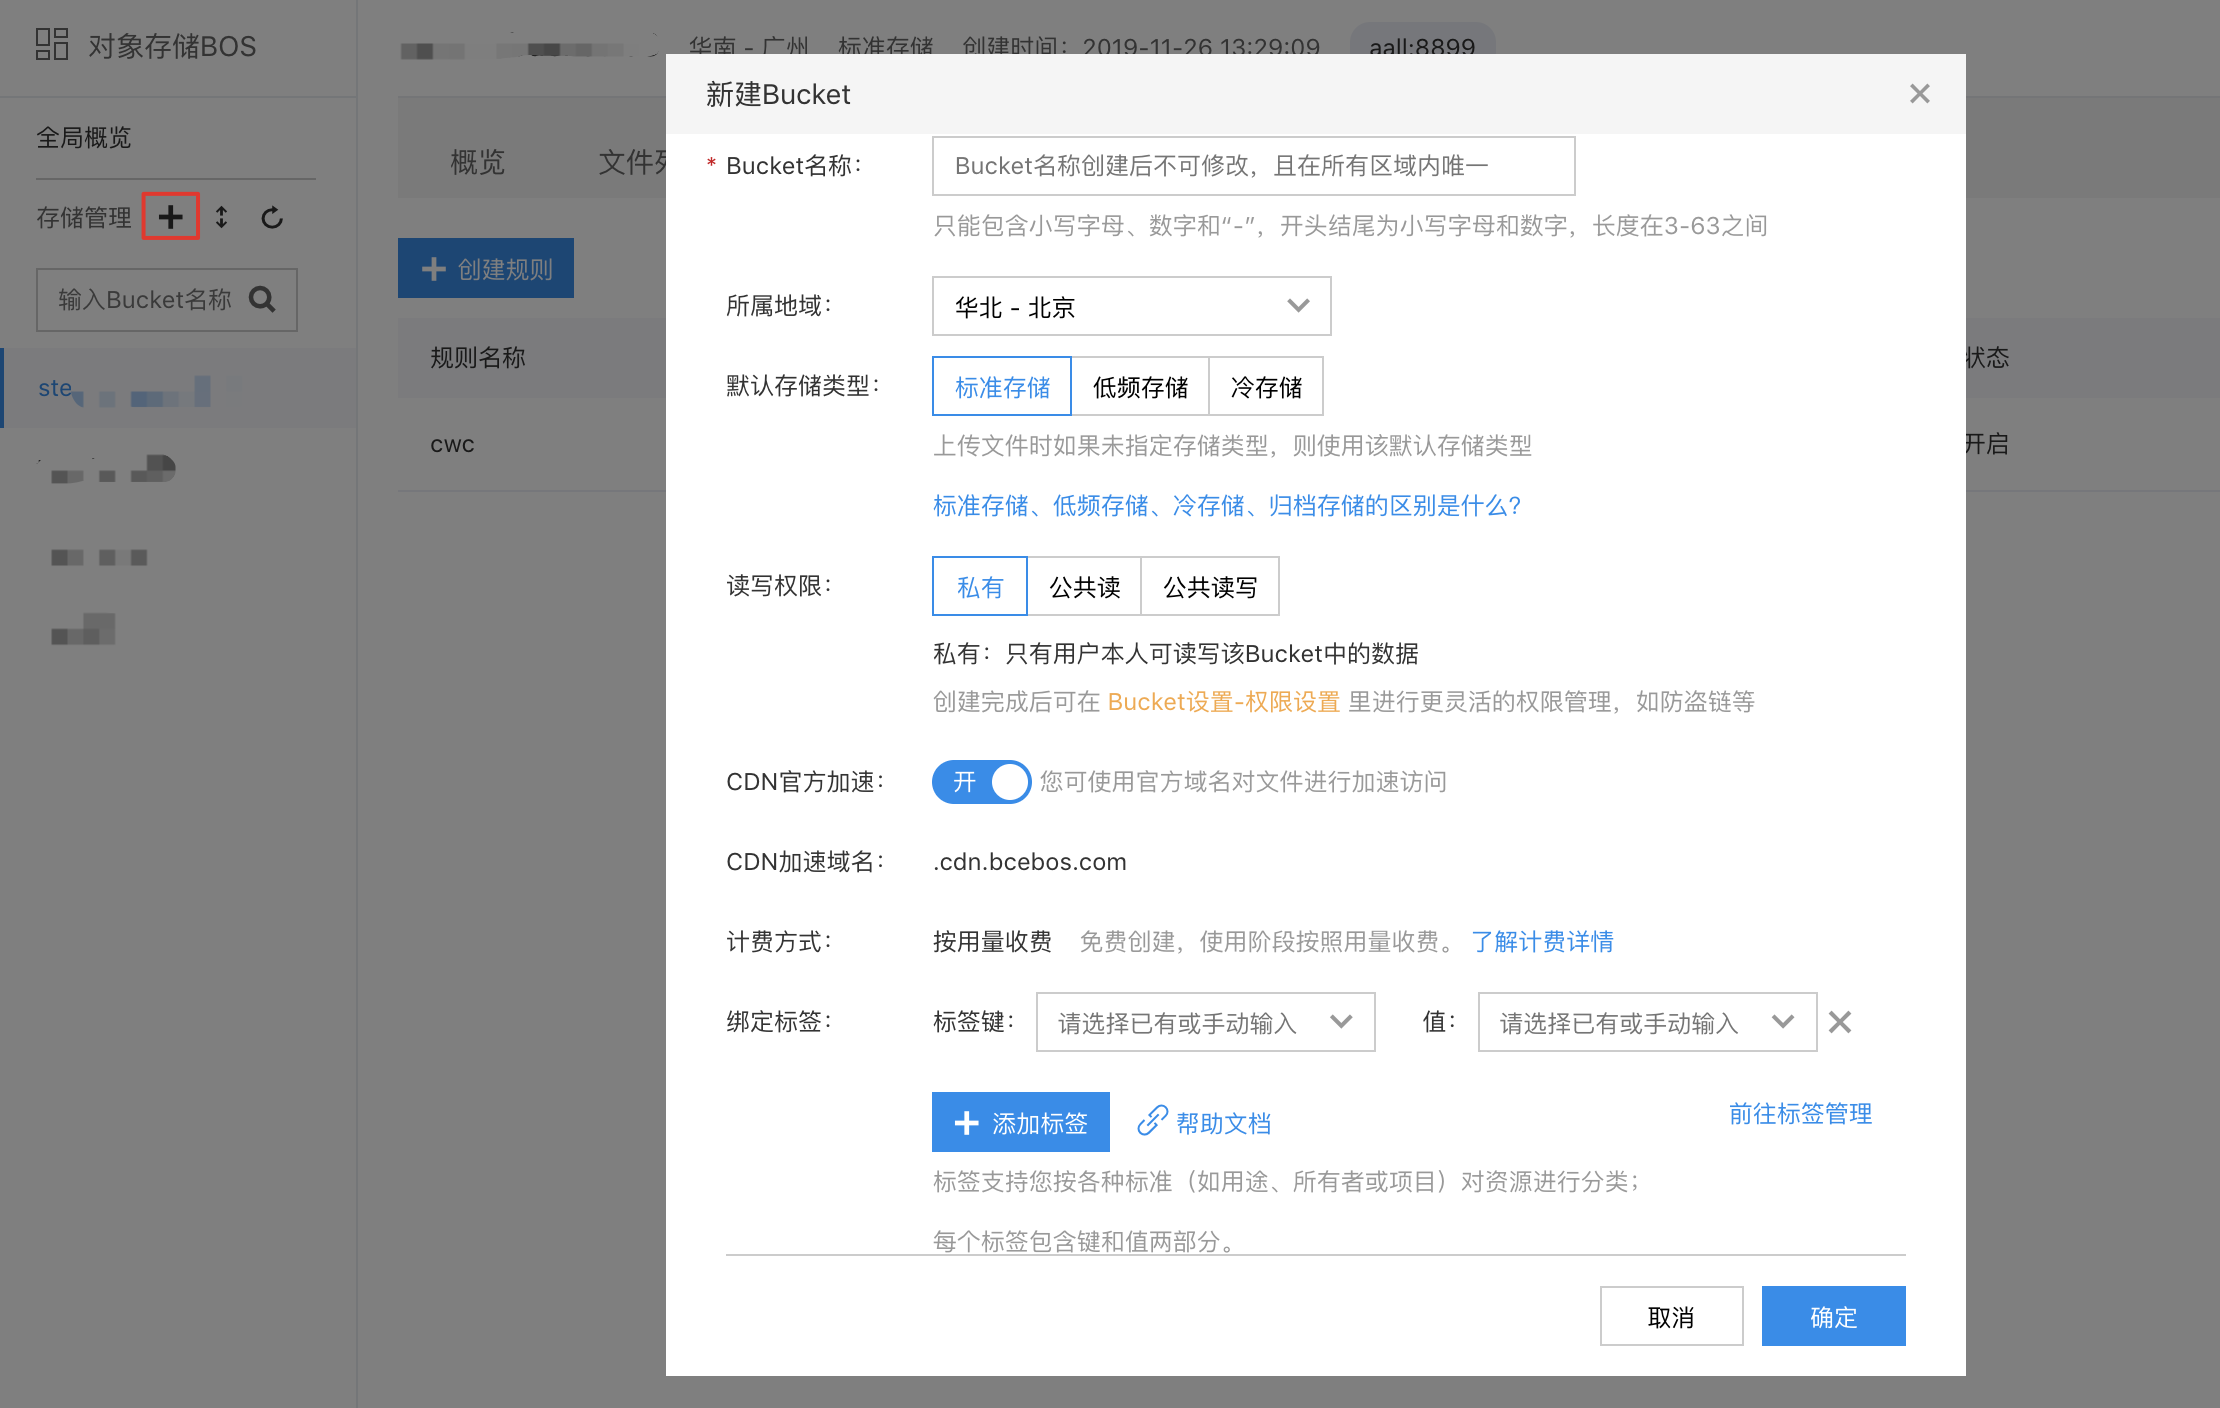
- In the left navigation bar of the console, find the bucket list and click the +button (Create Bucket button), then follow the prompts in the pop-up box to create a bucket.
| Configuration items | Configuration description |
|---|---|
| Bucket name |
|
| Region |
|
| Default storage class |
|
| Read-write permissions |
|
| CDN official acceleration |
|
| Tag binding |
|
| Other descriptions |
|
- After clicking OK, the bucket is created successfully. Next, you can upload files to the bucket.
Create a bucket by the API
API: [PutBucket](BOS/API Reference/Bucket-Related Interface/Basic Operations/PutBucket.md).
Create a bucket by using SDK
- JAVA SDK: [Create Bucket](BOS/SDK/Java-SDK/Bucket management/Create Bucket.md)
- Python SDK: [Create Bucket](BOS/SDK/Python-SDK/Bucket management/Create Bucket.md)
- PHP SDK: [Create Bucket](BOS/SDK/PHP-SDK/Bucket management.md#Create Bucket)
- C# SDK: [Create Bucket](BOS/SDK/C-Dotnet-SDK/Bucket management.md#Create Bucket)
- JavaScript SDK: [Create Bucket](BOS/SDK/JavaScript-SDK/Bucket management.md#Create Bucket)
- Android SDK: [Create Bucket](BOS/SDK/Android-SDK/Bucket management/Create Bucket.md)
- iOS SDK: [Create Bucket](BOS/SDK/IOS-SDK/Bucket management/Create New Bucket.md)
- Ruby SDK: [Create Bucket](BOS/SDK/Ruby-SDK/Bucket management/Create Bucket.md)
- Go SDK: [Create Bucket](BOS/SDK/GO-SDK/Bucket management.md#Create Bucket)
- C++ SDK: [Create Bucket](BOS/SDK/C++-SDK/Bucket management/Create Bucket.md)