
Image Service
Overview
BOS image processing is a service based on BOS’s core storage capabilities, offering flexible, diverse, and real-time processing features for images. Simply upload the original image to BOS, add processing parameters to your request, and instantly receive the processed image. Supported features include thumbnail generation, cropping, format conversion, rotation, and adding text/image watermarks. Images are processed and returned in real-time.
Images stored in BOS can be processed through the BOS console or API. Every bucket created in BOS includes built-in image processing capabilities by default, eliminating the need for additional activation.
For the workflow of the image processing service, please refer to Introduction to Data Processing.
For billing details related to data processing in the image processing service, please refer to Data Processing Fees.
Image processing protocols
BOS image processing currently supports two versions of image processing protocols: V1.0 and V2.0. The V2.0 version supports more image processing features and uses different command invocation methods compared to V1.0. Therefore, it is recommended that you use the V2.0 version. V1.0, as an older version, will be discontinued in the future. However, both versions are currently available, and the system will automatically recognize and be compatible with both protocol versions.
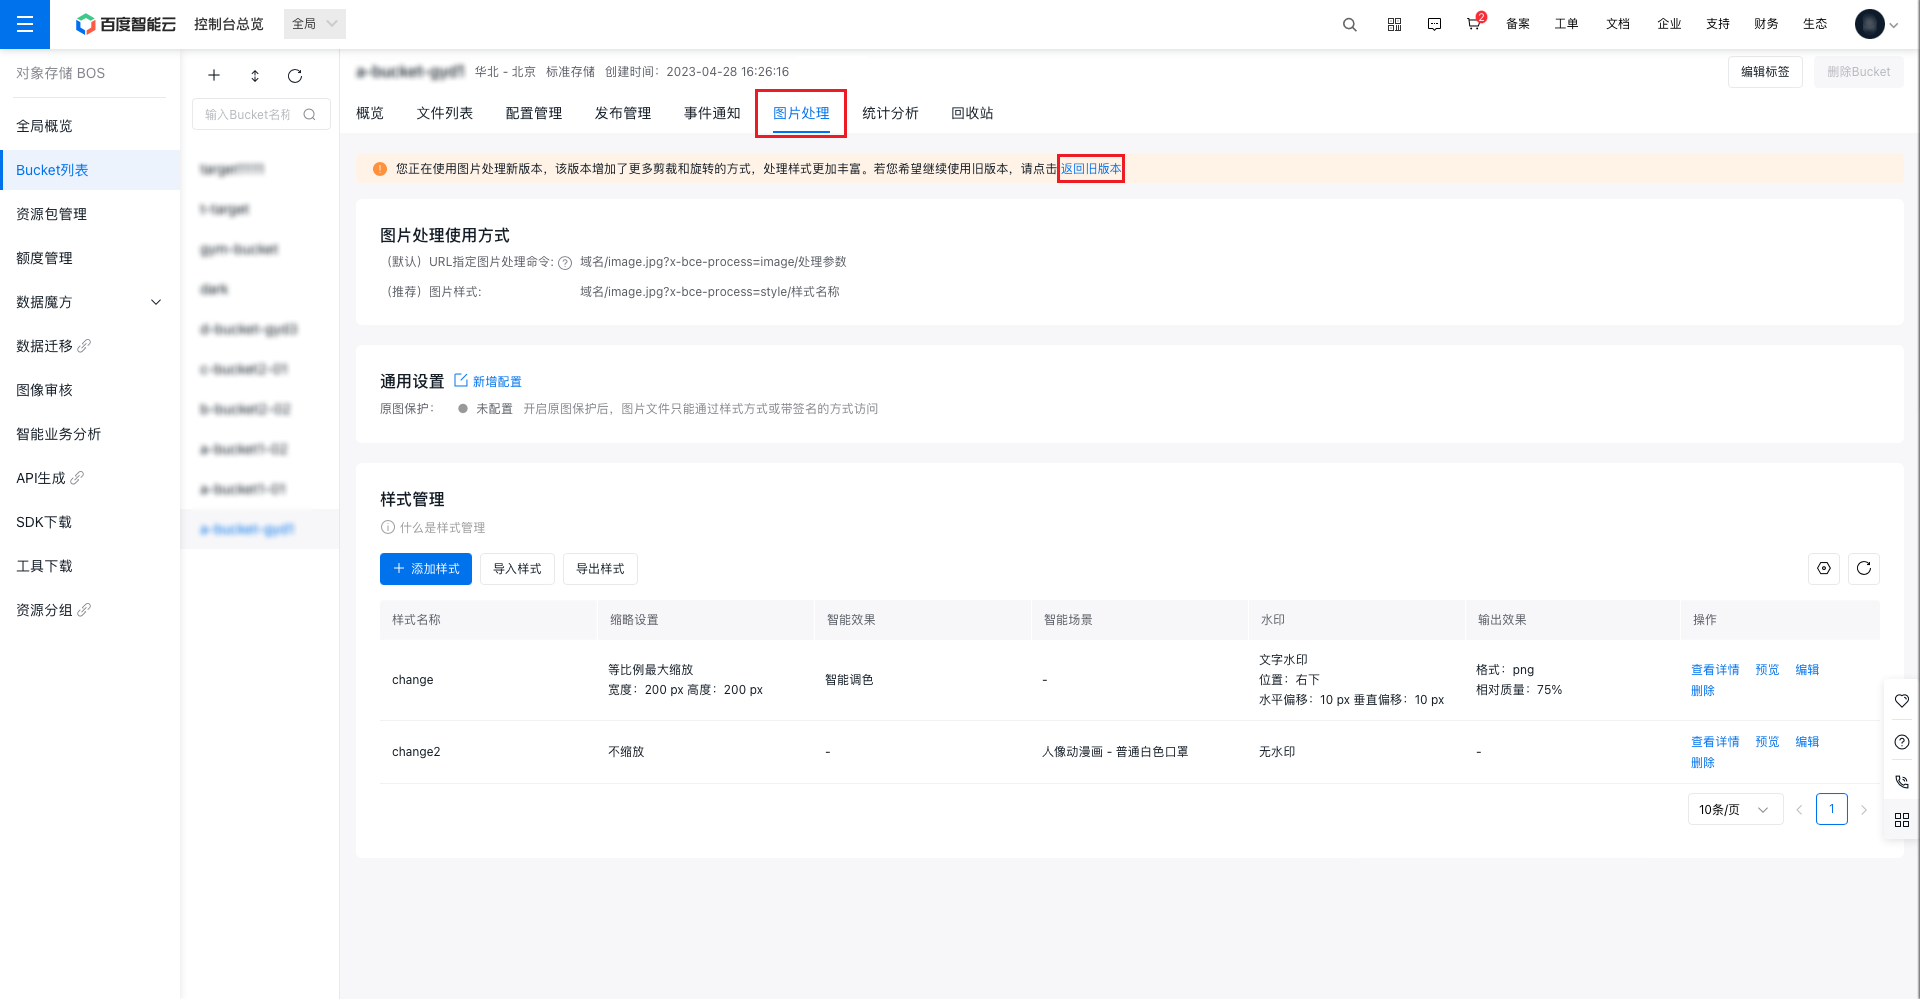
After logging in to the BOS console, you can switch between the two versions in the Image Processing tab of a Bucket.
Accessing the image processing service via image styles
Instructions for image style operations
1. Sign in to the Baidu AI Cloud official website.
If you have not registered an account, you must first register an account.
2. Access the BOS console
From the page's left navigation bar, select Storage & CDN - Baidu AI Cloud Object Storage (BOS) to access the BOS console.
3. Select the bucket where the original image is stored and access image processing
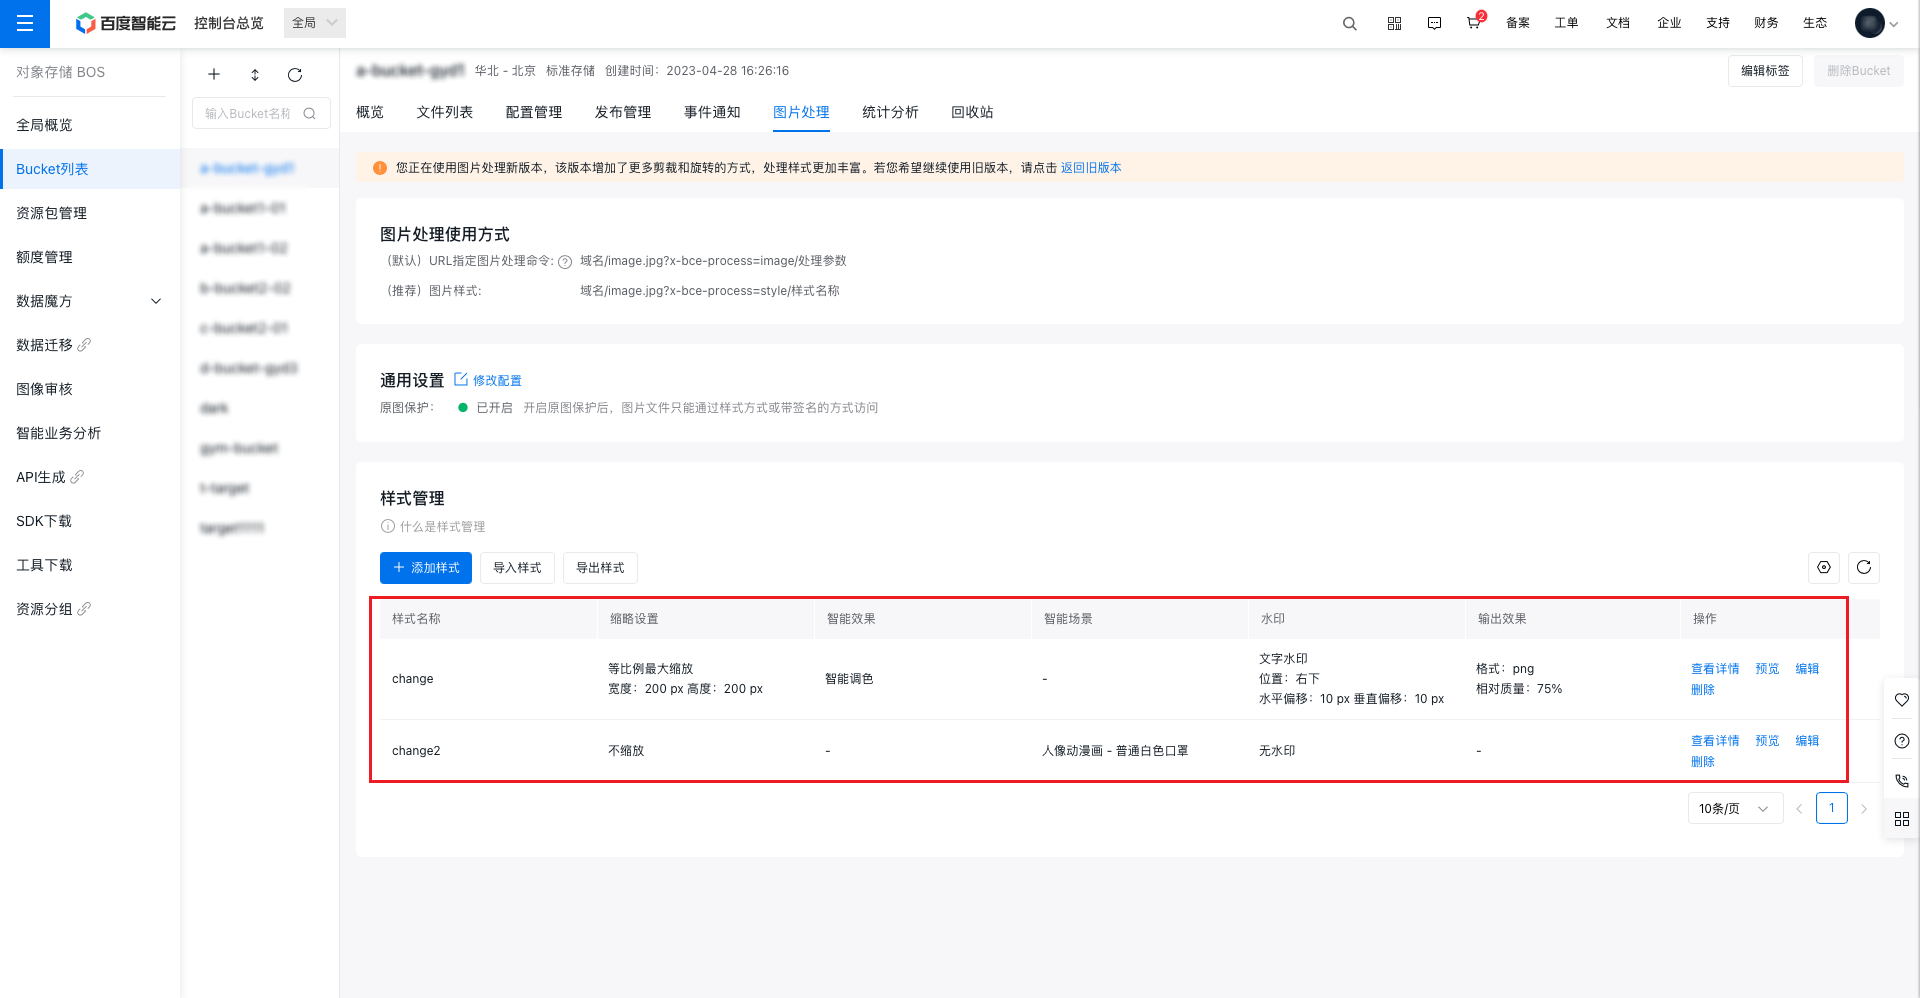
In the bucket list on the left, choose the target bucket and navigate to the image processing page. Here, you can create new image styles or review existing ones in the list.
4. Add a style
Click the Add Style button to enter the style addition page. For instructions on setting styles for the Image Processing Protocol V2.0, refer to Image Processing Protocol V2.0. For instructions on setting styles for the Image Processing Protocol V1.0, refer to Image Processing Protocol V1.0.

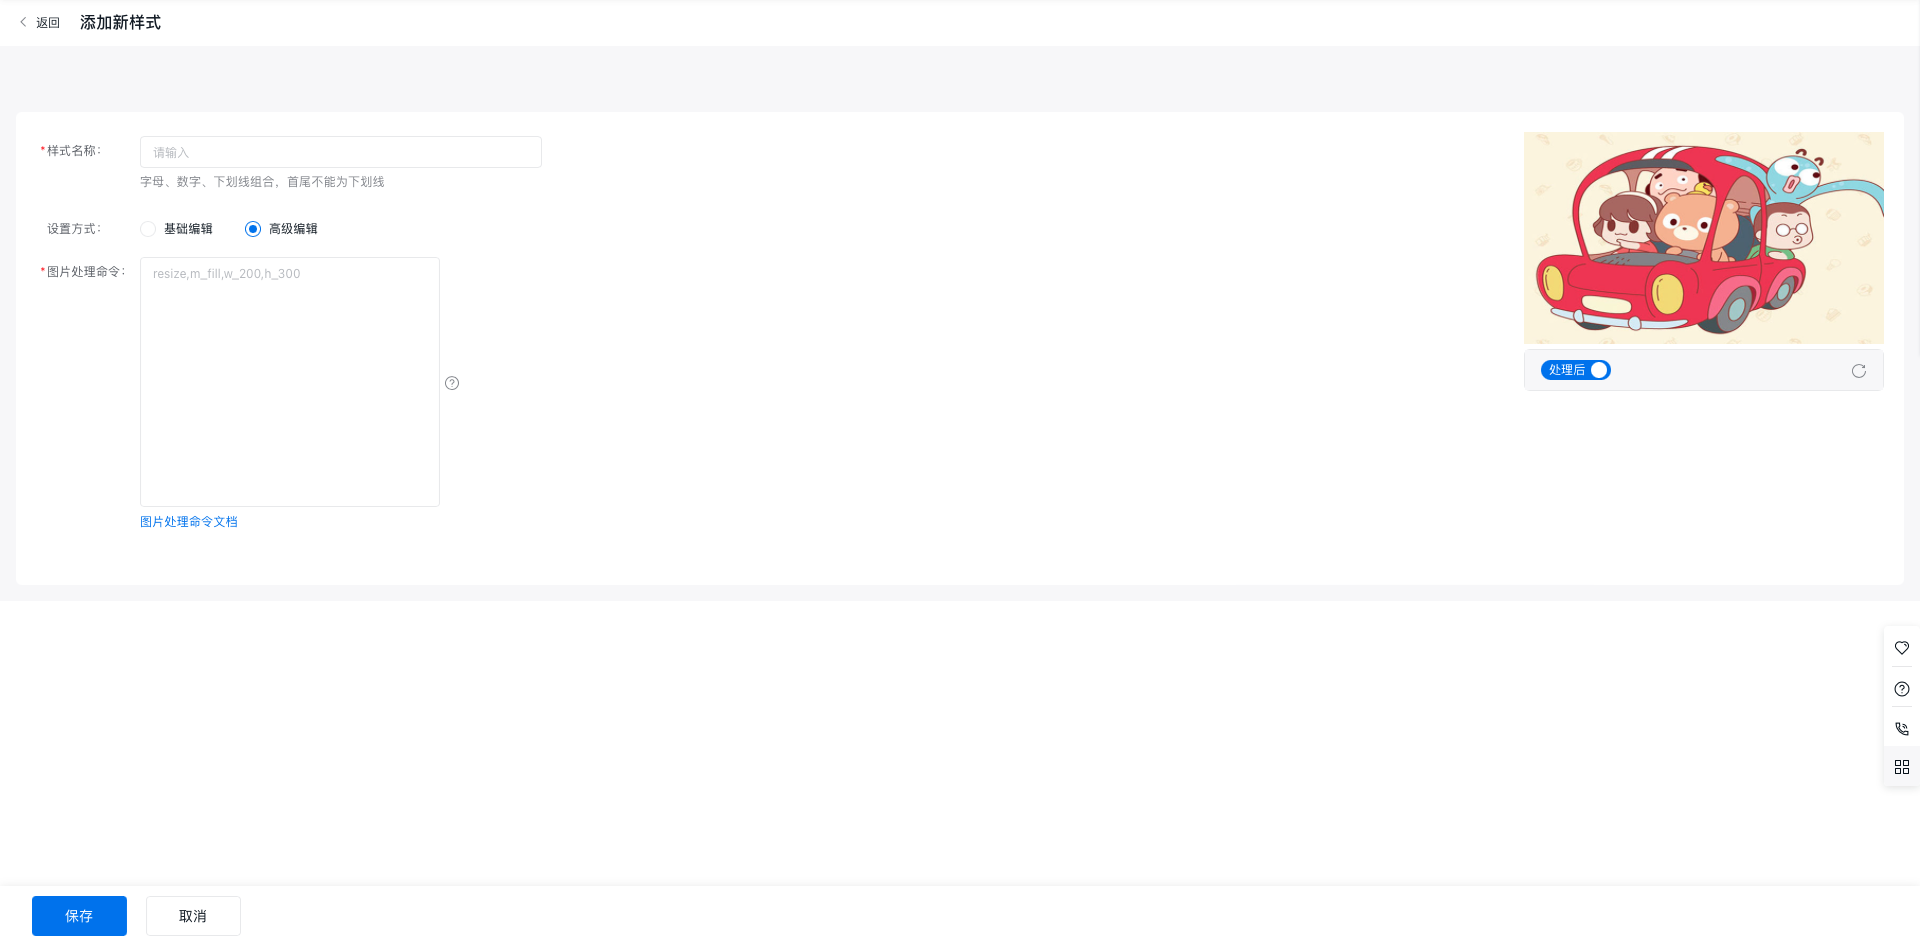
You can edit styles in the console via two methods: Basic Editing and Advanced Editing. Basic Editing: Use a graphical interface to create or modify styles. Advanced Editing: Customize image styles by entering command lines directly.
- Under Basic Editing, you can name your style and configure thumbnail settings.
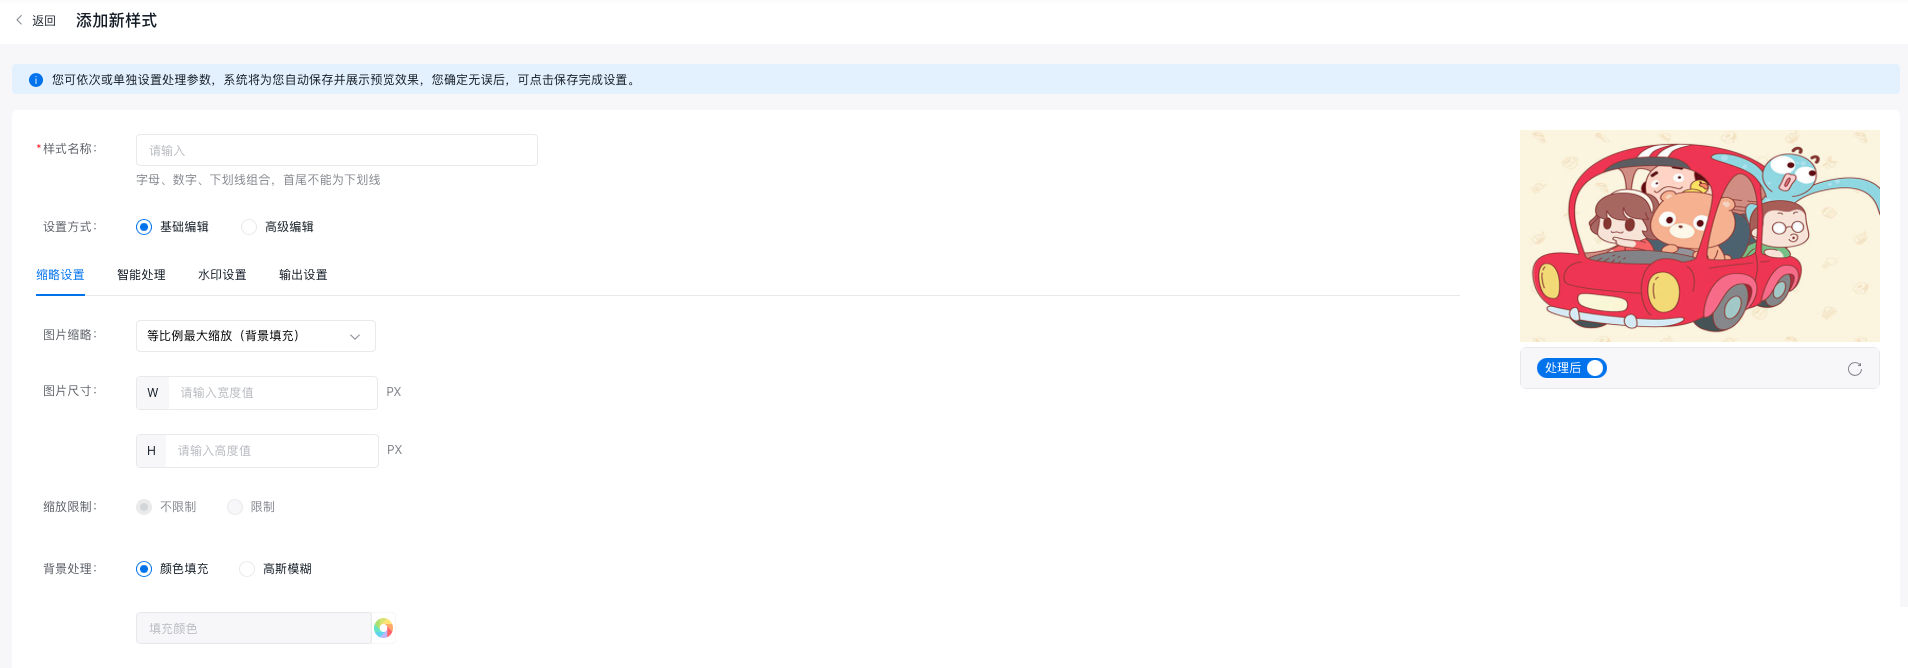
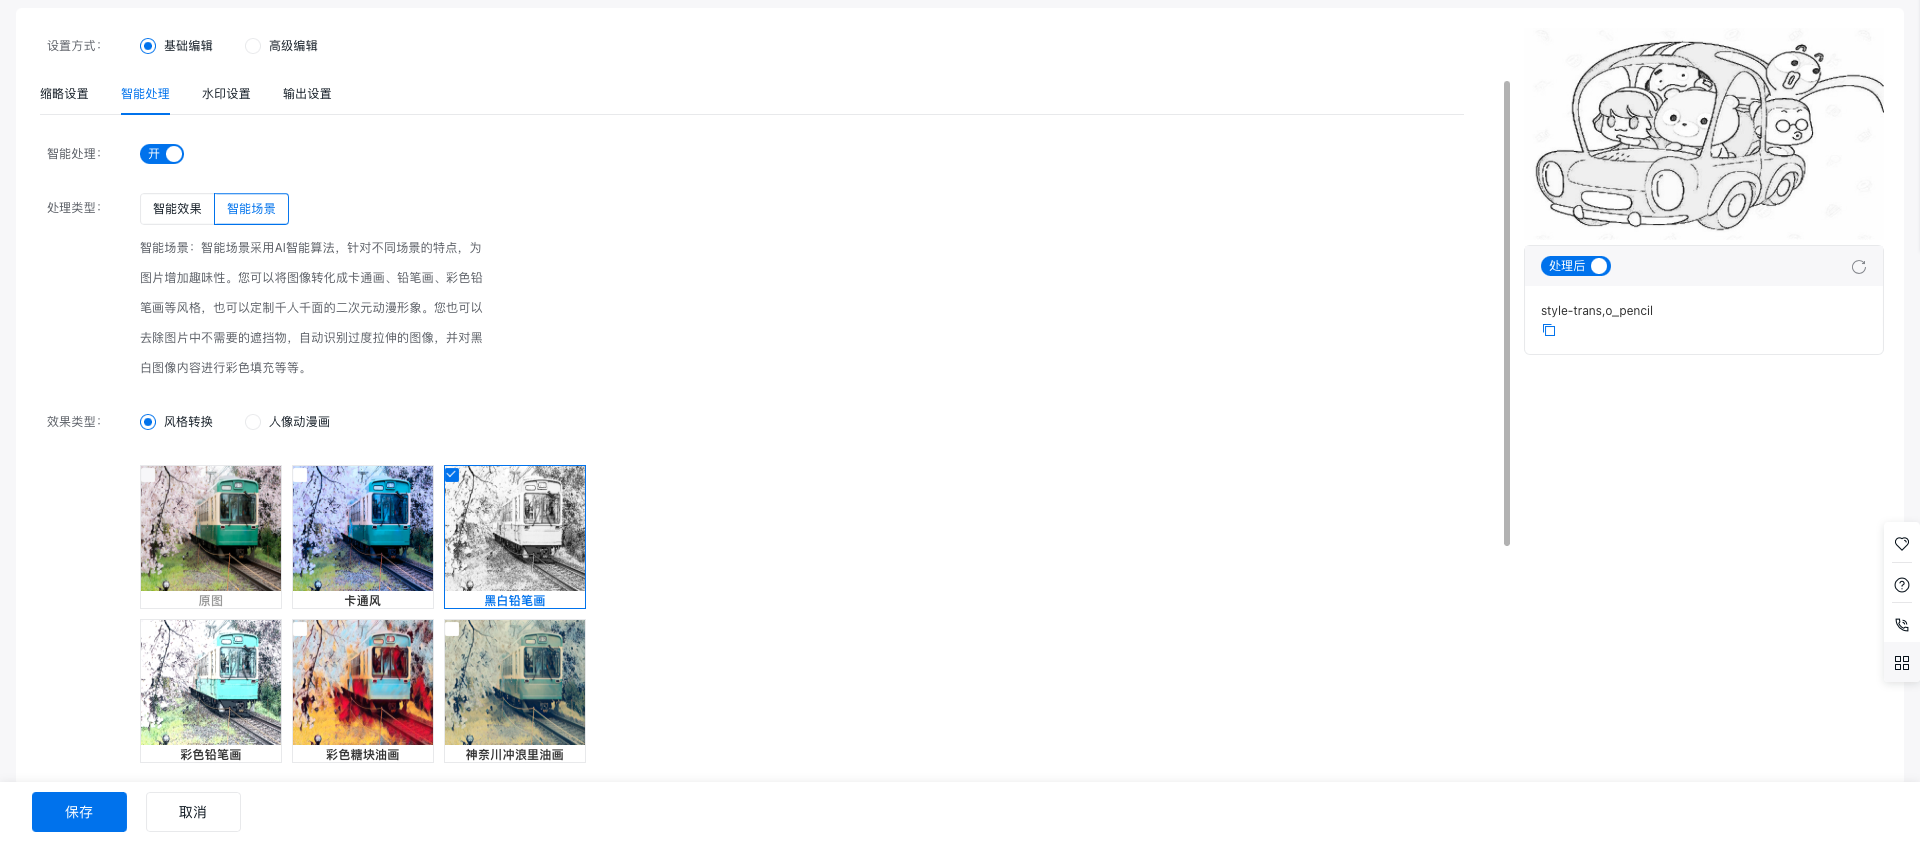
- Adjust watermarks, set output parameters, and enable intelligent processing.


- For intelligent processing, the supported types include Intelligent Effects and Intelligent Scenarios.
Note: Intelligent effects and intelligent scenarios cannot be applied simultaneously. The last selected processing type takes precedence. You can preview the intelligent processing effect on the sample image displayed on the right.
- Under advanced editing, you can set image styles by directly entering command lines. For detailed operations on image service command lines, refer to Image Processing Protocol V2.0 and Image Processing Protocol V1.0.
5. Style list
After a style is added, it will appear in the Style Management List of the Image Processing page. In the Operations column, you can select View Details to check the command details corresponding to the style. SelectPreview to preview the style in a new page. SelectEdit or Delete to modify or delete the style.
Note:
- Styles created with Image Processing Protocol 2.0 are listed only in the new protocol section, while styles created with Protocol 1.0 appear in the old protocol section. These styles are not displayed concurrently. Switch between protocols using the toggle at the top of the page to view them separately.
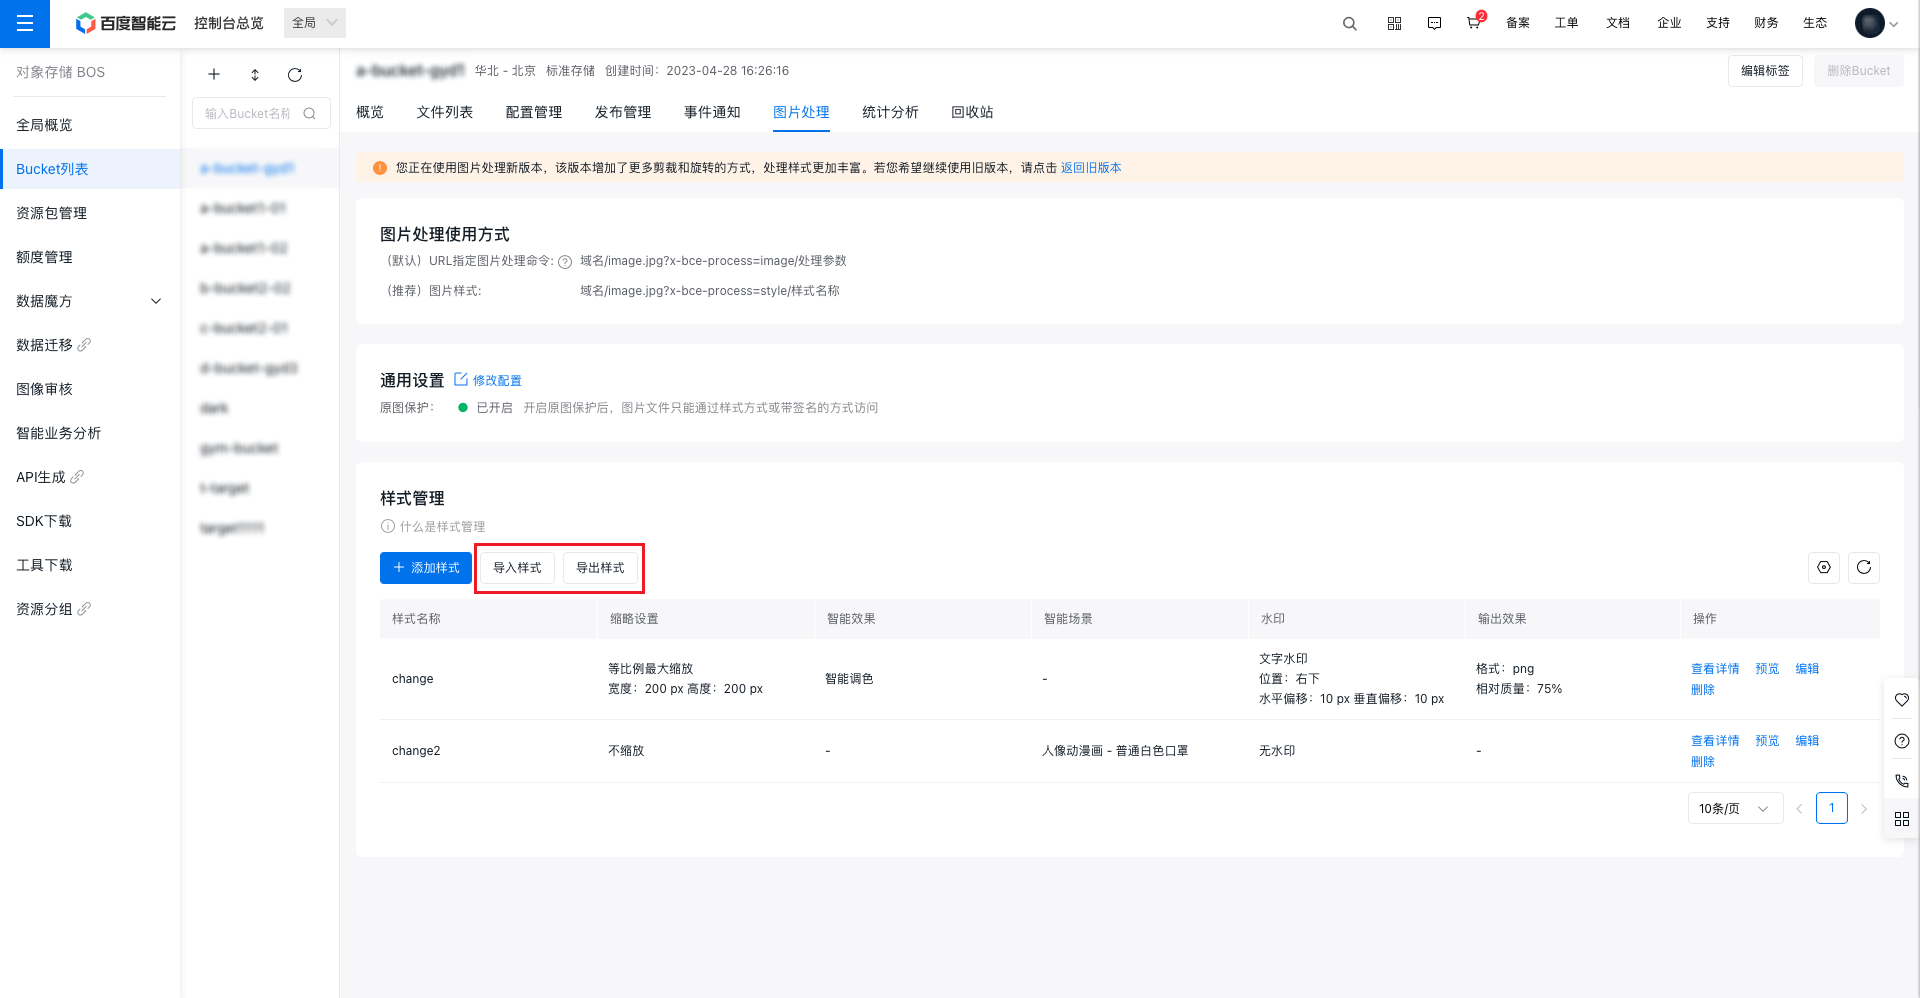
6. Style import and export
After adding styles, click Export Styles to export all current styles in bulk. BOS will generate a .txt file which you can save locally or share with other accounts.
If you have an existing style file, click Import Styles, select the .txt file, and BOS will automatically add the styles to your list.
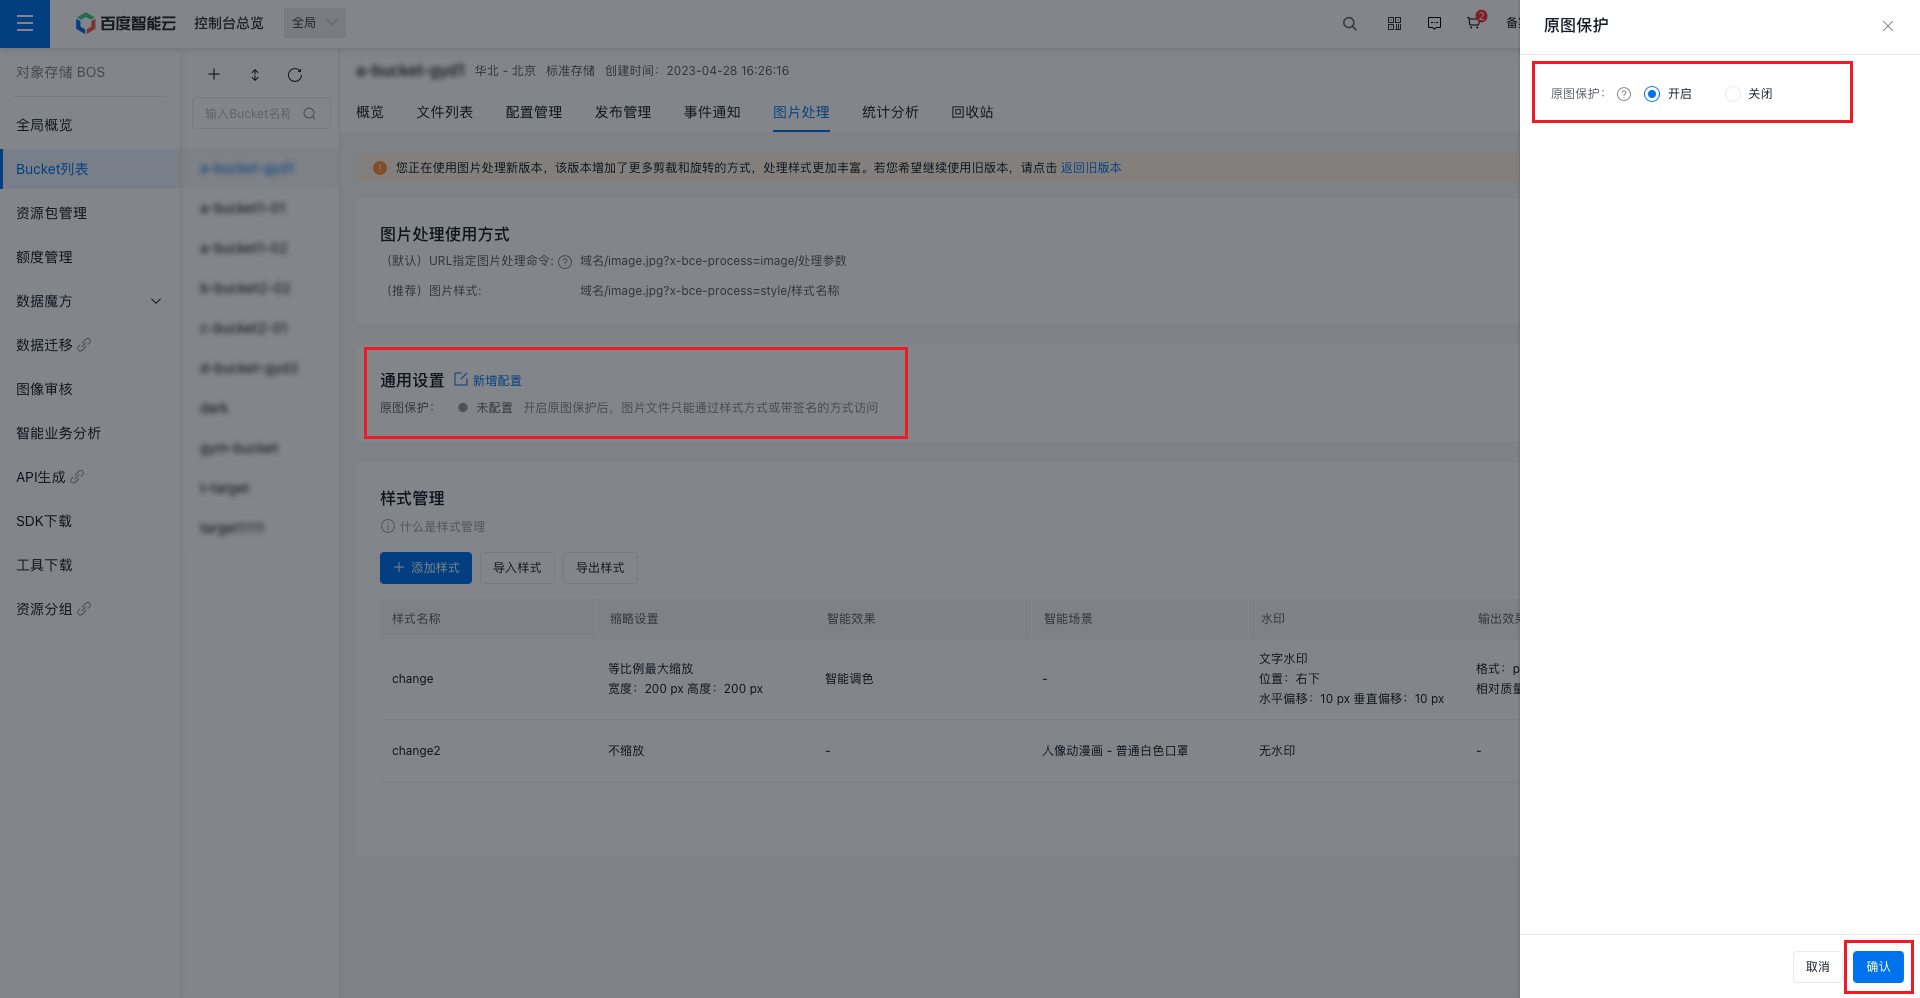
Original image protection
- Original image protection ensures the security of original images and prevents unauthorized access or malicious requests.
- Once original image protection is activated, direct access to image files within the bucket using the original file link is disabled. You can only access processed images via URLs with a style name or retrieve the original file via a URL with a signature.
- This feature is designed for scenarios where access to original images via processed image links is undesired, such as preventing image theft or blocking malicious usage. Enable original image protection for specific buckets to enhance the security of your original image files.
Example: Suppose you have set a watermark style named “stylename”, and the source file link is: https://a-bucket1-01.bj.bcebos.com/BOS.png. After enabling original image protection, you can only access the image file in the following two ways:
1. Access the processed image: Use a file URL with the style name. The format is
https://bucket.bj.bcebos.com/BOS.png?x-bce-process=style/stylename
2. Access the original image: Use a file URL with a signature. The format is https://bucket.bj.bcebos.com/BOS.png?authorization=
Note: If the image requester does not verify an authorized signature, they will only be able to access processed images via a “style-based URL.” Access to the original image or access via a “command-based URL” will be denied.
To enable original image protection, go to Image Processing - General Settings - Modify Configuration, select Enable, and confirm.
Note: Archived objects that have not been restored will not trigger image processing; restored archived objects can be processed normally.