
Configuring BOS Multi-User Access Control
Overview
Identity and Access Management helps users manage resource access permissions within cloud accounts. It caters to various enterprise roles by granting different staff levels access to specific product permissions. For enterprises requiring multi-user collaboration for resource operations, using Identity and Access Management is recommended.
Application scenarios
- Medium and large enterprise customers: Authorization management for multiple employees in the enterprise;
- Technology-oriented vendor or SAAS platform provider: Resource and permission management for proxy clients;
- Small and medium-sized developers or small enterprises: Add project members or collaborators for resource management.
Create IAM user
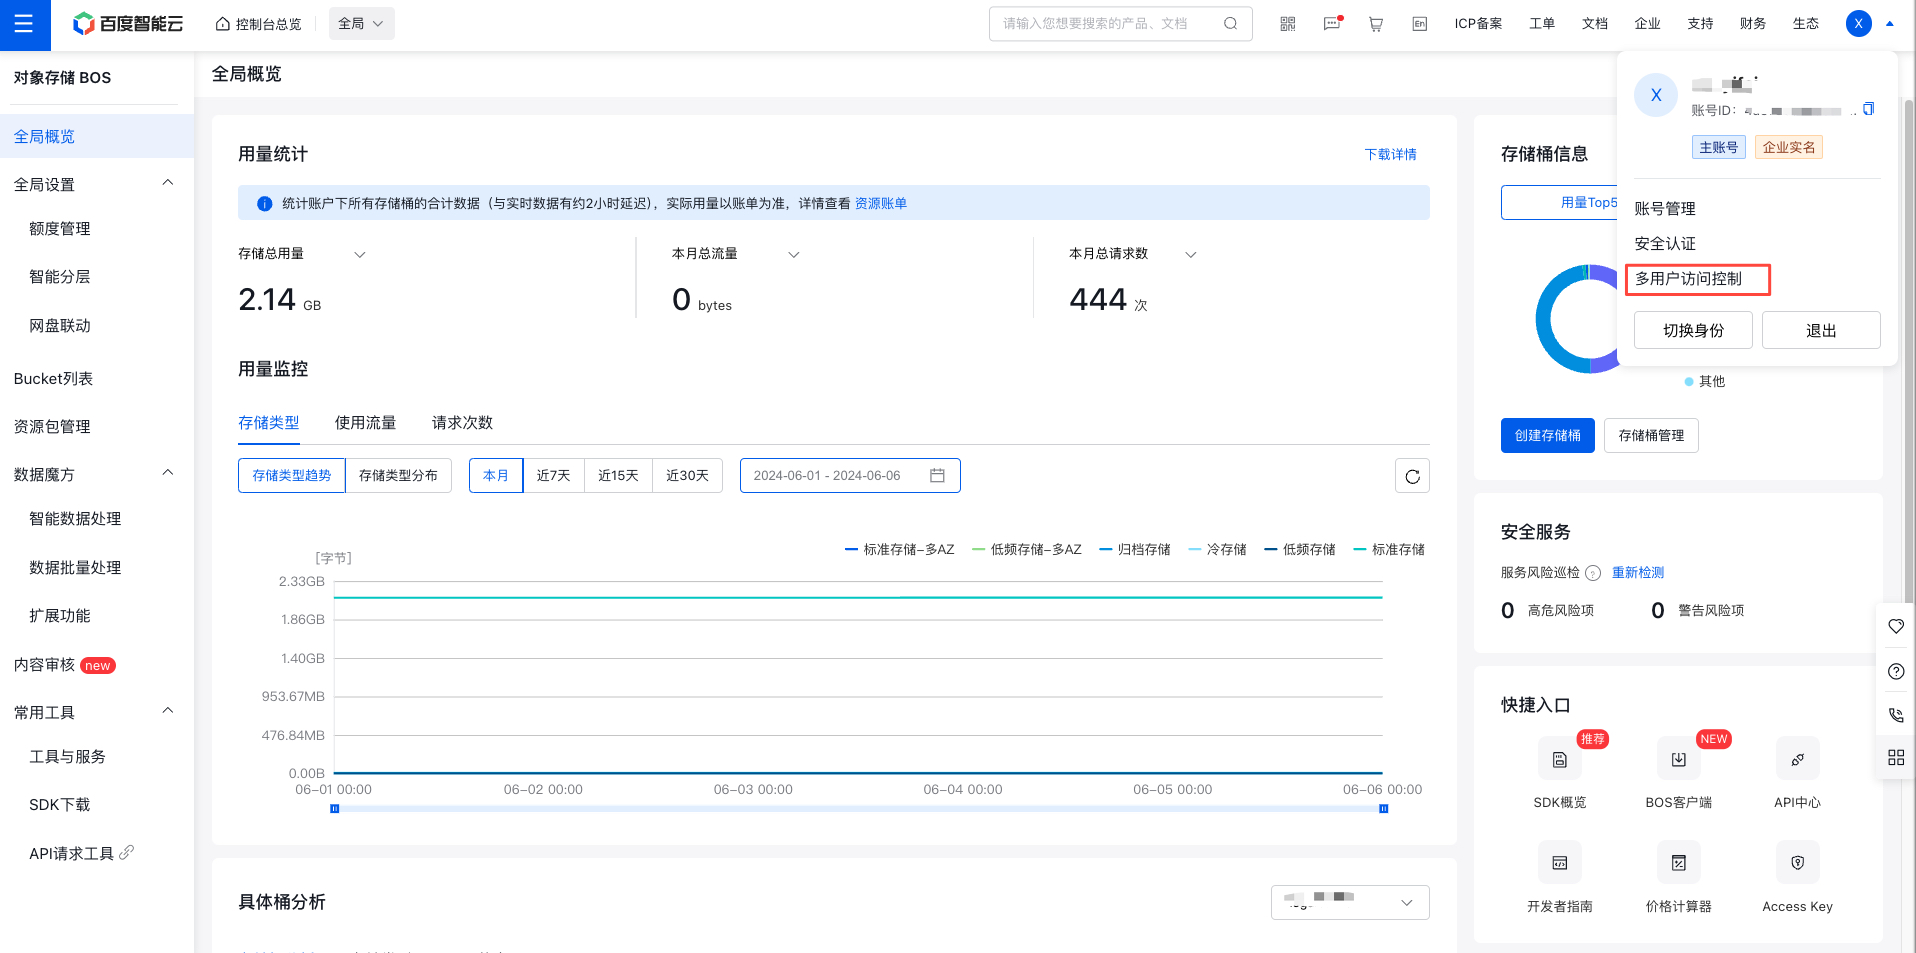
- After logging into the root account, select Identity and Access Management from the console to access the user management page.
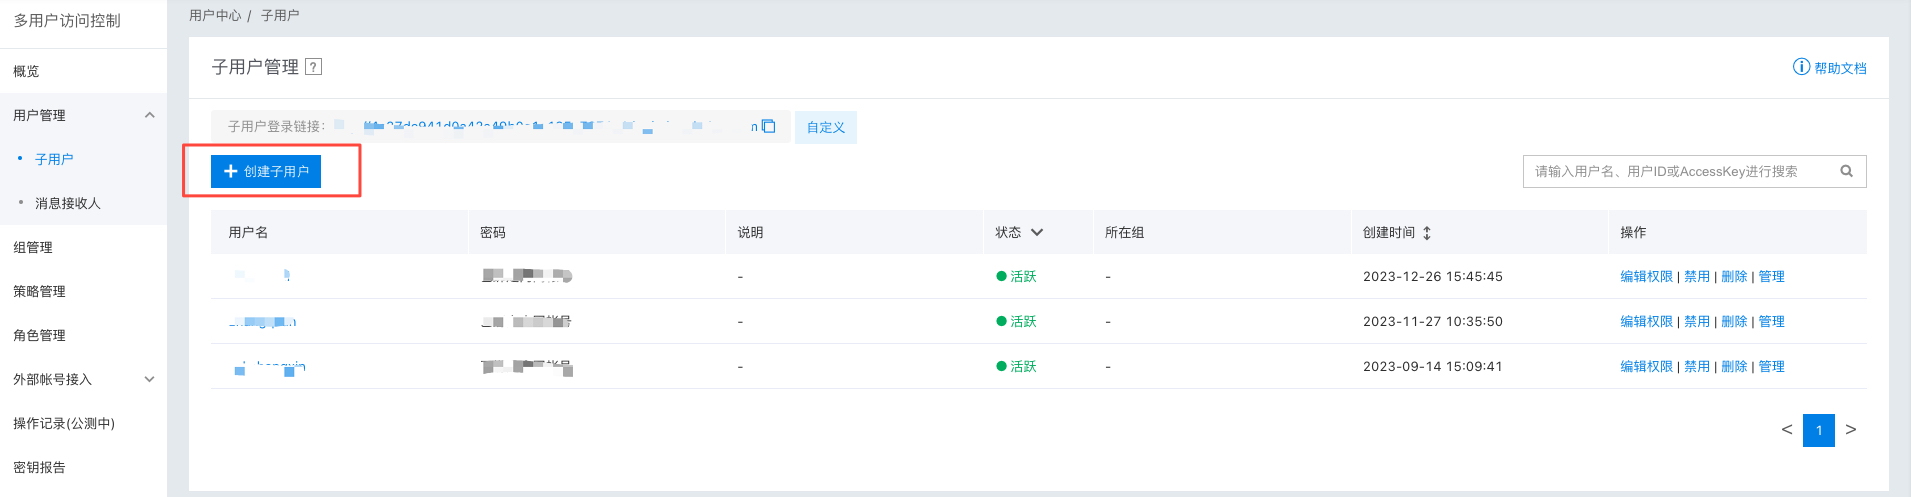
- Click on User Management in the left navigation bar, then click Create IAM User on the User Management - IAM User list page.
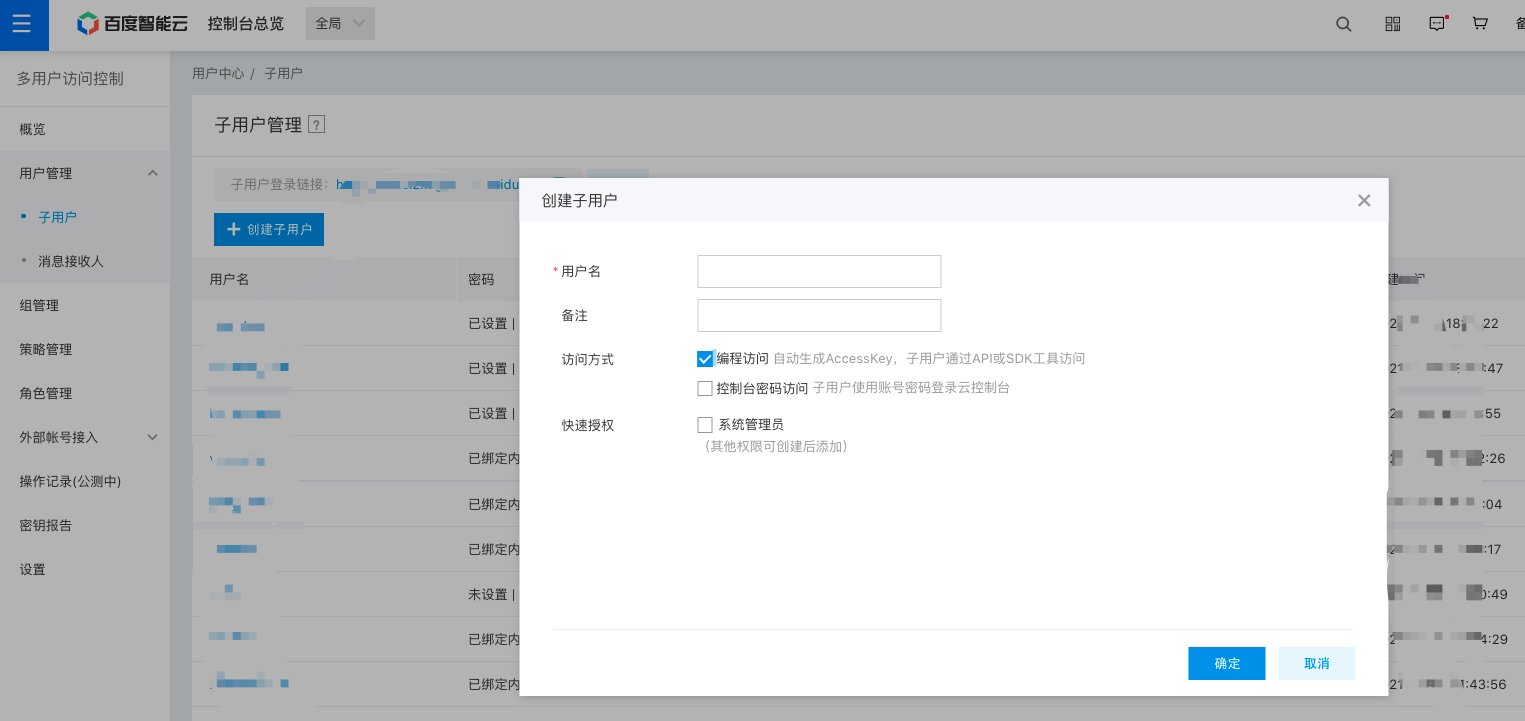
- In the Create IAM User dialog box that appears, enter the User Name, confirm the details, and return to the IAM User Management List page to view the newly created IAM user. (For sub-accounts that need to upload files, it is recommended to enable “Programmatic Access”; otherwise, file uploads may fail with the error “Authentication Failed.”)
Configuration Policy
Strategy type
BOS supports two types of policies: system policies and custom policies.
- System policy: A pre-defined set of permissions provided by the Baidu AI Cloud system for resource management. These can be directly assigned to IAM users, but users cannot modify them.
- Custom policy: A user-created, more granular set of permissions for resource management, allowing specific permissions to be configured for single instances. This provides flexibility to address the unique permission management needs of different users.
System policies
System policies include two types: BosFullAccess and BosListAndReadAccess. Their permission scopes are detailed as follows:
| Policy name | Permission | Permission scope |
|---|---|---|
| BosFullAccess | BOS management permissions | Management permissions include APIs such as READ, WRITE, and LIST, as well as actions like PutBucketACL, GetBucketACL, PutBucketCors, GetBucketCors, DeleteBucketCors, PutBucketLogging, GetBucketLogging, and DeleteBucketLogging. |
| BosListAndReadAccess | BOS read-only permissions | Read-only permissions include APIs like ListObjects, ListMultipartUploads, GetBucketLocation, HeadBucket, GetObject, GetObjectMeta, and ListParts. |
Custom policy
The primary user can implement instance-level permission control by adding custom policies via Policy Management - Create Policy. There are three methods to add a custom policy: Create via Visual Editor, Create via Tag, and Create via ACL. Users can modify the policy content according to specific permission requirements. For detailed configuration methods, refer to [Creating a Custom Policy](IAM/Operation guide/Permission Policies/Managing IAM Policies.md#Create custom policy).
Policy creation process
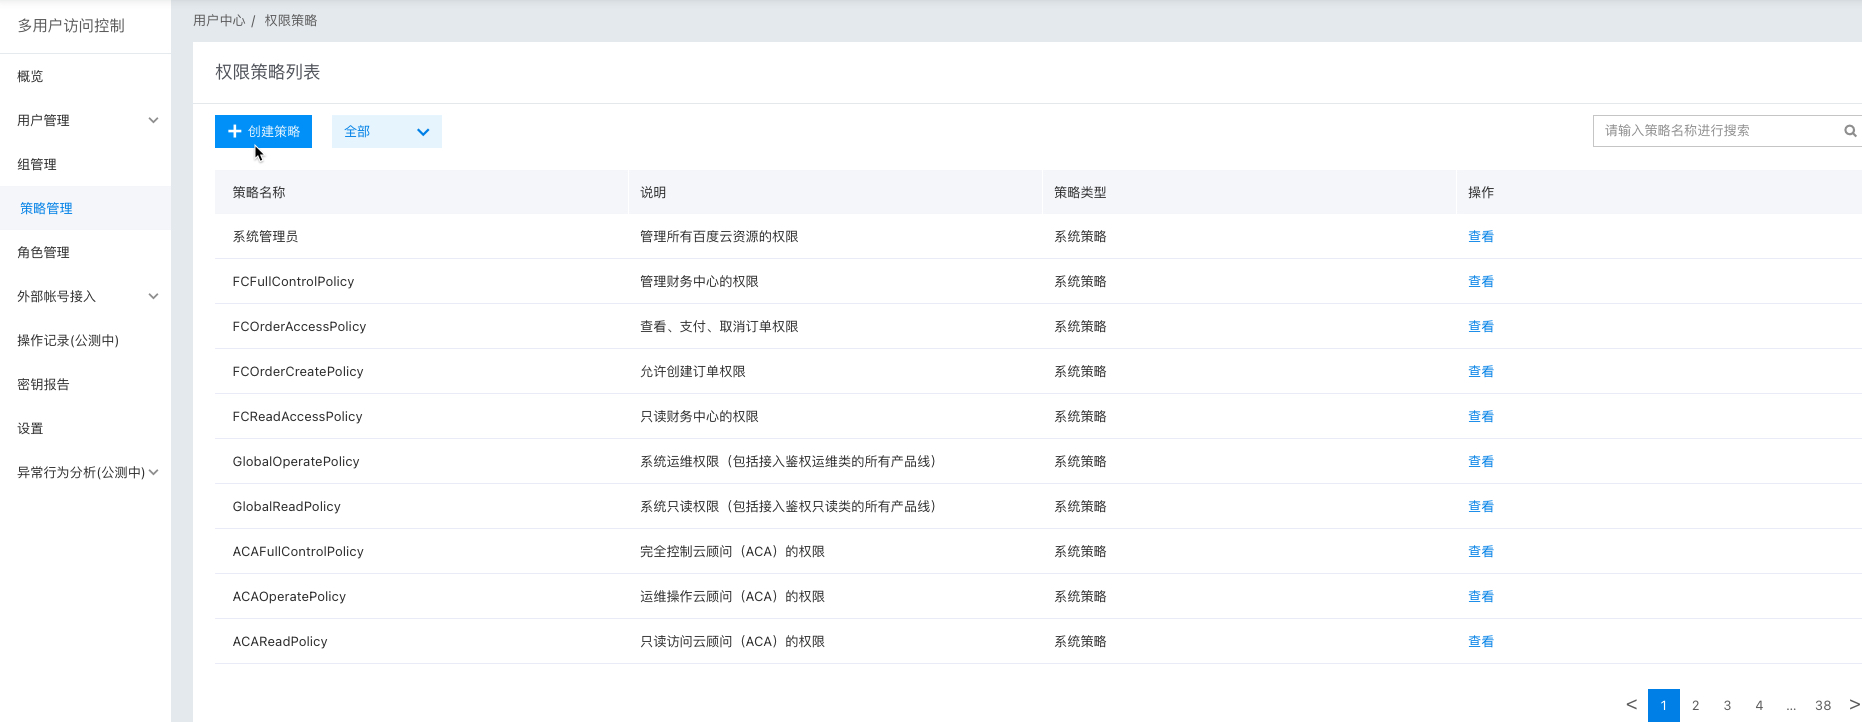
1. Click create policy
Select Policy Management from the page's left side, then click Create Policy on the newly opened page.
2. Select a policy creation method
You can either Create via Visual Editor or Create via Tag. To create a policy for instances associated with a particular tag, choose Create via Tag. If no tag-based policy is needed, opt for Create via Visual Editor.
3. Fill in basic policy information
On the policy creation page, enter the desired policy name. In the Description field, include notes (e.g., applicable instances, assigned IAM users, or intended use cases) to differentiate this policy from others.
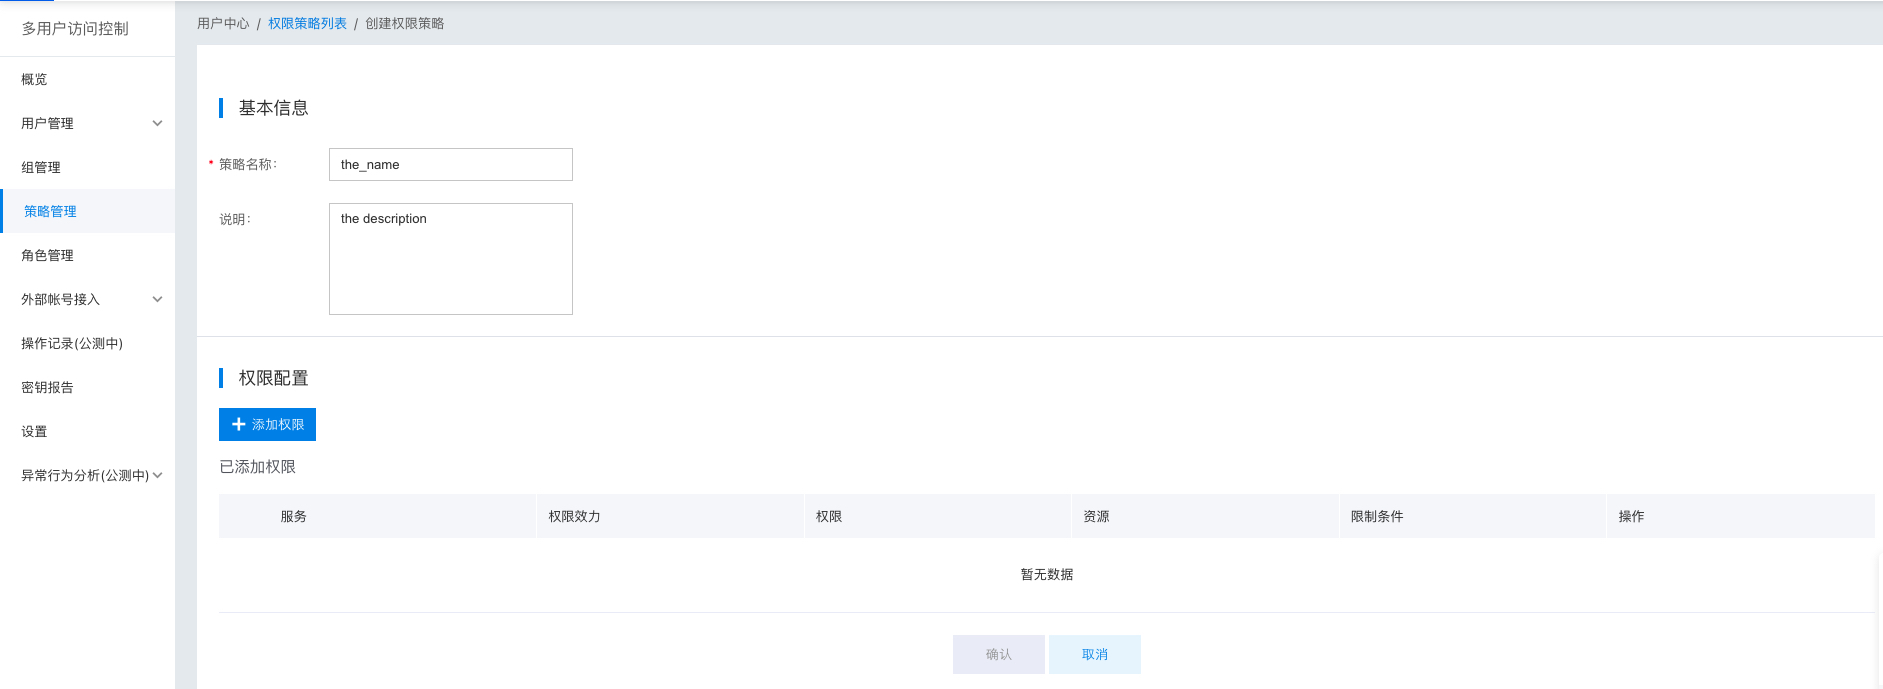
4. Configure policy permissions
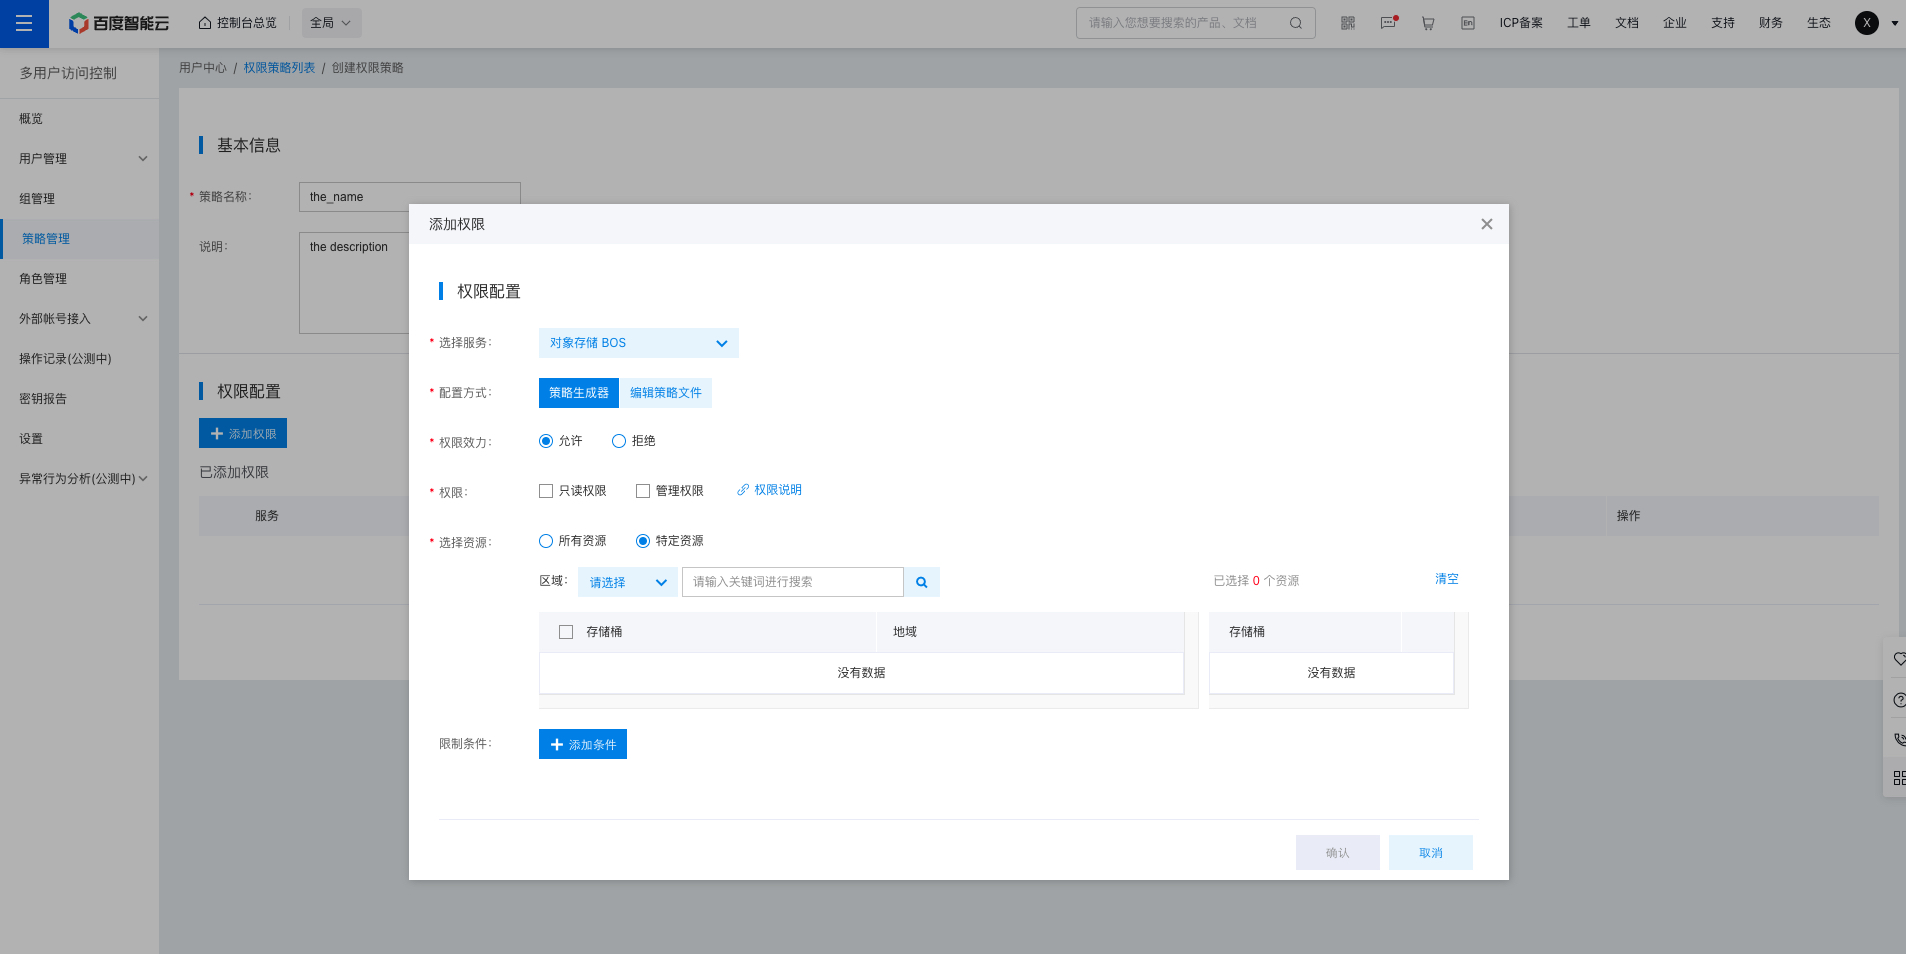
Once the basic details are filled out, configure the permissions to include in the policy.
- Start by selecting the product or service to which the policy will apply. For instance, if the policy should apply to BOS, select Baidu AI Cloud Object Storage (BOS) from the service list.
- Choose the policy configuration method. Visual Editor allows you to add pre-existing system permissions to the policy. Policy file requires you to edit the ACL permission policy. For detailed syntax, refer to [Policy Syntax](IAM/Operation guide/Permission Policies/ACL.md). For detailed explanations of BOS policy files, see [Policy File Description](BOS/Developer Guide/Data Security/Permission control/IAM primary-IAM user access control.md#Policy file description); you can also use the BOS ACL Editing Tool to obtain policy templates and customize policy content.
- If using the Visual Editor, specify whether the permissions should be “Allow” or “Deny.” “Allow” permits authorized users to perform operations defined by the permissions, while “Deny” prohibits users from performing those operations.
- Select the type of permission: Decide whether the policy should include “Read-Only Permissions” or “Management Permissions.” To understand the differences between the two, refer to the “System Policies” section above.
- You can also define the applicable resources. In BOS, you can specify the particular bucket(s) that the policy will apply to. If no bucket is selected, the policy will be applied to all buckets by default.
- Lastly, set the policy’s time constraints. Decide whether the policy should become effective after a certain time or expire before a certain time.
User Authorization
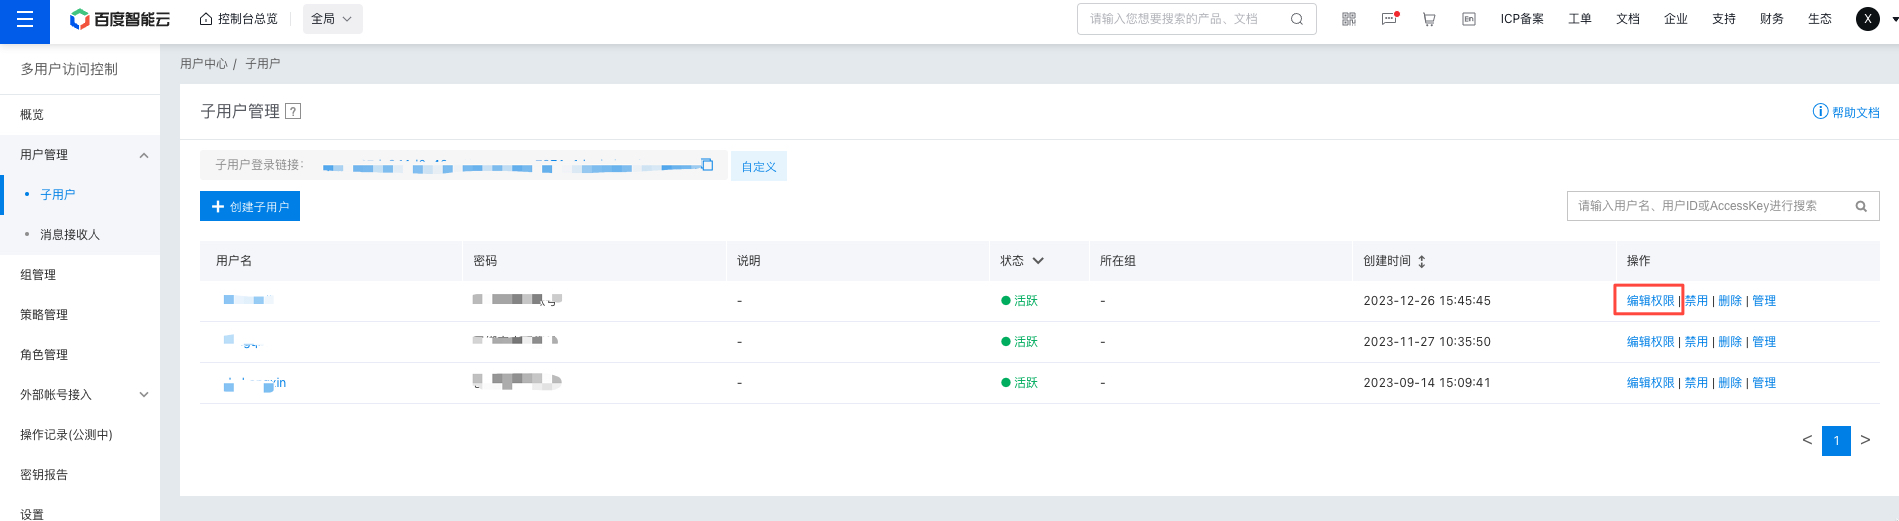
Once the IAM user has been created and the policy configured, you can assign the policy to the IAM user. After the assignment, the IAM user’s access to the primary user’s resources will be restricted by the permissions defined in the policy.
On the User Management - IAM Users list page, locate the IAM user to be authorized and select "Add Permissions" in the Operations column.
On the authorization page, choose the permissions you want to grant to the IAM user to define their access rights. The policy list on the left includes all system policies and your custom-created policies. Search for the desired policy by name in the search box, select it, and click "OK" to complete the authorization process.
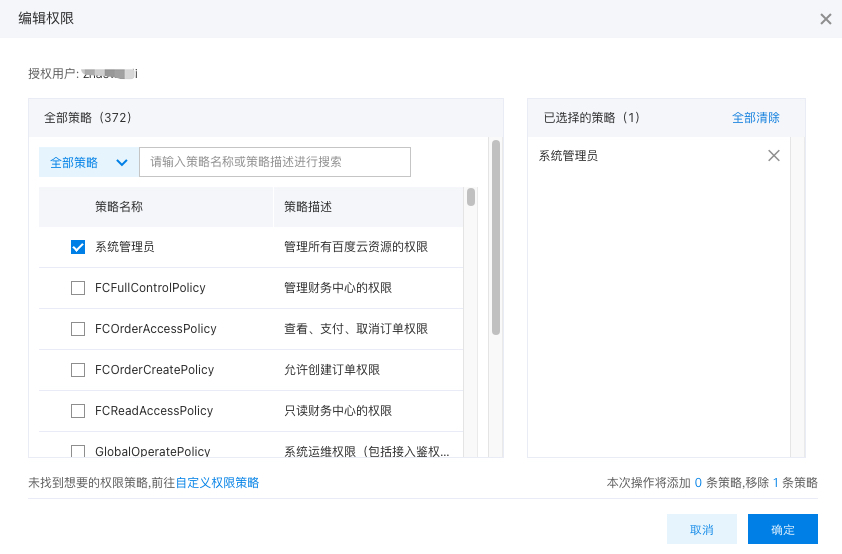
Note: To modify an IAM user's permission without altering existing policy rules, you must delete the current policy and add a new one, and you cannot uncheck the policy permissions that have already been added. If Programmatic Access was not checked when creating the IAM user, the sub-account must be added with the IAMManageAccessKeyPolicy template. An AKSK must be created for the sub-account to upload files normally.
The permission priority of IAM users in the primary-sub account structure is lower than BOS’s native bucket ACL settings. Bucket ACL permissions are based on the primary user’s UserId. If the system detects that the effect field in a Bucket ACL rule is set to “Deny” and the UserId matches the wildcard “*” or the root account’s UserId to which the IAM user belongs, BOS will prioritize the root account’s bucket ACL settings. In such cases, the permissions assigned to the IAM user under the root account will become invalid.
When a bucket is created, its ACL includes a default rule: the bucket creator has FULL_CONTROL permission. For bucket ACL settings, refer to [Bucket Permission Control](BOS/API Reference/Bucket-Related Interface/Permission control/PutBucketAcl.md).
Sign in as IAM User
After assigning permissions to the IAM user, the IAM user can access BOS in the following two ways:
- Click on the IAM user’s name to view their details (including AKSK and assigned permissions). The IAM user can use the AKSK to access BOS through peripheral tools, SDKs, or APIs.
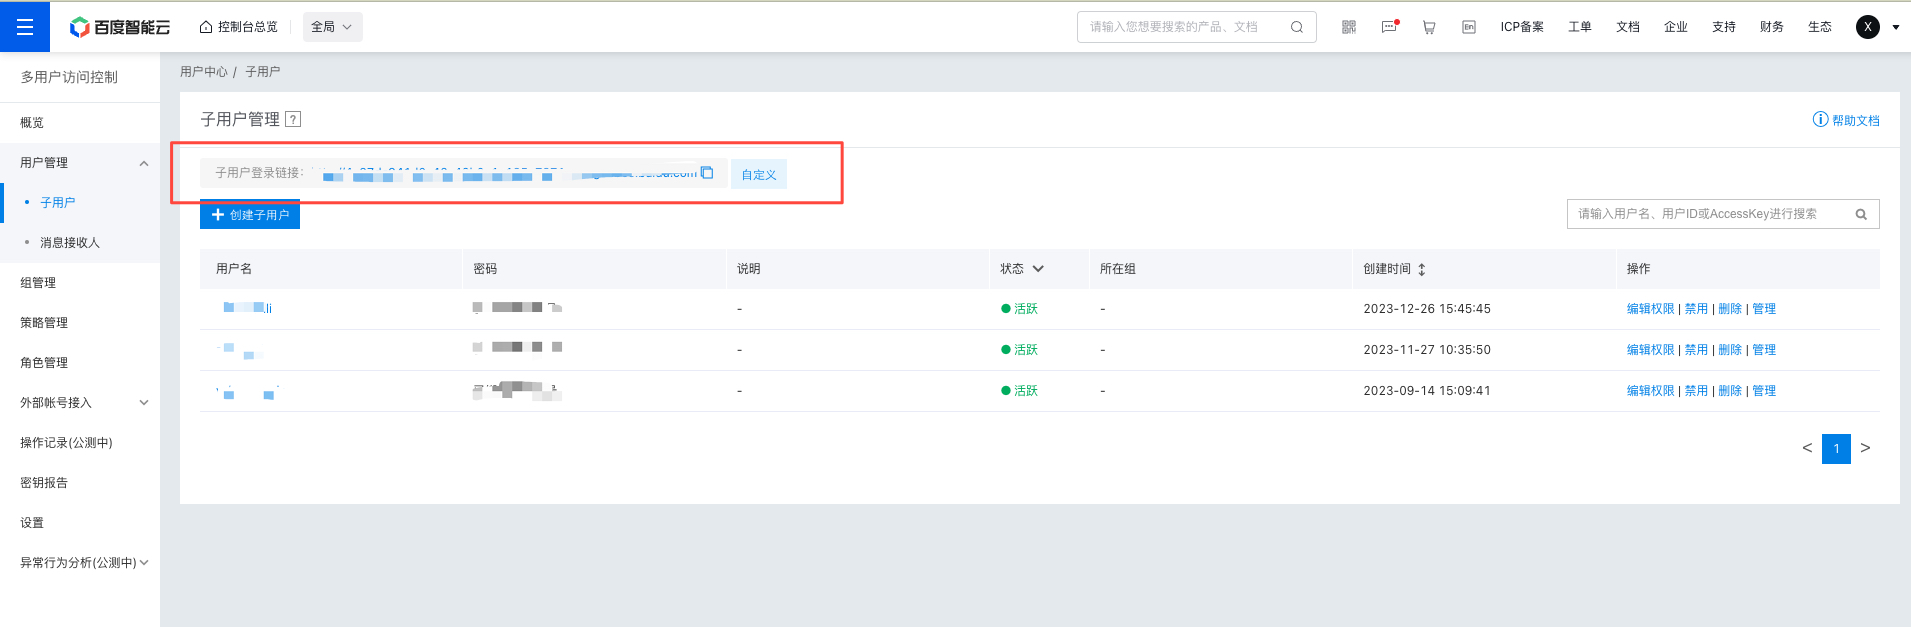
- Share the IAM user login link (found at the top of the console) with the user. Using this link, the IAM user can log in to the console and interact with the root account’s resources based on the assigned permissions.
Related documents
For other operations, refer to: Multi-User Access Control.