
BOS Dedicated Line Back-to-Origin IDC Best Practices
Overview
This tutorial presents the best practice solution for using BOS dedicated line for back-to-origin to IDC in a hybrid cloud environment
Application scenarios
This solution caters to customers needing to migrate data from private clouds to public clouds via back-to-origin. A hybrid cloud combines public and private clouds, enabling enterprises to benefit from the scalability and stability of public clouds while maintaining privacy for their data. In Baidu AI Cloud’s hybrid cloud solution, a dedicated line connects the customer’s IDC and Baidu AI Cloud VPC, ensuring seamless integration between on-cloud and off-cloud services. Enterprises can utilize the BOS built-in back-to-origin function to migrate data from private clouds to the BOS public cloud. Using a dedicated line for backhaul not only avoids challenges such as unstable networks and bandwidth competition typical of public network back-to-origin but also boosts back-to-origin speed, enabling swift data migration to the cloud.
There are multiple data migration solutions: Data Flow Platform CloudFlow Migration, BOS Import Script Tool, BOS Mirror Back-to-Origin. This tutorial mainly focuses on the back-to-origin solution via dedicated lines
Reference example: Customer site data migration to cloud
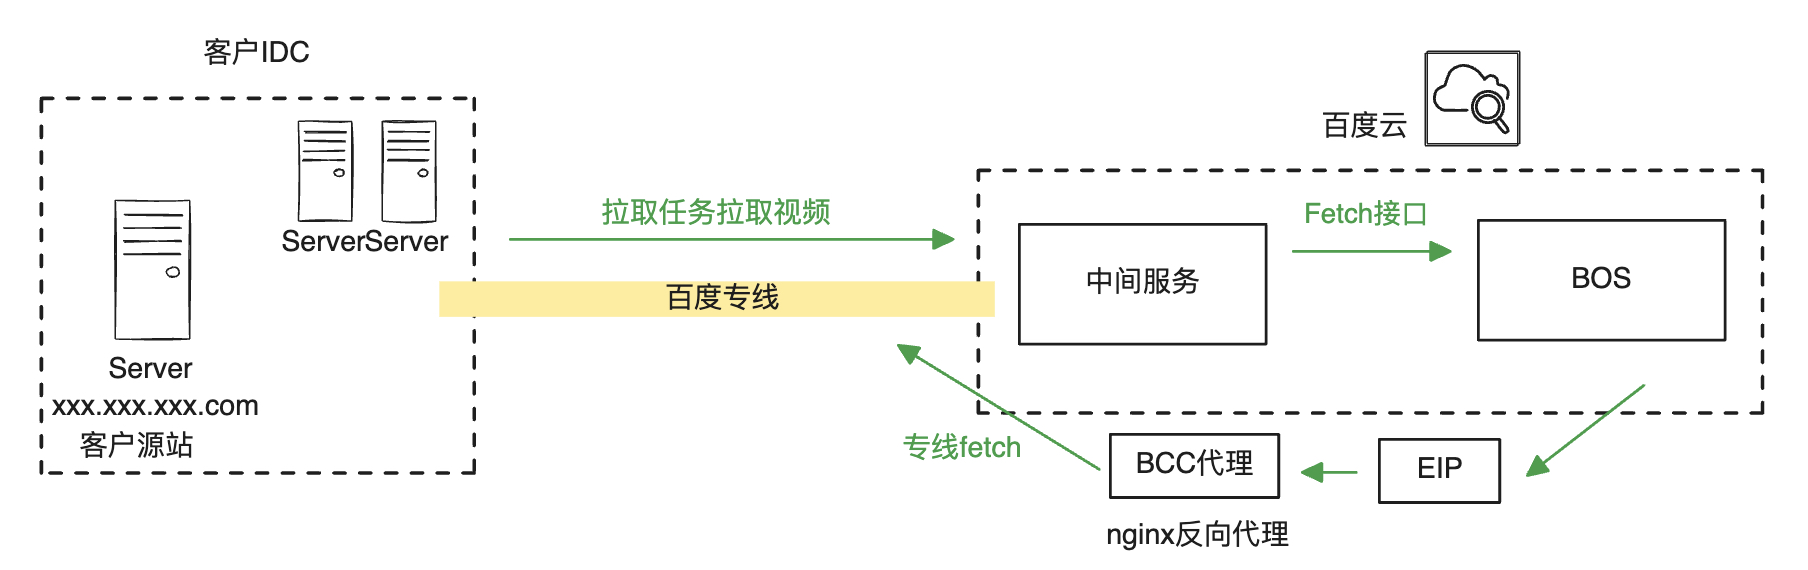
A customer wishes to back up data from their enterprise site to the cloud platform using mirror back-to-origin. Given their sensitivity to the stability and time required for back-to-origin, they can establish a dedicated line connection to Baidu’s internal VPC environment and adopt the dedicated line back-to-origin to IDC solution outlined in this article. The approximate architecture for the customer is as follows:
Practice solution
Overview
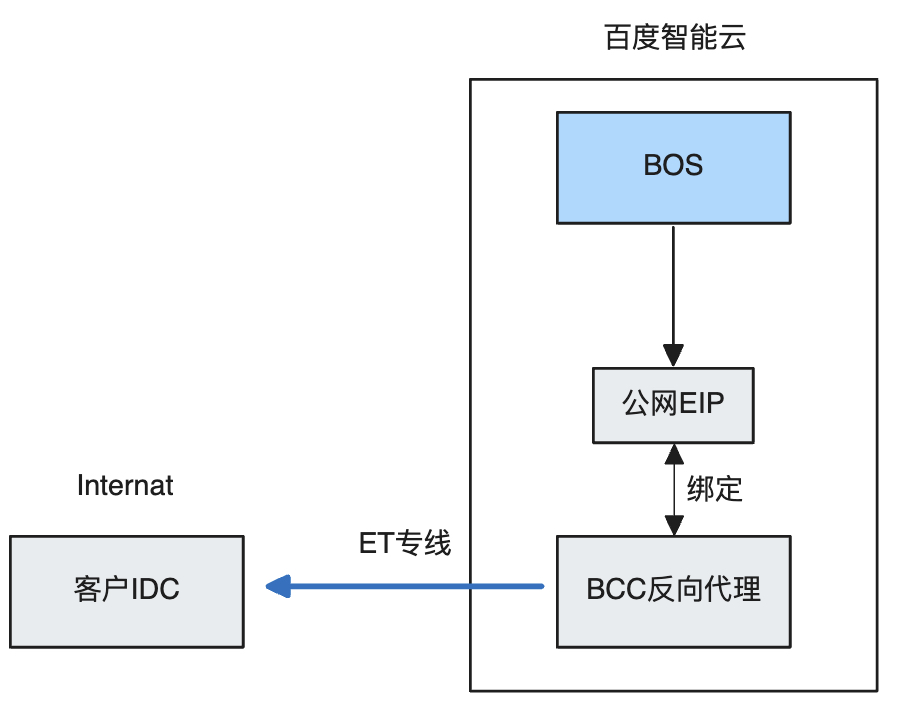
BOS supports public network back-to-origin. If customers configure a public network back-to-origin address, data flow will traverse the public network. To redirect the data flow to the customer’s dedicated line, certain configurations need to be set up. The overall data flow process is illustrated in the diagram.
Steps
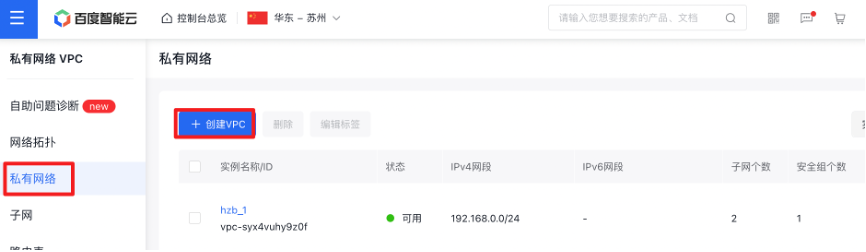
Step 1: Create a VPC
Users need to create a VPC in the specified region
After creating the VPC, it is necessary to enable the Route Relay function in the created VPC to allow traffic from the IDC network to be forwarded through this VPC

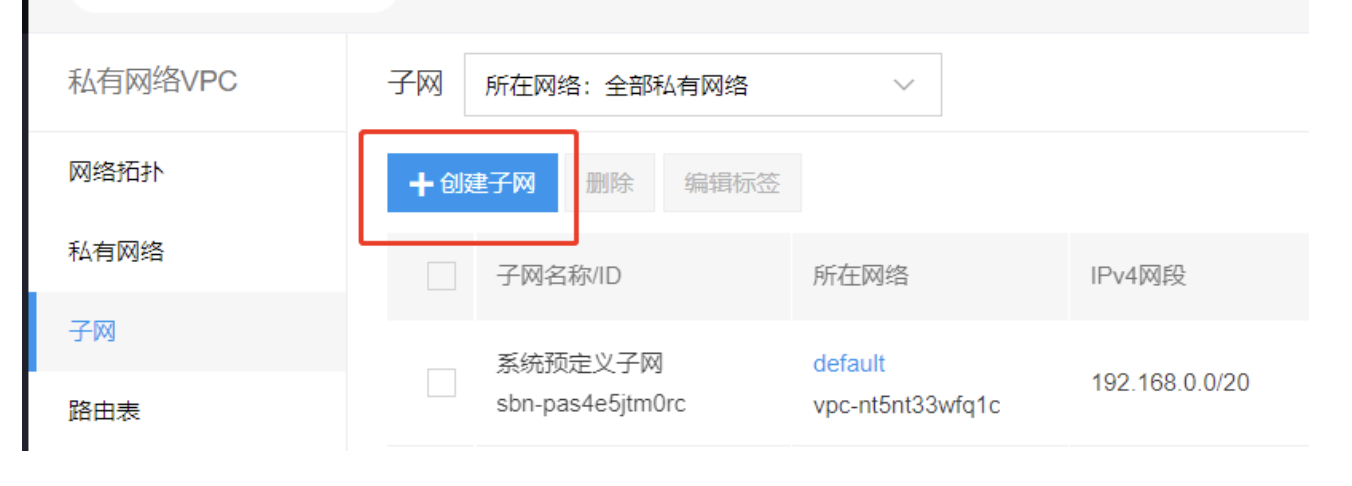
Step 2: Create an subnet
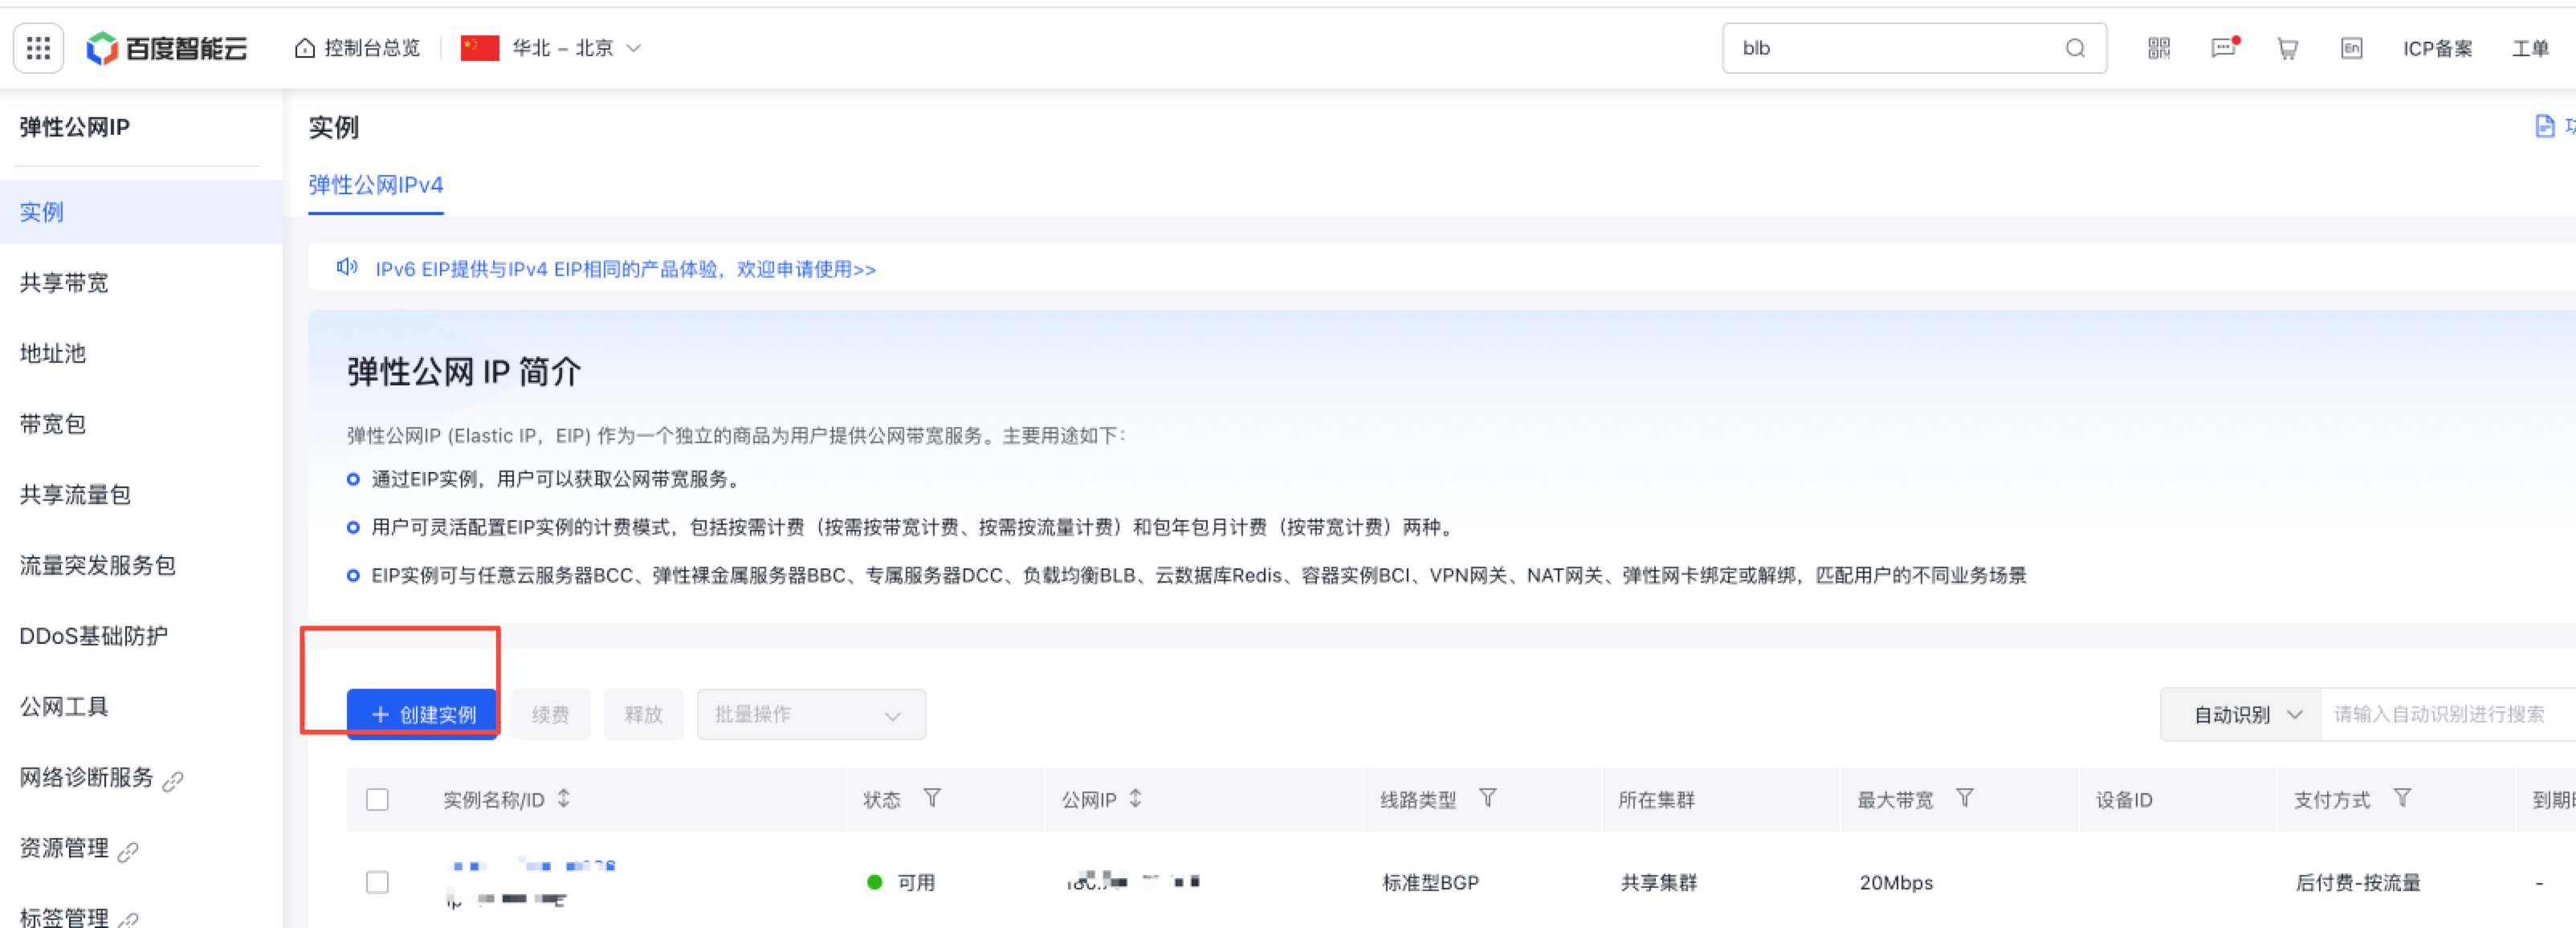
Step 3: Create an EIP
Create an EIP for the customized line after putting into allow list
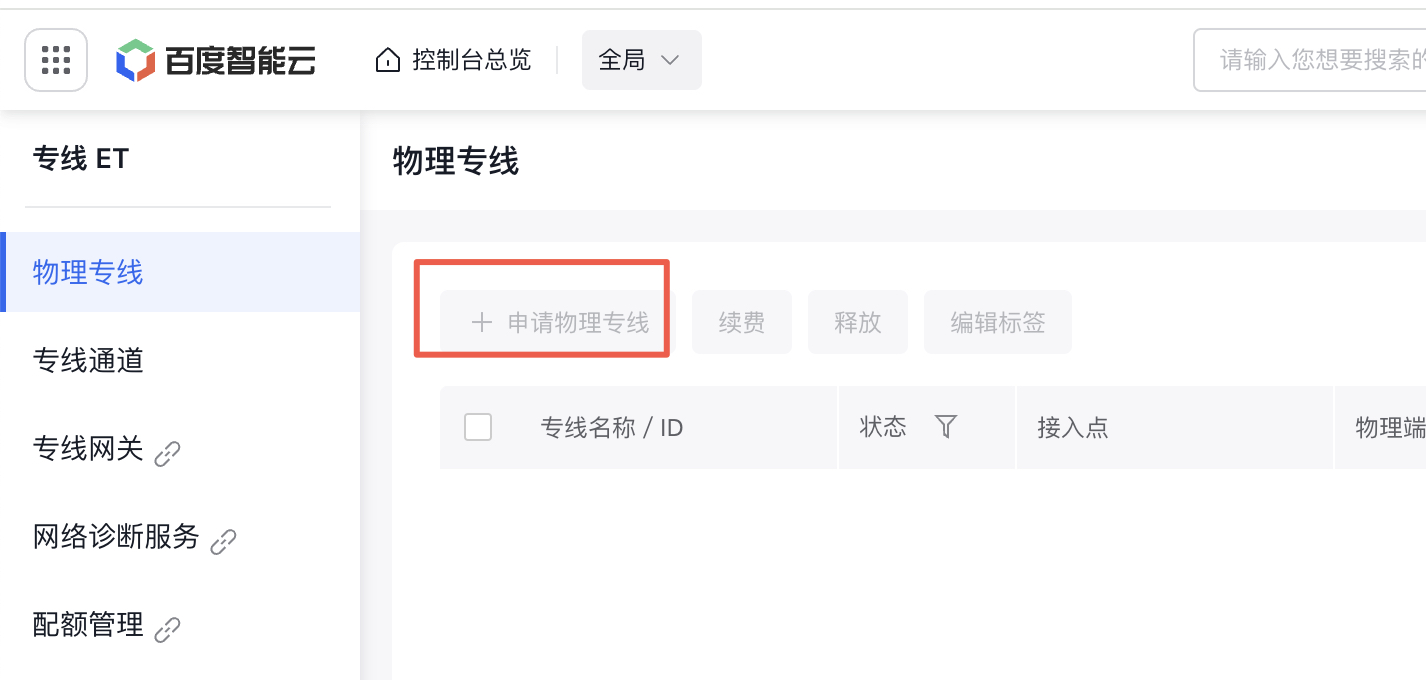
Step 4: Create a physical dedicated line
After enterprise authentication, you can apply for creating a physical dedicated line. After application, specialized staff will connect and debug the physical dedicated line
Step 5: Create a dedicated channel
- On the dedicated line ET API, users click the left navigation bar, select Dedicated Line Channels, and click the + New Channel List button on the right to create a new dedicated line channel

- Input fields for new dedicated line channel
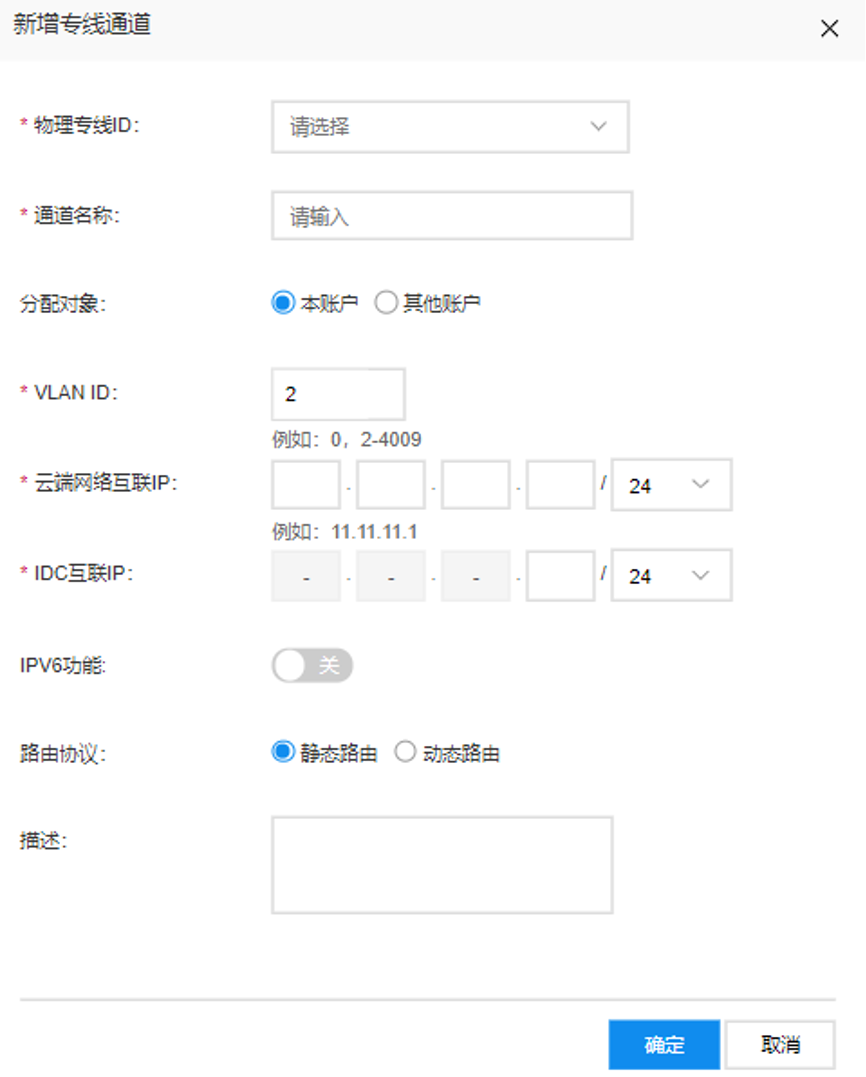
• Currently, the supported VLAN range for dedicated line channels is 0 and 2-4,009; VLAN 0 is in layer 3 mode, and only one dedicated line channel can be created under this physical dedicated line; VLAN 2-4,009 supports Trunk mode, allowing multiple dedicated line channels to be created under one physical dedicated line
• Cloud Network Interconnection IP: Refers to the interconnection IP on Baidu AI Cloud side (any two IPs in the same network segment)
• IDC Interconnection IP: Refers to the interconnection IP on the user side.
• The cloud network and IDC interconnection IP addresses should be unused IPs within the following three network segments: 10.0.0.0/8, 192.168.0.0/16, 172.16.0.0/12. However, they must not overlap with IP addresses used for interconnection in the smart cloud network, or on Baidu AI Cloud’s or the customer’s IDC side. It is recommended to use a 30-bit subnet mask for the interconnection address.
• Dedicated line channels support both static and dynamic routing, with dynamic routing leveraging the BGP protocol. Baidu AI Cloud’s BGP ASN is 45085. The Baidu AI Cloud console requires users to input the BGP ASN of their IDC, which must fall within the supported range of 1 - 4294967295.
- Routes must be established for the dedicated line channel. To create a new route, users should select the dedicated line channel ID, navigate to the left menu bar, pick Route Management, and click the + New Route Entry button.

Step 6: Create a dedicated gateway
Click Virtual Private Cloud (VPC) and select Dedicated Line Gateway for network connection
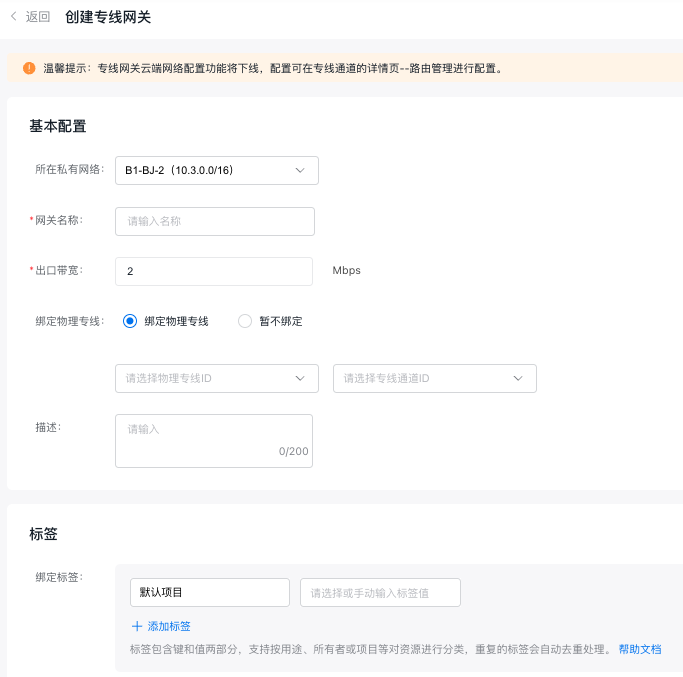
• Egress bandwidth: A speed limit can be configured for the dedicated line channel at the dedicated line gateway, supporting bandwidths ranging from 2 Mbps to 100 Gbps (depending on the physical port purchased by the user). The configured speed limit cannot exceed the capacity of the physical port linked to a single dedicated line, or the setting will be ineffective.
Step 7: Add routes
- Set up the VPC route table. After the dedicated line gateway has been successfully created and linked to the specified dedicated line, users must configure routes to the peer network within both the VPC and IDC route tables to enable traffic interconnection. Access the VPC details page, choose Route Table from the navigation bar, and click Add Route in the route table list.
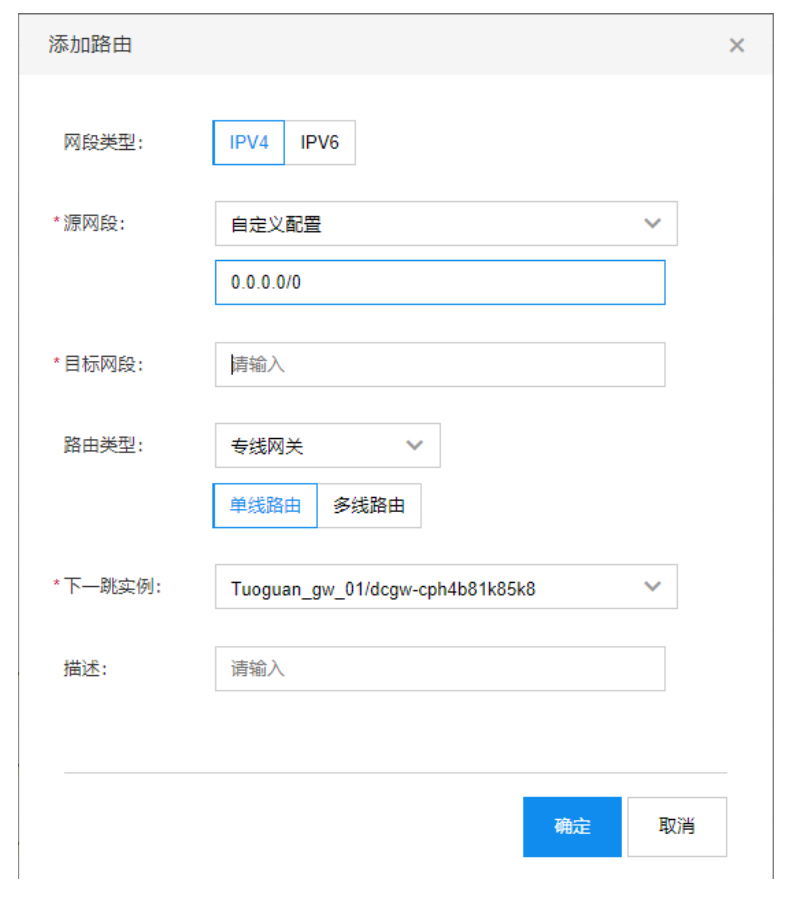
Select Custom Configuration for the source network segment and input 0.0.0.0/0. Specify the IDC area network segment as the destination network segment, which can accommodate multiple entries. Set Dedicated Line Gateway as the route type and assign the created dedicated line gateway as the next-hop instance. If there are multiple physical dedicated lines, select Path 1 and Path 2 in succession.
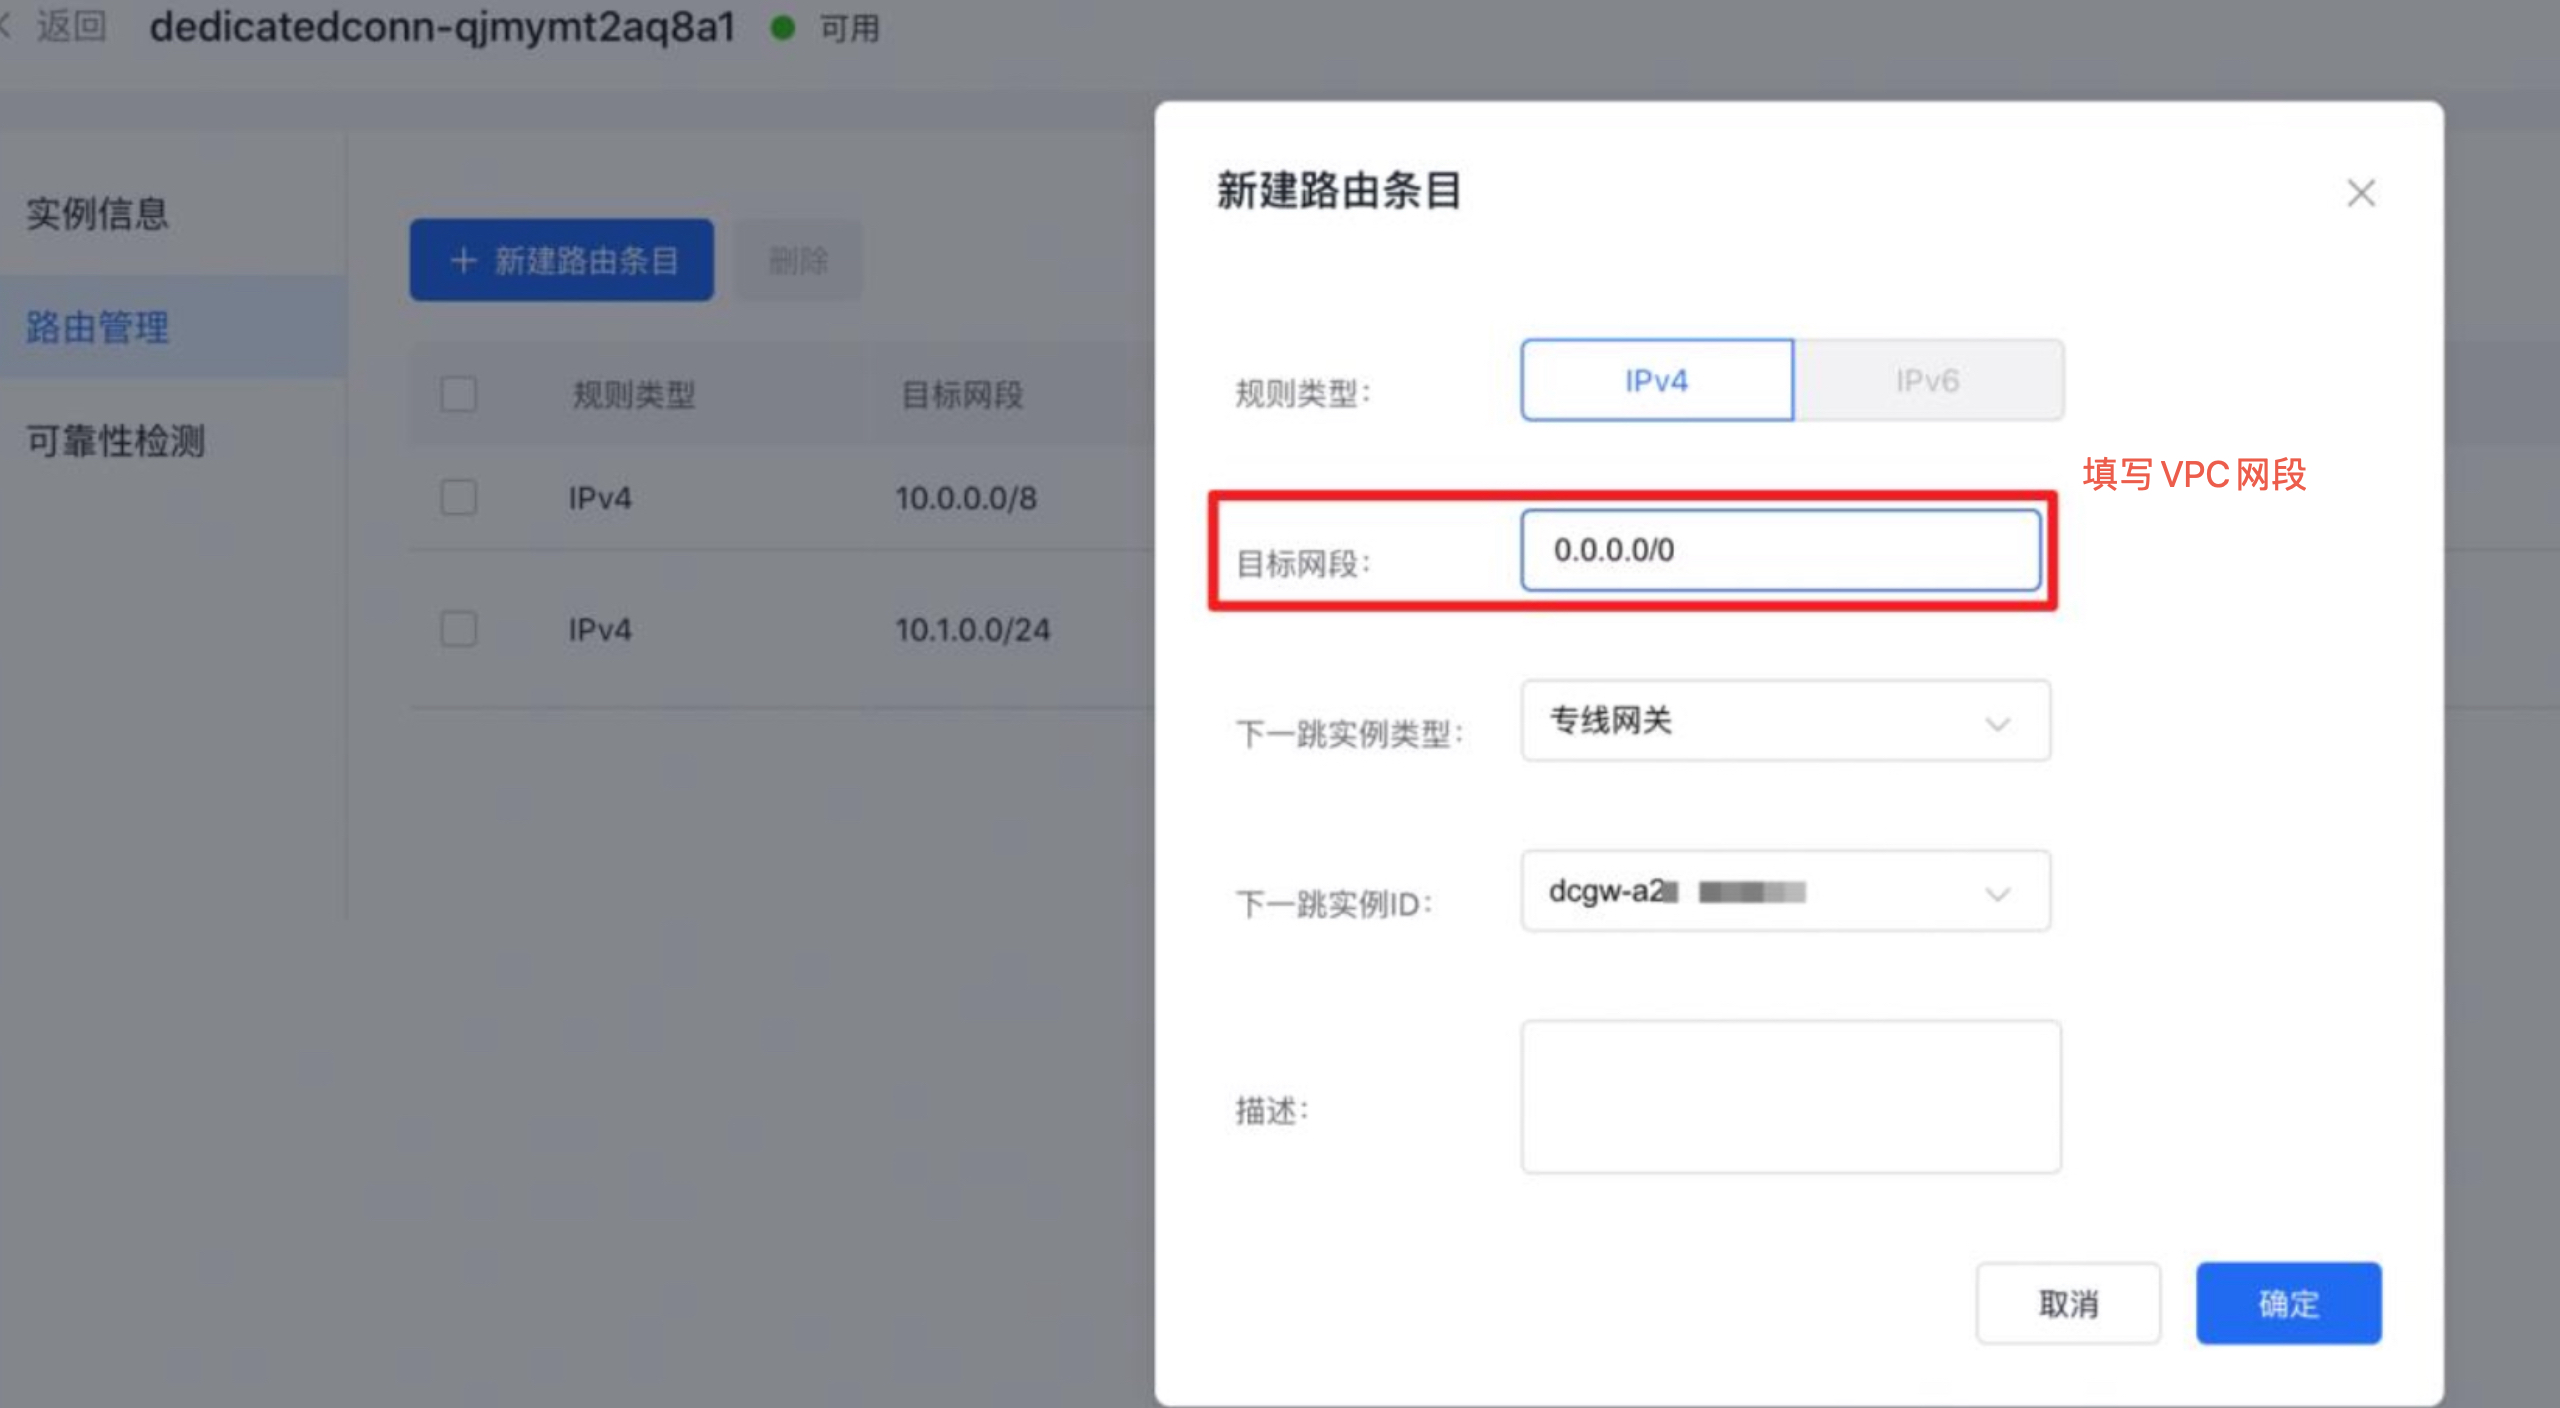
- Define the dedicated line channel routes. Access the dedicated line access ET console, go to Dedicated Line Channels in the left navigation bar, click the dedicated line channel ID, and open the details page for the dedicated line channel. In the route management section, click New Route Entry, input the VPC network segment for the target network, and select the created dedicated line gateway as the next-hop instance.
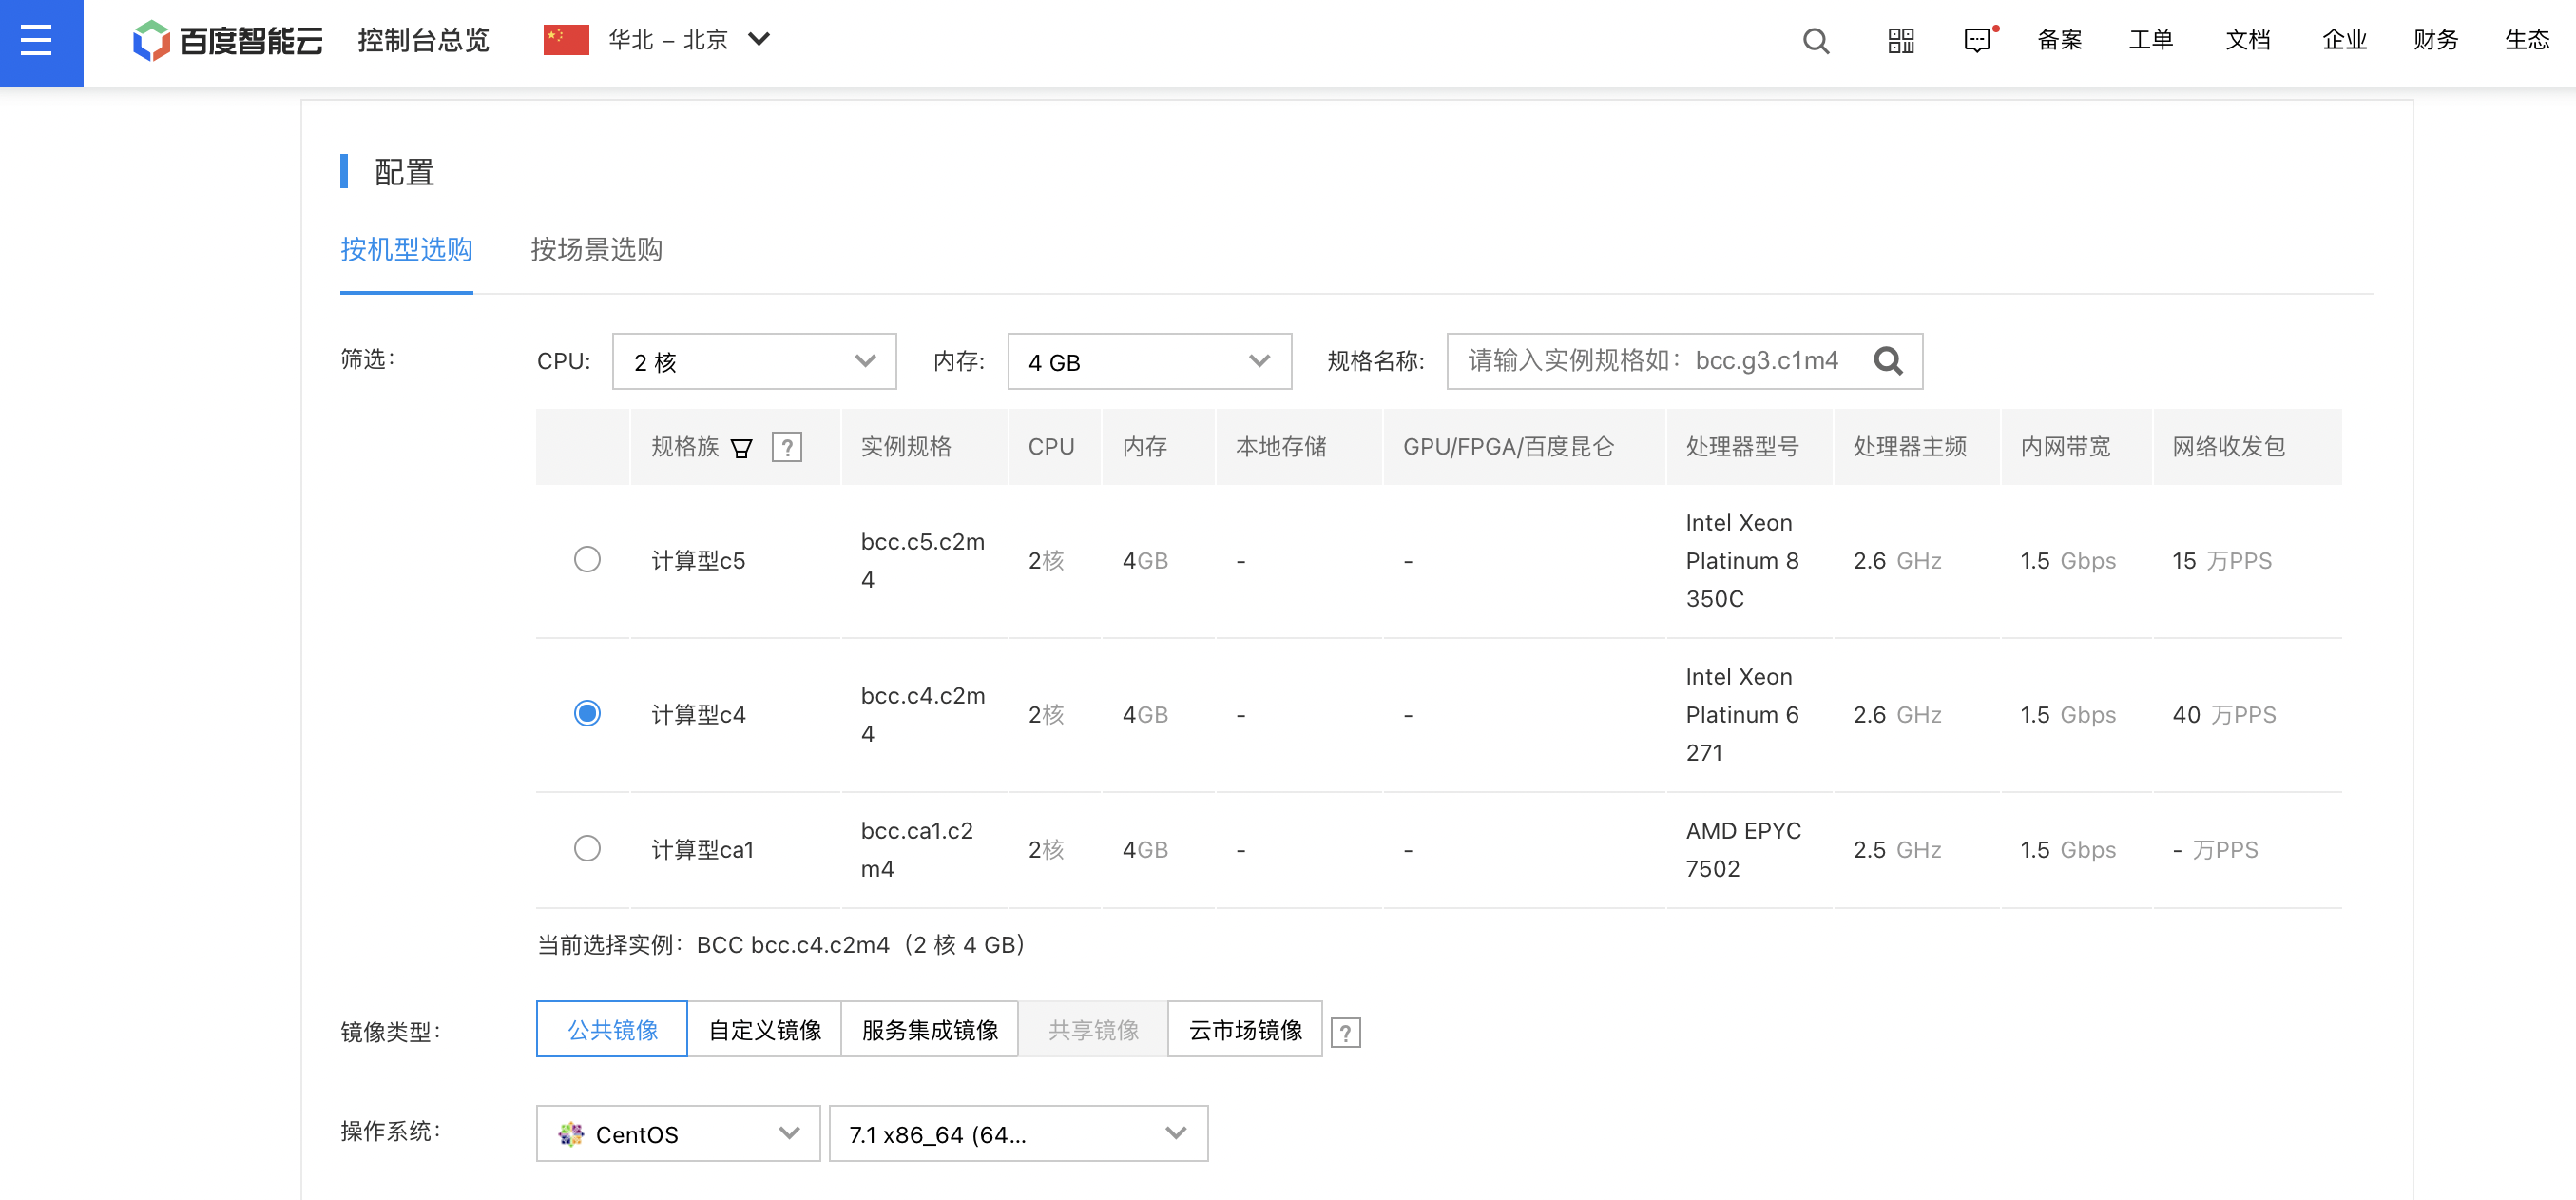
Step 8: Apply for a BCC instance for reverse proxy
- According to business requirements, apply for one or more BCC instances. Recommended setup: 2-core CPU, 4 GB memory, CentOS 7.1.
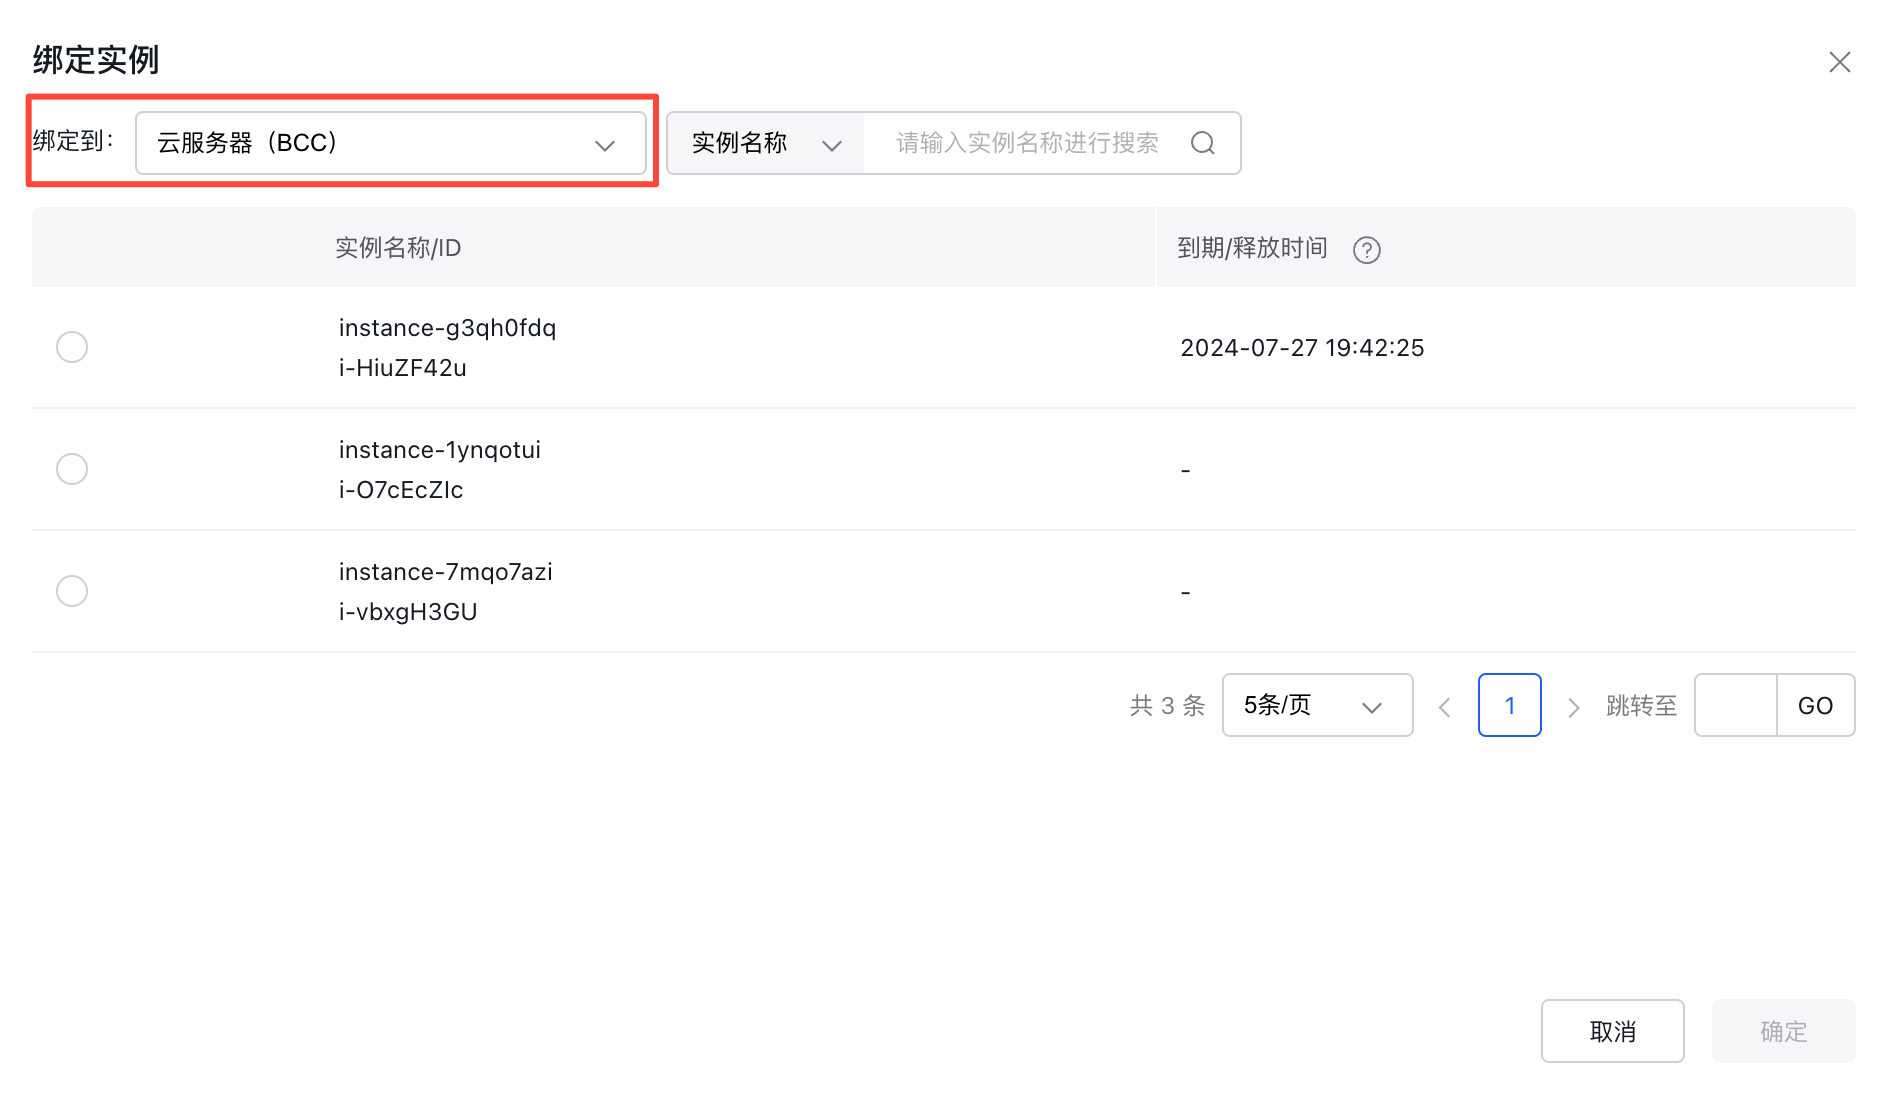
- Bind the BCC instance to an EIP. Attach the applied BCC instance to the previously created EIP.
- Install Nginx. Since an additional streaming module is essential to support the TCP protocol proxy, the streaming module must be installed alongside.
1// Installation
2yum install nginx nginx-mod-stream
3 // Configure nginx
4cd /nginx/
5vim nginx.conf
6 // Modify nginx configuration, refer to the following configuration
7server {
8    listen       80;
9    listen       [::]:80;
10    # server_name  _;
11    # root         /usr/share/nginx/html;
12    # Load configuration files for the default server block.
13    include /etc/nginx/default.d/*.conf;
14    error_page 404 /404.html;
15    location = /404.html {
16    }
17    error_page 500 502 503 504 /50x.html;
18    location = /50x.html {
19    }
20    location /video {
21        root   html;
22        index  index.html index.htm;
23        proxy_pass  http://10.xxx.xxx.xxx:80;
24        proxy_max_temp_file_size 0;
25    }
26    location /image {
27        root   html;
28        index  index.html index.htm;
29        proxy_pass  http://10.xxx.xxx.xxx:80;
30        proxy_max_temp_file_size 0;
31   }
32}
33 // Verify nginx configuration and start nginx
34nginx -t
35sudo systemctl start nginx
In the reference configuration file, the proxy_pass parameter needs to fill in the dedicated line channel target network segment configured in Step 6
Testing
After configuration, you can log in to the reverse proxy BCC to test the connectivity of the proxy to the customer’s IDC link using ping and wget commands
1ping xxx
2wget http://xxx/1.jpg
Utilize tools like BOS SDK, CLI, or BOS desktop to perform mirror back-to-origin operations and confirm that the data from the source site is acquired correctly. Additionally, log in to the Nginx proxy node to review logs and verify that the Nginx reverse proxy functions are operating as expected.
1less /usr/local/nginx/logs/access.logRelated products
Baidu Cloud Compute, Dedicated Line ET, Elastic Public Network EIP