Connect to the RDS Instance
Connection scenarios
Connection scenarios supported by the RDS include:
- BSS, access via Intranet
- BAE (Professional), access by Intranet
- BCH, access via Cloud Network
- User Local, access via Cloud Network
Connection presetting
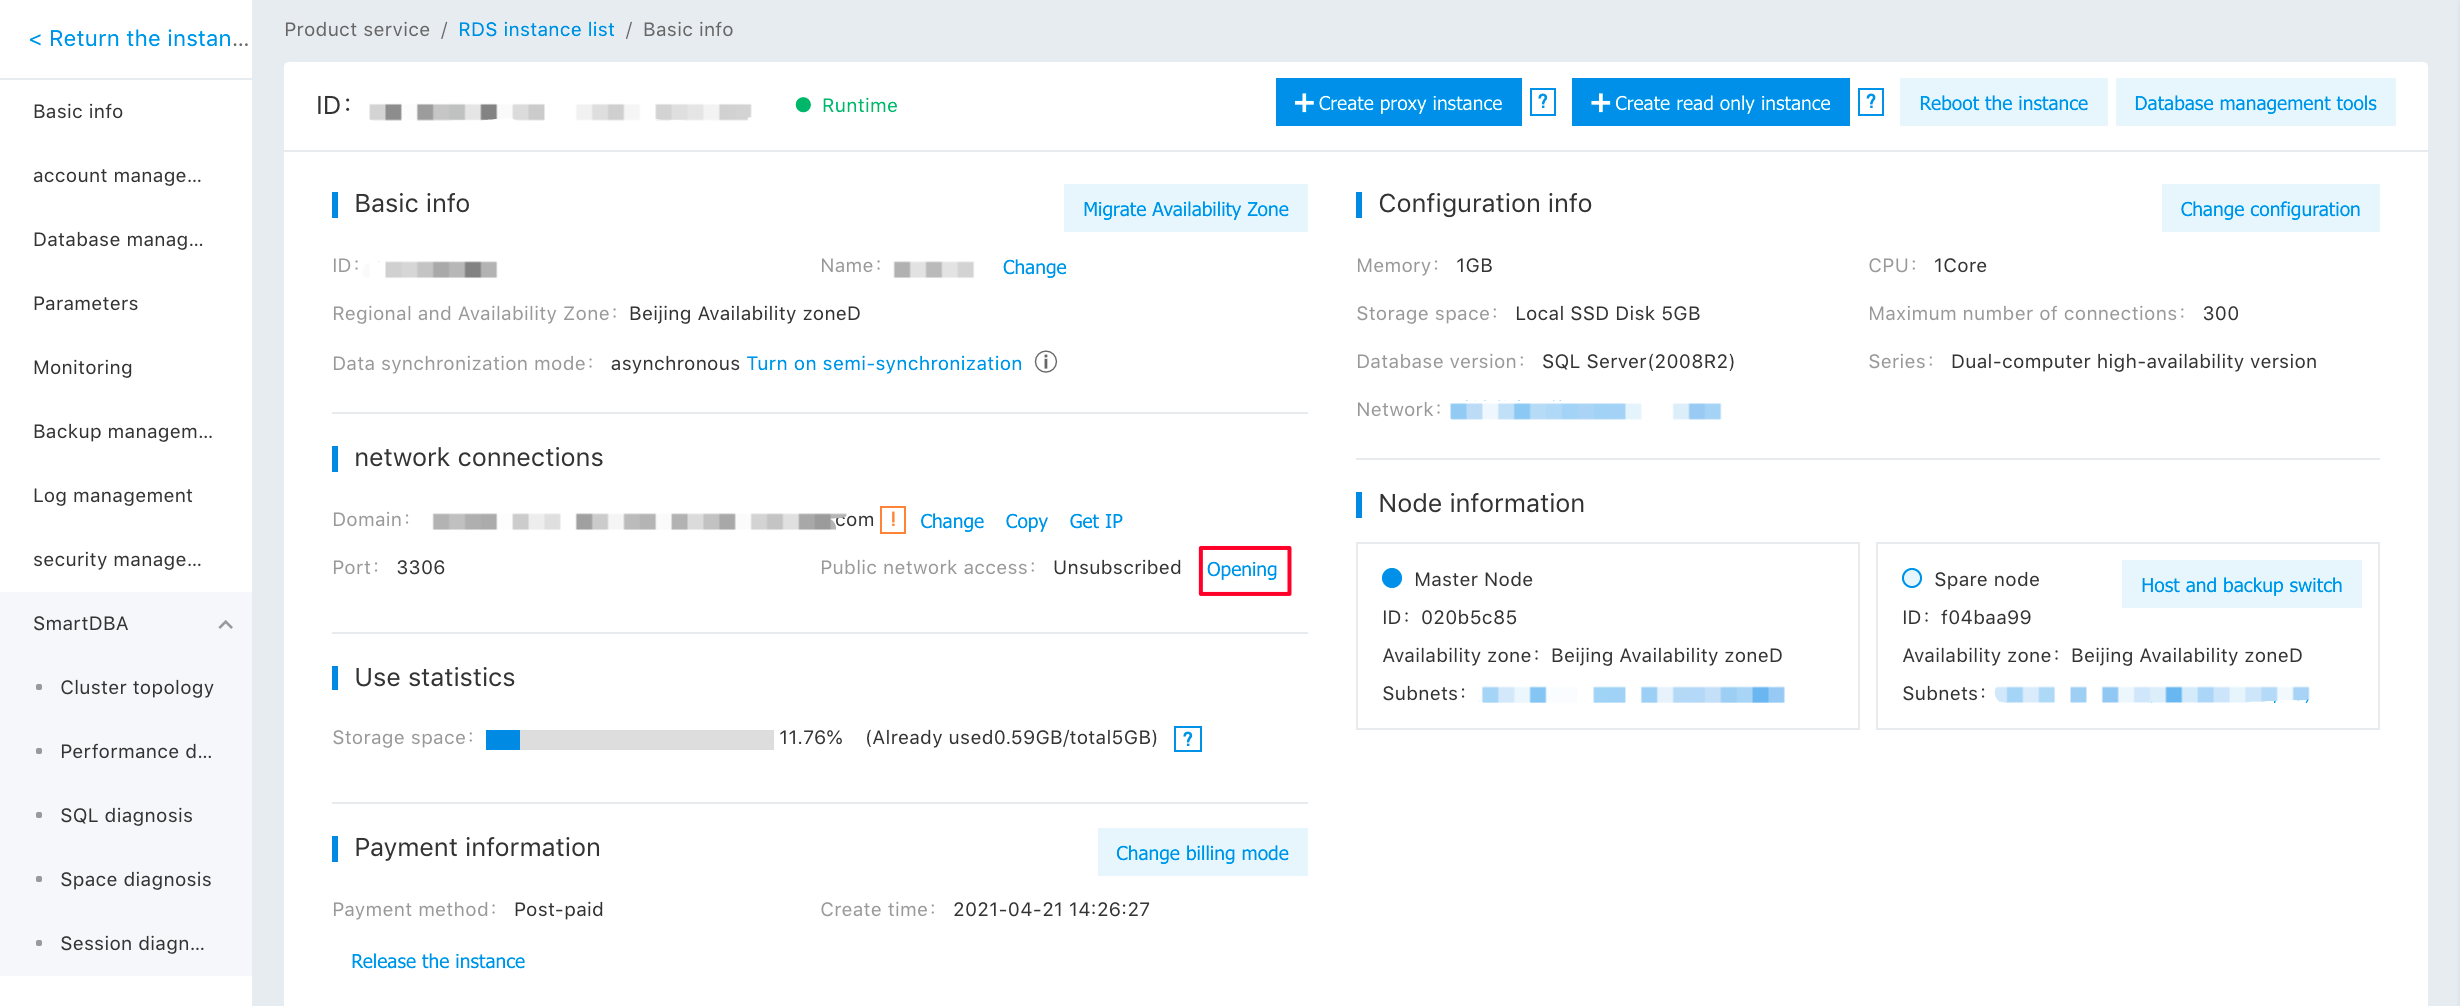
There are multiple ways to connect the RDS instances, such as accessing through client tools or accessing through domain name address in code. No matter which way to access the database you choose, the address, port number, account, and password information of the database are required. The address of the database is the domain name or IP address and port number of the RDS instance. You can click the instance name to enter the "Basic Information" page of the instance to view. The related account and password are required for database access connection. For account creation, see Database Account Management.
- Intranet connection: set whitelist and connect by Intranet domain name
- Cloud Network connection: set whitelist, enable the access to Cloud Network and connect by Cloud Network IP or domain name
Notes:
- Click "Get IP" to get the Intranet and Extranet IP addresses according to the domain name.
- To ensure normal operation of the service, link the RDS by Extranet IP or domain name, link Intranet IP directly with RDS. Master/backup switchover might result in data loss!
- After the creation of the RDS instance, all IPs are allowed, which facilitates the user's connection. To ensure data security, users should reset the whitelist before access to the database.
Enable Cloud Network Access
The user can access the RDS database through the private network and cloud network. By default, the Cloud Network is not enabled for the database. If there is a need for Cloud Network access, access to the Cloud Network needs to be enabled.
- Enter the "RDS - Instance List" page, and click "Enable" next to the "Access to Cloud Network" on the "Basic Information" page.

Connect to an Instance via the Client Tool
The user may connect the RDS instance via Microsoft SQL Server Management Studio.
Notes:RDS SQL Server Database is made in Version 2008R2, so you need to use the client tool that matches the database. You are advised to download it from the official website of Microsoft.
- Open Microsoft SQL Server Management Studio and click "Connect".
-
In the "Server Name" of the pop-up "Connect to Server" Dialog, enter RDS instance Intranet/Extranet address and port number. In the "Login Name" and "Password", enter database account and password, respectively.
You can get the RDS Intranet/Extranet address and port number on the instance's "Basic Information" page, and get the login name and password in the "Account Management" tab.
- Click "Connect" to complete the connection with the RDS instance.
Direct Access to an Instance via Code
The user can directly access the database through the domain name or IP address in the code. If accessing through Cloud Network, the Cloud Network access to the database needs to be enabled. Take the PHP code linking database as an example:
$server='IP Address or Server Name';
$username='Database Username';
$password='Database Password';
$database=’Database Name';

$conn=mssql_connect($server,$username,$password)
    or die("Couldn't connect to SQL Server on $server");
$db=mssql_select_db($database) or die("Couldn't open database $database");
Notes: The value of server is the domain name or IP address of the "Basic Information" page of the instance, the values of username and password are the account and password created on the "Account Management" tab, and the database denotes the database created on the "Database Management" tab.
