Windows Using HAVIP to Configure Master-Backup Multi-Machine
Overview
This document details the configuration of active-standby multi-machine setups using HAVIP on Windows, enabling the creation of active-standby clusters for high availability in services.
Solution overview
Configure master and standby multi-machines using high-availability virtual IP address (HAVIP) in a Windows environment. First, create three BCC instances and one HAVIP, then configure the domain environment for each Windows Server VM, install the "failover cluster" function, and configure DNS information. Create a cluster in the failover cluster manager, add all HAVIP member virtual machines, and set the cluster name. Bind the HAVIP to a Windows Server virtual machine and configure the IP address of HAVIP in the failover cluster manager. By switching between primary and standby, the high availability of Services is improved, ensuring system continuity and stability.
Configuration steps
Step 1: Create HAVIP
- Navigate to Products & Services - Virtual Private Cloud (VPC) and choose Network Interface Card - High-Availability Virtual IP Address from the left-hand menu.
-
Click Create Virtual IP to open the dialog box. Enter the following configuration details:
ConfigMap Description Virtual IP name - User-defined HAVIP name
Network - Select the virtual private cloud where the HAVIP is to be created
Subnet belonged - HAVIP has subnet attributes. Please select the subnet under the current VPC from the dropdown
Description - The service network interface card is billed based on instance runtime and traffic on an on-demand basis.
- Click OK, and the high-availability virtual IP address is created.

Step 2: Configure Windows Failover Cluster on active and backup services
Set up multiple Windows Server virtual machines requiring HAVIP functionality. Ensure that the virtual machines managing the HAVIP cluster and the high-availability virtual IP address are within the same subnet.
- Sign in to the Baidu Cloud Compute BCC Console, navigate to the instance page, click Create Instance, select Windows Server for OS, and complete the BCC creation by filling in the configuration details For detailed steps, refer to Instance creation guide.
- Sign in to the Baidu Cloud Compute instance. For specific operations, refer to Login method overview.
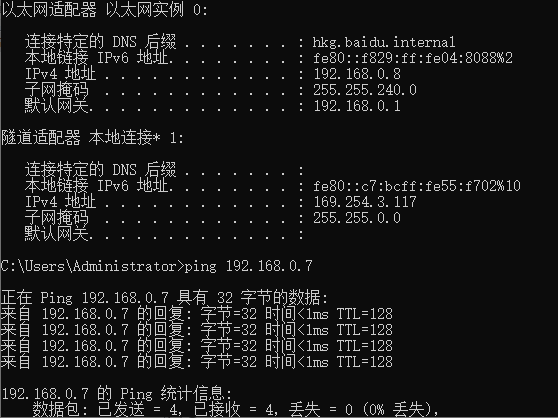
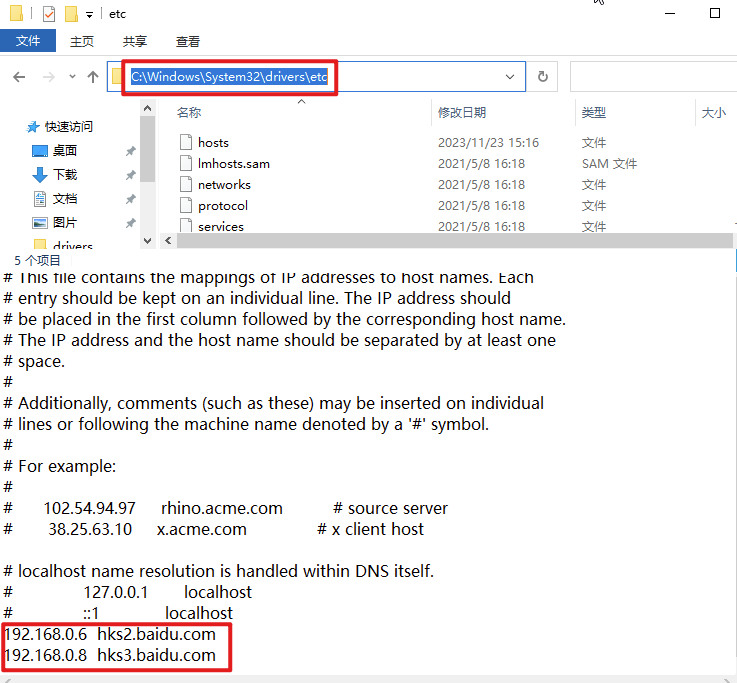
- Configure the host domain environment. For non-domain hosts, update the host file of the node to allow direct DNS resolution on all machines within the cluster. After assigning unique domain names to each HAVIP member virtual machine, restart the system.

- Install failover cluster: Navigate to Server Manager - Manage (M) - Add Roles and Functions

Follow the navigation to proceed, select Failover Cluster in the Functions module, and click Next to install.


- Configure the failover cluster
- Configure DNS: Select a Windows Server Node managing the cluster and configure the host information of other cluster members in the hosts file
After configuration, access the configured domain name to check network connectivity. If inaccessible, first verify whether the firewall is disabled
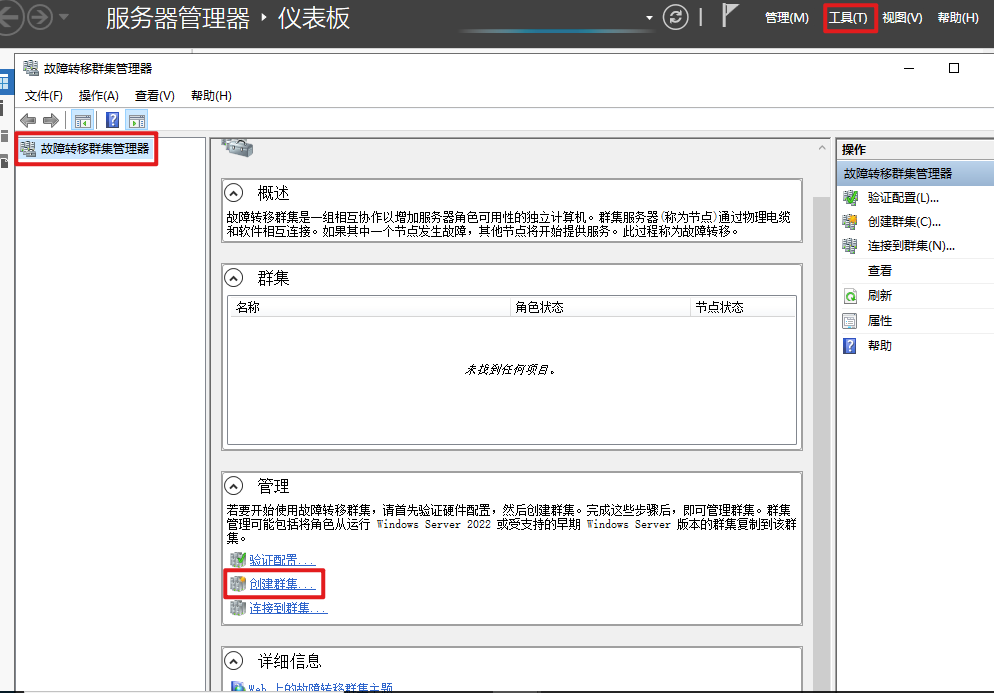
- Create a cluster: Open the failover cluster manager and click Create Cluster.
Add all machines within HAVIP members

Set the cluster name

After configuration, verify that the Cluster Node status is normal
1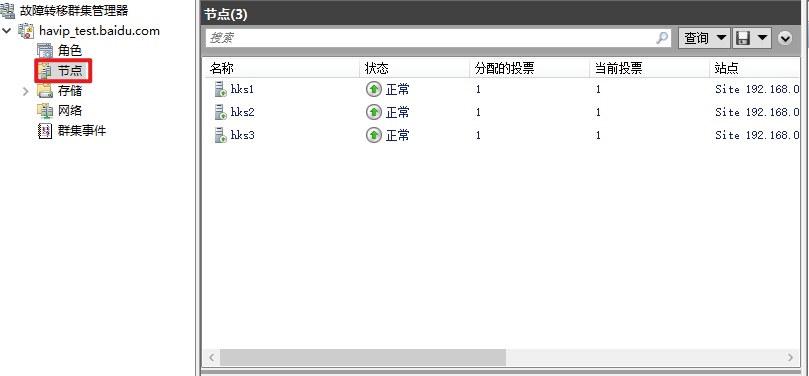Step 3: Bind the HAVIP to the Windows Server
- Sign in to the High-availability Virtual IP Address console, click the instance name to enter the details page, select Bind Server from the left navigation bar to access the backend server list, and click Add Real Server to select the Baidu Cloud Compute instance to be bound.

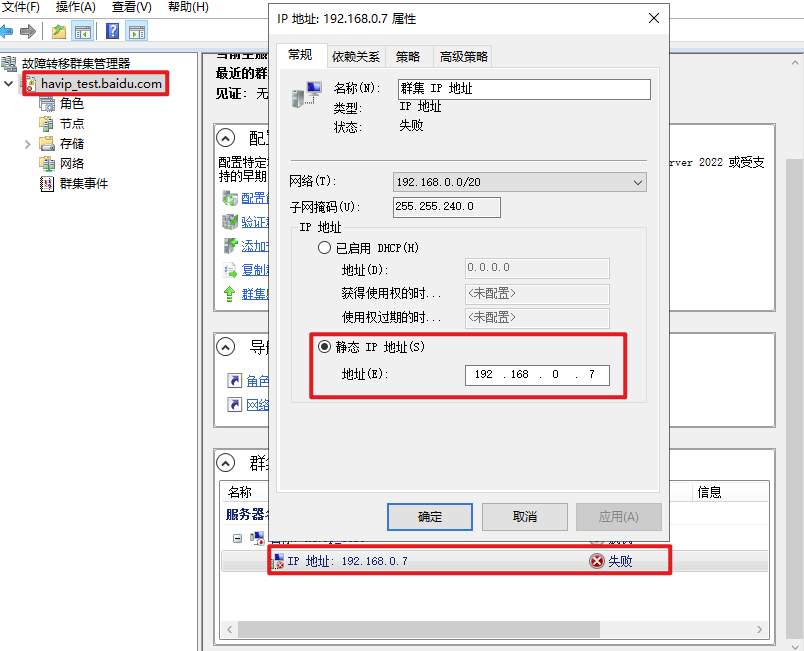
- Configure the HAVIP address in the Windows Server failover cluster: Click Server Name - IP Address and configure the HAVIP address via attributes.
- Connection succeeded

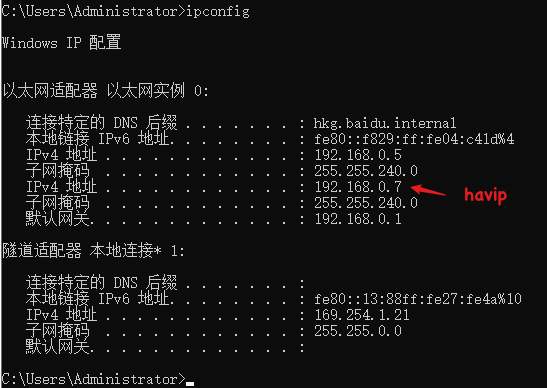
- According to the cluster display, the active server is hks1. Check the network interface card information; the HAVIP has been mounted
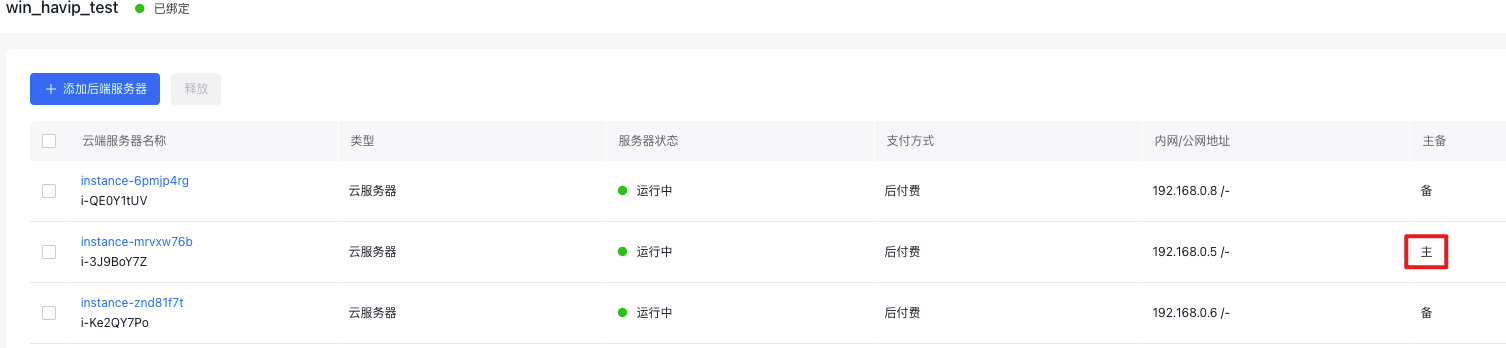
The console displays that the primary node is consistent with the cluster
- Verify connectivity