
Subnet
Create subnet
- In the virtual private cloud console, click Subnet in the left navigation bar to access the Subnet List page. Click Create Subnet to define a new subnet within the VPC network range.
- Availability zone: Select the availability zone for the subnet. It is recommended to deploy business systems across different availability zones to enhance disaster recovery. For more details, refer to [Availability Zone Documentation{-2-}.](Reference/Region Selection Instructions/Availability zone.md)
- Device type: General-purpose, BBC-dedicated (for hosting BBC instances, visible in the allow list)
-
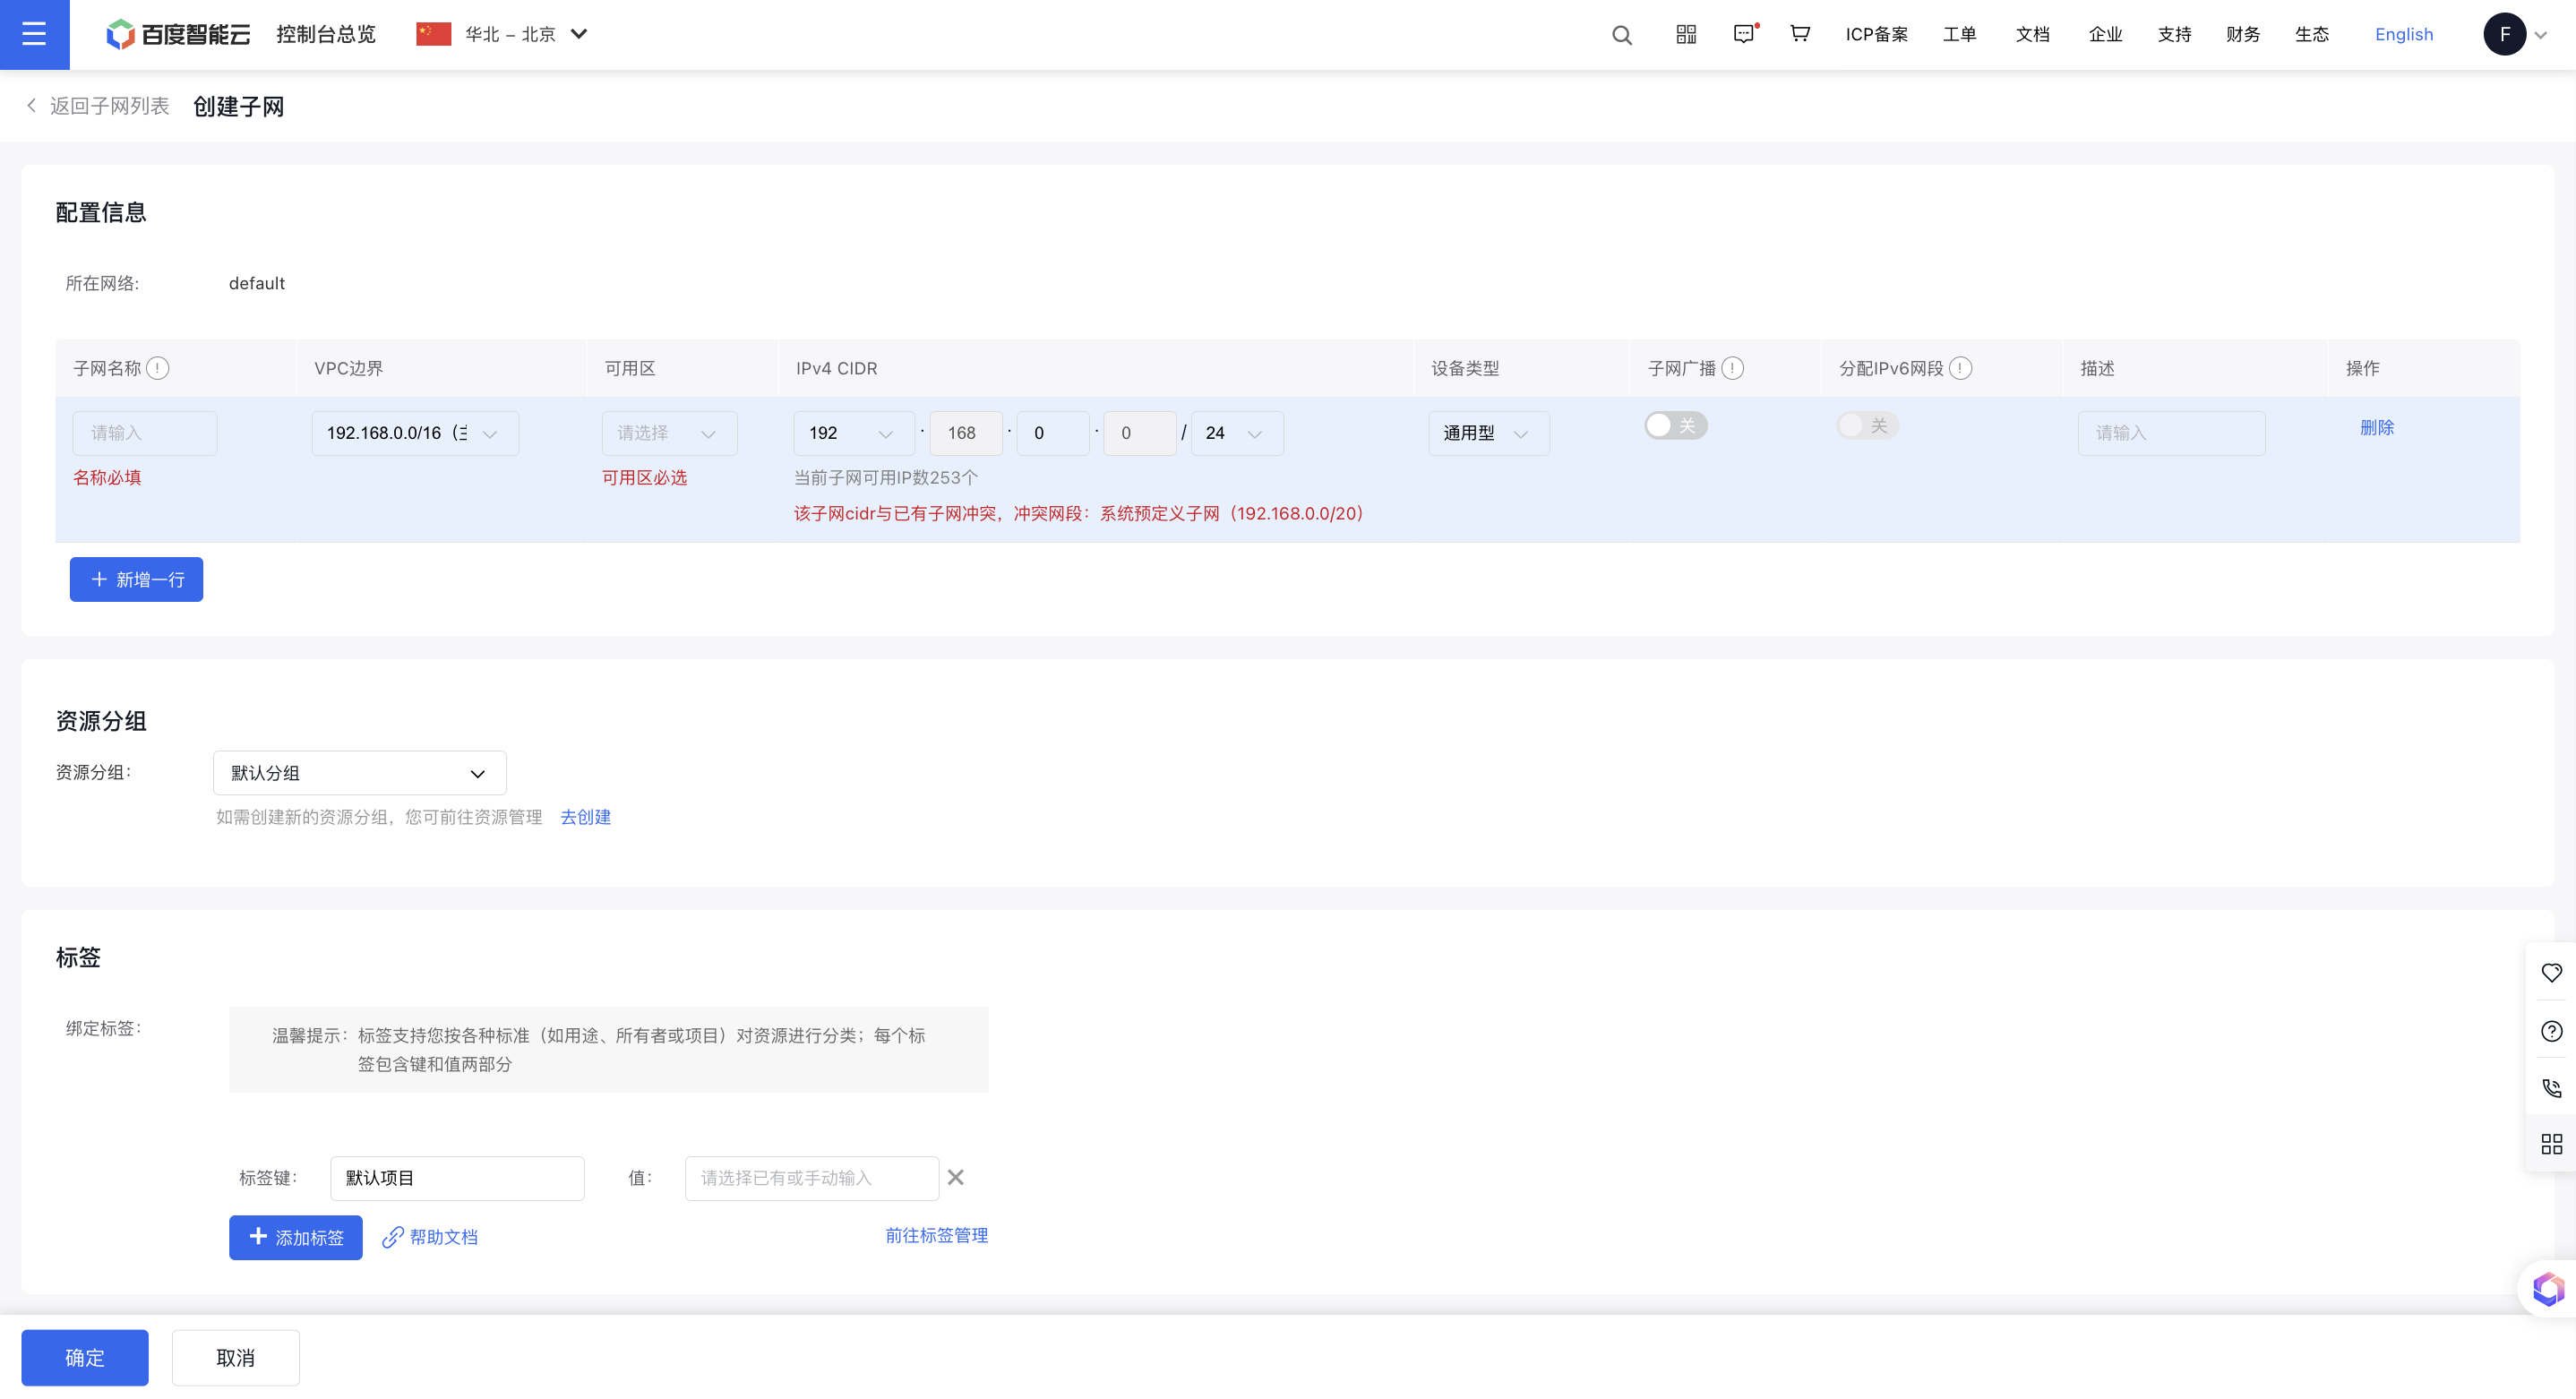
CIDR: The CIDR of a subnet block must be a subset of the VPC's overall CIDR block. When creating multiple subnets within a VPC, their CIDR blocks cannot overlap. The block size should be between a /16 netmask and a /29 netmask.
For example, when creating a "172.16.0.0/24" VPC, if three subnets need to be created within this address space, their CIDR blocks would be:
Subnet 1: 172.16.0.0/26, address range 172.16.0.0--172.16.0.63;
Subnet 2: 172.16.0.192/26, address range 172.16.0.192--172.16.0.255;
Subnet 3: 172.16.0.64/26, address range 172.16.0.64--172.16.0.127;
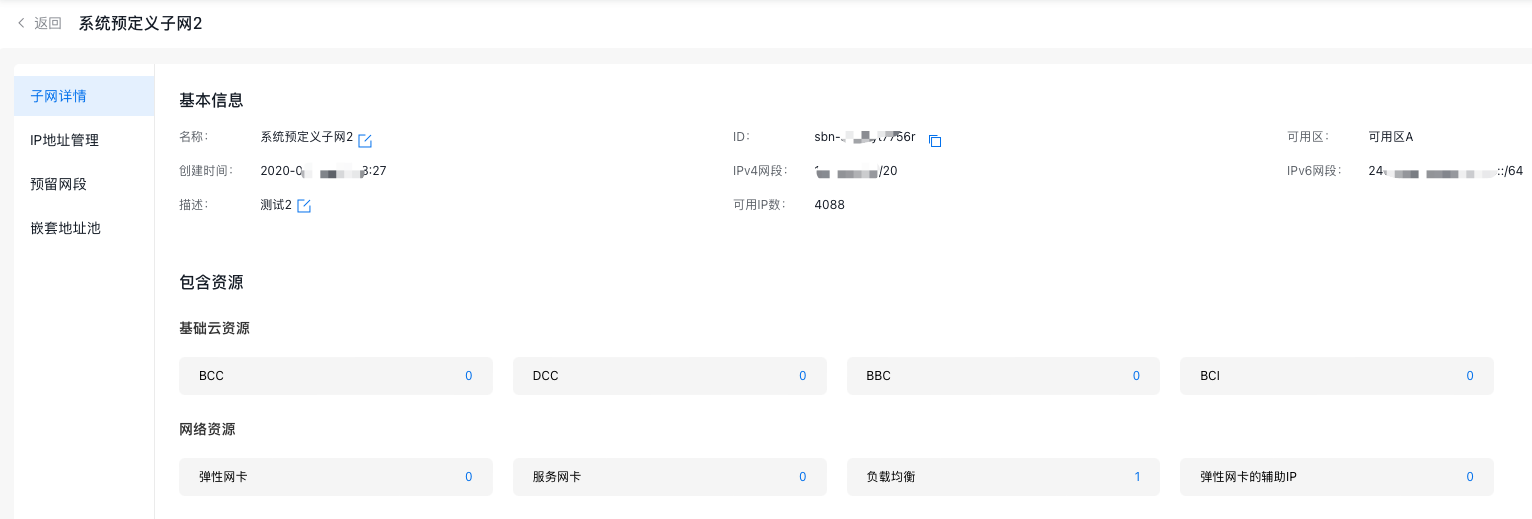
- Assign BCC instances to each subnet by entering the Subnet Details page, clicking the host count (0 when unassigned), and accessing the Instance List page.
-
Create a BCC Instance and enter the configuration information. For details, refer to [Create BCC instance](BCC/Operation guide/Instance/Create instance/Create Instance via Purchase Page.md).
It is advisable to choose the "prepay" option and provide the relevant configuration details.
- Follow the step-by-step instructions to purchase an EIP and finalize payment to activate it.
- Once the instance is successfully created, users will receive an SMS notification confirming the successful creation of the BCC instance, including details like the instance name, private and public IPs, username, and availability zone.

At this point, users have successfully created a virtual private cloud and subnet, and assigned the associated BCC Instance to the subnet. Users can access their BCC Instance via SSH or remote desktop. For detailed procedures, refer to [Sign in to BCC Instance](BCC/Operation guide/Instance/Sign in to instance/Login Method Overview.md).
Description:
- All subnets are interconnected by default.
- If an instance in the subnet is associated with an EIP, EIP routing will take priority over NAT routing if a conflict arises after adding NAT routing.
- If a newly created subnet overlaps with the network segment of any VPC route entries, a warning pop-up will appear. If creation proceeds, traffic will prioritize the subnet during routing conflicts instead of the peer network.
Subnet broadcast
Broadcasting, a one-to-many communication technique, eliminates the need to send data individually to each client, significantly reducing network bandwidth usage and system load. It is widely utilized in industries like finance and gaming.
- In the VPC console, click Subnet in the left navigation bar to access the Subnet List page.
- Click on the Subnet Name to enter the Subnet Details page, then toggle the subnet broadcast switch to enable broadcast functionality for the subnet.

Description:
- Subnets created before December 2022 do not currently support the broadcast function.
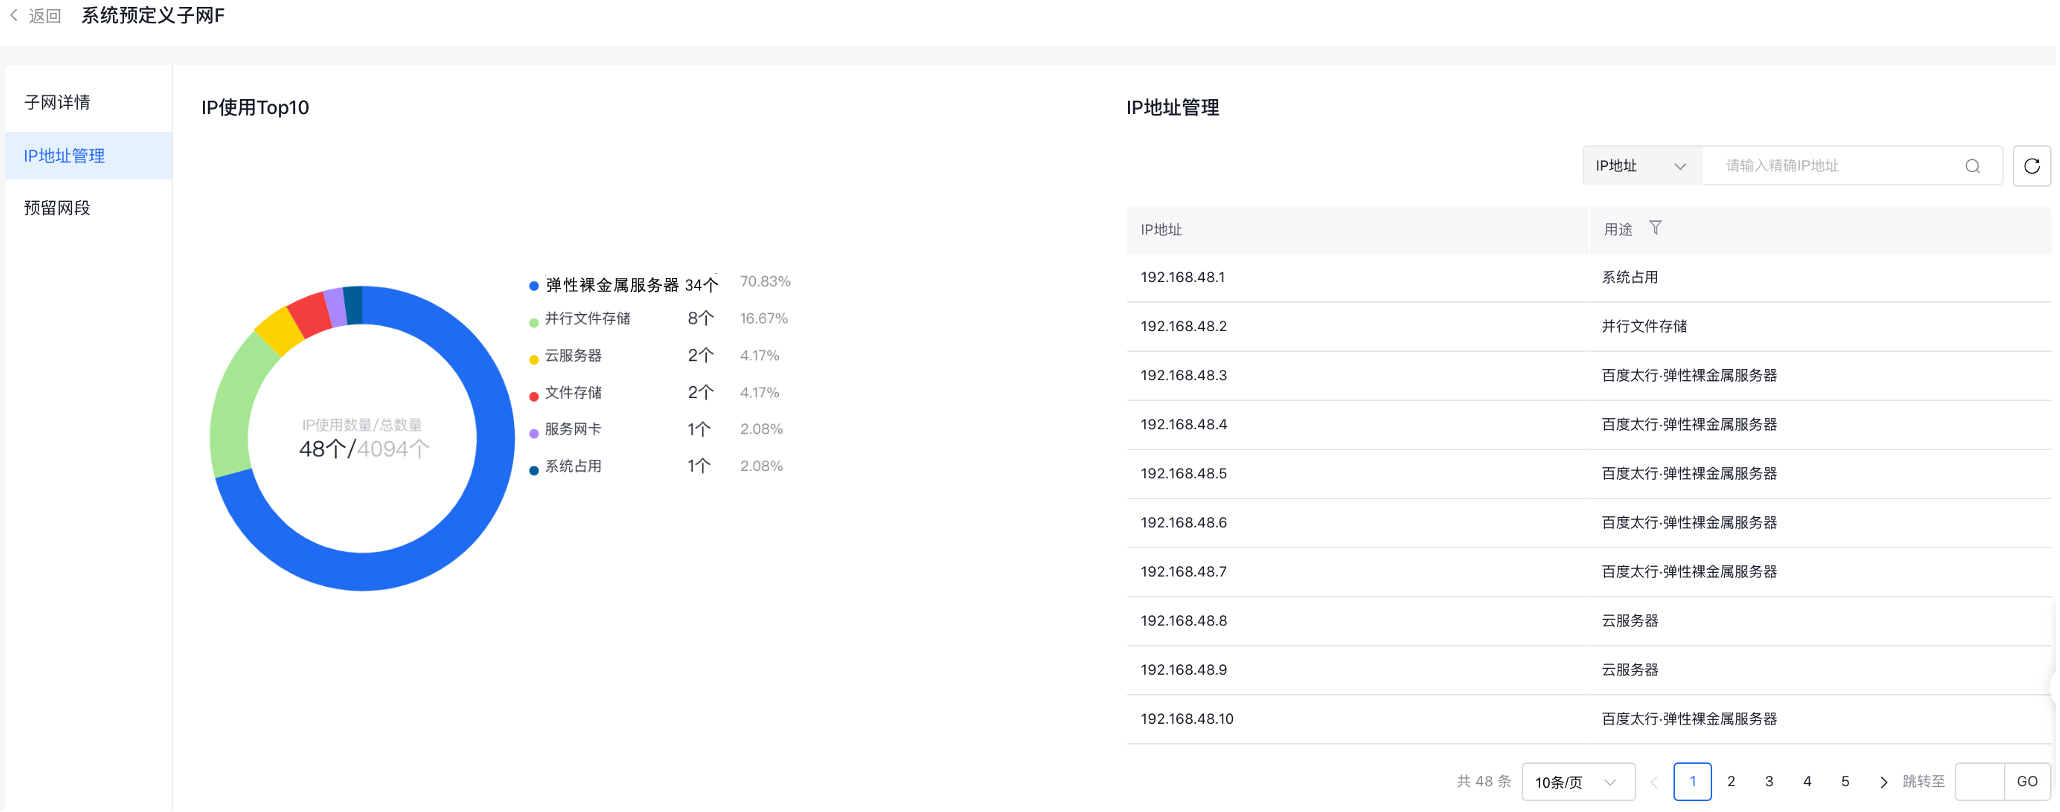
IP address management
IP address management showcases the top 10 resource types and data within the subnet, along with all occupied IP address details, enabling users to monitor subnet IP usage effectively.
- In the VPC console, click Subnet in the left navigation bar to access the Subnet List page.
- Click on the subnet name to access the Subnet Details page, then select IP Address Management from the left navigation bar to reach the IP Address Management page.
Reserved network segment
Within the CIDR range of a subnet, partitioned segments cannot be randomly assigned. If an IP address is specified during instance creation, it will be within the reserved network segment of the subnet, aiding users in address planning.
- In the VPC console, click Subnet in the left navigation bar to access the Subnet List page.
- Click on the subnet name to access the Subnet Details page, then choose Reserved Network Segment from the left navigation bar to view the Reserved Network Segment page.
- Click on Create Reserved Network Segment to open a dialog box for entering configuration details.
| ConfigMap | Description |
|---|---|
| Segment type | Select the type of network segment, supporting both IPv4 and IPv6 |
| Network segment | Specify the segment to reserve, ensuring its boundaries neither exceed the subnet's range nor overlap existing reserved network segments |
| Description | Edit the description information of reserved network segments |
