
Network probe
Updated at:2025-10-16
Baidu AI Cloud Network Probe is a service to monitor the quality of VPC network connectivity and supports Ping detection for various resources such as Baidu Cloud Compute, NAT gateway, VPN gateway, peering connections, dedicated gateway, and Cloud Smart Network. It tracks key metrics like latency and packet loss, enabling real-time evaluation of connection quality and instant notifications for connection failures.
Before Configuration, users should understand:
- A maximum of 50 network probe instances can be created within a VPC.
Create Network Probe
Follow these steps to modify the login password of the instance on the console:
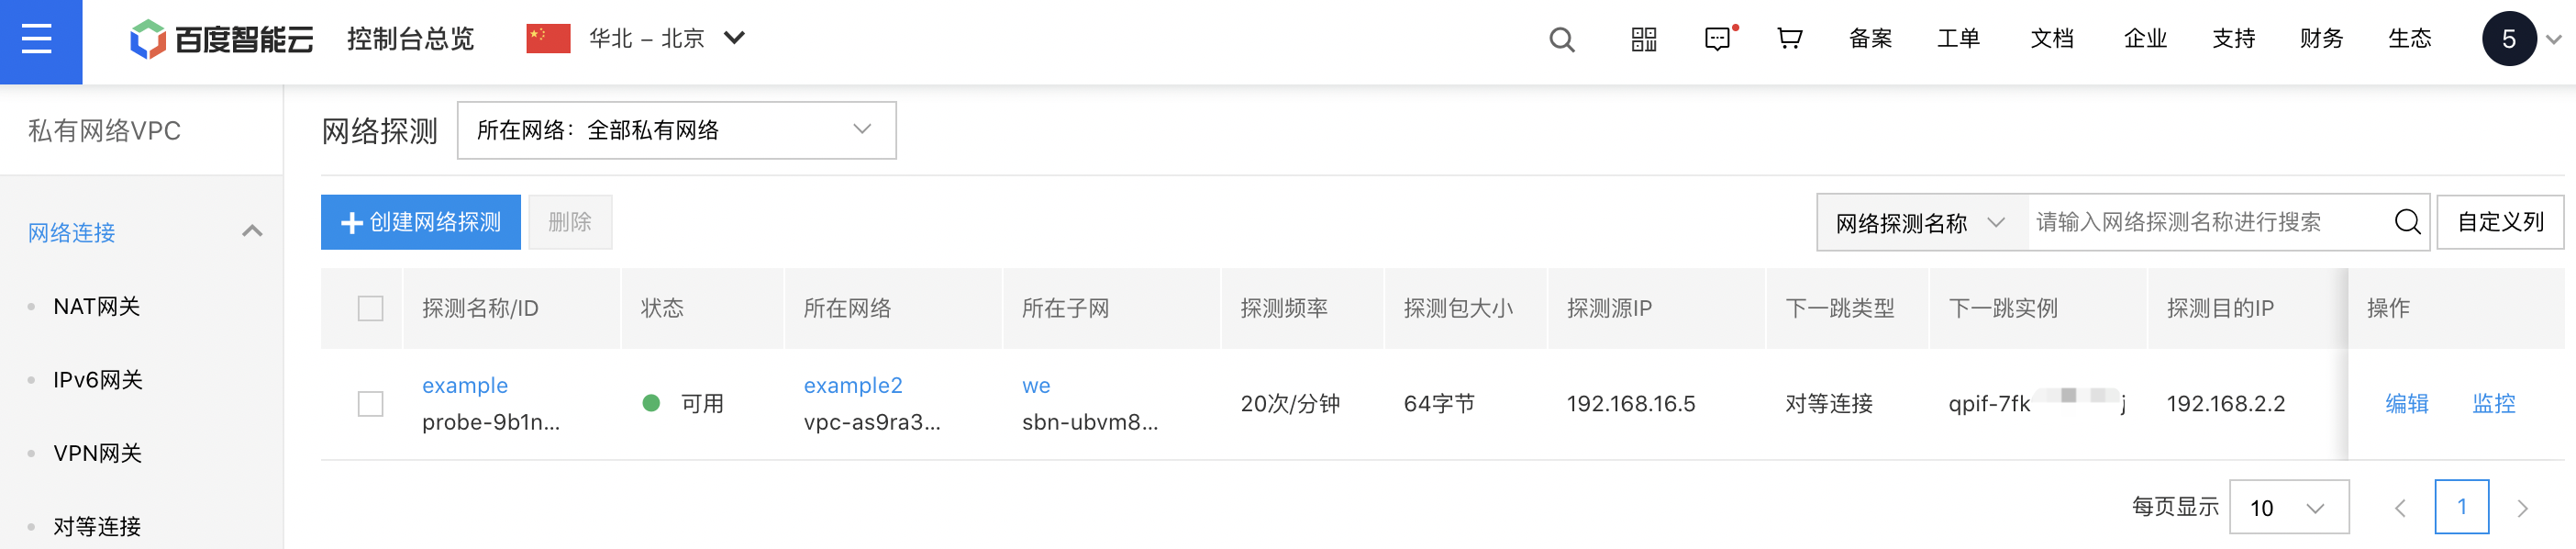
- Sign in to Management console and select Product Service - Network - Network Diagnostic Service (NDS).
- Access the Network Diagnostic Service (NDS) console, then select Network Probe from the left navigation menu to enter the list of network probe instances.
- Click Create Network Probe button and fill in the following configuration information:
| ConfigMap | Description |
|---|---|
| Probe name | Name of user-defined network probe |
| Network | Virtual private cloud where the probe source IP resides |
| Subnet belonged | Subnet where the probe source IP resides |
| Probing method | The default probe method is ICMP (PING) |
| Probe frequency | Select the probe frequency, defaulted as 20 times/minute |
| Probe source IP | Up to four source IP addresses can be added. By default, IPs are automatically assigned, but you can also manually input available IPs within the subnet. If automatic allocation is selected, priority is given to existing probe source IP addresses. |
| Probe destination IP | Users can add up to 1 destination IP address. Ensure the ICMP firewall policy is enabled for the destination host of the network probe |
| Automatically generate route | Enabled by default; If enabled, a detailed route will be auto-generated for network probing; If disabled, existing VPC routes will be used for forwarding |
| Source location next-hop route | If route auto-generation is enabled, the configuration for the next-hop route at the source location will be displayed; Select the next-hop type and specific instance |
| Description | Edit network probe-related description information |
- Click OK to finalize the creation of network diagnostic services.
Edit network probe
- Sign in to Management console and select Product Service - Network - Network Diagnostic Service (NDS).
- Access the Network Diagnostic Service (NDS) console, then select Network Probe from the left navigation menu to enter the list of network probe instances.
- Click Edit next to the instance to pop up a dialog box where users can edit the following information: probe name, probe frequency, probe destination IP, source next-hop route, and description.
Delete network probe
- Sign in to Management console and select Product Service - Network - Network Diagnostic Service (NDS).
- Access the Network Diagnostic Service (NDS) console, then select Network Probe from the left navigation menu to enter the list of network probe instances.
- Select the network diagnostic service instance to be deleted, then click Delete above the list, and confirm the deletion by clicking OK.
View monitor data
- Sign in to Management console and select Product Service - Network - Network Diagnostic Service (NDS).
- Access the Network Diagnostic Service (NDS) console, then select Network Probe from the left navigation menu to enter the list of network probe instances.
- Click Monitor next to the instance, and a monitor pop-up window will appear on the right side of the page.
- Click View More to access the Monitor Of Instance Details page.
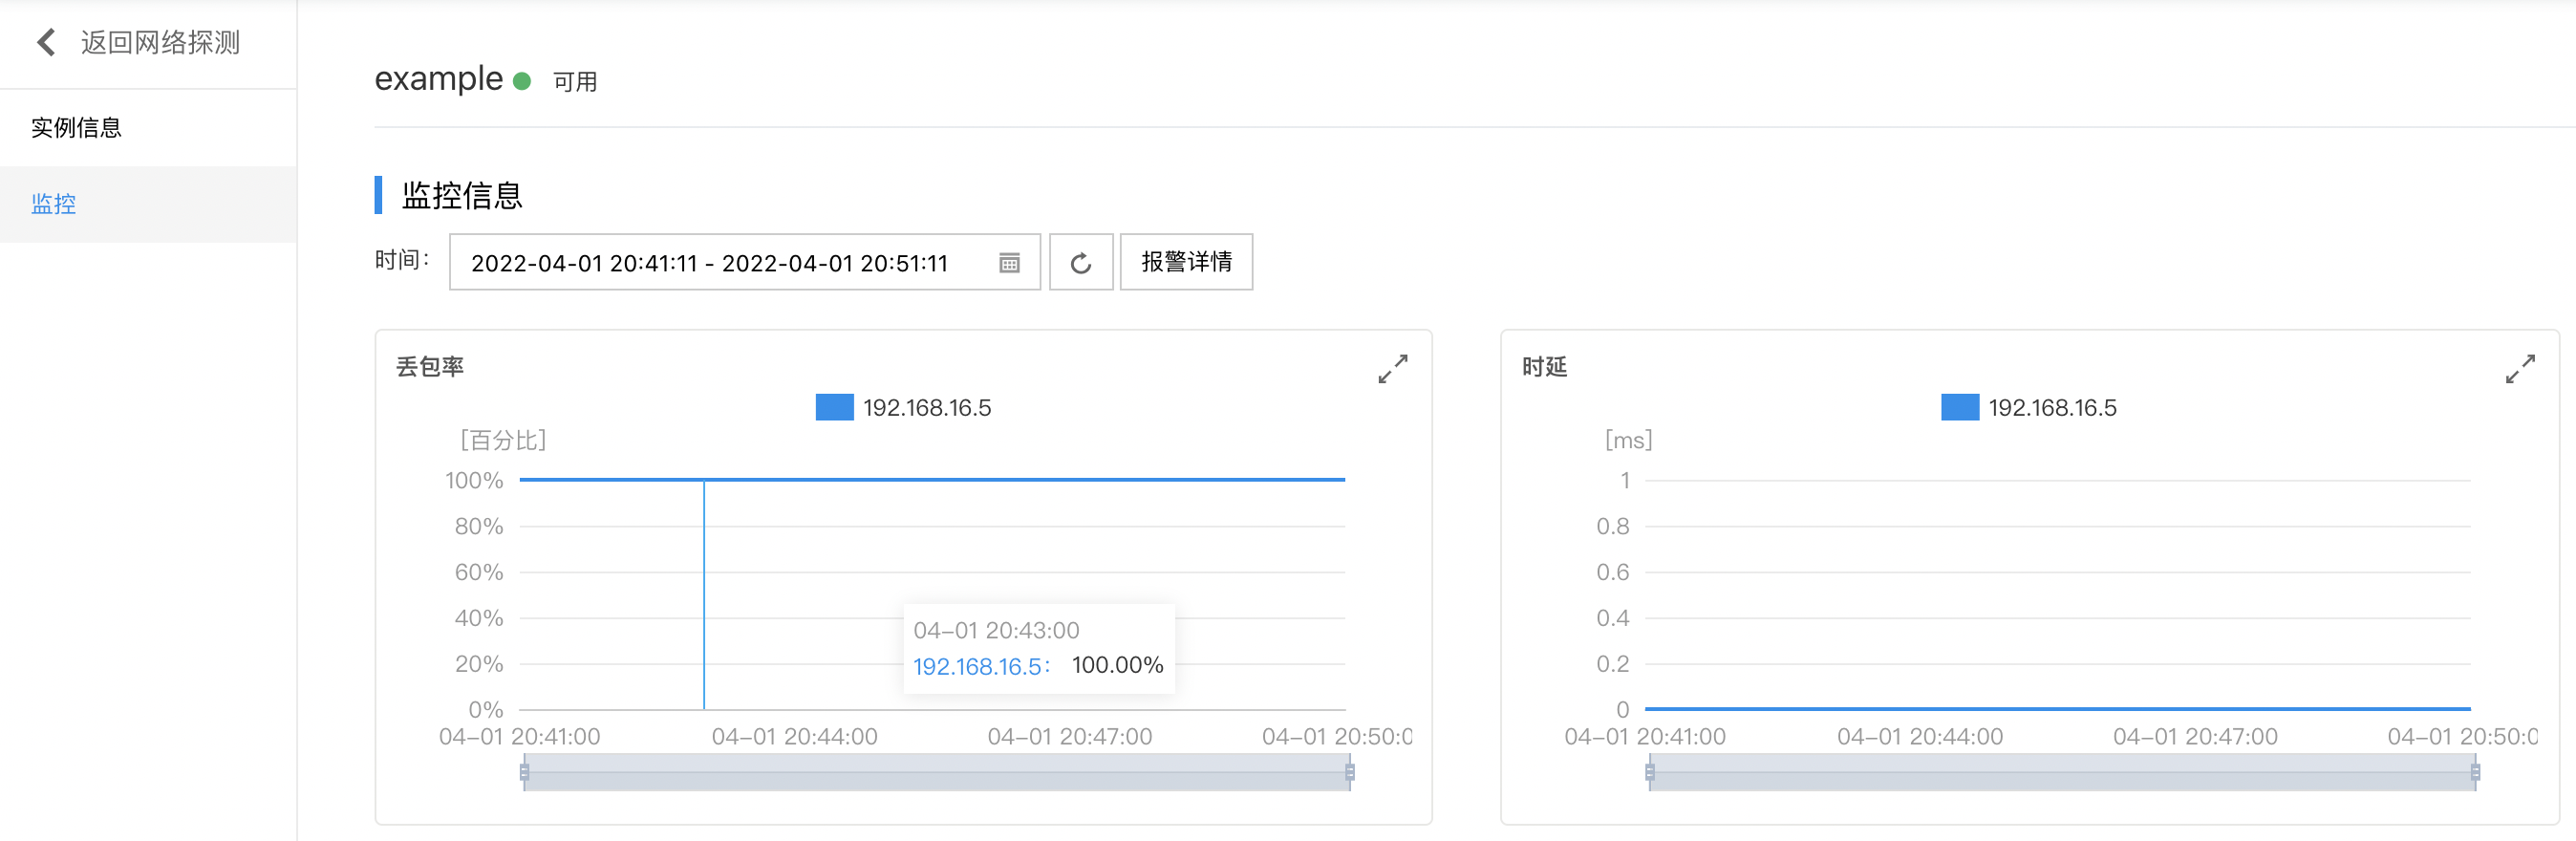
- Click Alarm Details on the Monitor page to enter the Alarm Policy Configuration page, where you can manage the alarm policy of network probe. For detailed operation steps, please see BCM Alarm Management.