
Create cloud disks
Overview
You can create and use cloud disk server (CDS) in the following ways:
- Simultaneously create a cloud disk server (CDS) while creating a Baidu Cloud Compute (BCC) instance.
- Create a cloud disk server (CDS) within the details section of an existing BCC instance.
- Independently create a postpaid cloud disk server (CDS) and later attach it to a BCC instance.
Data in cloud disk server (CDS) is stored in real-time by multi-replica means, ensuring stable and reliable performance. Baidu AI Cloud provides multiple types of disks for you to choose from. You can learn more about disk types and performance in Product Introduction.
Description:
- Each Baidu Cloud Compute (BCC) instance supports the attachment of up to 5 cloud disk servers (CDS) as data disks.
Disk bill type description
| Bill type | Instructions for use | Applicable scenarios |
|---|---|---|
| Subscription |
|
Application scenarios where there is clear usage duration, the binding relationship with computing instances is relatively fixed, and frequent adjustments to the mounting configuration are not required. |
| Postpay |
|
Elastic application scenarios where there is no clear usage cycle, or flexible adjustments of configurations or mounting relationship are required. |
Operation steps
Method 1: Create a cloud disk server (CDS) simultaneously when creating a BCC instance
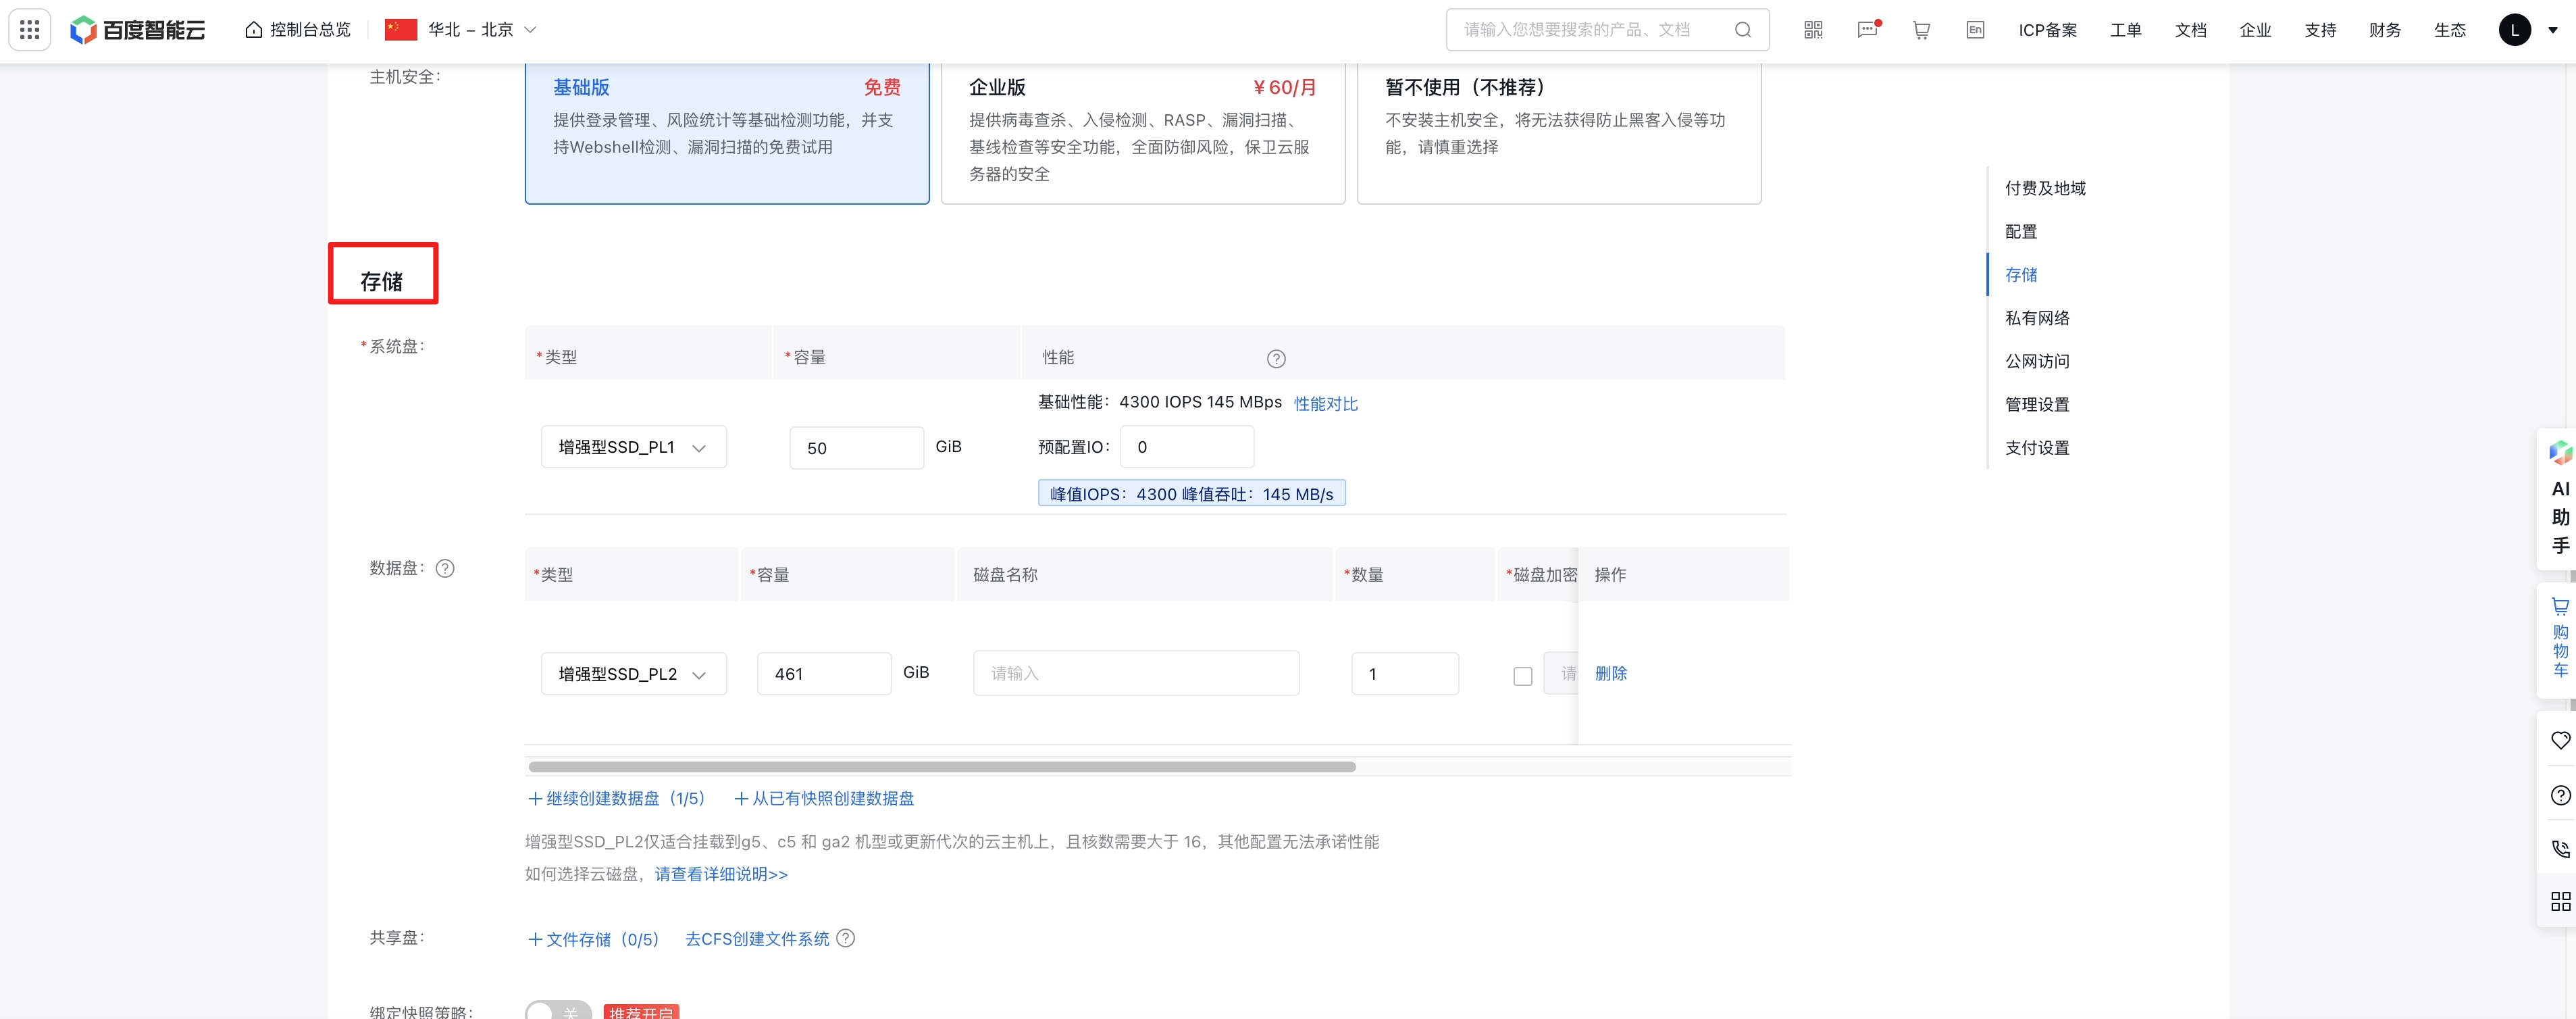
The cloud disk server (CDS) created this way is automatically mounted to the newly created BCC instance. After successful creation, you need to perform [Cloud Disk Server (CDS) Formatting](CDS/Disk Operation Guide/Basic Operations/Format cloud disks/Overview.md) before use.
Refer to [BCC Creation Guide](BCC/Operation guide/Instance/Create instance/Create Instance via Purchase Page.md) for detailed steps.
Method 2: Create cloud disk server (CDS) for existing BCC instances
If you need to add a cloud disk server (CDS) to an existing BCC instance, you can create a new cloud disk server (CDS) in the BCC console, which will be automatically mounted to the corresponding Baidu Cloud Compute (BCC) instance. After successful creation, you need to perform [Cloud Disk Server (CDS) Formatting](CDS/Disk Operation Guide/Basic Operations/Format cloud disks/Overview.md) before use.
Steps are as follows:
1. Sign in to the Baidu AI Cloud official website
Sign in to Baidu AI Cloud official website.
- If you have not registered an account, you must first [register an account](UserGuide/Register an account.md#Register a Baidu Account).
- If you have registered an account, you can directly sign in.
2. Access the BCC console
Navigate to the BCC console by selecting "Baidu Cloud Compute > Baidu Cloud Compute (BCC)" in the left sidebar.
3. Select a BCC instance
Navigate to the BCC instance list by clicking the Instance button in the left-hand menu. Before selecting the BCC instance to create a CDS for, ensure you’ve switched to the correct BCC region by clicking on the Region Name in the upper-left corner of the console.

Description:
- Baidu AI Cloud currently supports multiple regions. If you need to create cloud disk server (CDS) in multiple regions, please refer to [Region Selection Guide](Reference/Region Selection Instructions/Region.md).
- Disks created in different regions operate independently.
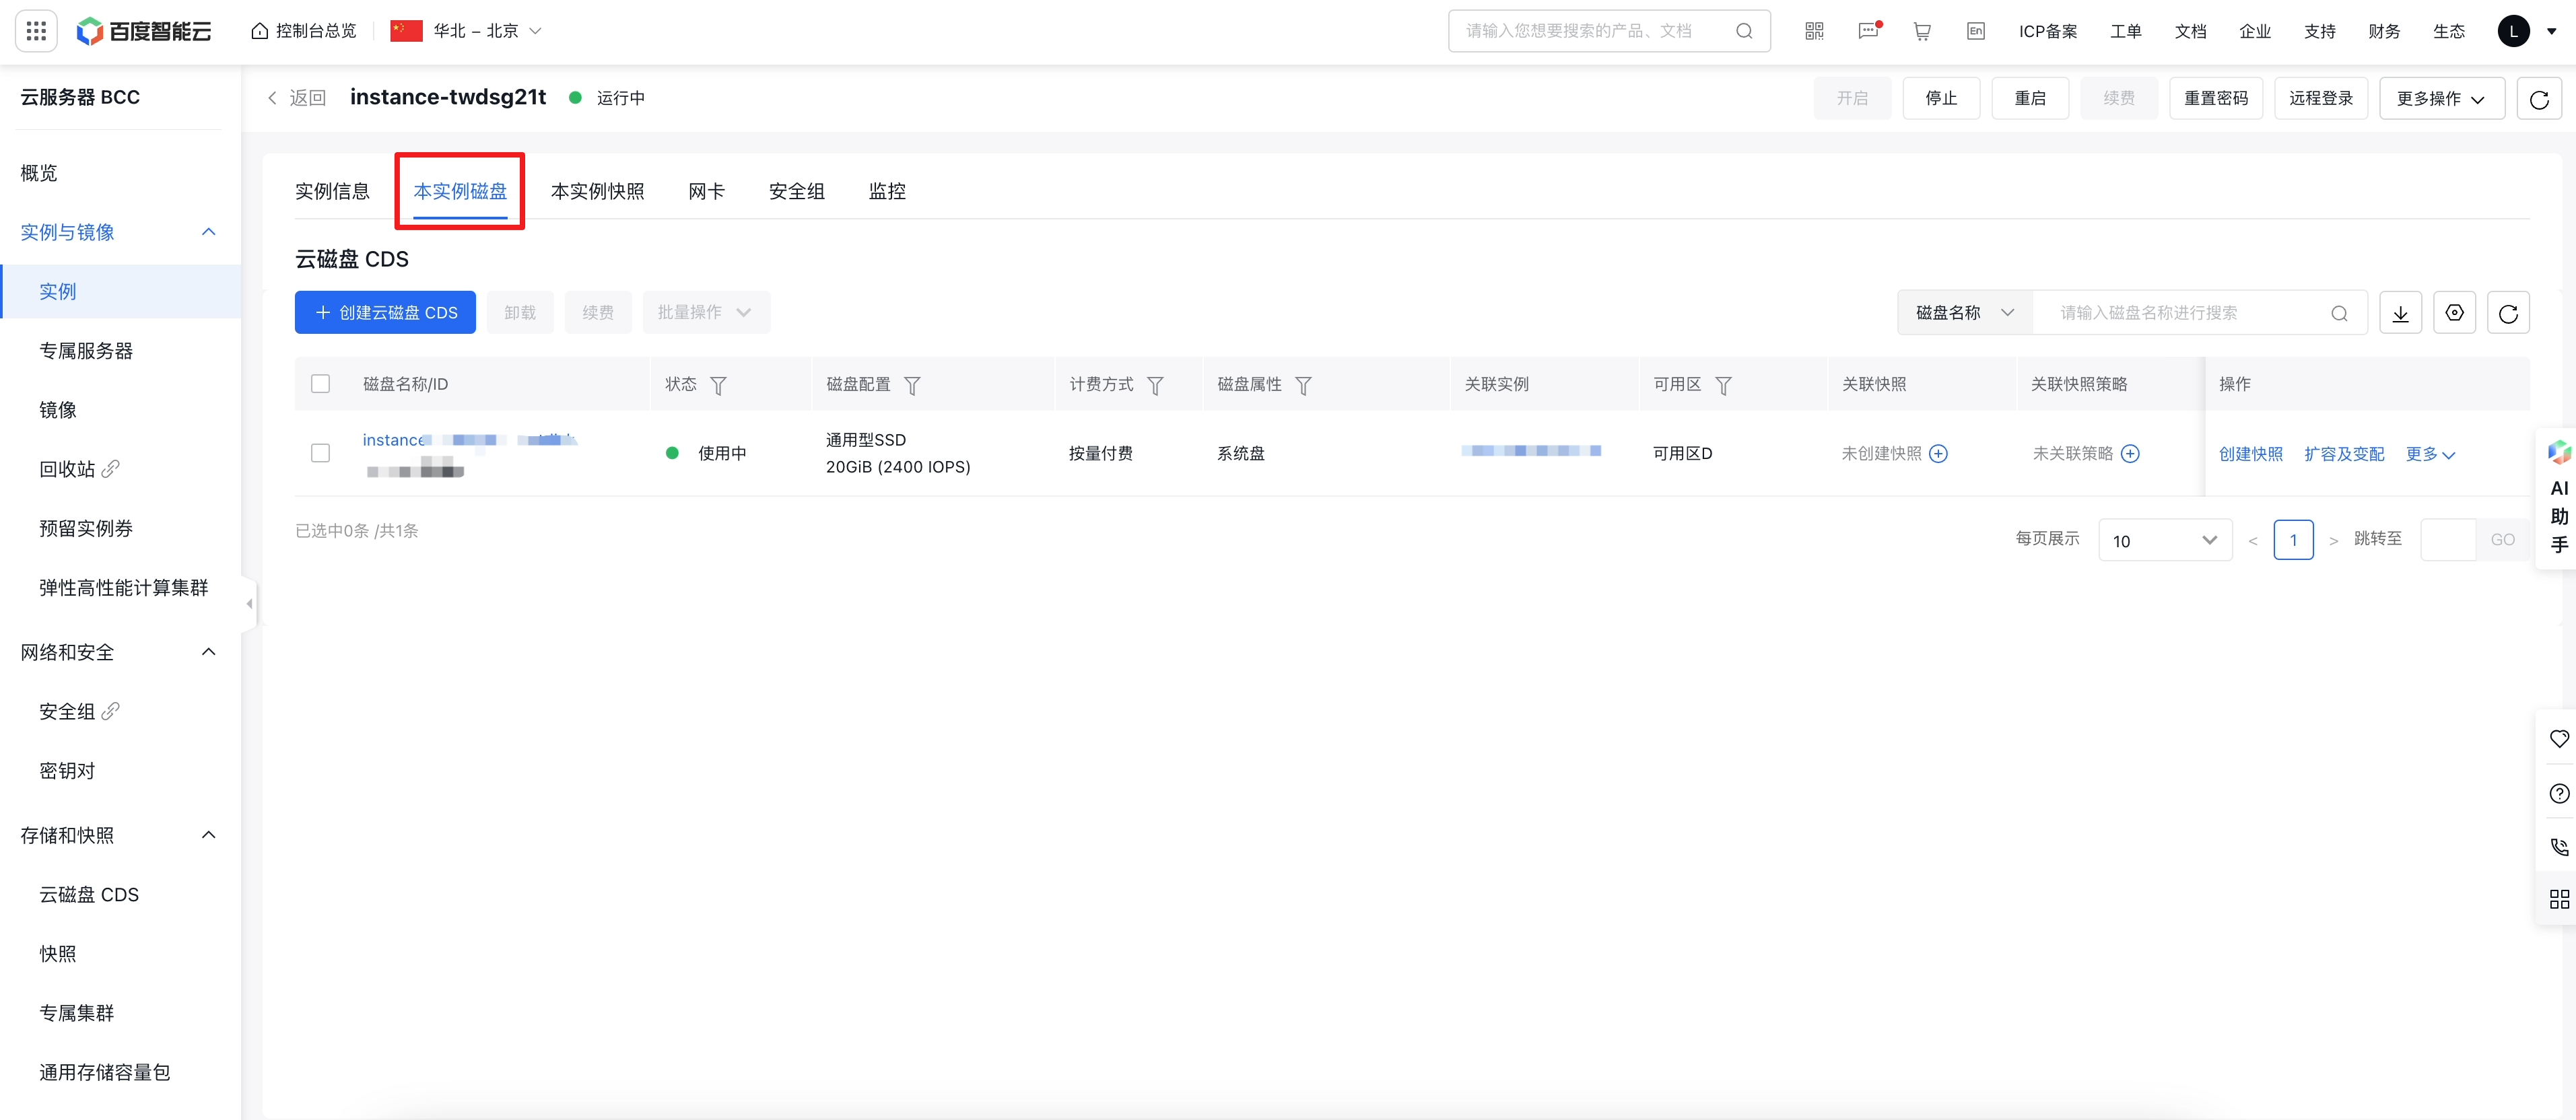
4. Enter the instance details page
From the instance list, click the name of the target BCC instance for which you want to create a cloud disk server (CDS). This will take you to the instance details page. On the left side, click Disks of This Instance to access the instance’s disk page.
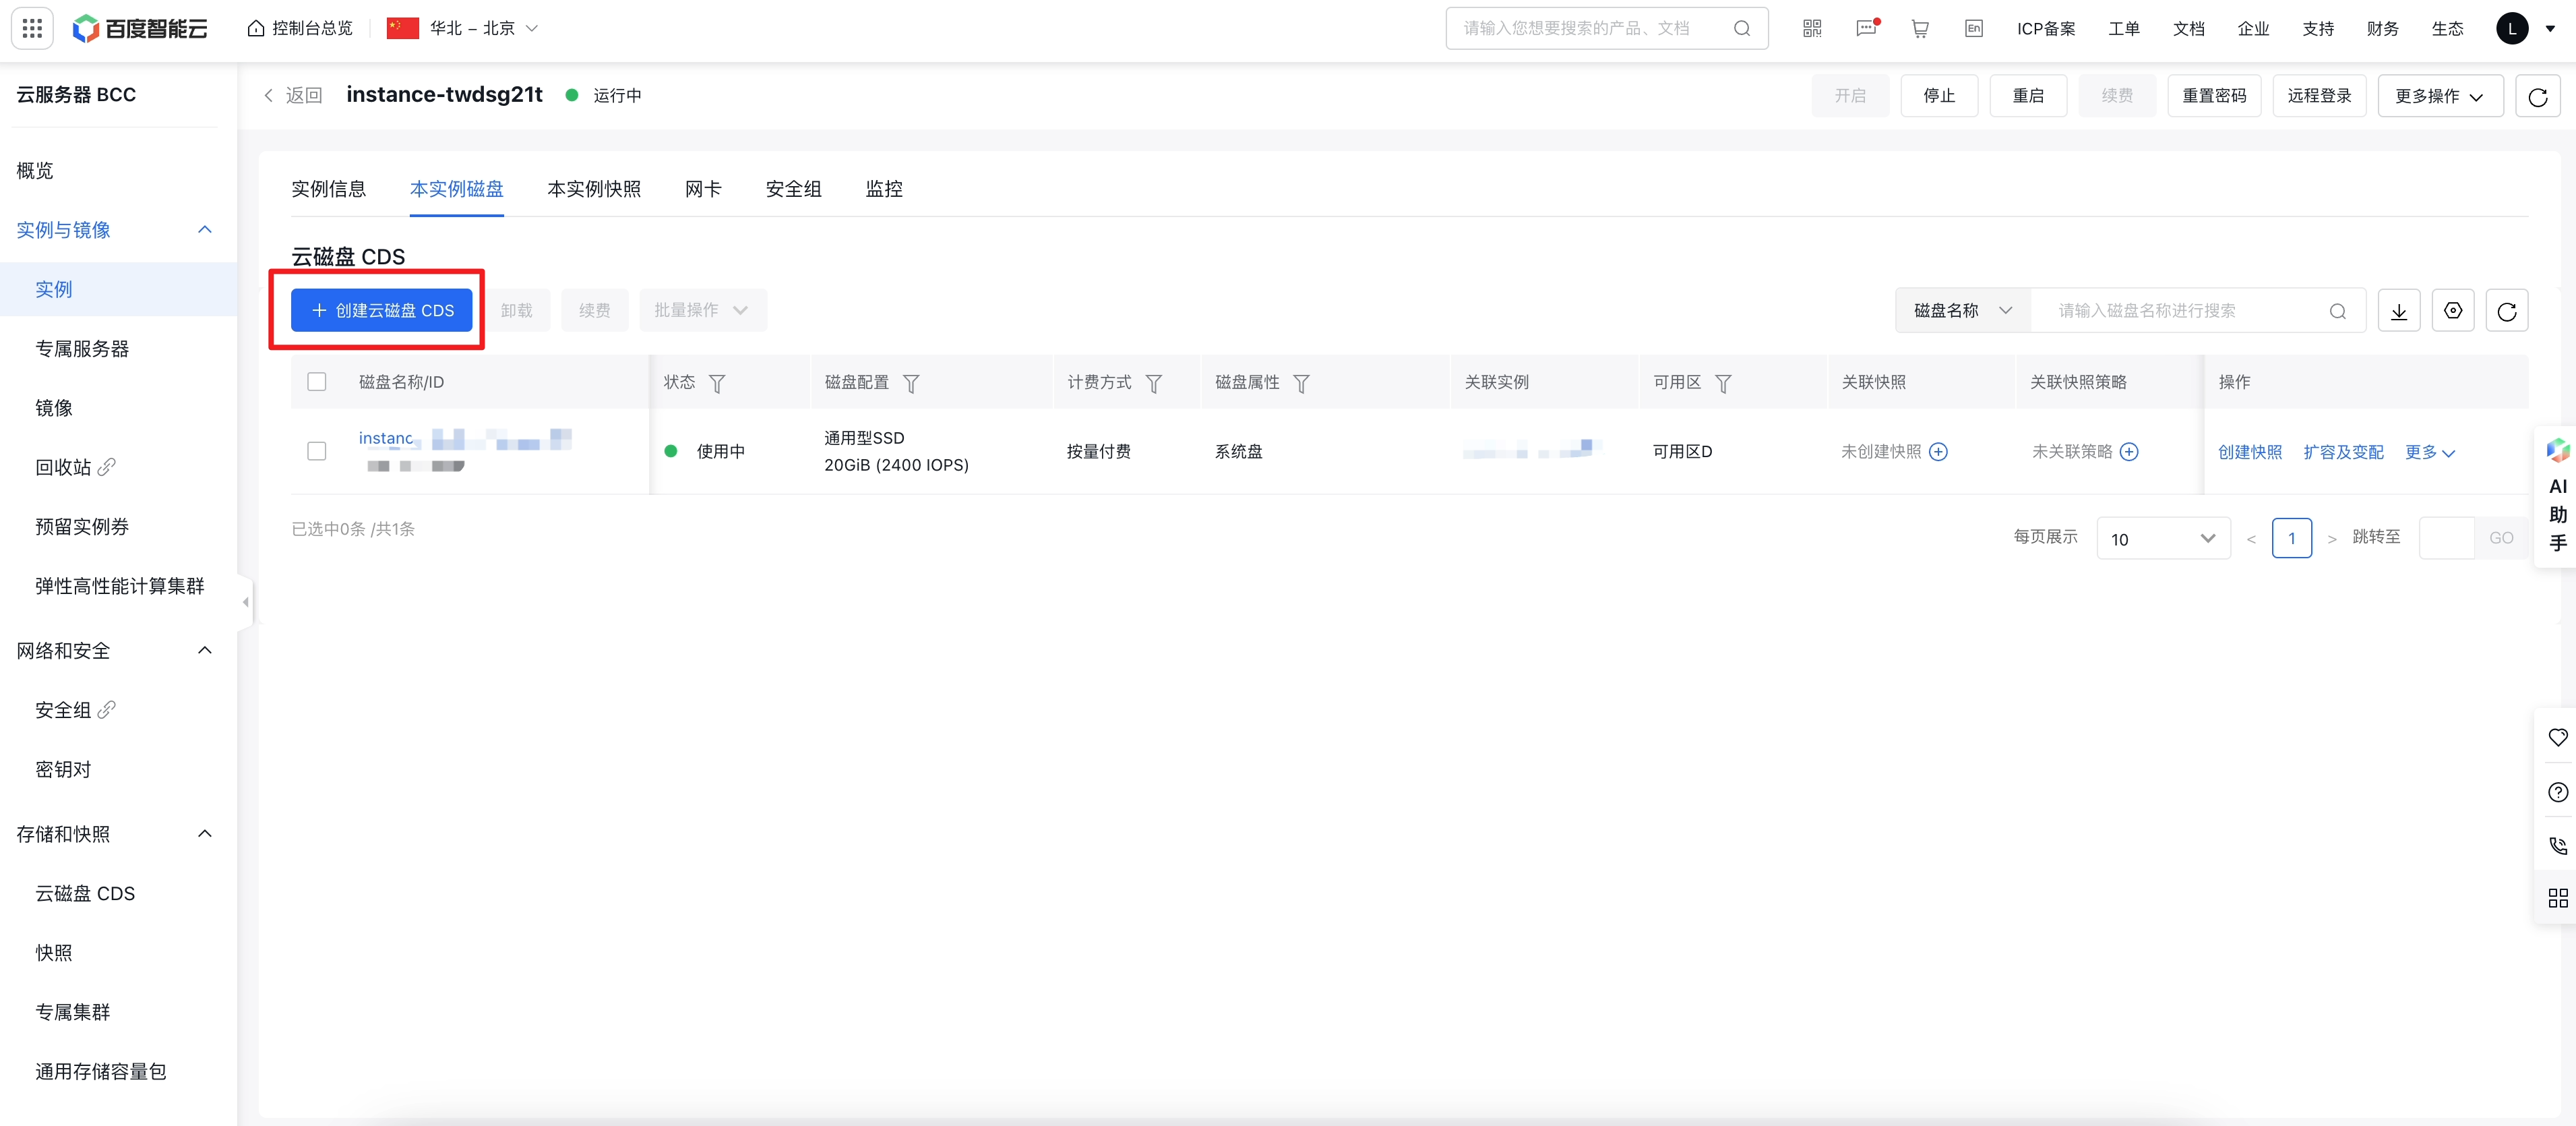
5. Create a cloud disk server (CDS)
Click "Create CDS Disk" to open the "Create Disk" page.
Bill Types
On this page, select bill type of disk, including prepay and postpay.
Note:
- Prepaid BCC instances support both prepaid and postpaid cloud disk servers (CDS), while postpaid BCC instances support only postpaid CDS.
Configuration information
Simultaneously, you must select the type and capacity of cloud disk server.

You can also create multiple cloud disk servers simultaneously for a BCC instance by clicking Create Cloud Disk Server (CDS), with up to 5 data cloud disks per instance. Alternatively, you may create new cloud disk servers directly from existing snapshots by entering their names or IDs.

Additionally, you can associate snapshot policies during creation by selecting from existing policies. If no snapshot policy has been created, click Create Snapshot Policy to set one up.
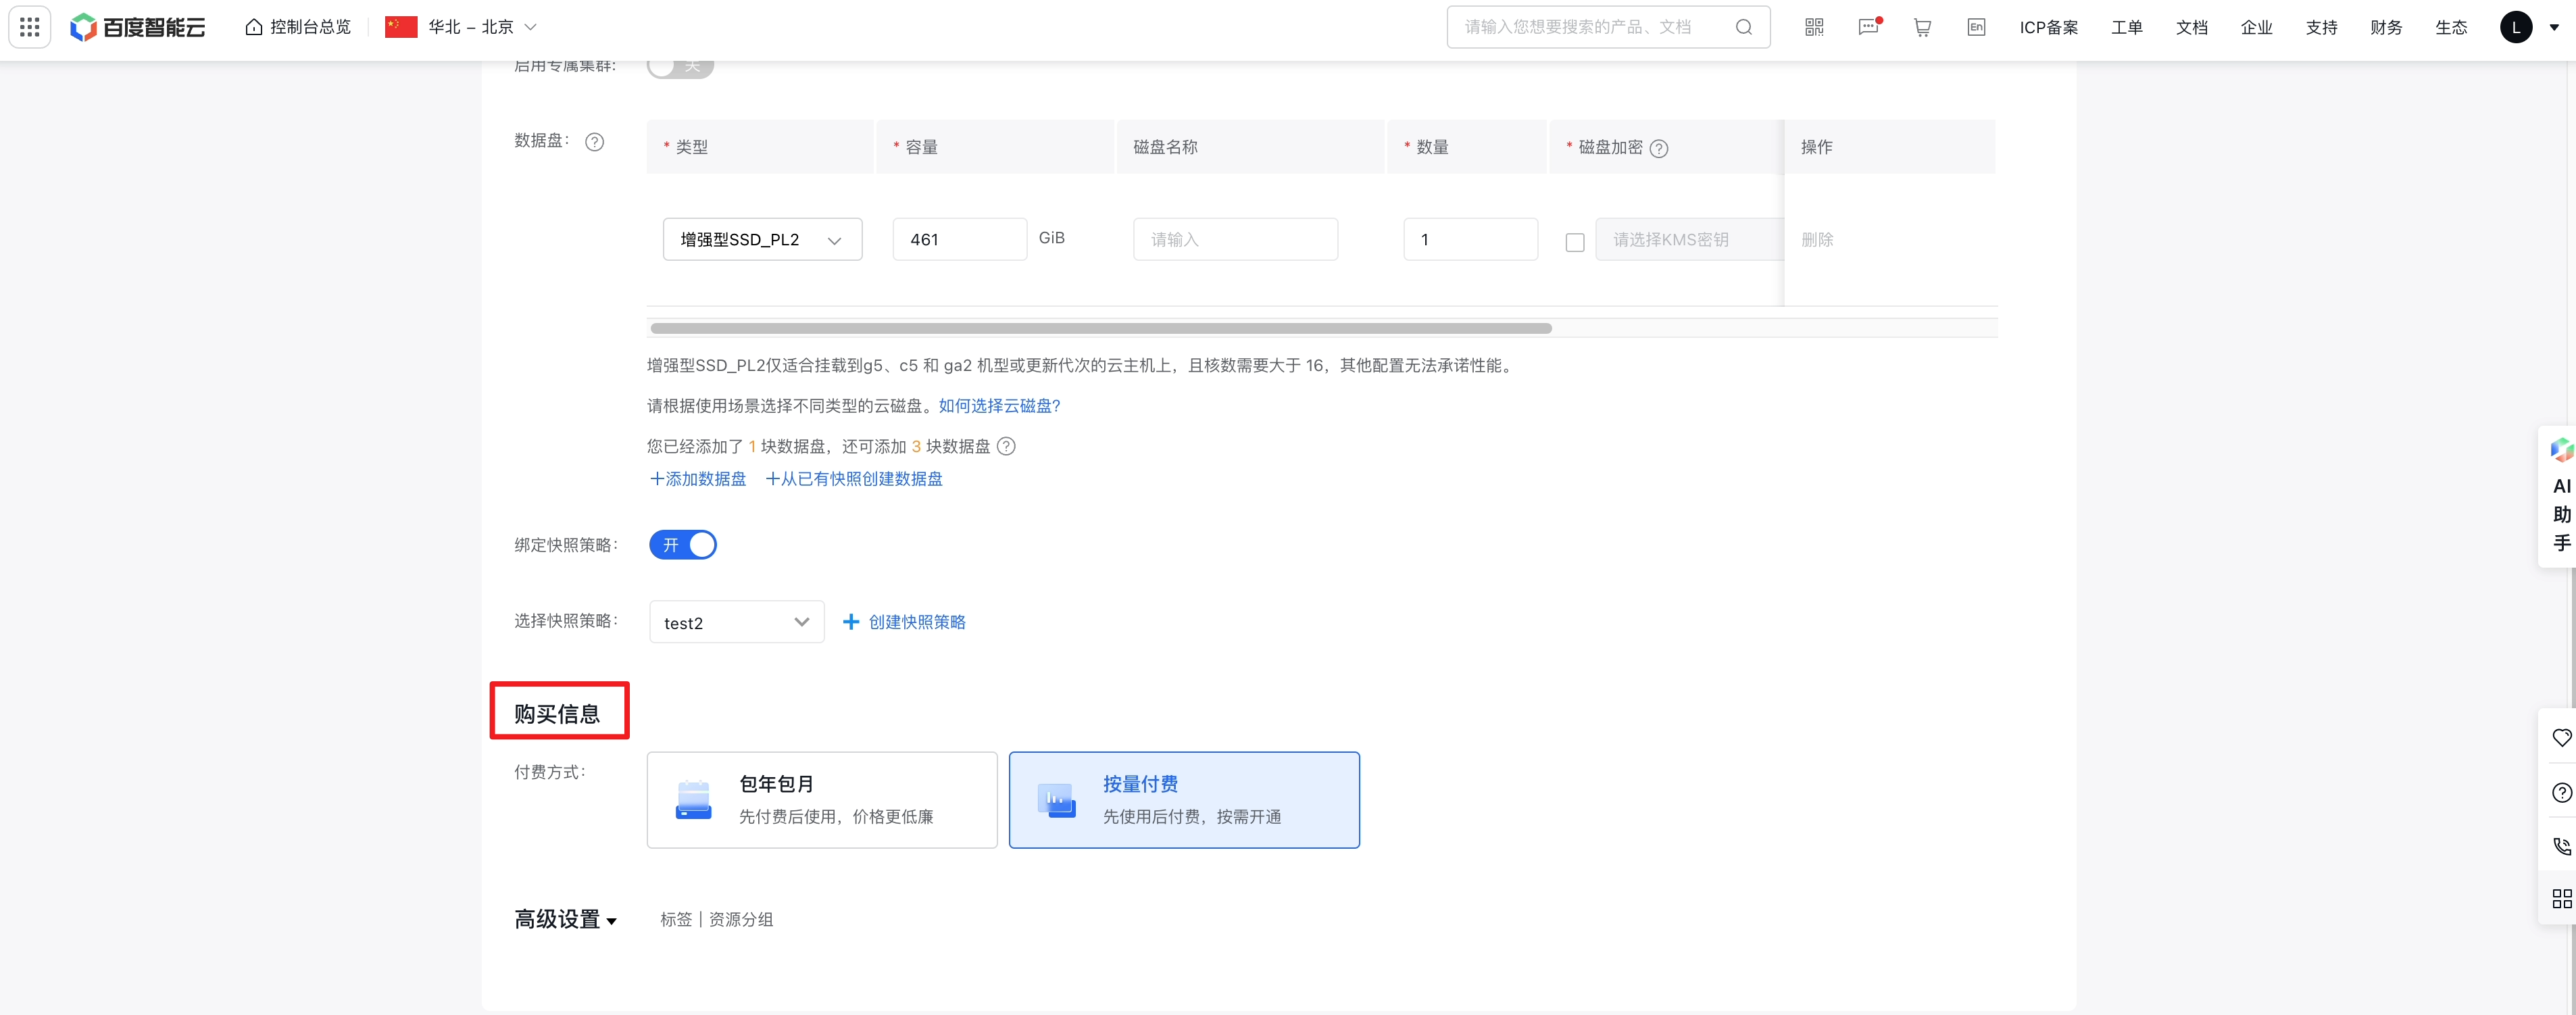
Purchase information
After completing the configuration details, proceed to select the purchase details for the disk.
- When mounting to a subscription-based instance, you can select either a subscription or postpaid disk. If choosing a subscription disk, the expiration date will align with that of the mounted instance.
- If the billing type for the mounted instance is postpay, the disk will only support the postpay billing model.
6. Confirm order
Verify the configuration and pricing details displayed on the right side of the page before clicking Next to complete the payment process.
7. Creation succeeded
Once the payment is successful, the message "Payment Succeeded" will be displayed and the cloud disk server (CDS) will be created. An SMS notification will also be sent confirming the successful purchase of the cloud disk server.
Method 3: Independently create cloud disk server (CDS)
If you plan to [mount](CDS/Disk Operation Guide/Basic Operations/mount Cloud Disk Server.md) the disk to a target Baidu Cloud Compute (BCC) instance later, you may purchase cloud disk server (CDS) separately and complete [ Cloud Disk Server (CDS) Formatting](CDS/Disk Operation Guide/Basic Operations/Format cloud disks/Overview.md). Operation steps are as follows:
1. Sign in to the Baidu AI Cloud official website
Sign in to Baidu AI Cloud official website.
- If you have not registered an account, you must first [register an account](UserGuide/Register an account.md#Register a Baidu Account).
- If you have registered an account, you can directly sign in.
2. Access the CDS console
From the left-hand menu, navigate to Product Services > Cloud Disk Server (CDS) to access the Disk List page.
3. Create a cloud disk server (CDS)
Create portal
Click Create Cloud Disk Server (CDS) in the top-left corner to go to the Create Instance page.
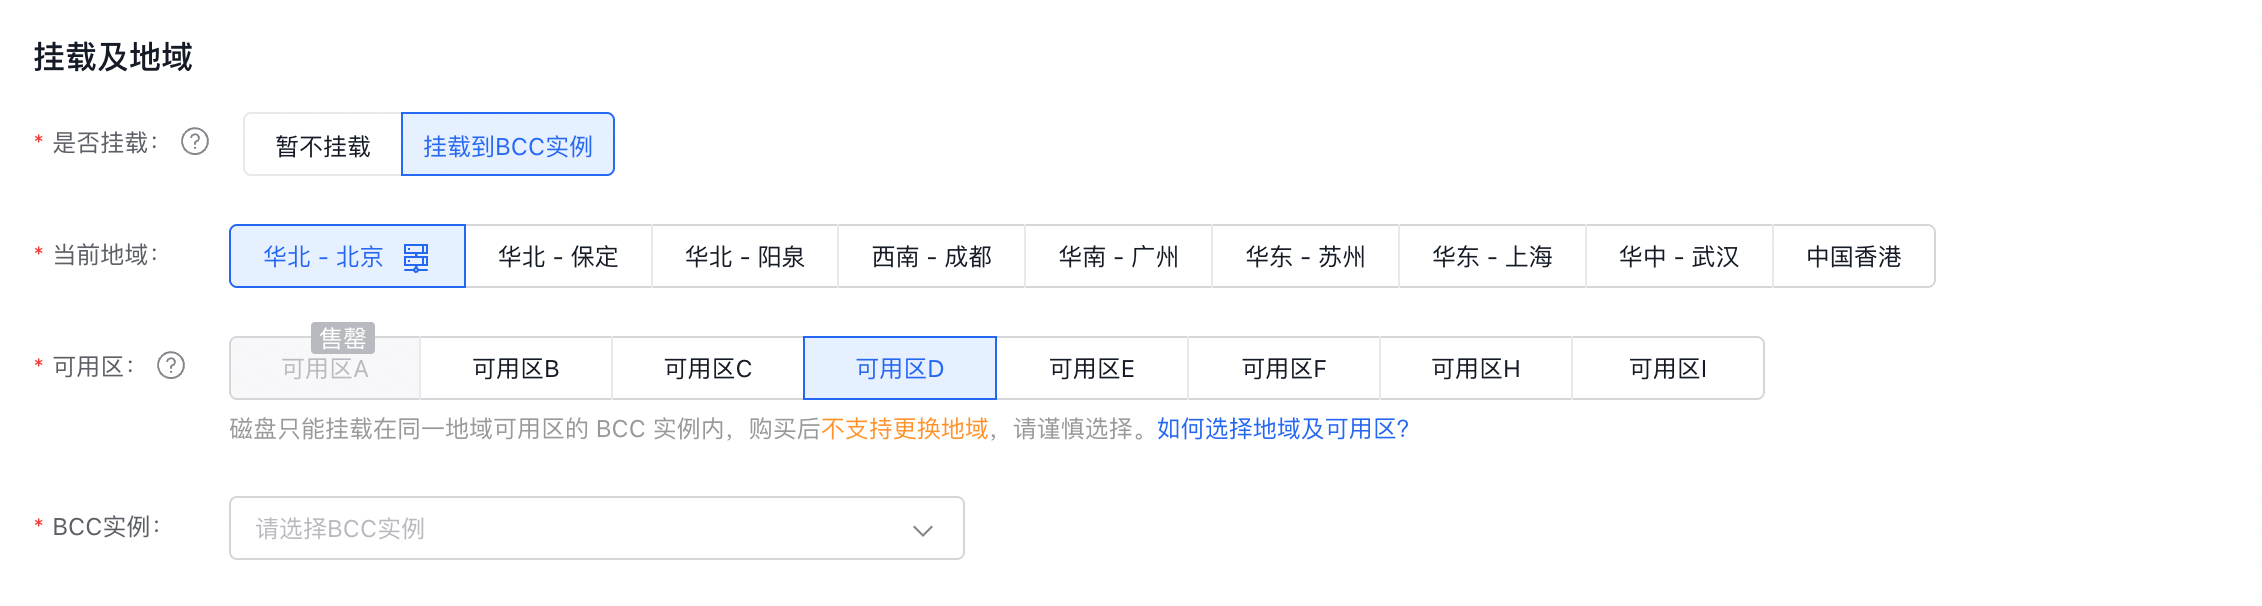
Mount and region
At the top of the page, choose between Do Not Mount Now or Mount to BCC Instance to proceed with creating the disk.
Note:
- The Do Not Mount Now option is available only for postpaid cloud disk servers.
- If you select the Mount to BCC Instance option, the billing method for the disk will correspond to that of the mounted instance. For subscription-based instances, you can create either subscription or postpaid disks. For postpaid instances, only postpaid disks can be created.
Select the disk region and availability zone. If the "Mount to BCC Instance" option is chosen, you also need to select the matching BCC instance.
Note:
- If "Do Not Mount Now" is selected, or the billing type for the mounted BCC instance is postpaid, you can only create a postpaid cloud disk server.
- Disks created in different regions operate independently from one another. Make sure the region you select matches the BCC instance's region before creating a Cloud Disk Server (CDS).
Disk configuration
You must select the type and capacity of cloud disk server.
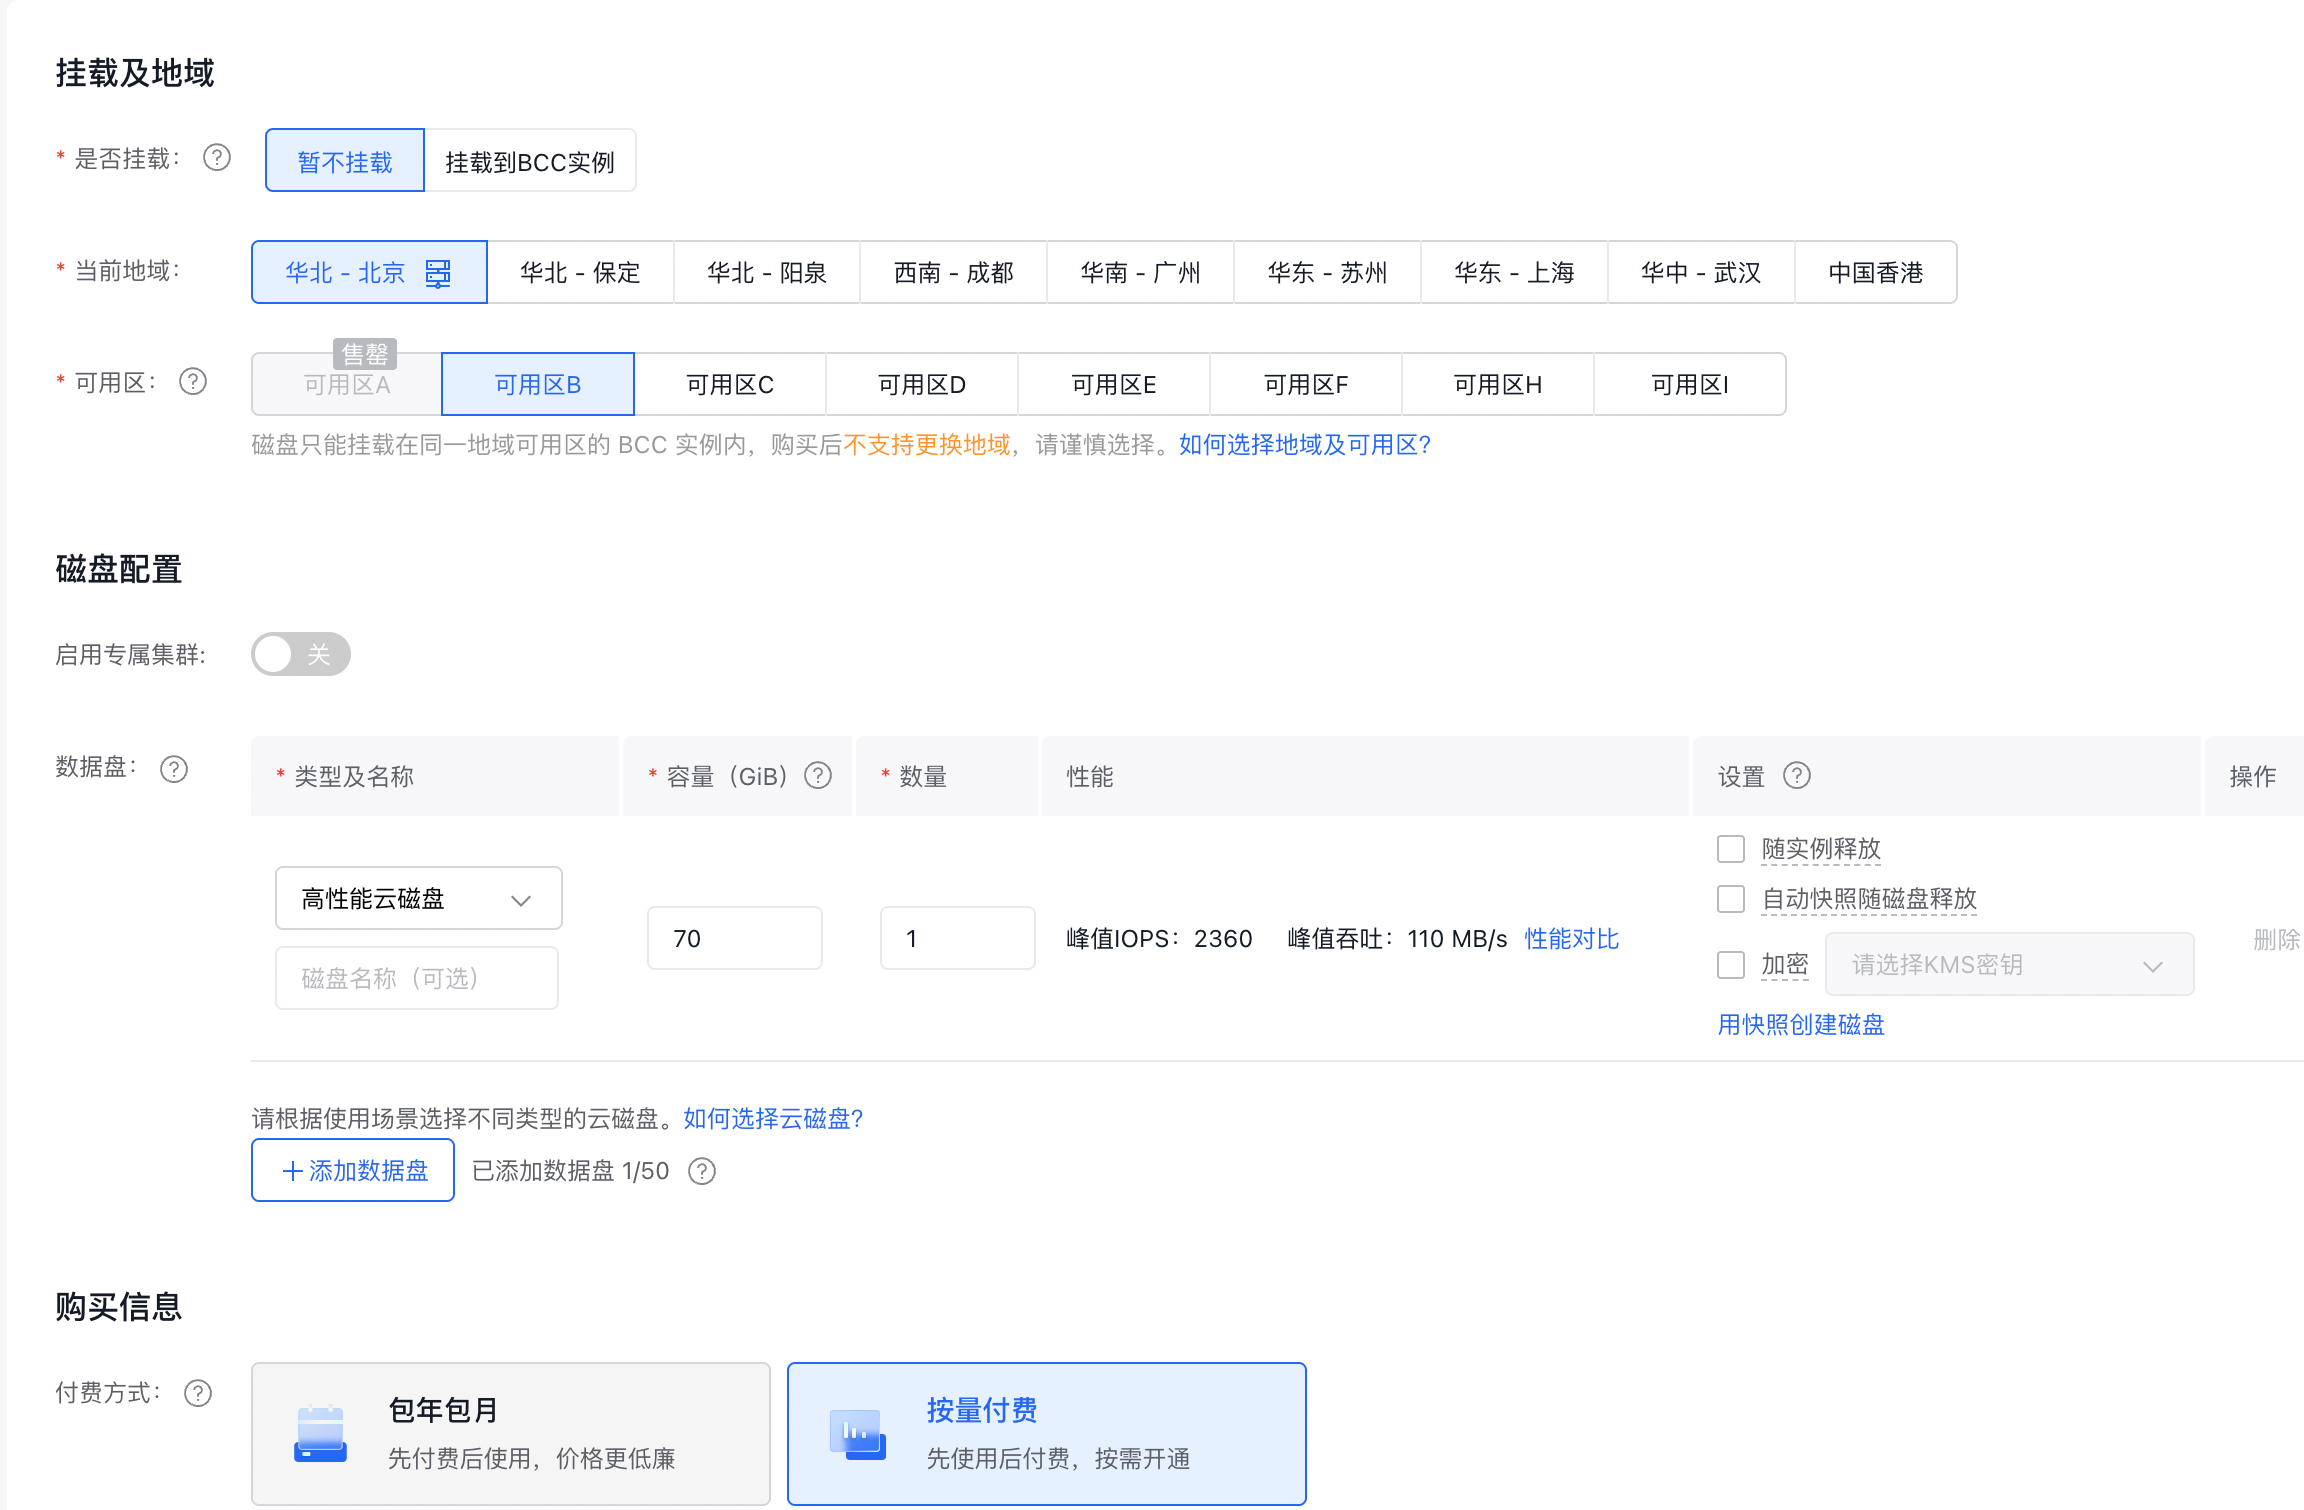
Configure the disk's associated release attribute and enable disk encryption as needed.
Note:
- The associated release attribute includes two options: releasing the disk along with the instance, and releasing automatic snapshots with the disk.
- The disk encryption feature can only be set during creation and cannot be modified later.
Click the "Add Data Disk" button on the page to create multiple cloud disk servers with varying configurations.

Purchase information
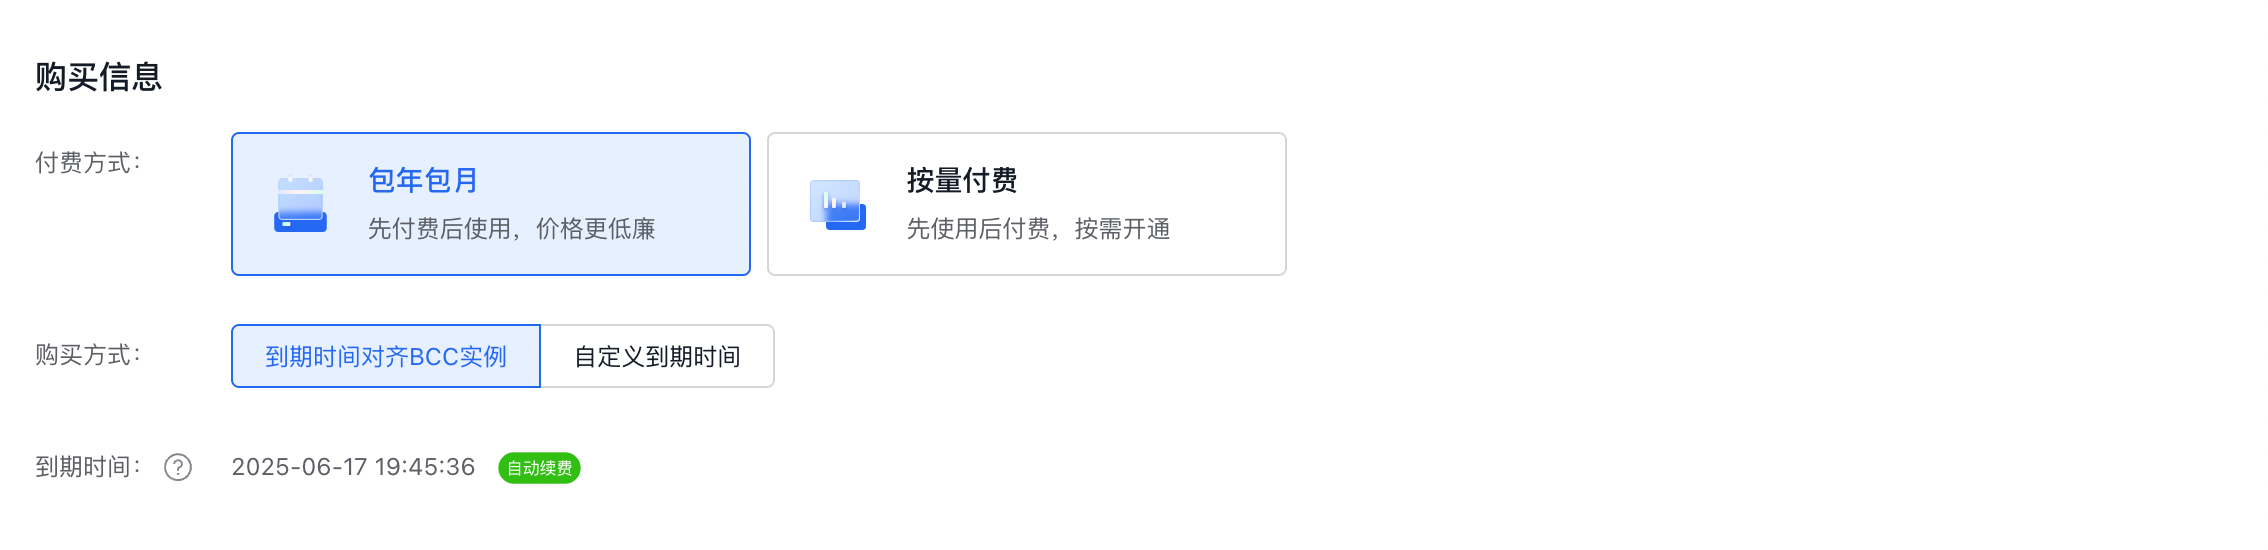
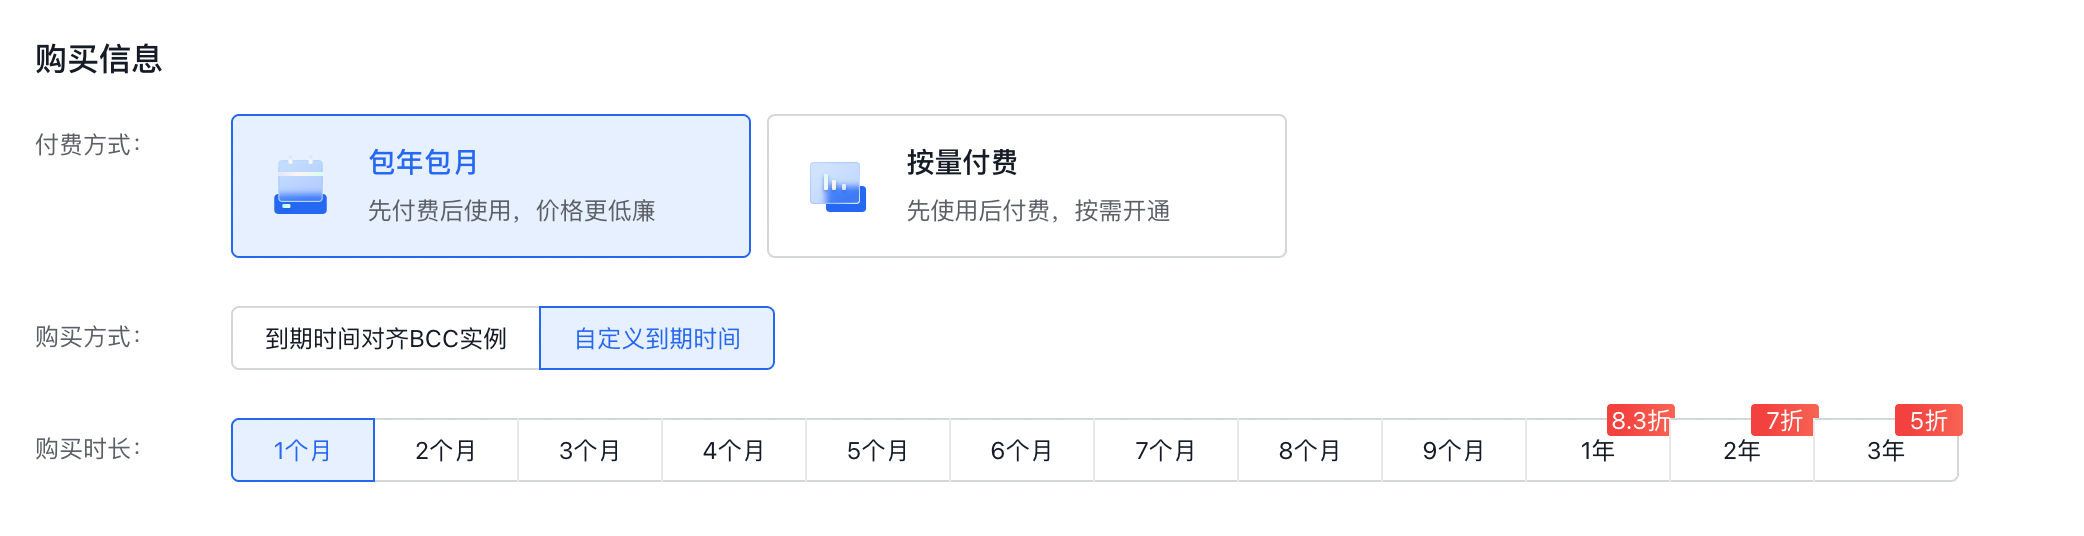
The selectable bill type of disk is determined by whether it is mounted and the bill type of the target BCC instance. When creating a subscription disk, the default purchase method is Align Expiration Time with BCC Instance, and the purchase period is automatically calculated.
You can also set a custom purchase period to take advantage of extended-plan benefits.
Note:
- The selected purchase period of disk must exceed (expiration time of mounted BCC instance - current time).
5. Confirm order
Confirm configuration and pricing you selected are correct on the right of page, then click Next to complete payment.
6. Creation succeeded
Once the payment is successful, the message "Payment Succeeded" will be displayed and the cloud disk server (CDS) will be created. An SMS notification will also be sent confirming the successful purchase of the cloud disk server.