
Deploy the SSL Credential in the BCC-Nginx
Configure the SSL certificate for the Web service in the Nginx environment built based on the Centos-7.2 Deployment LNMP Environement Tutorial. The domain name needs to be prepared in advance. The following steps are the entire process to configure and deploy the certificate.
Download and Decompress a Certificate
Enter "Baidu AI Cloud Console" -- "Security and Management" -- "SSL Certificate Service" -- "Purchased Certificate List", and then click "View Information" based on the certificate information applied for the domain name bound with this BCC.
Click "Download Certificate", and select the PEM_Nginx format, and then set the 4-digit decompression password.
After the successful download locally, double click "Open", and then you can see the crt and key files. Select "Decompress to", and set the path, and then enter the 4-digit password you just set on the console.
Upload Certificate Files to BCC
Upload the crt and key files decompressed in the previous step to the BCC's Nginx configuration directory /etc/nginx/ through FTP or other tools.

Modify the configuration file
vim /etc/nginx/nginx.confAdd the following virtual host configuration, or uncomment the HTTPS host.
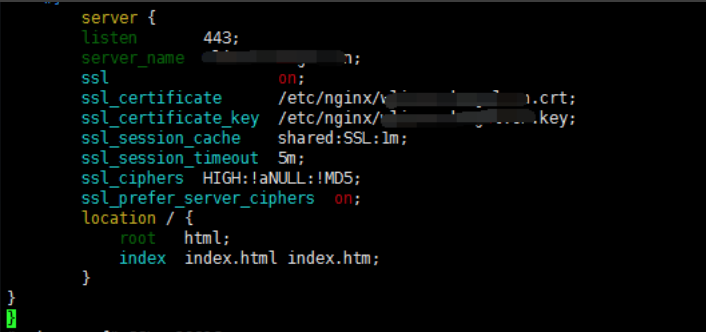
server {
    listen       443;
    server_name  ********.com;    #Replace the bound domain name, it must be the domain name that applied for the certificate
   ssl                  on;     #This line is added separately, which means that you must add ssl function.
    ssl_certificate      /etc/nginx/********.com.crt;  #This is the crt file path to download the nginx certificate. You can download the absolute path or related path through this path.
    ssl_certificate_key  /etc/nginx/*********.com.key;   # It's the same as crt's rule
    ssl_session_cache    shared:SSL:1m;
    ssl_session_timeout  5m;
    ssl_ciphers  HIGH:!aNULL:!MD5;
    ssl_prefer_server_ciphers  on;
    location / {
        root   html;
        index  index.html index.htm;
    }
}
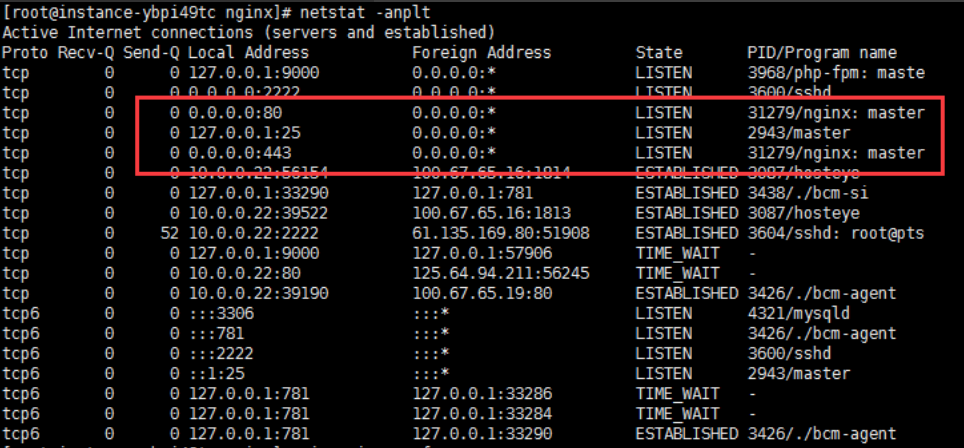
After the successful save of configuration, restart the Nginx service.
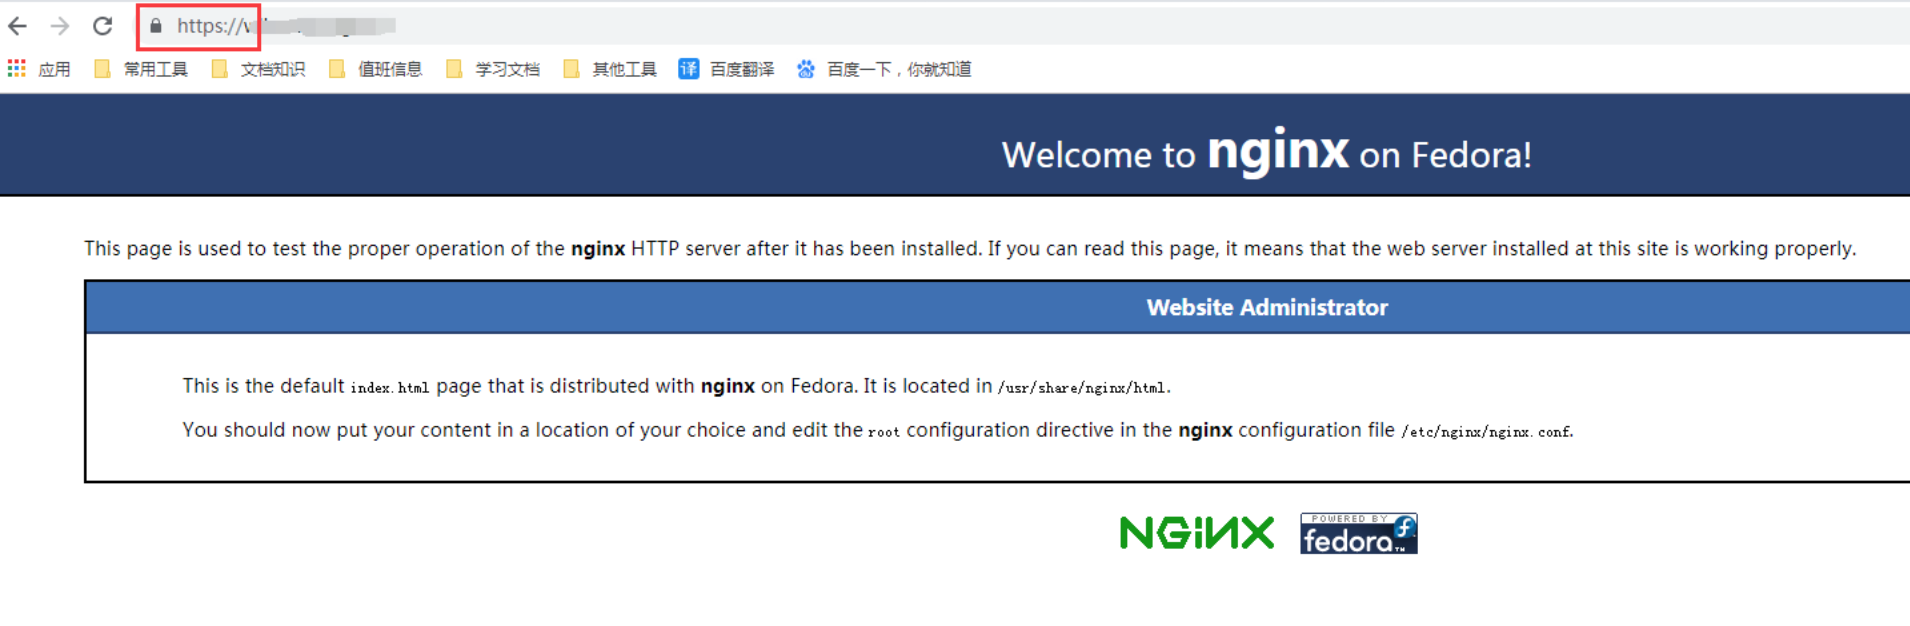
systemctl restart nginxAt this time, you can view that the port 443 is enabled through the command netstat -anplt. You can normally access the site through the domain name https: //.
HTTP to HTTPS Forcibly
vim /etc/nginx/nginx.confChange localhost after server_name to this certificate domain name in the server with the port 80. And then add a statement below:
rewrite ^(.*)$ https://${server_name}$1 permanent;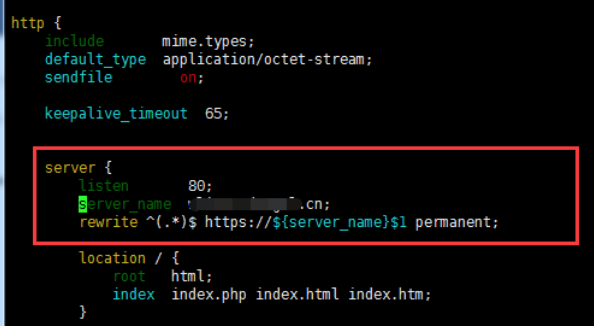
After the successful save, restart Nginx:
systemctl restart nginxAt this time, all ports 301 jumps to the HTTPS request when you access the domain name directly.