
Deploy the LNMP Environment in the Centos-7.2
This document introduces how to build a LNMP environment by using the centos 7.2 system. centos7.2 builds a LAMP environement by following the steps below:
1.Configure a Firewall
The CentOS 7.0 system and higher uses the firewall by default.
Disable firewall:
systemctl stop firewalld.service         # stop the firewall
systemctl disable firewalld.service      #Disable firewall startup
2. Install and Configure the Nginx
(1) You can use the yum source provided in BCC for the installation directly.
yum install -y nginx
(2) Modify the default Nginx configuration file.
cd    /etc/nginx/                              #Default configuration directory of nginx
mv    nginx.conf    nginx.conf.swf             #Rename of Configuration file generate by installing “yum” is used no longer
mv     nginx.conf.default  nginx.conf          #The default file is modified as loading configuration file
(3) Start and access the Nginx.
systemctl start nginx.service                     #start “nginx”
systemctl stop nginx.service                      #stop
systemctl restart nginx.service                   #restart
systemctl enable nginx.service
At this time, you access by the public IP to open the default welcome page of nginx.
3. Install the PHP and Dependent Extension and Start the PHP
(1) Install the PHP environment.
yum install -y php-fpm php php-mysql php-gd libjpeg* php-ldap php-odbc php-pear php-xml php-xmlrpc php-mbstring php-bcmath php-mhash(2) Start php-fpm.
systemctl start php-fpm.service             #start “php-fpm”
systemctl enable php-fpm.service            #Set the boot
(3) Modify the configuration file, and enable Nginx to be compatible with Php.
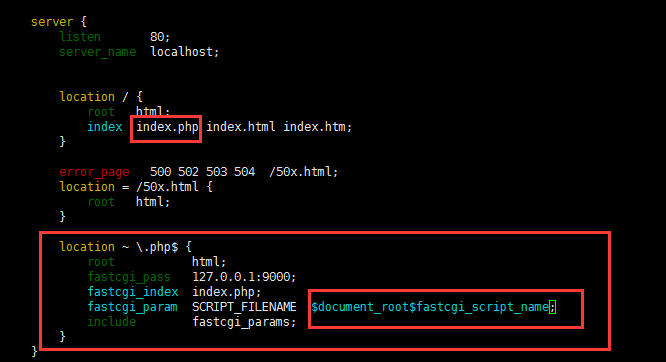
vim /etc/nginx/nginx.conf
Add index.php to the location.
You only need to remove # comments before the PHP identification and change the parameter fastcgi_param.
location / {
root html;
index index.php index.html index.htm;
}

error_page 500 502 503 504 /50x.html;
location = /50x.html {
root html;
}

location ~ \.php$ {
root html;
fastcgi_pass 127.0.0.1:9000;
fastcgi_index index.php;
fastcgi_param SCRIPT_FILENAME    $document_root$fastcgi_script_name;
include fastcgi_params;
}
(4) Restart Nginx and php-fpm.
systemctl restart php-fpm.service
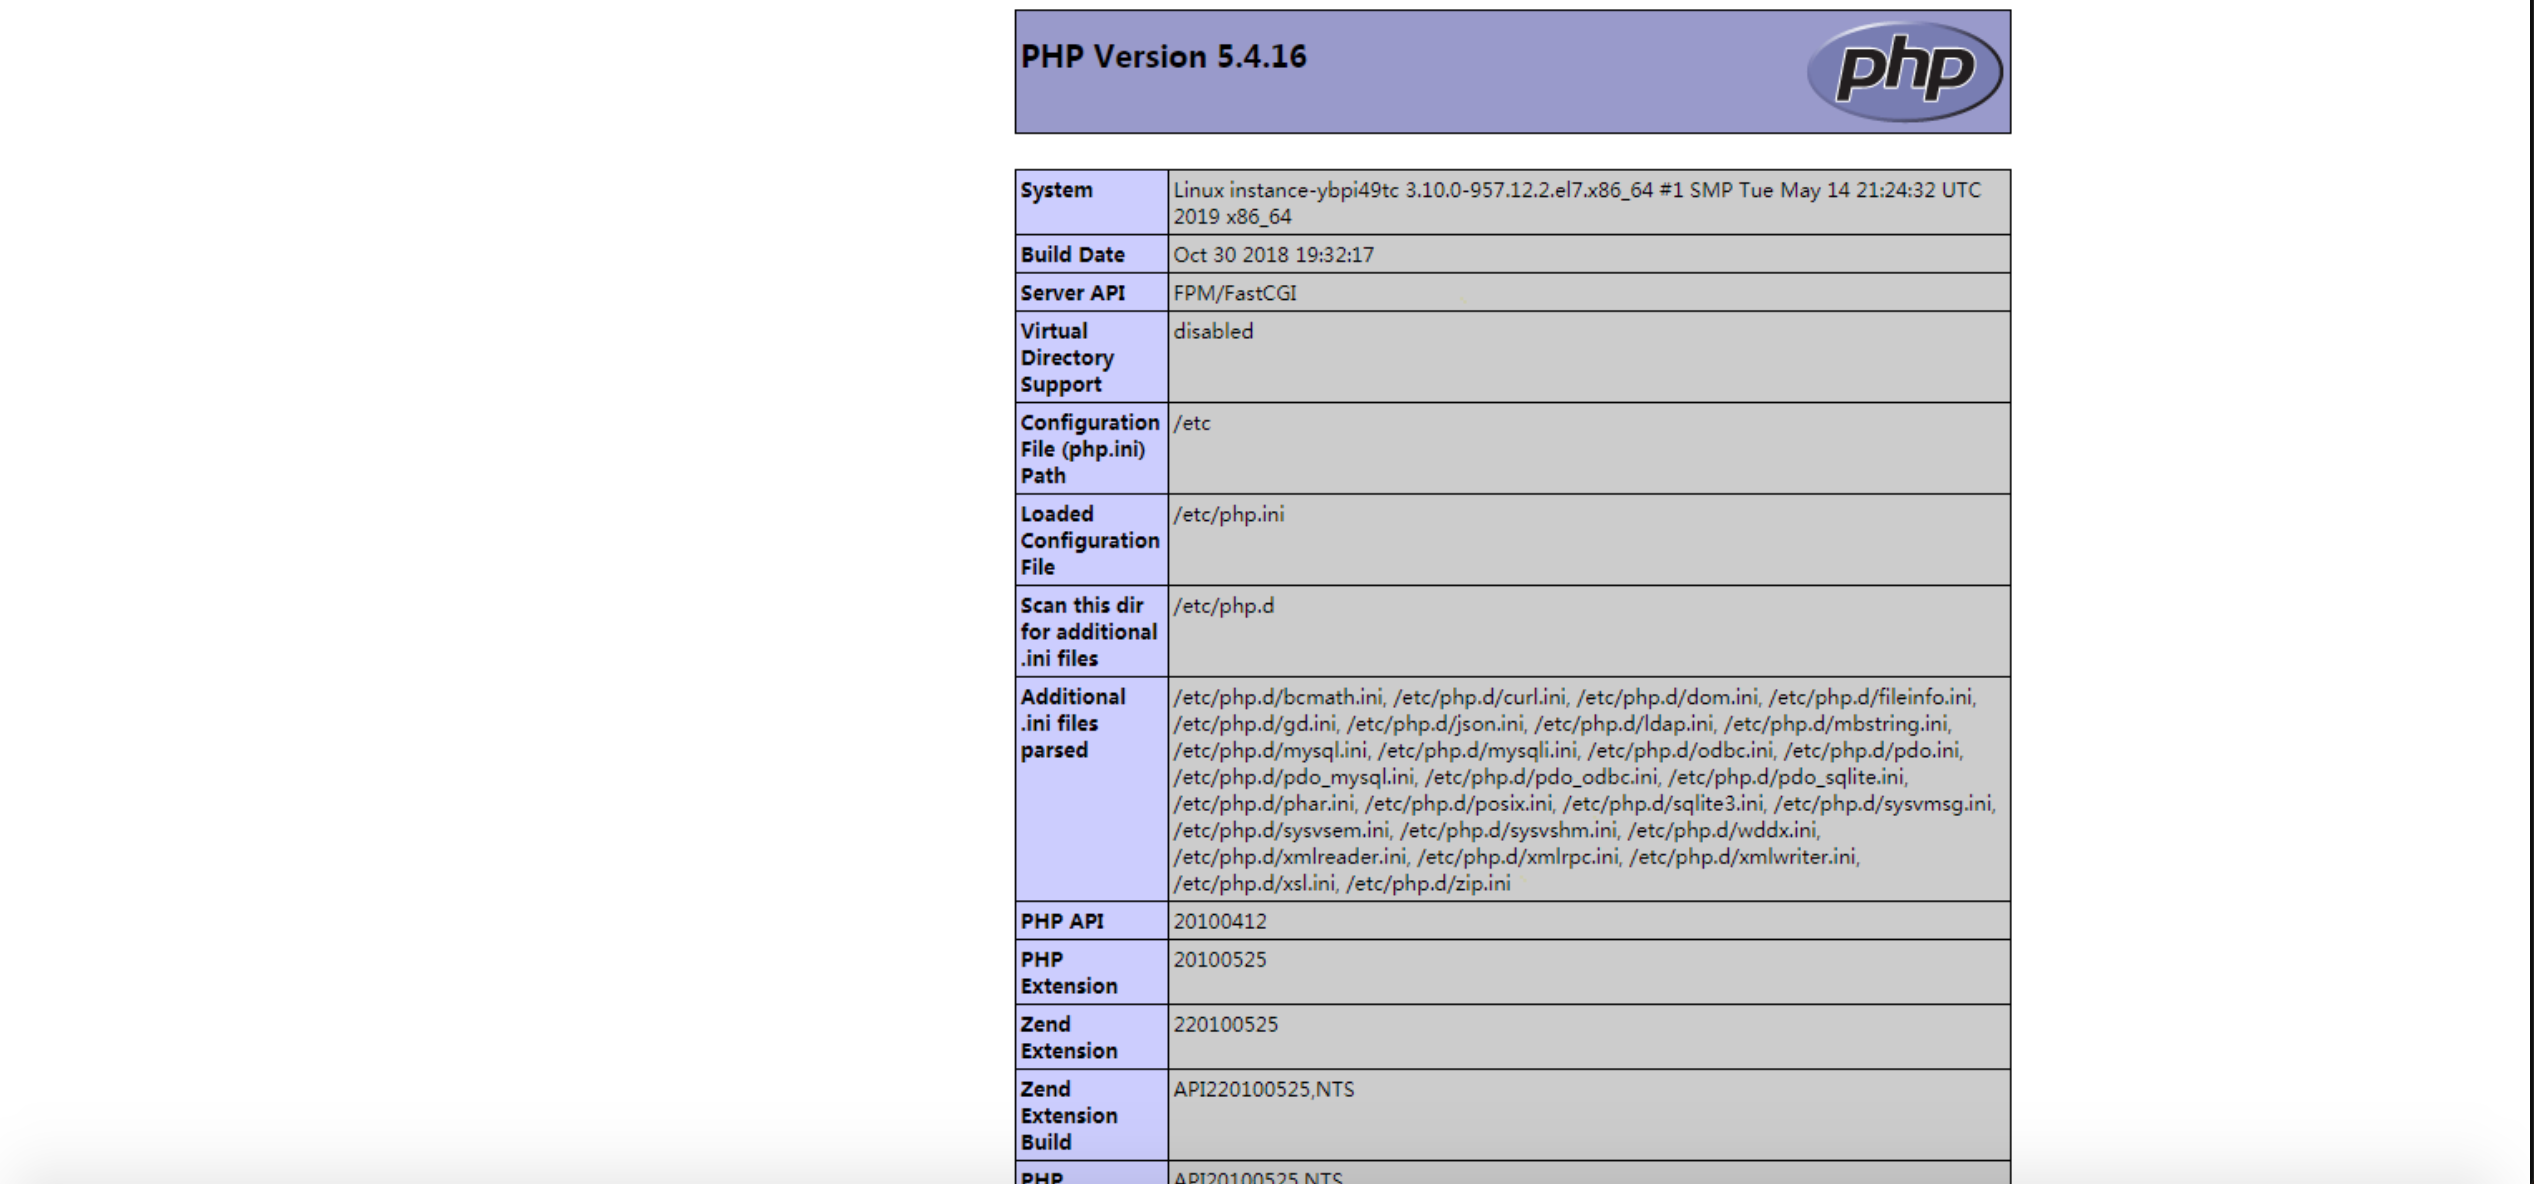
systemctl restart nginx.service(5) Access phpinfo for authentication.
Enter the default Nginx root directory. cd /usr/share/nginx/html/
vim index.php
<?php
echo phpinfo();
At this time, you can access the public IP/index.php to see the PHP probe page.
4. Install the Mysql and Connect to the PHP for Authentication
(1) The default database is MariaDB for the centos7 system or higher, and you need to download the Mysql source for the installation.
wget http://dev.mysql.com/get/mysql-community-release-el7-5.noarch.rpm
rpm -ivh mysql-community-release-el7-5.noarch.rpm
yum install -y mysql-community-server
Restart the Mysql service after the successful installation:
systemctl start mysqld
(2) The Mysql database is not set with the password after successful installation. You can access the database to authorize and set the password.
mysql -u root
mysql> use mysql;
mysql> update user set password=PASSWORD("Enter the root user password here") where user='root';
mysql> flush privileges;
mysql> exit
(3) Write the PHP code to test whether Mysql can be connected and accessed.
vim /usr/share/nginx/html/test.php
<?php
$link=mysql_connect("localhost","root"," the database password set just now.");
if(!$link) echo "FAILD!error";
else echo "OK!You succeeded.";
?>
After the save, you can accessIP/test.phpto see the following information.
At this point, the LAMP environment based on the centos7.2 is built successfully.