
CSN supports VPC custom route tables for secure traffic access
Overview
The Virtual Private Cloud (VPC) allows the creation of multiple custom route tables, which can be linked to the Transit Gateway (TGW) of the Cloud Smart Network. This enables traffic from TGW to VPC to adhere to custom route tables, addressing user needs in diverse scenarios, including implementing security measures between multiple VPCs.
Requirement scenarios
Security VPC: Access traffic among multiple VPCs must be secured via a security VPC.
Description:
- A security VPC is a specialized Virtual Private Cloud (VPC) setup designed to deploy third-party firewalls for safeguarding traffic pathways for interactions across multiple VPCs and between VPCs and the public network.
- The configuration of third-party firewalls is not covered here. Users can set them up independently according to their specific requirements.
Solution overview
Access traffic between two VPCs via security VPC
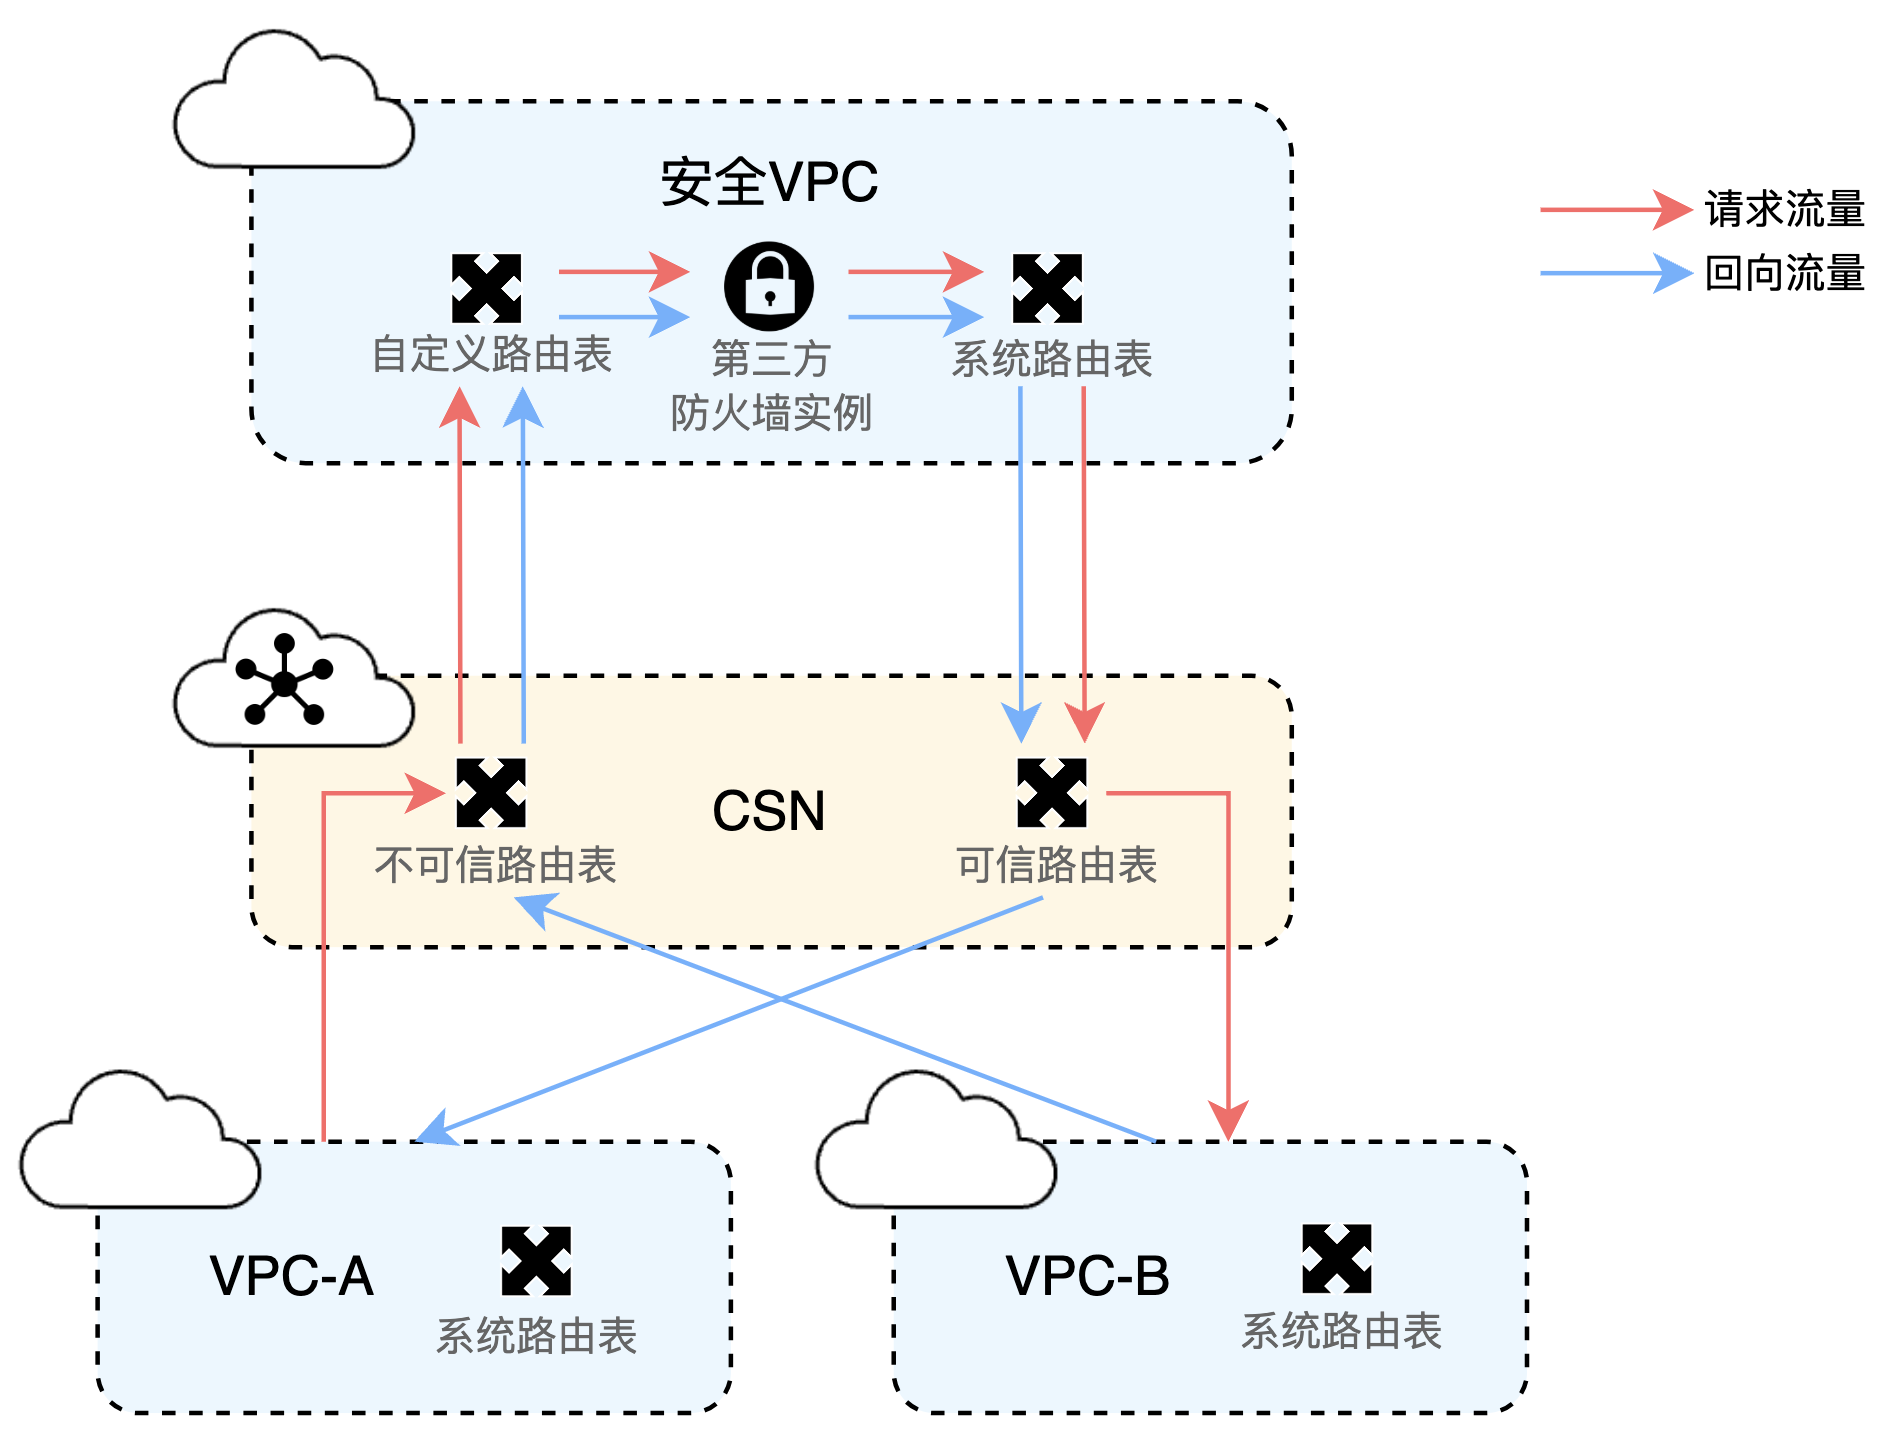
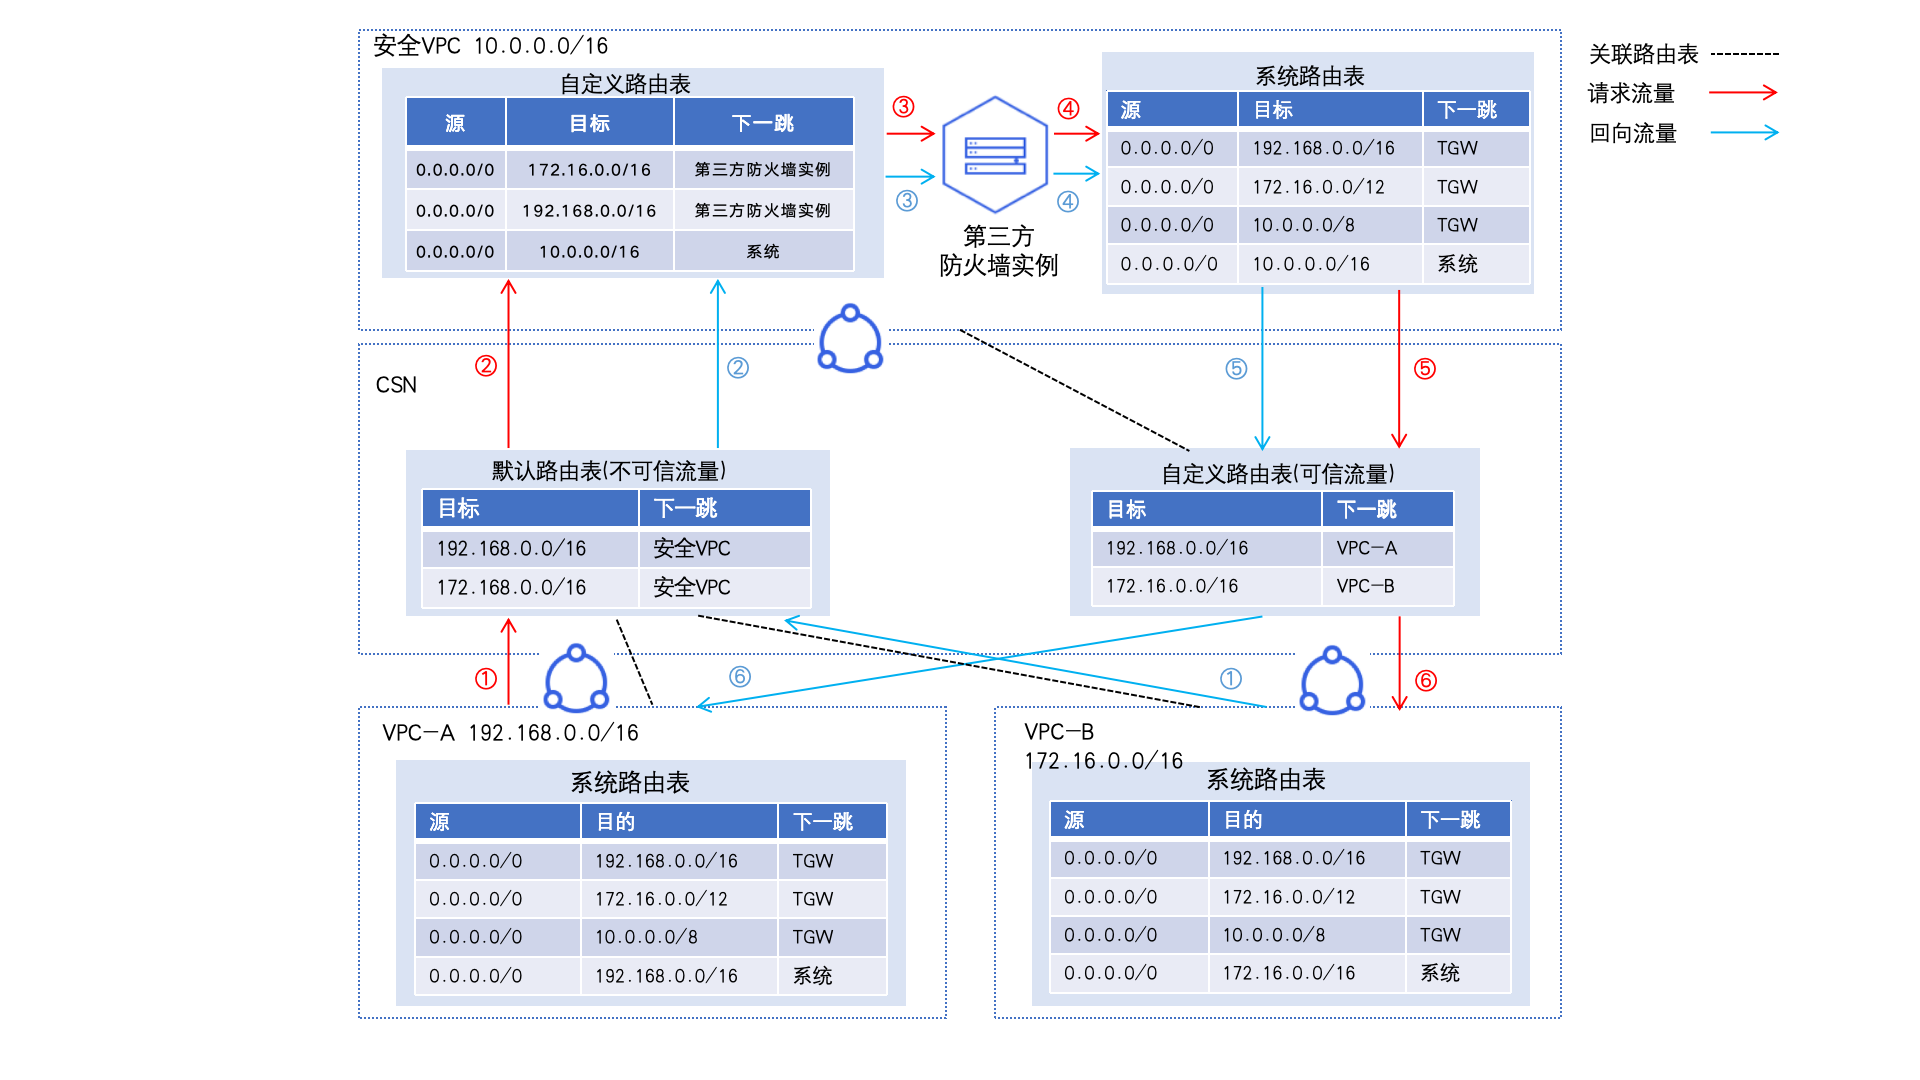
When request traffic is transmitted from the source VPC, it first passes through the third-party firewall instance in the security VPC before reaching the destination VPC. Similarly, return traffic from the destination VPC flows through the third-party firewall instance in the security VPC before rerouting to the source VPC.
Configure route tables as follows (see configuration steps for details):
- Service VPC route settings: For VPC-A and VPC-B, the default system route table already fulfills basic communication requirements. When they access the Cloud Smart Network (CSN), the system automatically synchronizes the route information of the three major private network segments pointing to these two VPCs to the Transit Gateway (TGW). This eliminates the need for complicated operations, providing a simple foundation for connectivity.
- Route table classification and association: In CSN, the default route table is defined as an untrusted route table, while a manually created custom route table is defined as a trusted route table. VPC-A and VPC-B are associated with the untrusted route table, whereas the security VPC is associated with the trusted route table.
- Refined traffic direction for security VPC: The custom route table of the security VPC is bound to the Transit Gateway (TGW) to redirect incoming traffic of the security VPC to the firewall. Meanwhile, the system route table of the security VPC directs traffic to the TGW.
Configuration steps
Environment preparation
Create three VPCs: VPC-A, VPC-B, and the security VPC. In the current VPC route table setup, subnet direct routes take precedence over custom routes. It's recommended to use different network segments for each VPC to avoid traffic interference from direct routes. For instance, the network segment for VPC-A can be 192.168.0.0/16, for VPC-B 172.16.0.0/16, and for the security VPC 10.0.0.0/16.
For specific operations, refer to Create VPC
Create a virtual machine in the security VPC to simulate a third-party firewall, and create one virtual machine each in VPC-A and VPC-B to test connectivity for access traffic between the two VPCs.
For specific operations, refer to Baidu Cloud Compute Instance
Appropriately configure security groups for the three virtual machines to allow mutual communication between them.
For specific operations, refer to Security Group.
Configuration process

Step I: Create a CSN instance and load VPC
- Sign in to Baidu AI Cloud Console and create a CSN instance.
For specific operations, refer to Create CSN Instance
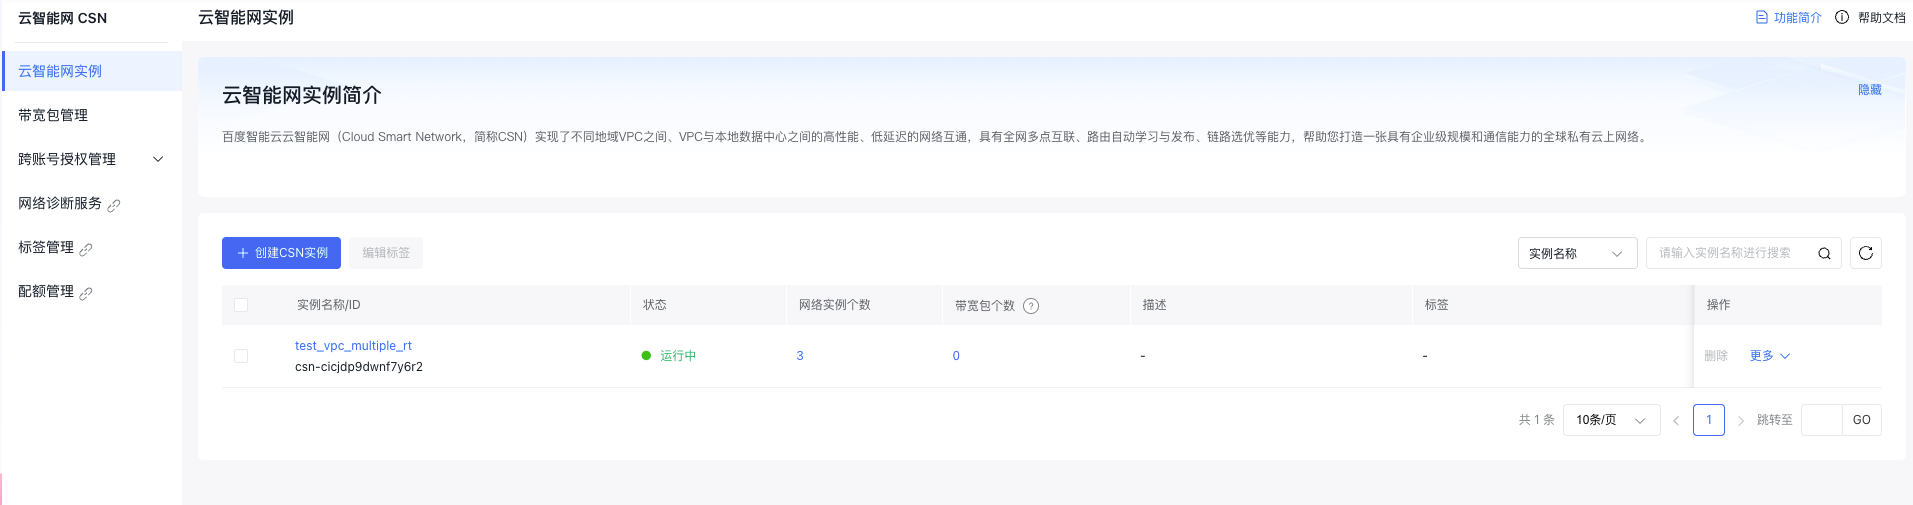
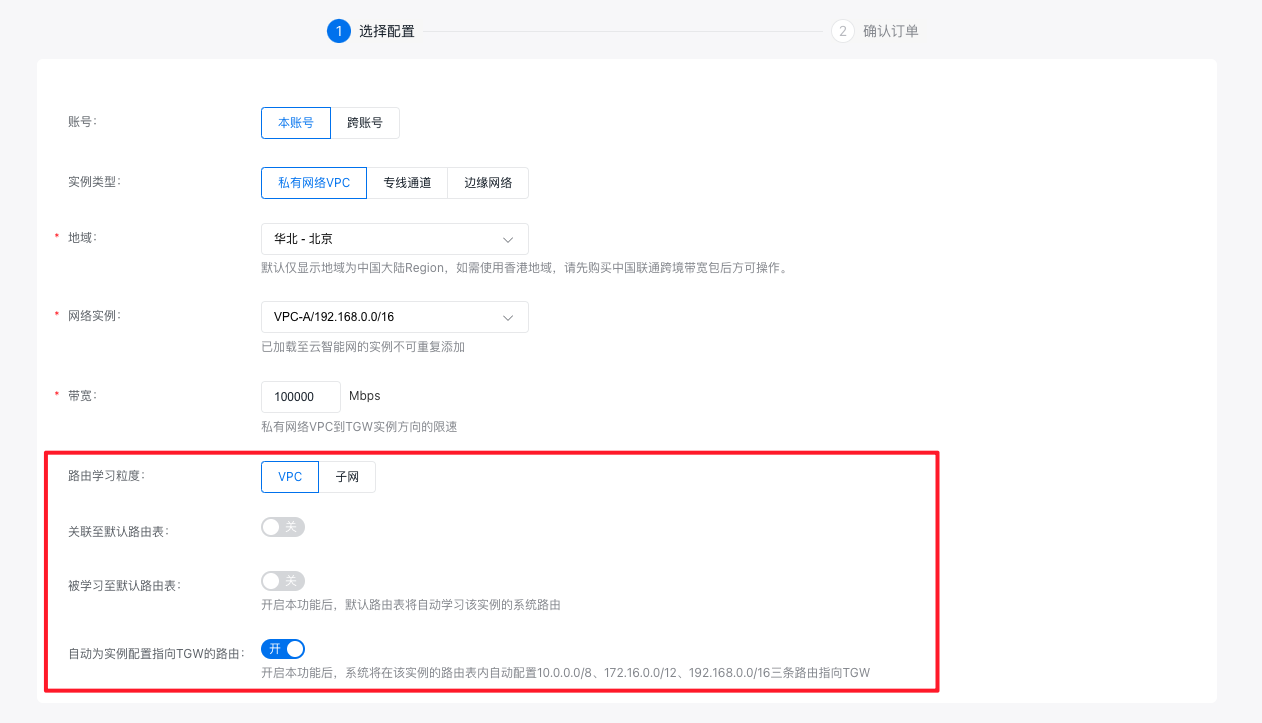
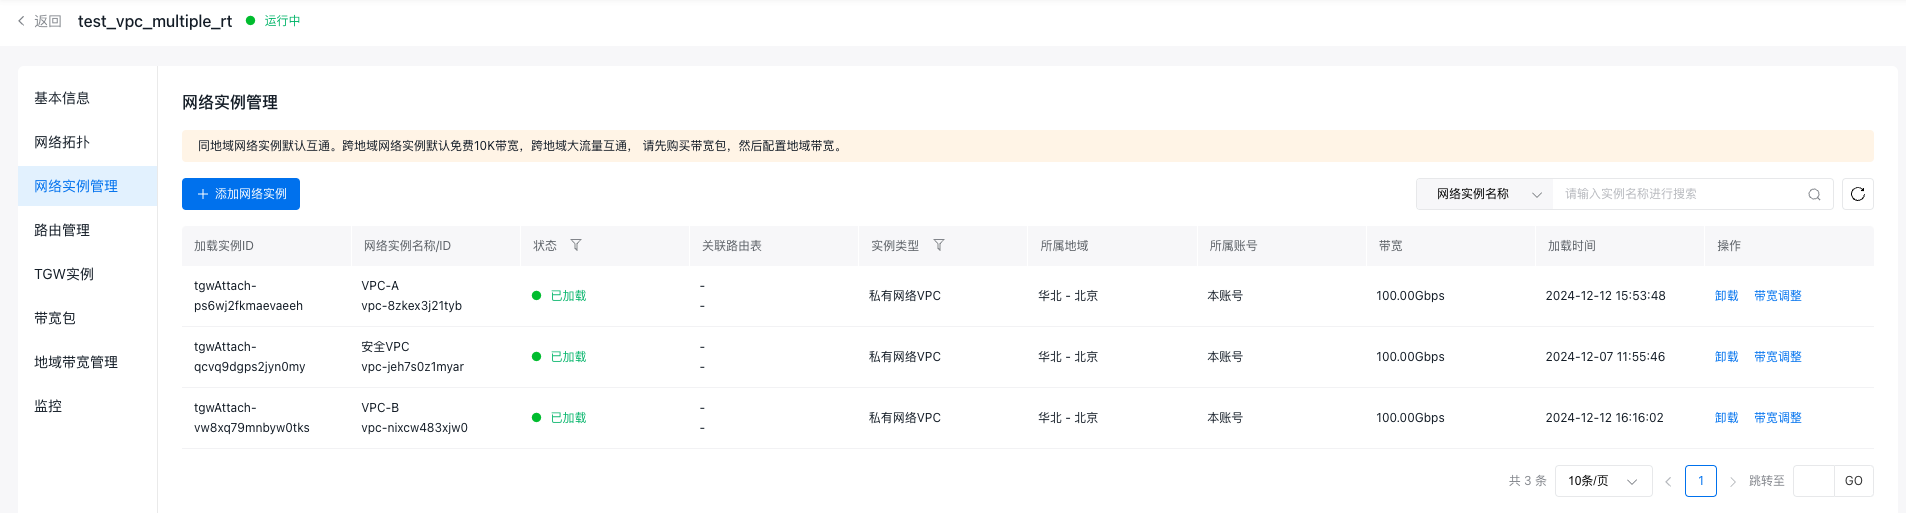
- Click on the created instance name to access the Basic Instance Information page. Then, click the Network Instance Management button in the left sidebar to navigate to the Network Instance Management page and sequentially add VPC-A, VPC-B, and the security VPC to CSN.
For specific operations, refer to Add Network Instance.
- Note: When adding, select VPC for route-learning granularity. Disable both "Associate to Default Route Table" and "Learn to Default Route Table" options (as these will be configured later). Enable the "Automatically Configure Routes Pointing to TGW for the Instance" option.

- Once the three VPCs are loaded, the Network Instance Management page will appear as shown in the accompanying figure.
Step II: Configure CSN instance route tables
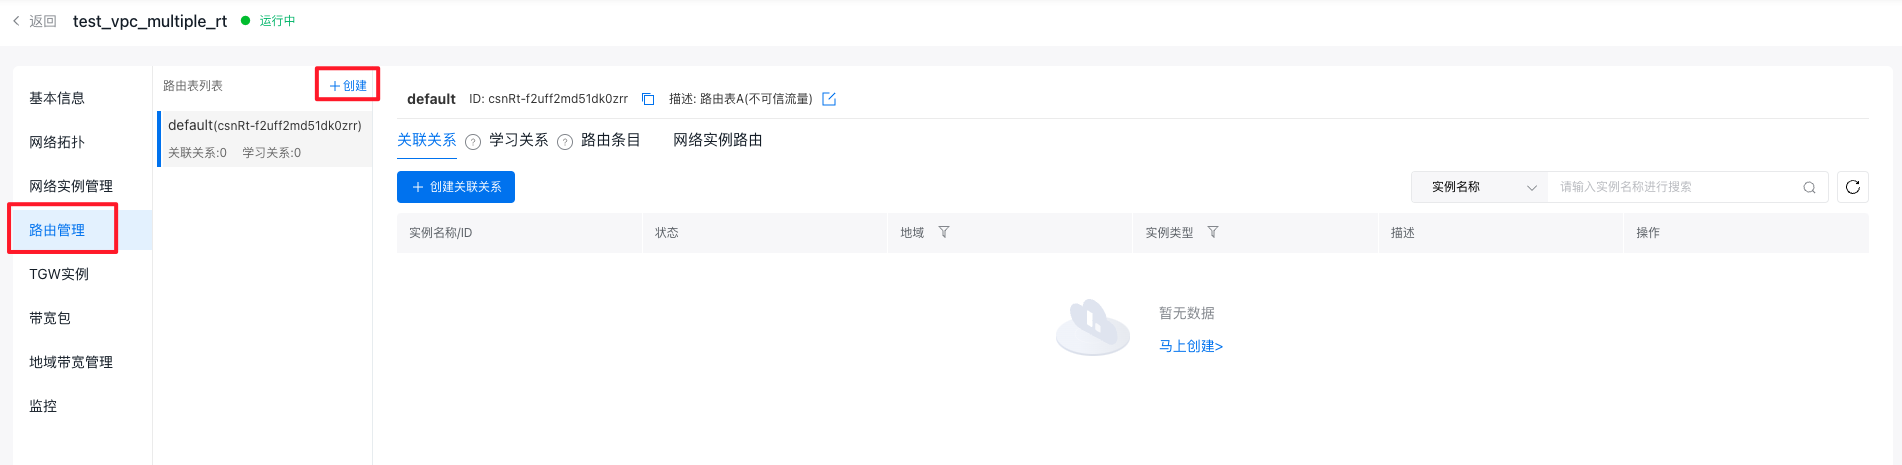
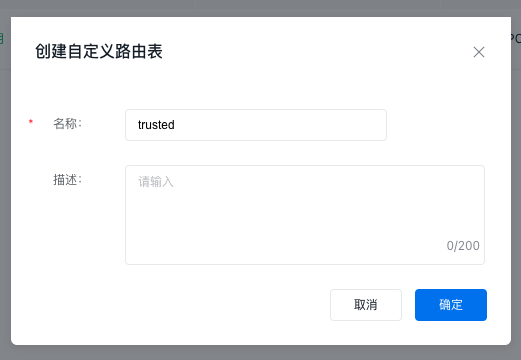
- Click on the Route Management button in the left sidebar to open the Route Management page. At this stage, the route table list will display a default route table, classified as an untrusted route table. After being added to the CSN multiple-route-table allow list, click the + Create button in the route table list to create a custom route table, classify it as the trusted route table, and name it "trusted.\
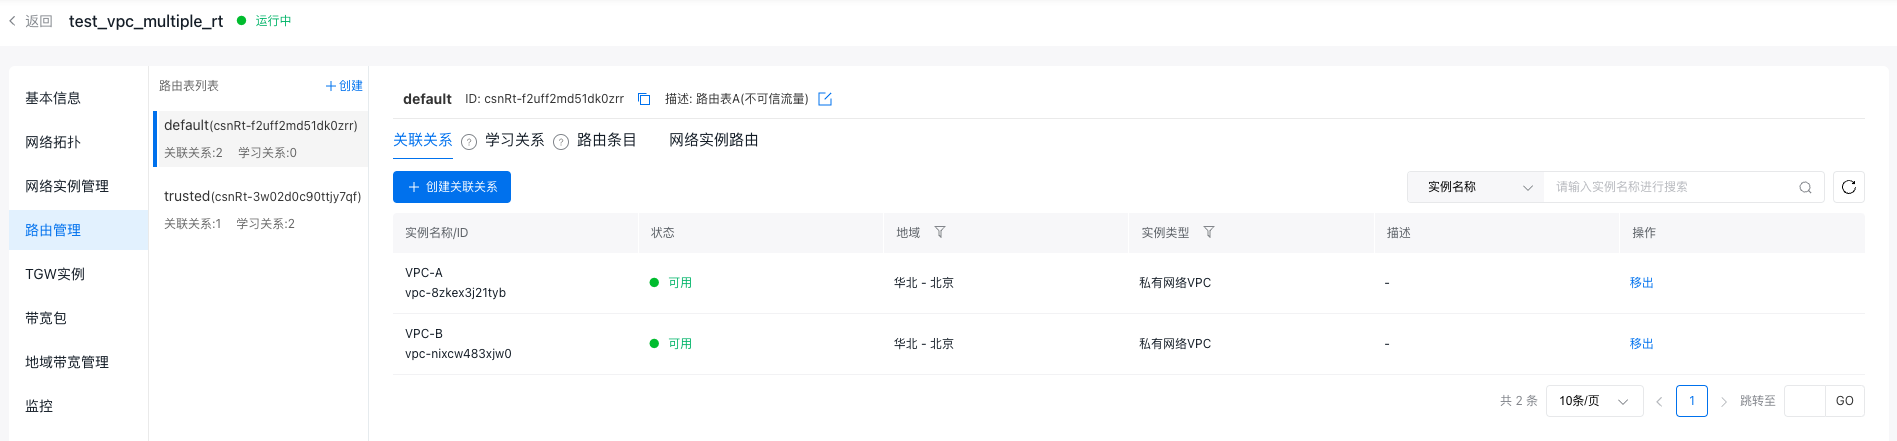
- In the untrusted route table (default), add affiliations with VPC-A and VPC-B so traffic entering TGW from these VPCs is matched to the untrusted route table.
For specific operations, refer to Method for Creating Affiliation.
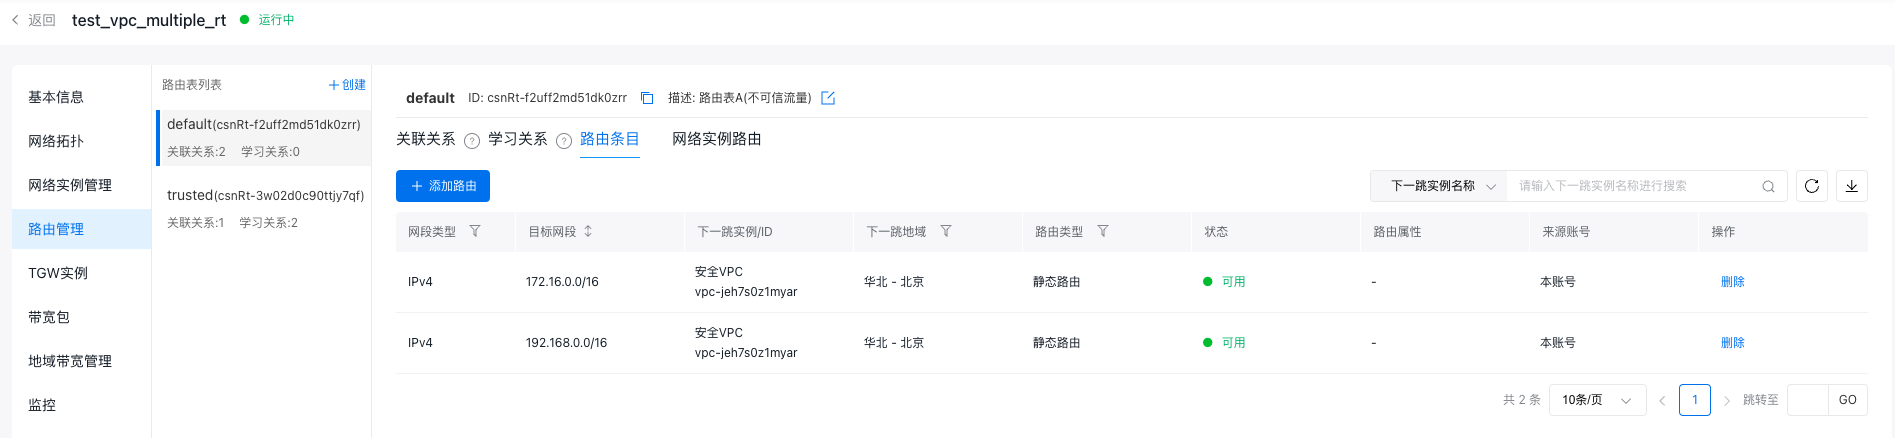
- In the untrusted route table (default), add two static routes: Set the destination network segments as the network segments of VPC-A and VPC-B, respectively, and the next-hop instance as the security VPC. This ensures that access traffic between VPC-A and VPC-B is forwarded to the security VPC.
Refer to Method for Adding Routes.
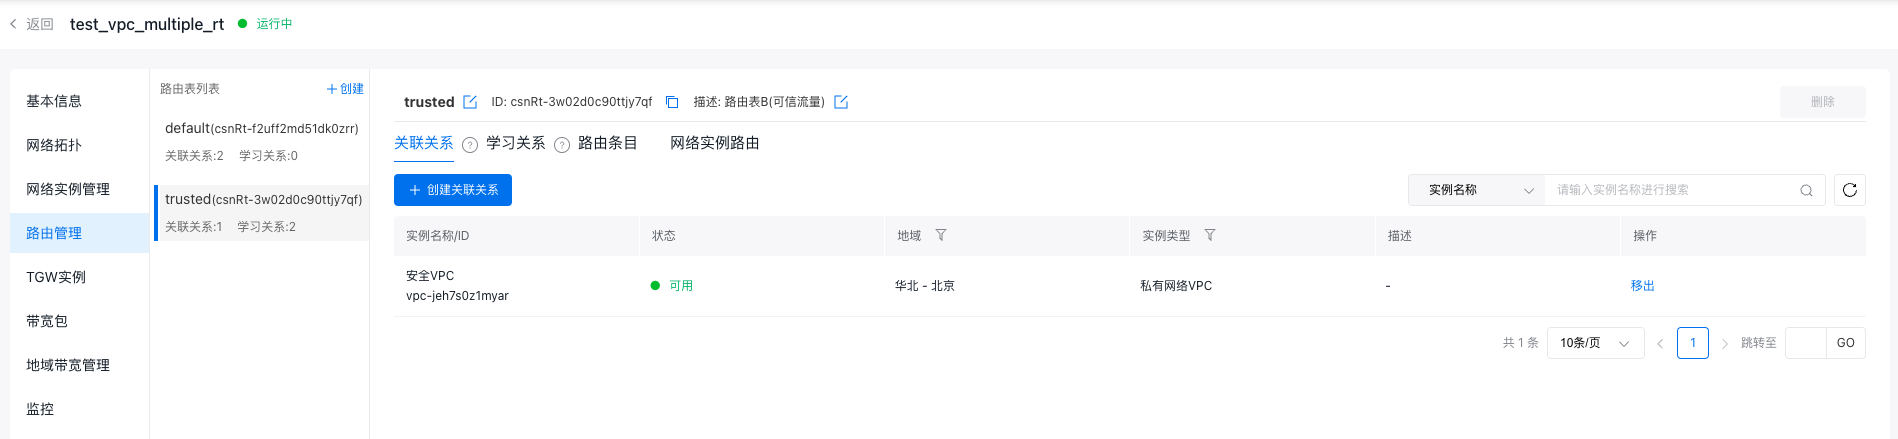
- In the trusted route table (trusted), create an affiliation with the security VPC, ensuring traffic entering TGW from the security VPC is matched to the trusted route table.
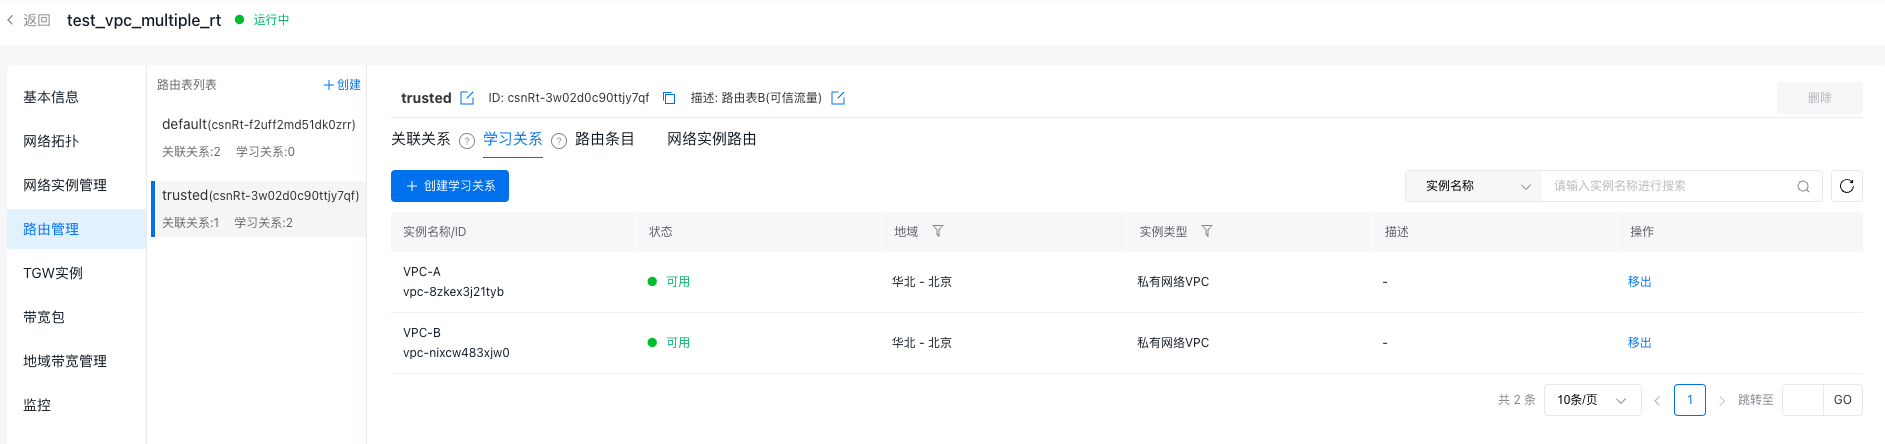
- In the trusted route table (trusted), establish learning relationships with VPC-A and VPC-B to forward traffic passing through the security VPC to either VPC-A or VPC-B.
Refer to Method for Creating Learning Relationships.
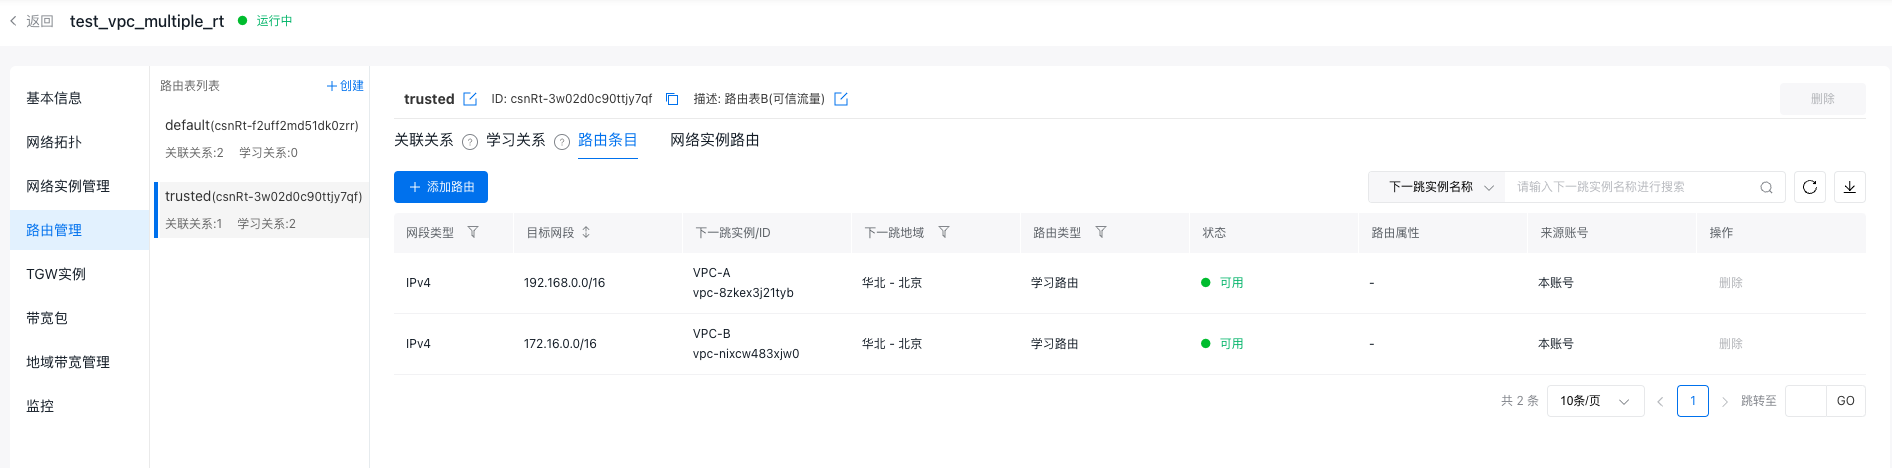
- After configuration, the route table information of the CSN instance is as follows:
|
Route table name |
Route table description |
Associate VPC |
Route |
|
|---|---|---|---|---|
|
Destination segment |
Next hop |
|||
|
default |
Untrusted traffic |
VPC-A and VPC-B |
192.168.0.0/16 |
Security VPC |
|
172.16.0.0/16 |
Security VPC |
|||
|
trusted |
Trusted traffic |
Security VPC |
192.168.0.0/16 |
VPC-A |
|
172.16.0.0/16 |
VPC-B |
|||
Step III: Configure security VPC route table
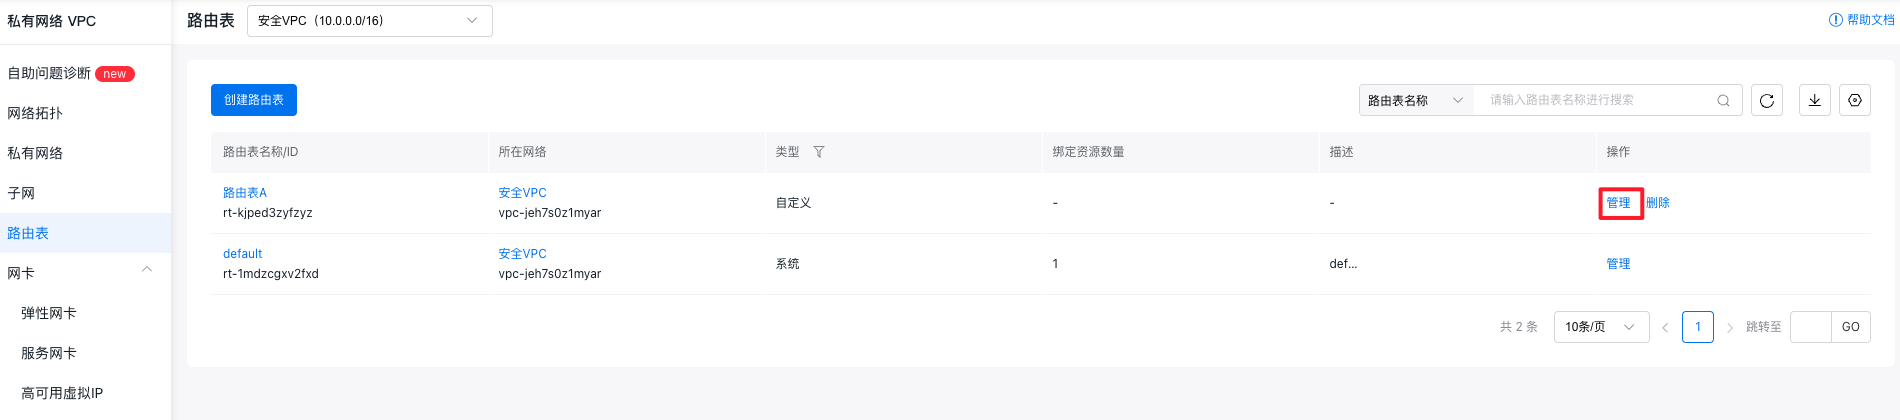
- Sign in to the Virtual Private Cloud Console, click the Route Table button in the left sidebar to enter the Route Table page; click the Create Route Table button to name the route table Route Table A and select the security VPC for the network.


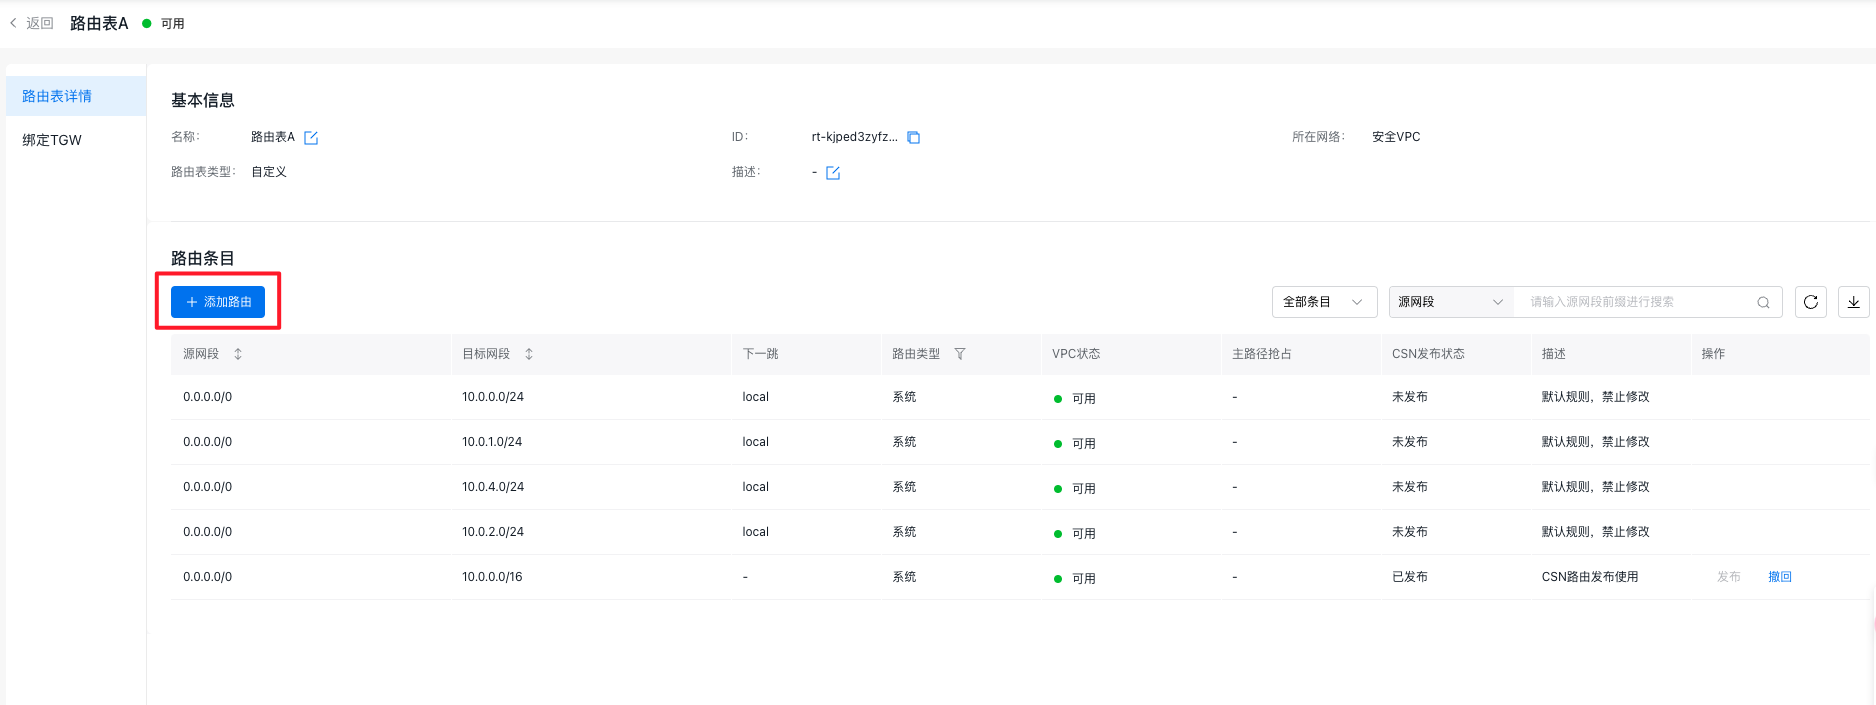
- Once created, click the Manage button next to Route Table A to access its details page.
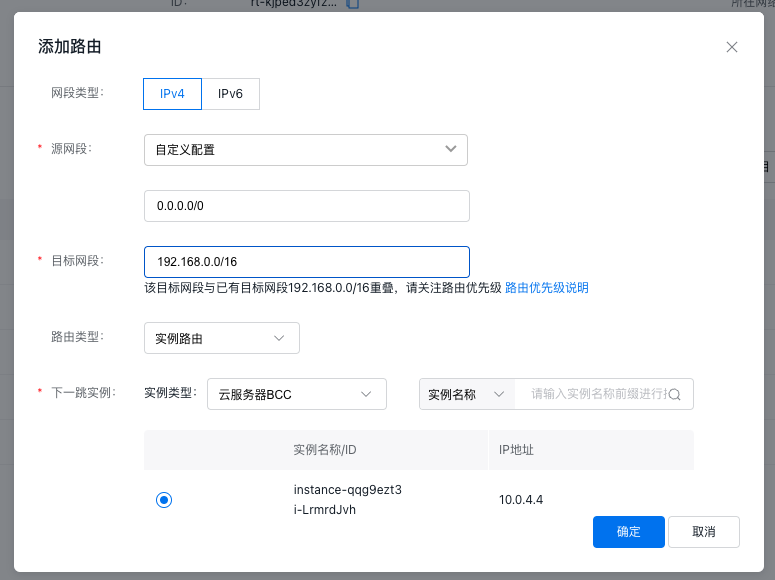
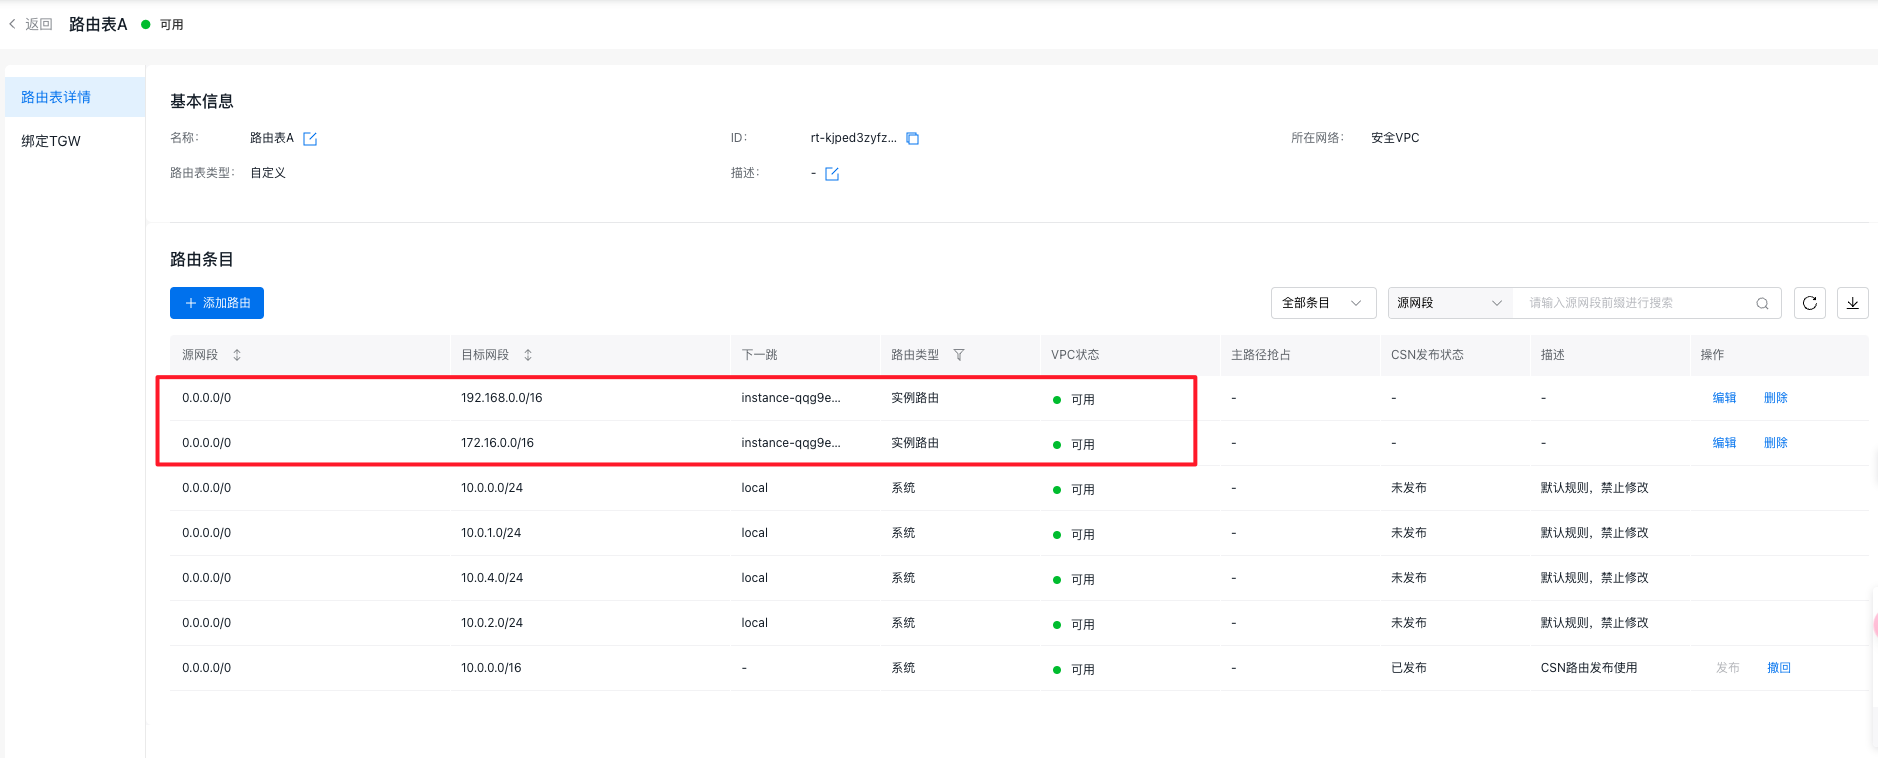
Click the + Add Route button, choose Custom Configuration for the source network segment, and enter 0.0.0.0/0. For the destination network segment, input the network segment of VPC-A. Select Instance Route as the route type and choose the user’s third-party firewall instance as the next-hop instance. Repeat this process to add a route for VPC-B's network segment and any other necessary routes with similar configurations.
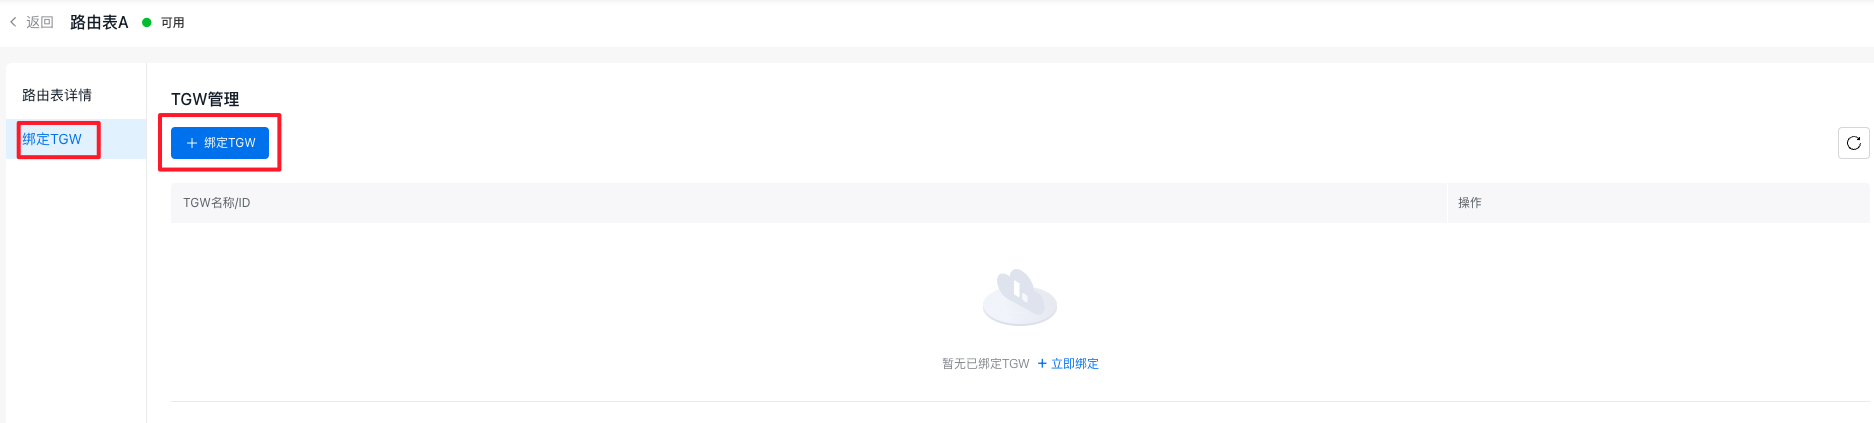
Step IV: Bind the TGW to the custom route table of the security VPC
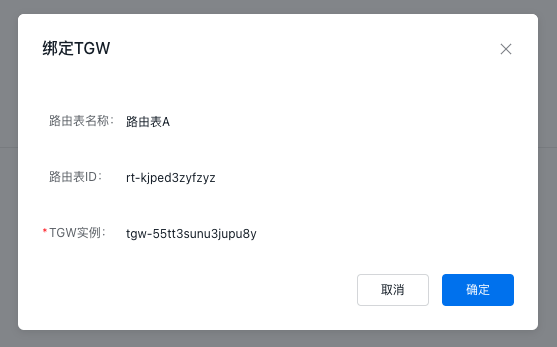
- On the Route Table A Details page, click the Bind TGW button in the left sidebar. Then, click the + Bind TGW button to attach the created TGW instance, ensuring that traffic from TGW to the security VPC is matched with the custom route table.

- After configuration, the information of the VPC route table is as follows:
|
VPC name |
Route table name |
Bind resources |
Route |
||
|---|---|---|---|---|---|
|
Source network segment |
Destination segment |
Next hop |
|||
|
VPC-A |
default |
All resources in the VPC |
0.0.0.0/0 |
192.168.0.0/16 |
System |
|
0.0.0.0/0 |
192.168.0.0/16 |
TGW instance |
|||
|
0.0.0.0/0 |
172.16.0.0/12 |
TGW instance |
|||
|
0.0.0.0/0 |
10.0.0.0/8 |
TGW instance |
|||
|
VPC-B |
default |
All resources in the VPC |
0.0.0.0/0 |
172.16.0.0/16 |
System |
|
0.0.0.0/0 |
192.168.0.0/16 |
TGW instance |
|||
|
0.0.0.0/0 |
172.16.0.0/12 |
TGW instance |
|||
|
0.0.0.0/0 |
10.0.0.0/8 |
TGW instance |
|||
|
Security VPC |
default |
All resources in the VPC except TGW |
0.0.0.0/0 |
10.0.0.0/16 |
System |
|
0.0.0.0/0 |
192.168.0.0/16 |
TGW instance |
|||
|
0.0.0.0/0 |
172.16.0.0/12 |
TGW instance |
|||
|
0.0.0.0/0 |
10.0.0.0/8 |
TGW instance |
|||
|
Route table A |
TGW instance (traffic from TGW to VPC matches this route table) |
0.0.0.0/0 |
10.0.0.0/16 |
System |
|
|
0.0.0.0/0 |
192.168.0.0/16 |
Third-party firewall instance |
|||
|
0.0.0.0/0 |
172.16.0.0/16 |
Third-party firewall instance |
|||
Connectivity test
- Log in to the third-party firewall instance in the security VPC and execute the necessary commands to enable traffic forwarding.
1# Temporarily enable forwarding (invalid after restart)
2echo 1 > /proc/sys/net/ipv4/ip_forward
3# Permanently enable forwarding
4echo 'net.ipv4.ip_forward=1' >> /etc/sysctl.conf
5sudo sysctl -p- Log in to the virtual machine in VPC-A and run the ping command to test its connectivity with the virtual machine in VPC-B. At the same time, on the third-party firewall instance in the security VPC, execute the tcpdump command to verify whether access traffic between VPC-A and VPC-B is passing through the firewall.
1# Test connectivity between VPC-A and VPC-B
2 ping <virtual machine IP address>
3# Test whether traffic passes through the third-party firewall
4 tcpdump host <source virtual machine IP address> and <destination virtual machine IP address>
Related products
Baidu Cloud Compute (BCC), Virtual Private Cloud (VPC), Cloud Smart Network (CSN)