Create Kubernetes Nodes at the Edges
This document describes how to create a CCE Kubernetes Node at the Edge in Baidu AI Cloud. For the instructions for Kubernetes Node at the Edge, see Overview of Cloud Container Engine for Edge.
Prerequisites
- Submit an application for the [open beta test of CCE [Cloud Container Engine for Edge](https://cloud.baidu.com/survey/cceonbec.html).](https://cloud.baidu.com/survey/cceonbec.html)
- The Master node of the Kubernetes Nodes at the Edges should support public network access. You must bind the node instance to EIP, or ensure that a NAT gateway is available in the VPC. The Master node subnet is already added to the NAT route.
- Submit an application for the Use of Baidu Edge Computing (BEC) Node.
-
Prepare the edge cloud server used to deploy the cluster Worker node through the Baidu Edge Computing (BEC) Console. The instance configuration requirements are as follows:
- The instances must be bound to the public IP.
- A 100GB system disk is recommended for your instance. Also, you can select other specifications according to your business requirements.
Create Cluster
- Log in to Baidu AI Cloud Official Website, and click Management Console in the upper right corner to enter the console.
- In the navbar on the left side of the console, select "Product Services> CloudNative> Cloud Container Engine CCE" to enter the "Cluster Management> Cluster List" page.
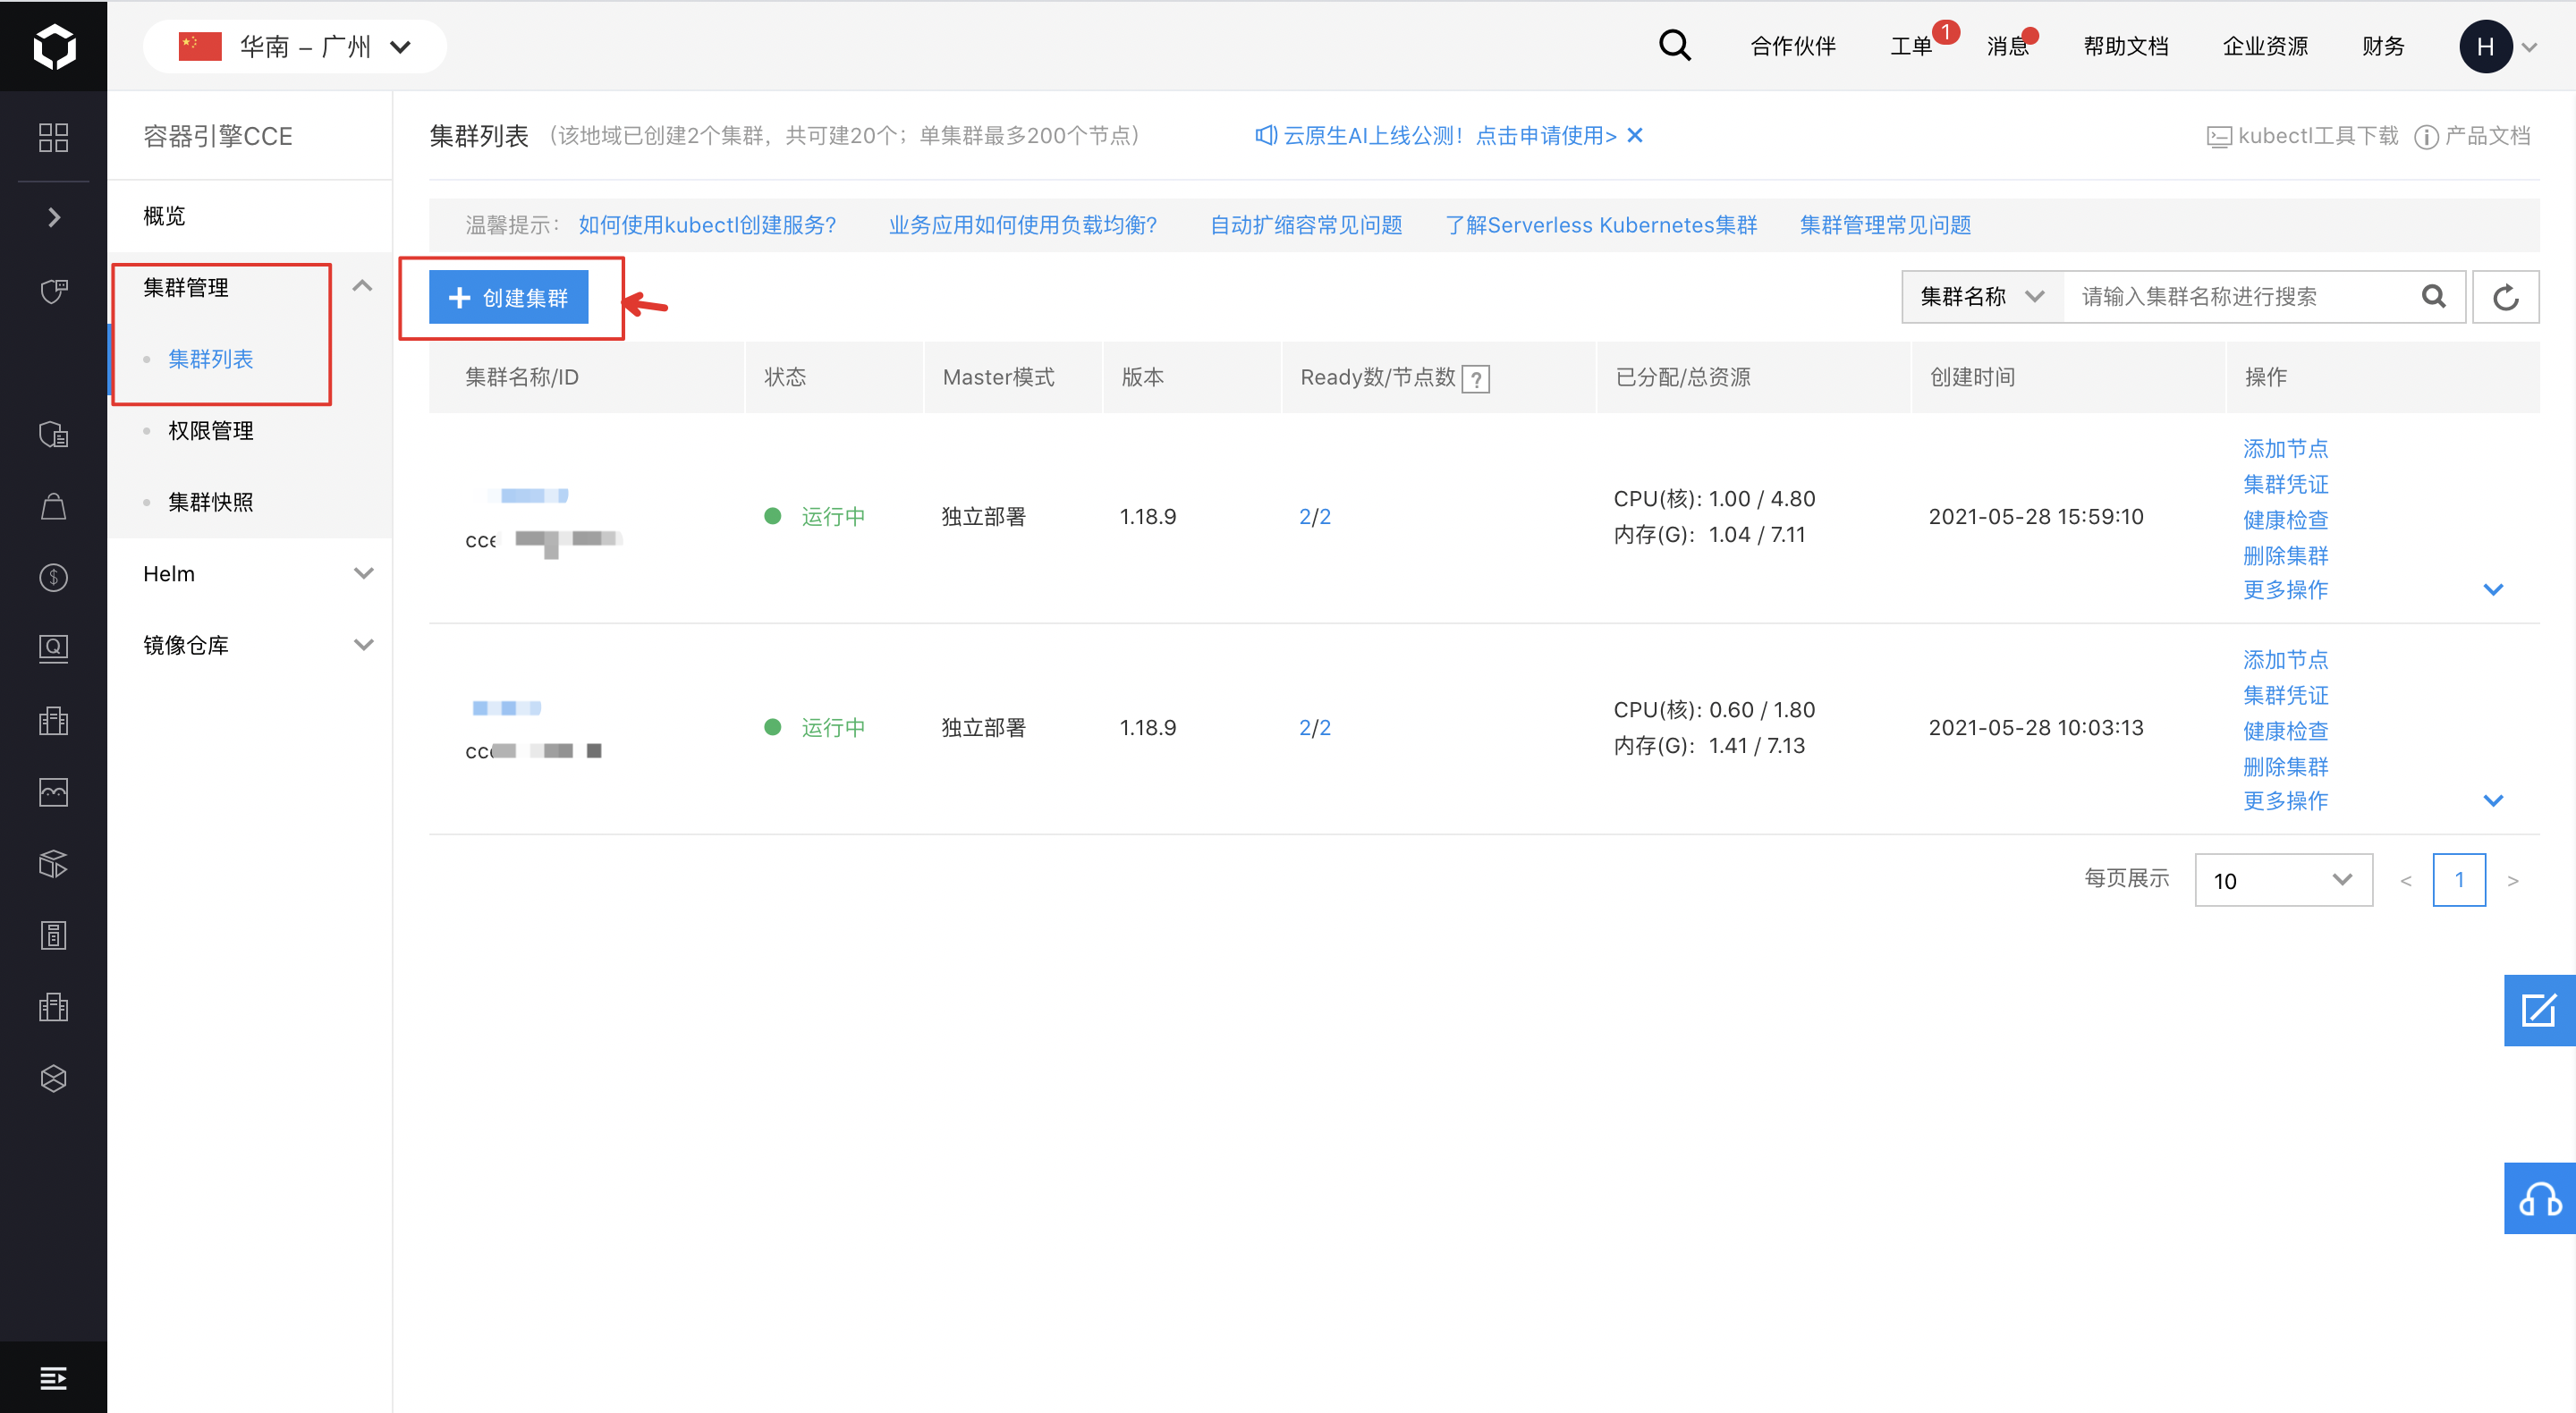
- (Optional) The “Cluster List” page displays the information of all created CCE clusters, such as name/ID, status, Master mode, and K8S version. You can search clusters via cluster names and other properties, view cluster credentials, and perform other operations.
- (Optional) In the upper left corner, select the region where the cluster resides. For the Kubernetes Nodes at the Edges, select the region where the Master node instance resides. You can change the region according to your actual requirements. The Cloud Container Engine CCE service currently supports North China-Beijing, North China-Baoding, South China-Guangzhou, East China-Suzhou, Hong Kong, and other regions.
- Click the "Create Cluster" button to enter the select "Cluster Template" page, scroll down to "Edge Kubernetes Cluster", and then click “Create”.
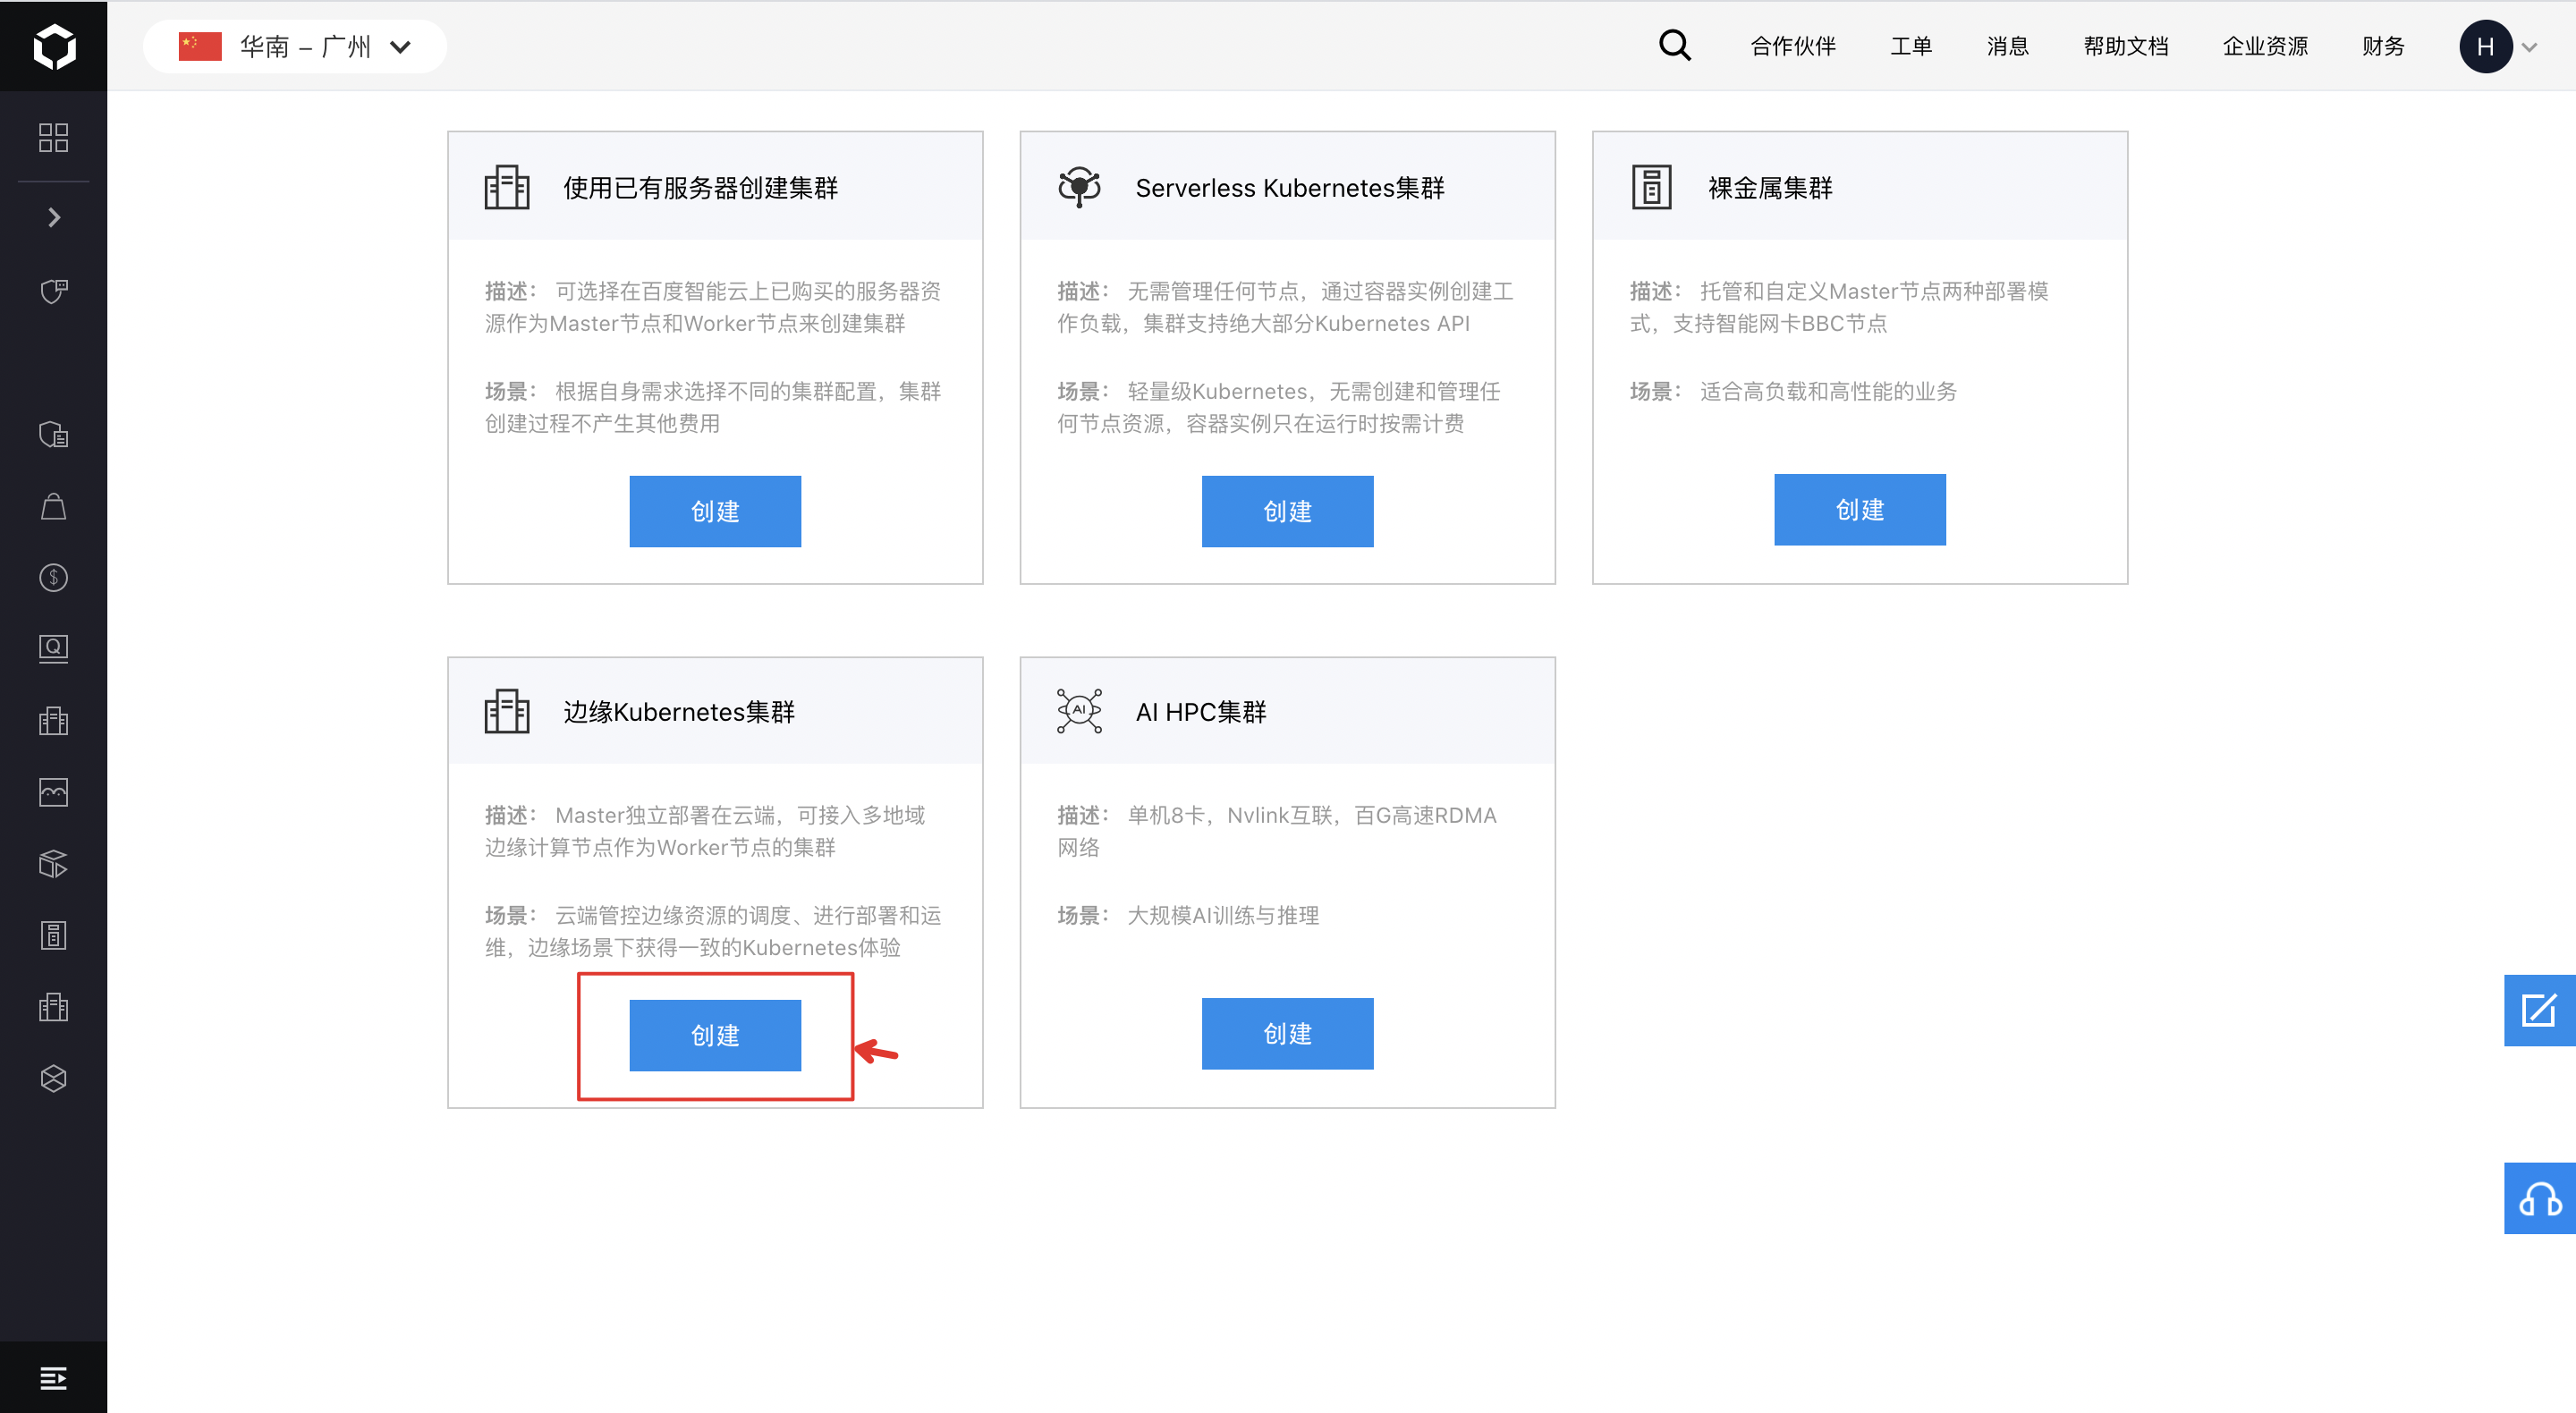
Note: If the “Create” button becomes dimmed, you need to click "Enable now" to apply for the open-beta-test whitelist.
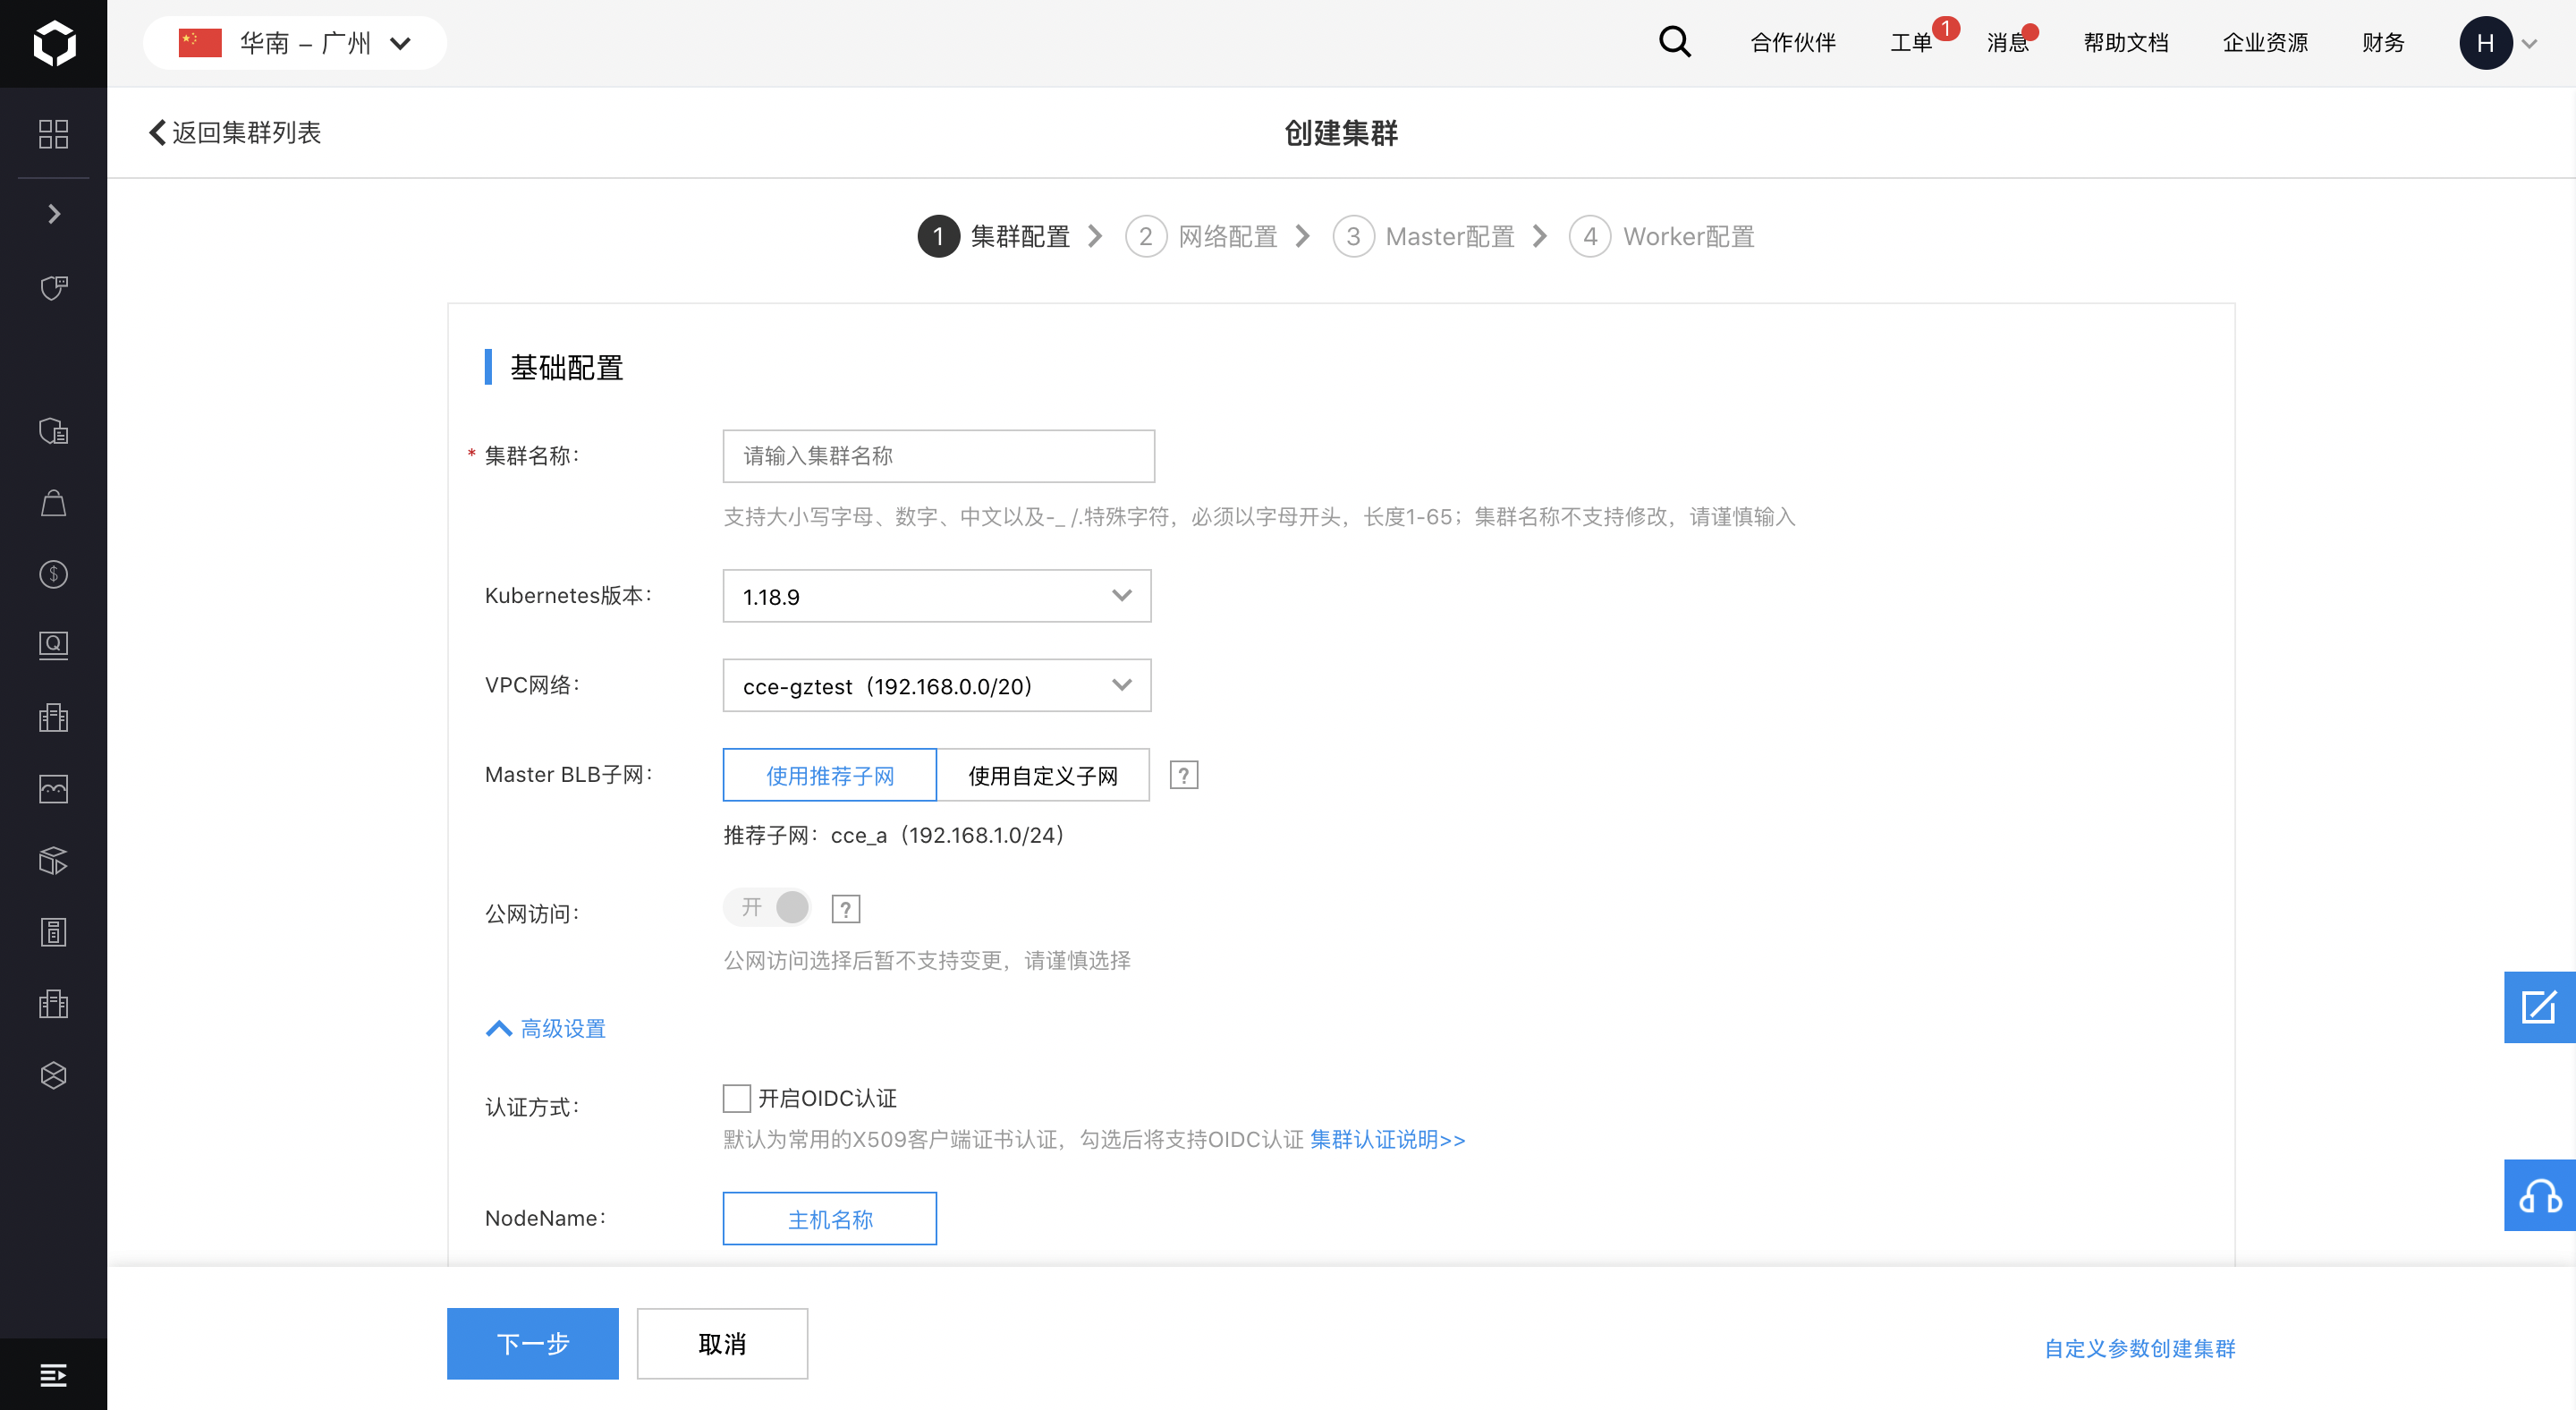
- According to the cluster creation navigation guide and by combining your business requirements, configure the following options in sequence: basic cluster configuration, network configuration, Master configuration, and Worker configuration. After confirming the configuration, submit your creation application.
-
Cluster configuration:
- Cluster name: supports uppercase and lowercase letters, numbers, Chinese, and special characters (such as -, _, /, and .), has a length of 1-65 characters and must start with a letter. Note: You cannot modify the cluster name after the cluster creation. Thus, be prudent to enter the cluster name.
- Kubernetets version: At present, the Kubernetes Nodes at the Edges 1.18.9 support version 1.18.9.
- VPC network: The VPC network where the cluster resides. For the Kubernetes Nodes at the Edges, the VPC network mainly refers to the VPC network where the Master node instance and the BLB instance created by default reside.
- Master BLB subnet: By default, CCE uses this subnet to create the private network BLB instance for the API Server of the cluster. Note: You cannot select the NAT private network.
- Public network access: With the public network access enabled, CCE creates and attaches a public network IP for Master BLB, allowing access to the cluster's API Server via the public network. Note: The edge nodes of the Kubernetes Nodes at the Edges need to interact with the cloud API server through the public network. The public network access is enabled by default and cannot be changed.
- Advanced setting: The advanced setting is the same as ordinary clusters. If you do not have any special requirements, keep the edge cluster in the default status. Note: The nodename of the Kubernetes Nodes at the Edges only supports the host name.
-
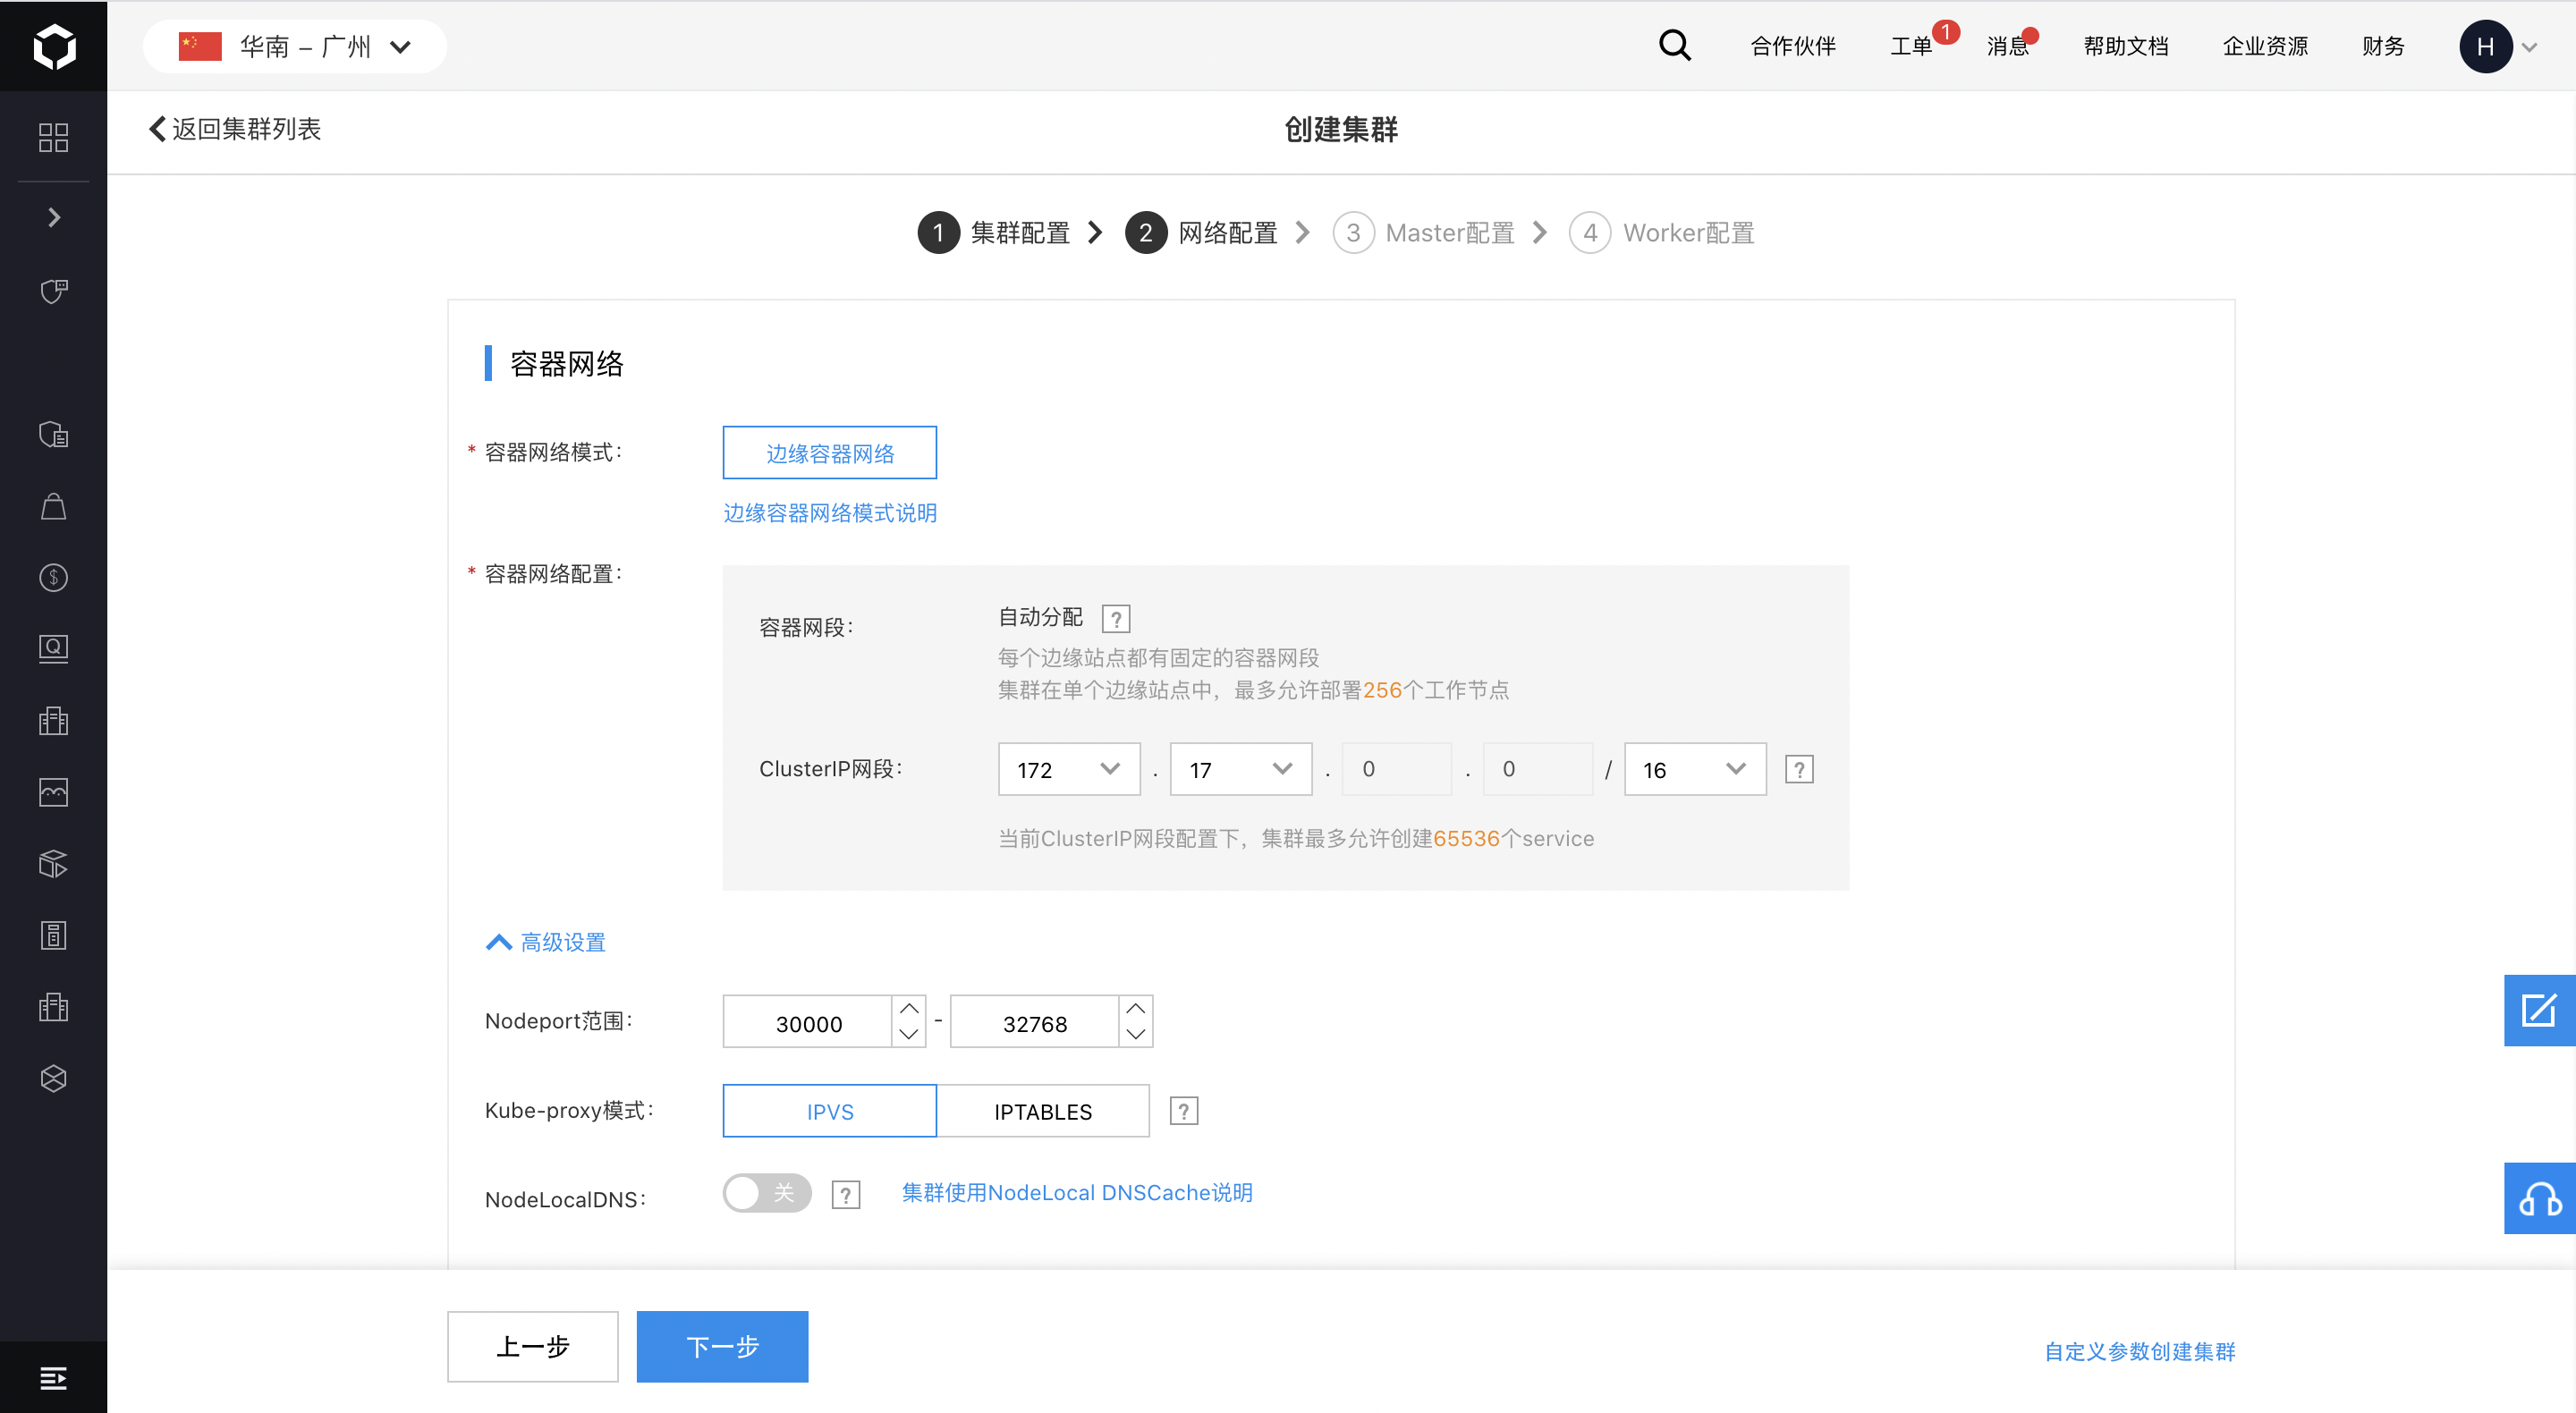
Network configuration:
- Container network mode: The container network mode of the Kubernetes Nodes at the Edges is implemented based on the open-source network solution calico, namely the "edge container network". You need not select this option here.
- Container network configuration: The IP address range of the container is the IP address range within which the Pod is. The Kubernetes Nodes at the Edges automatically allocate the IP address range of the container to each edge site. Thus, you do not need to set the IP address range. For the allocation of the IP address range, see IP Address Range of Edge Container. The cluster is in a single edge site. You can deploy up to 256 working nodes. ClusterIP refers to the service exposed through the internal IP of the cluster. The service can be accessed in the cluster. The ClusterIP IP address range is the service IP address range, which needs to be independent of the node network, node subnet, and container IP address range. The user should define 172 and 192 IP address ranges. You should plan the service IP address range according to the cluster service scale in advance.
- Advanced setting: The advanced setting includes Nodeport range, Kube-proxy mode, and NodeLocalDNS, which is the same as ordinary clusters. For details, see Introductions for Ordinary Clusters. If you do not have any special requirements, keep the edge cluster in the default status.
-
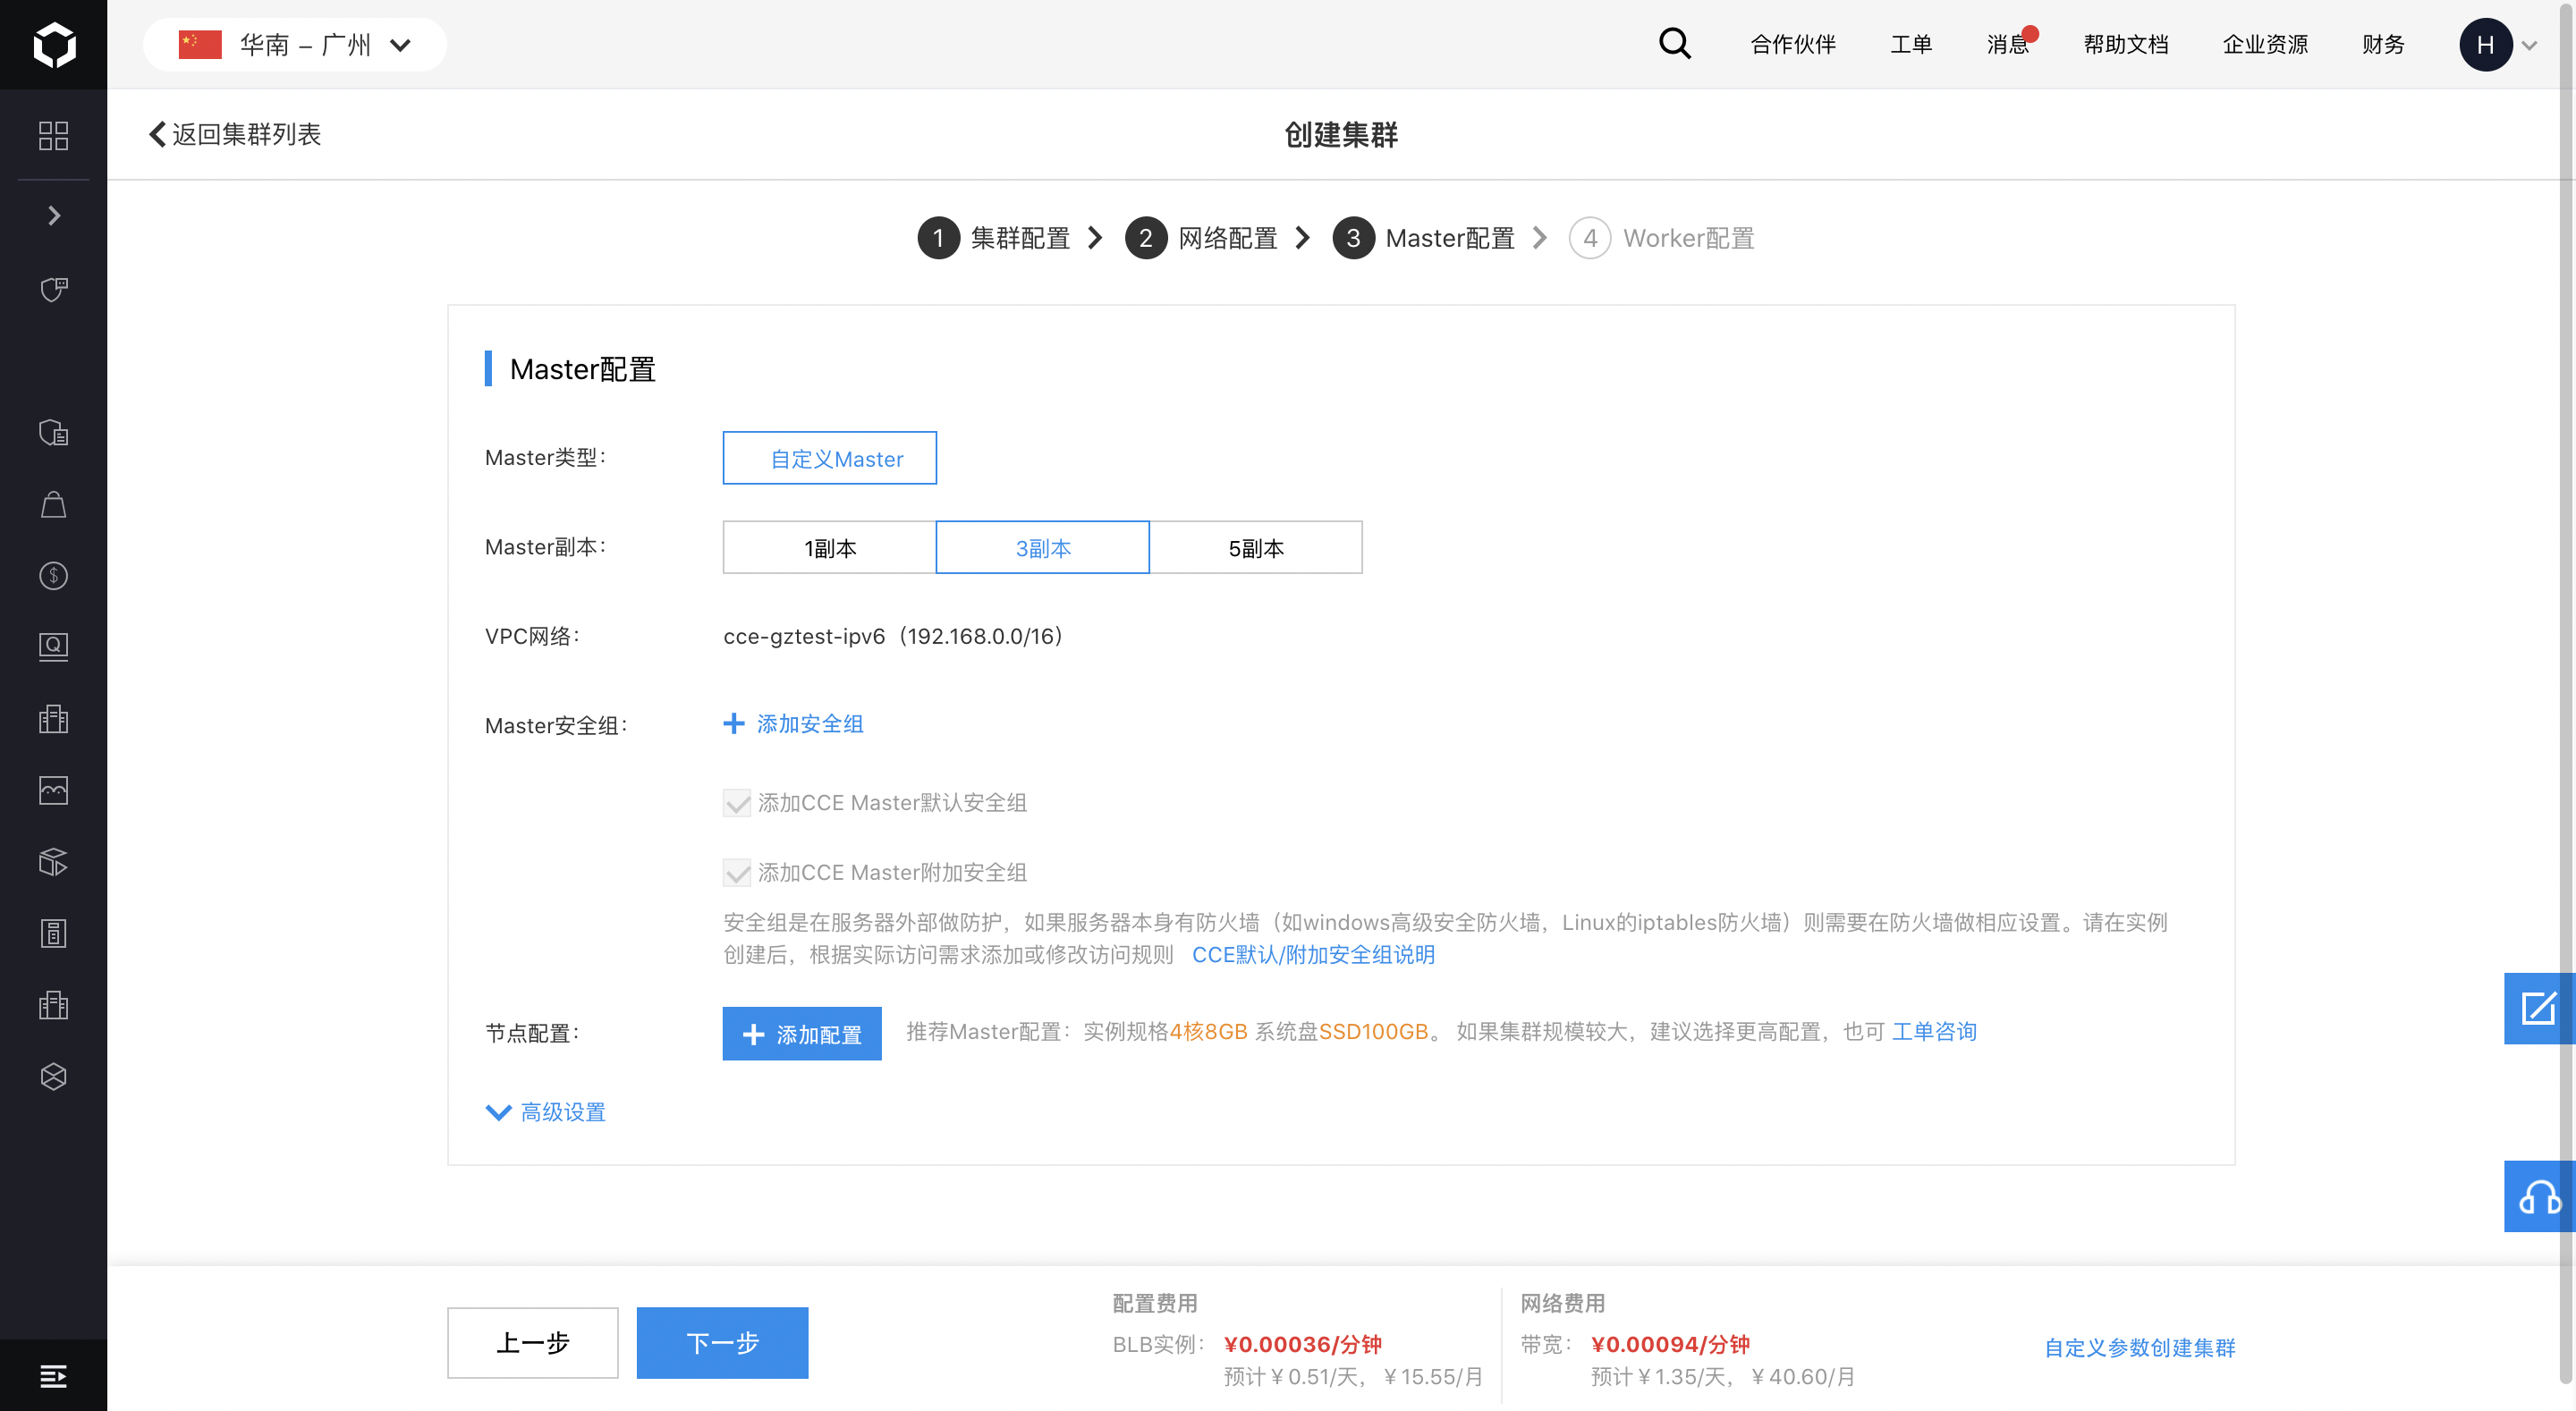
Master configuration:
- The Master node of the Kubernetes Nodes at the Edges is deployed in the cloud. That is, you can use BCC as the master node. Currently, only the "Custom Master" type is available. That is, users can independently manage and maintain the master node and the control components of the cluster. The method for creating the Kubernetes Nodes at the Edges is the same as ordinary clusters. Also, you can create an edge cluster by creating a node or adding an existing node. For configuration parameters, see Ordinary Clusters.
Notes:
(1) By default, the Kubernetes Node at the Edges has three Master replicas. Baidu AI Cloud recommends you choose a multi-replica Master to guarantee the high availability of the cluster;
(2) Multiple Master security groups are available for your selection. The default security group of CCE Master is selected by default, which contains the security group rules necessary for the normal access to the Kubernetes Nodes at the Edges. Baidu AI Cloud recommends you should not unselect the default option.
(3) The Master node of the Kubernetes Nodes at the Edges should support public network access. You must bind the node instance to EIP or ensure that a NAT gateway is available in the VPC and the Master node subnet is already added to the NAT route.
-
Worker configuration:
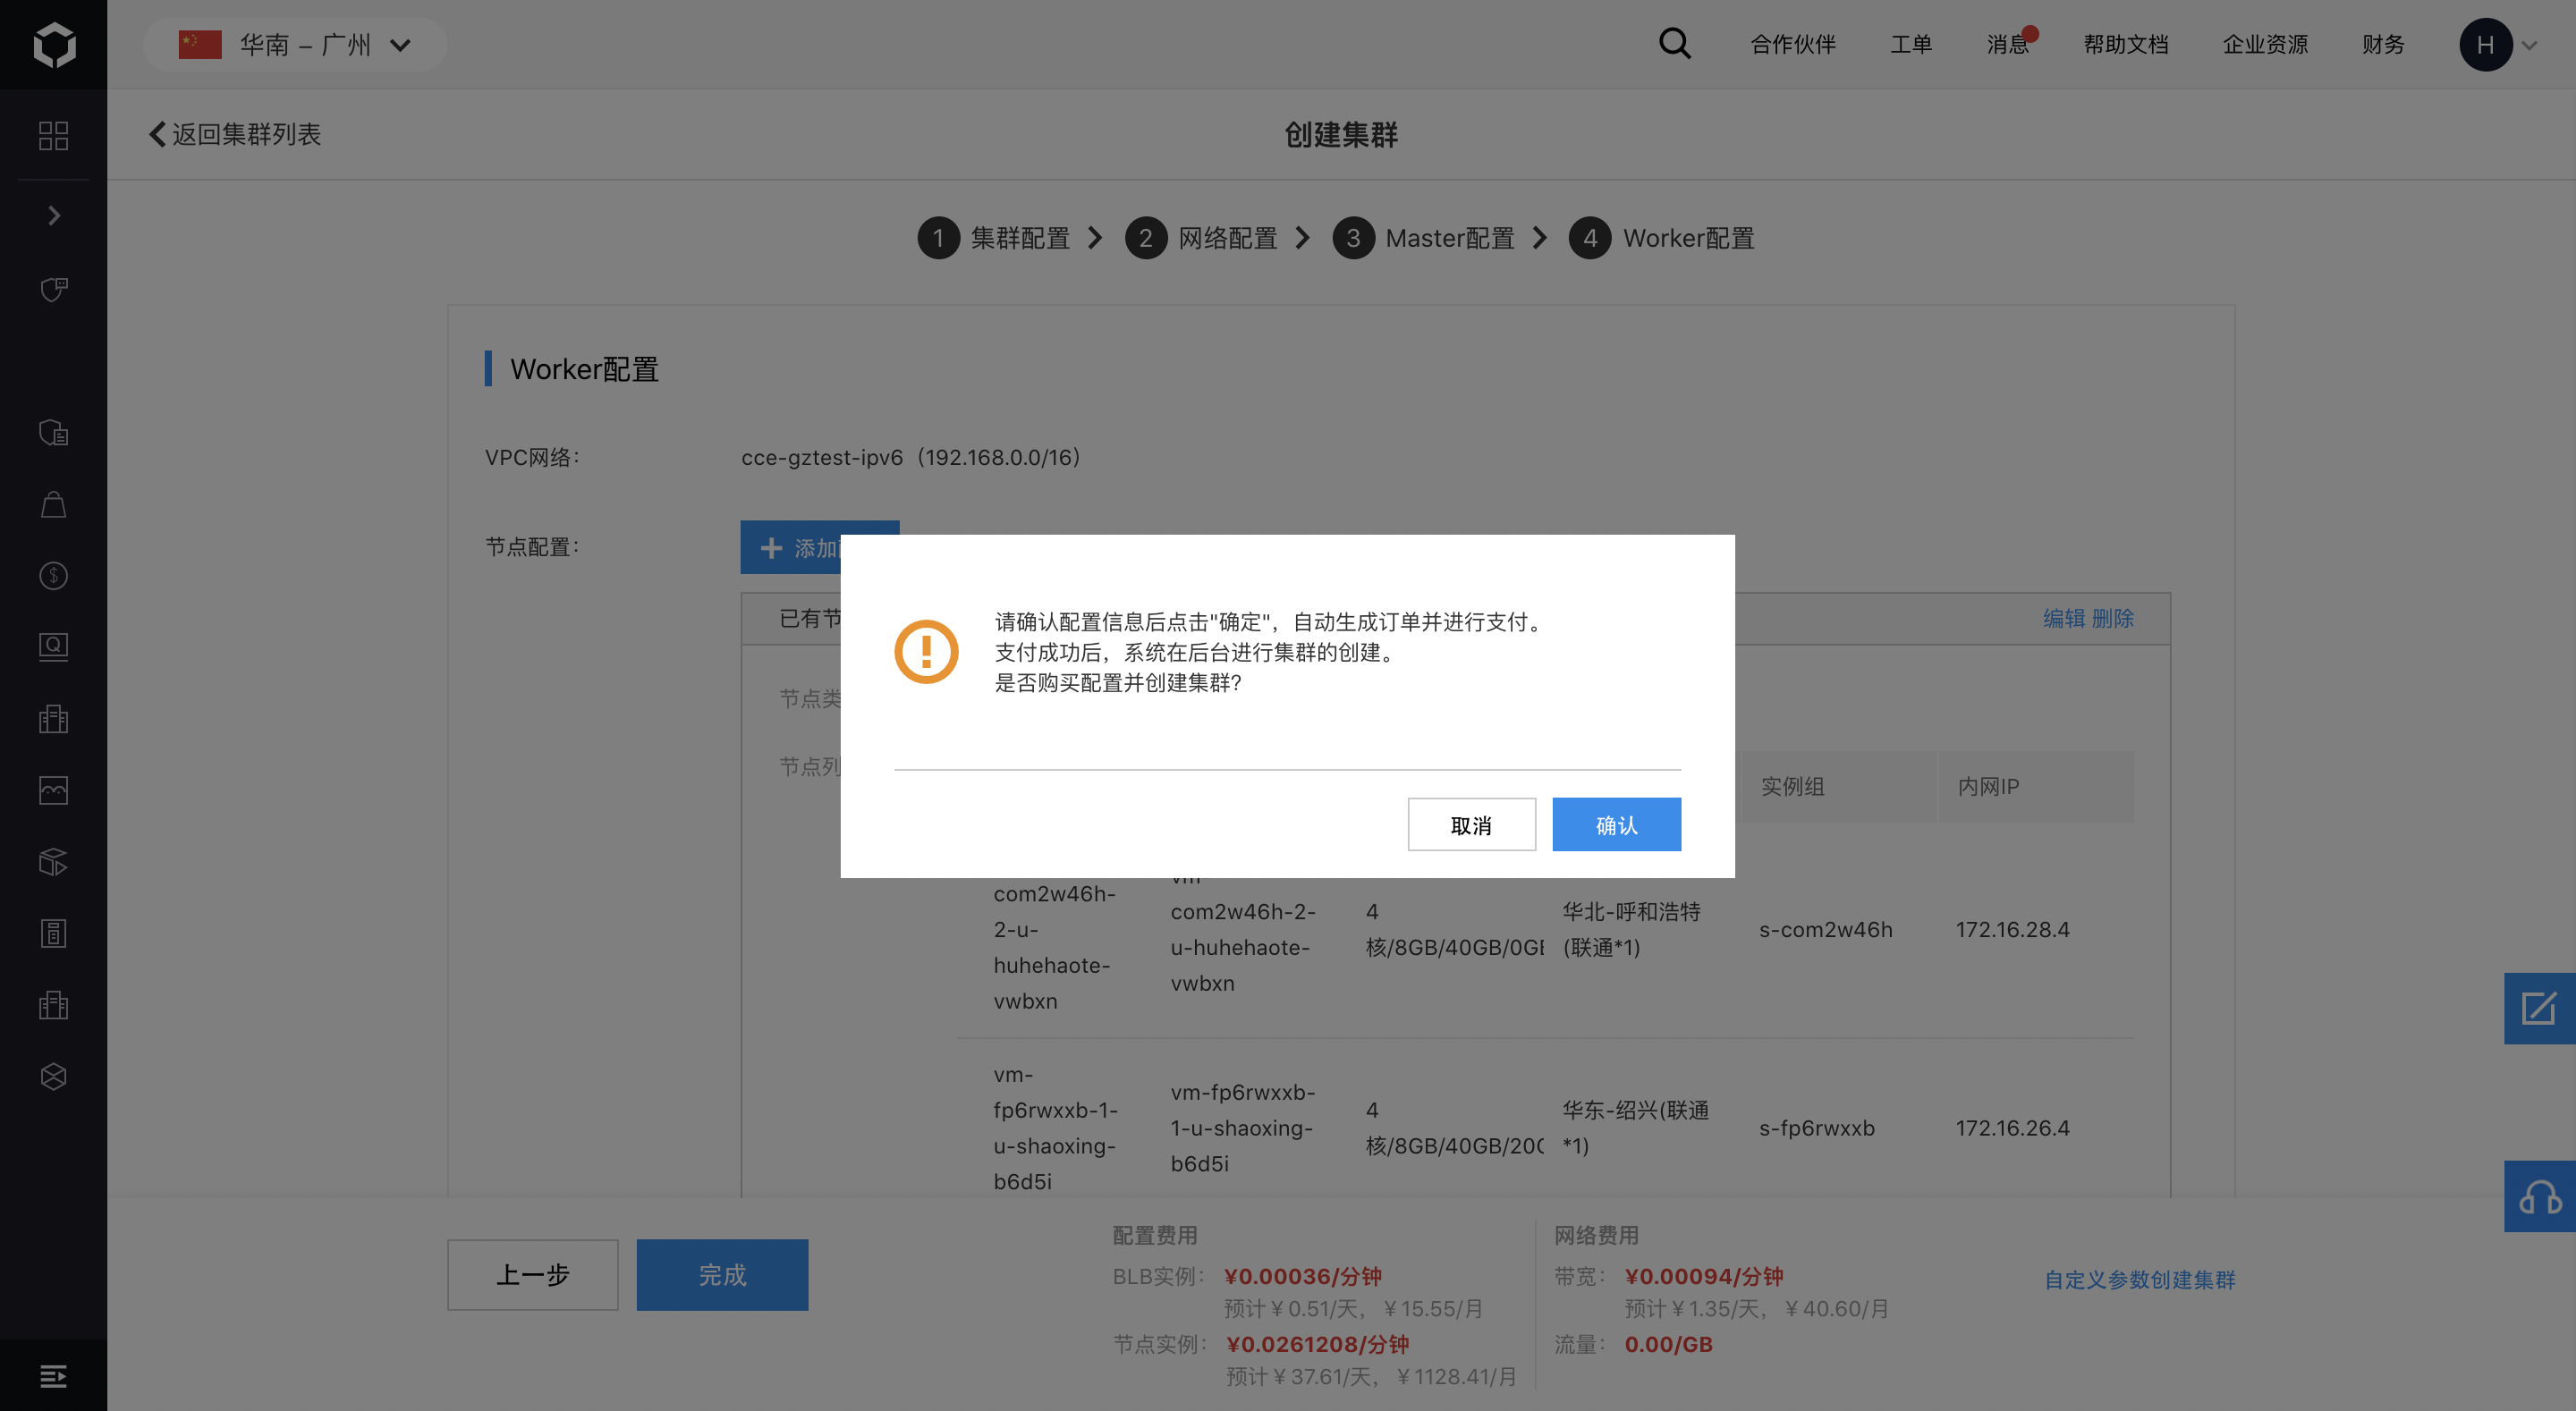
- The Worker nodes of the Kubernetes Nodes at the Edges are deployed at the edge. At present, you can only create a Kubernetes Node at the Edges by using existing nodes. Thus, you need to create a BEC instance in the BEC console in advance. However, you must bind the BEC instance to the public IP. You can deploy the Kubernetes Node at the Edges by selecting multiple BEC instances across edge sites and across instance groups. Other node configurations are the same as ordinary clusters. For configuration parameters, see Ordinary Clusters.
Note: The Kubernetes Nodes at the Edges do not support the system re-installation of BEC instances. Thus, you need to confirm the password of the selected instance.

- After confirming all the configurations, click "Finish". In the re-confirmation pop-up window, click "OK" to start creating the cluster.
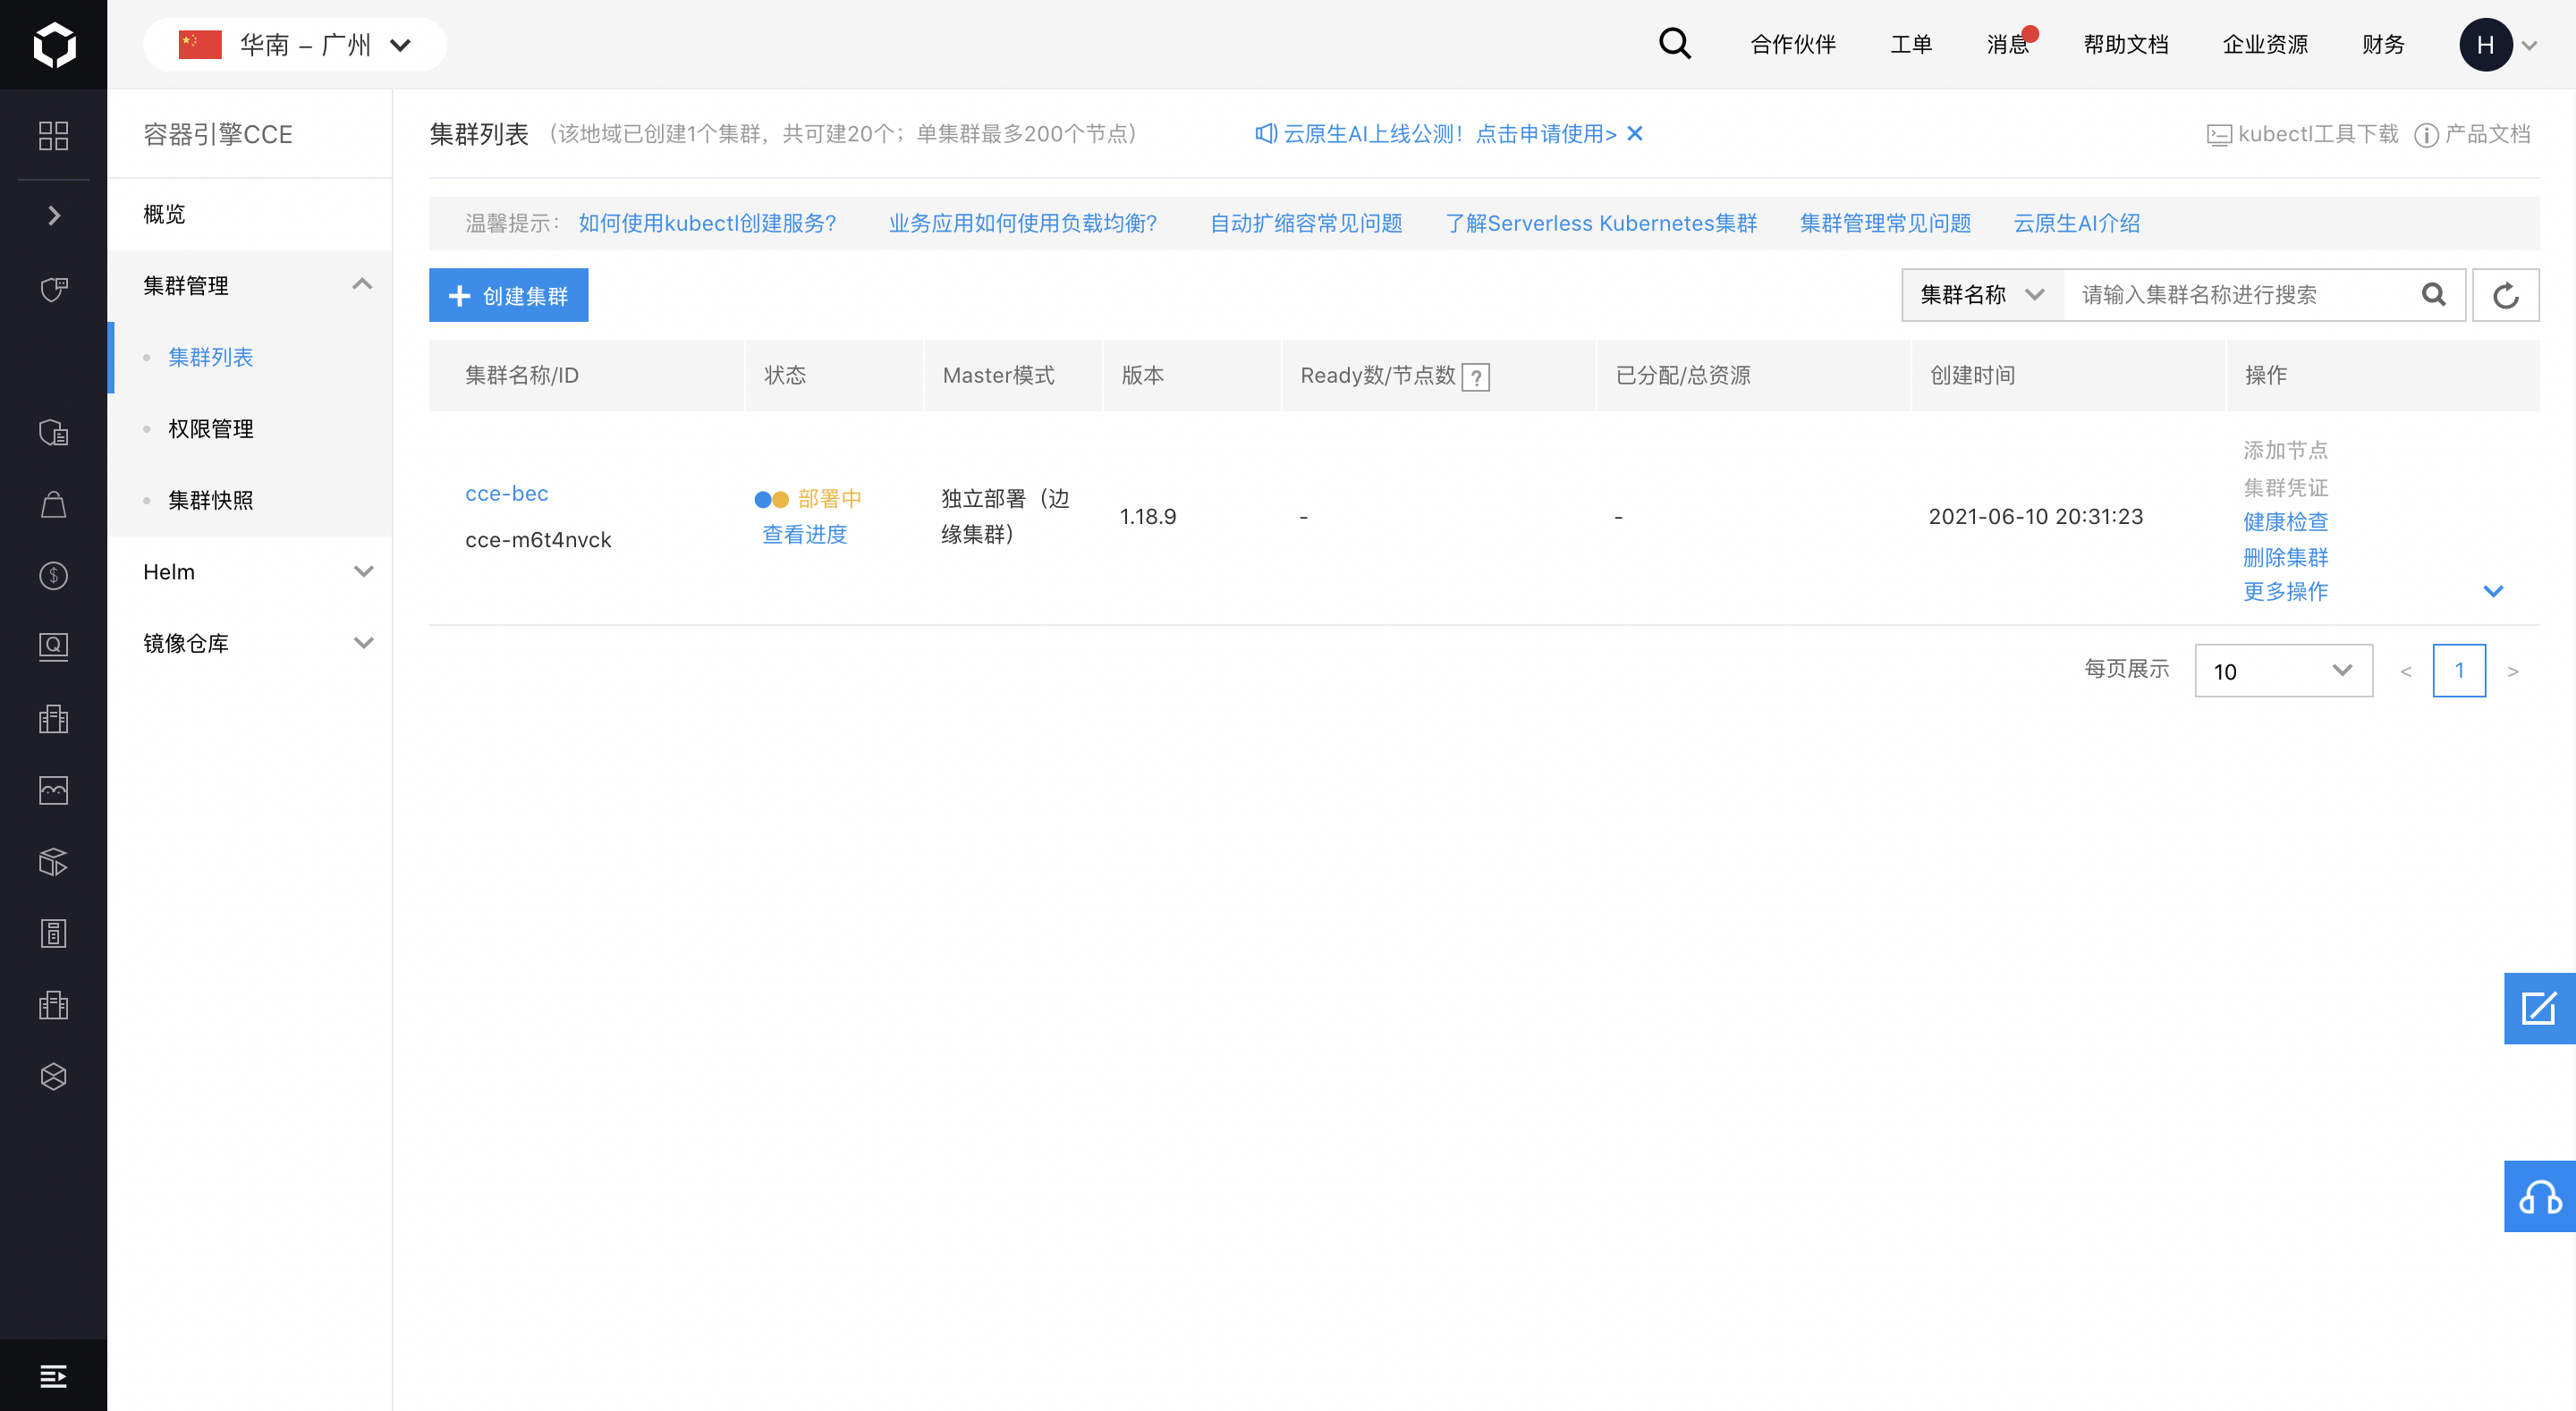
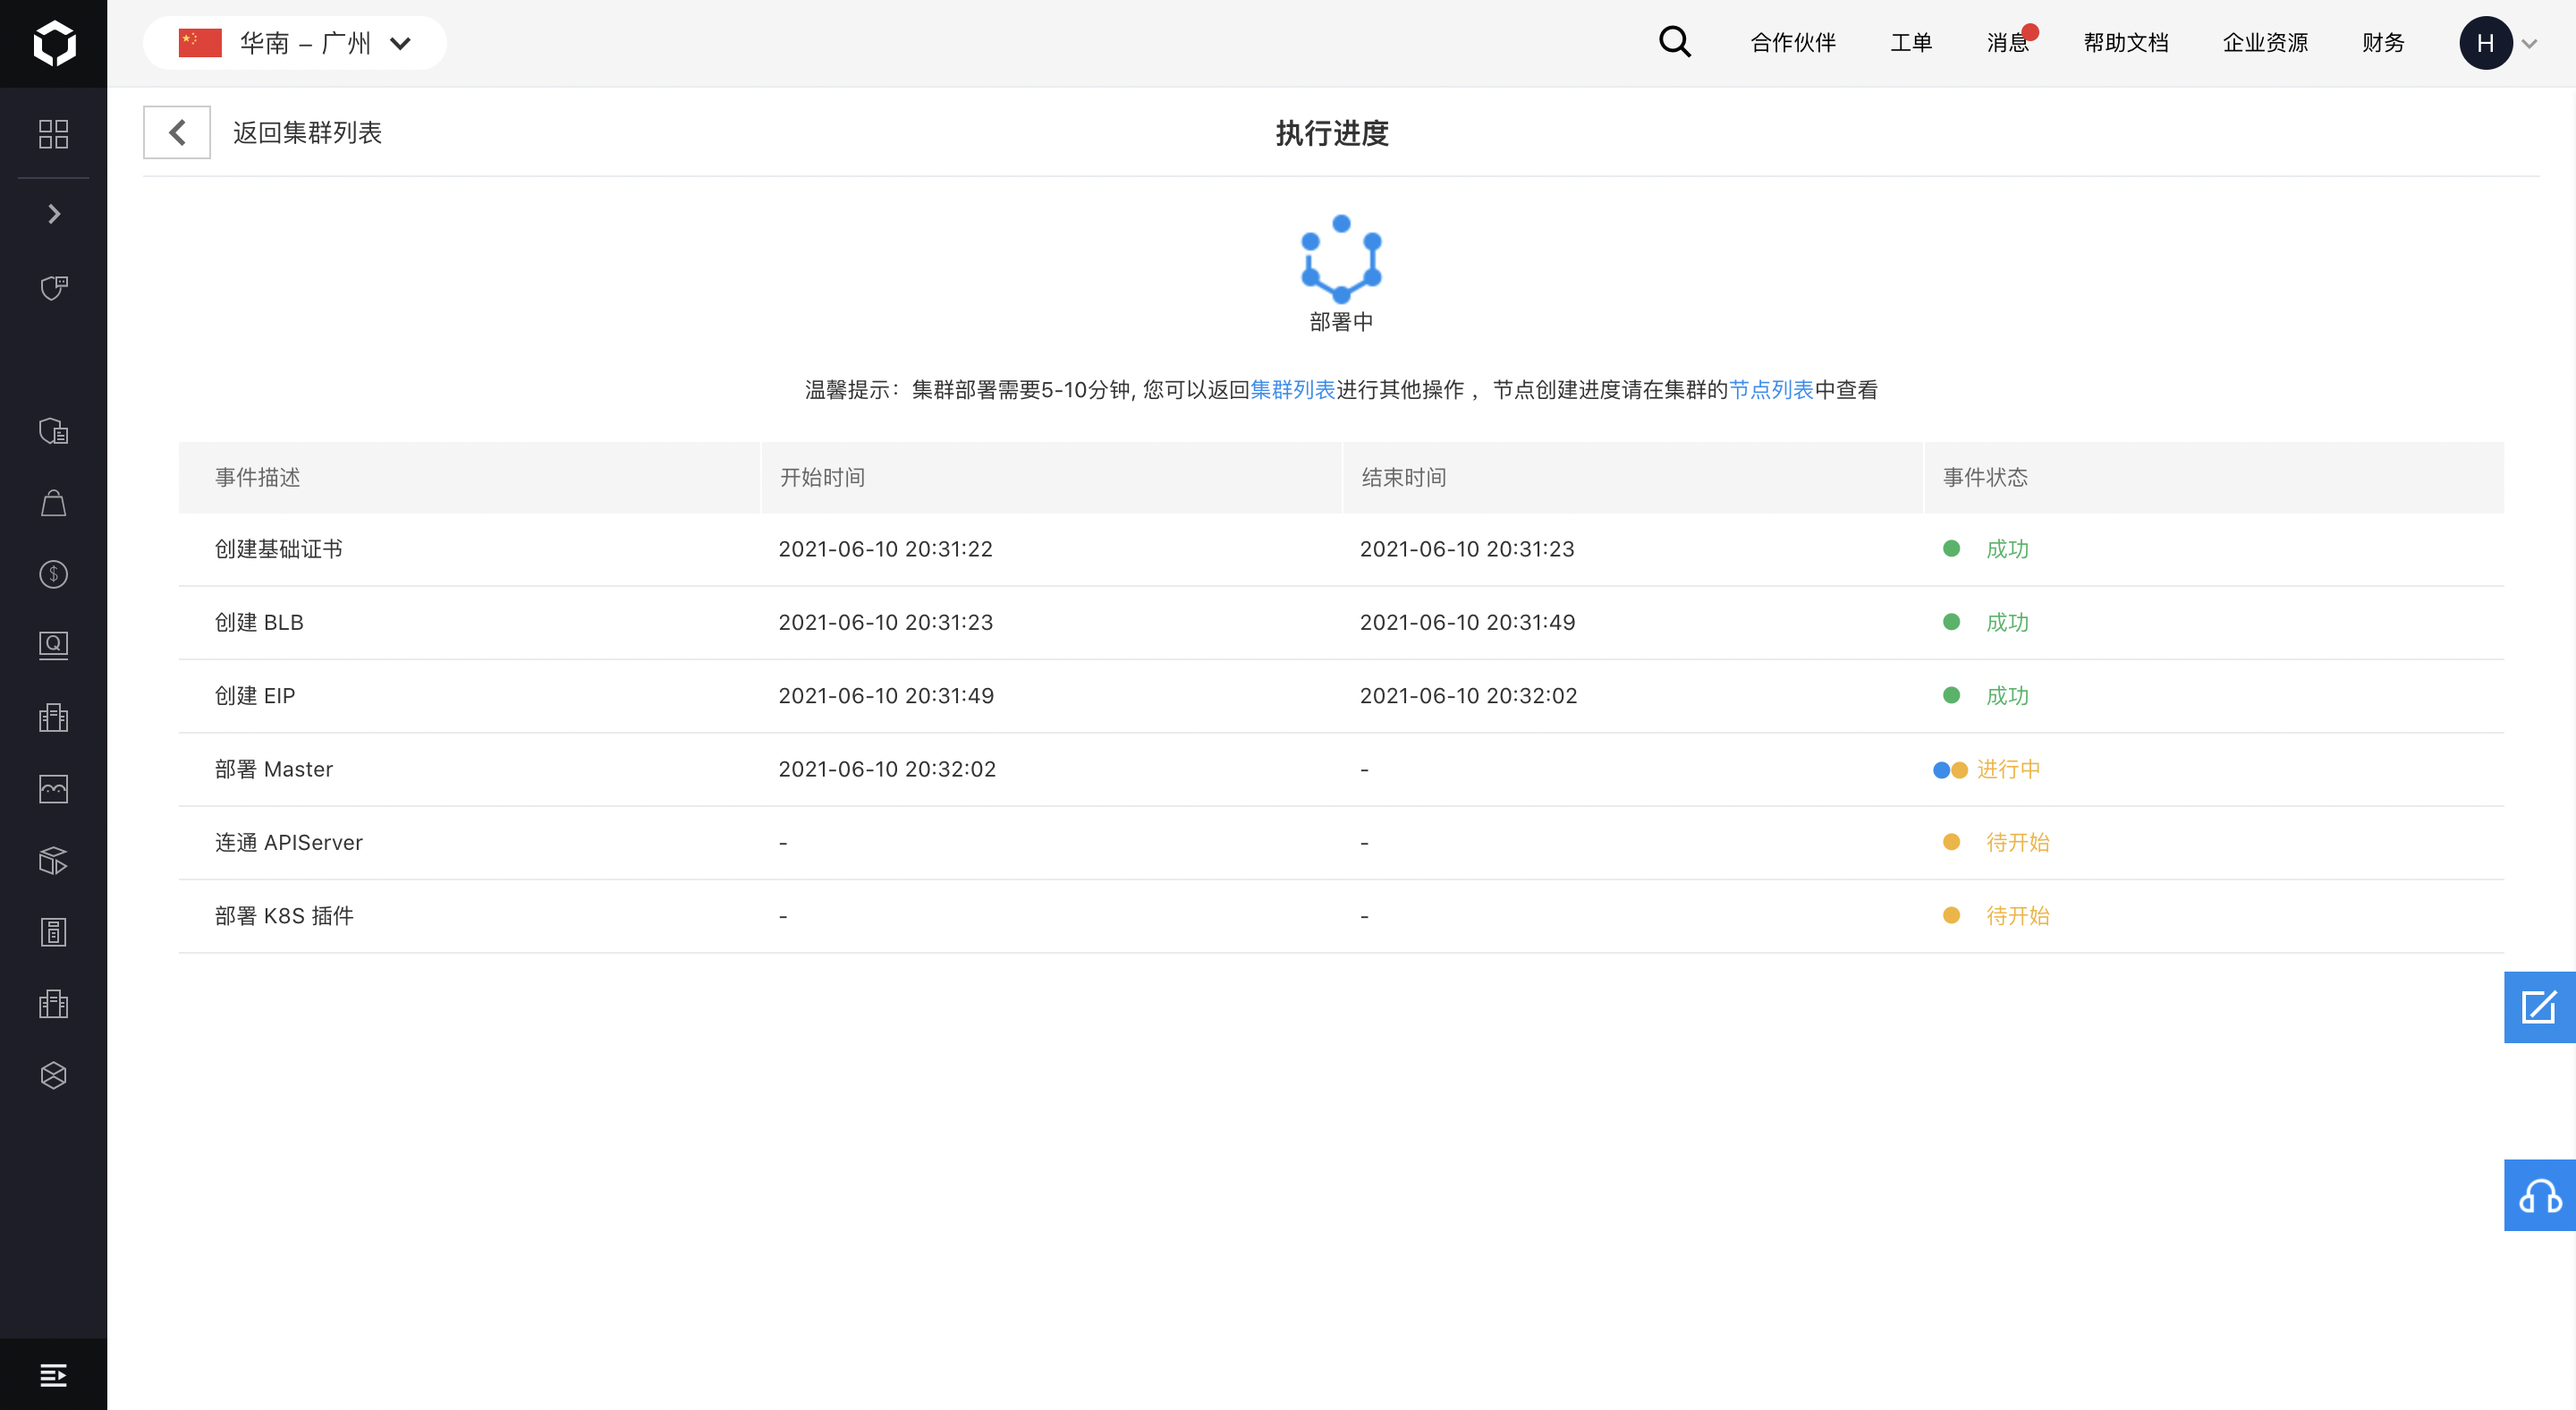
- Return to the "Cluster List" page to view the cluster deployment progress. The cluster deployment takes about 5-10 minutes.
Operation Cluster
After the creation of a CCE cluster, you can view the list of existing clusters and cluster details on the Baidu Cloud Console and operate the cluster.
View More Details
- Go to "Product Service> CloudNative>Cloud Container Engine CCE" and click "Cluster Management> Cluster List". Then, you can see the list of clusters that the user has created.
- If many clusters exist, you can quickly search by "Cluster name".
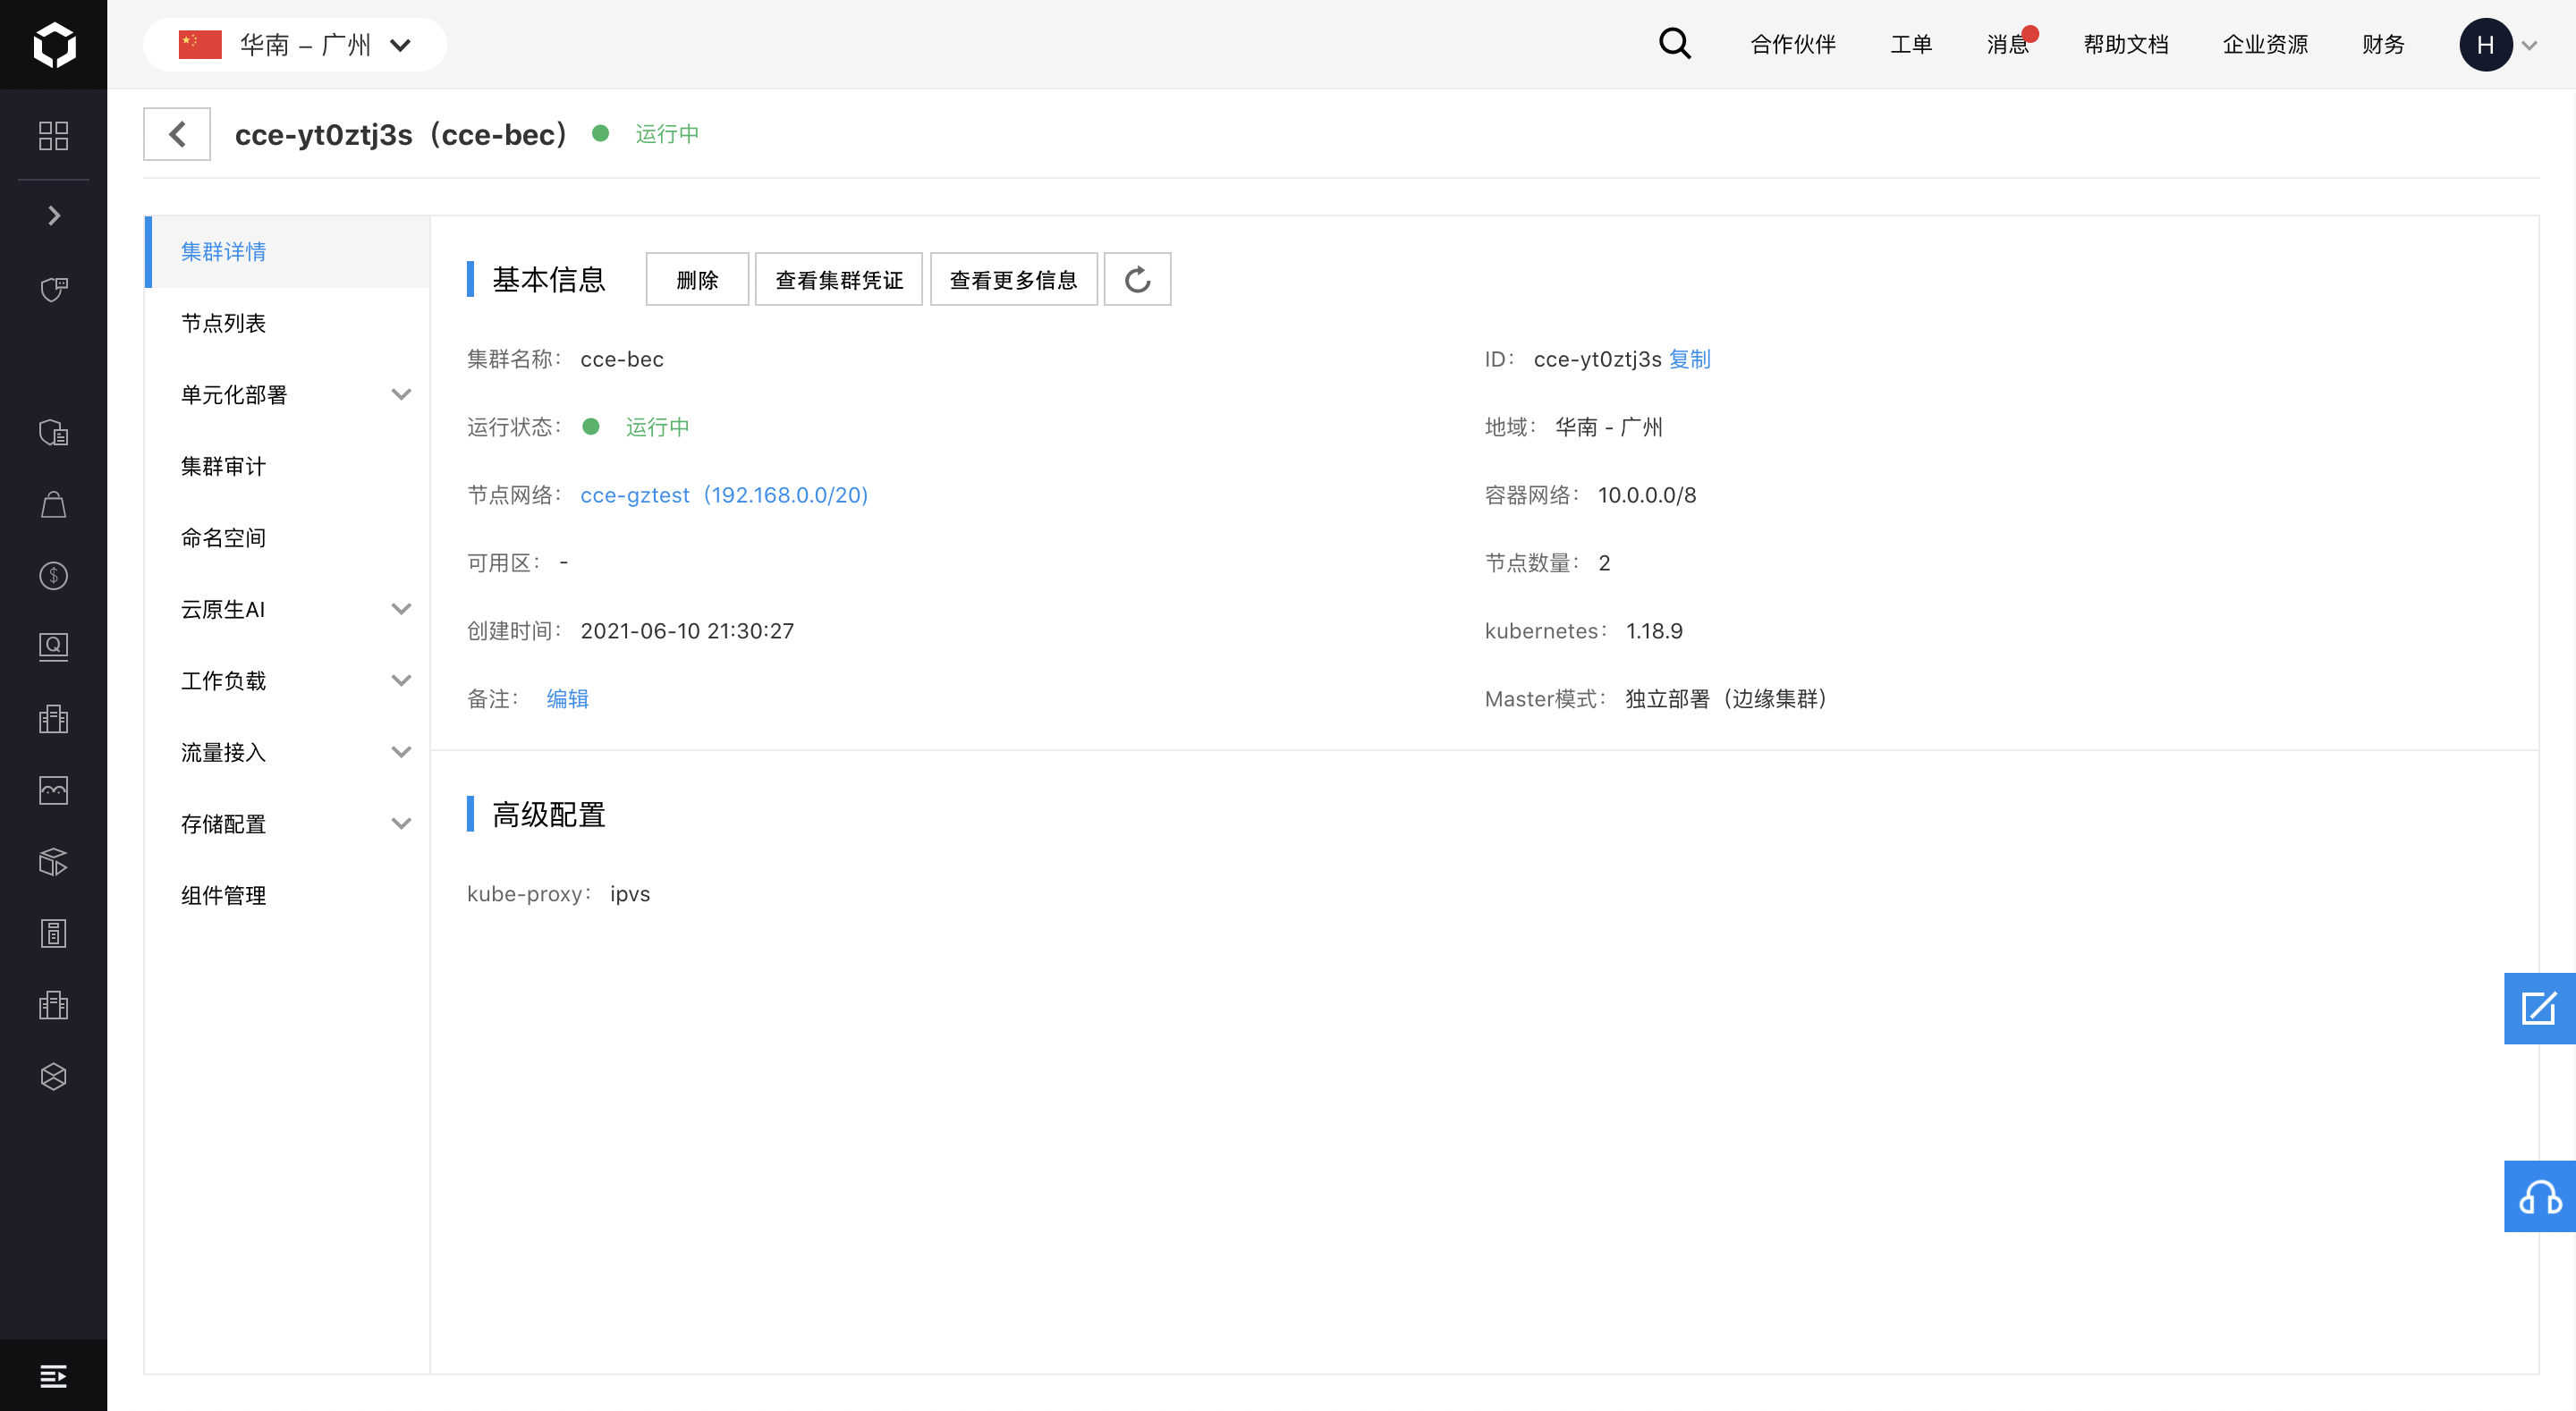
- Click the cluster name in the "Cluster Name/ID" column of the cluster list to enter the "Cluster Details" page to view cluster details.
You can view basic information and advanced configuration of the cluster:
Basic information includes cluster name, cluster ID, cluster running status, cluster region (for the edge cluster, which refers to the region where the cloud Master node resides), node network (for the edge cluster, which refers to the VPC network where the cloud Master node resides), container network, and availability zone (Which refers to the availability zone where the Worker node resides. The edge node of the cloud edge cluster is at the edge site rather than in availability zone), number of nodes, creation time, Kubernetes version, remarks, and Master mode. The current edge cluster only supports "Independent deployment (edge clusters)”;
The advanced configuration is the kube-proxy mode selected by the user.
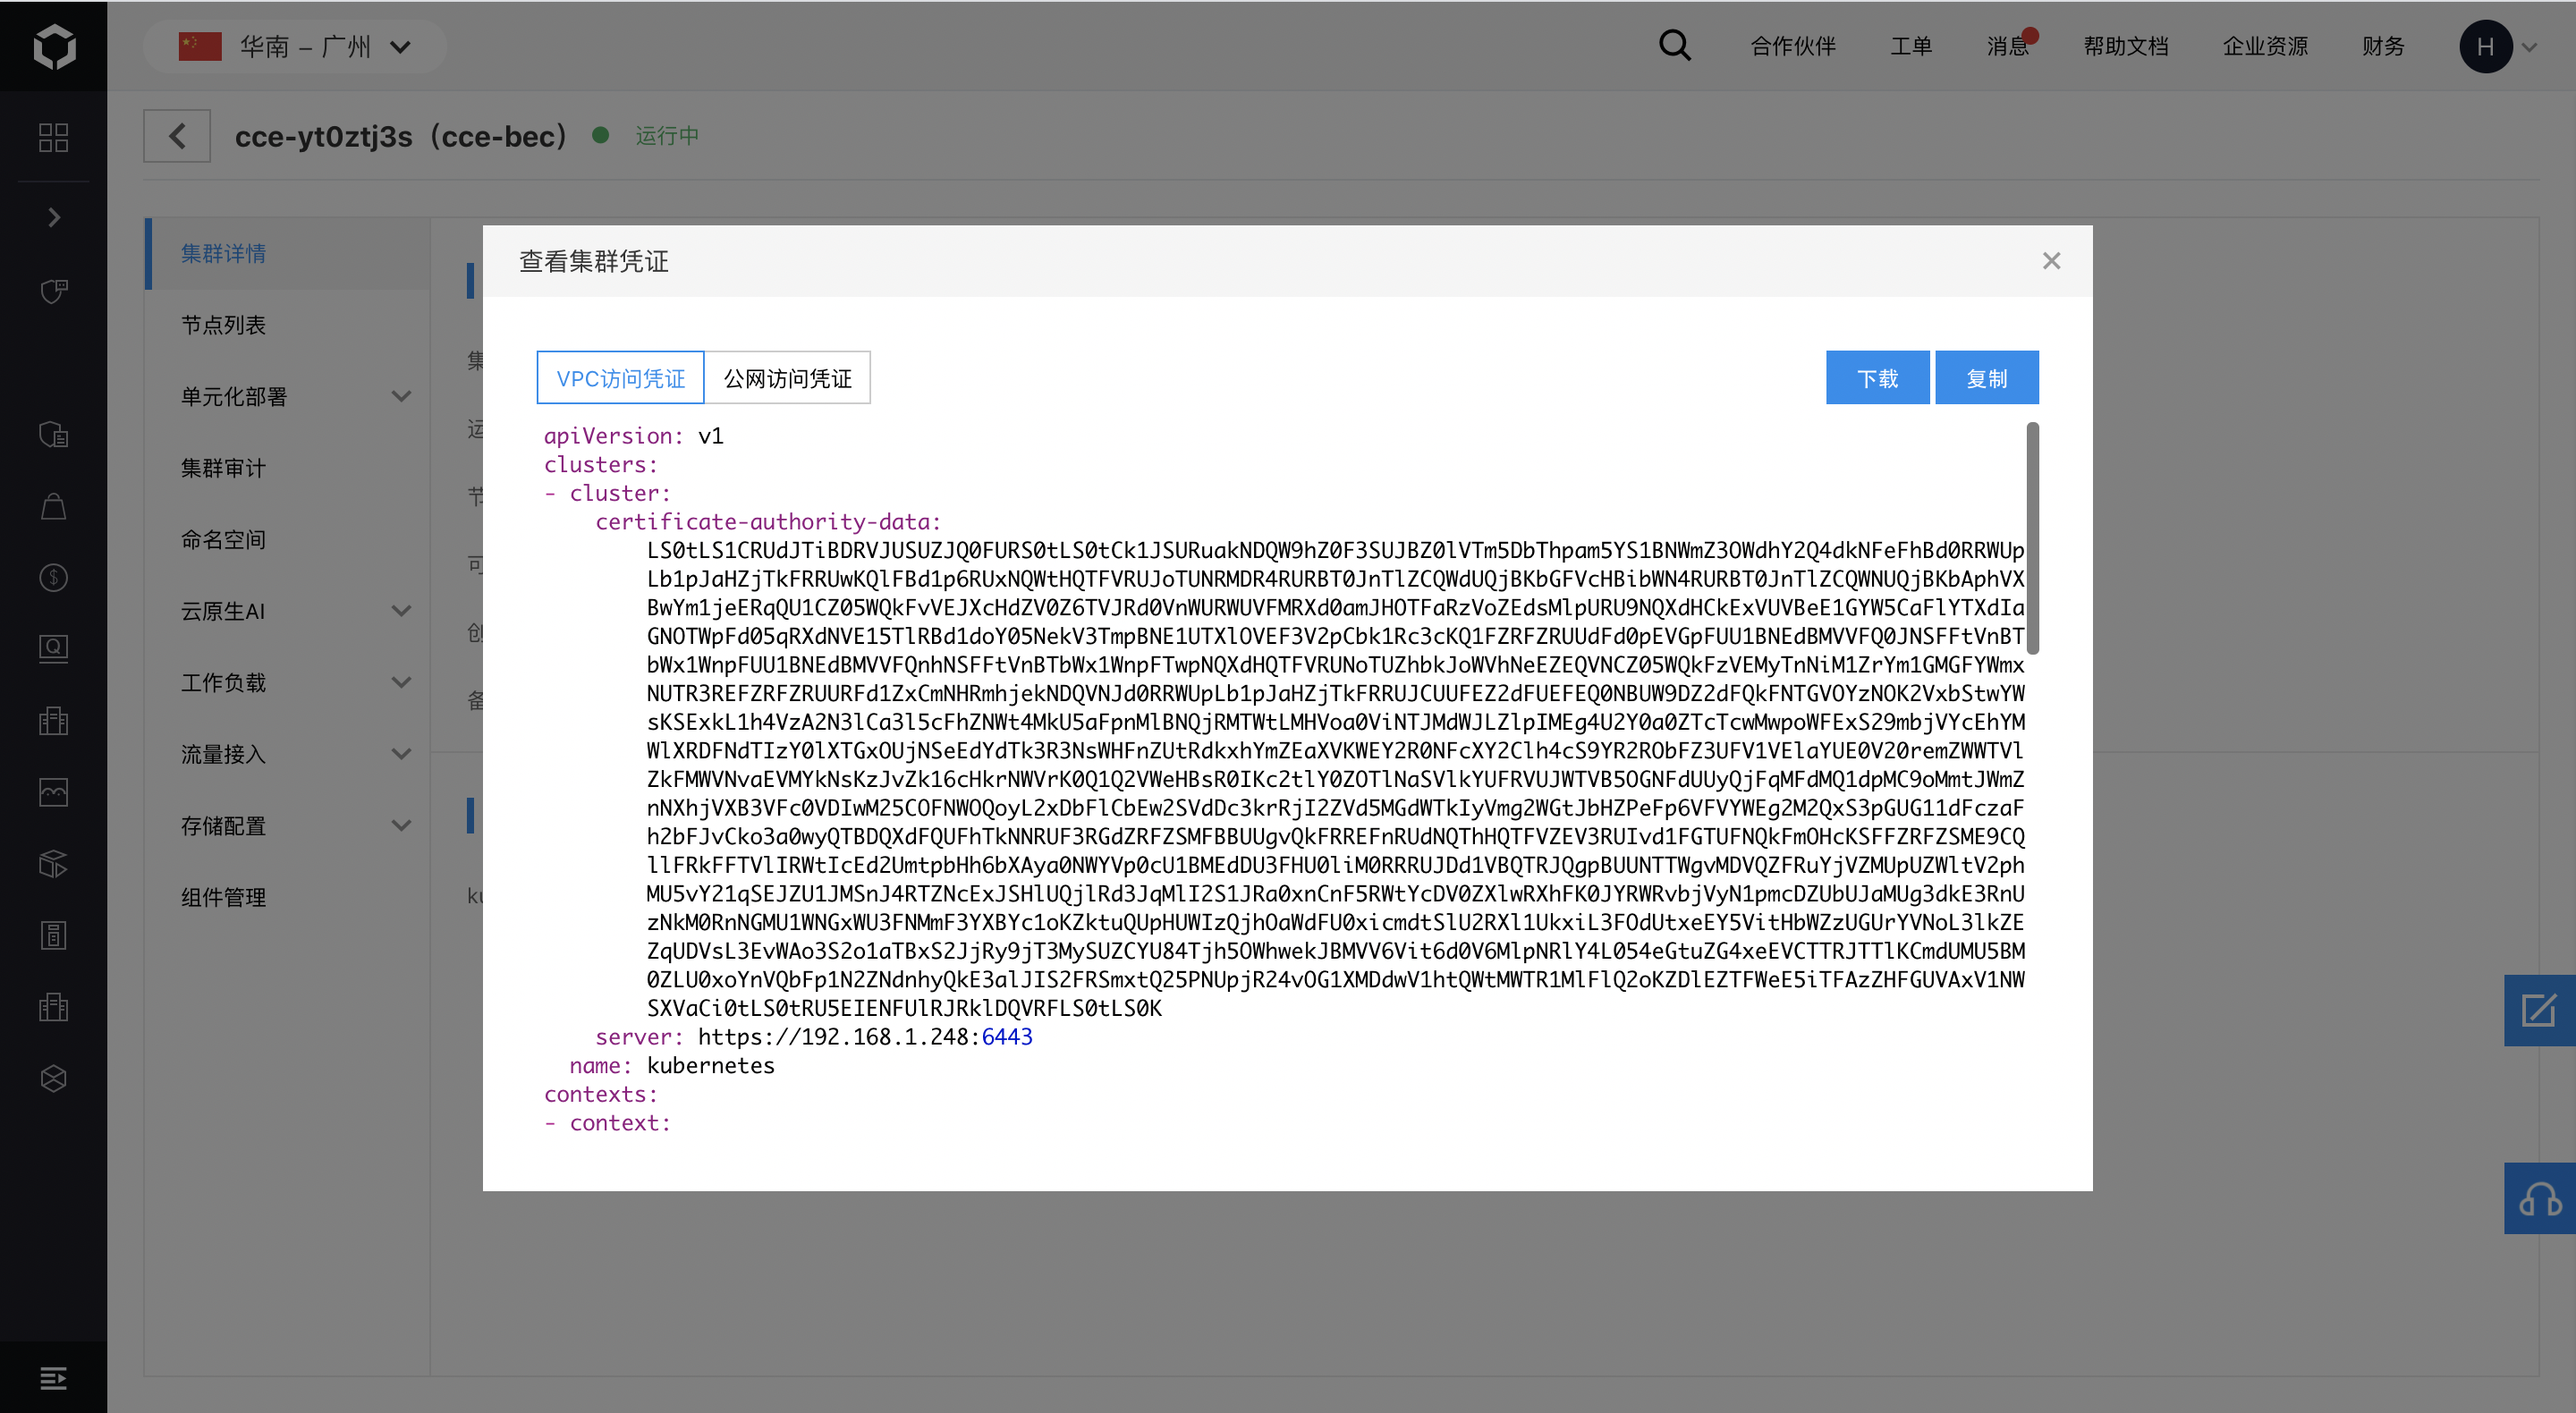
Cluster Credential
In the operation column of the cluster list, click "Cluster Credential". Or, on the cluster details page, click "View Cluster Credential" to view and download the kubeconfig file used to connect to the cluster through Kubectl for private or public network access.
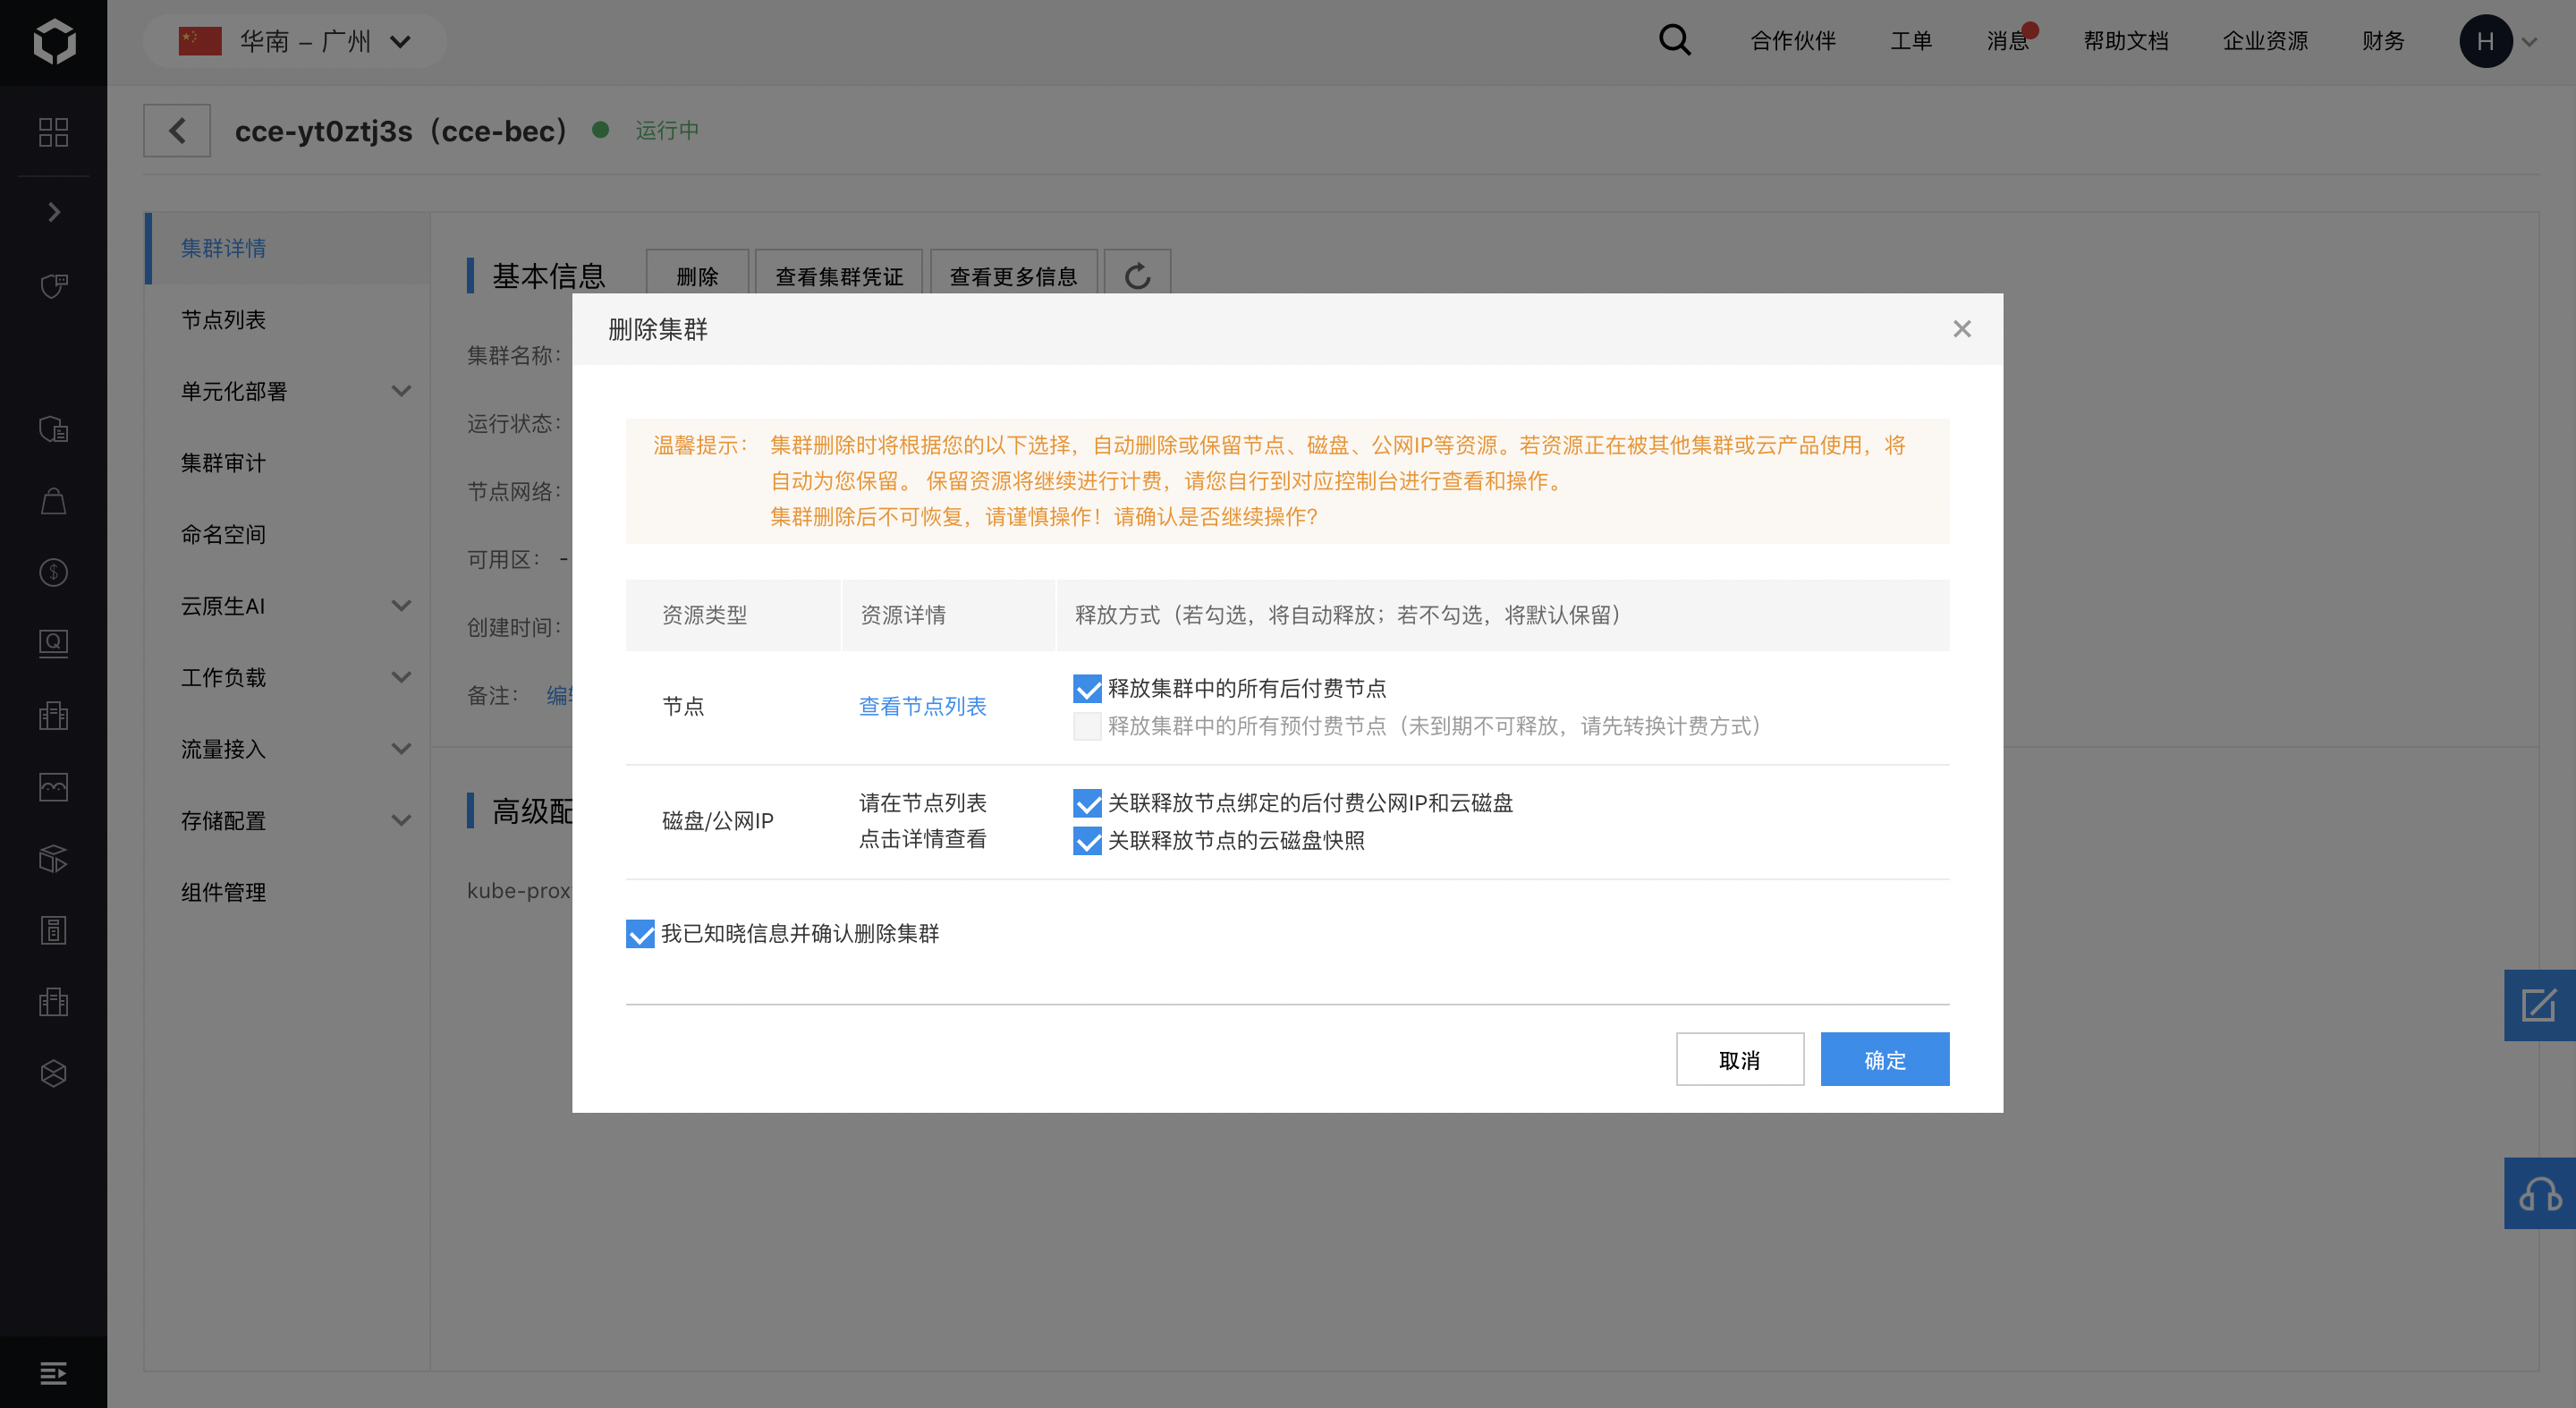
Delete Cluster
In the operation column of the cluster list, click "Delete Cluster", or on the cluster details page, click the "Delete" button. Then, in the second confirmation pop-up window, select whether or not to release the associated resources (if not, the associated resources are retained and continue billing). After that, click "OK" to start deleting the cluster.
Note: The snapshot is unrecoverable after deletion.