
Managing BLB Ordinary Instance
View BLB instances
- Select Products > Network > Load Balancer, access the Baidu Load Balancer (BLB) Management Console page, click General-purpose Instance to view the relevant information of BLB instances, including:
| Item | Description |
|---|---|
| Instance name/ID | BLB instance name and ID: Click the instance name to navigate to the BLB Instance Details page, as shown in Step 2. |
| Status | BLB instance status: If "Running" is displayed, the BLB instance is operating normally. |
| Public IPv4 IP/Internet connection type/bandwidth | BLB assigns a public IP as the access point for using the BLB service. |
| Internal IP address | BLB assigns a private IP as the access point for using the BLB service. |
| Network | The Virtual Private Cloud (VPC) where the BLB is located. If not specified, the system assigns a default VPC. |
| Frontend protocol/port | Supported protocols (e.g., HTTP, TCP) and port numbers for listeners linked to the BLB instance. |
| Backend protocol/port | Protocols and port numbers forwarded by the BLB instance listener to the backend BCC. |
| Health check | Probe whether the backend BCC of the server can provide services normally |
| Real server | BCC connected to the BLB instance. |
- Click the name link in the Instance Name/ID column to view BLB details
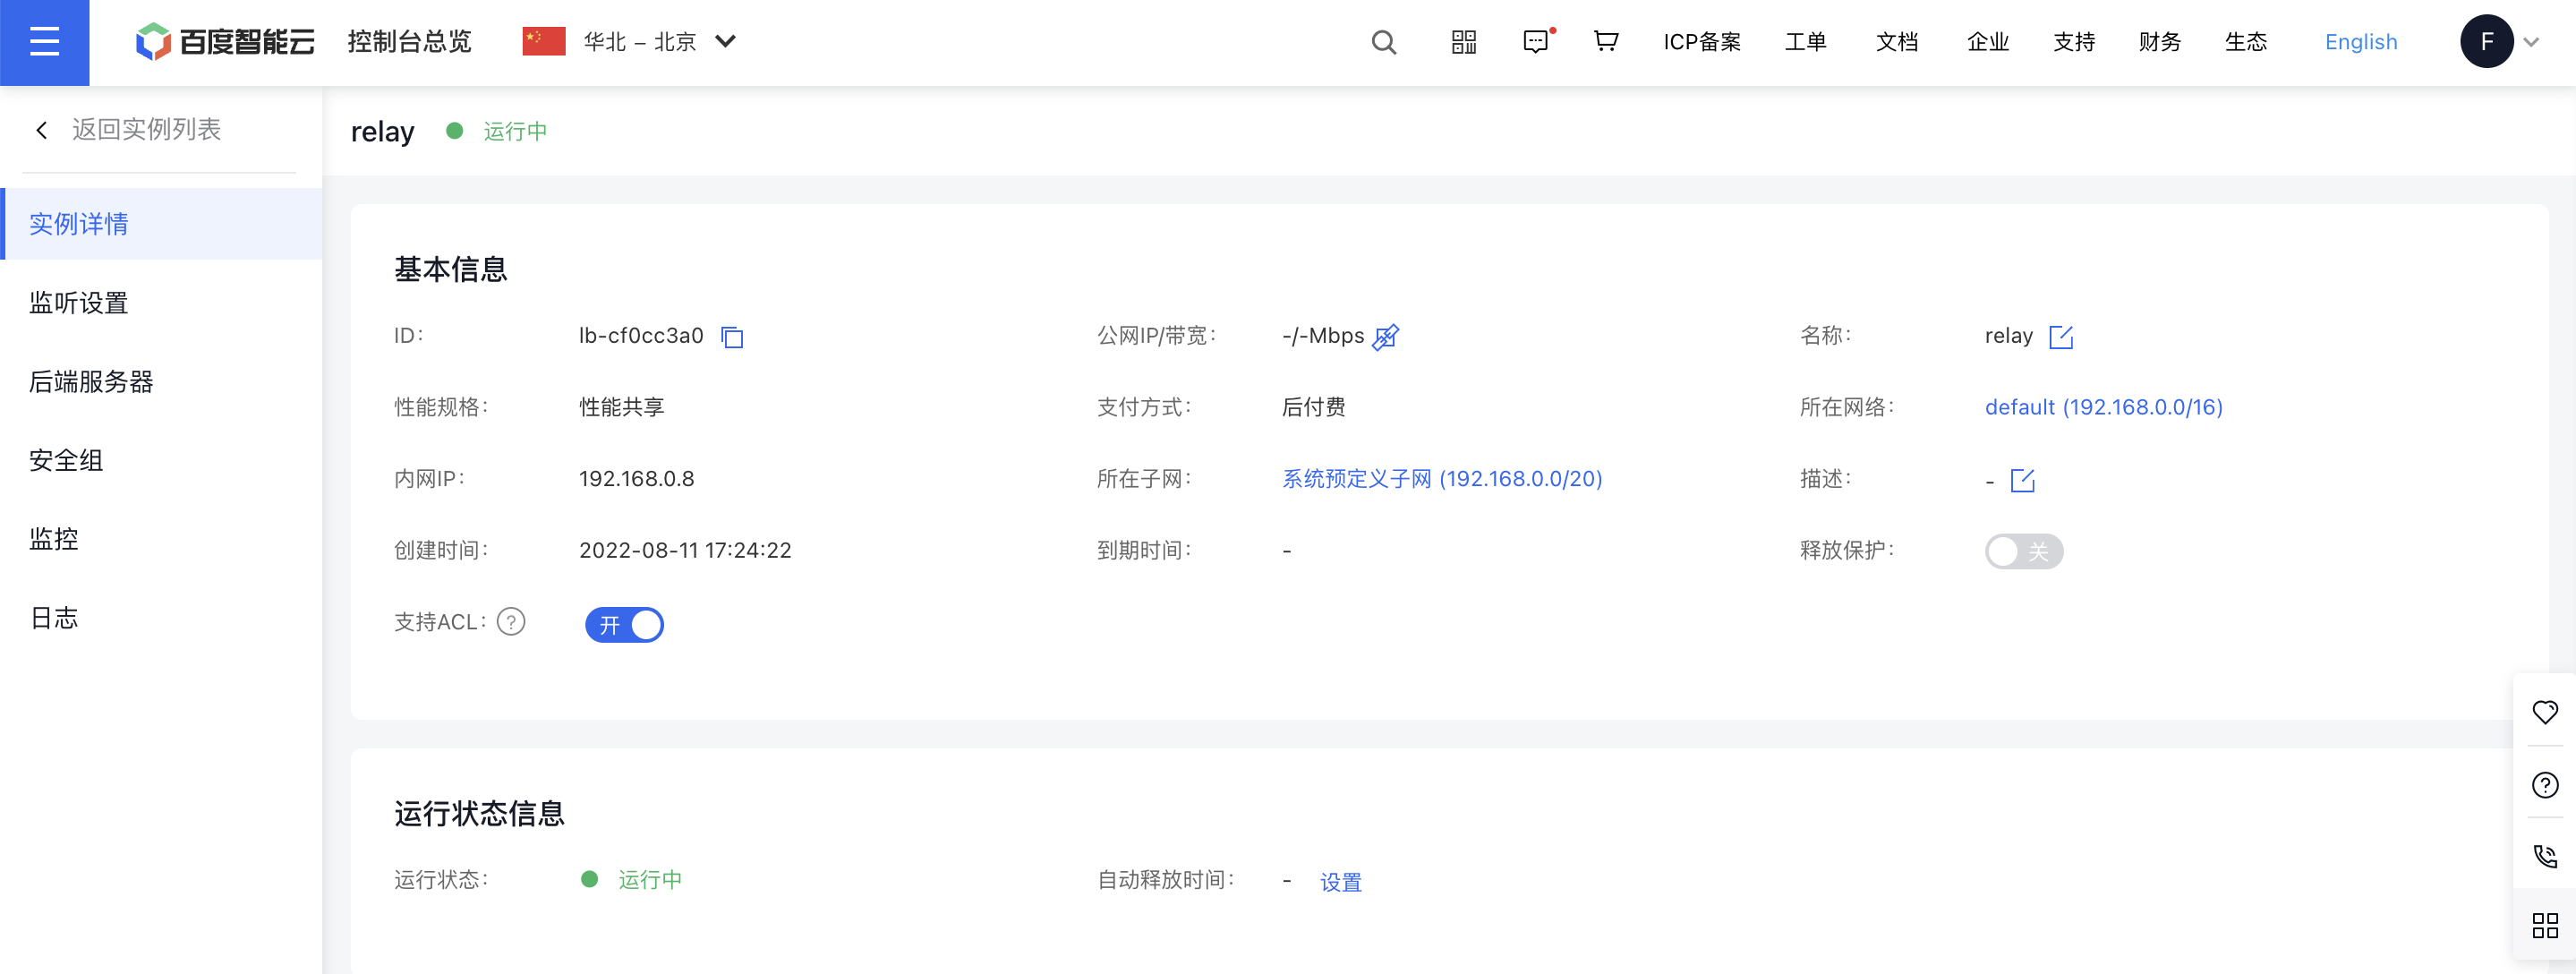
Modify instance name
- Navigate to Product & Service > Baidu Load Balancer (BLB) to view the BLB list.
- On the Instance Details page, click the Modify button next to Name to rename the BLB instance in the pop-up window.
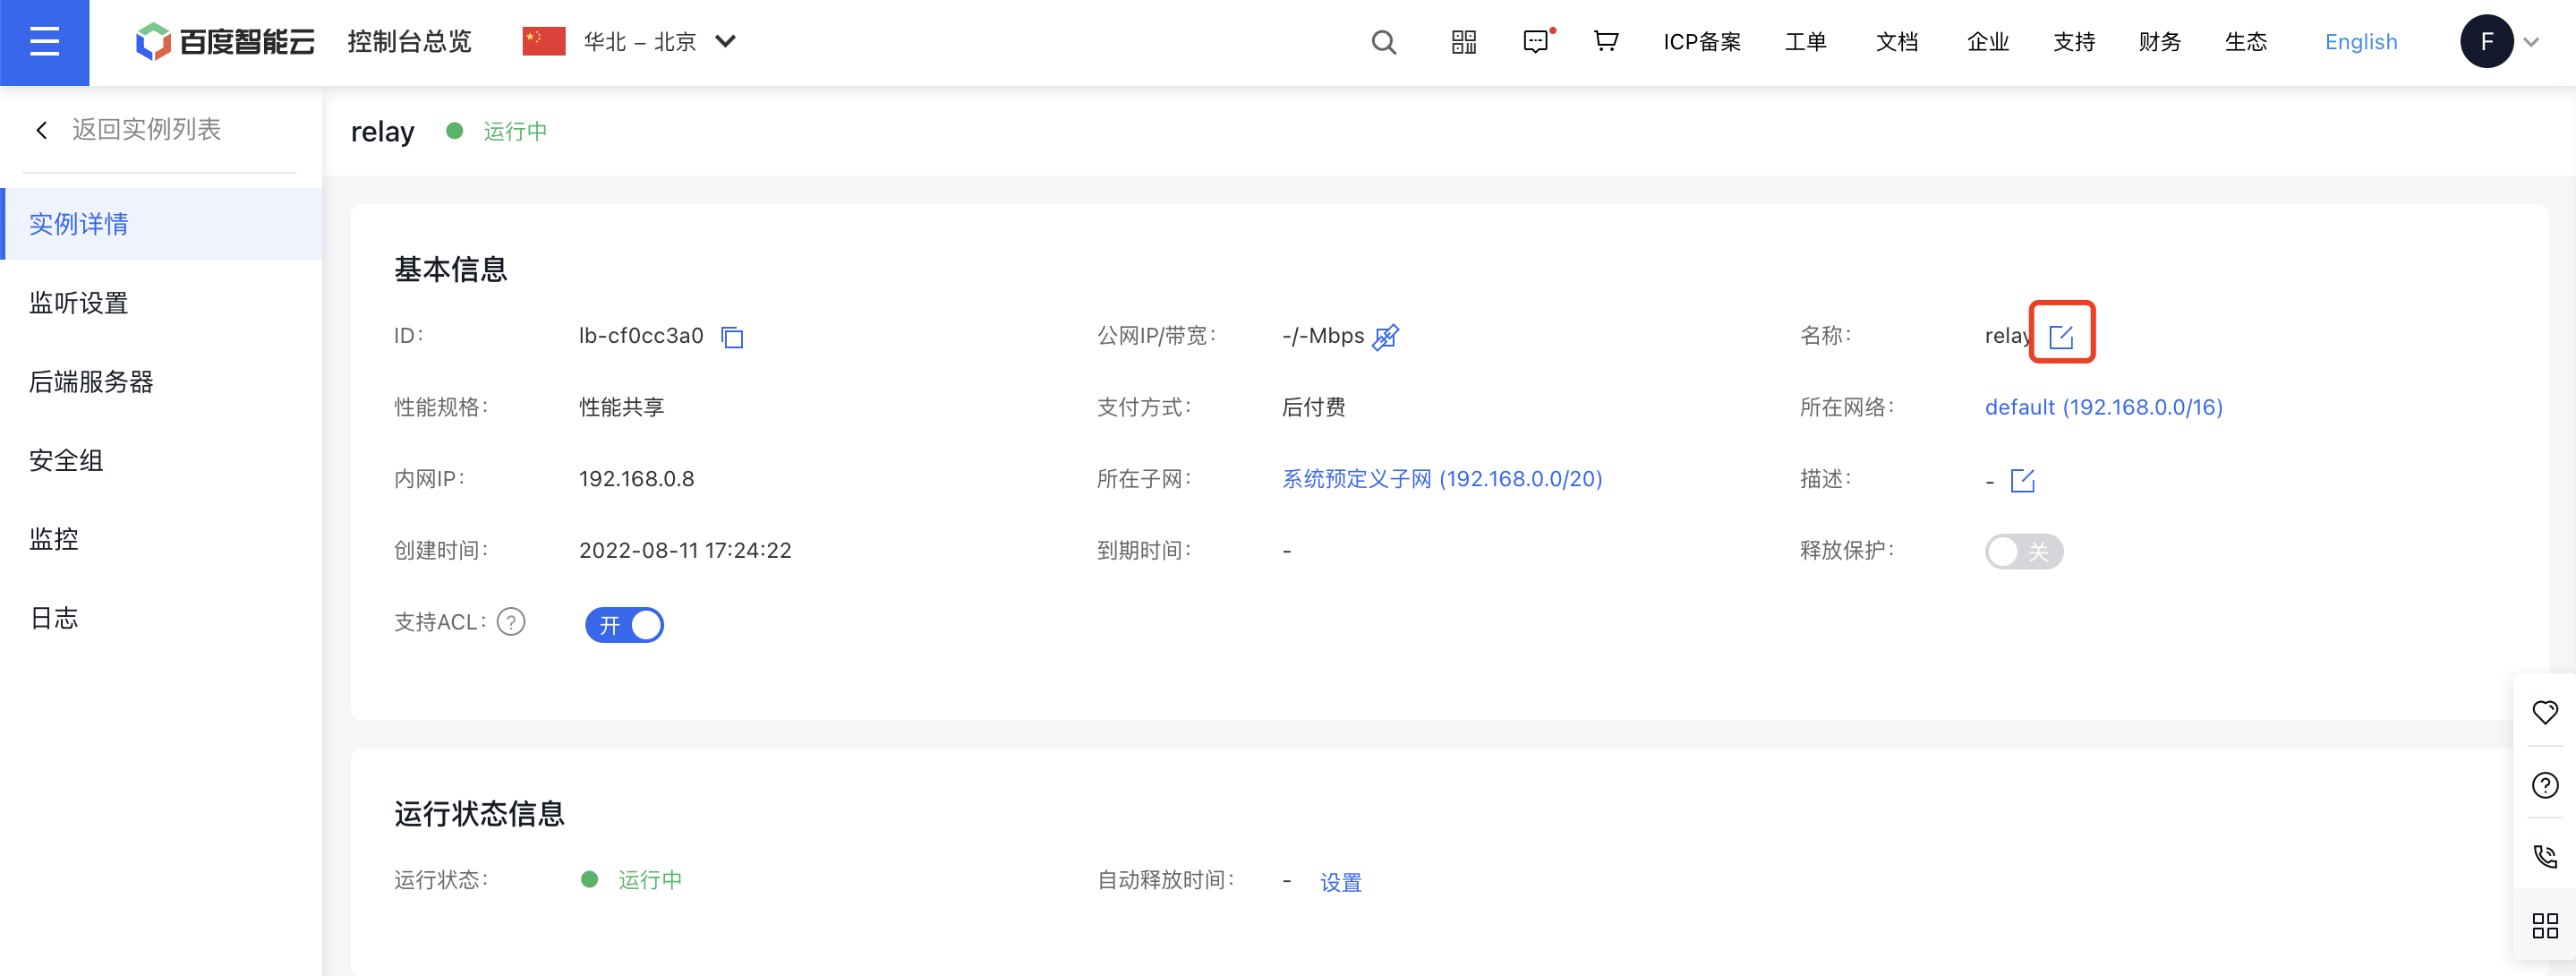
- Enter a name following the naming conventions and click OK to save the changes.
Modify BLB instance IP address
Before changing the IP address, you must create a new EIP instance, set its billing type, and replace the currently assigned EIP instance with the new one.
Note:
- The billing type of an existing EIP instance cannot be altered.
- When replacing an EIP instance, minimize the impact on current operations. For example, if a website domain name is tied to the current BLB instance’s EIP via DNS, first redirect DNS resolution to another public EIP address. Once the EIP replacement is complete, update the DNS resolution to point to the new BLB instance EIP.
- To change the private IP address, submit a ticket request.
- Create a new EIP instance and configure its billing type based on operational needs.
-
Identify the BLB instance requiring an IP change, click the specified icon, and unbind the EIP instance.

-
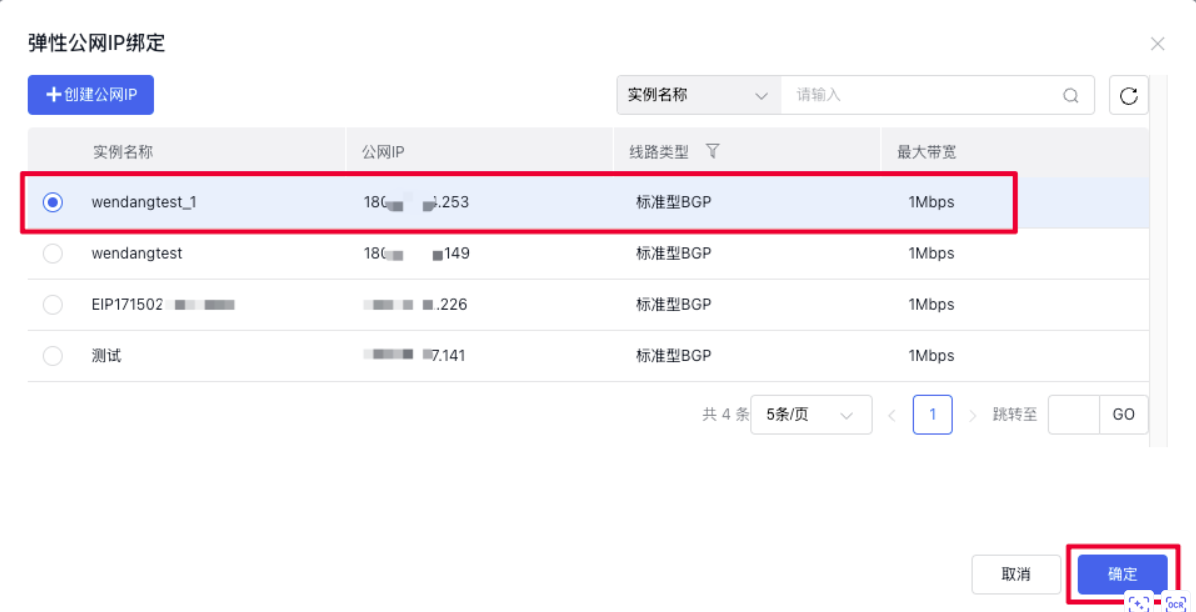
Update the BLB instance list. When the BLB instance status shows "No Public IP," you can bind a new EIP instance. Click the appropriate icon, select the newly created EIP instance, and click OK to complete the binding process.

Change bandwidth
Changing network bandwidth includes adjusting the EIP bandwidth linked to the BLB instance as well as altering the BLB instance's bandwidth. To modify the linked EIP bandwidth, update the bandwidth settings of the EIP instance bound to the BLB.
Modify BLB instance EIP address
- Create a new EIP instance and configure it based on service needs.
- Locate the BLB instance requiring an IP address change, click the icon shown below, and unbind the EIP instance.

- Click the corresponding BLB instance icon, as shown in the following figure:

- Add a new EIP:
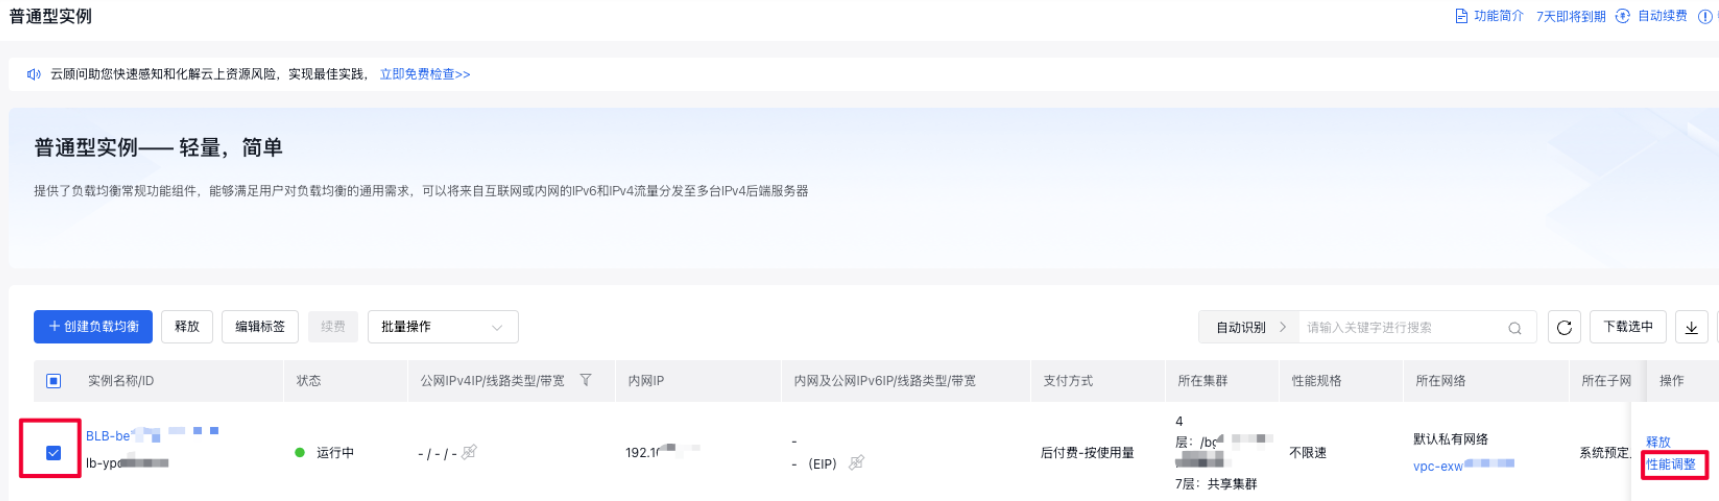
BLB instance bandwidth change:
After entering the General-purpose Instance page, select the BLB instance whose bandwidth needs to be modified, click Performance Adjustment in the operation column, and adjust the performance specifications of the BLB instance according to service bandwidth requirements
Delete BLB instance
Manually release BLB instance
- Go to Products > Network > Load Balancer > General-purpose Instance to access the BLB Management Console.
- Select the BLB instance to be deleted and click Release.
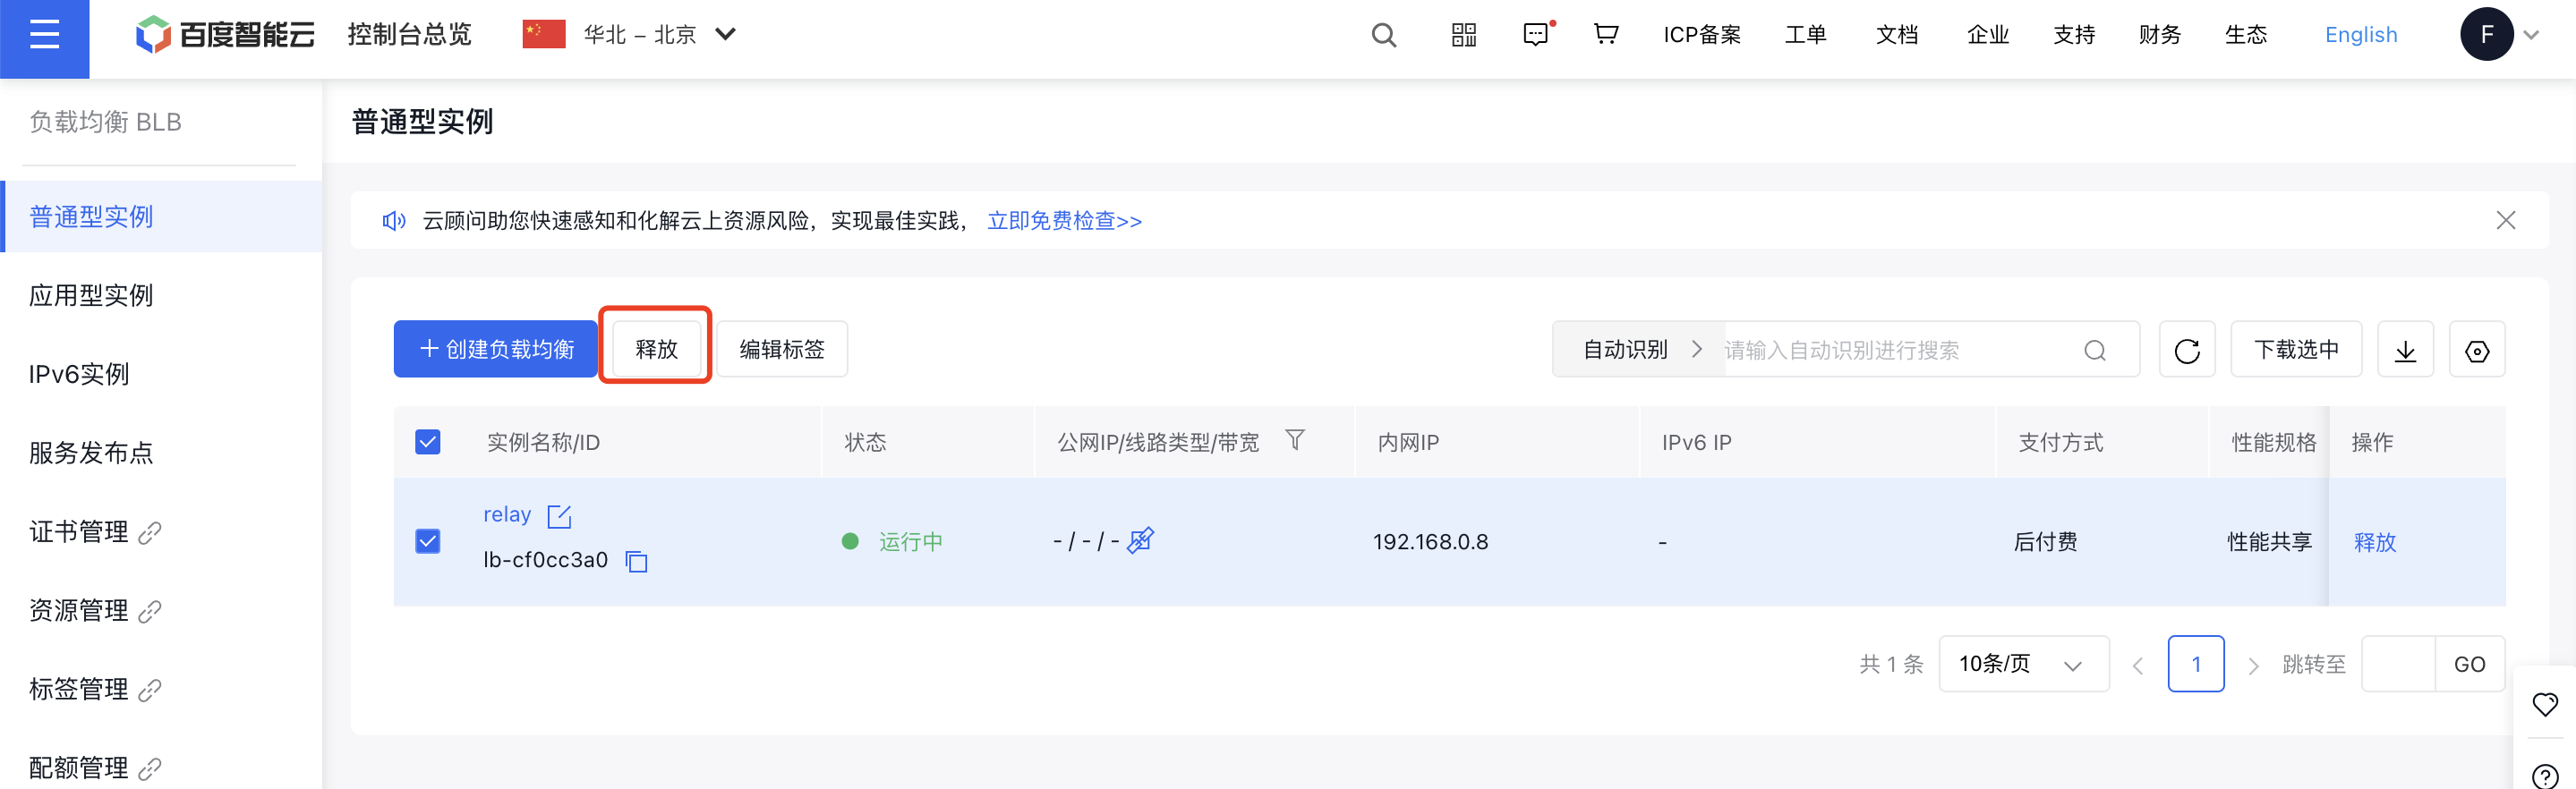
- In the pop-up dialog box, click OK.
Automatically release BLB instance
Once the automatic release of the BLB instance is set, it will be released automatically at the specified time.
There are two ways to automatically release an BLB instance:
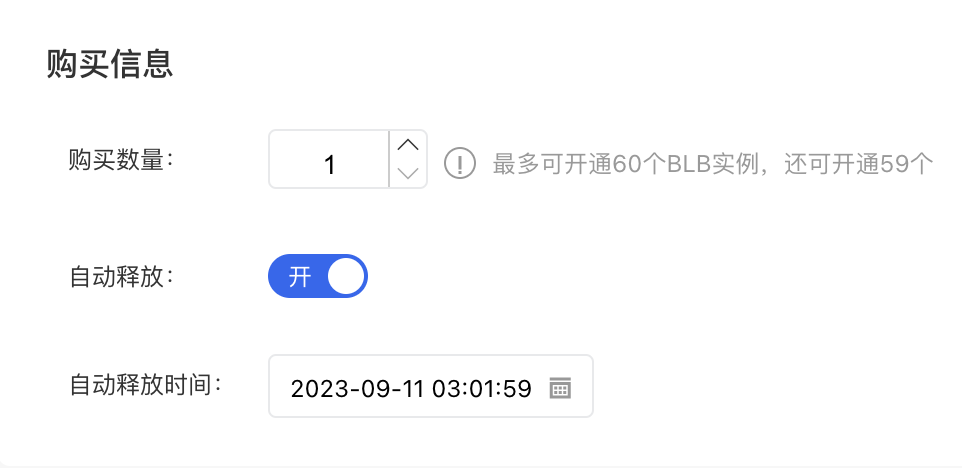
- Method I: To create a new BLB instance, set it up on the Create BLB Instance page.
- Go to Product > Network > Load Balancer to access the Baidu Load Balancer (BLB) Management Console page. Click General-purpose Instance, then select Create Load Balancer.
- Set the automatic release time for the BLB instance during the creation process, as shown in the diagram below.
- Method II: For an already created BLB instance, you can set it on the BLB Instance Details page.
- Go to Product > Network > Load Balancer to access the Baidu Load Balancer (BLB) Management Console page. Click General-purpose Instance, then select Create Load Balancer.
- Click on the name link under the Instance Name/ID column to navigate to the Instance Details page.
- Go to the Instance Details tab and click on Auto Release Time - Settings.
- In the pop-up window, choose Set Auto Release, configure the date and specific release time, then click OK to finalize the setting.