Quick Start
To quickly create a publicly accessible Baidu Load Balancer (BLB) instance and forward client requests to real servers, please refer to this document.
Deployment strategy
- Create BCC instance and deploy application server
- Create a BLB instance with public network access
- Add real server
- Add a TCP listener
- Public Network Access to real server
- View monitor data
Create BCC instance and deploy application server
Create 2 subscription BCC instances:
- Sign in to Baidu AI Cloud official website.
- Sign in to Baidu AI Cloud Platform:
Description:
- If no username exists, sign up first. Refer to [Register](UserGuide/Register an account.md#Register a Baidu Account) for operations
- If a username exists, refer to {Sign in for operations.
- After logging in, go to Products > Compute > Baidu Cloud Compute (BCC), and click on Buy Now.
- Fill in relevant configuration information according to the page prompts. For details, refer to Create BCC Instance.
Notes Configure the public network access when creating a BLB instance. Thus, you do not need to select public network access when creating a BCC instance.
- Once payment is completed following the specified steps, the system will create the Baidu Cloud Compute instance in the backend.
- Go to the Instance List page to check the creation status. The instance status will show as "Running" once the creation is successful.
- After successful instance creation, the system will notify you via SMS.
- After creating the BCC instance, you can Remotely Connect to the Instance via SmartTerm. Taking CentOS as an example, the reference commands for deploying the nginx application server are as follows:
1yum install -y nginx
2systemctl start nginx.service
Create a BLB instance with public network access
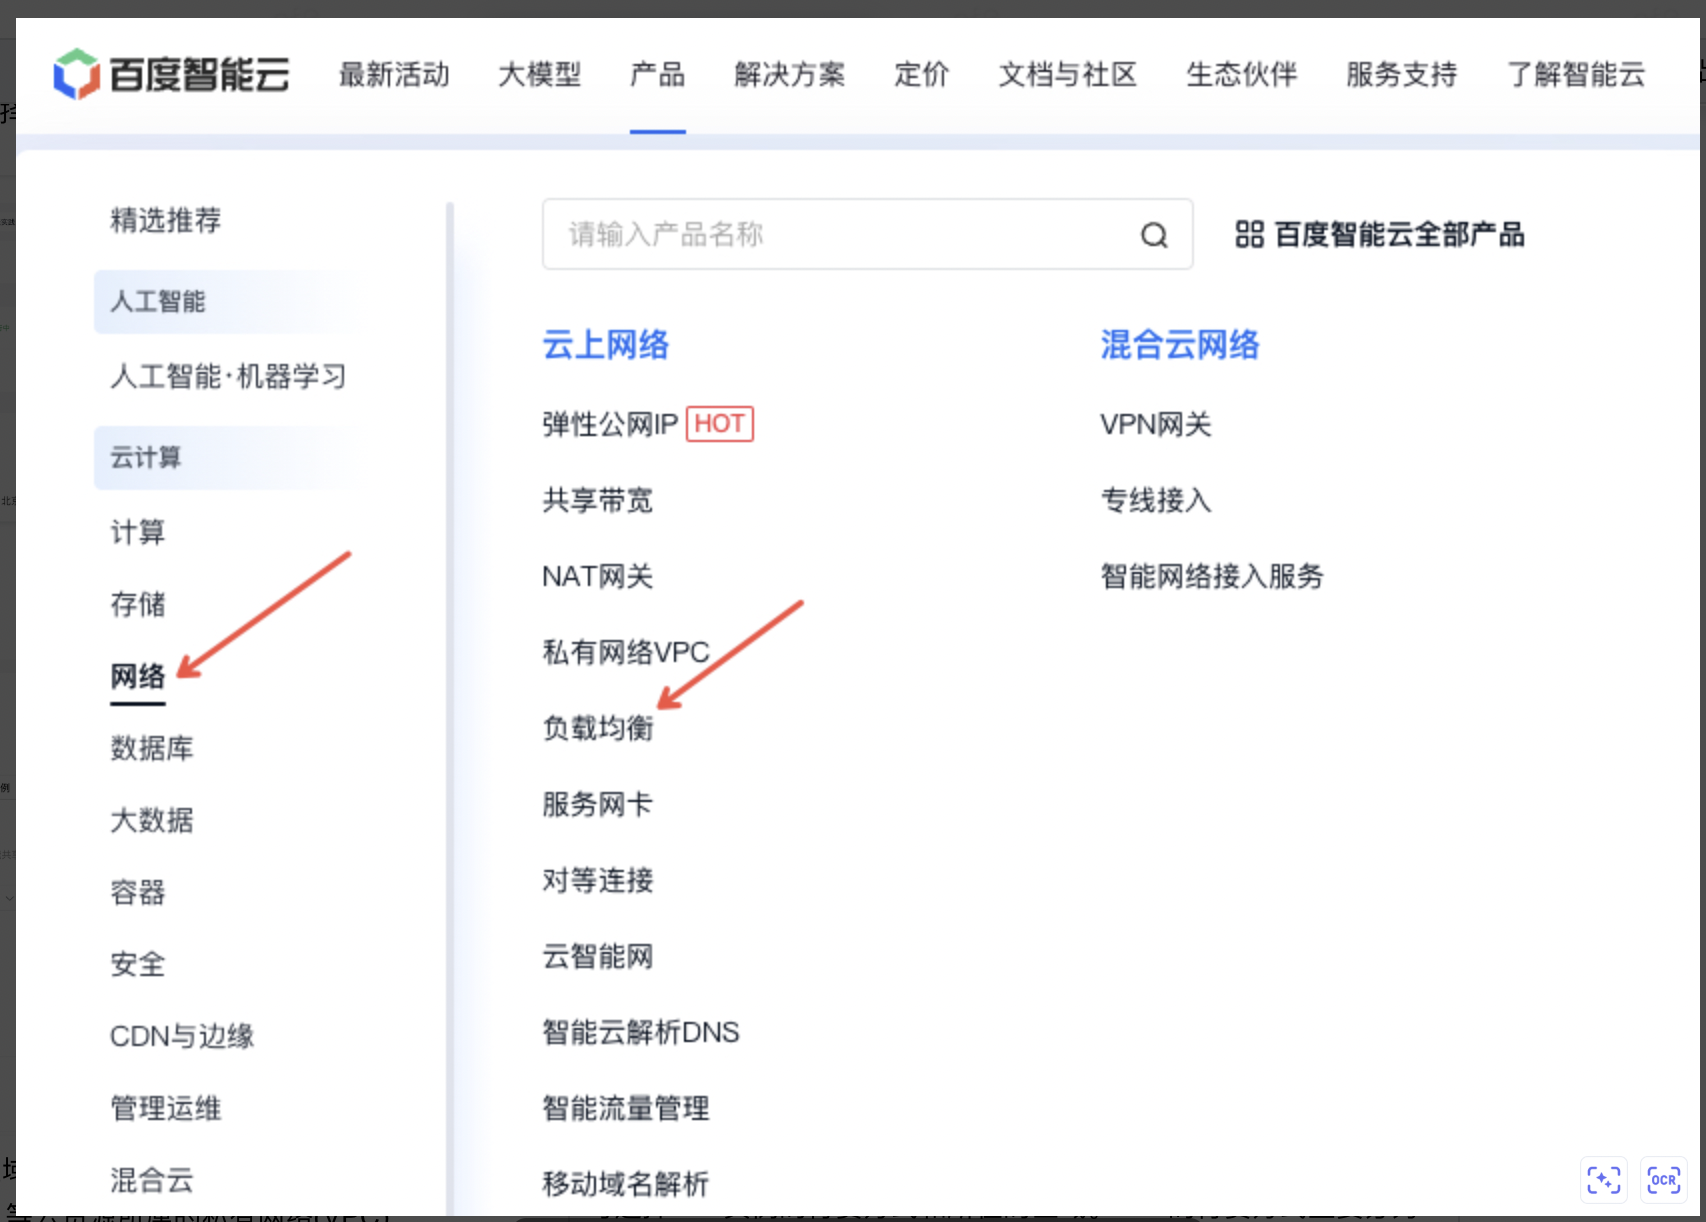
- Sign in to the console, select Products > Network > Load Balancer, and then click Buy Now.
- Choose the billing type and region for the BLB instance.
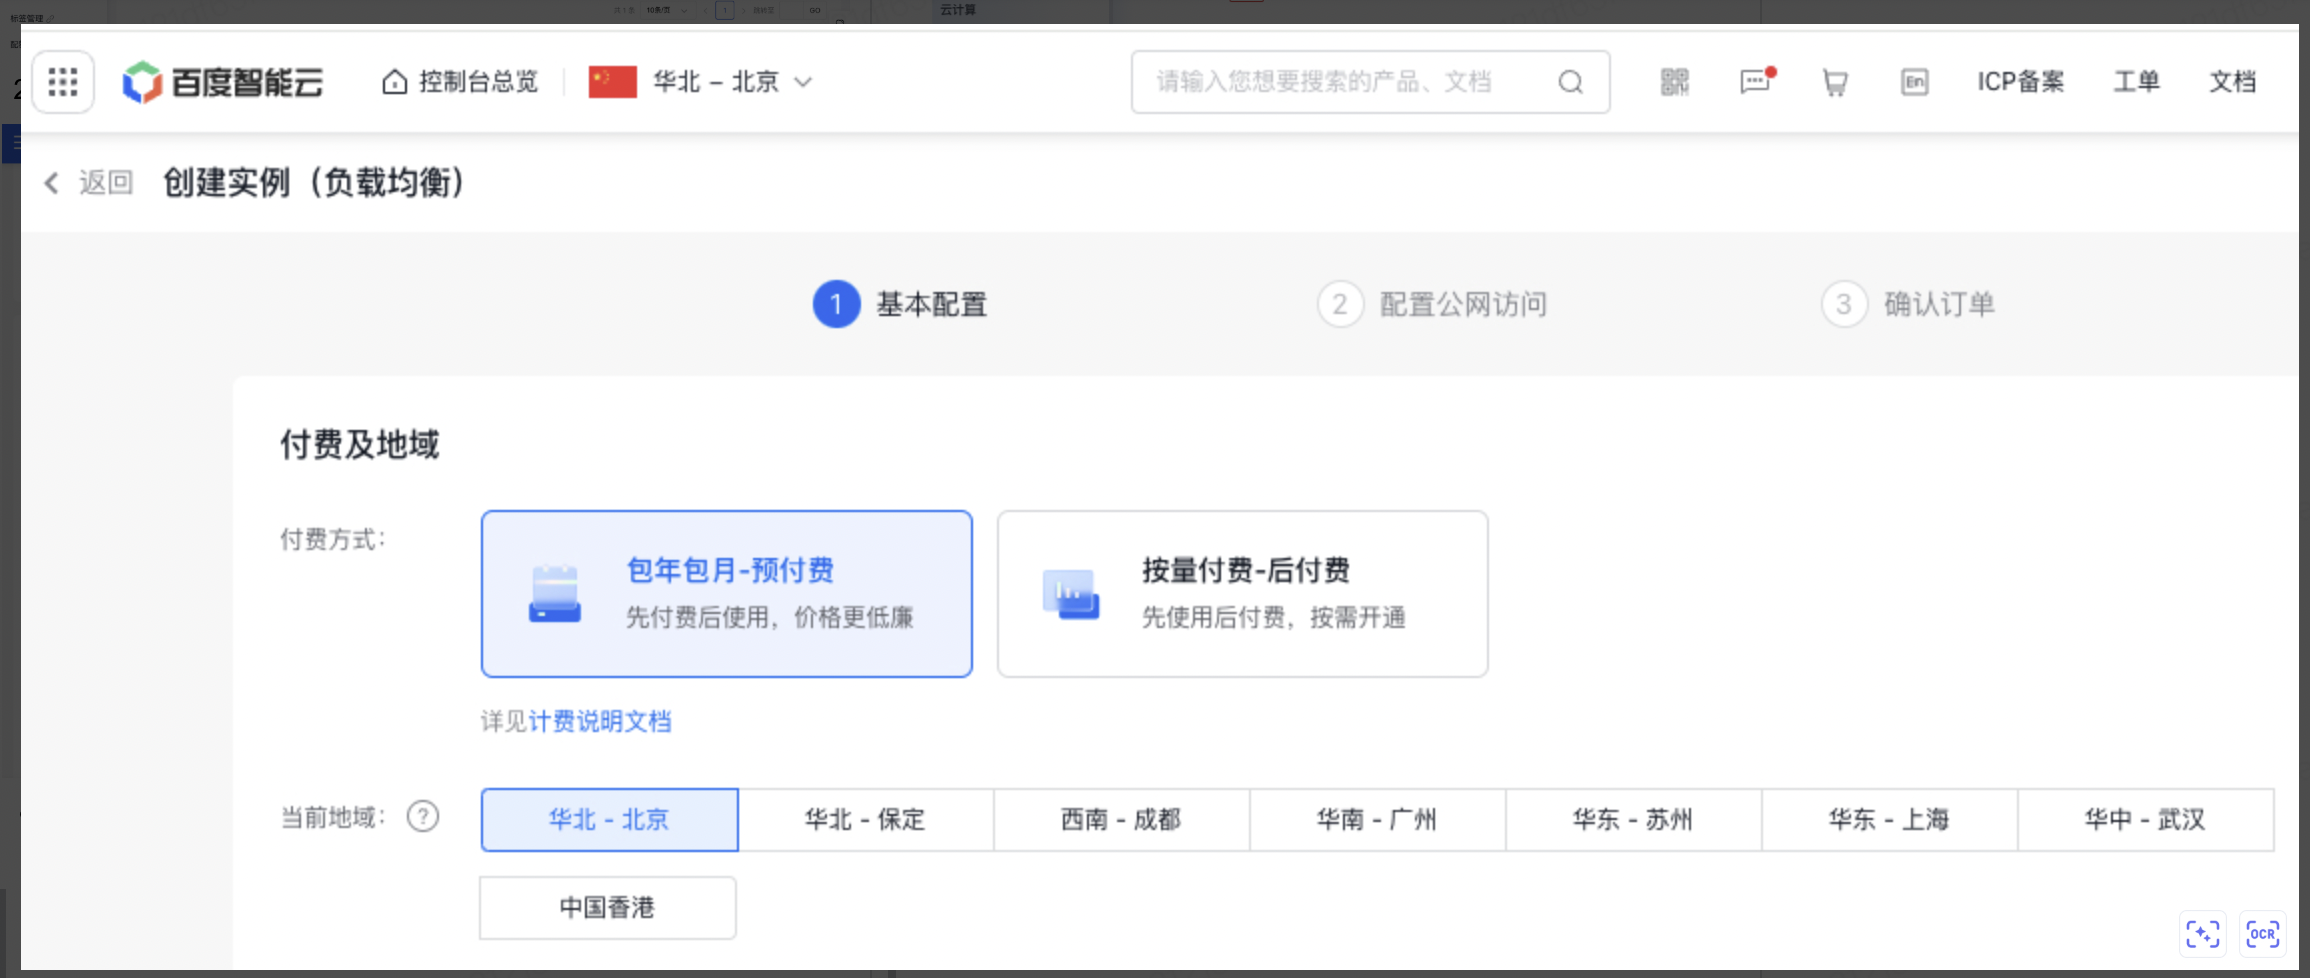 You can select the bill type and location of BLB instance. The bill type for BLB are mainly divided into prepay and postpay. For details, refer to Load Balancer Instance Billing.
Description:
- It is generally recommended to purchase the BLB instance and real servers in the same region to simplify configuration and reduce network latency between them.
- For the required BLB cross-region real server mounting, consider purchasing application BLB instances. Refer to Mount Real Servers in Cross-region VPCs by Using IP Group.
-
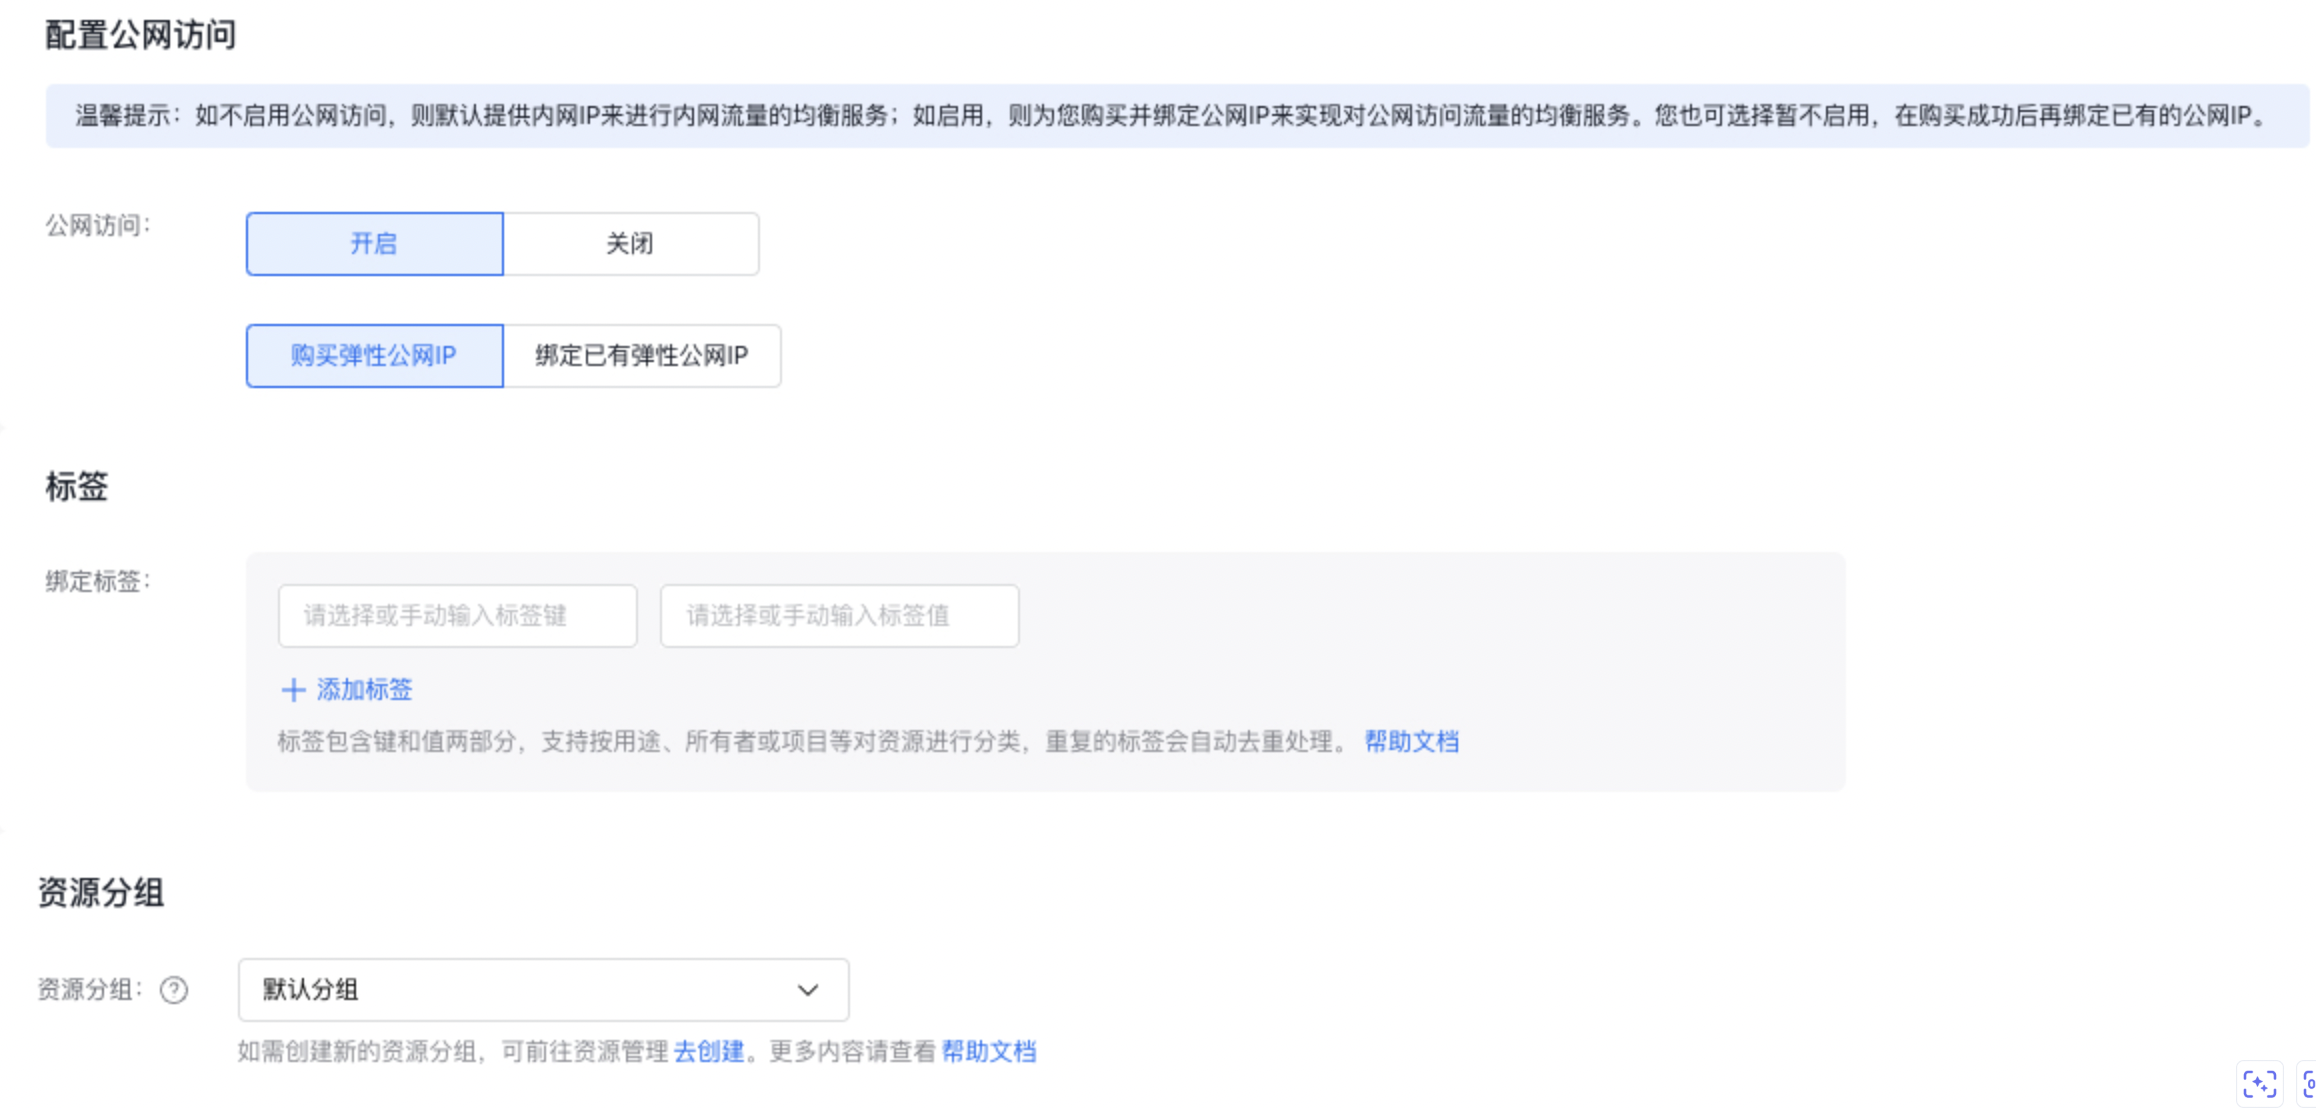
Configure public network access: Select Enable or Disable Public network access based on actual conditions.
- If OFF is selected, it means the public IP will not be bound during the creation of this BLB instance. You can bind a public IP later if needed.
- If ON is selected, the feature will be enabled, meaning that a public IP will be purchased and bound to the BLB instance during its creation.
- Purchase Information: Specify the purchase quantity and configure whether to enable auto-release.
Notes When creating a BLB instance, users can directly configure the [Auto-release](BLB/Operation guide/General-purpose BLB instance/Managing BLB Ordinary Instance.md#Automatically release BLB instance) of BLB instance, and the BLB instance will be released automatically at the preset time.
- Select BLB instance configuration information
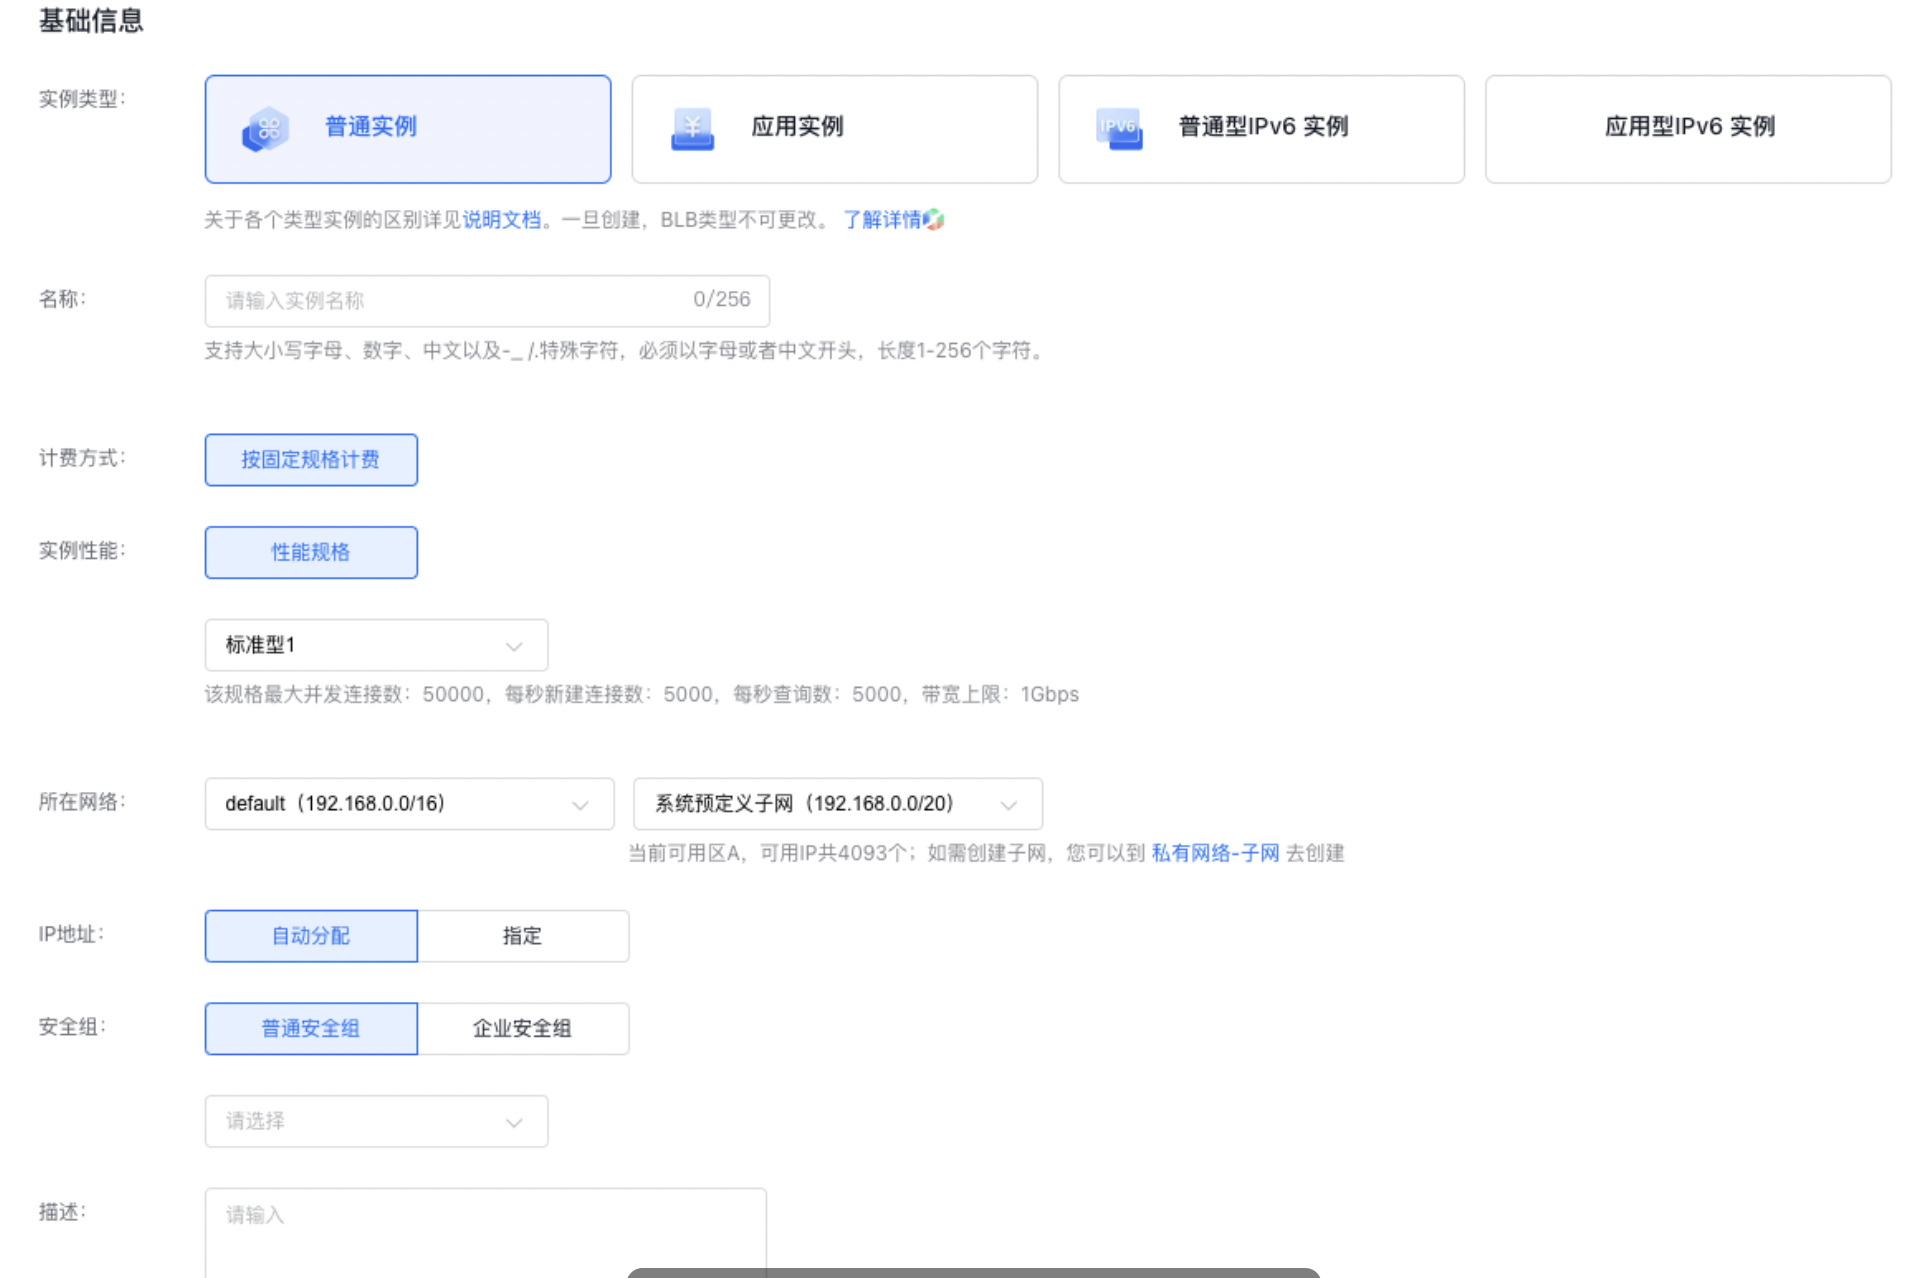
Enter the instance name and specify the BLB instance type, performance, network, and other basic details.
- Instance Type: BLB. For differences between various types of instances, refer to BLB Selection Guide. Note that a BLB instance type cannot be changed once being created.
- Network: The Virtual Private Cloud (VPC) to which the BLB being created and its associated BCC cloud resources belong.
-
Select other information (users can select it as needed)
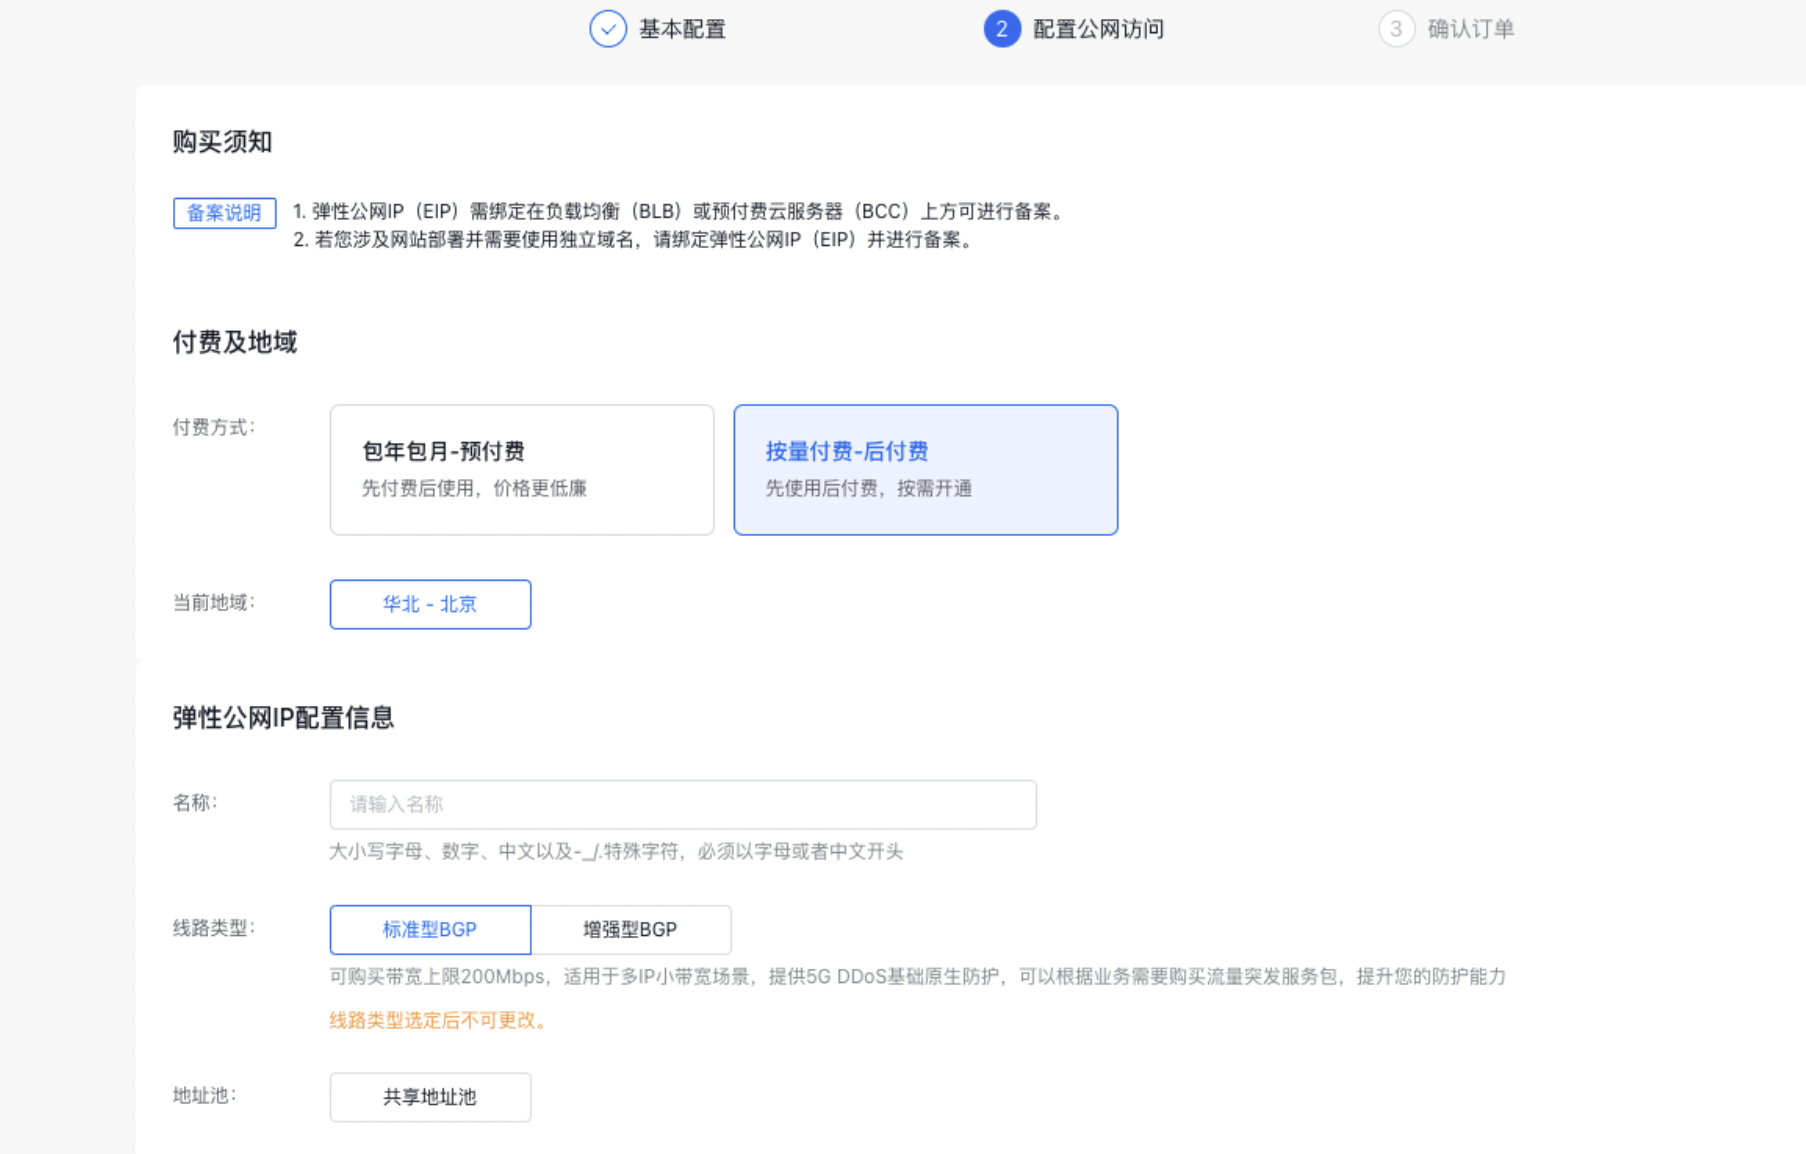
 Configure public access: Optional for users. If public access is not enabled, the system will automatically skip this step. Moreover, after enabling public access, users can choose to purchase an EIP or bind an existing EIP.
Description:
- Select the option to purchase an EIP. After the BLB instance is successfully created, the system will automatically create and bind an EIP to the instance, requiring no additional action from the user.
- Bind an existing EIP: Use this option if you already have an EIP available for binding.
-
Select purchase information: Select the duration, instance count and whether to enable auto-renewal.
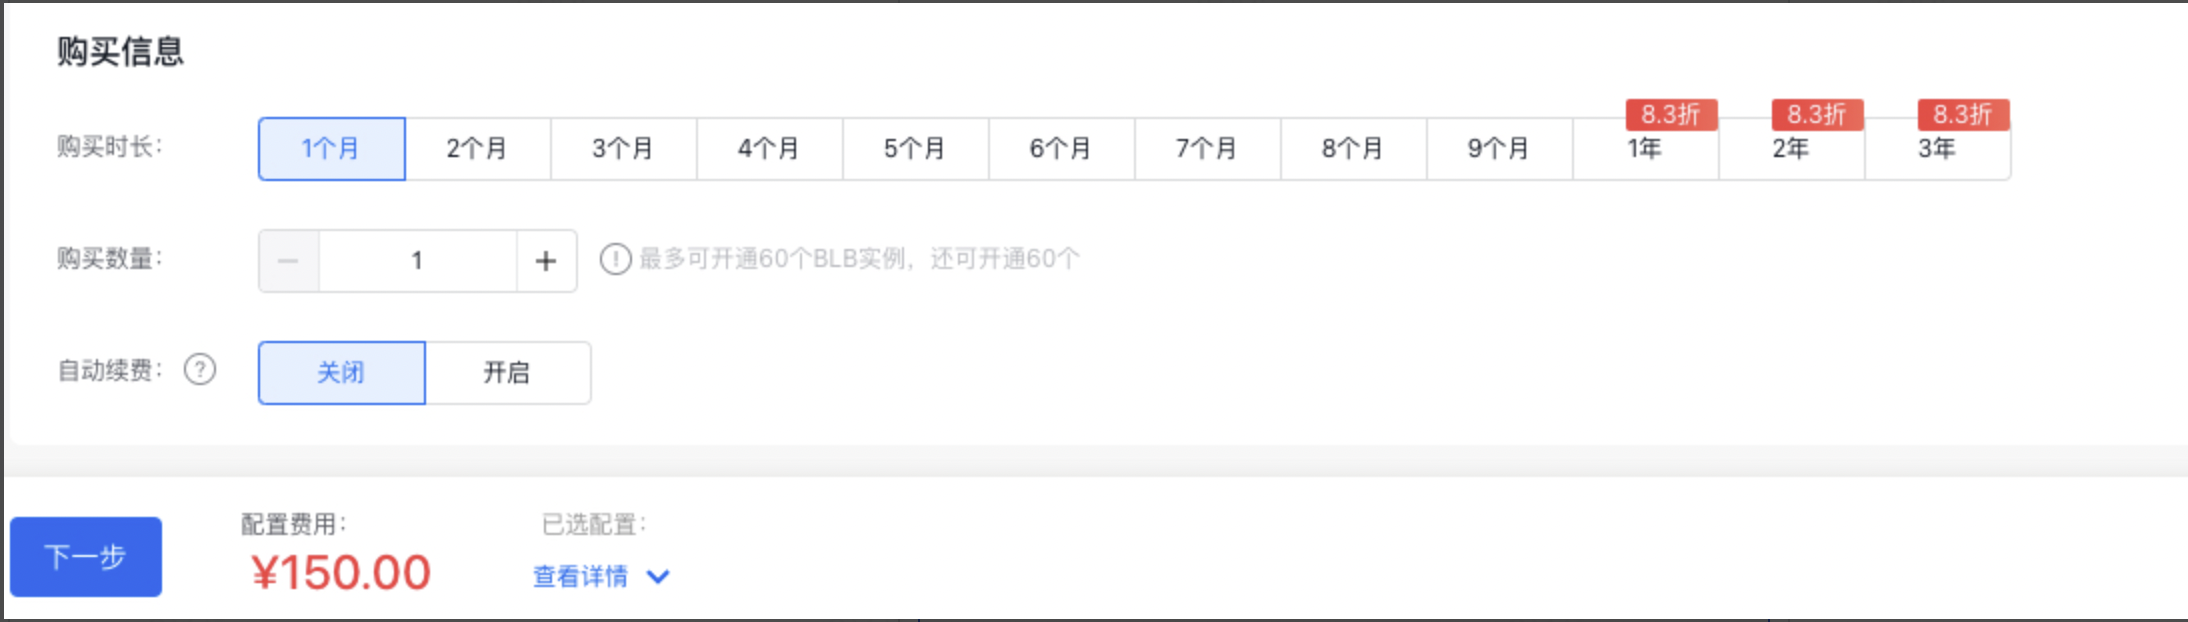
Description: *When creating a BLB instance, users can directly configure the Auto-release of BLB instance, and the BLB instance will be released automatically at the preset time.
- Configure public access (optional, if public access is not enabled, the system will automatically skip this step) Configure EIP instance information: For the configuration method of EIP instances, refer to [Create EIP Instance](EIP/Operation guide/EIP Instance/Create instance.md).
- Complete the order confirmation and payment following the system prompts. You will receive an SMS notification upon successful creation.
Add real server
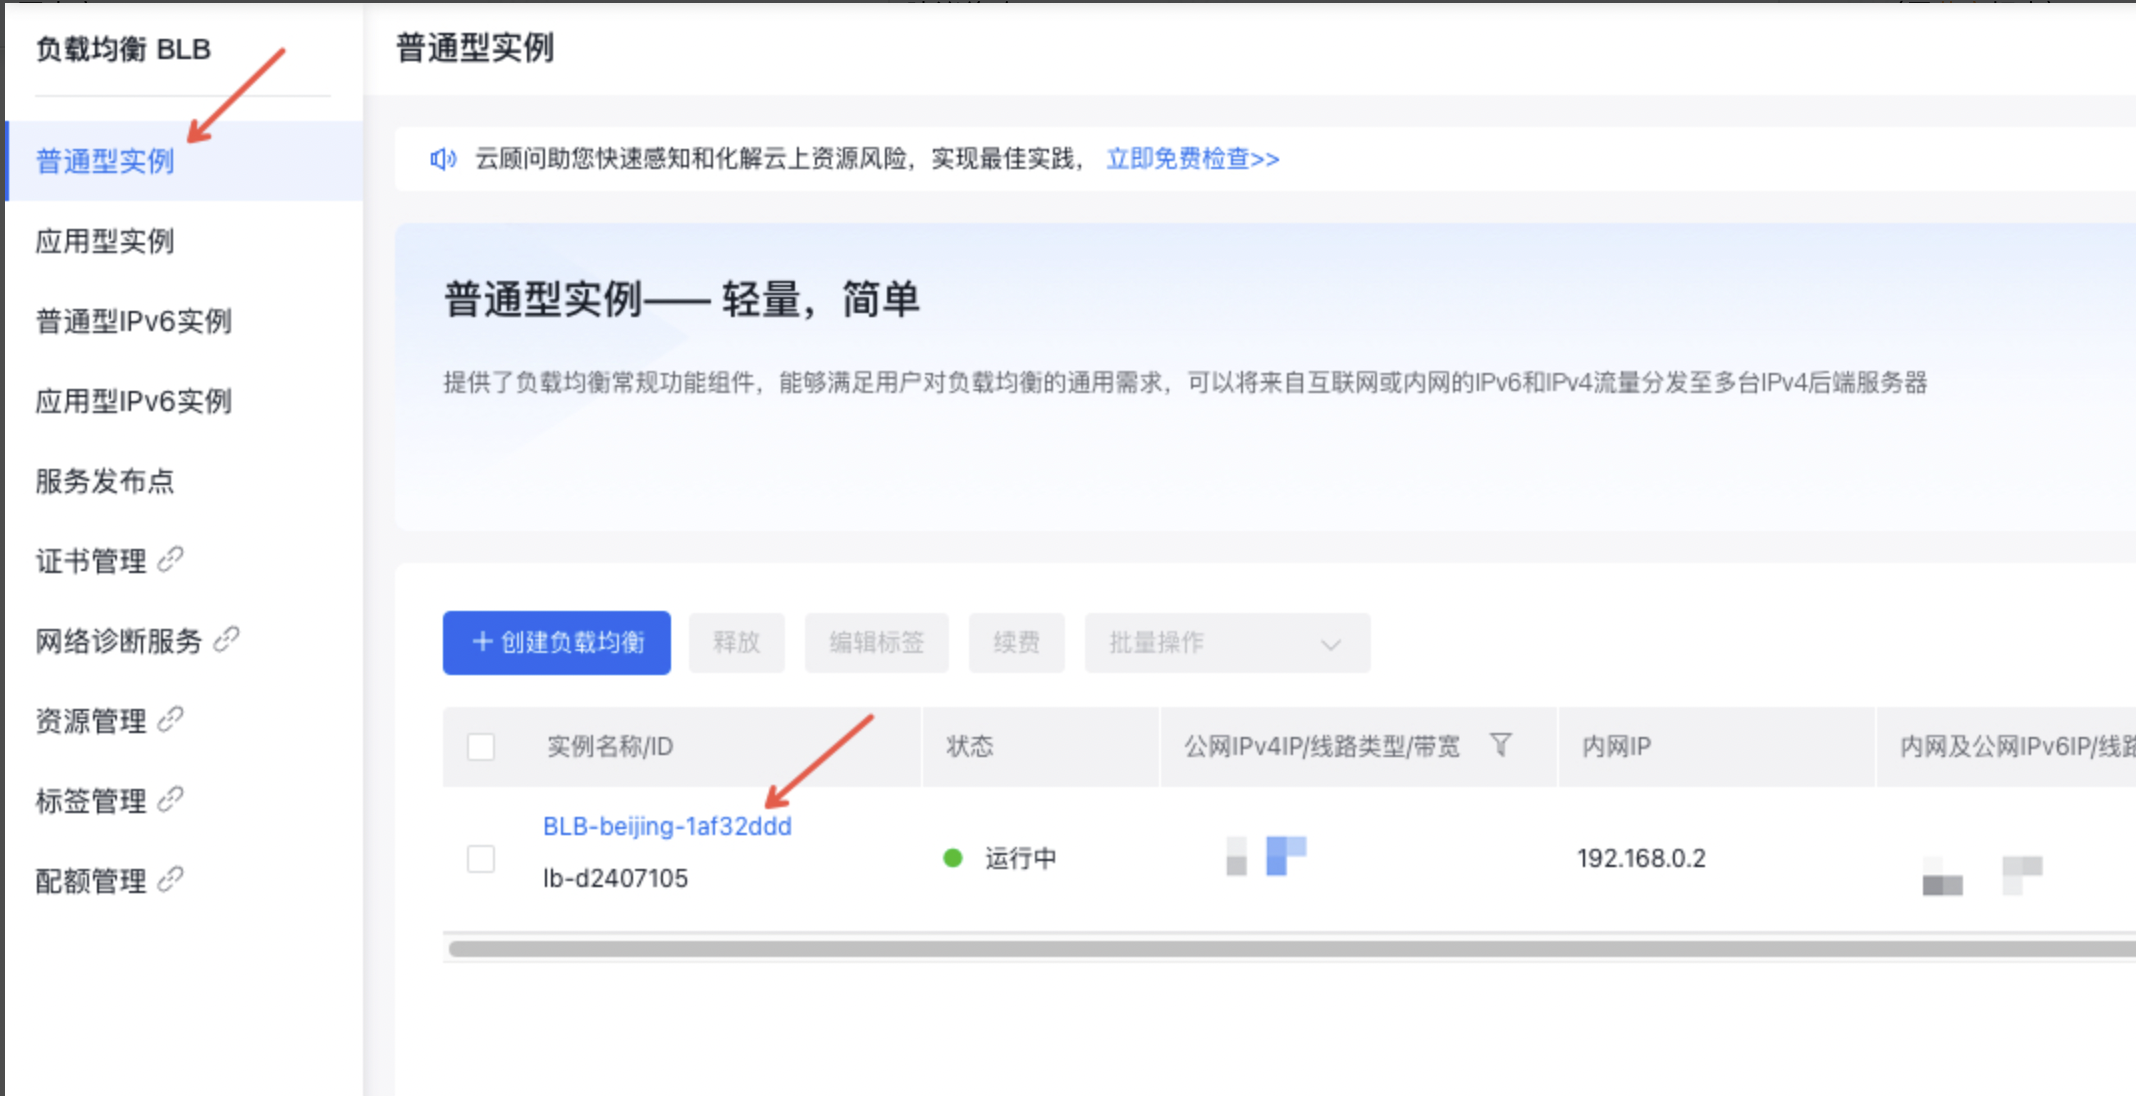
- Go to Product & Service > Baidu Load Balance (BLB) to access the Baidu Load Balance (BLB) list.
- Click on the link in the Load Balancer ID/Name column to proceed to the Instance Details page.
- Click on the Real Server tab to add BCC servers that require load balancing.
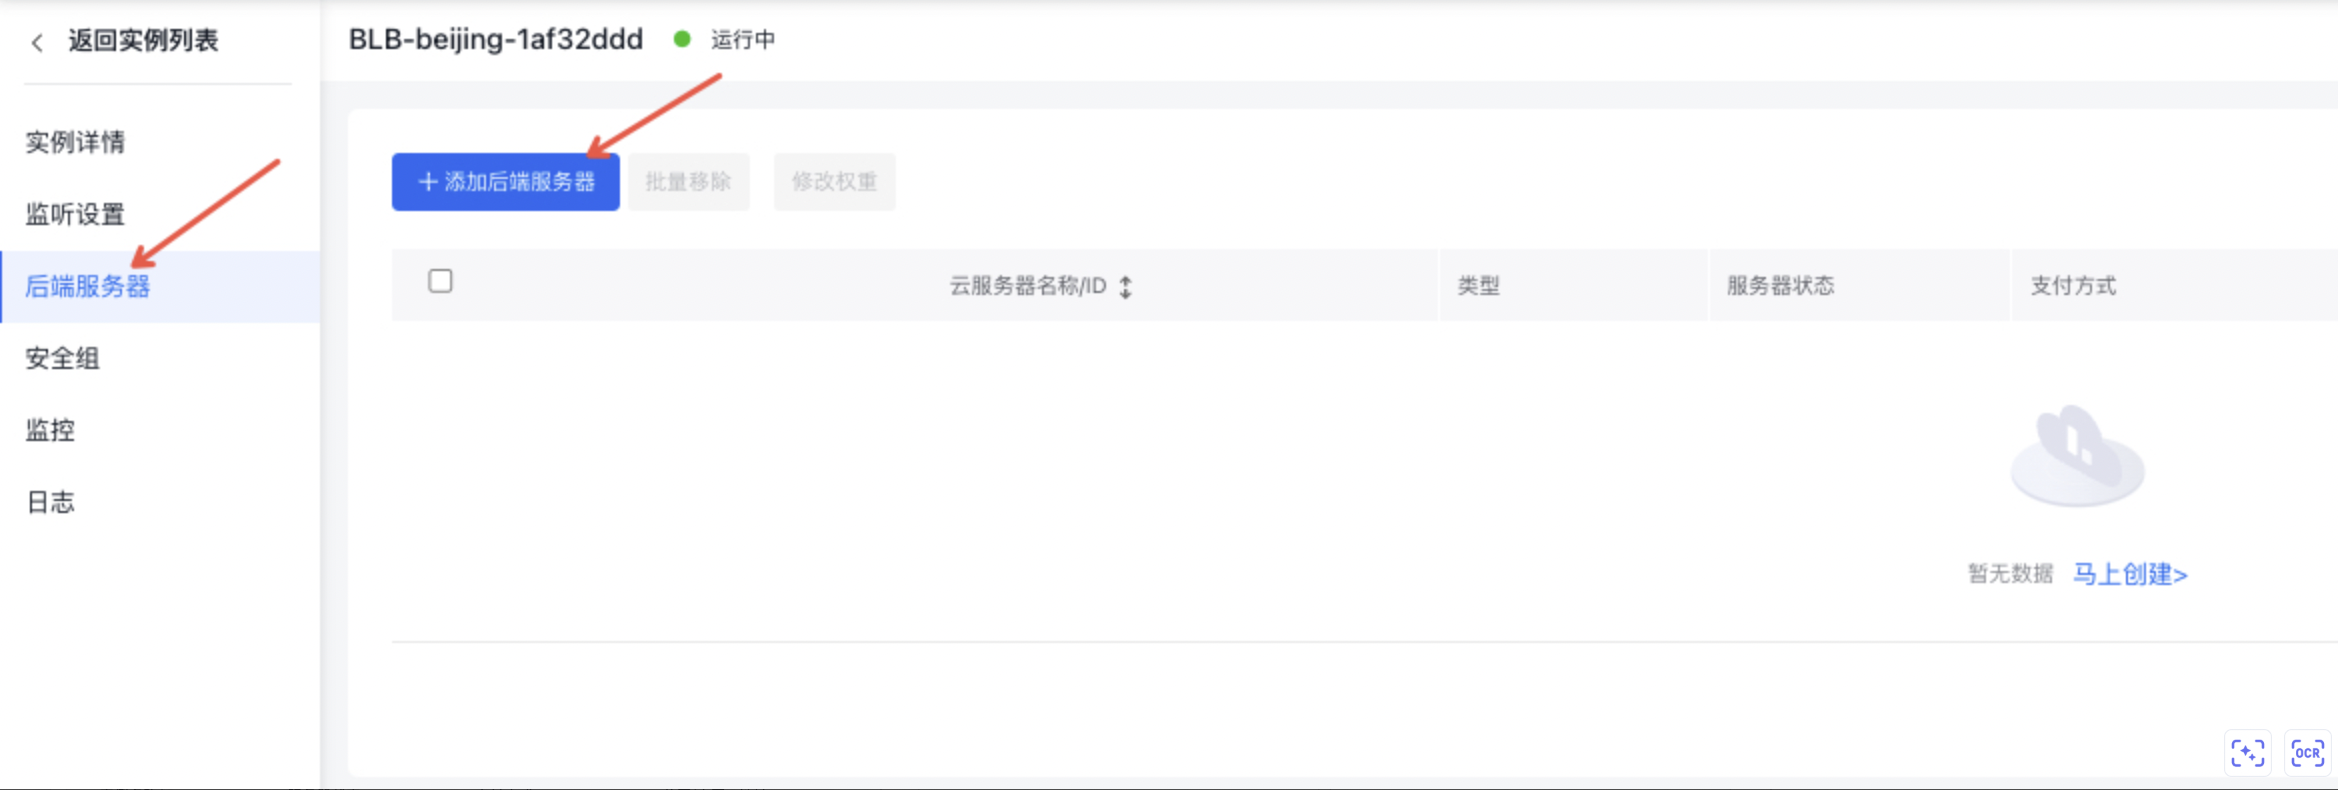
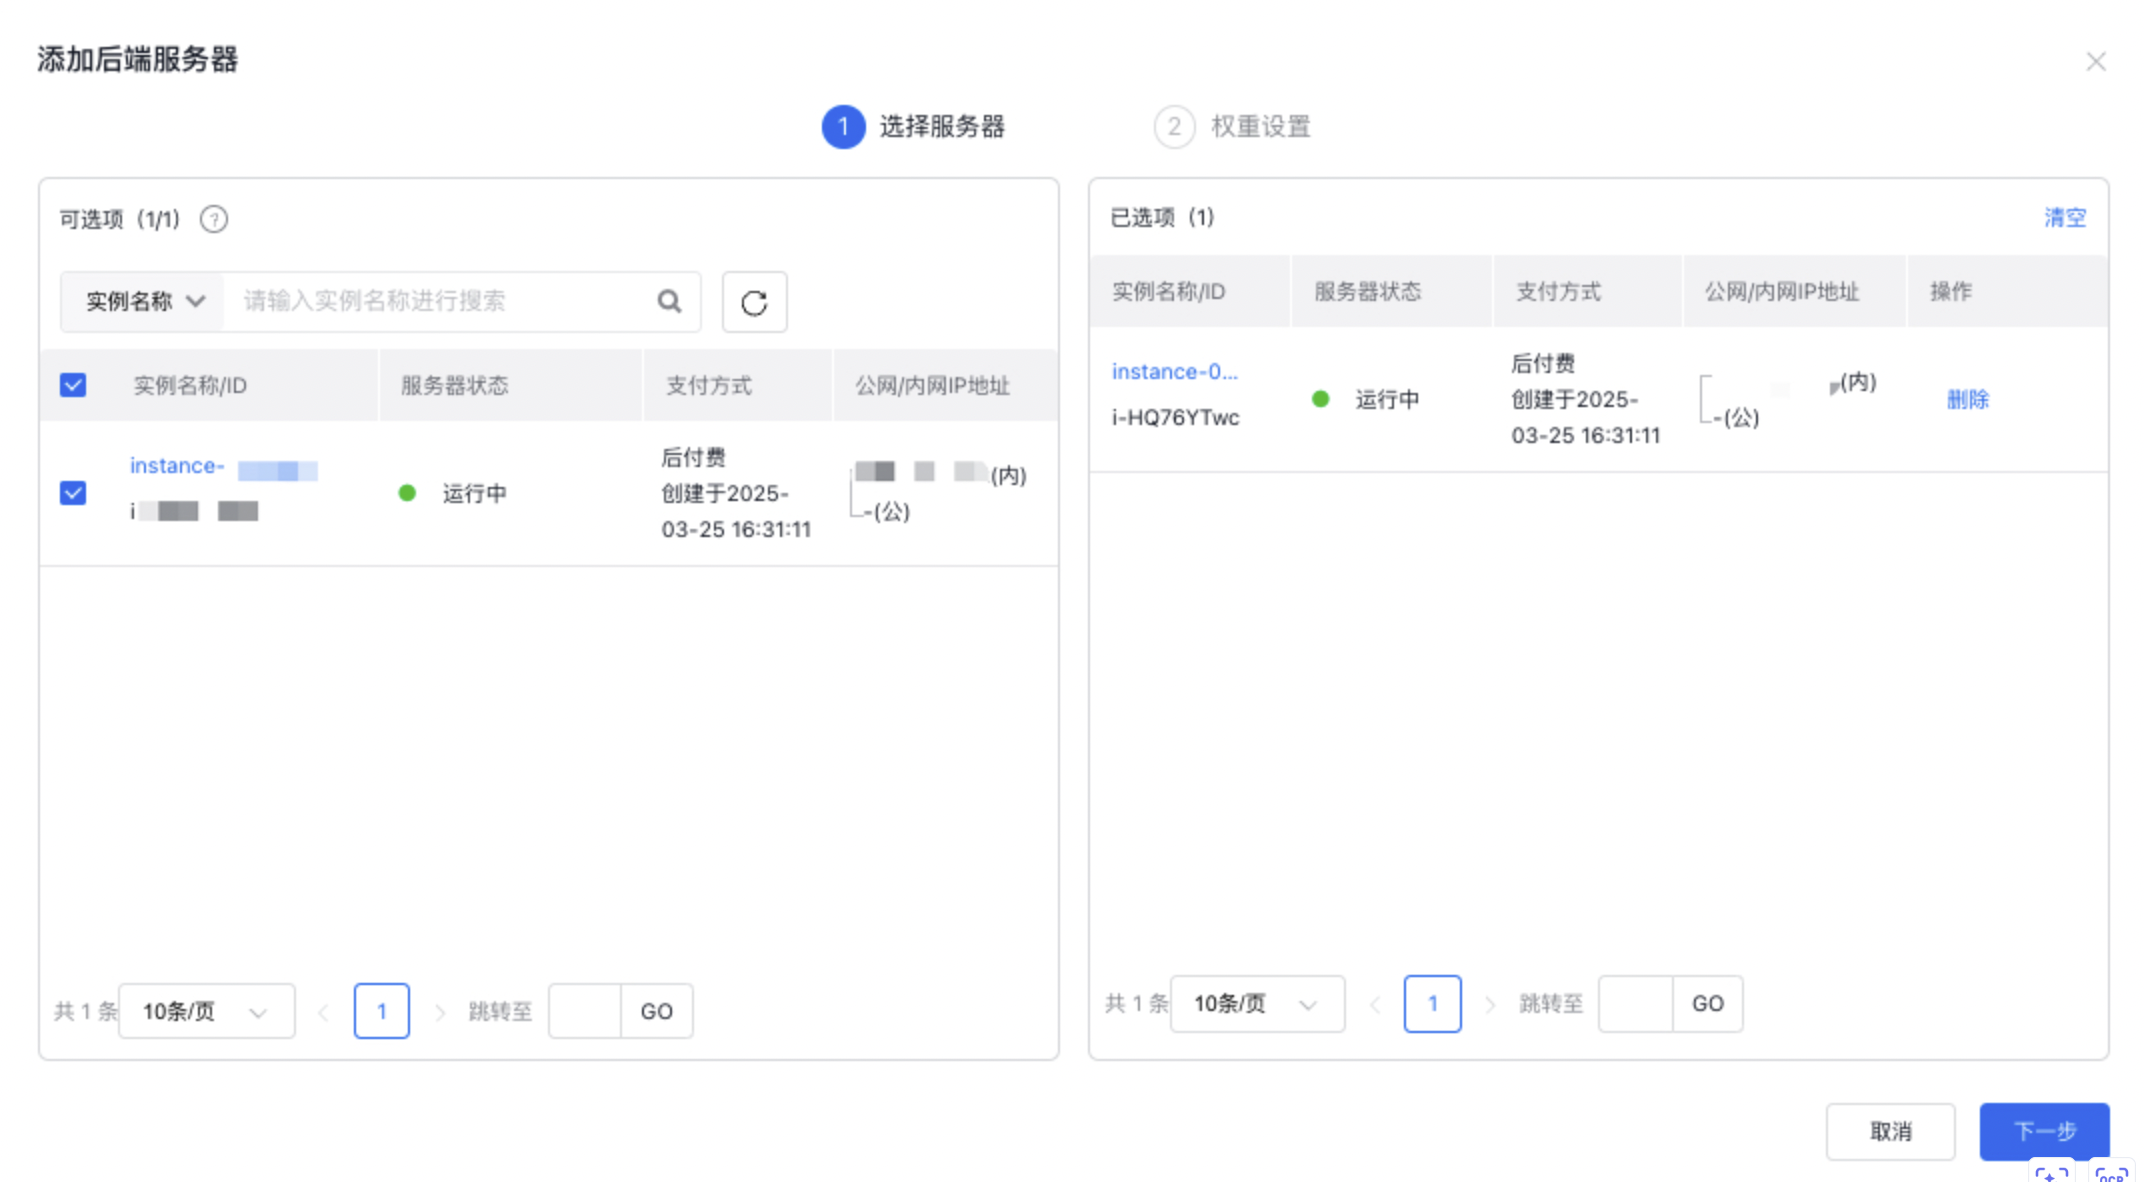
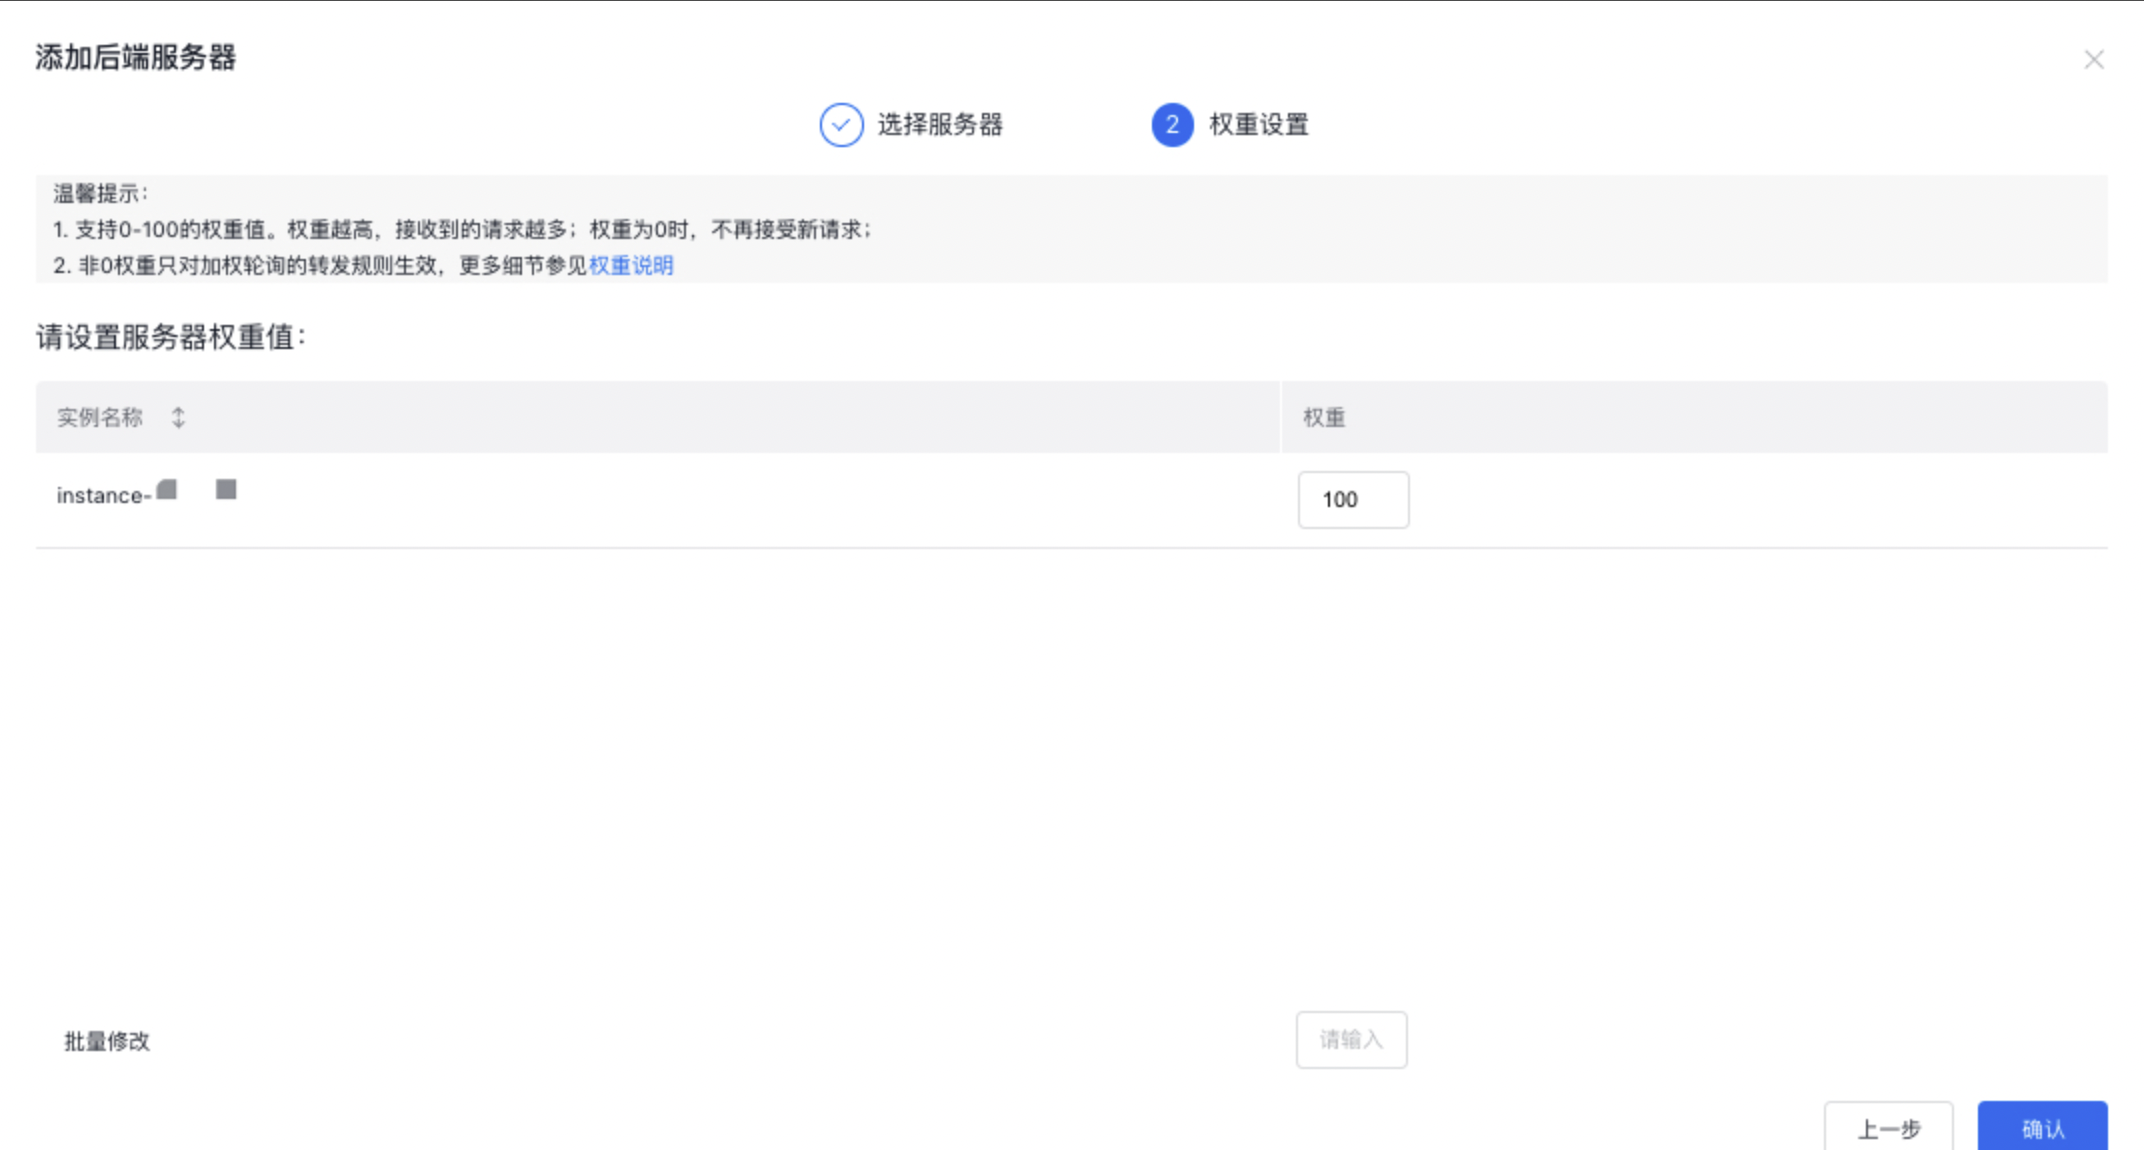
- Assign weights to the BCC servers within the BLB instance.
Weight is used to set different request forwarding ratios for different real server instances. The weight value is relative. If it is set to the same value, the forwarding ratio will be identical.
Add a TCP listener
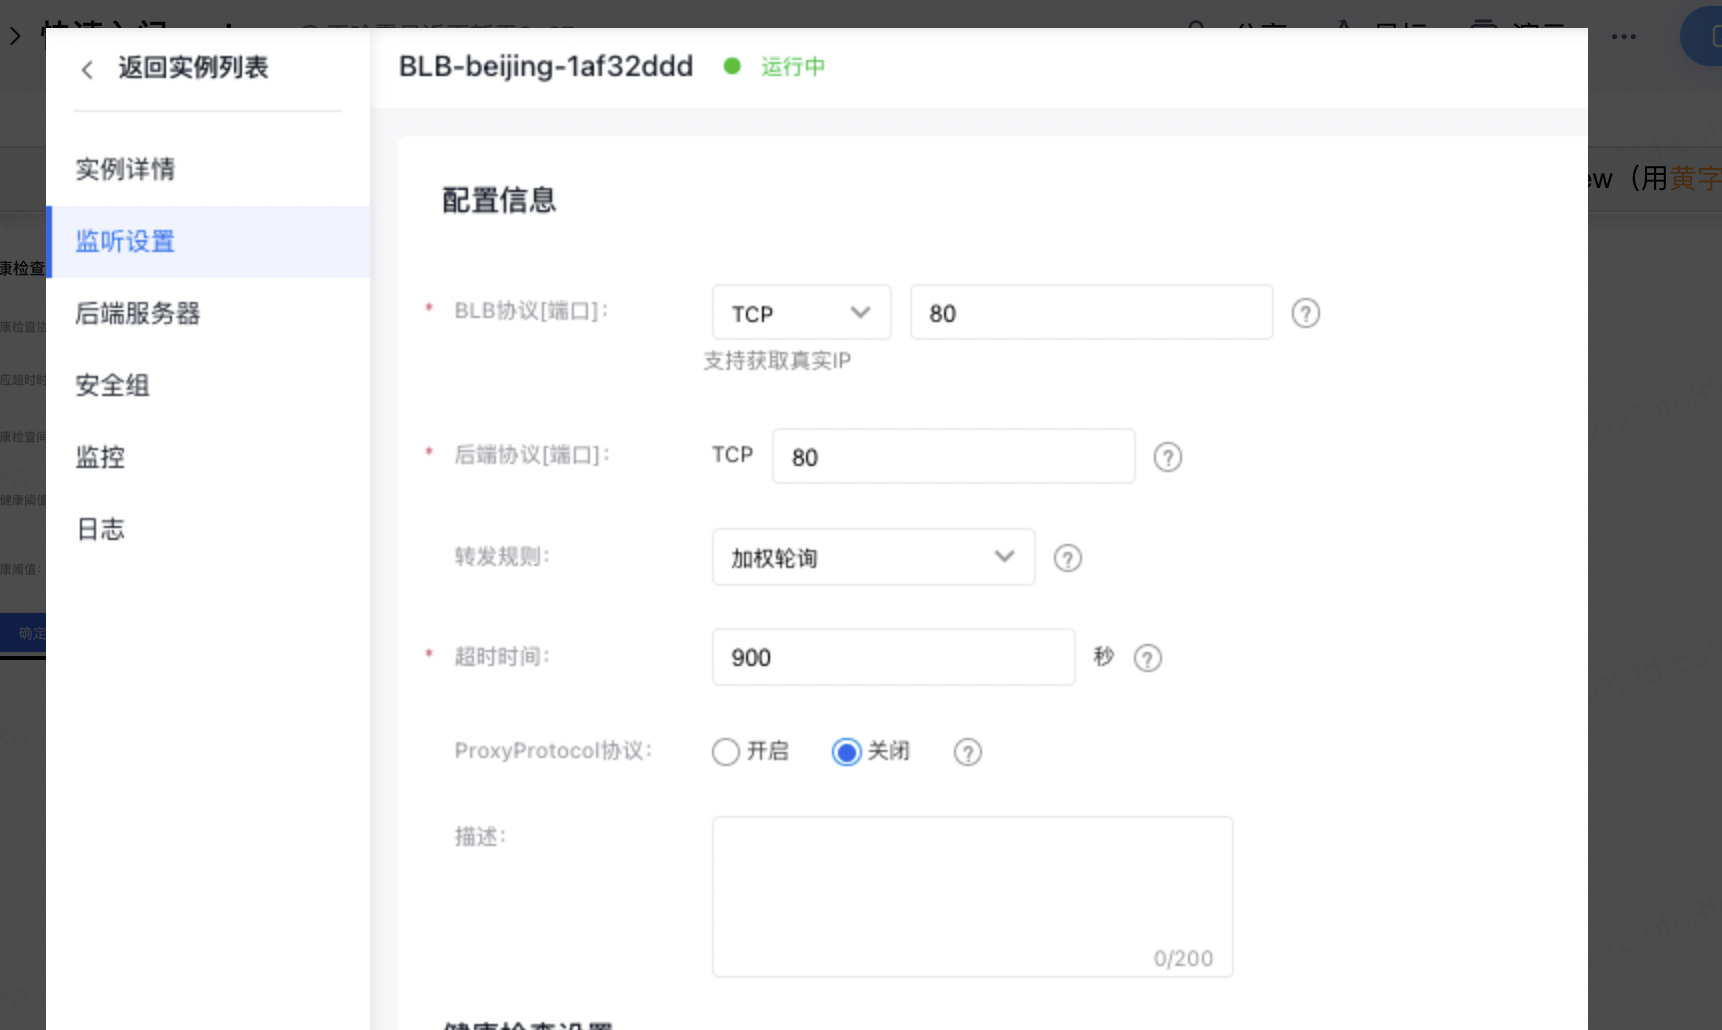
The listener configuration consists of two parts: Configuring Information and Setting Health Check.
- Select Product > Network > Load Balancer to enter the BLB console list. The following demonstrates the configuration of a general-purpose BLB instance by adding a TCP listener.
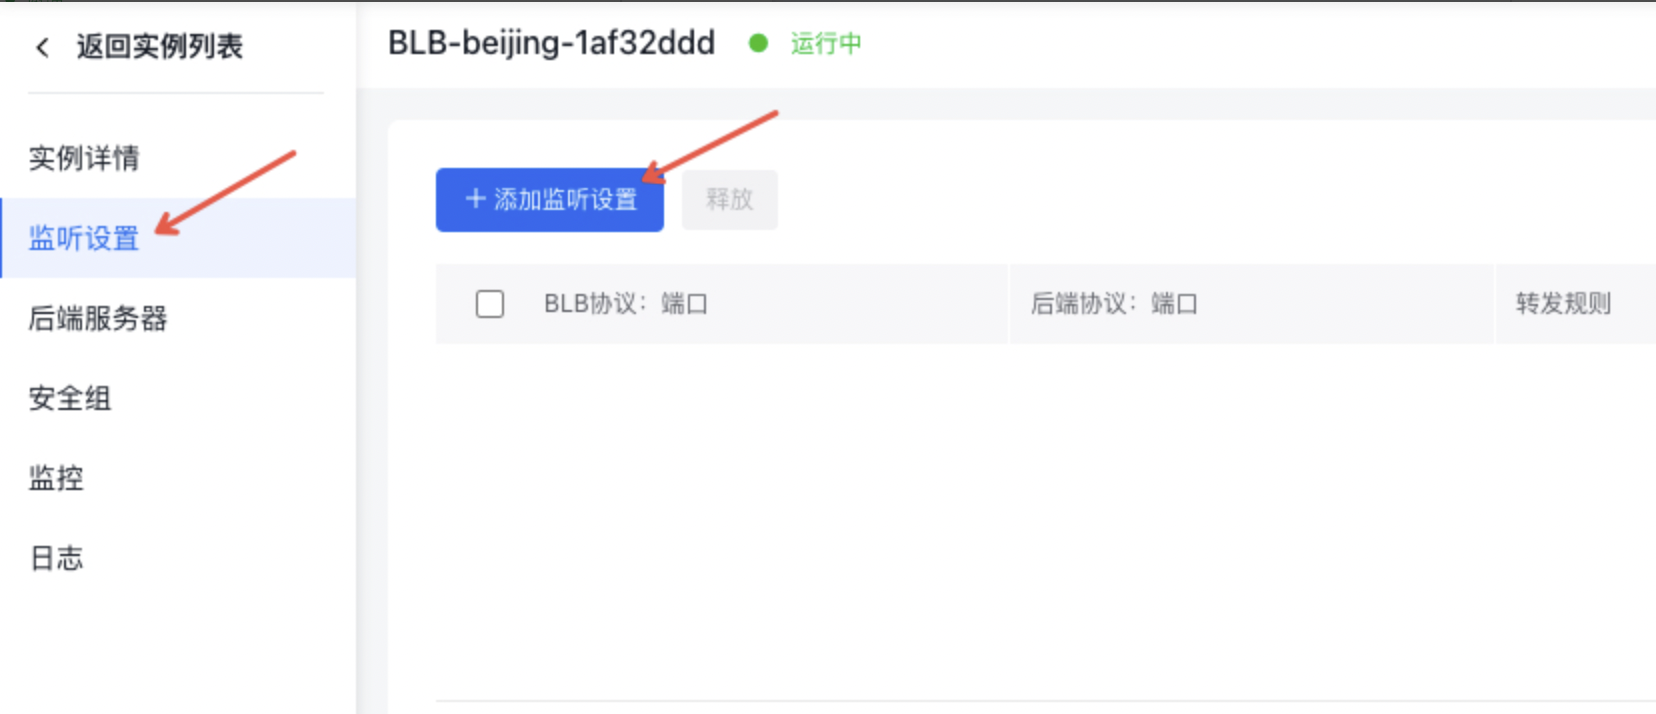
- First, select a standard instance in the left sidebar, click the ID link under the Load Balancer ID/First Name column to enter the Instance Details page.
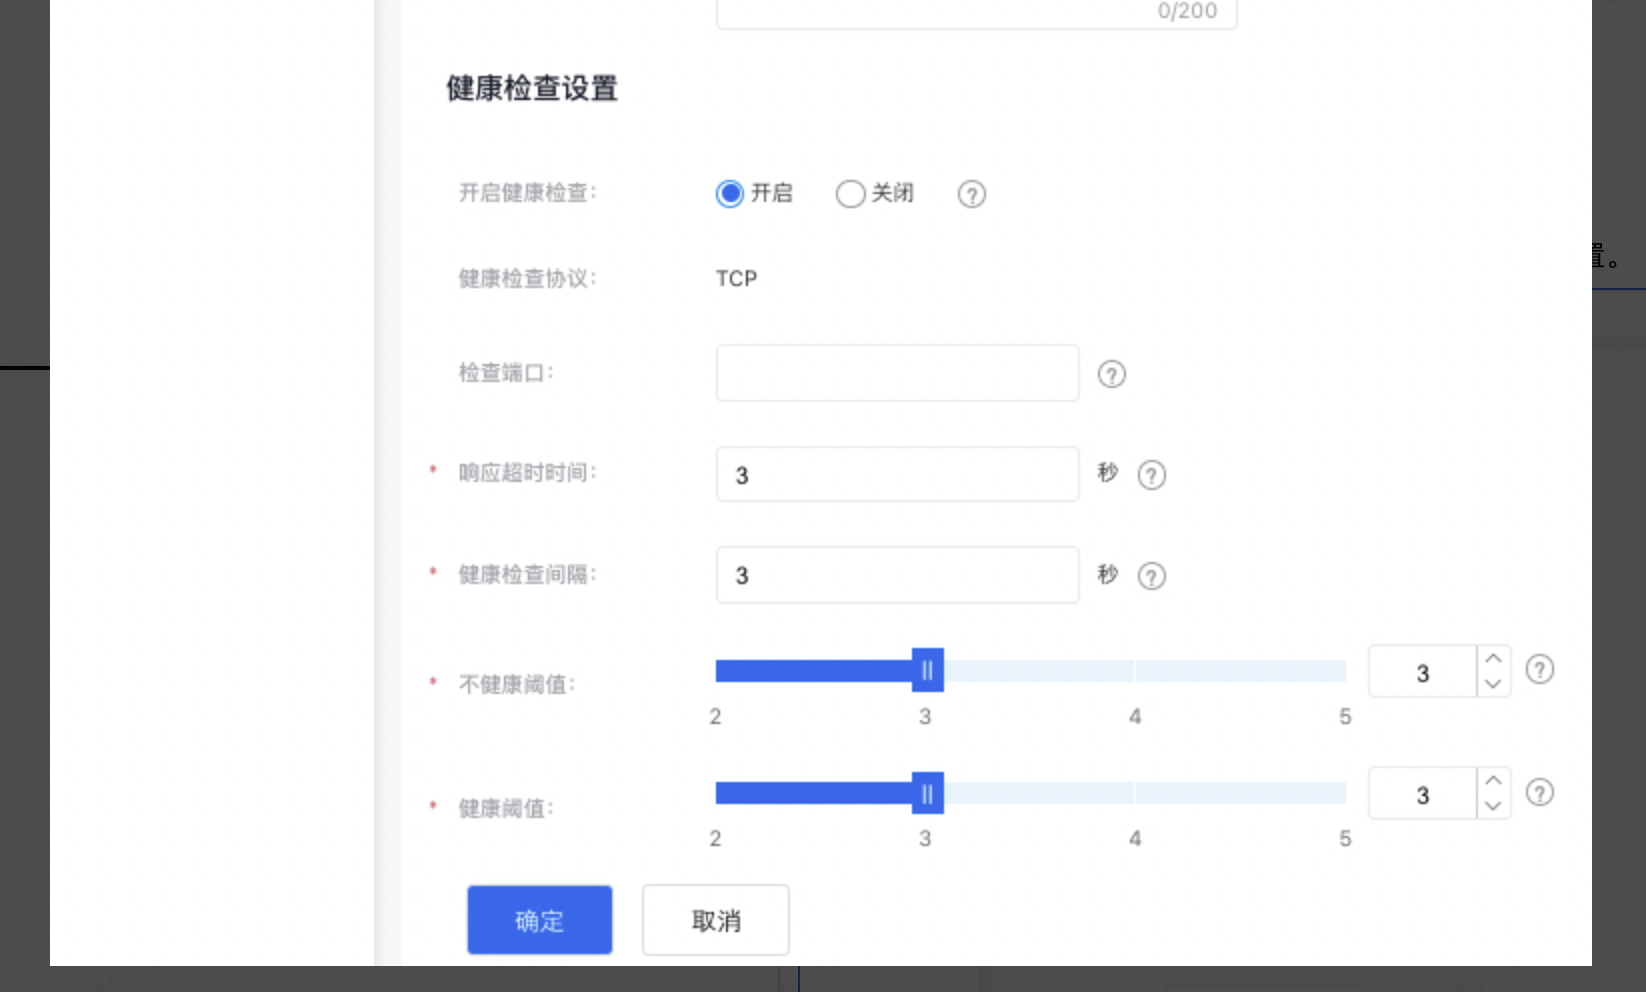
- Click the Listener Settings tab, then click the Add Listener Settings button. The following demonstrates the basic listener configuration and health check setup by taking a TCP listener as an example.
- Use the Configure Information page to set up the listener port based on the provided prompts.
- Set Health Check can be used to set relevant parameters for health checks according to the page prompts.
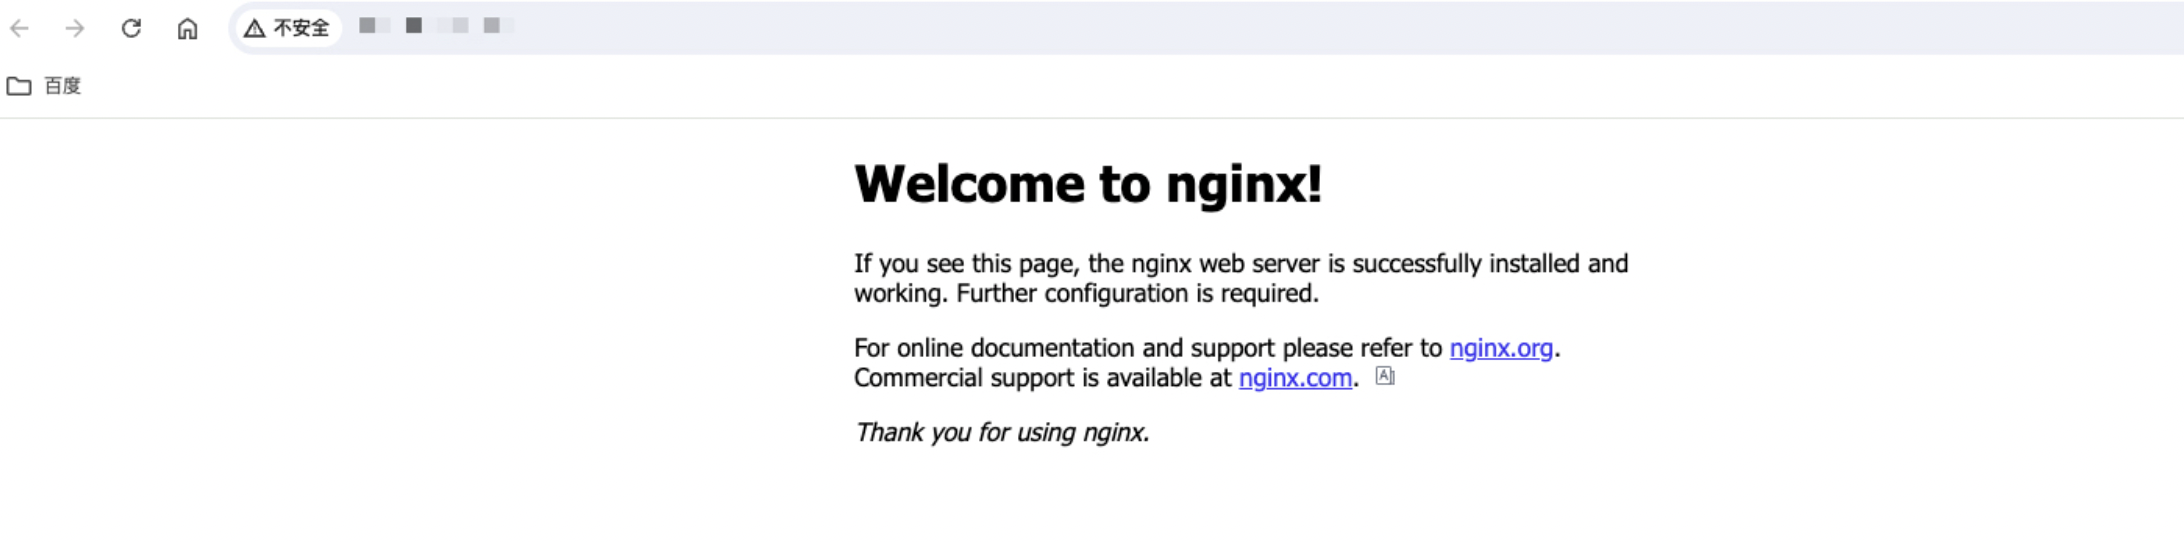
Public Network Access to real server
In this case, you can access the real server by entering the public EIP address bound to the BLB in a browser.
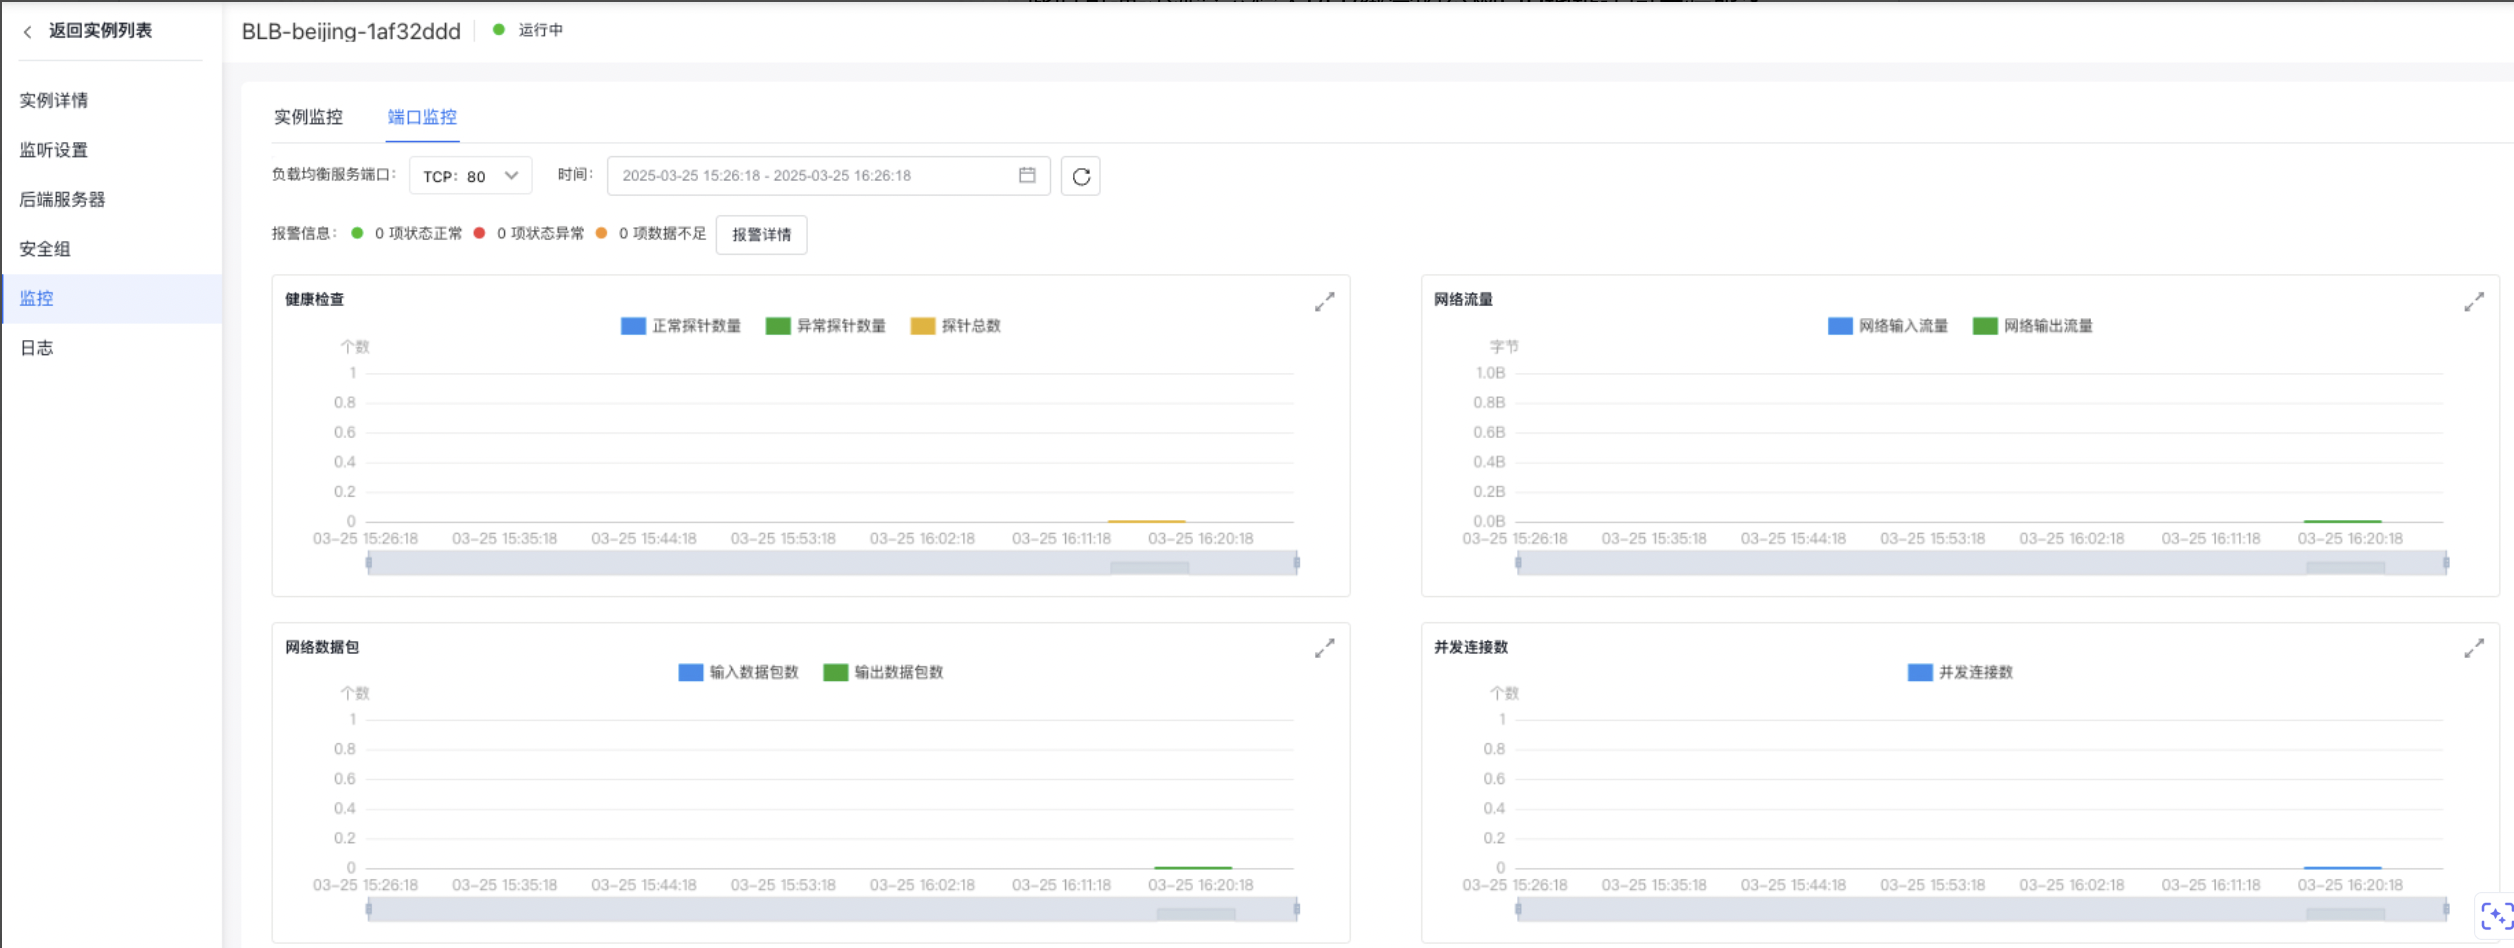
View monitor data
After configuring the BLB instance, along with its real servers and listeners, you can access its monitoring data. To do so, navigate to the BLB Details page and select the Instance Monitor tab to view various monitoring charts.