Implementing Multi-Site Hosting via Application BLB
Overview
This document primarily explains how to configure an application BLB to distribute requests for accessing different domain names to various real servers.
Requirement scenarios
You Users often encounter scenarios of multi-site access, where multiple domain names resolve to the same EIP, and different servers provide services for different sites at the backend. In this case, we can use application BLB to meet the demand for multi-domain forwarding access.
Solution overview
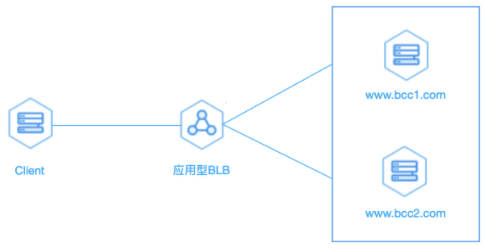
As illustrated in the figure below, create three BCCs within the same VPC—one serving as the test client and the other two functioning as WebServers for website services—and establish an application BLB instance in the same VPC for traffic load distribution.
Configuration steps
Environment preparation
- Create a VPC. For specific steps to create a VPC, refer to Create VPC.
- Create a subnet within the VPC. For specific steps to create a subnet, refer to Create Subnet.
- Create three BCCs in the subnet: bcc1, bcc2, and bcc3 respectively. For specific steps to create a BCC, refer to Create BCC Instance.
- Deploy and install Nginx on two BCC servers among them, then start the corresponding website services with the addresses of www.bcc1testsdkhfahsdfh.com and www.bcc2testsdkhfahsdfh.com. For deploying Nginx in CentOS, refer to CentOS-7.2 LNMP Environment Deployment.
- Purchase an application BLB instance in the subnet. For specific steps to purchase an application BLB instance, refer to Application BLB Instance.
Add target group
- Navigate to Product & Service > Baidu Load Balancer (BLB) to access the Baidu Load Balancer (BLB) list.
- Click the ID link in the Load Balancer ID/Name column to open the Instance Details page.
- Click the "Target Group" tab, select "Add Server Group", and configure the name, description, port and server of the server group in the pop-up window. Here, we add BCC1 and BCC2 to the two target groups BCC_GROUP1 and BCC_GROUP2 respectively. For specific operations on configuring target group, please refer to Target Group Configuration.

Add a HTTP listener
The listener configuration consists of two parts: Configuring Information and Setting Health Check.
- Go to Product & Service > Baidu Load Balancer (BLB), then click Application Instance to enter the Baidu Load Balancer (BLB) list.
- Select the ID link in the Load Balancer ID/Name column to visit the Instance Details page. Next, click on the "Listener Settings" tab to access the listener section, and then select "Create Listener."
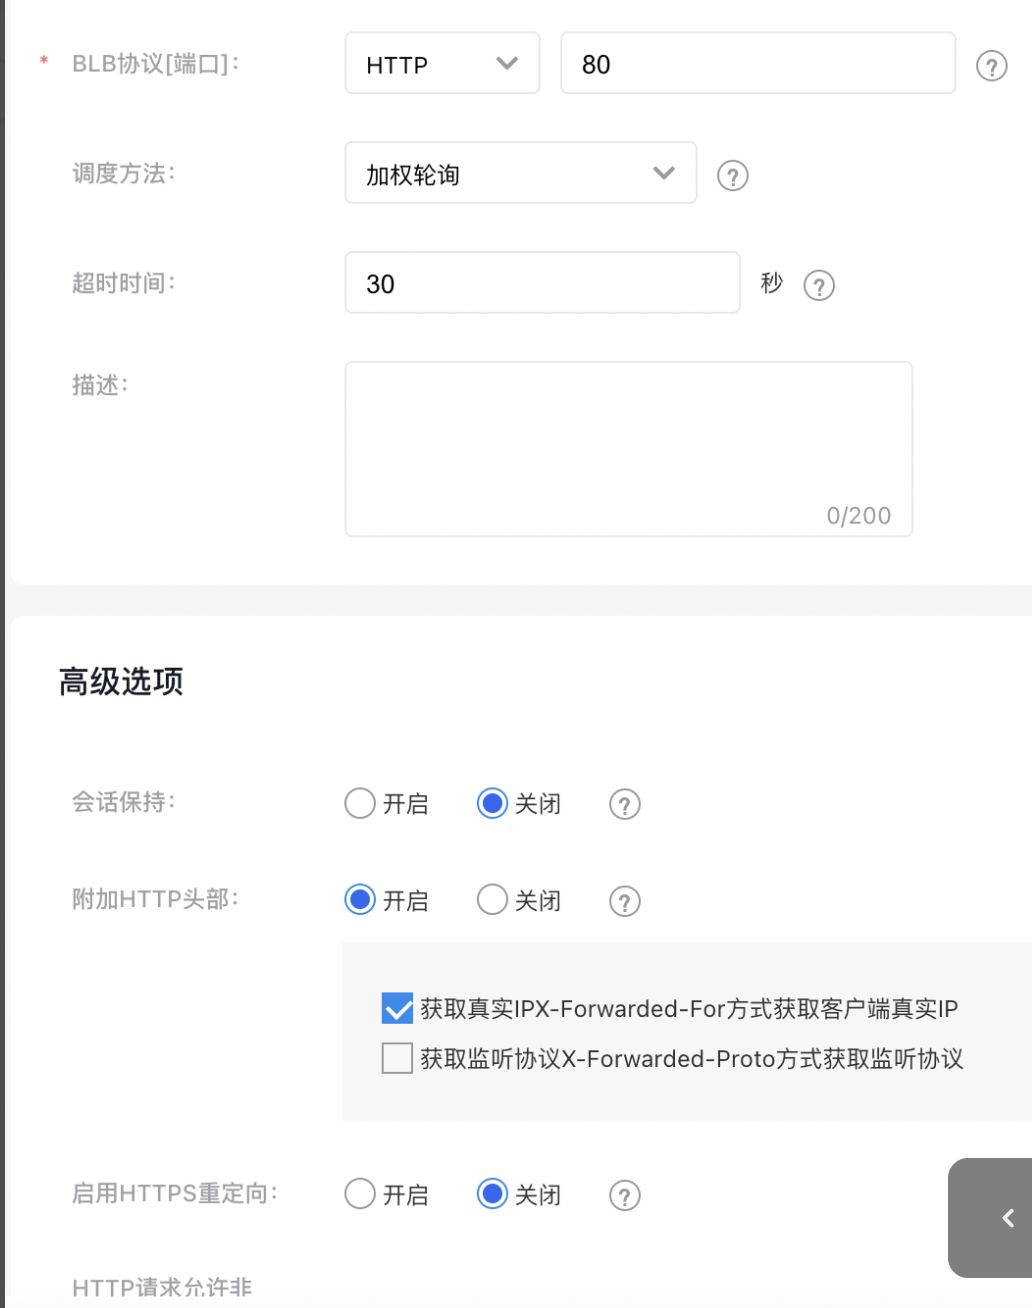
- For the listener's BLB protocol, choose HTTP and select the port corresponding to the Nginx service. For instance, the default port 80 is used in this example.
Configure forwarding rules
In the forwarding rules, click "Add Rule" to create two rules:
Rule 1: Select "Domain Name" as the matching condition, enter "*.bcc1testsdkhfahsdfh.com" as the matching content, select the target group where BCC1 resides as the target group, and choose port 80
Rule 2: Select "Domain Name" as the matching condition, enter "*.bcc1testsdkhfahsdfh.com" as the matching content, select the target group where BCC2 resides as the target group, and choose port 80

For detailed instructions on application BLB listener and forwarding rules, refer to the Configuration Application BLB Instance Listener.
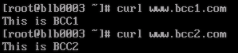
Access test
Set up domain name resolution on the client (simulating real access scenarios), resolving both www.bcc1testsdkhfahsdfh.com and www.bcc2testsdkhfahsdfh.com to the frontend IP of the BLB.

When accessing www.bcc1testsdkhfahsdfh.com and www.bcc2testsdkhfahsdfh.com, you can observe that requests are accurately distributed to the respective BCCs.