General-purpose IPv6 BLB instance
An IPv6 LoadBalancer uses IPv6 single-stack technology and integrates with an IPv4 LoadBalancer to enable dual-stack IPv6/IPv4 communication. Upon creation of an IPv6 LoadBalancer, the system assigns an IPv6 address to process requests from IPv6 clients.
Create a general-purpose IPv6 instance
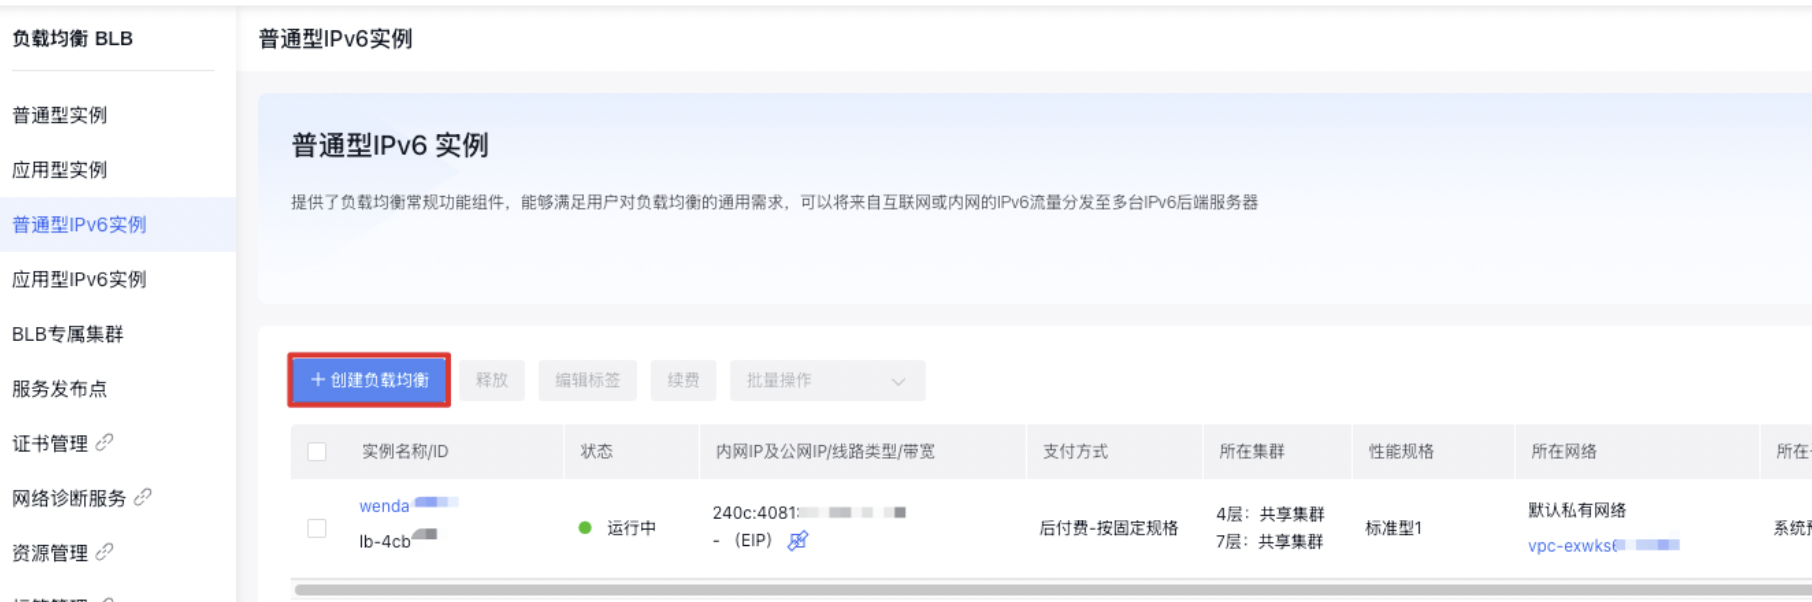
- Log in to Baidu AI Cloud, navigate to Products > Network > Load Balancer, access the Baidu Load Balancer (BLB) Management Console, and click on General-purpose IPv6 Instance to open the Instance List page.
- Click Create Load Balancer to enter the Create Instance interface.
- Choose the configuration information.
| ConfigMap | Description |
|---|---|
| Billing and Region | Selectable bill type and current region |
| Name | Customizable IPv6 instance name |
| Instance type | Select a general-purpose IPv6 instance |
| Network | Virtual Private Cloud (VPC) to which the BLB being created currently and corresponding BCC cloud resources belong |
| Allocate IPv6 | An IPv6 instance must be assigned an IPv6 IP, which can be automatically allocated or manually specified |
| Security group | You may select either a created security group or a default security group |
| Tag | Organize resources using various criteria (e.g., purpose, owner, or project); each tag is composed of a key and a value. |
| Resource group | Selectable resource group |
| Purchase information | You can select the purchase count and set the automatic release information, etc. |
- Confirm the configuration information and complete the order confirmation and payment according to the system prompts. Users will receive an SMS notification upon successful creation.
- Select Products > Network > Load Balancer, access the Baidu Load Balancer (BLB) Management Console page, click General-purpose IPv6 Instance to enter the Instance List page, and view the relevant information of BLB instances, including:
| Item | Description |
|---|---|
| Instance name/ID | BLB instance's name and ID. Click the instance name to access the BLB Instance Details page, as shown in Step 2 |
| Status | BLB instance's current operational status. If it displays "Running," the BLB instance is functioning normally |
| Internal IP address | IPv6 IP assigned or specified at the time of creation. BLB provides an access address for balancer services. |
| Network | Virtual Private Cloud (VPC) where BLB is located. If not specified, the system provides a default VPC |
| Subnet belonged | Virtual Private Cloud (VPC) where BLB is located. If not specified, the system provides a default VPC |
| Frontend protocol/port | Protocols (e.g., HTTP, TCP) and port numbers of listeners associated with the BLB instance |
| Backend protocol/port | Protocols and port numbers forwarded by the listener associated with the BLB instance to the backend BCC |
| Real server | BCC associated with the BLB instance |
| Resource group | User-defined resource group |
Configure listener
Configure TCP listener
The TCP listener configuration includes two parts: Configure Information and Set Health Check. When health check is enabled, BLB will automatically block unhealthy real servers.
- Select Products > Network > Load Balancer, access the Baidu Load Balancer (BLB) Management Console page, and click General-purpose IPv6 Instance to enter the Instance List page.
- Click the load balancer name to access the Instance Details page.
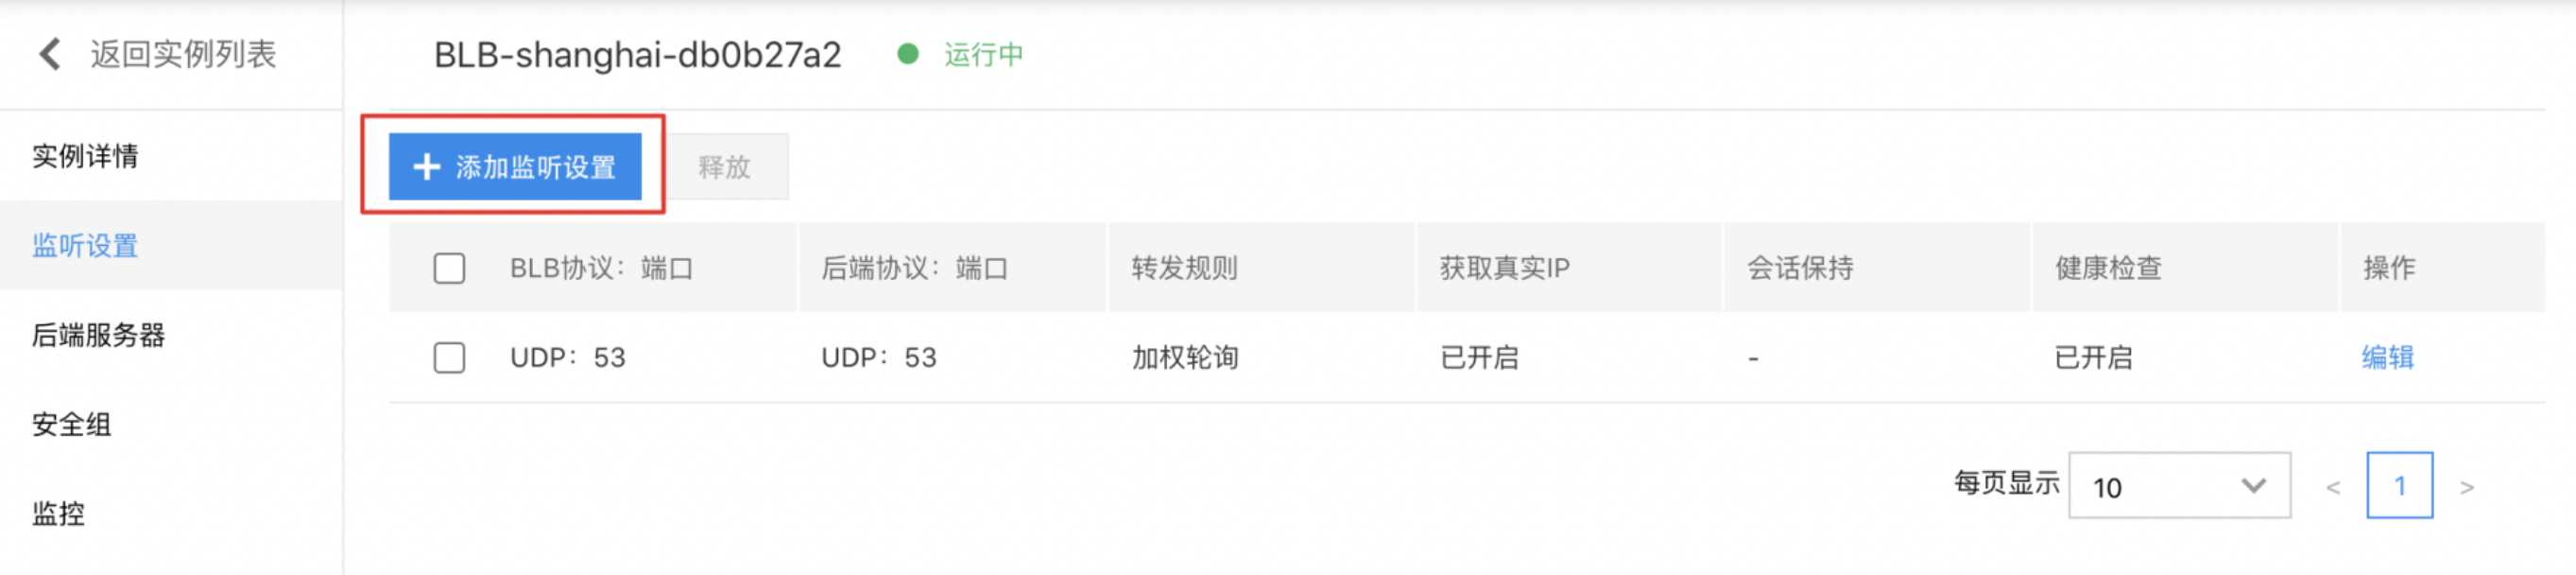
- Click Listener Settings > Add Listener Settings in the left navigation bar to configure the basic settings and health check for the listener.
- Configure the necessary settings.
| ConfigMap | Description |
|---|---|
| BLB protocol port | Select TCP type and fill in the port |
| Backend protocol port | Fill in the real server port |
| Forwarding rules | You may select weighted round robin, weighted least connections, or source IP |
| Timeout duration | Specify TCP connection timeout duration. The input range is an integer between 10 and 4000, and the default value is 900 seconds. |
| ProxyProtocol protocol | Enable the ProxyProtocol feature to capture and pass details like the client's source IP, source port, destination IP, destination port, and protocol. Ensure that the real server is configured to support ProxyProtocol before enabling this feature. |
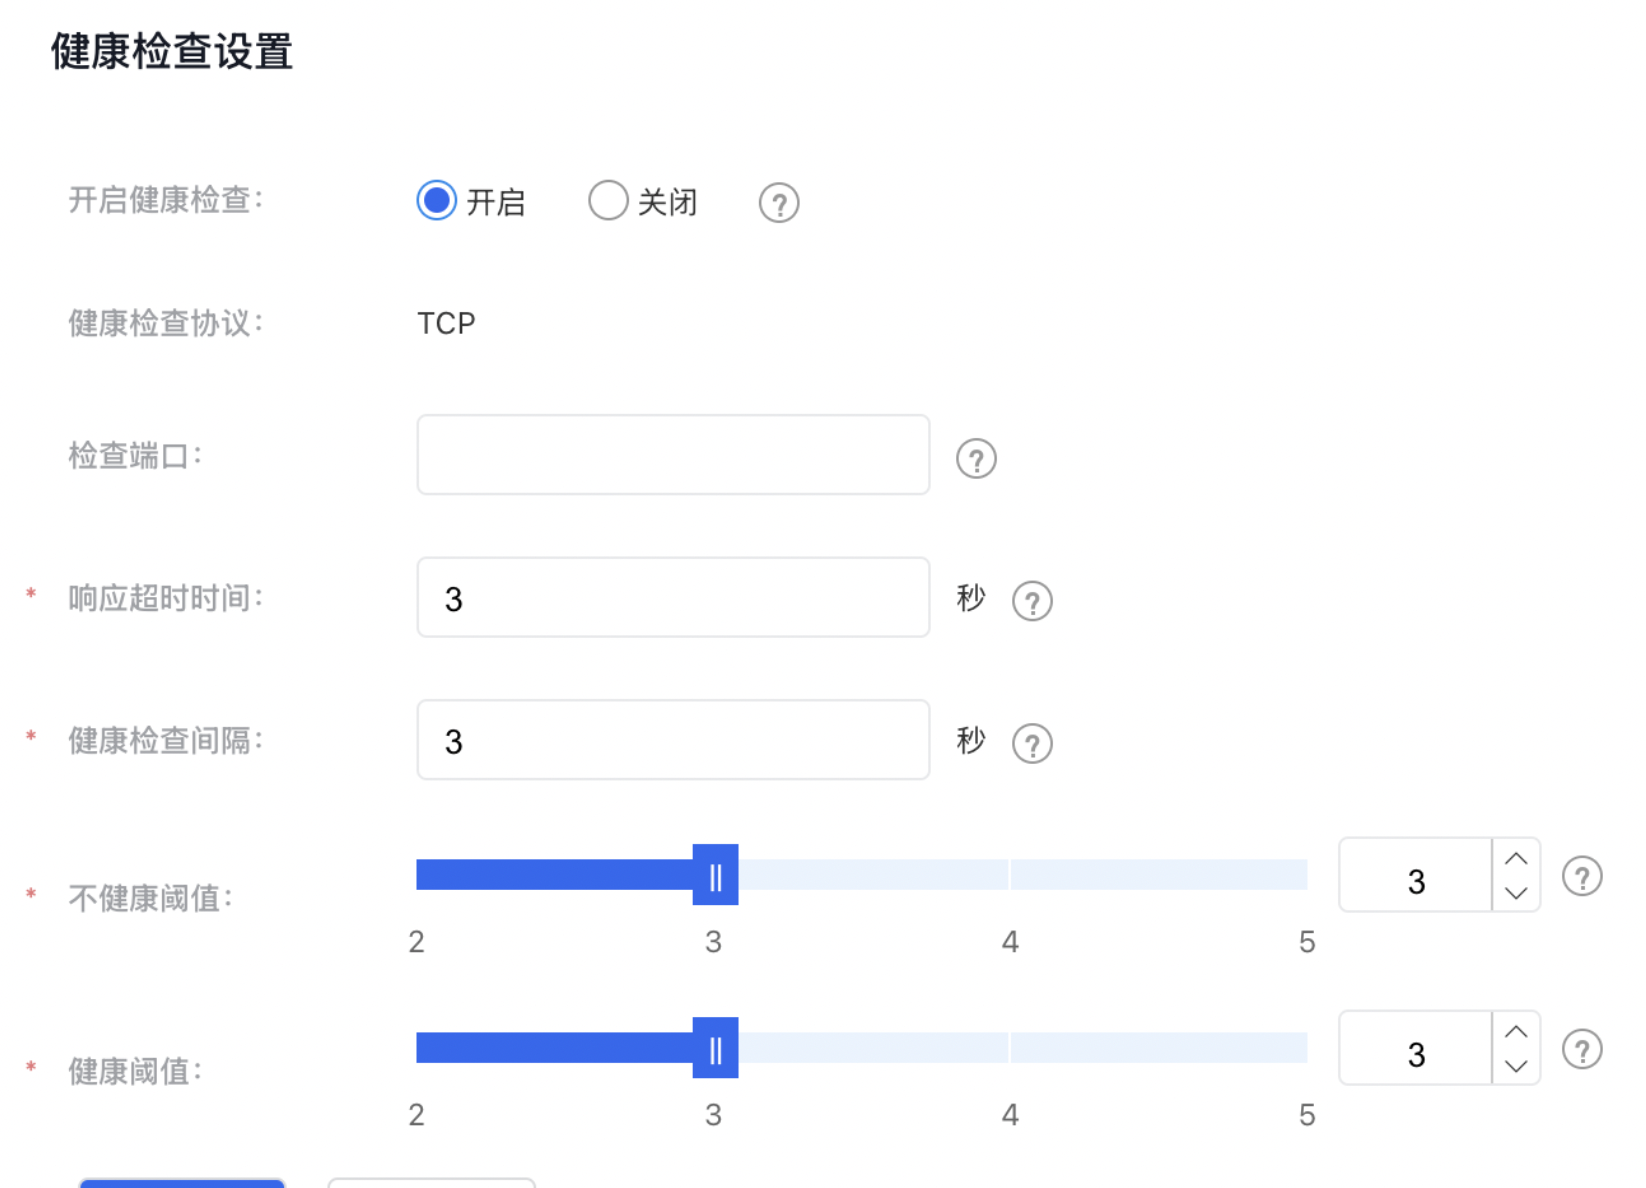
- Set up health checks.
| ConfigMap | Description |
|---|---|
| Response timeout | Enter an integer between 1 and 60. It is recommended to set it to 3 seconds |
| Health check interval | Enter an integer between 1 and 10. It is recommended to set it to 3 seconds |
| Unhealthy threshold | If the count of the consecutive failed health checks exceed this threshold, the server will be deemed unhealthy and removed from the server pool until recovery. |
| Health threshold | When the number of consecutive successful health checks surpasses this limit, the server will be marked as healthy and will rejoin the server pool. |
- Once all configurations are completed, click the OK button to finalize adding the TCP listener.
Configure UDP listener
Scenario overview
Typical use cases for UDP traffic include DNS services, Internet of Things applications, and scenarios where high reliability of data transmission is not critical.
Operation steps
The UDP listener configuration includes two parts: Configure Information and Set Health Check. When health check is enabled, BLB will automatically block unhealthy real servers.
- Select Products > Network > Load Balancer, access the Baidu Load Balancer (BLB) Management Console page, and click General-purpose IPv6 Instance to enter the Instance List page.
- Click the load balancer name to access the Instance Details page.
- Click Listener Settings > Add Listener Settings to configure the basic settings and health check for the listener. Select UDP for the BLB protocol.

- Set configuration information.
| ConfigMap | Description |
|---|---|
| BLB protocol port | Select UDP type and fill in the port |
| Backend protocol port | Fill in the real server port |
| Forwarding rules | You may select weighted round robin, weighted least connections, or source IP |
| Timeout duration | Set the timeout duration for UDP connections. The value must be an integer between 5 and 4000, with a default of 30 seconds. |
| ProxyProtocol protocol | You can choose whether to enable the ProxyProtocol protocol to obtain the client's source IP, source Port, access destination IP, destination Port and access protocol. |
- Set up health checks.
| ConfigMap | Description |
|---|---|
| Response timeout | Enter an integer between 1 and 60. It is recommended to set it to 3 seconds |
| Health check interval | Enter an integer between 1 and 10. It is recommended to set it to 3 seconds |
| Unhealthy threshold | If the count of the consecutive failed health checks exceed this threshold, the server will be deemed unhealthy and removed from the server pool until recovery. |
| Health threshold | When the number of consecutive successful health checks surpasses this limit, the server will be marked as healthy and will rejoin the server pool. |
- After completing the above setup, click the OK button to finalize adding the UDP listener.
Edit listener settings
On the Listener Settings tab, click Edit to enter the editing interface. After editing, click OK.

Release listener settings
- In the Listener Settings tab, choose the listener settings to be removed, then click the Release button.
- In the pop-up window, click OK to confirm and complete the release process.
Configure real server
Add real server
- Go to Products > Network > Load Balancer, open the Baidu Load Balancer (BLB) Management Console page, and select General-purpose IPv6 Instance to navigate to the Instance List page.
- Click the name of the load balancer to open the Instance Details page.
- Click Real Server > Add Real Server to access the real server list. The real server list displays IPv6 BCC instance names, statuses, and other information under the same Virtual Private Cloud (VPC) as the current BLB.
Description:
The real server list here only displays IPv6-type instances, not all available ones.
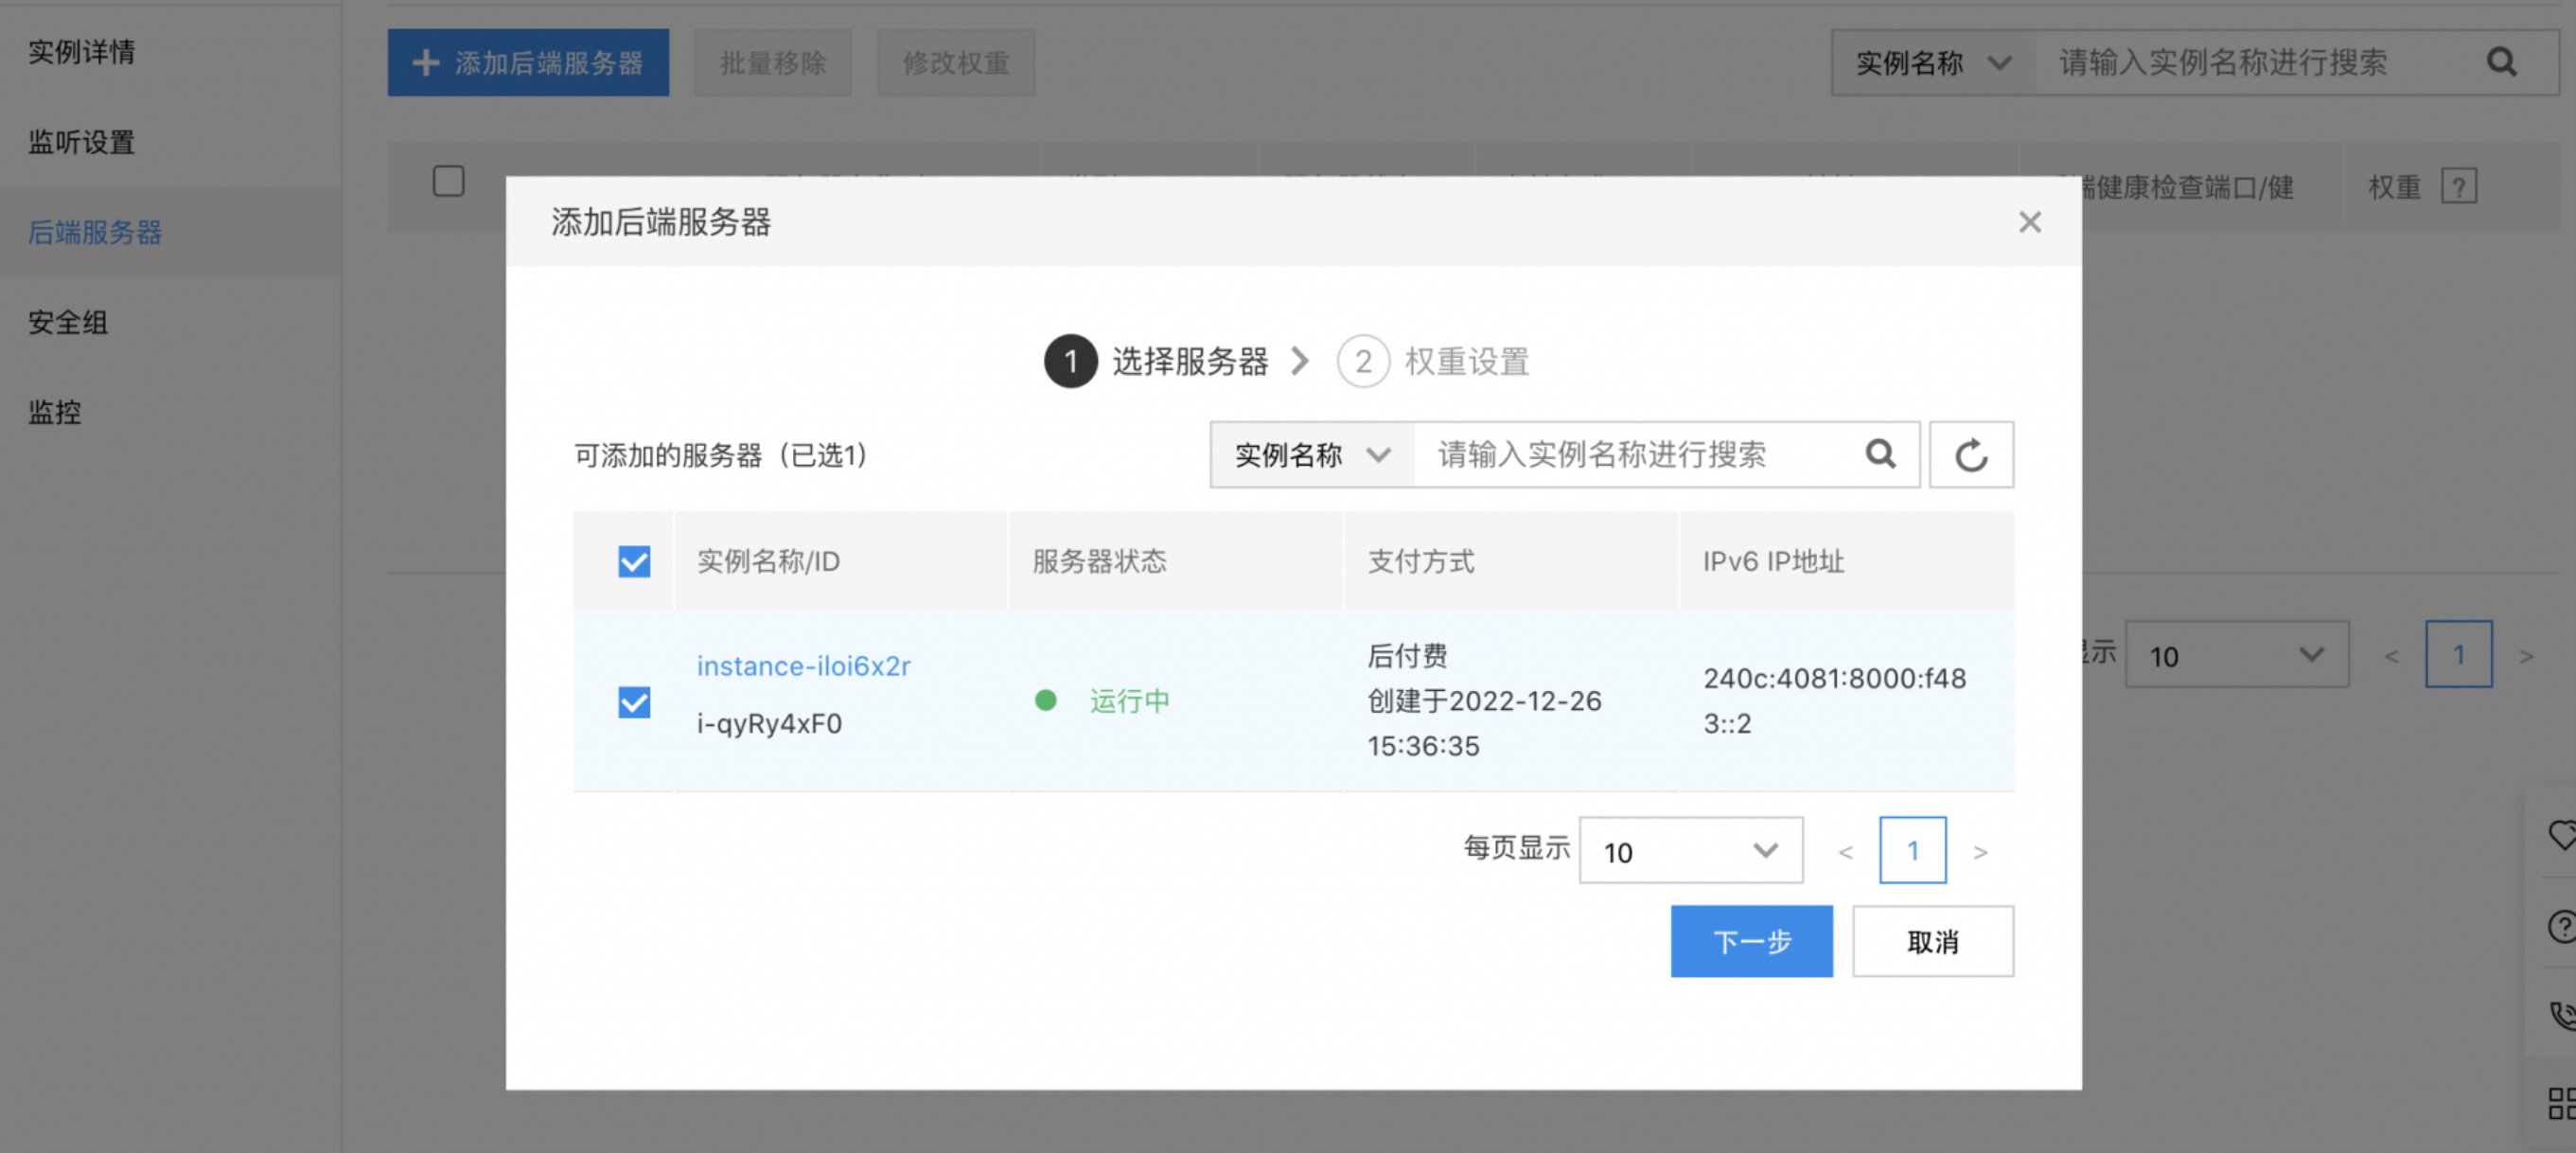
- Set the weight for the real servers. The weight determines the distribution of request forwarding among the server instances. For instance, if two servers have different configurations, the more powerful server can be assigned a higher weight to handle more incoming requests.
- The weight value is relative. If all servers have the same weight, their request forwarding ratios will be equal.
- Weights can range from 0 to 100. A higher weight means more requests will be forwarded to that server; if a weight is set to "0," the server will not receive any new requests.
- Non-zero weights do not apply to forwarding rules other than weighted round robin and weighted least connections.
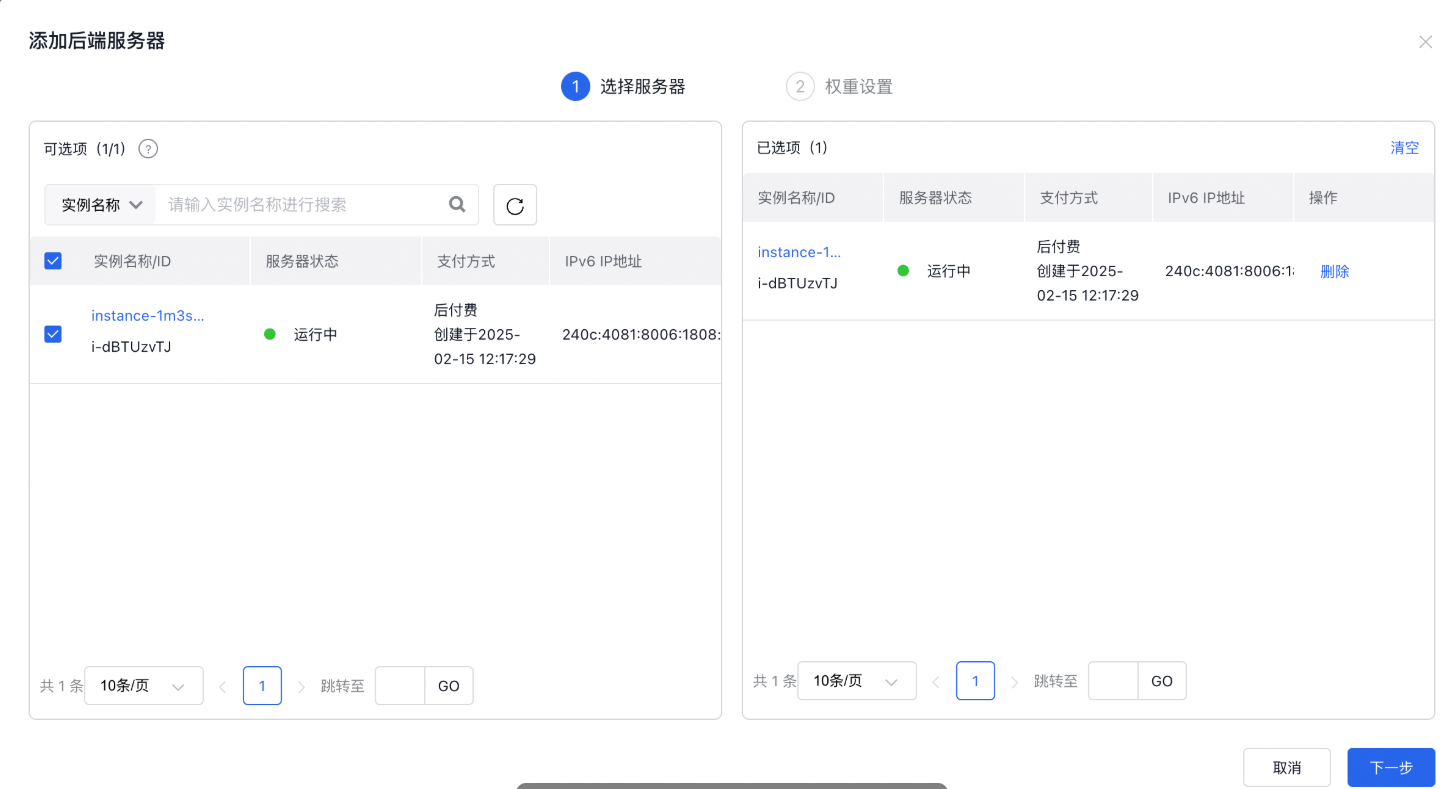
- Select one or more real server instances to add and click OK to integrate them into the load balancer service.
Modify real server weight
- Under the Real Server tab, find and choose the real server instance that requires modifications.
- Click Modify Weight to reselect the real servers and adjust their weight values. For detailed instructions, refer to the Add Real Server section.
Remove real server
- On the Real Server tab, select the server instance you want to remove.
- Click Batch Removal to complete the removal process.
Set security group
Currently, the default ingress rules of BCC security groups allow all traffic. If you need to configure security group rules in a more granular way, refer to the following guidelines. BLB performs health status checks by interacting with BCC via a specific intranet network segment. Therefore, when configuring BCC security group, you need to pay attention to releasing these intranet IP segments for the ingress rules of the security group. As the Layer 4 listener (e.g. TCP protocol) enables the real IP function by default (the source IP of the packet is the client IP), the ingress rule of the user BCC security group needs to additionally release the client IP address; The real IP function of the Layer 7 listener (e.g. HTTP protocol) is implemented via the X-Forwarded-For header, so the backend BCC security group of the Layer 7 listener does not need to release the client IP address. The ingress rules of the BCC security group require the following configuration for the source IP:
| Listener type | Public BLB address | Internal BLB address |
|---|---|---|
| Layer-4 Listener (e.g., TCP protocol) | Allow the public IP segment where the user's client is located and permit 100.64.0.0/10 (health check) | Allow the 10.0.0.0/8 network segment (the IP address of the intranet BCC packet will be converted to the IP address of the 10.0.0.0/8 network segment, so it appears to the real server of BLB that the client request comes from 10.0.0.0/8 network segment) and the 100.64.0.0/10 network segment (health check) |
| Layer 7 Listener (e.g., HTTP protocol) | Allow 100.79.0.0/16 network segment | Allow 100.79.0.0/16 network segment |
The open ports in the security group must include at least the BLB real server port and the health check port.
Associate with security group
- Navigate to Products > Network > Load Balancer, access the Baidu Load Balancer (BLB) Management Console page, and select General-purpose IPv6 Instance to go to the Instance List page.
- Click on the link in the Load Balancer ID/Name column to proceed to the Instance Details page.
- Click Security Group to enter the Security Group page. Egress or ingress rules can be selected from the list of currently applied security group rules; In the list of associated security group rules
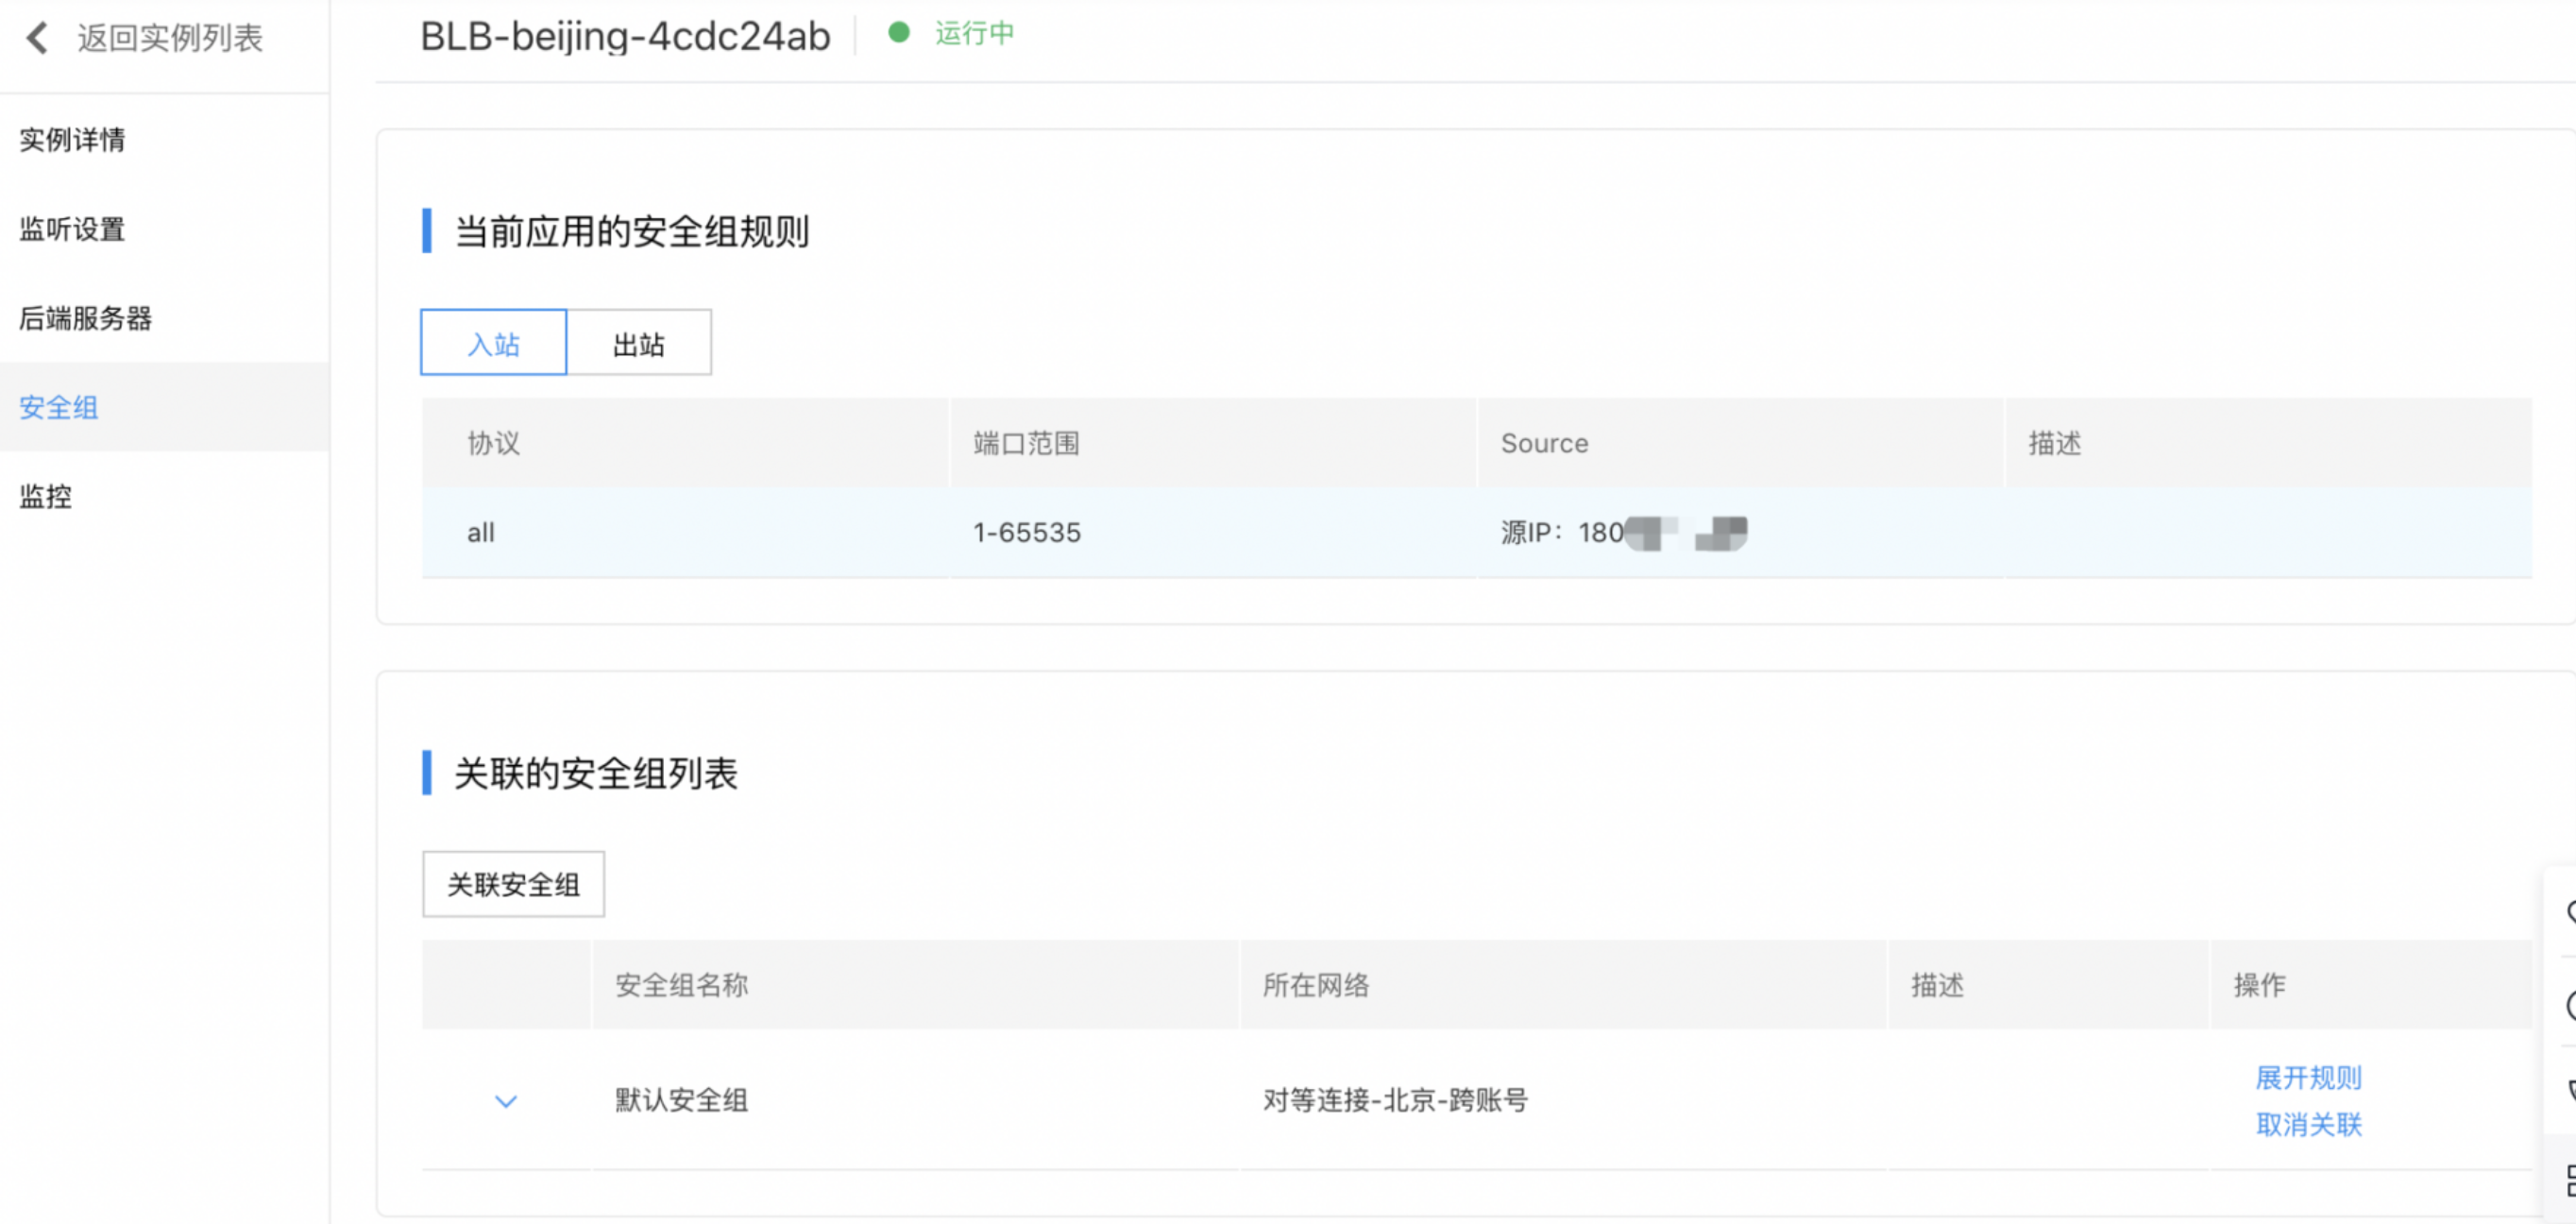
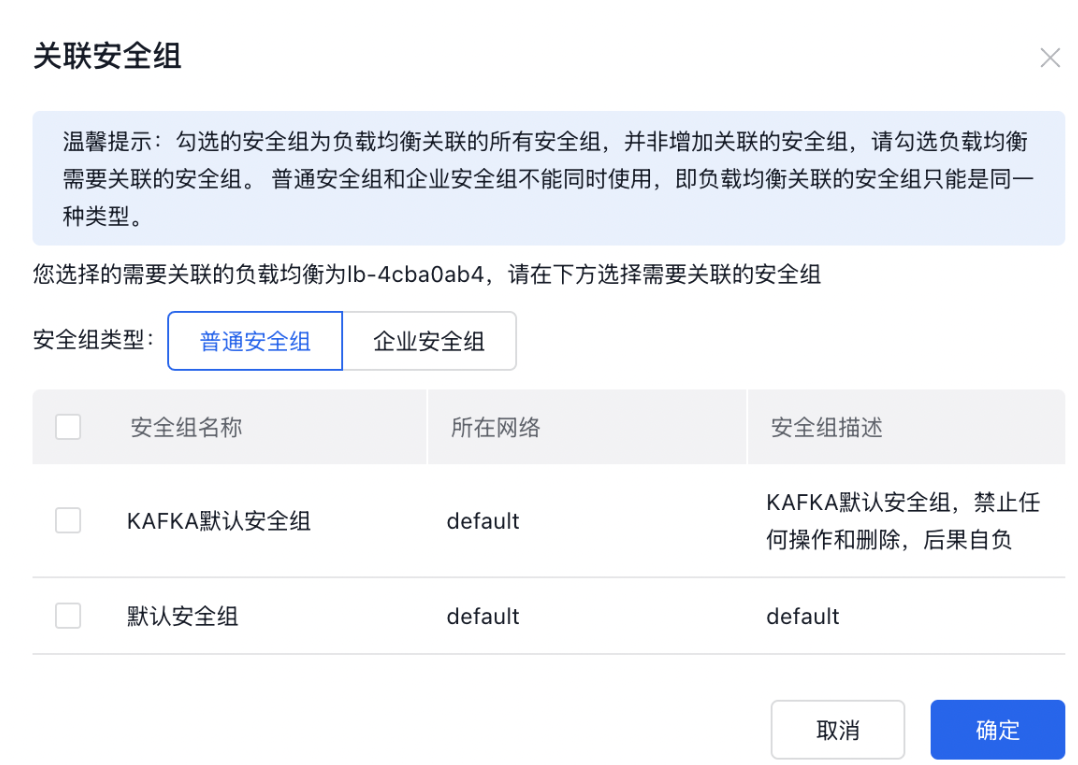
- Click Associate Security Group or Associate Now to access the list of security groups that can be associated

- Check the security group that needs to be associated for load balancer and confirm. The security group will then be associated, and the security group rules will apply to the current instance.
Disassociate security group
- On the Security Group page, click Disassociate under the Associated Security Group List's operation column.
- Click OK in the confirmation pop-up window to complete disassociation. The corresponding security group rules for the current application will be removed.

View monitor data
Go to the Monitor tab on the BLB Details page to analyze monitoring data, including port monitor and real server monitor details.
View port monitor
- Go to Products > Network > Load Balancer, open the Baidu Load Balancer (BLB) Management Console page, and select General-purpose IPv6 Instance to navigate to the Instance List page.
- Click on the link in the Load Balancer ID/Name column to proceed to the Instance Details page.
- Click Monitor to enter the Monitor page, then click Port Monitor to display the monitor status.
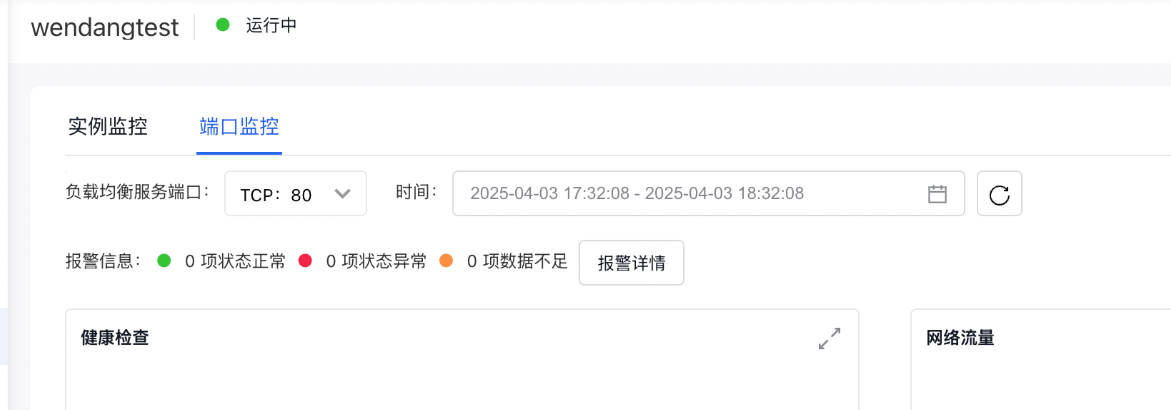
- For Layer 4 Listeners, the port monitor information includes:
-
Health check
- Total probe count: The total number of real servers added.
- Normal probe count: The number of real servers that successfully passed health checks.
- Abnormal probe count: The number of real servers that failed health checks.
-
Network traffic
- Network ingress traffic: Data received by the listener from users, measured in bytes per minute.
- Network egress traffic: Data sent by the listener to users, measured in bytes per minute.
-
Network packet
- Inbound packet count: The total number of data packets received by the listener from users, calculated per minute.
- Outbound packet count: The total number of packets sent by the listener to users, calculated per minute.
- Concurrent connections: The number of simultaneous TCP connections.
- Traffic interruption: Incoming and outgoing traffic has dropped.
- Packet loss: Both inbound and outbound packets have been dropped.
- Connections dropped: Connections dropped that were not properly established
- New connections: New connections within the time period
- For Layer 7 listeners, the port monitor information, in addition to the above contents, also includes:
- Request count: Count of HTTP requests received by the listener, in requests/minute.
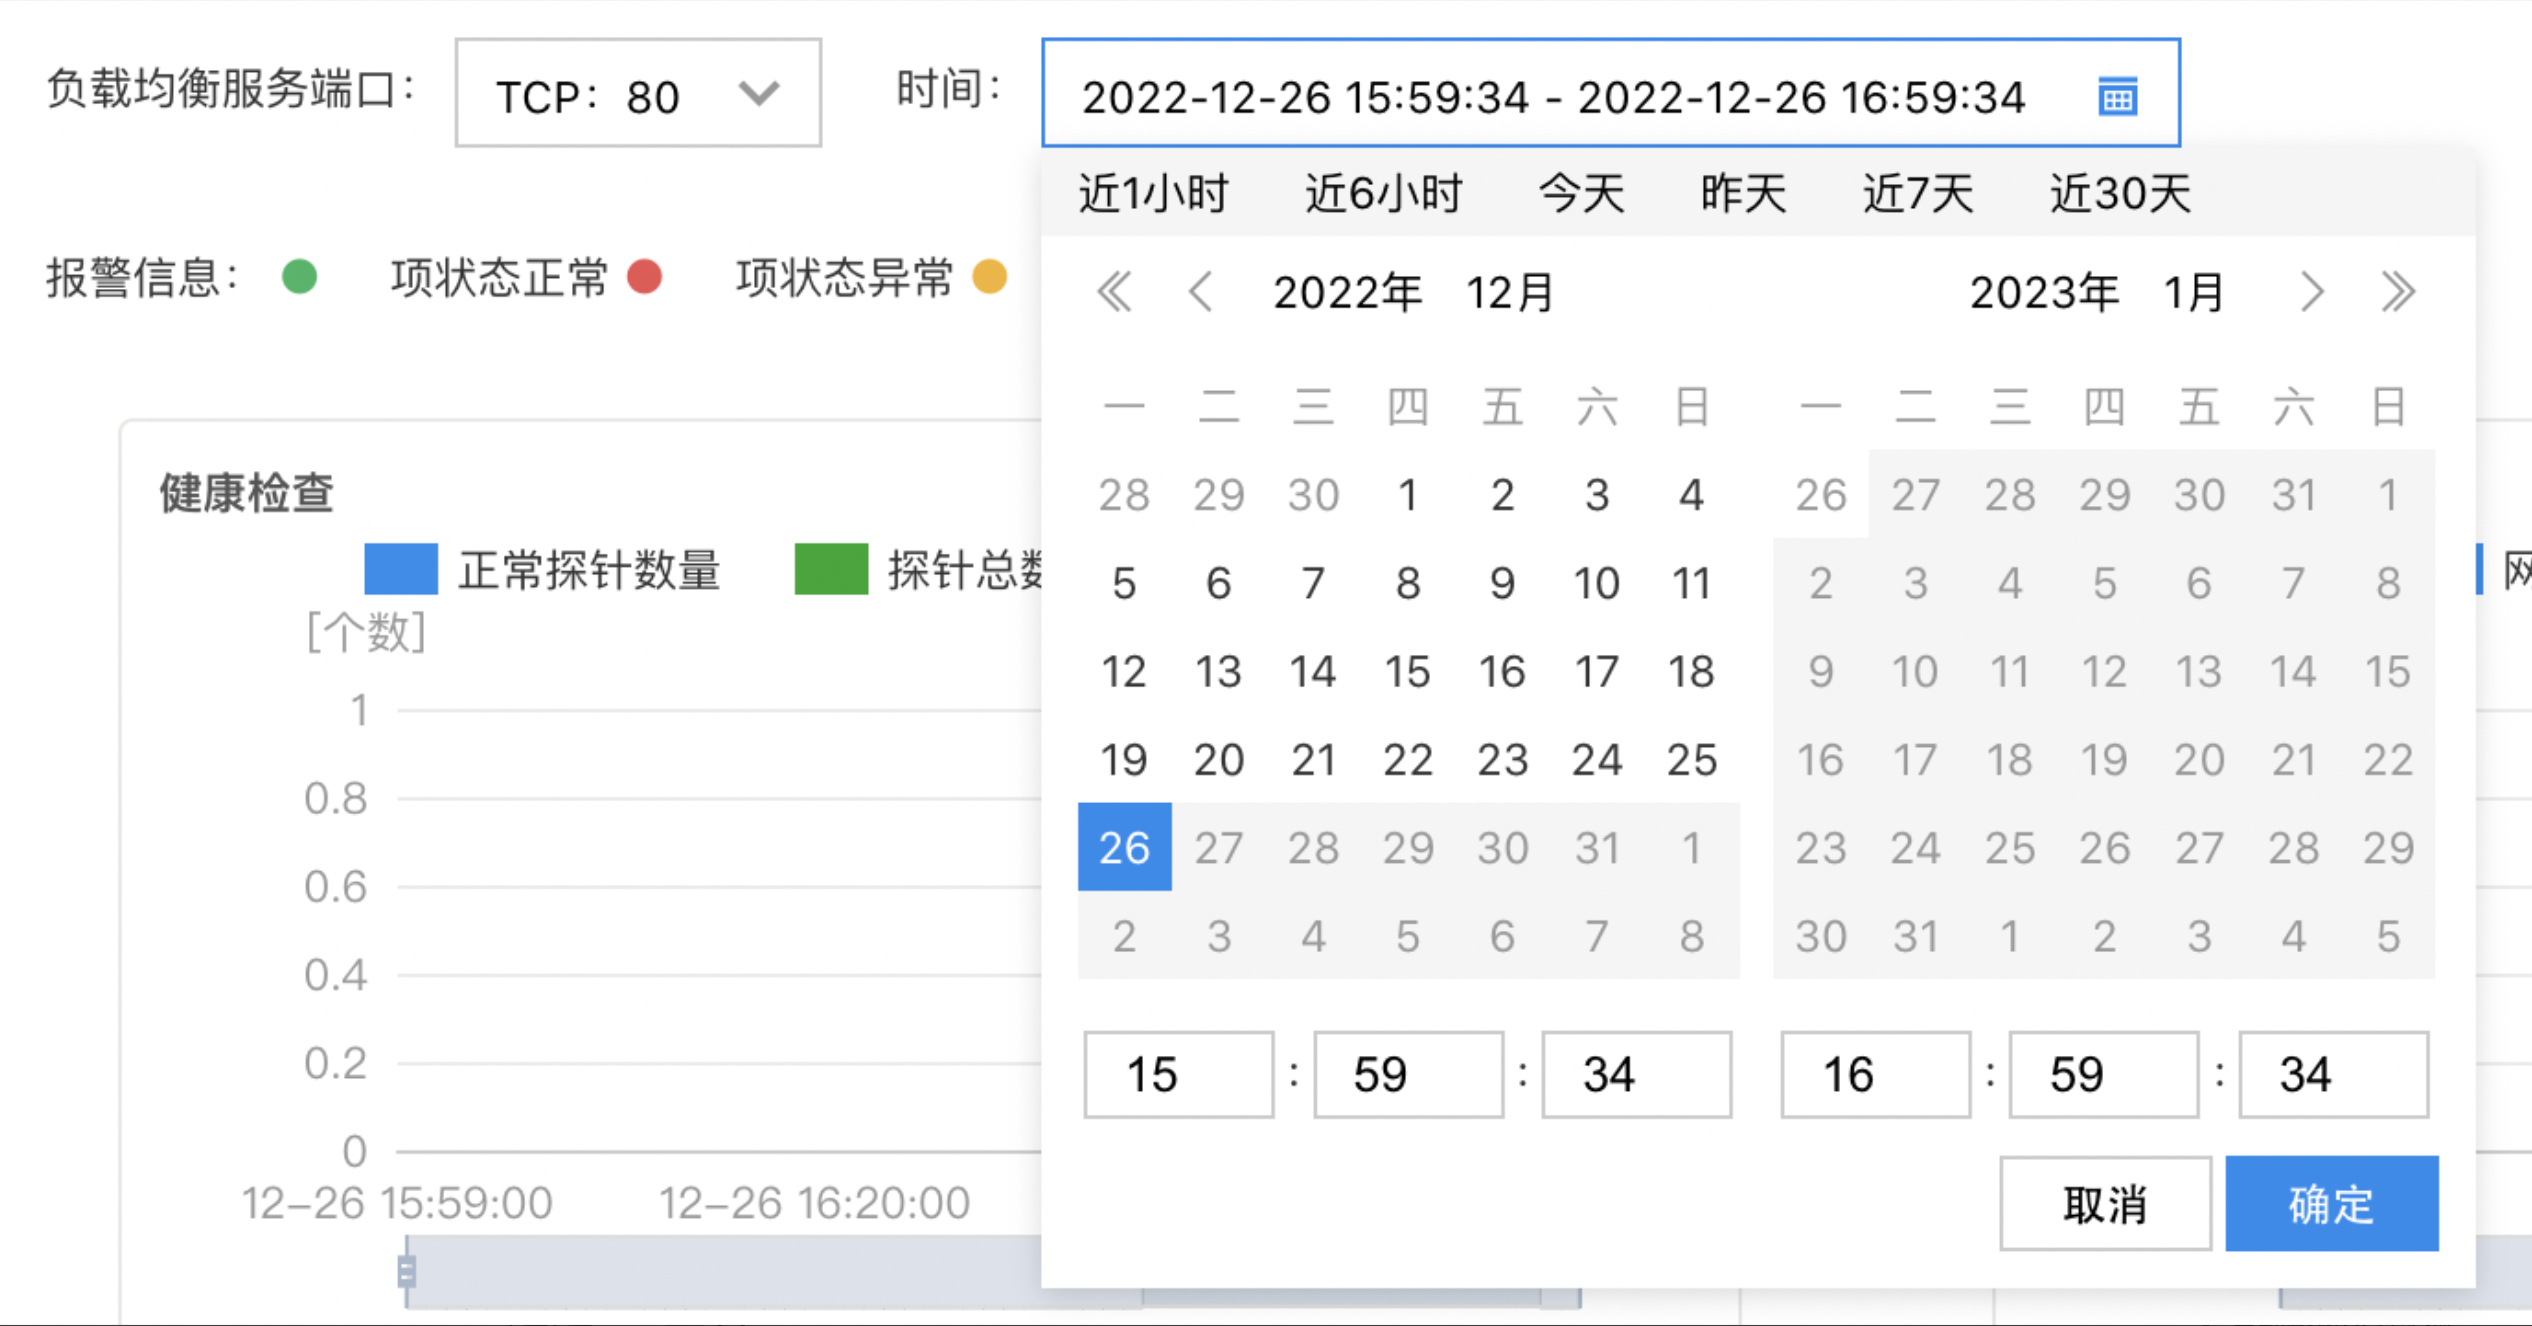
- By default, the system gives the monitor information within the last hour. To view more information, click the time to switch the time range, as shown in the following figure:
View via API
For detailed interfaces, refer to Baidu Cloud Monitor (BCM) Query Data Interface. For obtaining BLB monitor request parameters "scope", "metricName" and "dimensions", please refer to the following table:
| scope | metricName | dimensions |
|---|---|---|
| BCE_BLB | UnhealthyCount abnormal instance count TotalCount total instance count HealthyCount normal instance count RequestCount request count NetworkInBytes network ingress traffic NetworkOutBytes network egress traffic ActiveConnCount active connection count NetworkInPkgCount inbound packet count NetworkOutPkgCount outbound packet count |
BlbId + BlbPort are concatenated with a ".”, e.g., BlbId=lb-dd45e123, BlbPort=80 , then the instance is: lb-dd45e123.80 |
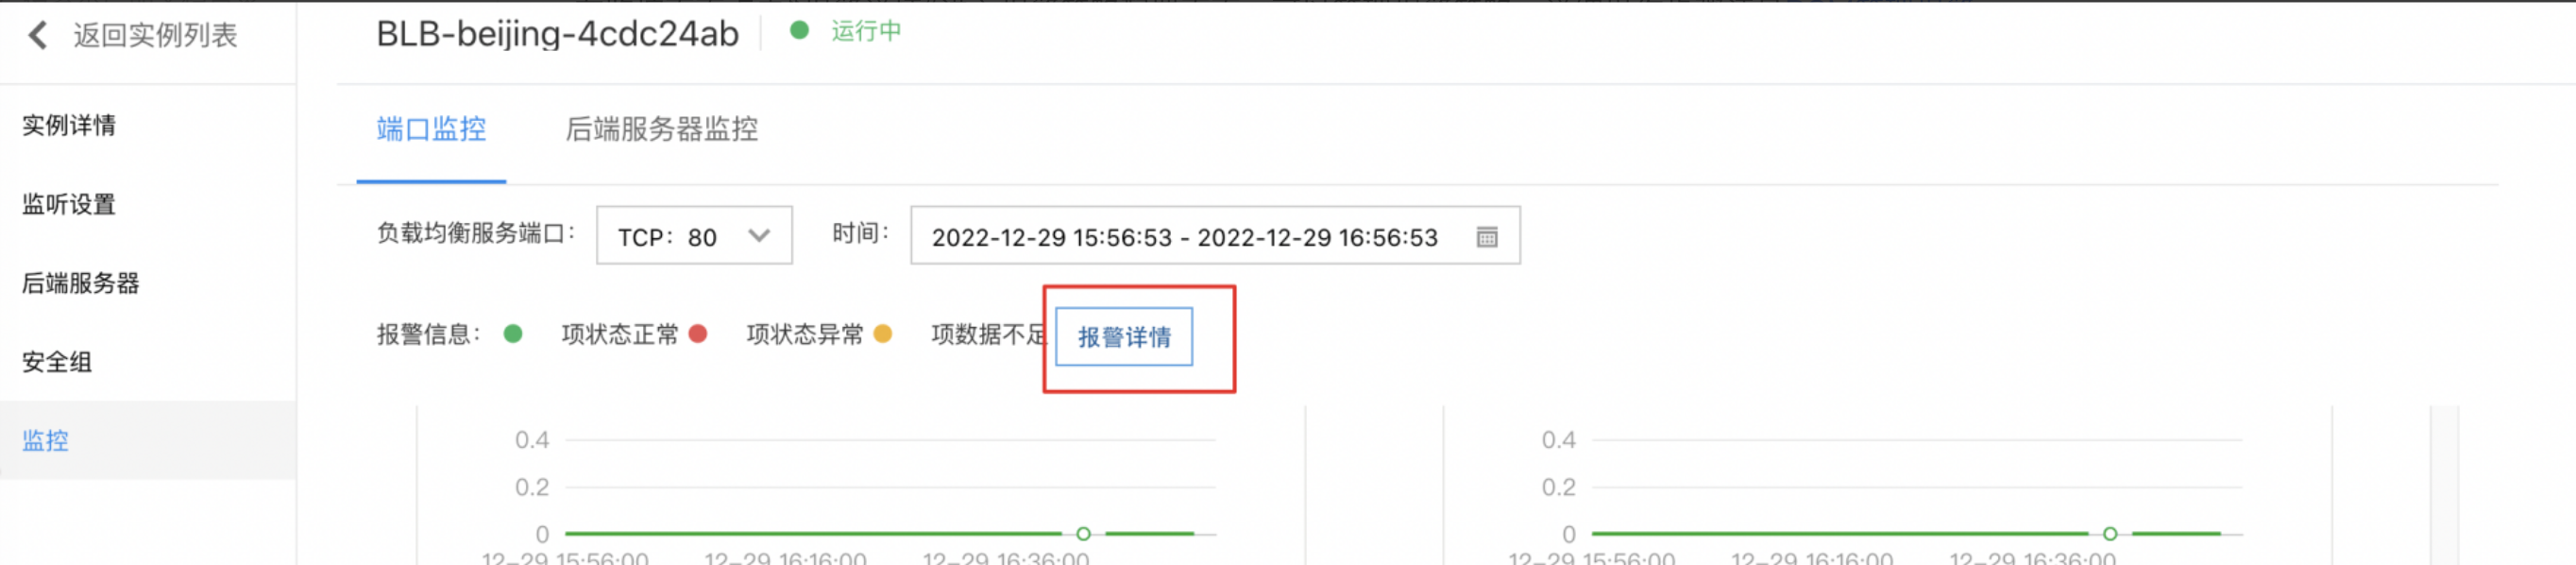
Manage Alarms
Click Alarm Details on the Monitor page to enter the alarm policy configuration page, where you can manage the alarm strategy. For detailed operation steps, please see BCM Alarm Management.
Release IPv6 instance
Manually release BLB instance
- Go to Products > Network > Load Balancer, open the Baidu Load Balancer (BLB) Management Console page, and select General-purpose IPv6 Instance to navigate to the Instance List page.
- Select the IPv6 instance you want to release and click "Release.\
- In the pop-up dialog box, click OK.
Automatically release BLB instance
After setting the automatic release of IPv6 instance, the instance will be automatically released at the set time. There are two ways to automatically release an IPv6 instance:
- Method I: For creating a new IPv6 instance, you can set it on the Create BLB Instance page.
- Click Products > Network > Load Balancer, access the Baidu Load Balancer (BLB) Management Console page, click General-purpose IPv6 Instance to enter the Instance List page. and select Create Load Balancer.
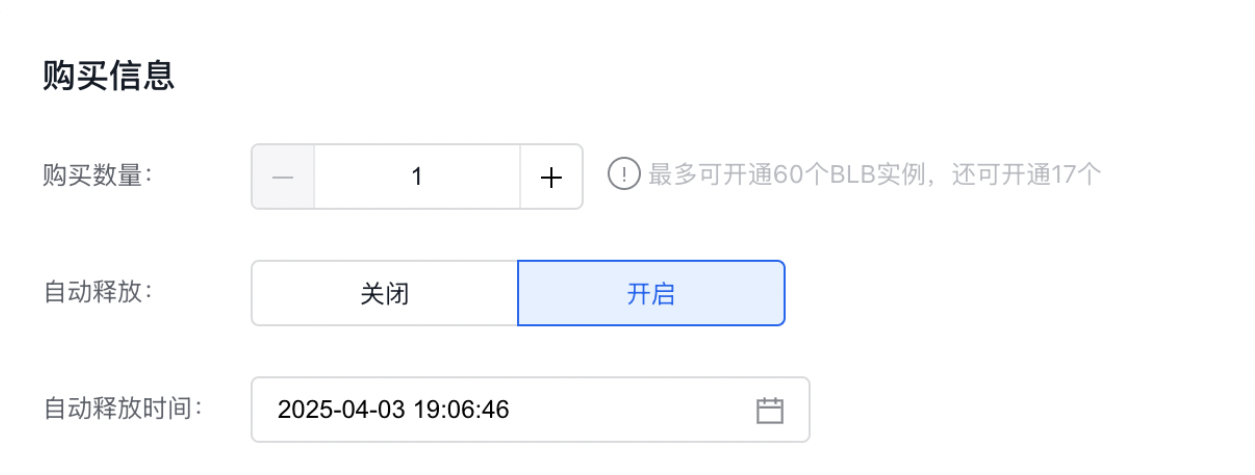
- Set the automatic release time of the BLB instance while creating the BLB instance, as shown in the following figure.
- Method II: For an already created BLB instance, you can set it on the BLB Instance Details page.
1. Select Products > Network > Load Balancer, access the Baidu Load Balancer (BLB) Management Console page, and click General-purpose IPv6 Instance to enter the Instance List page.
2. Click the load balancer name to access the Instance Details page.
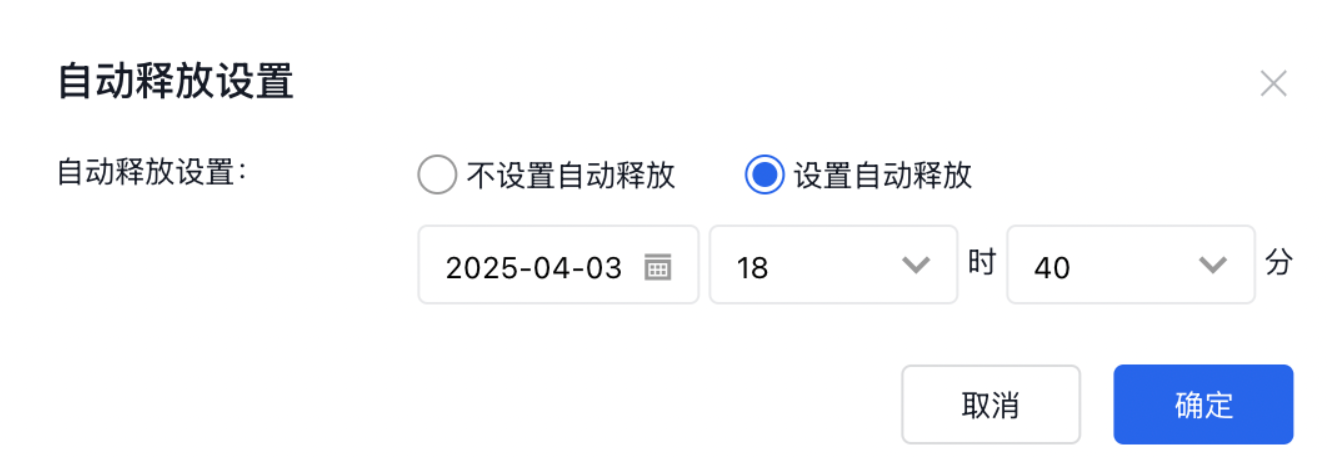
3. Click Auto Release Time - Set.
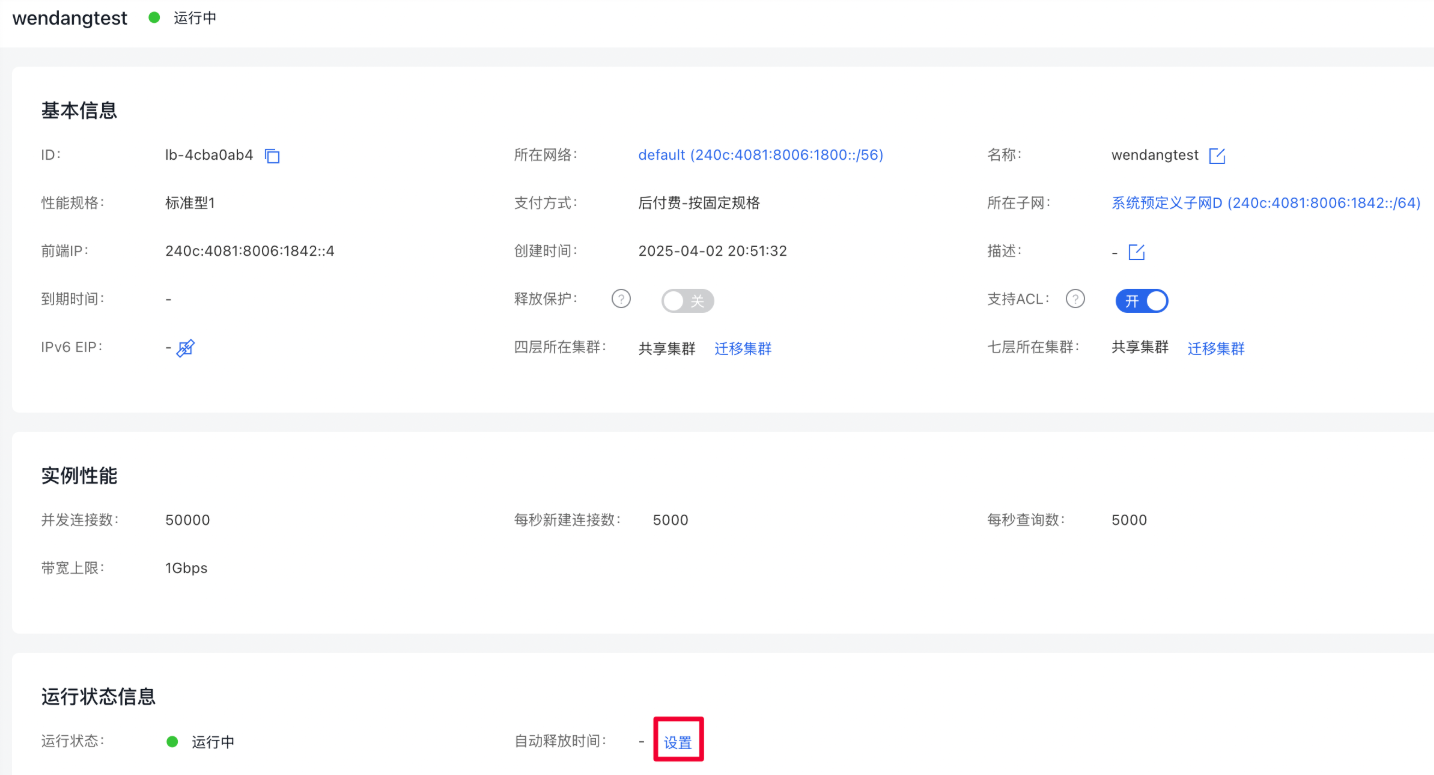
- In the pop-up window, select Set Auto Release, configure the release date and specific time below, and click OK to complete the setting.