
Load Balancer Security Protection Strategy
Scenario introduction
While ensuring public and private network traffic distribution, the load balancer service may face numerous security challenges that could significantly disrupt regular operations. This document highlights ways to strengthen system security and achieve traffic protection.
Attack prevention
Network ACL and security group
The load balancer can work with the VPC service's network ACL and security group functions to improve access security and control traffic of the real server. Combining network ACL and security group can help add three-layer filtering between "internal/external user access" and "real server group" to ensure secure access to real servers.
1. Create Security Group
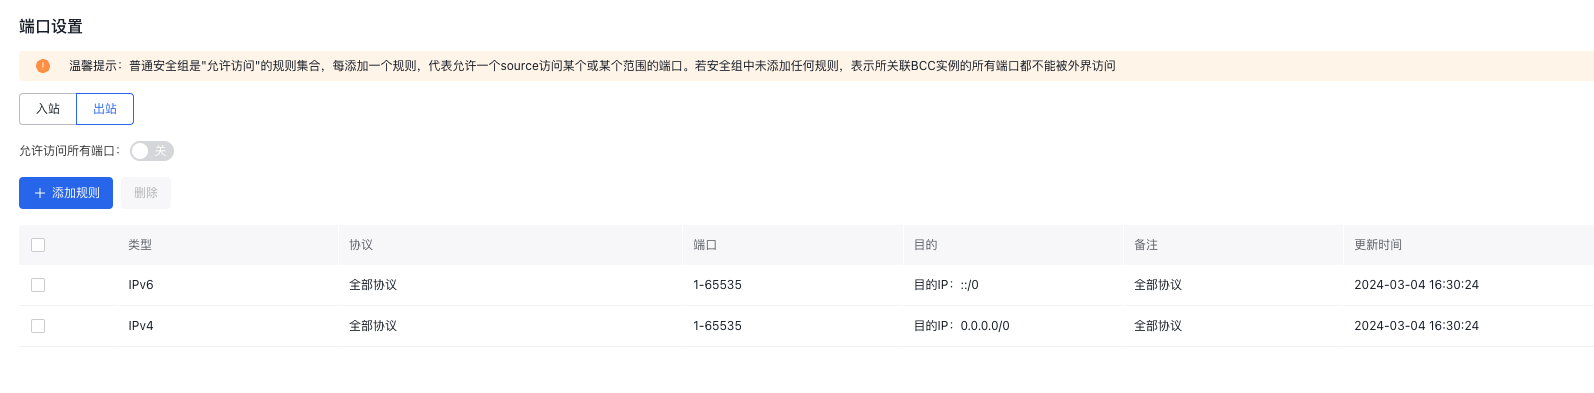
Click Create Security Group on the Security Group page Add egress and ingress rules in the Security Group creation page, such as:
- Ingress rules

- Egress rules
2. Associate the Load Balancer with the Security Group
Click the BLB instance name, navigate to Security Group in the left menu, select Associate Security Group from the Associated Security Group List, and choose the created Security Group in the pop-up window for association.
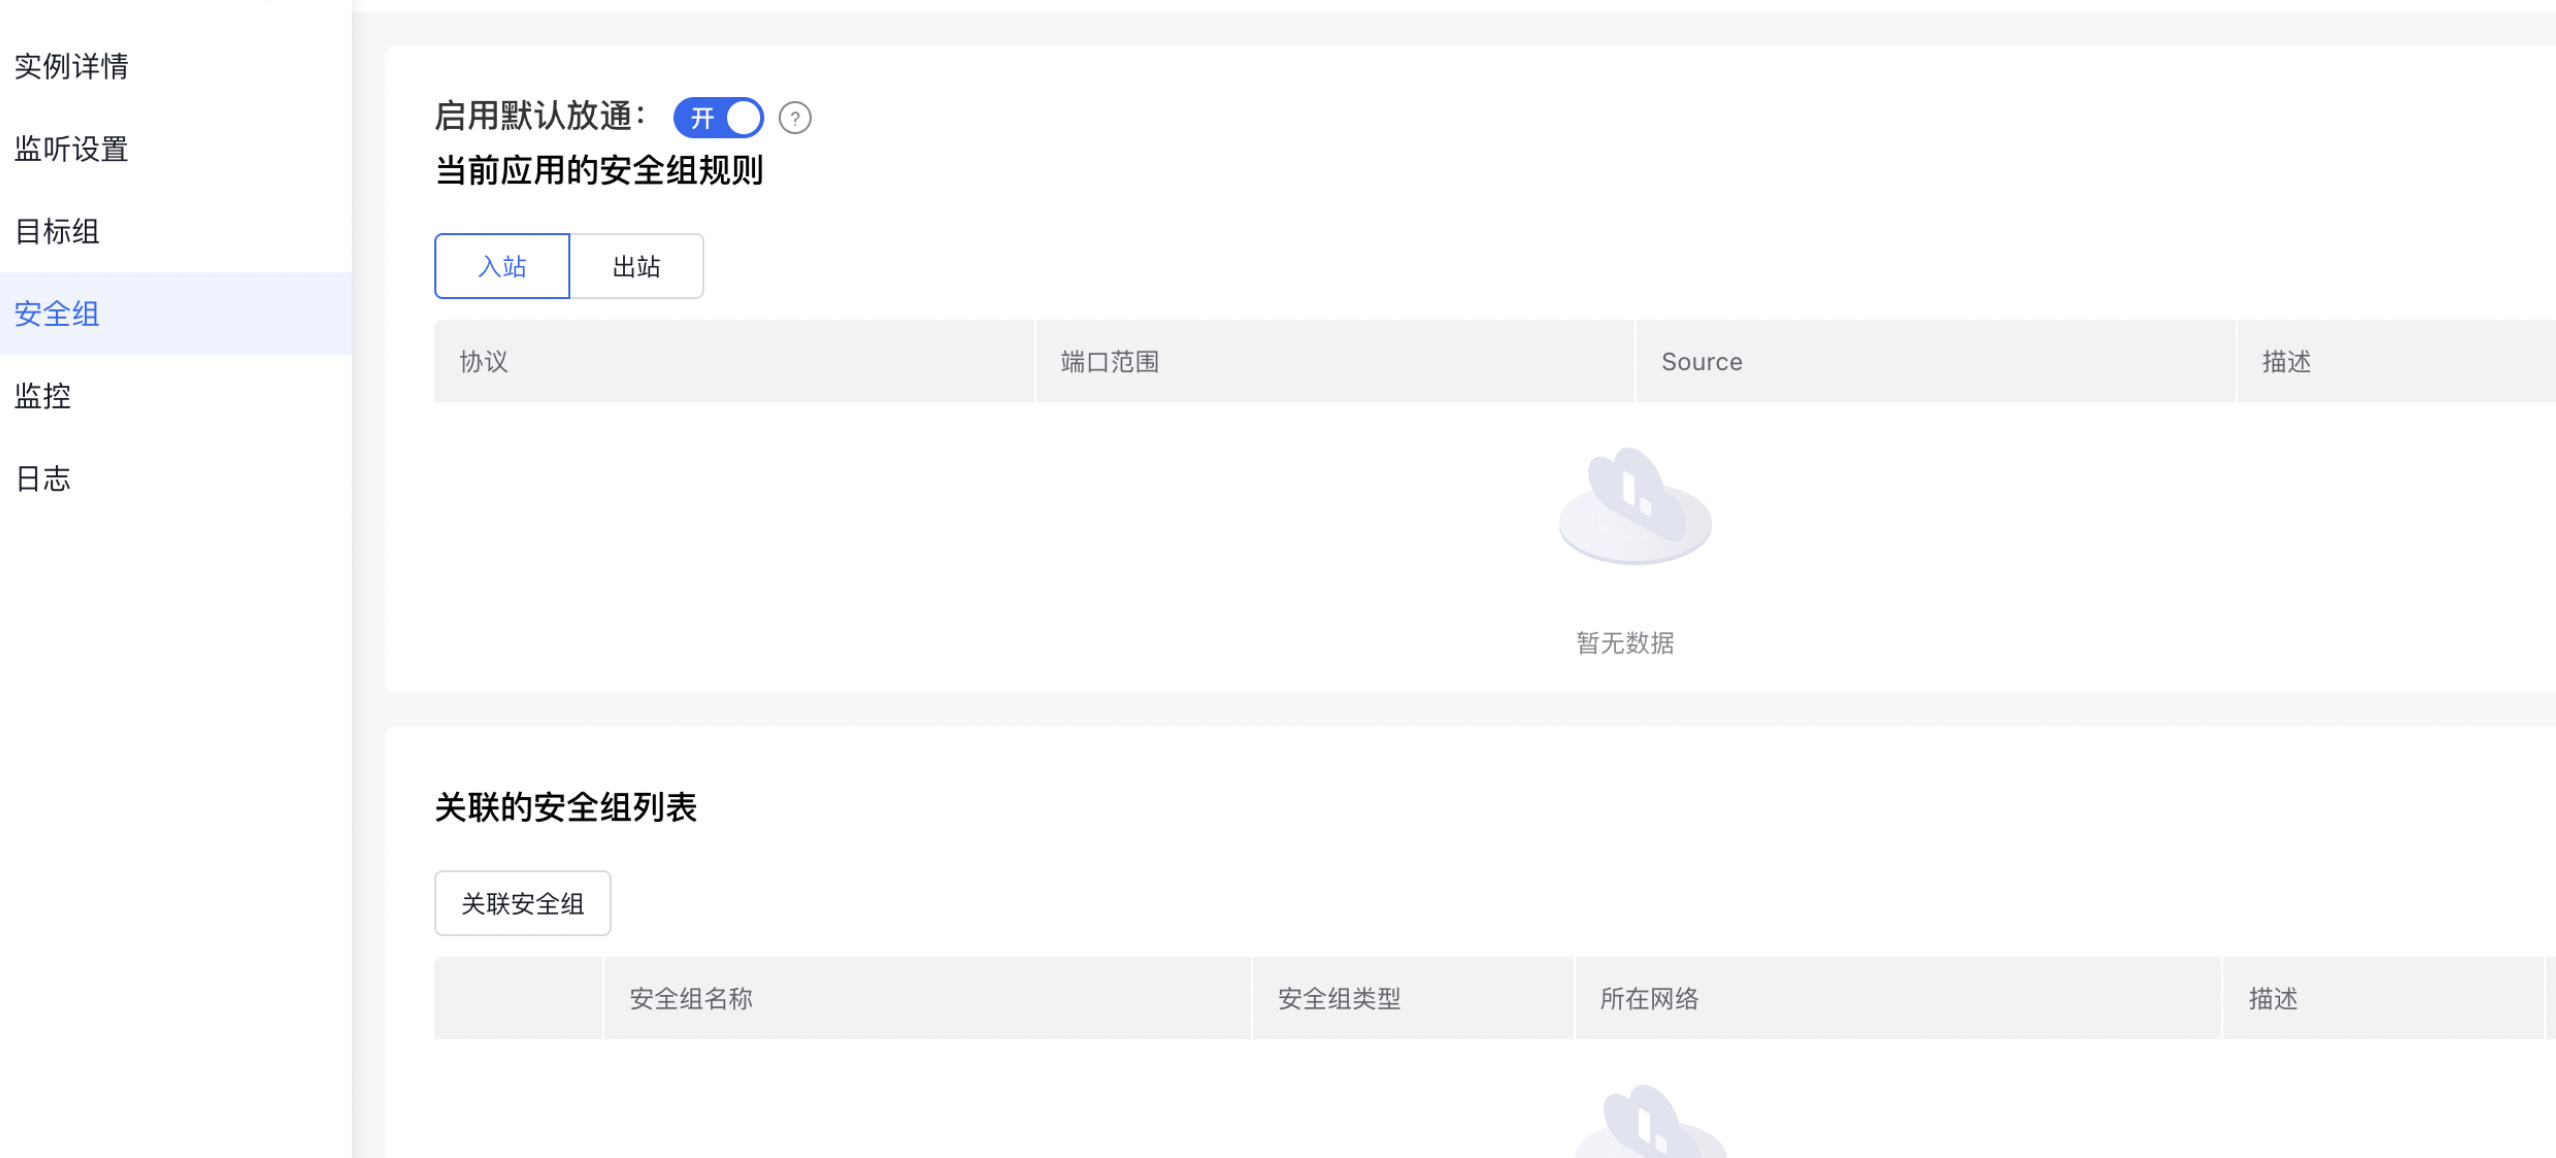
Note: When the Default Pass-Through switch is enabled, BLB and BCC will allow traffic by default; when disabled, the traffic from BLB will be controlled by the BCC security group.
3. Set VPC ACL
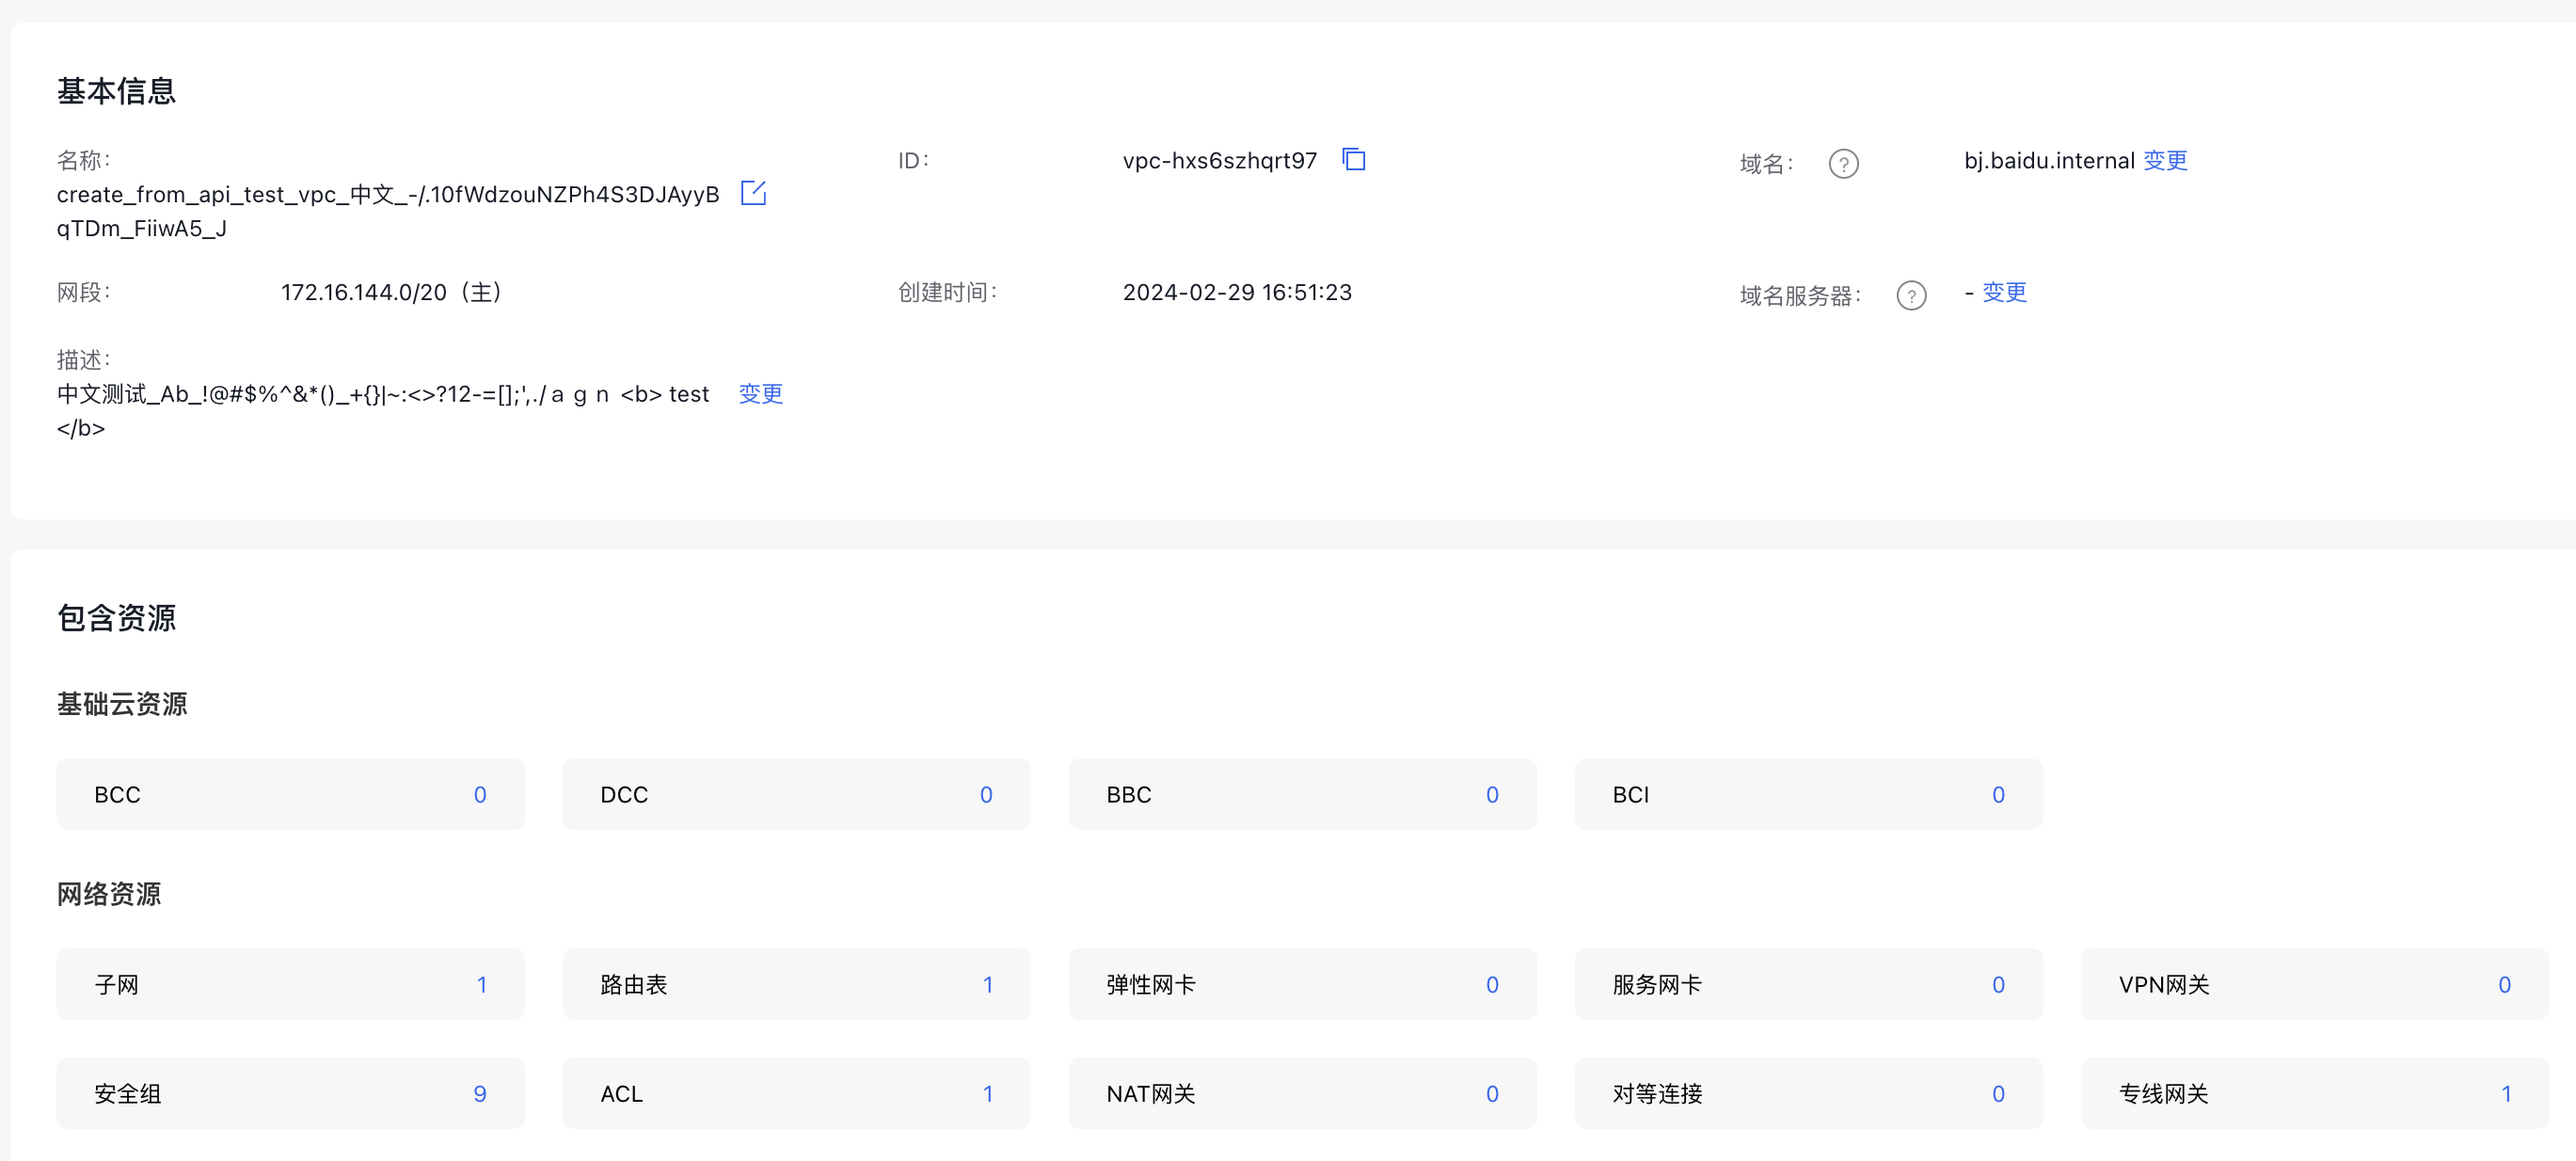
In addition to security groups, VPC ACL can be set to holistically control the subnet ingress traffic. Click the VPC name to enter the VPC details page, and then click the Virtual Private Cloud tag, select the corresponding instance name, locate the ACL under Included Resources - Network Resources, and click the blue number on the right.
 Enter to the ACL details page, click the dropdown arrow on the left, and configure egress and ingress rules.
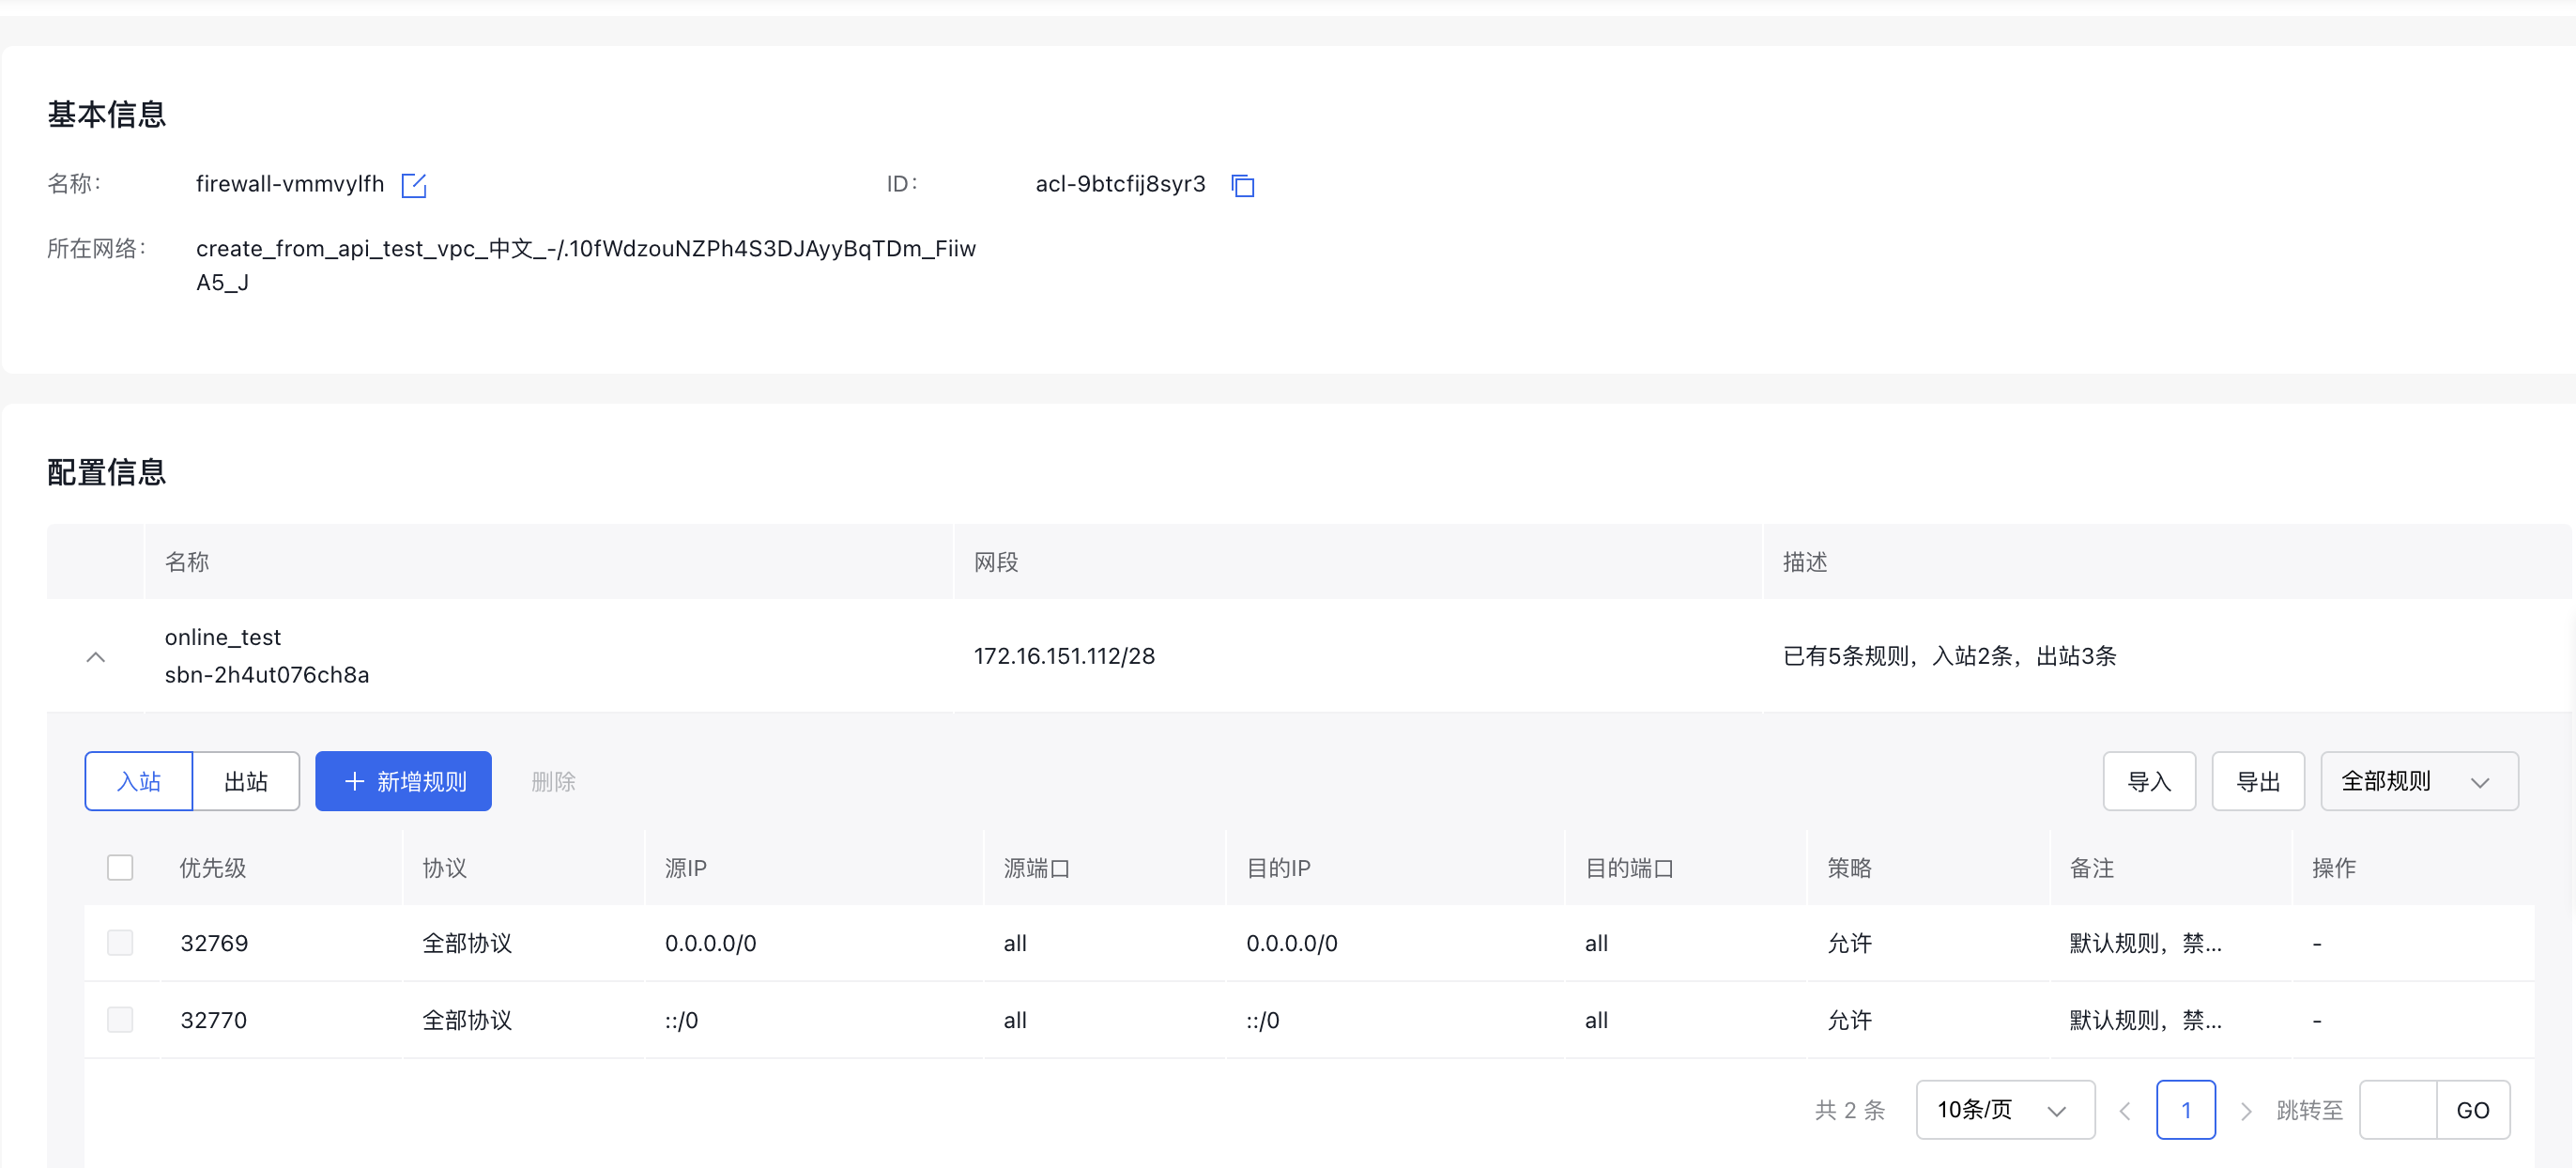 Afterwards, egress and ingress BLB traffic will undergo dual verification by the ACL of the VPC and the security group associated with the BLB. This will significantly enhance the security of the BLB instance.
Configure HTTPS access
HTTPS (Hypertext Transfer Protocol Secure) is the encrypted version of HTTP, designed to ensure secure data transmission. It uses the TLS (Transport Layer Security) or the older SSL (Secure Sockets Layer) protocol to safeguard the transfer of information.
Currently, Load Balancers allow configuration of listener ports using the HTTPS protocol, to secure data transfer between clients and servers, preventing eavesdropping and man-in-the-middle attacks.
Configuring an HTTPS listener requires the following steps:
1. Certificate acquisition
You can upload or purchase a new SSL certificate in Certificate Management. For detailed instructions, please refer to Certificate Purchase Guide and Certificate Upload Guide After completing the above process, you can view your issued or uploaded SSL certificates in Certificate Management. For detailed instructions, please refer to Certificate Management Guide. Later, you can select the above SSL certificate from the dropdown list when creating an application BLB HTTPS listener.
Note: Only server-type certificates are supported for listener configuration
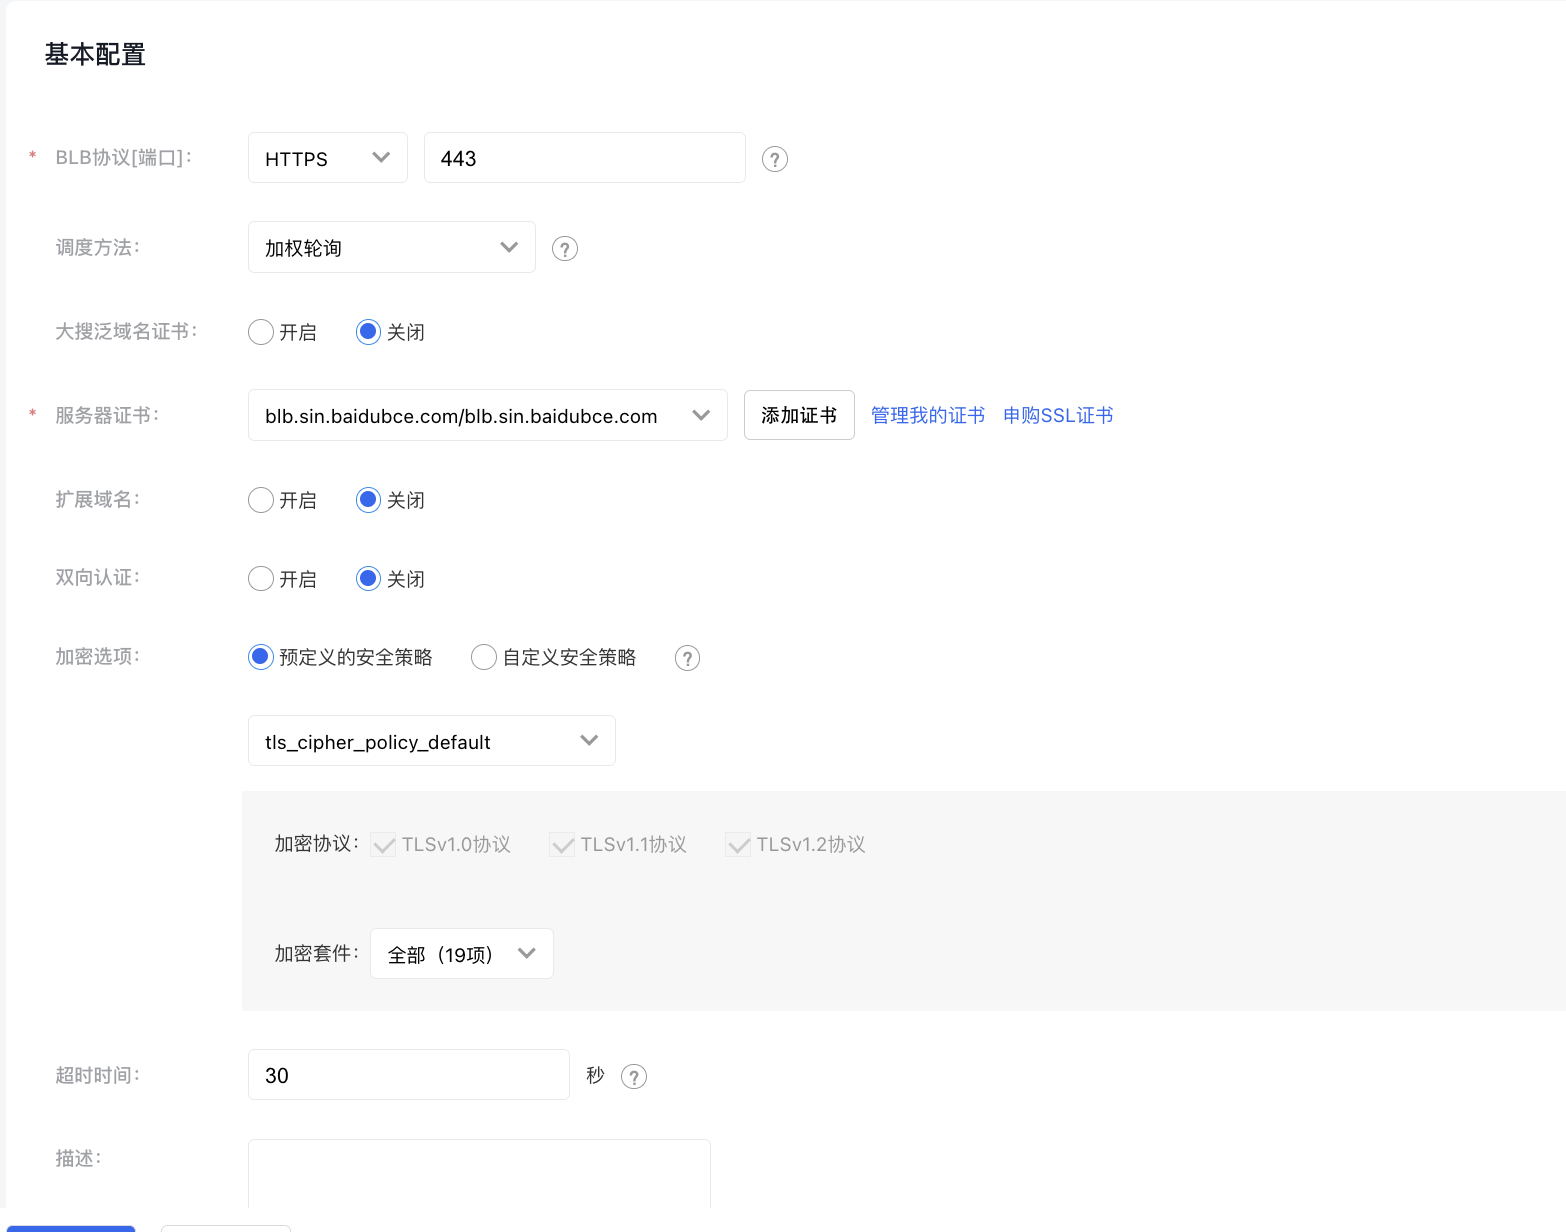
2. HTTPS listener configuration
Enabling HTTPS protocol listeners allows the load balancer to handle data encryption and decryption, enabling the backend service to focus solely on the service itself. Using the above configured certificate, you can configure an HTTPS listener to enhance service security.
HTTPS Listener Port Configuration Guide
Configuration example is as follows:
3. Enable mutual certification (optional)
Mutual authentication, also known as mutual SSL authentication or client certificate authentication, is a mechanism to improve security in network communications. In standard SSL/TLS connections, only the server provides its certificate for authentication, while the client doesn’t require verification. Mutual authentication mandates the client to present a valid certificate as well, ensuring that both parties verify each other. This significantly reduces the risk of impersonation and man-in-the-middle attacks.
3.1 Upload CA certificate
You can upload a CA certificate in Certificate Management, and select CA certificate during upload.
3.2 Configure mutual certification in HTTPS listener
When configuring the HTTPS listener, enable Mutual Certification and select the previously uploaded CA certificate
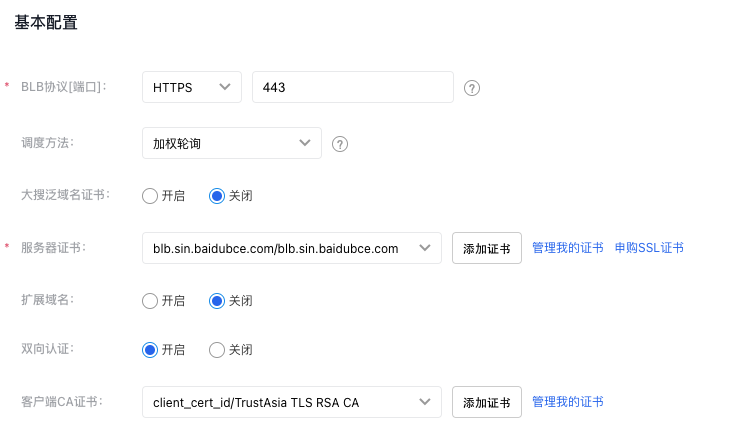 Ensure that clients accessing the Load Balancer are properly configured the same CA certificate and possess the certificate's private key.
Use the application firewall WAF to provide access security
Web application firewall (WAF) is a web security protection product provided by Baidu AI Cloud, which effectively guards against various web attacks, assists users in customizing access rules, and enhances the security of websites and other services. The innovative WAF technical architecture system enables to flexibly deploy WAF instances at various web service entry points, eliminating the vulnerability of hackers bypassing proxies to directly attack origin servers in traditional cloud WAF architectures. The integration of cloud security big data capabilities also enables WAF to more effectively and quickly help clients improve website security and availability. By binding WAF on the Application Load Balancer Instance, the security protection capability of the service entry can be improved.
1. Create a WAF Instance
Click to purchase WAF resources in the WAF Instance List.
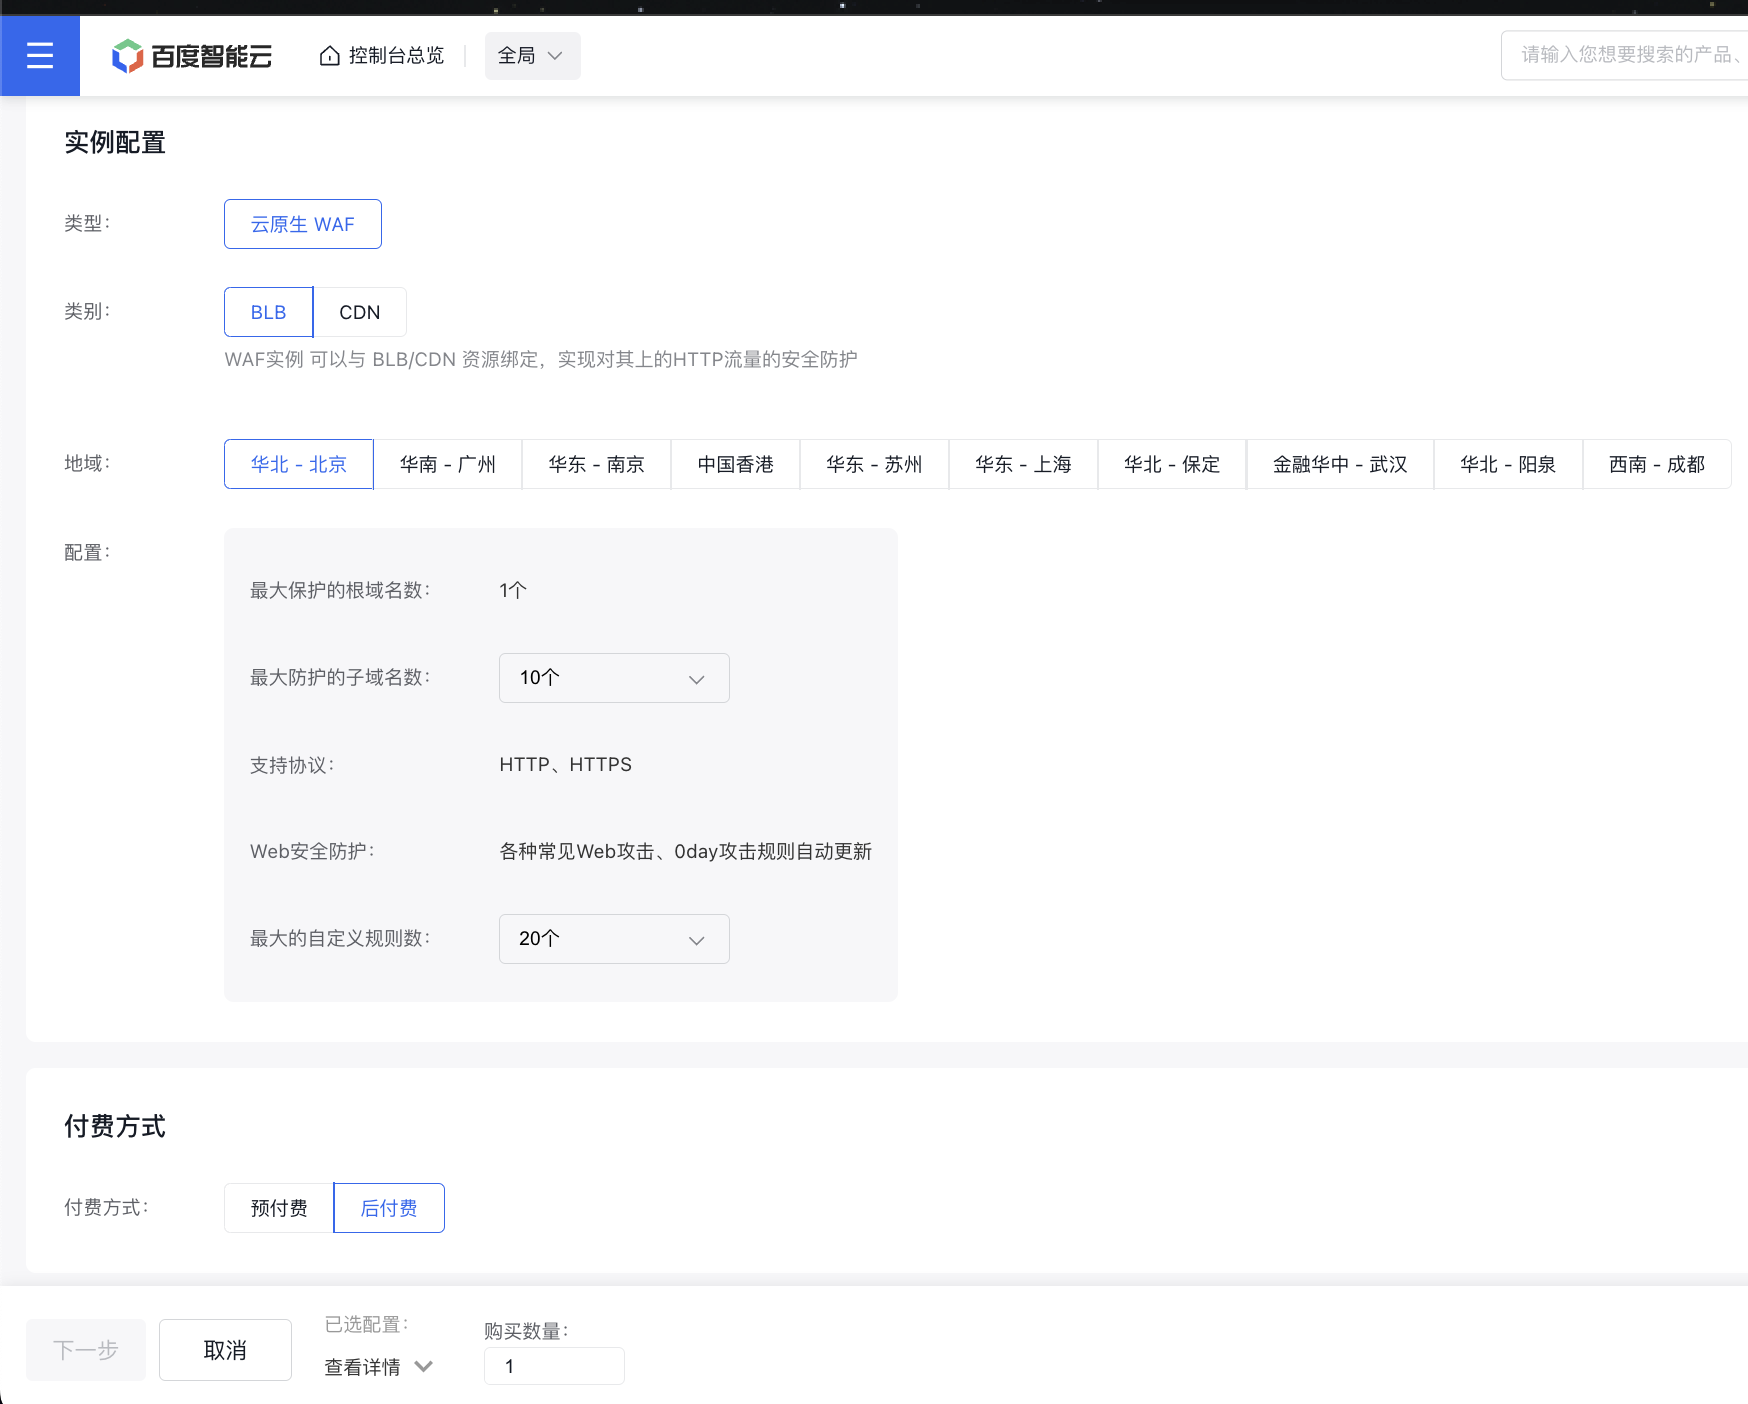
Select the BLB type to create a new one.
Configuration example:
2. Bind WAF with the BLB instance
After purchasing the WAF instance, you need to configure it to enable WAF protection. The configuration steps are as follows:
- Select "Product Services > Application Firewall Service WAF" to enter the BLB WAF list page, click Configuration under the Primary Domain Name column to access the configuration details page.
-
Enter the basic configuration details, including the Root Domain Name and the Subdomain to protect, then select the associated Load Balancer BLB Instance.
Only BLB instances in the same region as the WAF instance can be bound, only supporting HTTP/HTTPS protocols. If no eligible BLB instances are available, please visit Console to purchase or reconfigure a BLB instance.
Plain Text1 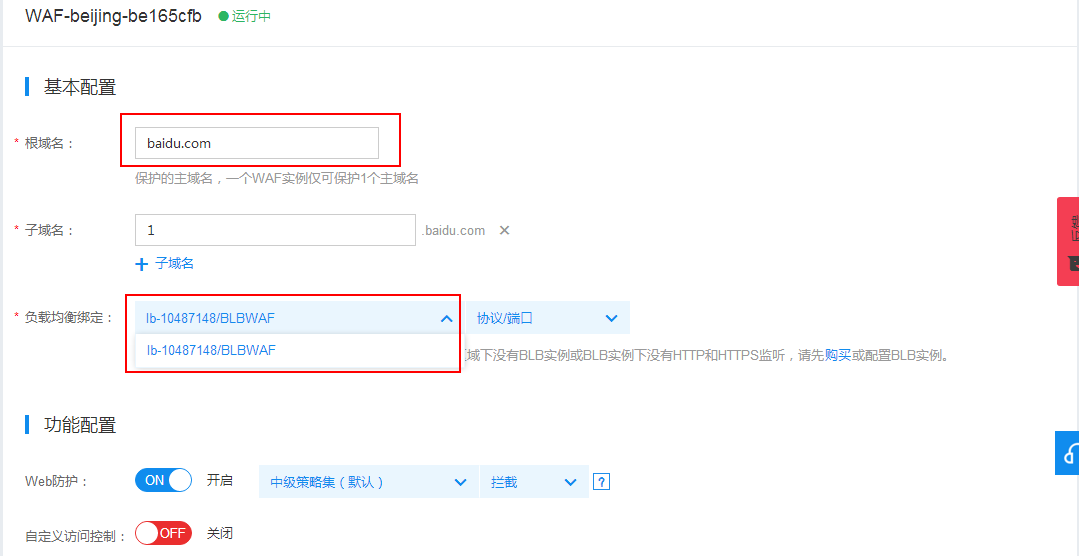 -
Turn on the web protection feature and choose a protection strategy level.
- The intermediate strategy level is enabled by default. Stricter security results in better protection. Advanced strategies provide high security but may lead to false blocking; the intermediate level combines medium and low strategies; low-level strategies are more lenient.
- Each protection strategy includes Intercept and Observe functions. Intercept mode immediately blocks attack requests, whereas Observe mode logs the requests without blocking them.
- (Optional) Enable custom access control by clicking the Add key. This allows for implementing service-specific controls and filtering through custom rules.
| Parameters | Description |
|---|---|
| Name | Custom access control rule name |
| Matching items | Match and process HTTP request fields such as Source IP Address, URL Address, Referer, and User-Agent. |
| Matching mode | Choose a matching mode: prefix, inclusion, or suffix. |
| Match string | Input the string to be used for access control. |
| Execution action | List strings in the blocklist or allow list |
| Mode | Block: Instantly block detected attack requests. Observe: Log detected attacks without blocking them. |
- Click Confirm Activation to finalize the BLB binding process.
Attack investigation
For abnormal access requests, you can enable access logs on the BLB, transfer them in BOS and BLS products, and leverage Baidu Cloud Monitor capability to analyze and troubleshoot abnormal access requests. Note: The capability to transfer access logs in BOS and BLS products is only supported for instances on shared clusters with Layer 7 listeners.
1. Baidu Cloud Monitor
Baidu Cloud Monitor displays the traffic received by the BLB instance, viewable on the Monitoring page of the LB instance.
- Click the BLB Name to enter the BLB Instance Details page, and then click Monitoring in the left navigation bar to access the Monitoring page of the current BLB instance. In the [Load Balancer Service Port] dropdown, select the port you wish to view. Special attention can be paid to whether there are abnormal surges in Network Input Bandwidth and Network Output Bandwidth.
2. Access logs
Access logs enable detailed recording of request information for BLB instances. For instances with access logs enabled, troubleshooting for abnormal traffic is facilitated. Before enabling this feature, ensure you create a BOS bucket to store the access details from BLB access logging.
2.1 Create a BOS bucket
On the BOS Homepage, click Bucket List in the left navigation bar, and then click the + button at the top to create a bucket. Configuration example:

2.2 Enable access logging
- Click the BLB Name to enter the BLB Instance Details page, and then click Logs in the left navigation bar to access the Log Details page of the current BLB instance. Enable Logging and store them in the bucket created earlier.
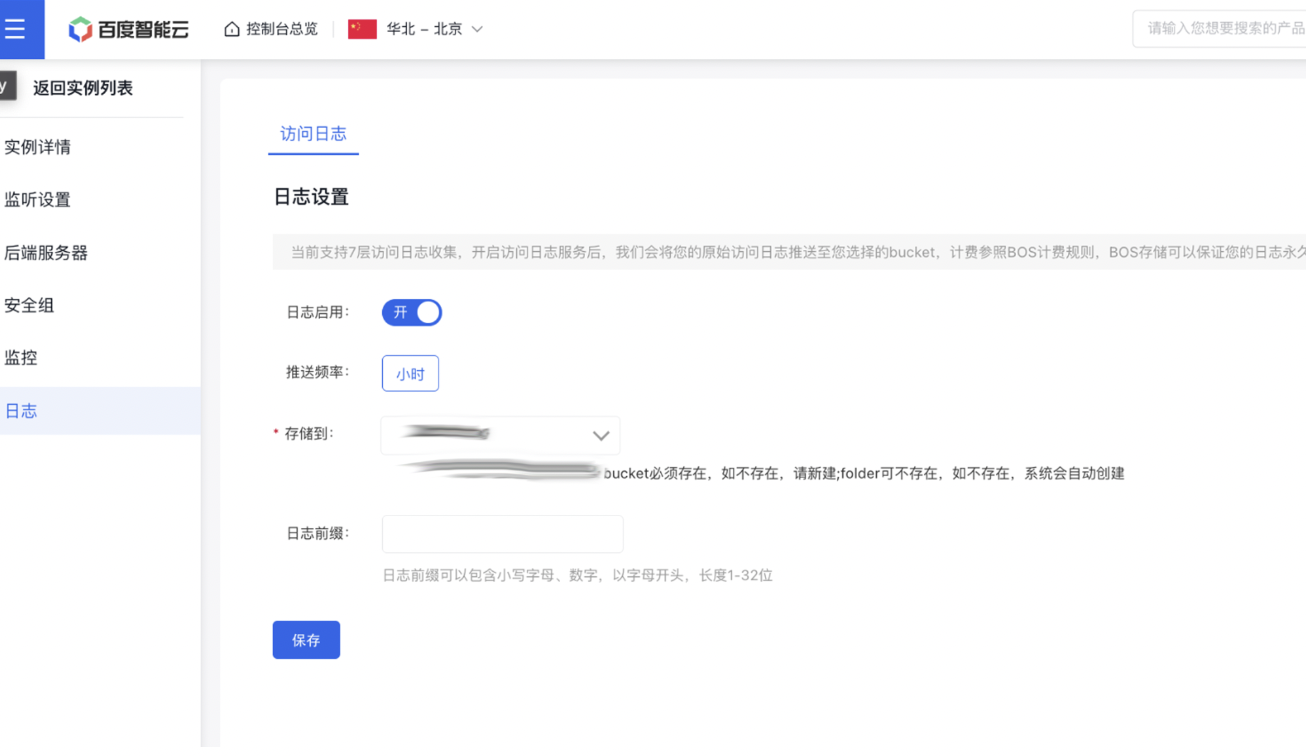 Subsequently, with access logs enabled, access information can be viewed in the selected bucket.