
Create file system
Updated at:2025-11-11
To utilize the Baidu AI Cloud File System (CFS) service, you need to first create a file system.
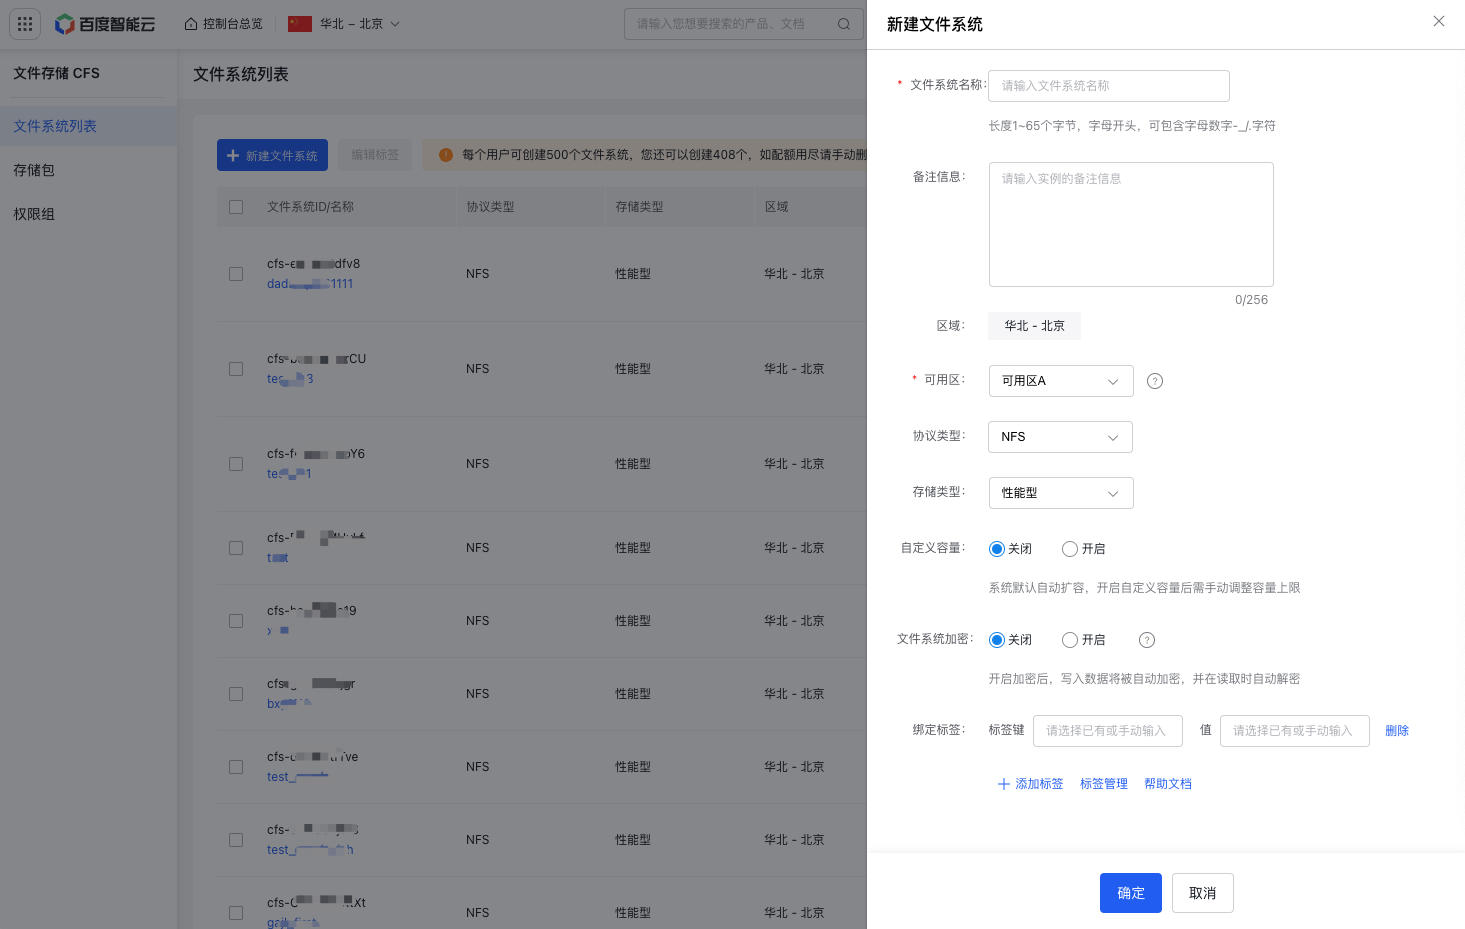
Navigate to the Cloud File System (CFS) -> File System List page in the Baidu AI Cloud management console. Click the Create File System button in the upper left corner of the page. Configure the required parameters for the file system in the pop-up window and complete the setup. Detailed purchase interface and parameters are as follows:
| Parameters | Description |
|---|---|
| File system name | Assign a name to the file system according to your requirements. |
| Remarks | Provide remarks for the instance (up to 256 characters) as needed. |
| Region | This indicates the region where the file system will be created. To change the region, select the region name in the upper left corner of the console. |
| Availability zone | Choose an availability zone for the file system based on your needs. Each region has multiple availability zones. All availability zones where the CFS service is deployed within the selected region will be displayed. While CFS file systems can be mounted across different availability zones, it is recommended to choose the same availability zone where your virtual machines/containers are located. This reduces latency caused by cross-zone access and ensures optimal performance. |
| Protocol type | Select the desired protocol for the file system. Currently, CFS supports NFS and SMB protocols. |
| Storage class | Choose between capacity-optimized and performance-optimized CFS types based on your requirements. |
| Custom capacity | Enable or disable custom capacity as needed. By default, the system auto-scales. If custom capacity is enabled, you will need to manually adjust the maximum capacity. |
| Capacity limit | If Custom Capacity is enabled, set the maximum capacity (upper limit) of the file system as needed. When the actual usage reaches this limit, write operations will be disabled, and you will need to adjust the capacity accordingly. |
| File system encryption | Once encryption is enabled, data will automatically be encrypted when written and decrypted when read. |
| Tag unbinding | By assigning tags to each cloud resource, you can easily classify, identify, and manage these resources. |
After configuring all parameters of the file system, click OK to create the file system successfully.
Once the file system is created, you will need to create a mount target to use the file system. Common statuses of file system instances include:
| Instance status | Status description |
|---|---|
| Running | File system instance running normally |
| Creating | File system instance creating |
| Deleting | File system instance deleting |
| Backup restoration failed | The file system instance failed to be restored from the backup copy of the source file system. It is recommended to delete the instance and retry the backup restoration |
| Backup restoring | The file system instance is being restored from the backup copy of the source file system. If the amount of data to be restored is large, the restoration process will take longer |
| Stopped | After your account is in arrears, the file system will stop running if any of the following conditions are met. 1. The file system is not bound to a storage package 2. The file system is bound to a storage package, but the package has been exhausted 3. The file system is bound to a storage package, but the package is not active or has expired For more details, see Insufficient balance reminders and debt handling. |