
Batch mounting and unmounting NFS CFS on multiple BCC
Batch Mount
If your business requires multiple BCC instances to share data in the same CFS file system, you can use the Cloud Assistant to execute batch mount commands, allowing multiple BCC instances to mount the same CFS file system with one click.
Prerequisites
Before performing batch mount, the following conditions must be met:
- The following has been down: Create File System, Add Mount Target.
- BCC instance and CFS mount target reside in the same VPC
- The BCC instance has been authorized in the permission group of the CFS file system mount target. For details, refer to Permission Group Management.
Usage restrictions
Before performing batch mount, you should master the following limitations for the operation:
- Only Linux operating systems on BCC instances support mounting NFS CFS file systems.
- Only BCC instances in the "Running" status are supported. If the BCC instance is in the "Starting" or "Stopped" status, please restore it to "Running" first.
- The Cloud Assistant is functioning normally.
- The BCC instance and the CFS file system must be in the same region. The Cloud Assistant does not support mounting BCC instances across different regions.
Operation steps
- Sign in to the Baidu Cloud Compute (BCC) console, and select O&M & & Monitor - Cloud Assistant in the left navigation bar.
- Log in to the Cloud Assistant Console, navigate to the Public Commands section in the left navigation bar, select the Batch Mount CFS command, and click Execute.
- Go to the command execution panel to configure the required command parameters, such as MountTargetDomain, LocalPath, CFSRemotePath, and AutomountOnBoot.
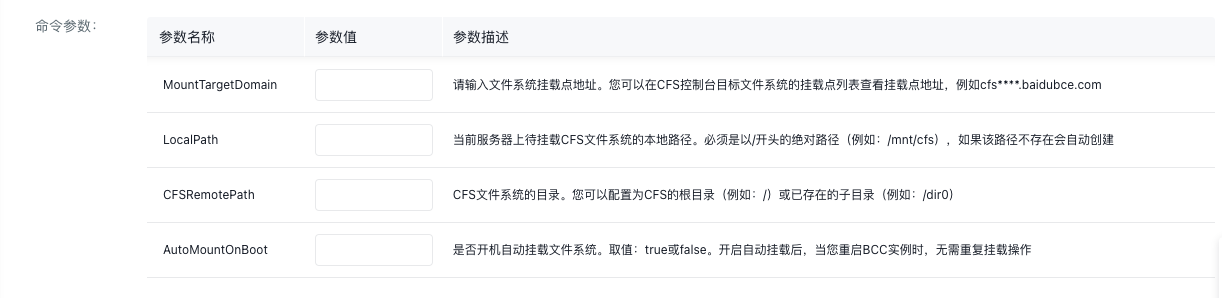
Command parameter |
Parameter description |
|---|---|
| MountTargetDomain | Enter the file system mount target address, which can be viewed in the mount target list of the target file system on the CFS console, e.g., cfs****.baidubce.com. For detailed operations, refer to View File System Details |
| LocalPath | Specify the local path on the current server where the CFS file system will be mounted. It must be an absolute path starting with / (e.g., /mnt/cfs). If the path doesn’t exist, it will be created automatically. |
| CFSRemotePath | Provide the directory path for the CFS file system. This can be set to the root directory of CFS (e.g., /) or an existing subdirectory (e.g., /dir0). |
| AutomountOnBoot | Set options for automatic mounting of the file system at startup. Values can be true or false. When automatic mounting is enabled, the mount operation does not need to be redone after restarting the BCC instance. |
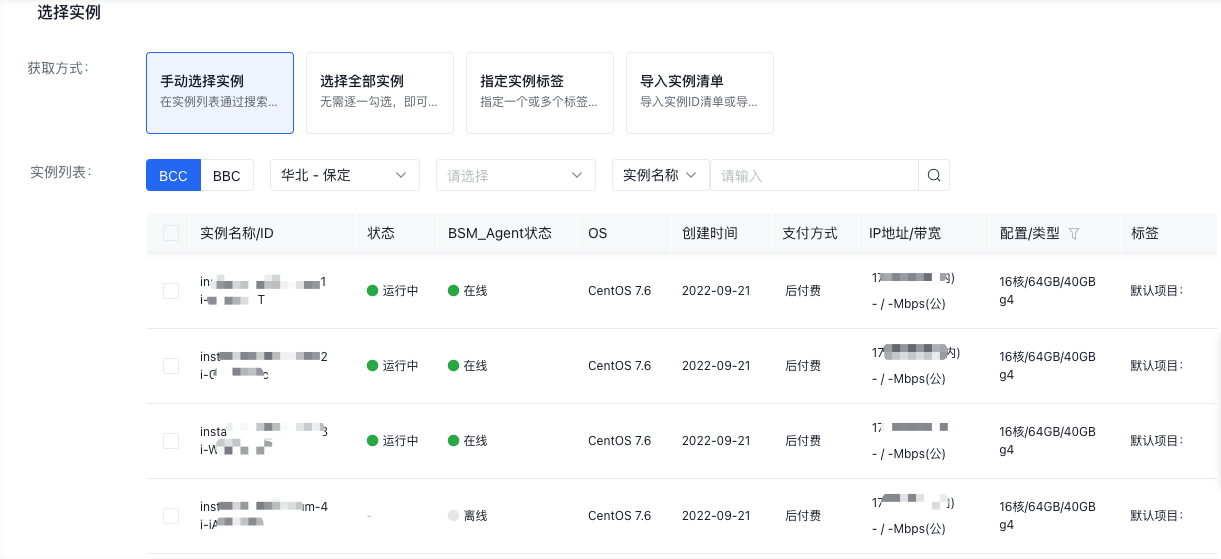
Select multiple BCC instances for batch mounting based on your service requirements. You can manually select instances, select all instances, specify instance tags, or import an instance inventory.
After clicking Execute, you can view the execution status in the records. Upon success, each BCC instance will display a success status. If it fails, troubleshoot using the error message and retry.

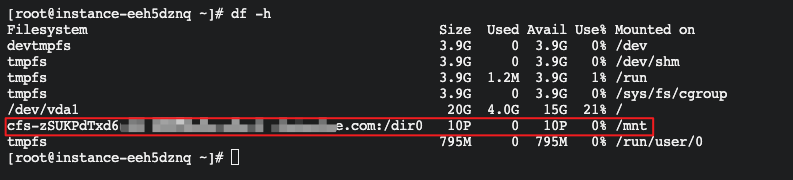
You can log in to a specific BCC instance to verify the mount. Use the following command to check. If the specified message is returned, it indicates a successful mount.
df -h
Batch unmount
If multiple BCC instances no longer need to share data in the same CFS file system, you can use Cloud Assistant to execute batch unmount commands.
- On the Public Command page in the Cloud Assistant Console, select the Batch Unmount CFS command and click Execute.
- Access the command execution panel and configure the LocalPath command parameter.

- Select the BCC instances to batch unmount, then click Execute to finalize the process.