
Lightweight Registry Access
Lightweight Registry
The lightweight registry mainly provides developers with local lightweight registry services, and provides developers with features such as service registration and discovery in the development, joint testing, and testing phases;
Precondition
Before using the lightweight registry, please make sure:
- Install JDK1.8 in the environment and complete the environment configuration;
- Ensure that ports 8600, 8500, 8301, 8302 and 8300 are not occupied;
Lightweight Registry Installation
Download
It is recommended that you find a machine (such as local), and download and install Consul registry under the premise of ensuring the normal network environment;
The lightweight registry Consul supports multiple operating systems, such as Windows, Linux/MacOS, please download as needed:
- Download address of Consul official website, It is recommended that you use version 1.6.1;
- Baidu AI Cloud download address;
Installation
Port check
Before installing the Consul lightweight registry, please make sure that the ports below are not occupied.
| Use | Default port |
|---|---|
| DNS: The DNS server (TCP and UDP) | 8600 |
| HTTP: The HTTP API (TCP Only) | 8500 |
| LAN Serf: The Serf LAN port (TCP and UDP) | 8301 |
| Wan Serf: The Serf WAN port (TCP and UDP) | 8302 |
| server: Server RPC address (TCP Only) | 8300 |
Installation Steps
1.Unzip the downloaded installation package, and you will find that it contains Consul binary files. 2.Start as follows
Windows operation system:
.\consul.exe agent -dev Linux /MacOS System:
./consul agent -dev Description: You can also add the location of the consul file to the PATH environment variable to facilitate the execution of commands anywhere;
3.To verify whether it is started, visit the address http://127.0.0.1:8500 to check whether the UI starts normally. After the normal start, you can click on Nodes through the UI interface to observe Healthy Nodes. Normally, a node will be displayed and the node is Leader node.
Use a Lightweight Registry
SDK Description
<dependency>
    <groupId>com.baidubce.formula</groupId>
    <artifactId>spring-cloud-formula-cnap</artifactId>
    <version>{version}</version>
</dependency>
The version number information version can be found in Maven Warehouse to find and use the latest version.
Create a provider
Create a service provider application project locally, add dependencies, enable service registration and discovery features, and designate the registry as the local registry.
1.Create a Maven project named provider-demo, select 1.8 for JDK. 2.Add dependency in pom.xml.
<parent>
    <groupId>org.springframework.boot</groupId>
    <artifactId>spring-boot-starter-parent</artifactId>
    <version>2.0.7.RELEASE</version>
    <relativePath/>
</parent>

<dependencyManagement>
    <dependencies>
        <dependency>
            <groupId>org.springframework.cloud</groupId>
            <artifactId>spring-cloud-dependencies</artifactId>
            <version>Finchley.SR2</version>
            <type>pom</type>
            <scope>import</scope>
        </dependency>
    </dependencies>
</dependencyManagement>

<dependencies>
    <!-- Add dependency  -->
    <dependency>
        <groupId>com.baidubce.formula</groupId>
        <artifactId>spring-cloud-formula-cnap</artifactId>
        <version>{version}</version>
    </dependency>
    <dependency>
        <groupId>org.springframework.boot</groupId>
        <artifactId>spring-boot-starter-web</artifactId>
    </dependency>
</dependencies>
Here we take Spring boot 2.0.7.REALEASE and Spring Cloud Finchley.SR2 as examples to add corresponding dependencies.
3.Create provider startup and enable service registration and discovery.
import org.springframework.boot.SpringApplication;
import org.springframework.boot.autoconfigure.SpringBootApplication;
import org.springframework.cloud.client.discovery.EnableDiscoveryClient;

@SpringBootApplication
@EnableDiscoveryClient
public class ProviderApplication {

    public static void main(String[] args) {
        SpringApplication.run(ProviderApplication.class, args);
    }
}
4.Create a simple Controller including a method to get the parameters in the URL.
import org.springframework.web.bind.annotation.PathVariable;
import org.springframework.web.bind.annotation.RequestMapping;
import org.springframework.web.bind.annotation.RequestMethod;
import org.springframework.web.bind.annotation.RestController;

@RestController
@RequestMapping(value = "/echo")
public class EchoController {

    @RequestMapping(value = "/{message}", method = RequestMethod.GET)
    public String echo(@PathVariable String message) {

        return message;
    }
}
5.Create a file application.properties in the src\main\resources path, add the following configuration in application.properties, and specify the address information of the registry. If you do not specify the address of the registry, the default address is http://127.0.0.1:8500.
spring.application.name=provider-demo
server.port=10001

# The default registry address information is as follows; if you deploy on other machines, please change to the corresponding machine address information
formula.discovery.host=http://127.0.0.1
formula.discovery.port=8500
6.Validation results
i) Start the main function in ProviderApplication;
ii) Visit the registry console http://127.0.0.1:8500;
iii) Select Services at the top to view the corresponding registered service information, you can see that the provider-demo is already included in the service list, and click the service name to query the details of the service;
Create a consumer
Create a service consumer application project locally, add dependencies, enable service registration and discovery features, and designate the registry as the local registry.
Meanwhile, the service provider is called through the RestTemplate and FeignClient respectively.
1.Create a Maven project named consumer-demo, select 1.8 for JDK. 2.Add dependency in pom.xml.
<parent>
    <groupId>org.springframework.boot</groupId>
    <artifactId>spring-boot-starter-parent</artifactId>
    <version>2.0.7.RELEASE</version>
    <relativePath/>
</parent>

<dependencyManagement>
    <dependencies>
        <dependency>
            <groupId>org.springframework.cloud</groupId>
            <artifactId>spring-cloud-dependencies</artifactId>
            <version>Finchley.SR2</version>
            <type>pom</type>
            <scope>import</scope>
        </dependency>
    </dependencies>
</dependencyManagement>

<dependencies>

    <!-- Add dependency  -->
    <dependency>
        <groupId>com.baidubce.formula</groupId>
        <artifactId>spring-cloud-formula-cnap</artifactId>
        <version>{version}</version>
    </dependency>
    <dependency>
        <groupId>org.springframework.boot</groupId>
        <artifactId>spring-boot-starter-web</artifactId>
    </dependency>
    <dependency>
        <groupId>org.springframework.cloud</groupId>
        <artifactId>spring-cloud-starter-openfeign</artifactId>
    </dependency>
</dependencies>
Here we take Spring boot 2.0.7.REALEASE and Spring Cloud Finchley.SR2 as examples to add corresponding dependencies.
3.Create consumer startup and enable service registration and discovery.
import org.springframework.boot.SpringApplication;
import org.springframework.boot.autoconfigure.SpringBootApplication;
import org.springframework.cloud.client.discovery.EnableDiscoveryClient;
import org.springframework.cloud.client.loadbalancer.LoadBalanced;
import org.springframework.cloud.openfeign.EnableFeignClients;
import org.springframework.context.annotation.Bean;
import org.springframework.web.client.RestTemplate;

@SpringBootApplication
@EnableDiscoveryClient
@EnableFeignClients
public class ConsumerApplication {

    @LoadBalanced
    @Bean
    public RestTemplate restTemplate() {
        return new RestTemplate();
    }

    public static void main(String[] args) {
        SpringApplication.run(ConsumerApplication.class, args);
    }
}
As above, you need to add @EnableFeignClients to register and activate FeignClient, add @LoadBalance annotation to integrate RestTemplate with service discovery.
4.Create FeignClient interface
import org.springframework.cloud.openfeign.FeignClient;
import org.springframework.web.bind.annotation.PathVariable;
import org.springframework.web.bind.annotation.RequestMapping;
import org.springframework.web.bind.annotation.RequestMethod;

@FeignClient(name = "provider-demo")
public interface EchoService {
    @RequestMapping(value = "/echo/{message}", method = RequestMethod.GET)
    String echo(@PathVariable("message") String message);
}
Among them, The provider-demo of FeignClient is the service name name configured in the provider project. (spring.application.name).
5.Create a simple Controller including a method to get the parameters in the URL.
import org.springframework.beans.factory.annotation.Autowired;
import org.springframework.web.bind.annotation.PathVariable;
import org.springframework.web.bind.annotation.RequestMapping;
import org.springframework.web.bind.annotation.RequestMethod;
import org.springframework.web.bind.annotation.RestController;
import org.springframework.web.client.RestTemplate;

@RestController
public class EchoController {

    @Autowired
    private RestTemplate restTemplate;

    @Autowired
    private EchoService echoService;

    @RequestMapping(value = "/echo-rest/{message}", method = RequestMethod.GET)
    public String rest(@PathVariable String message) {
        return restTemplate.getForObject("http://provider-demo/echo/" + message, String.class);
    }

    @RequestMapping(value = "/echo-feign/{message}", method = RequestMethod.GET)
    public String feign(@PathVariable String message) {
        return echoService.echo(message);
    }
}
6.Create a file application.properties in the src\main\resources path, add the following configuration in application.properties, and specify the address information of the registry. If you do not specify the address of the registry, the default address is http://127.0.0.1:8500.
spring.application.name=consumer-demo
server.port=9999

# The default registry address information is as follows; if you deploy on other machines, please change to the corresponding machine address information
formula.discovery.host=http://127.0.0.1
formula.discovery.port=8500
7.Validation results
i) Start the main function in ConsumerApplication;
ii) Visit the registry console http://127.0.0.1:8500;
iii) Select Services at the top to view the corresponding registered service information, you can see that consumer-demo is already included in the service list, and click the service name to query the details of the service;
Local test
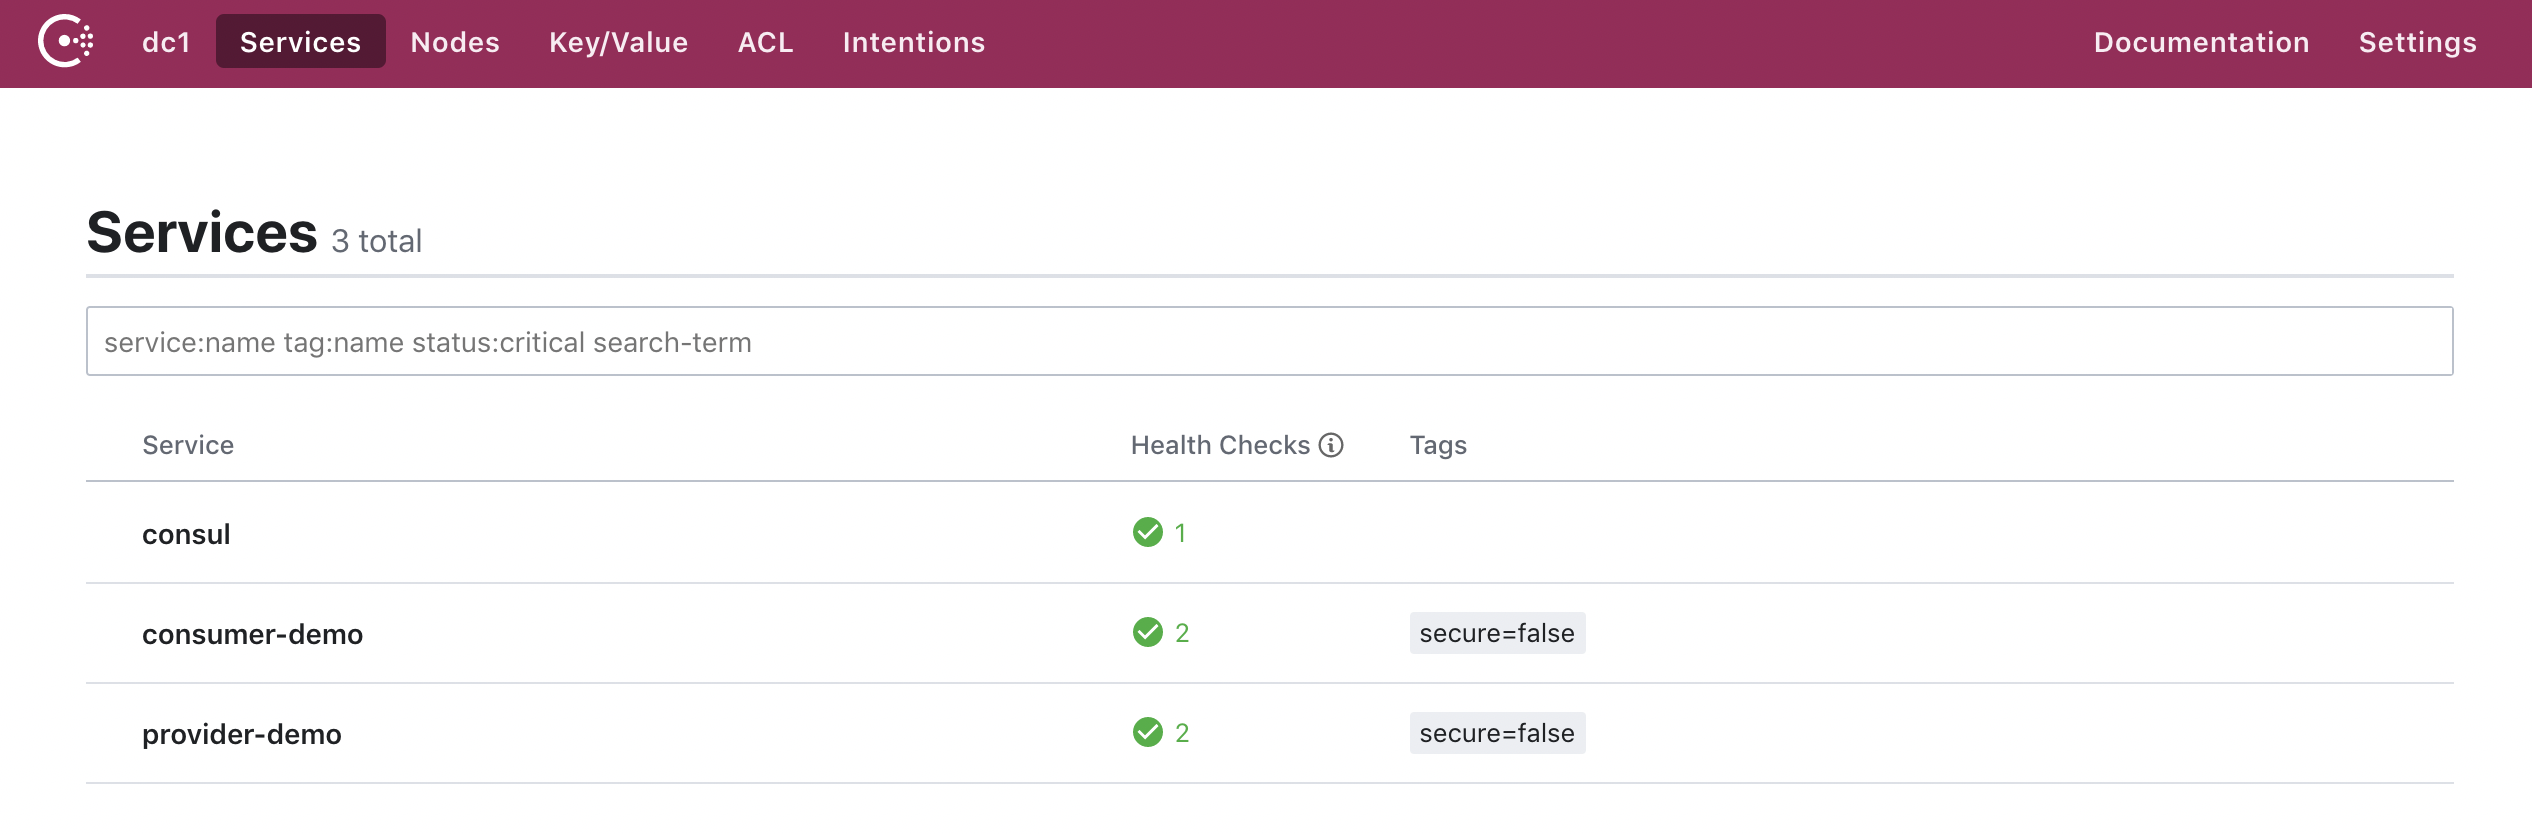
After the above steps are completed, view the lightweight registry page (http://127.0.0.1:8500/ui/dc1/services), and the registered consumer-demo and provider-demo services are displayed as shown in the figure below.
Test the service call of the consumer to the provider locally, as follows:
- Linux /MacOS System:
curl http://localhost:9999/echo-rest/hello
curl http://localhost:9999/echo-feign/hello - Windows system: You can enter http://localhost:9999/echo-rest/hello in the browser, http://localhost:9999/echo-feign/hello to view the results