
Application Management
Application
After completing application development, you can deploy the application through the CNAP. Currently, the platform supports containerized deploy through the console.
Note: We recommend that you use the latest version of firefox or chrome browser for console operation.
View application list
1、Log in to the CNAP console
2、Click Application under App Hosting in the left function menu bar to enter the application list page.
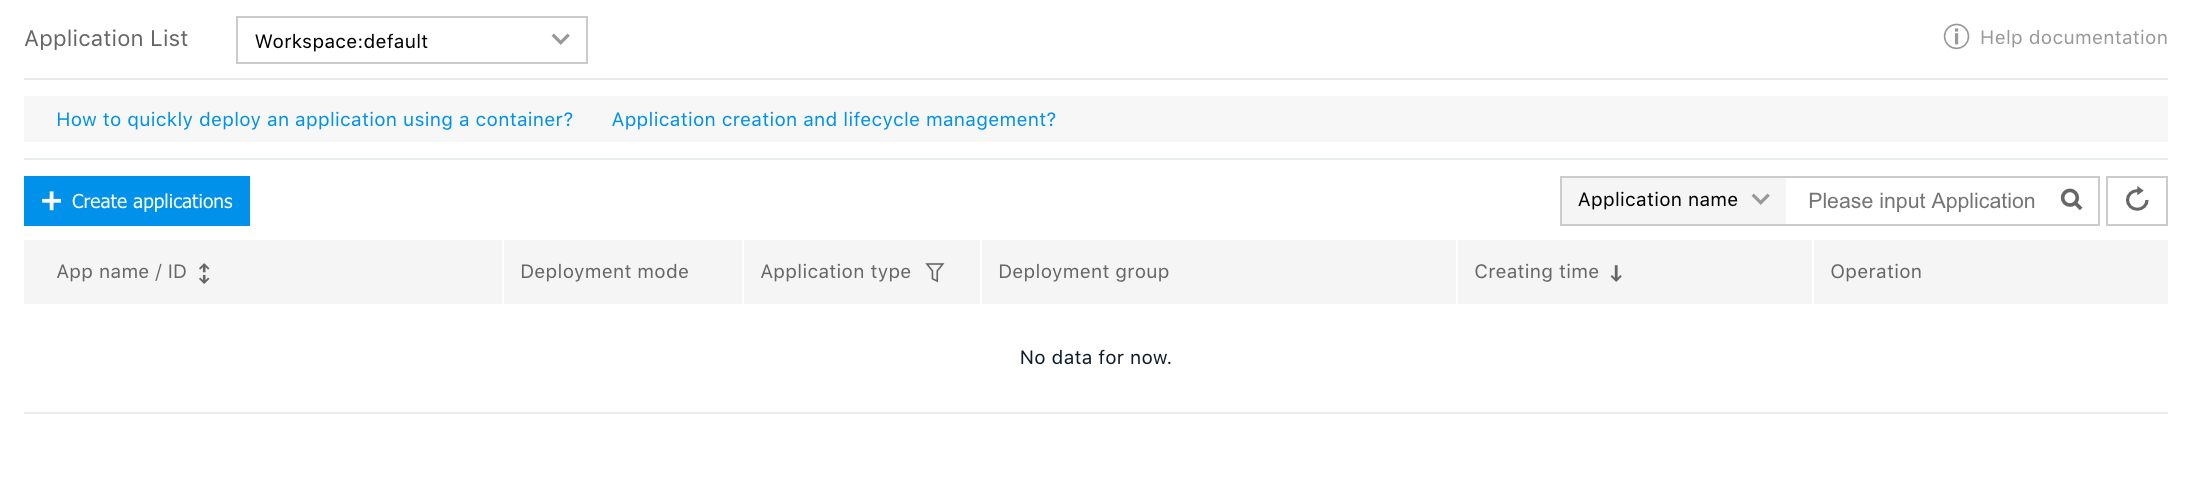
- Application name/ID: Name of the created application and the unique ID information of the application on the platform.
- Deploy method: Container deploy.(Currently only container deploy is supported)
- Application type: Ordinary application/micro-service /Mesh application. Micro service application can use micro service functions, such as registration center and service monitoring.
- Deploy group: Information about the deploy group and the running status of the current application. Click on the deploy group name (e.g.: dep), Directly enter its details page.
- Creation time: Apply creation timestamp.
- Operation: You can view application details, create deployment groups, manage deployment groups, or delete applications. When deleting an application, all deployment groups and access methods under the application will be deleted.
Application creation
1、Click [Create applications] on the [application list] page to enter the create application process.
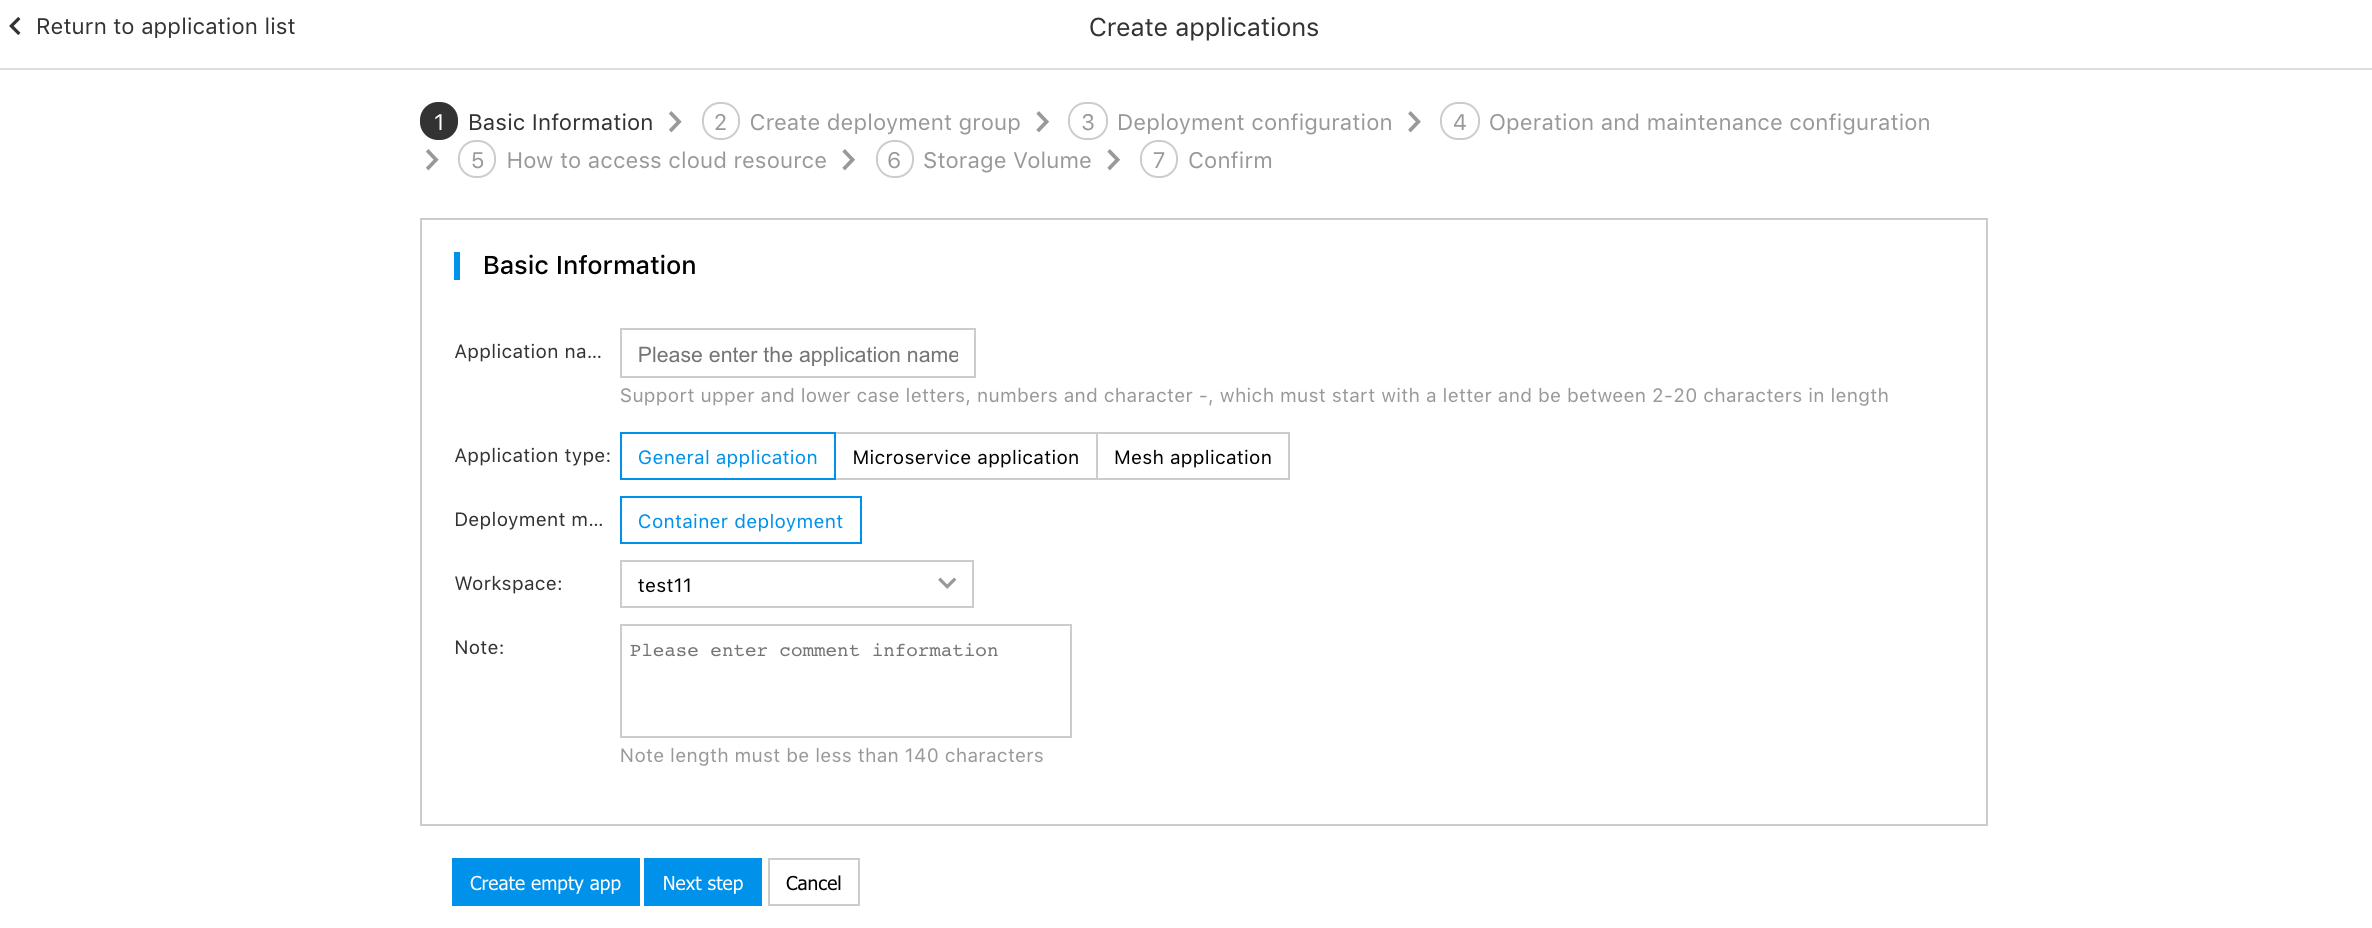
Basic information:
- Application name: Name of the application. It supports uppercase and lowercase letters, numbers and - characters. It must start with a letter and be 2-20 bits long. It is not supported to create applications with the same name in the same workspace.
- Application type: General application/micro service application/Mesh application
- Deploy method: Container deploy.
- Workspace: Workspace where the application deploy is located.
- Remarks: Description of the application.
If the deploy environment is not ready, you can first create an empty application, and then perform the environment deploy by operating Create Deploy Group on the application list page.
2、Click Next to enter the create deploy group page and create the application deploy group information.
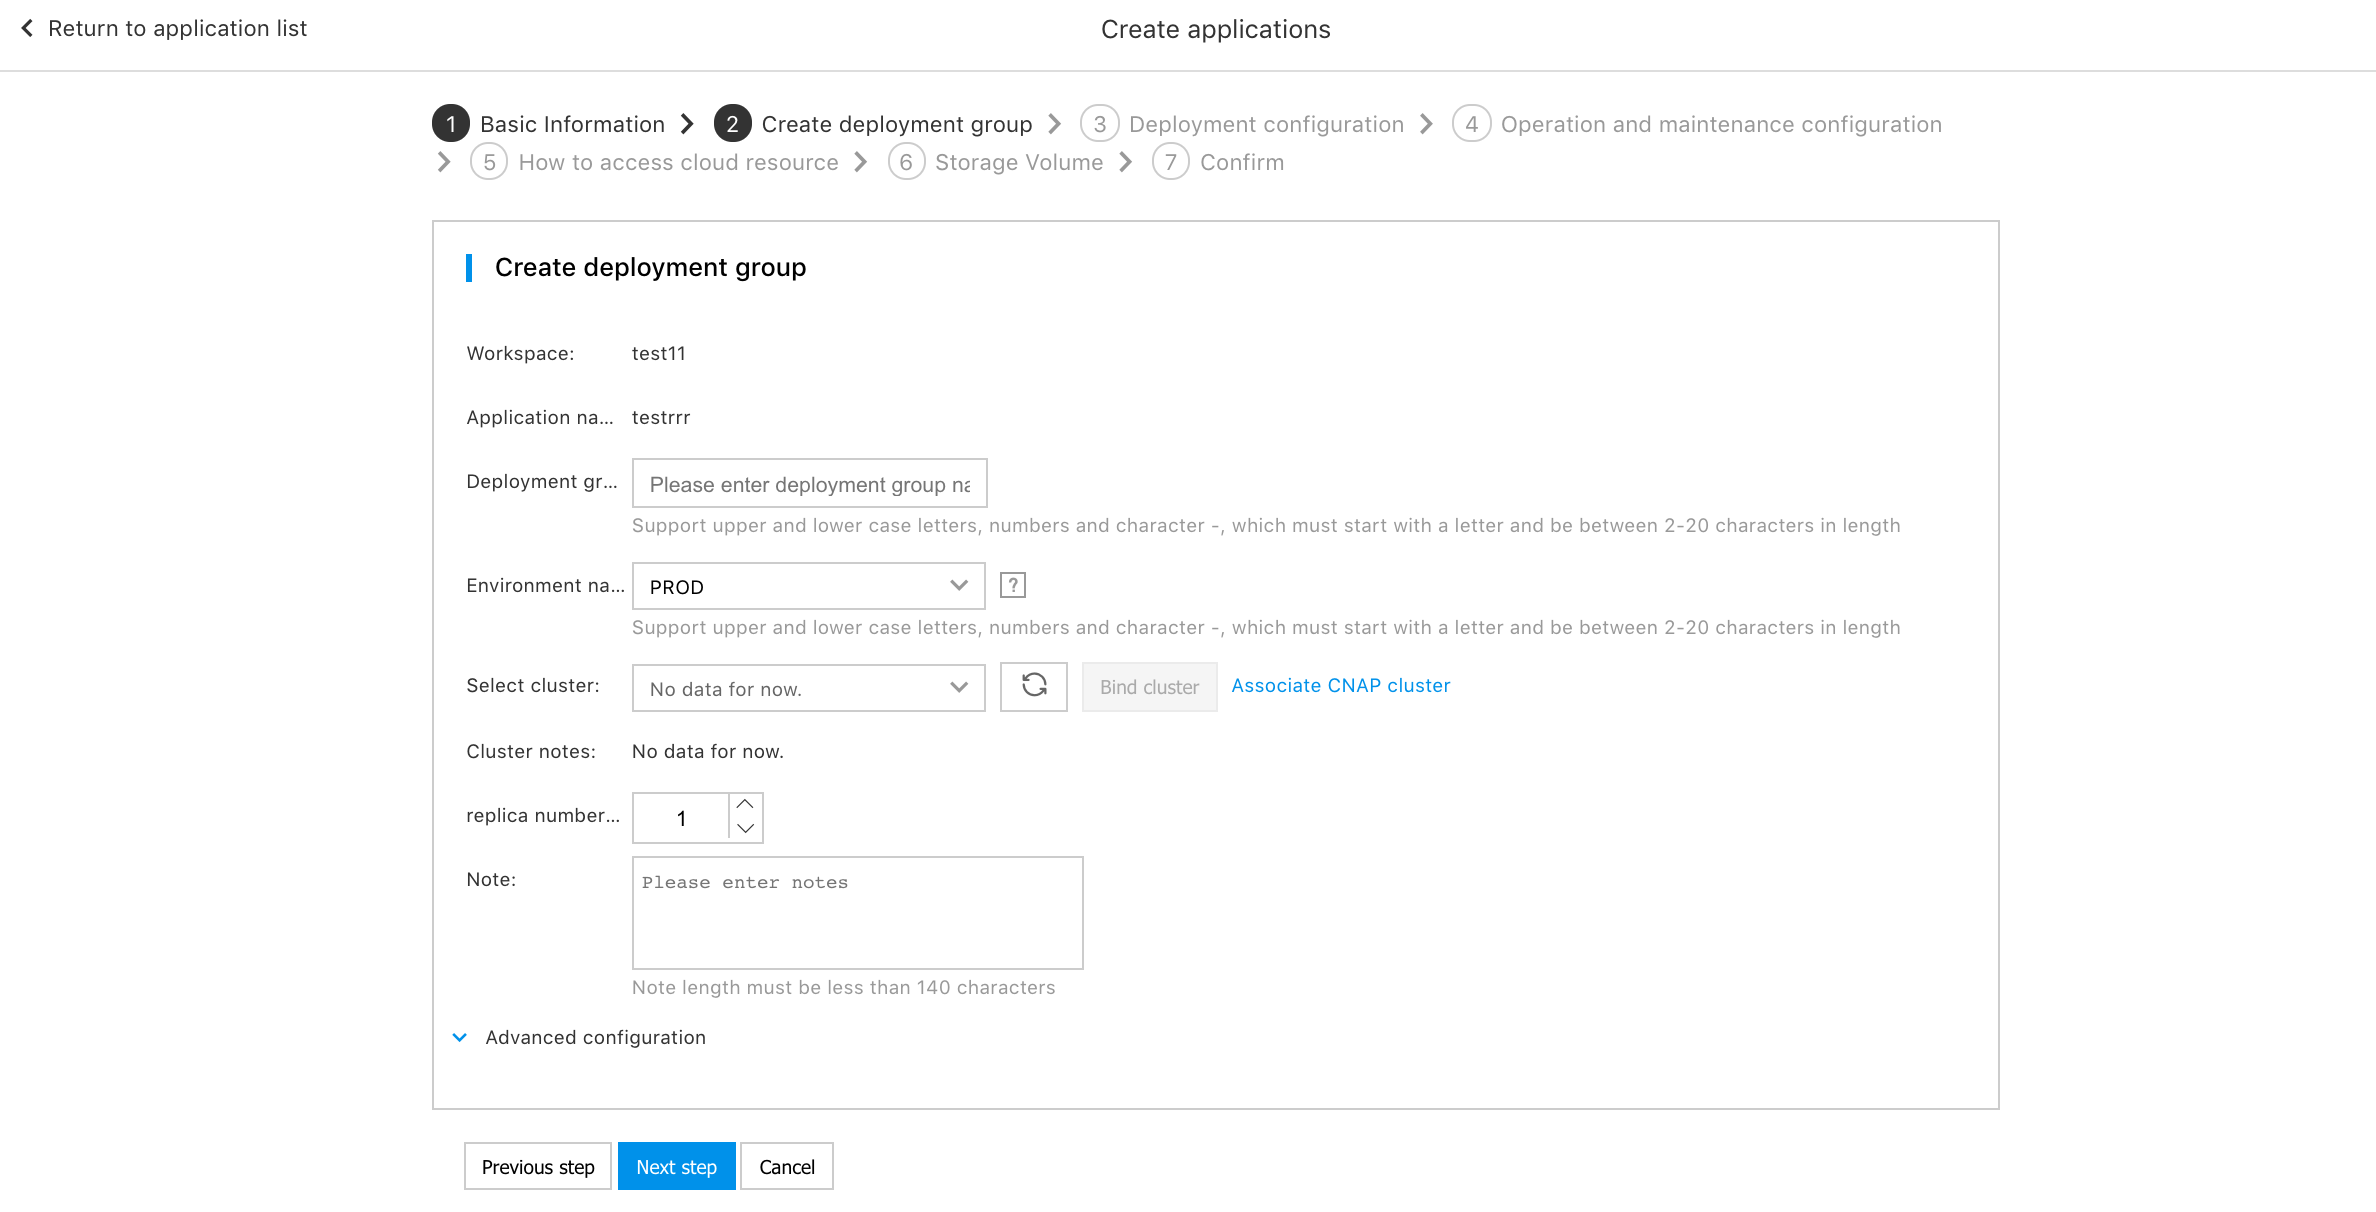
Deploy group information:
- Workspace: Selected workspace information.
- Application name: Application name filled in.
- Deploy group name: Name of the deploy group under the application. It supports uppercase and lowercase letters, numbers and - characters. It must start with a letter and be 2-20 bits long. It is not supported to create deployment groups with the same name in the same application.
- Environment name: Optional environment name. Currently optional environments: DEV、TEST、STAGING、PROD。 Environment names correspond to the actual application running environment, such as development environment, test environment and generation environment.
- Select cluster: Select the cluster where the deploy is located. If the environment is bound to the cluster, you can select the environment to automatically bring out the cluster, and modification is not supported. If the environment is not bound to the cluster, you need to click Binding Cluster on the right side of the selected cluster to bind the cluster to the cluster when selecting the environment for the first time.
- Cluster remarks: Cluster remarks (the description of the cluster when the cluster is imported can be modified in the [Cluster Management](https://cloud.baidu.com/doc/CNAP/s/7jwvxngzi#Cluster Details))
- Configuration of number of copies: Configure the initial number of copies for application deploy.
- Remarks: Perform custom description of deploy environment information, with 1 to 140 characters.
- Advanced configuration: It is supported to custom some settings for the deployment group, including: Update strategies, annotations, tags, node selectors, HostAliases, etc., as follows:

Update the Strategy
(Optional) Configure the update policy of the deployment group, support rolling update and batch update, and the default is rolling update. For details on batch update, please refer to [Batch Update](https://cloud.baidu.com/doc/CNAP/s/qk82edbcm#Change Deployment Group).
Annotation
(Optional) Annotations are annotations in kubernetes. Pease refer to Annotations for details.
Tags
(Optional) Tags are the labels in kubernetes, please refer to Tagsfor details.
Node selector
(Optional) The node selector is the nodeSelector in kubernetes. For details, please refer to Node Selector.
HostAliases
(Optional) You can add entries to the Pod/etc/hosts file by configuring HostAliases. For details, please refer to [HostAliases](https://kubernetes.io/docs/concepts/services-networking/add-entries-to-pod-etc-hosts-with -host-aliases/).
3、Click Next to deploy the configuration page which configures the application package and container running environment information, such as: Image and version, container memory and CPU, application environment variable information.
Basic information
- Container name: Custom container name supports lowercase letters, numbers, -characters and must start and end with lowercase letters
- Repository: You can select the official image repository for docker, or customize the repository credentials in Repository Credentials .
- Image address: To deploy the image address, operate Select from the Repository to select the image address of the repository, or enter the image address.
- Image version: Click Image Version text box, the console will automatically load the image version, and select the required version from the drop-down list.
- CPU limit: Set CPU limit for the container.
- Memory limit: Setting for limit of the container memory.
- Run command: An input command that controls the running of a container.
- Operating parameters: Input parameters that control the running of the container, such as: ---port=8080, Multiple parameters are separated by newlines.
Downward API
(Optional) The Pod and Container fields can be presented to the running container in the form of environment variables or file mounting. For details, please refer to Downward API.
Configuration files
(Optional) You can specify the configuration to be used and the version of the configuration when creating the deployment group. For details, please refer to [Configuration Management](https://cloud.baidu.com/doc/CNAP/s/Gk4cnov81#Deployment configuration when creating a deployment group).
Environment variable
(Optional) Configure the environment variable information for application running as follows:
Life cycle
(Optional) Configure a container hook to trigger after the container is created or deleted.
Health check
(Optional) Configure information such as the inspection mode, path and execution command of the application service probe and application liveness probe. If it is a mesh application, a business probe is needed to set the path of the health check, as shown in the figure:
4、Click [Next] to configure the operation configuration information. For details, please refer to [Operation Configuration](http://doc.bce.baidu-int.com/@bce-doc/file/document/432f8713-d886-417f- b394-ffa7e3fdf17a).
5、Click Next to configure the application access mode information.
You can add the access entry of the application here, or you can add it as needed after the application is deployed. For details, please refer to [Create Access Method](https://cloud.baidu.com/doc/CNAP/s/Wk6bwcbwo#Create Access Method).
6、Click [Next] to configure storage volume information.
You can add a storage volume here, or you can add it as needed after the application is deployed. For details, please refer to [Add Storage Volume](https://cloud.baidu.com/doc/CNAP/s/ck82egya4# Mount storage volume when creating an application).
7、Click Next to show all the information of the application configuration process. Click Submit to start creating application task after you confirm the information is correct.
Lifecycle management for application
Click the target application name on the application list page to enter the application details page. In the application details, you can manage the entire life cycle of the application, including application expansion and reduction, launch/abolish, and application changes.
View application details
You can view the basic configuration of the application and the configuration information of the access mode on the application details page. Basic configuration:
View list of deploy group
Click Deploy Group Management in the left function menu bar to enter the deploy group list page.
List show information
- Deploy group name/ID: Created deploy group name/ID.
- Status: Running status of the deploy group.
- Instance specifications: Deploy group instance specifications
- Number of copies: Initial number of copies for container.
- Environments: The environments where the deploy group is located such as DEV, TEST and PROD are specified when the deploy group is created.
- Clusters: The clusters where the application deploy is located are specified when the deploy group is created.
- Region located: The area where the deployment group is located is consistent with the area of the cluster.
- Last update time: Deploy group update time.
- Operation: Details, WebSSH, clone deployment group, modify deployment group, modify the number of copies, delete, view events. Note Modifying the number of copies will trigger the application change process. You can query the change process information in Change Management and Operation Log on the left menu bar.
Create deploy group
The operation of creating deploy group is the same as that of Create Deploy Group Deploy Configuration, operation and maintenance configuration, Access Portal and storage volume in the application creation flow line.
Manage deploy groups
Click the name of the target deploy group or click Modify Deploy Group in the operation on the deploy group list page to enter the deploy group management page and change the deploy group.
Enter the deployment group details through the deployment group name, and view the basic information of the deployment group, container group list, deployment configuration information, operation configuration information, access methods, and storage volumes.
Basic information of the deployment group:
List of container groups: You can view the instance running status of the deploy group, and view the running log in Operation. You can log in to the container via WebSSH to perform related operations. Meanwhile, you can click [View Event] to view related events of the instance.
Deploy configuration information:
The deployment group configuration information can be changed. The change information and process can be queried in the menu bar on the left side of the application details page [Change Management] [Operation Log].
Operation configuration information: You can configure and change the operation configuration of the deployment group application here.
Access mode: Here you can configure and change the access mode of the deploy group.
Storage volume: Here you can configure and change the access mode of the storage volume.
Elastic scaling
On the application details page, in the feature menu bar on the left, click [Elastic Scaling] to enter the elastic scaling rule list page.
Create automatic scaling rules On the elastic scaling rule list page, click [Add Rule] to enter the Create Elastic Scaling Rule page, enter the relevant information and confirm to create an elastic scaling rule.
The relevant information includes:
- Target deployment group: The target deployment group for which the elastic scaling rule takes effect can be automatically displayed on the interface and cannot be edited.
- Minimum number of copies: The minimum number of copies of the deployment group when the elastic scaling rule takes effect, and the minimum is 1.
- Maximum number of copies: The maximum number of copies of the deployment group when the elastic scaling rule takes effect, and the minimum is 2.
- Time to take effect: The time when the elastic scaling rule takes effect.
- Time to cease to take effect: The time when the elastic scaling rule ceases to take effect.
- Cooling time: The time interval between adjacent elastic expansions is 30 seconds at least.
- Periodic expansion: After the periodic expansion is enabled, the deployment group will maintain the maximum number of copies during the expansion period.
- Scaling index: Scale the deployment group based on the computing results and rules of the scaling index, including the index name, computing method, and expected threshold. When multiple scaling metrics take effect at the same time, the metric computing result with the largest number of expected copies is used.
Edit elastic scaling rules:
Click [Edit] in the target elastic rule operation column on the elastic scaling rule list page to enter the edit elastic scaling rule page, enter the relevant information and confirm to edit the elastic scaling rule.
Disable elastic scaling rules:
Click [Disable] in the target elastic rule operation column on the elastic scaling rule list page to disable the elastic scaling rule.
Enable elastic scaling rules:
Click [Enable] in the target elastic rule operation column on the elastic scaling rule list page to enable the elastic scaling rule.
Delete elastic scaling rules:
Click [Delete] in the target elastic rule operation column on the elastic scaling rule list page to delete the elastic scaling rule.
Change Management
On the application details page, in the feature menu bar on the left, click [Change Management] to enter the change management list page. For related operations of change management, please refer to [Change Management](https://cloud.baidu.com/doc/CNAP/s/Qk82dwgql#View the list of change records).
Operation log
You can query the application change operation information in any time period in the operation log. You can click [View Details] in the operation column of the target operation log to view the detailed information of the operation log.
Event query
Event query can query Kubernetes events and CNAP platform events. You can click [Kubernetes Events] under [Event Query] to enter the Kubernetes event list page, and click [Application Hosting Platform Events] to enter the application hosting platform event list page. For details, please refer to Event Query.