
Deployment of Applications by Containers
Last Updated:2020-09-23
The tutorial will guide you through the deployment of container application functionality in CNAP.
About the Tutorial
The tutorial will guide you to deploy an Nginx service. During the operation, related operations (create CCE cluster, create BLB, EIP, etc.) may incur costs.
Aims
- Import a CCE cluster
- Deploy Nginx with CNAP and create a public network access portal
- Access Nginx services and view logs
- Remove Nginx service
Preparation
- To create a CCE cluster in North China, you can refer to the CCE Create Cluster document .
Step 1: Import a CCE cluster
- Log in to the CNAP Console. Click [Cluster Management] to enter the cluster management list page.
-
Click [Import K8S Cluster] at the top left of the cluster list page.

-
Select the basic information of the cluster you want to import
- Cluster type Currently, only Baidu AI Cloud CCE clusters are supported.
- Select a cluster: Select the CCE cluster. If the user does not have a CCE cluster, please click [Create CCE Cluster] to go to Baidu CCE Cluster to create a cluster.
- Select a workspace: After selecting or creating, select the corresponding workspace.
- Remarks: The description of the cluster, no more than 140 characters.
Step 2: Deploy Nginx with CNAP and create a public network access portal
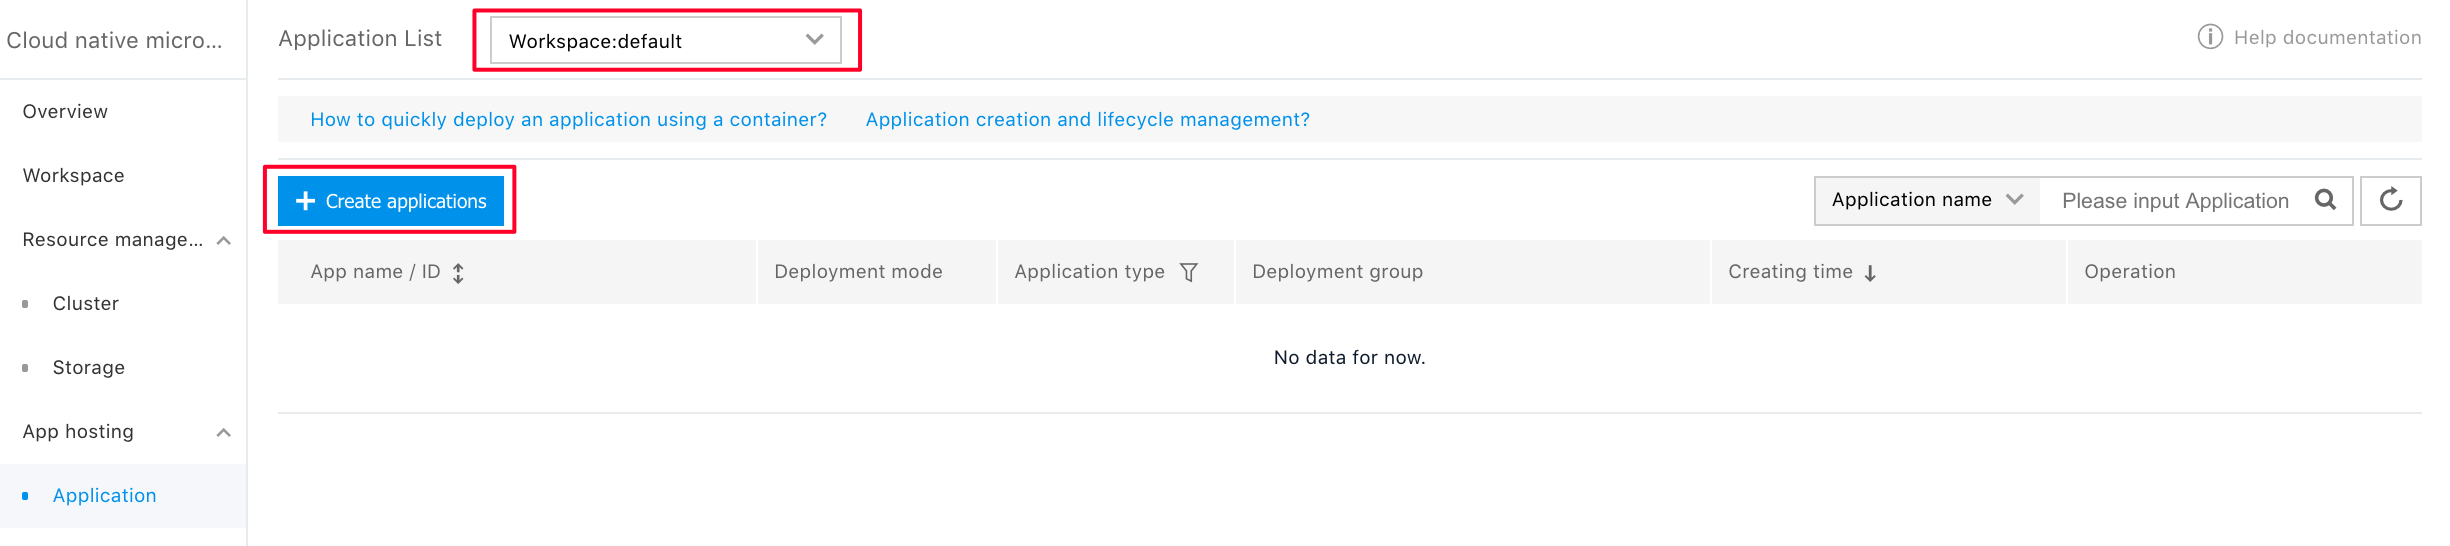
- Log in to the CNAP Console.
- Click [Application Hosting] in the left navigation bar, and click [Application] to enter the application list.
-
Click [Create Application] at the top left of the application list page.
- Fill in the basic information of the application.
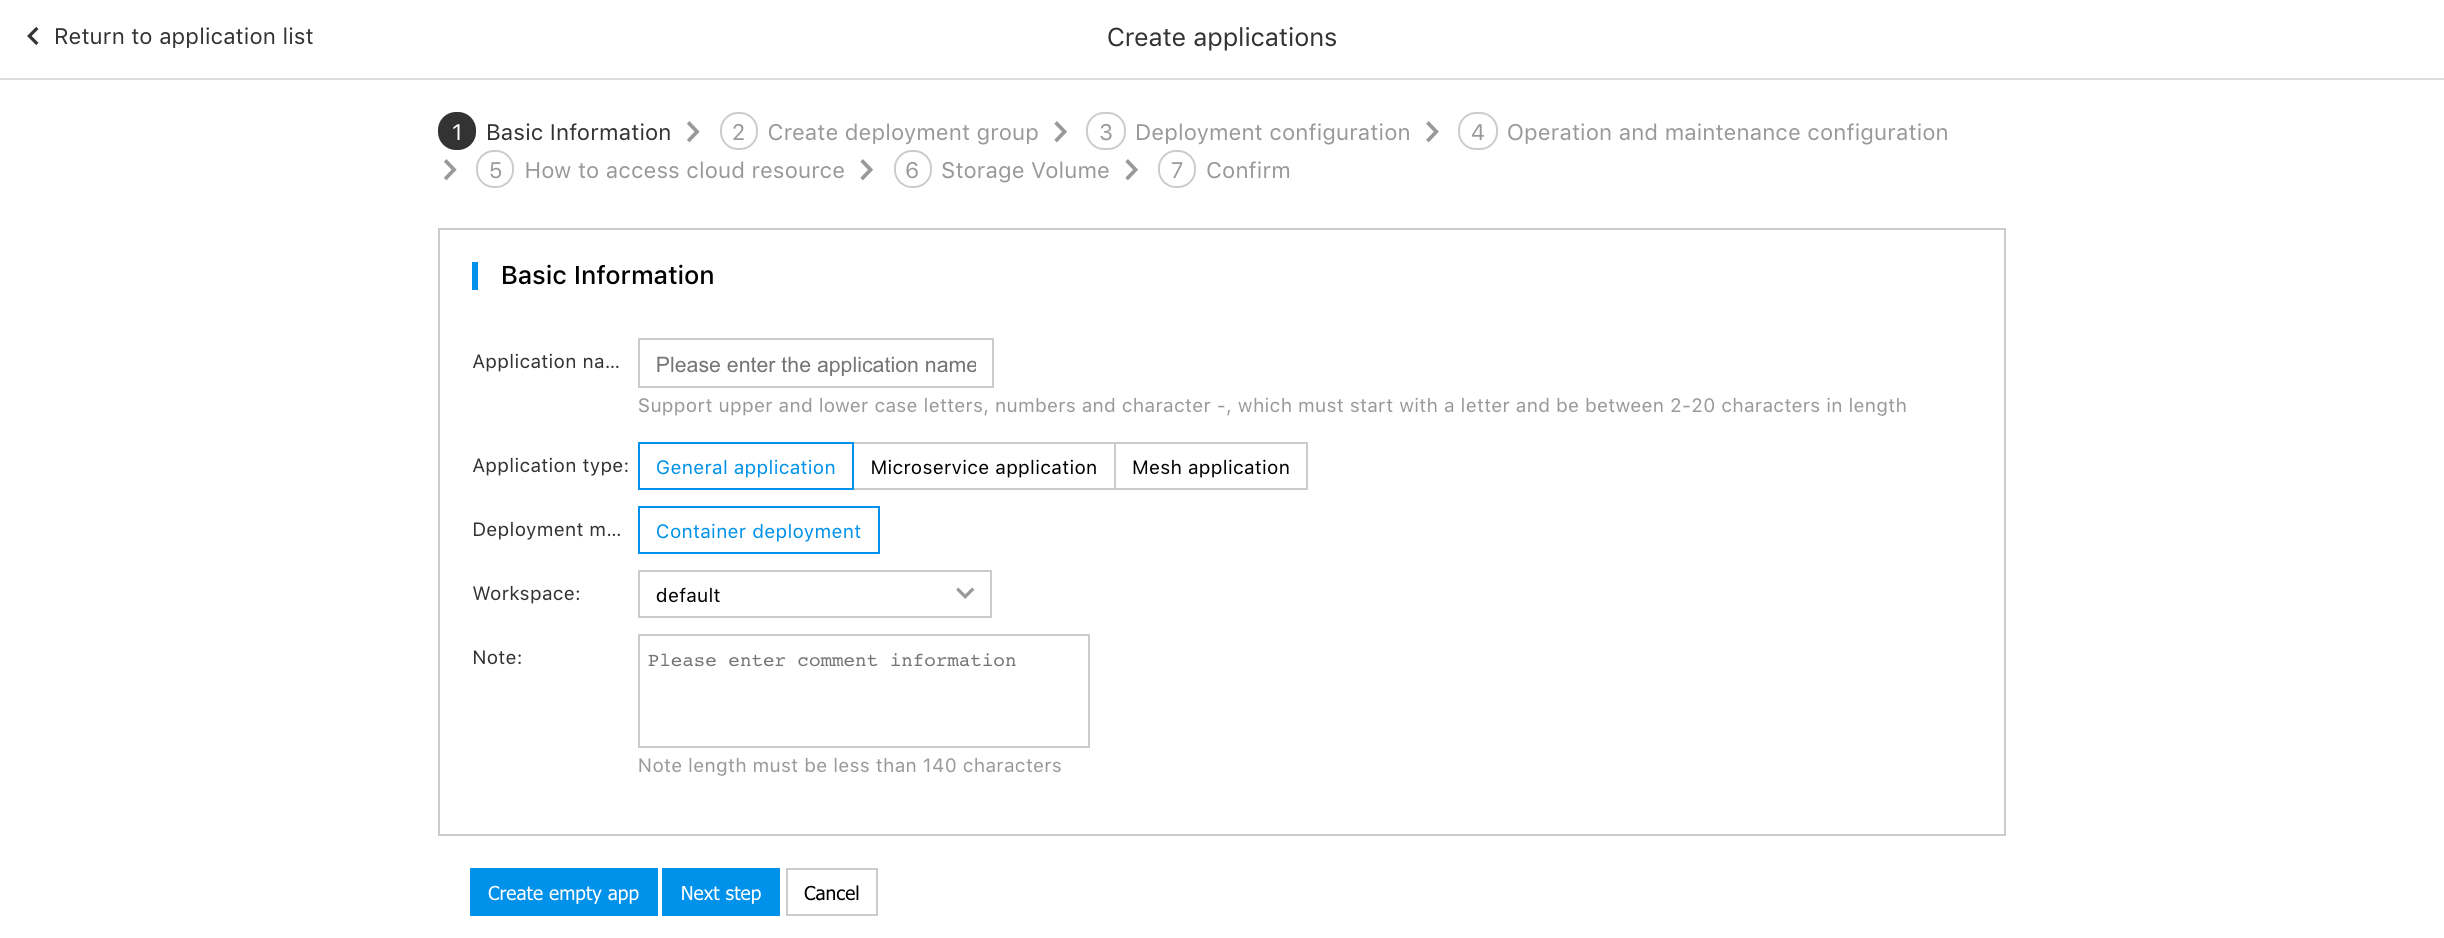
- Application name: The name of the application. It supports uppercase and lowercase letters, numbers, and the "-" character. It must start with a letter and be 2-20 characters long.
- Application type: Please select a common application.
- Deployment method: CNAP currently supports container deployment. Select the default value.
- Workspace: The workspace to which the app will be deployed; select the default value.
- Remarks: Application notes. Note: length must be less than 140 characters.
- Click [Next] and fill in the basic information of the deploy group. It should be noted that when using an environment for the first time, you need to Click [Bind Cluster] to bind the CCE cluster to the selected environment.

- Deploy group name: The name of the application. It supports uppercase and lowercase letters, numbers, and the "-" character. It must start with a letter and be 2-20 characters long.
- Environment name: In each workspace, four environments are created for users by default, and deploy groups are deployed to the corresponding environments. Select the environment and click [Bind Cluster] to bind the environment to the cluster.
- Number of copies configuration: The number of copies of the deploy group instance.
- Update policy: The update policy of the deploy group.
- Remarks: Note of the deploy group. Note: length must be less than 140 characters.
- Click [Next] and fill in the basic information about the deploy group configuration.
- Container name: The name of the container.
- Repository: Deploy the repository of the image, and select the default Docker Hub Public.
- Mirror address: Deploy the address of the image, and fill in nginx.
- Image version: Click [Image Version Text Box], and the console will automatically load the image version of nginx. Select the required version from the drop-down list.
- CPU cap: The limit of the container CPU.
- Maximum memory: The limit of the container memory.
- Click [Next] and click [Add Entry] to add an access entry for the current deploy group. If you do not want to buy BLB and EIP services, you can adjust it for intra-cluster access, which will not cause additional costs.
- Access name: The name of entry. It supports uppercase and lowercase letters, numbers, and the "-" character. It must start with a letter and be 2-20 characters long.
- Access mode: Support intra-cluster, intra-VPC and public network accesses. Selecting public network access will automatically create BLB and EIP services for your purchase.
- Protocol: Support TCP and UDP; select TCP.
- Access port: The port to access the container.
- Listening port: The port to listen to the container.
- Click [Next] to check and fill in the information about the application and deploy group. If there is an error, click [Back] to modify. After checking it is correct, click [Submit] to create a deploy group.
- Wait for the deploy group to complete deploy. The status of the deploy group will change from changing to running.
Step 3: Access Nginx services and view logs
- Click [Application Hosting] in the left navigation bar, and click [Application] to enter the application list.
- Click [Nginx], and click [Application Monitoring] again to view the CPU and memory allocation monitoring at the deploy group level.
- Return to [Application Details], and click [Access Method] on the right to view the access method created. IP is the created public network access IP and the access port is the corresponding port.
- Open your browser and enter the given IP and port to access the successfully deployed Nginx service.
- Click [Deploy group Management] and click the deploy group [Nginx-prod] again.
- Click [Instance List] to view the deployed container and CPU and memory allocation.
- Click the log button, and you can see the log of the specified container
Step 4: Remove Nginx service
- Click [Application Hosting] in the left navigation bar, and click [Application] to enter the application list.
- Click [Nginx], click [Application Details] again, and then click [Access Method] on the right, and click [Delete] to delete the access method.
- Return to [Application Details], and click [Deploy group Management] on the right to view the list of deploy groups, and click [Delete] to delete the deploy group.
- Return to the [Application] list, view the application list, and click [Delete] to delete the application.