
Create Scaling Group
The scaling group is a basic container of all objects of user management in the automatic scaling, including the configuration of scaling up, cloud resource, scaling rule, etc. They all belong to one scaling group. So the creation of a scaling group is the first step to use the automatic scaling.
The complete process of creating a scaling group is as follows:

Service Subscription
The automatic scaling uses the test invitation system at the earlier stage. You should apply for subscribing the automatic scaling services at the website of Baidu AI Cloud before the creation of the scaling group:
1.Log in to the official website of Baidu AI Cloud, and open the home page of automatic scaling products via [Product] - [Computing and Network] - [Computing] - [Automatic Scaling].
2.Click the "Apply Now" button to fill in and submit the application form for the automatic scaling test in the opened page.
3.After receiving your application, we enter the audit stage. If your application passes the audit, we grant you the permission to use the automatic scaling. After the permission is granted to you, you can see the automatic scaling in the console "Product Service > Computing". Click it to enter the scaling group list:

4.Click "Create a Scaling Group" button at the upper left side of the scaling group list to start the creation of the scaling group.
Description: Currently, the automatic scaling only supports the "North China - Beijing" region, and you should switch to the region for use.
Configuration of Scaling Group
The configuration of scaling group is used to define the basic properties of the scaling group, including the region, network, range of scalable nodes, etc.
Operation steps
1.Log in to the management console to enter "Product Service > Computing > AutoScaling". Click "Create a Scaling Group" in the page of "Scaling Group List", fill in the basic information and bind the load balance.

Configuration description
- The scaling group name should meet: Upper and lower case letters, numbers, and -_ /. special characters. It must start with letters, with a length ranging from 1 to 65.
- Select the network. All nodes of the scaling group are created in the private network.
- Select one available zone and the node subnet corresponding to the available zone.
- Set the minimum and maximum numbers of nodes to limit the scaling boundary of the scaling group, so as to prevent the extreme cases of too many resources caused by scaling up and too few resources caused by scaling down.
- Set the number of initialized nodes, and create the initialized nodes according to the number when the scaling group is created.
- Set the cooling time. The duration that the scaling group enters the cooling status after scaling up is used to wait for the monitoring index of the scaling group to return to normal. The cooling time can prevent the false triggering of alarm tasks.
- (Optional) Set the load balance. All nodes in the scaling group are automatically added to the load balance to realize the automatic import of access traffic.
After completing all scaling group configurations and confirmation, click "Next" to enter the configuration of scaling up.
Configuration of Scaling Up
The configuration of scaling group stipulates the attributes of nodes created when the scaling group is initialized and scaled up, including the server type, package configuration, system information, etc.
After the configuration of scaling group, enter the page of configuration of scaling up to complete configuration.
Configuration description of basic information
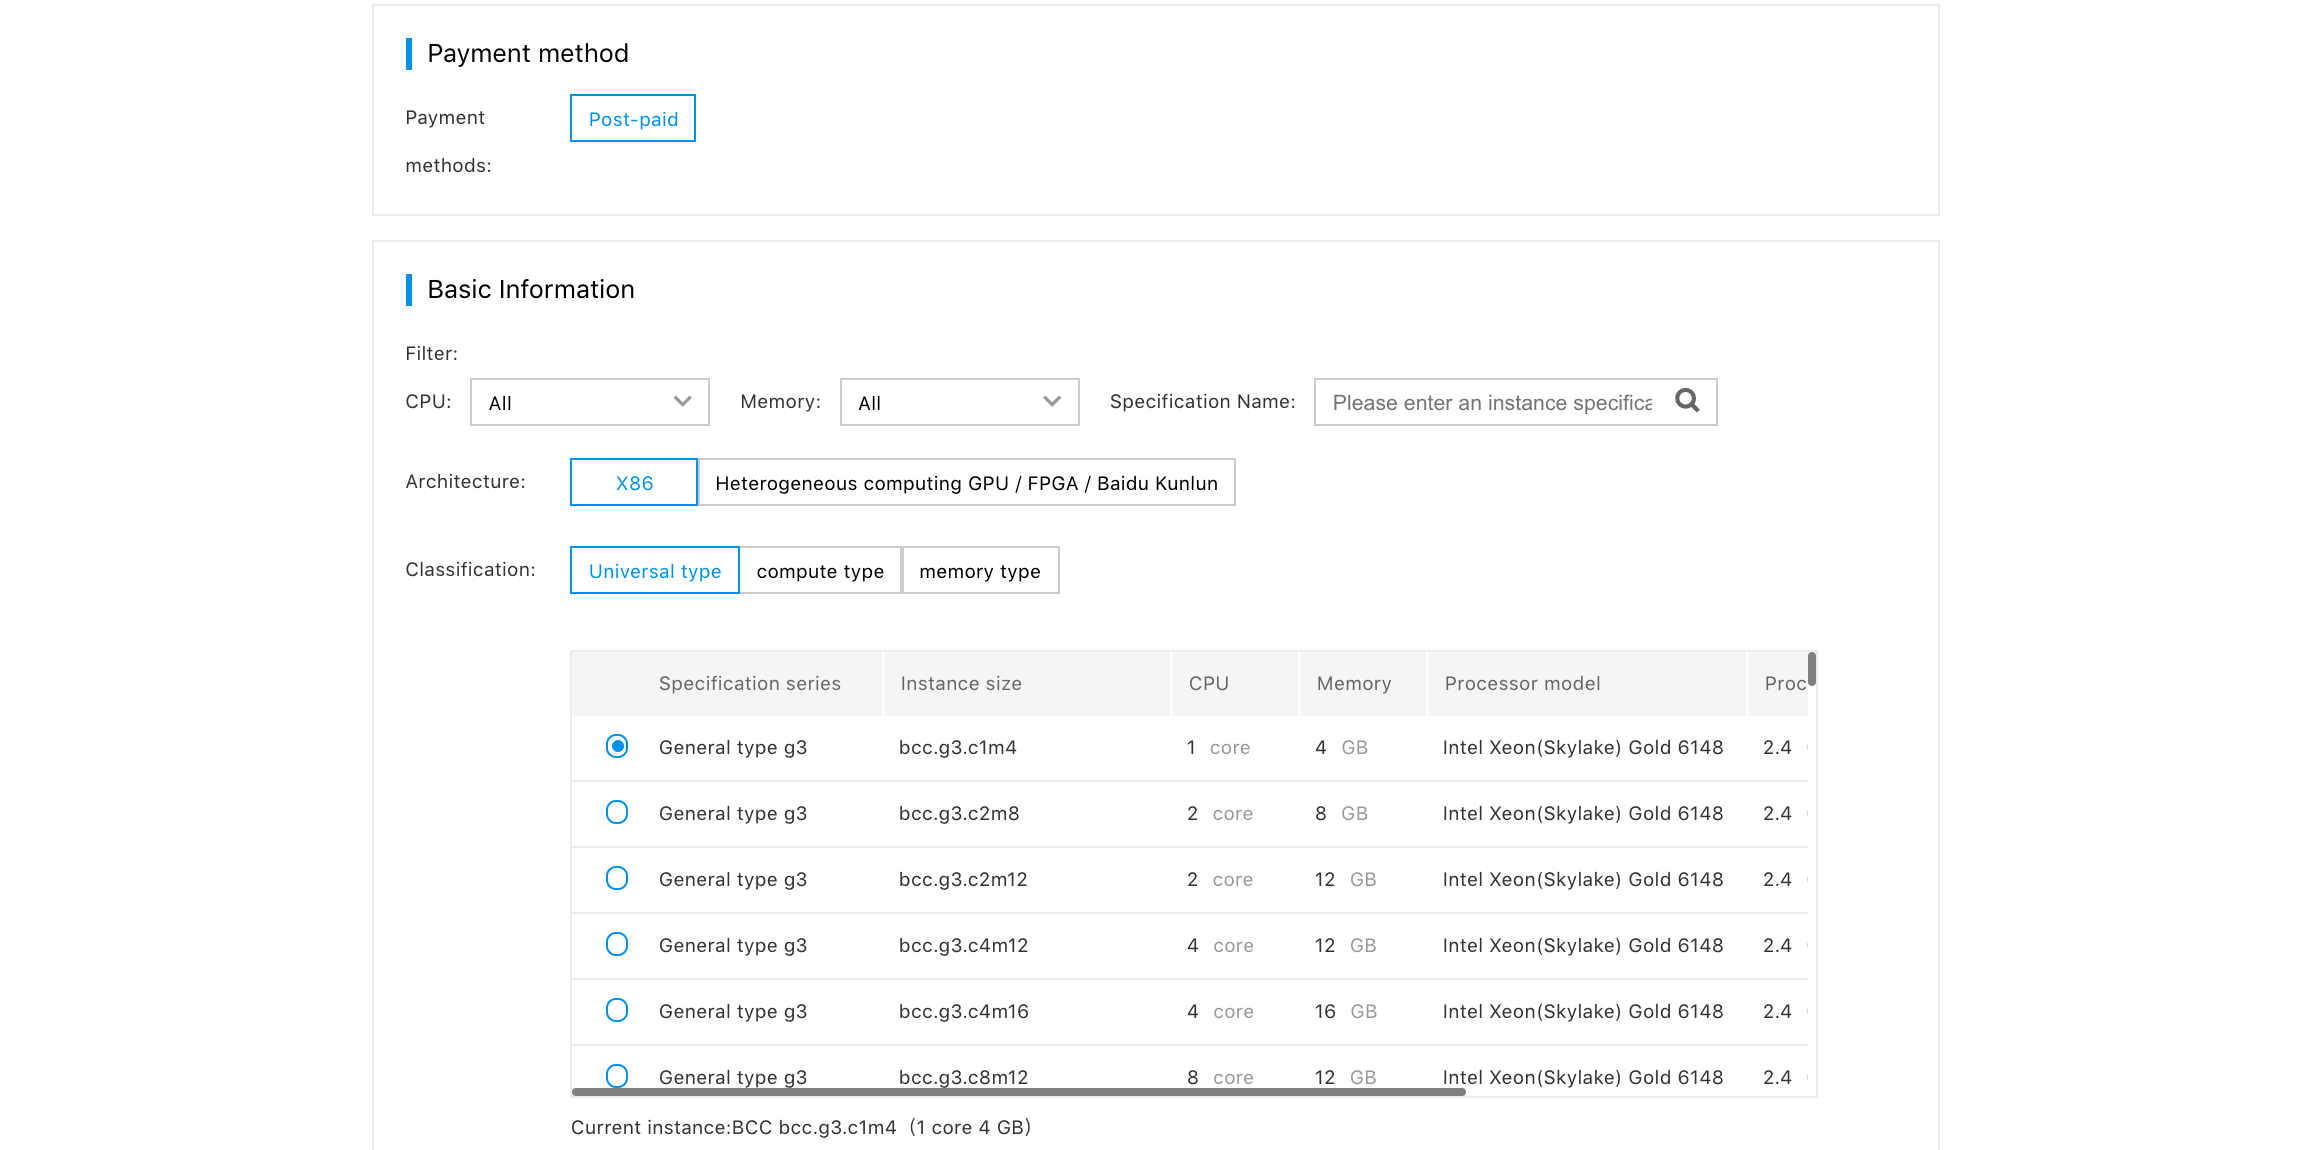
- Select the cloud server type. The server types which are not supported by the available zone where the scaling group is located or have been sold out are cancelled.
- Select the size of CPU and the memory.
- Select the image type to support the public image, user-defined image, service integration image, and shared image. If you should package the business applications in a system image, we recommend you to use the user-defined image.
- Select the operation system.
Configuration description of storage
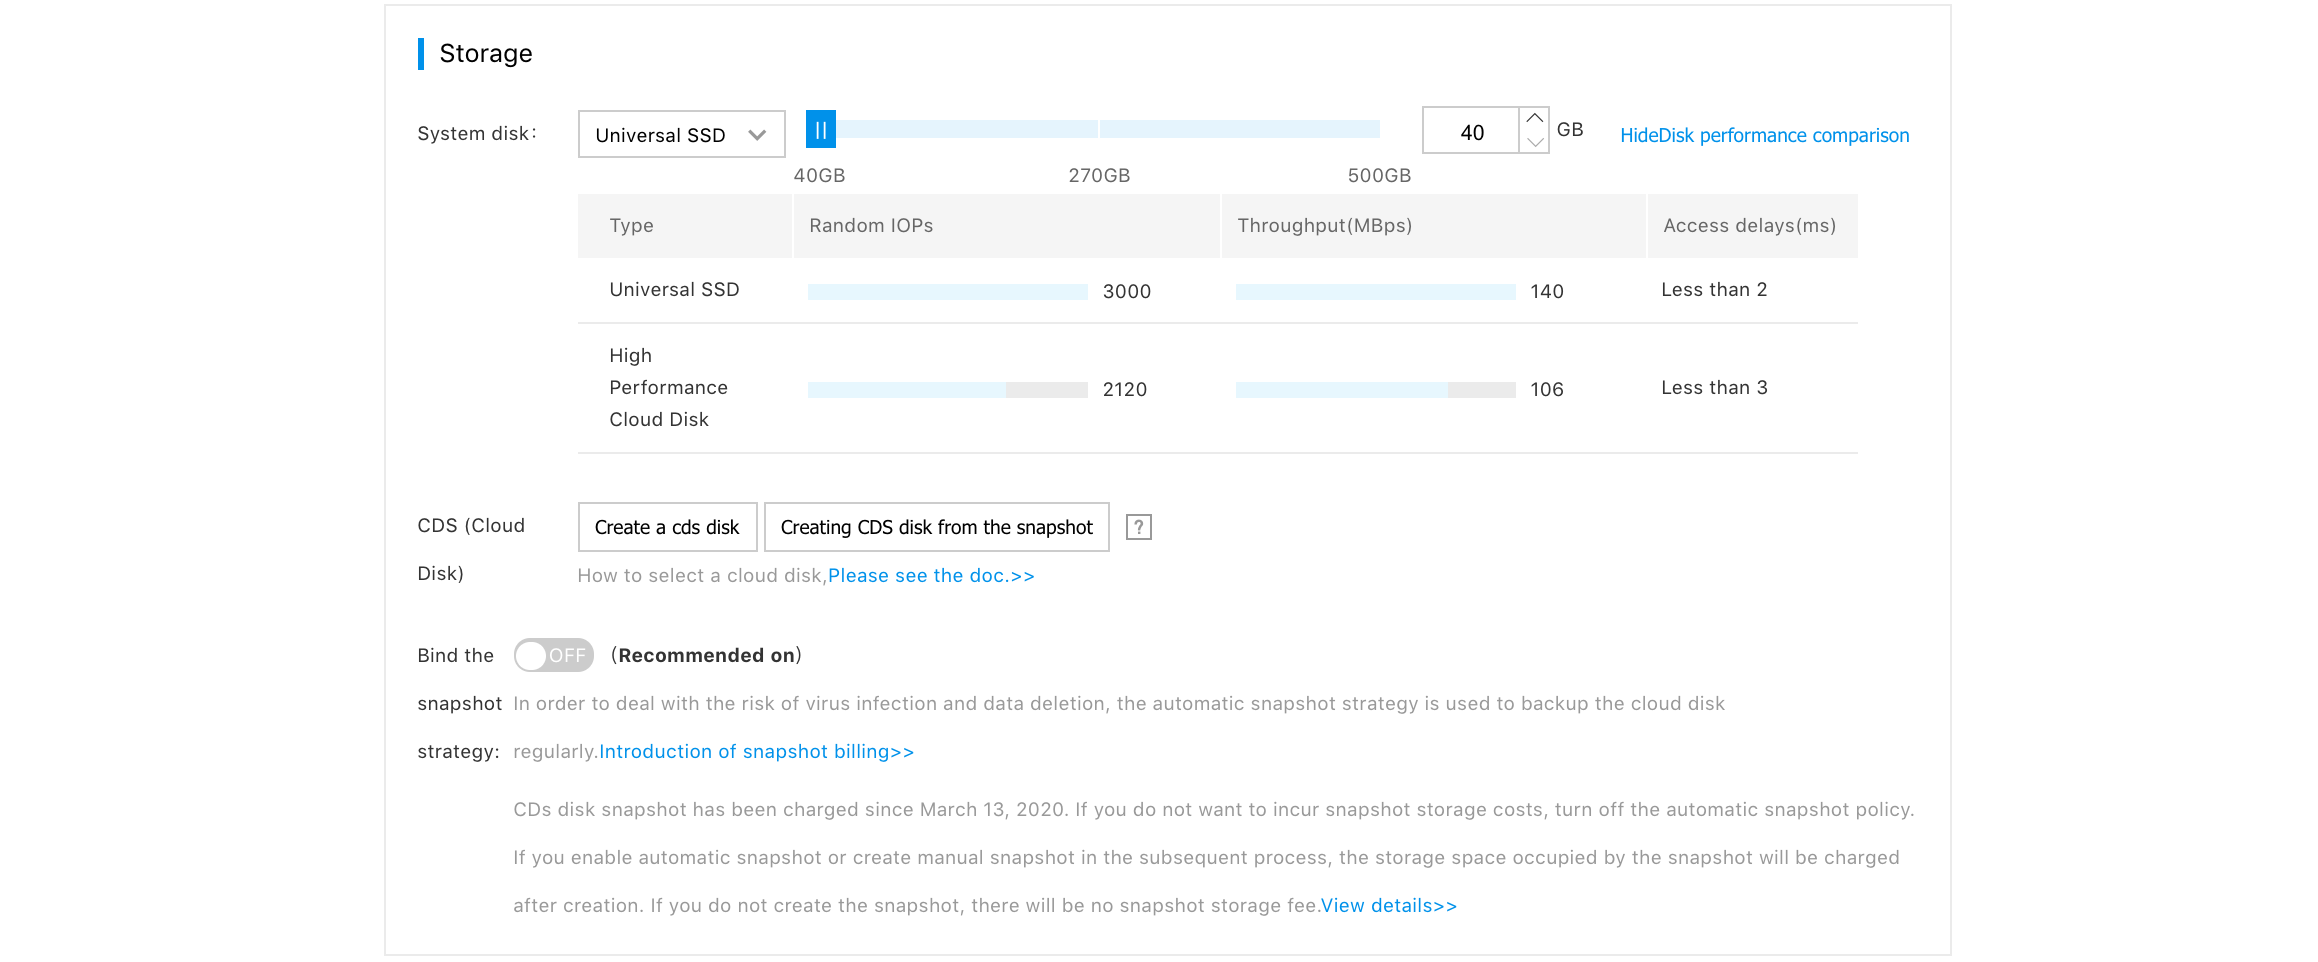
- Select the type and size of the system disk. The first 40GB of the system disk is free. And the excessive part should be charged separately.
- (Optional) You can add up to 5 CDS cloud disks, and respectively select the disk type and size for each disk.
Configuration description of elastic resources
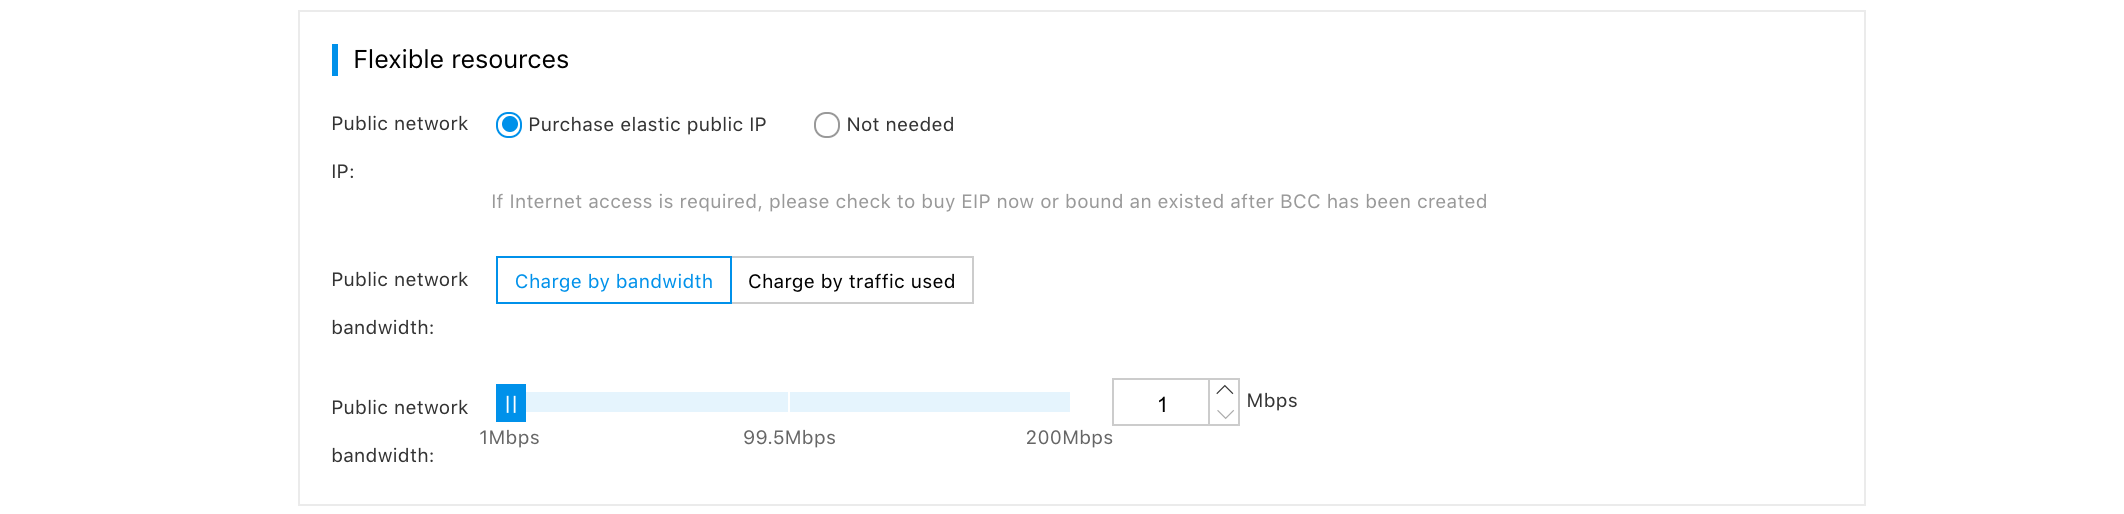
- Select whether to purchase the elastic public network IP. If the elastic public network IP is selected, the public network IP is automatically purchased and distributed for the nodes in the creation of nodes by the scaling group.
- Select the public network bandwidth to support two modes of charging by the bandwidth and the consumed traffic.
- Set the bandwidth peak.
Configuration description of the network

- (Optional) Set the configuration of the security group.
Configuration description of system information
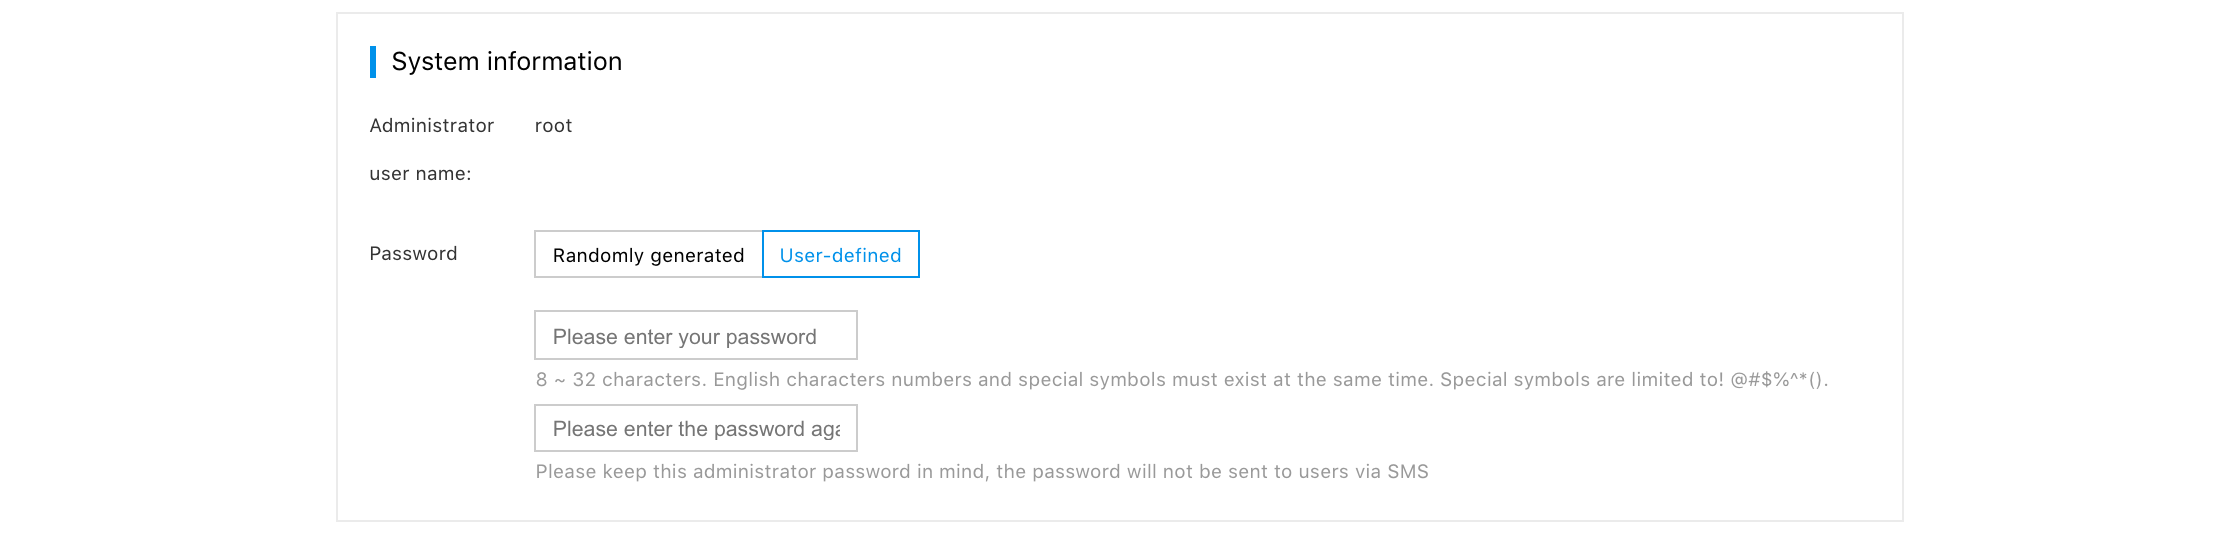
- Select the password method. Currently, the randomly generated password and the user-defined password are supported.
After filling in the configuration of scaling up, you can see the selected configuration at the right side of the page. After confirmation, click "Next" to enter the page of order confirmation.
Note: If the number of the initialized nodes is 0, directly complete the creation in the next step.
Order Confirmation
If the number of the initialize nodes is not 0, enter the page of order confirmation. The page of order confirmation displays the fees required by the initialized nodes of the created scaling group. Because the cloud resources in the scaling group are all post-paid, fees are not deducted immediately from your account, but charged at the unit price of resources according to the actual use time.
- After confirming the order information is correct, click "Pay".
- After payment, click "Return to Console".
- Find the newly created scaling group in the scaling group list. When the scaling group changes to the status of "Cooling" from the status of "Create", we can start management and use of the scaling group after the scaling group is created.