The Device Status Data are Stored to TSDB
Introduction
This document introduces how to store the status data reported by the device to TSDB through the rule engine, and the application can query the historical status data of the device from TSDB.
You are recommended to get familiar with Getting Started before reading this example.
Scenario Description
This scenario demonstrates the common features that are used in the application scenarios of IoT, including device access, data reporting, data storage, data query and display, etc.
- Hardware design
The temperature and humidity sensor can periodically report the current ambient temperature and humidity.
In this example, we use MQTT.fx to simulate the device for data reporting.
- Data storage
The status data reported by the device will be stored to TSDB automatically, and the application can access the historical temperature and humidity data by querying the database for display and analysis.
- Data display
After the data are stored in TSDB, the TSDB data can be accessed by IoT Visualization, and the screen displays the temperature and humidity information.
Operation Steps
Create device
Create an IoT Core instance
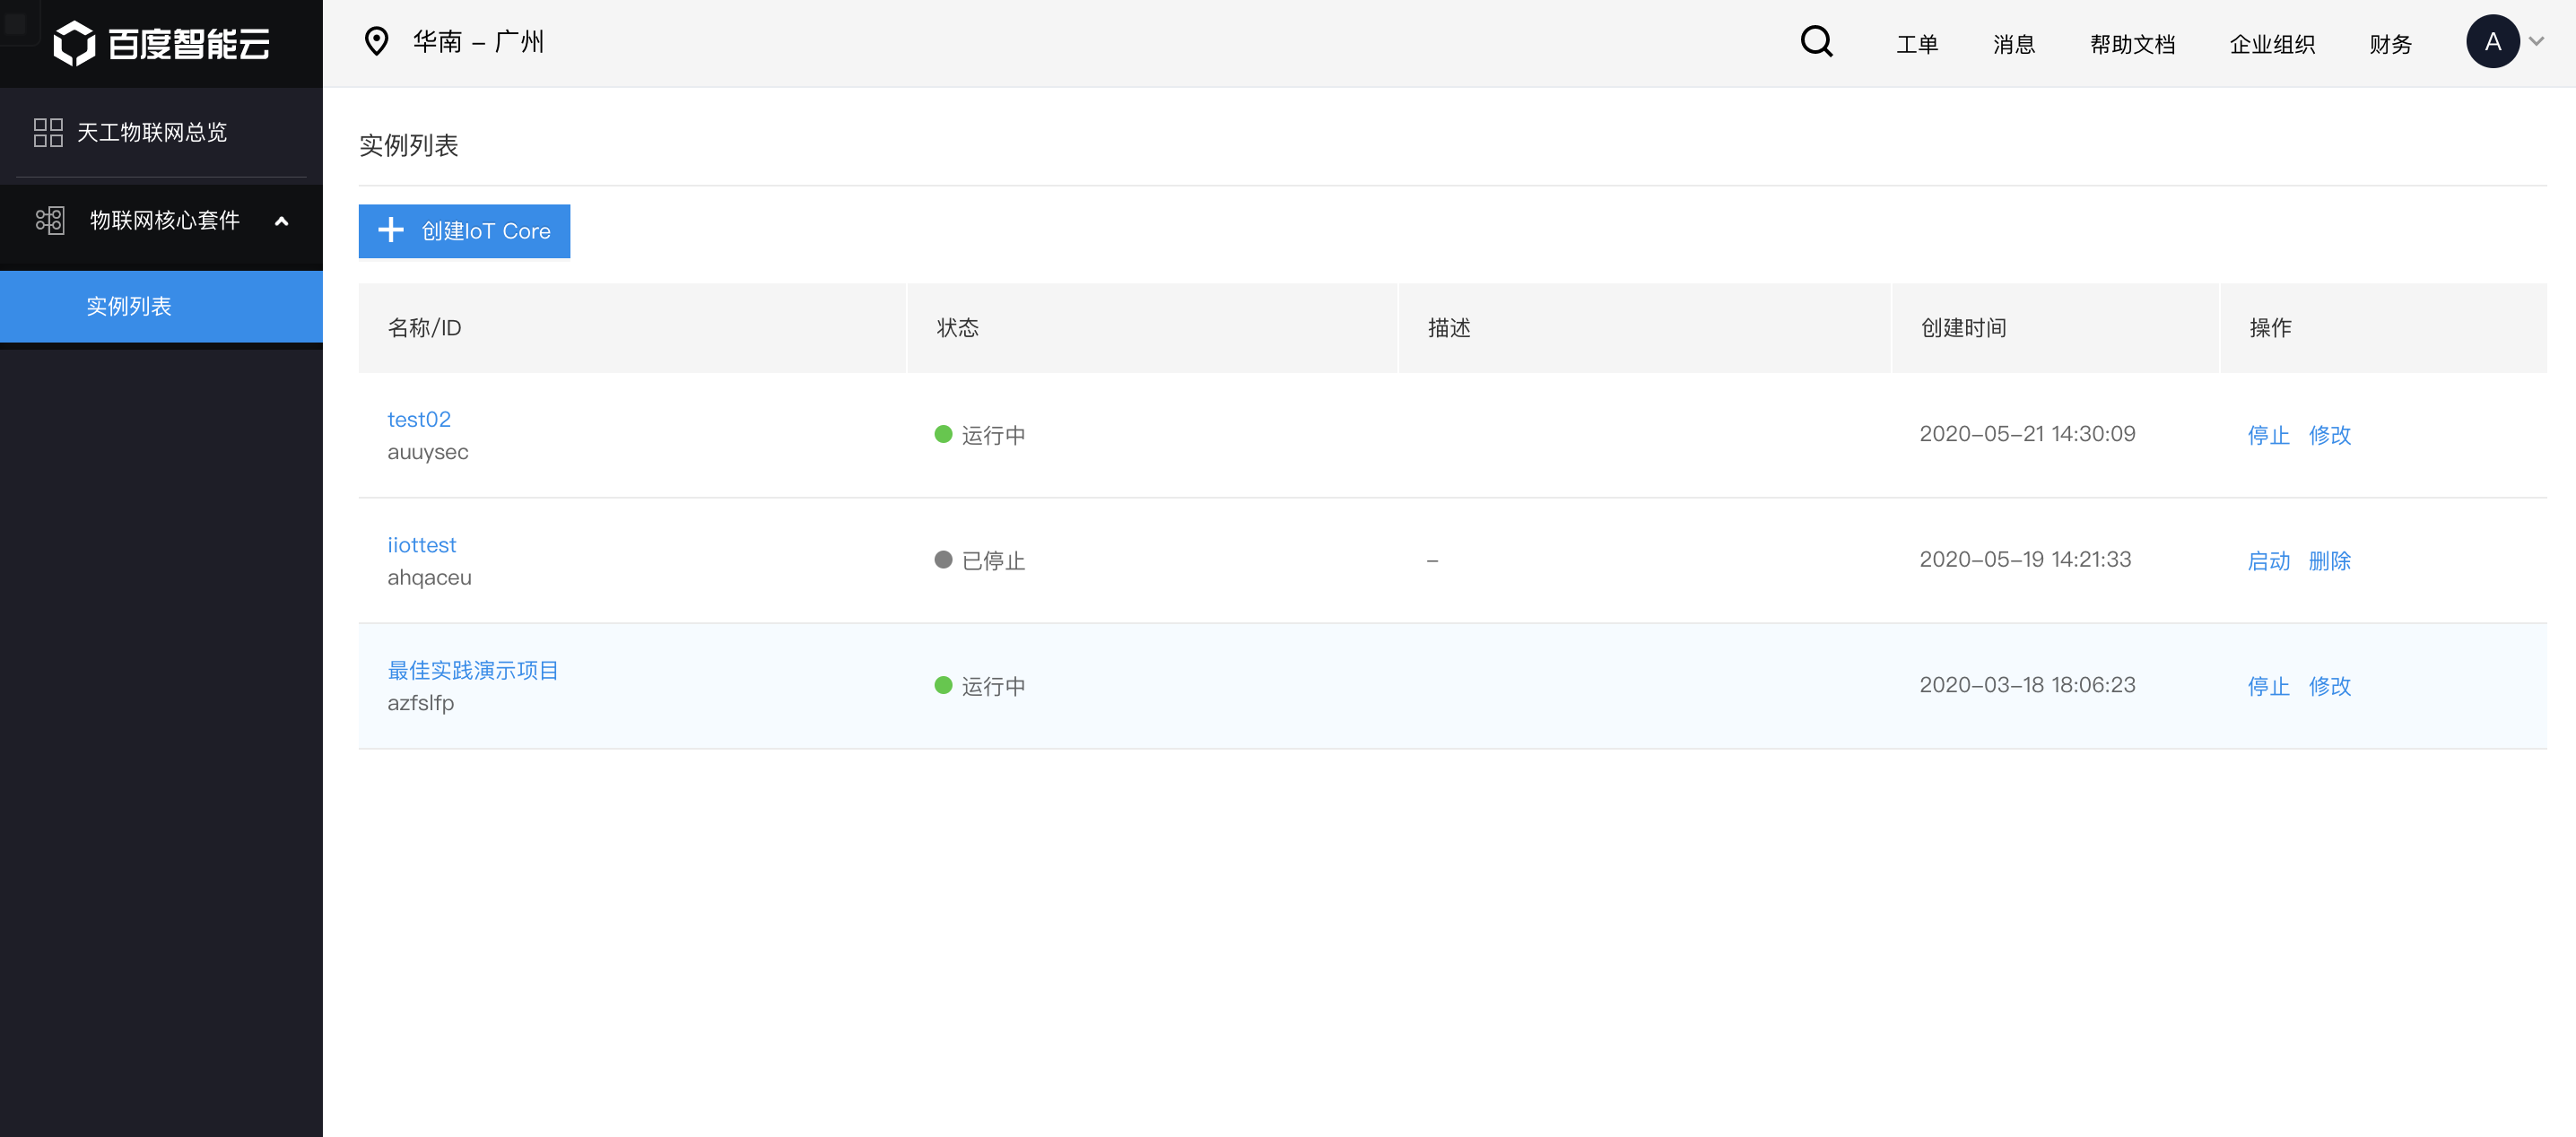
Click the button [Create loT Core] on the page with loT Core instance list, and click [Submit] after entering the name].
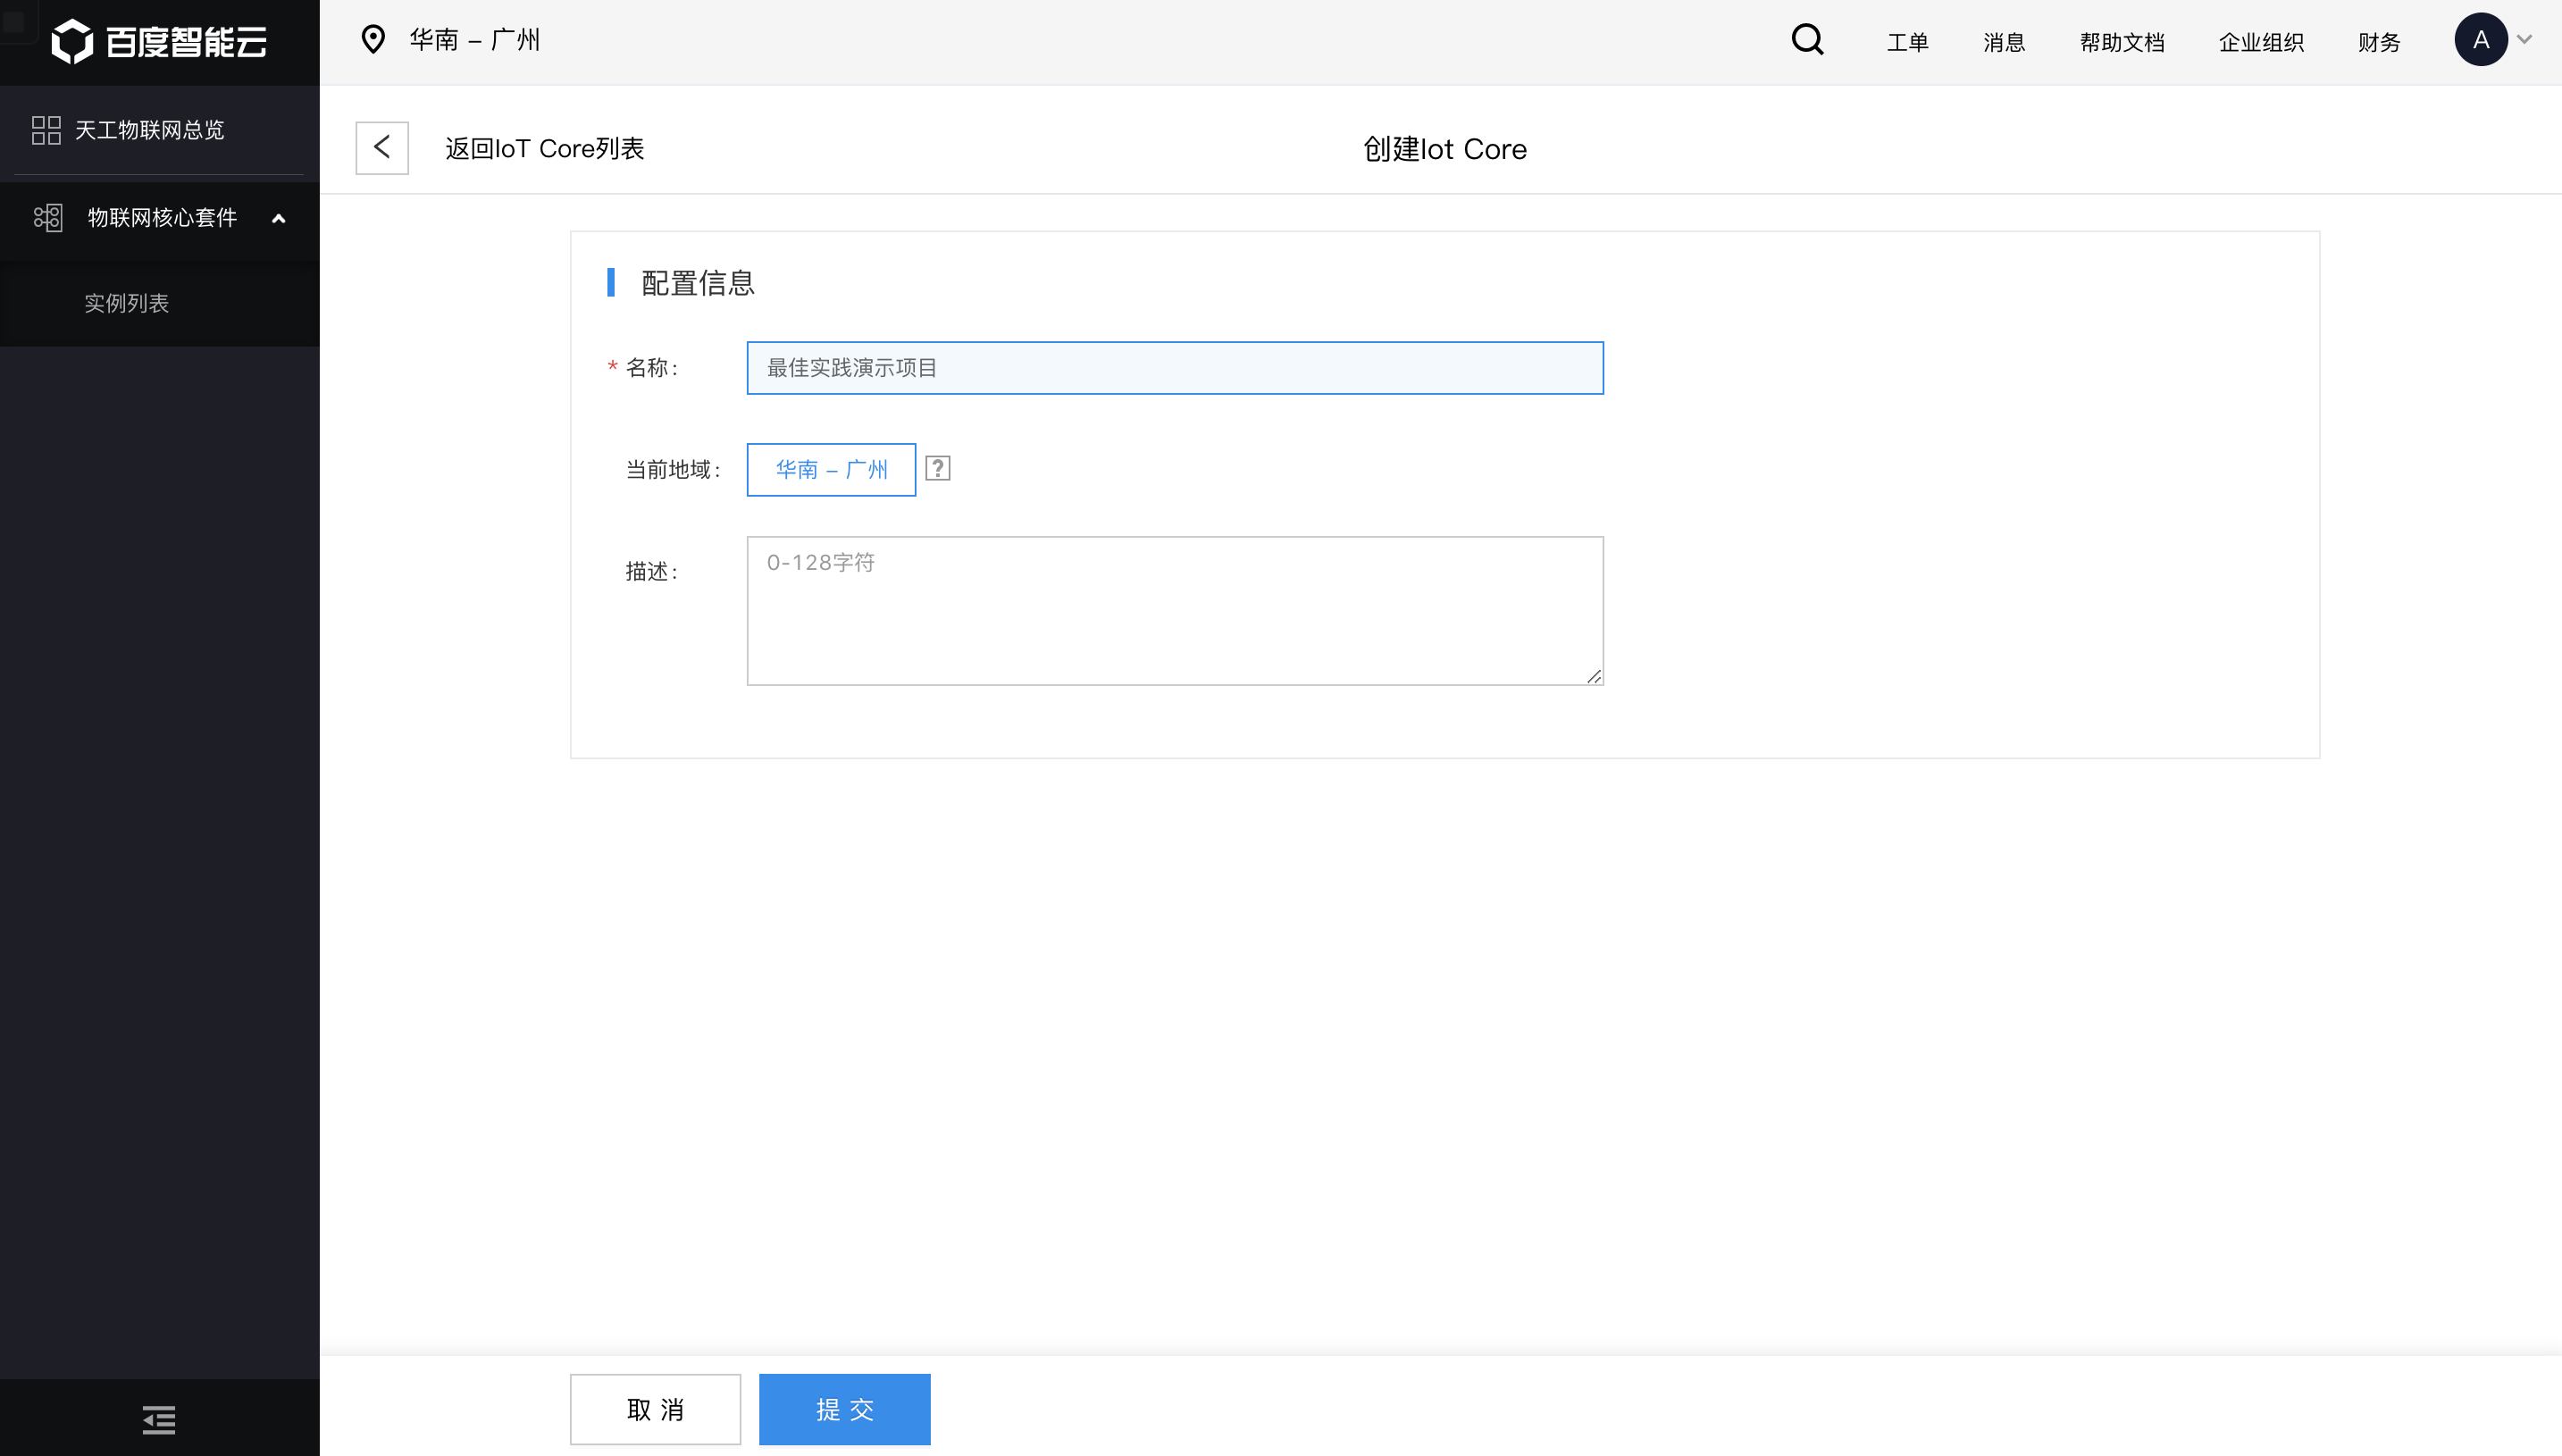
The newly created instance will be displayed in the list after the creation is successful.
Create device template
Click IoT Core instance name in the list, enter the detailed page, and select the [Device Template] menu on the left.
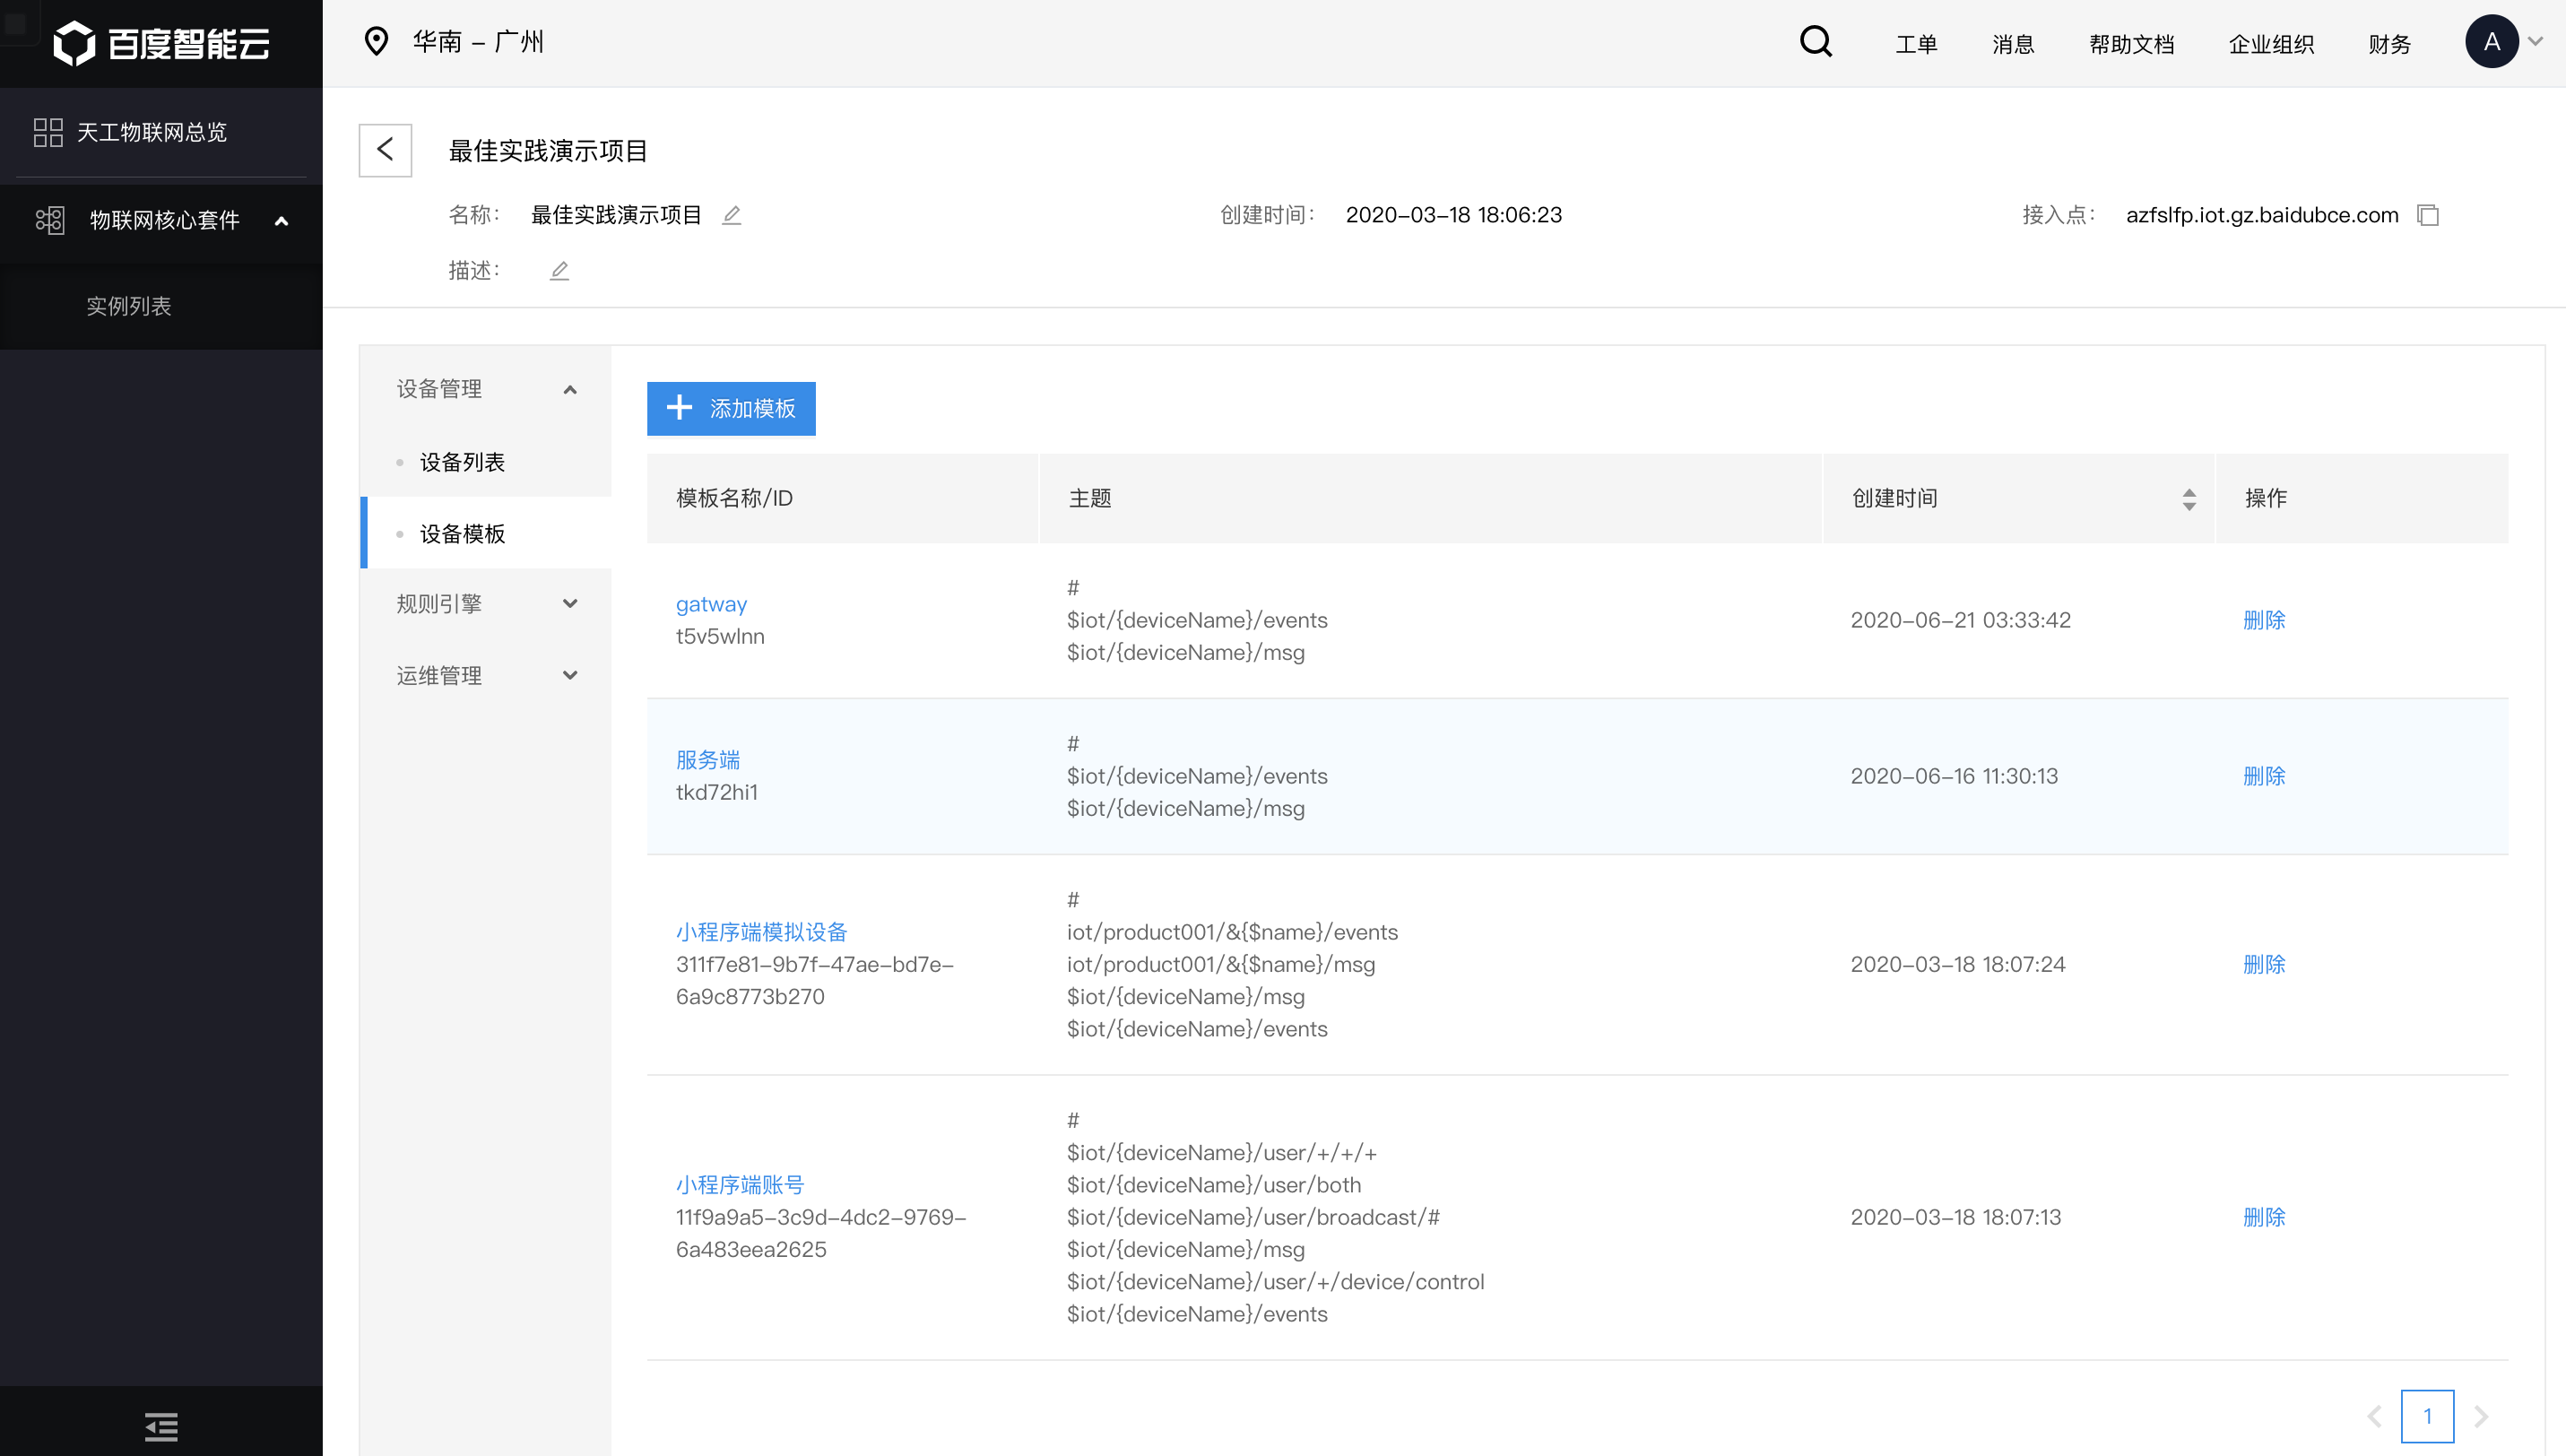
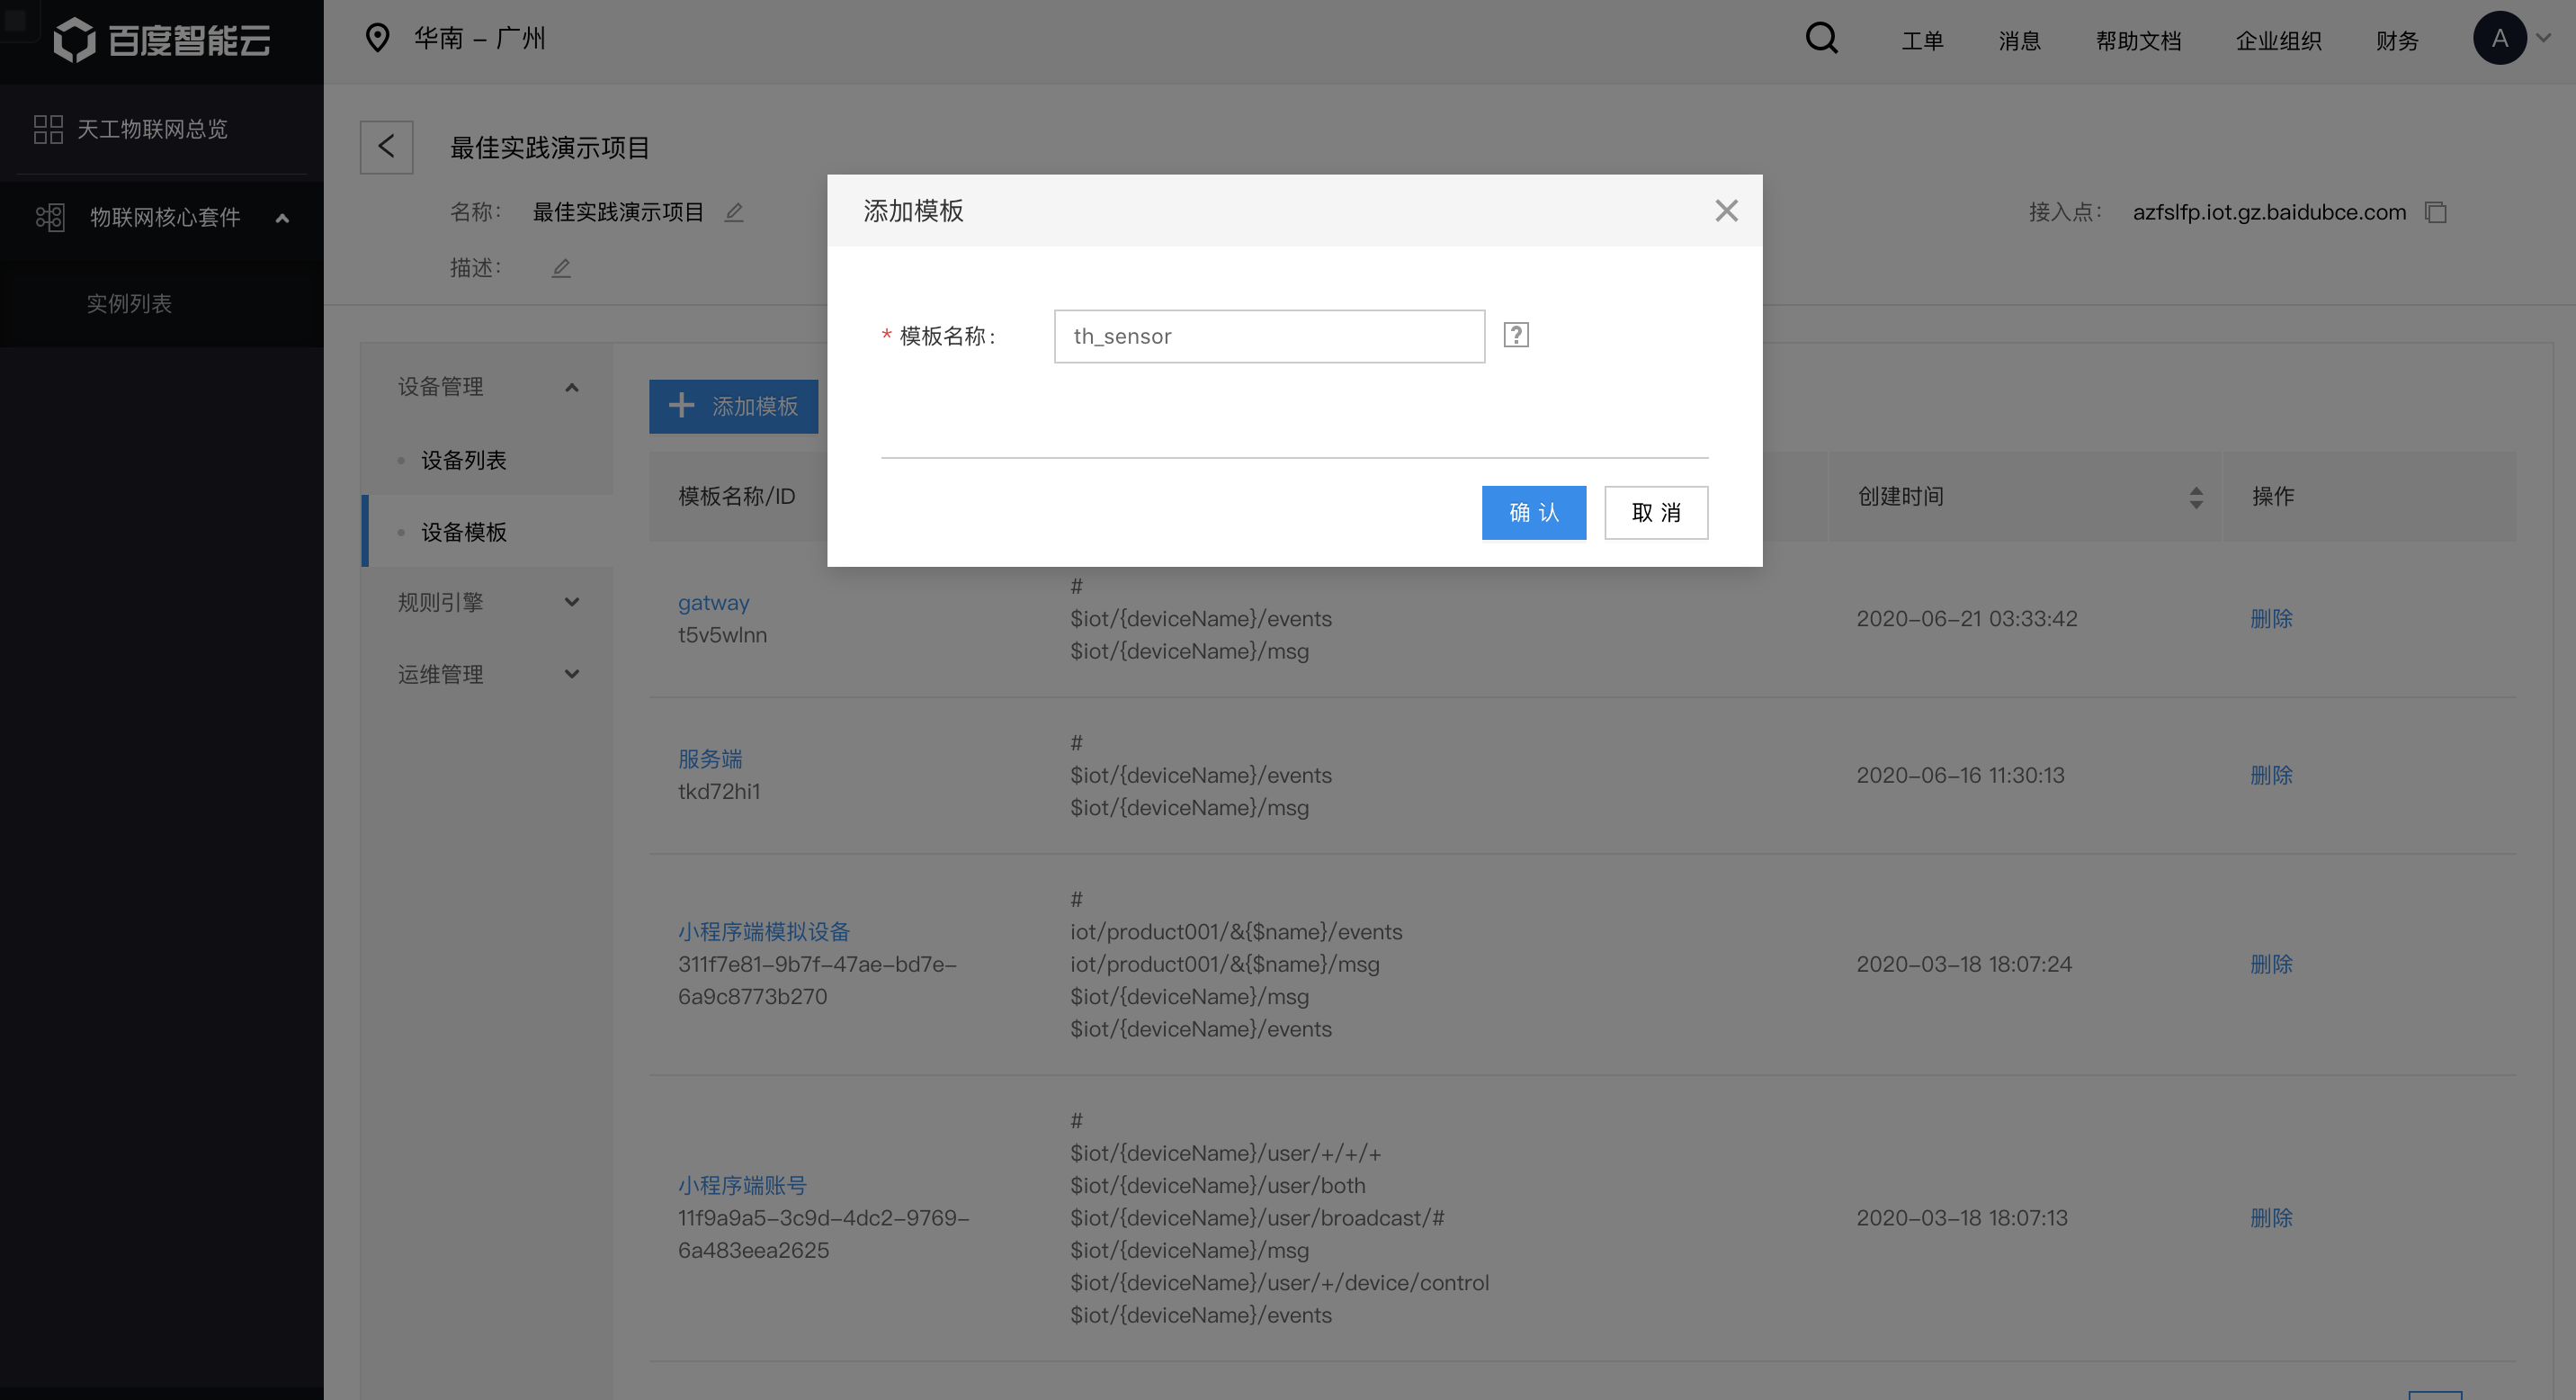
Click [Add Template], enter the template information and then submit, create a device template named th_sensor, and then you can view it in the template list after successful creation.
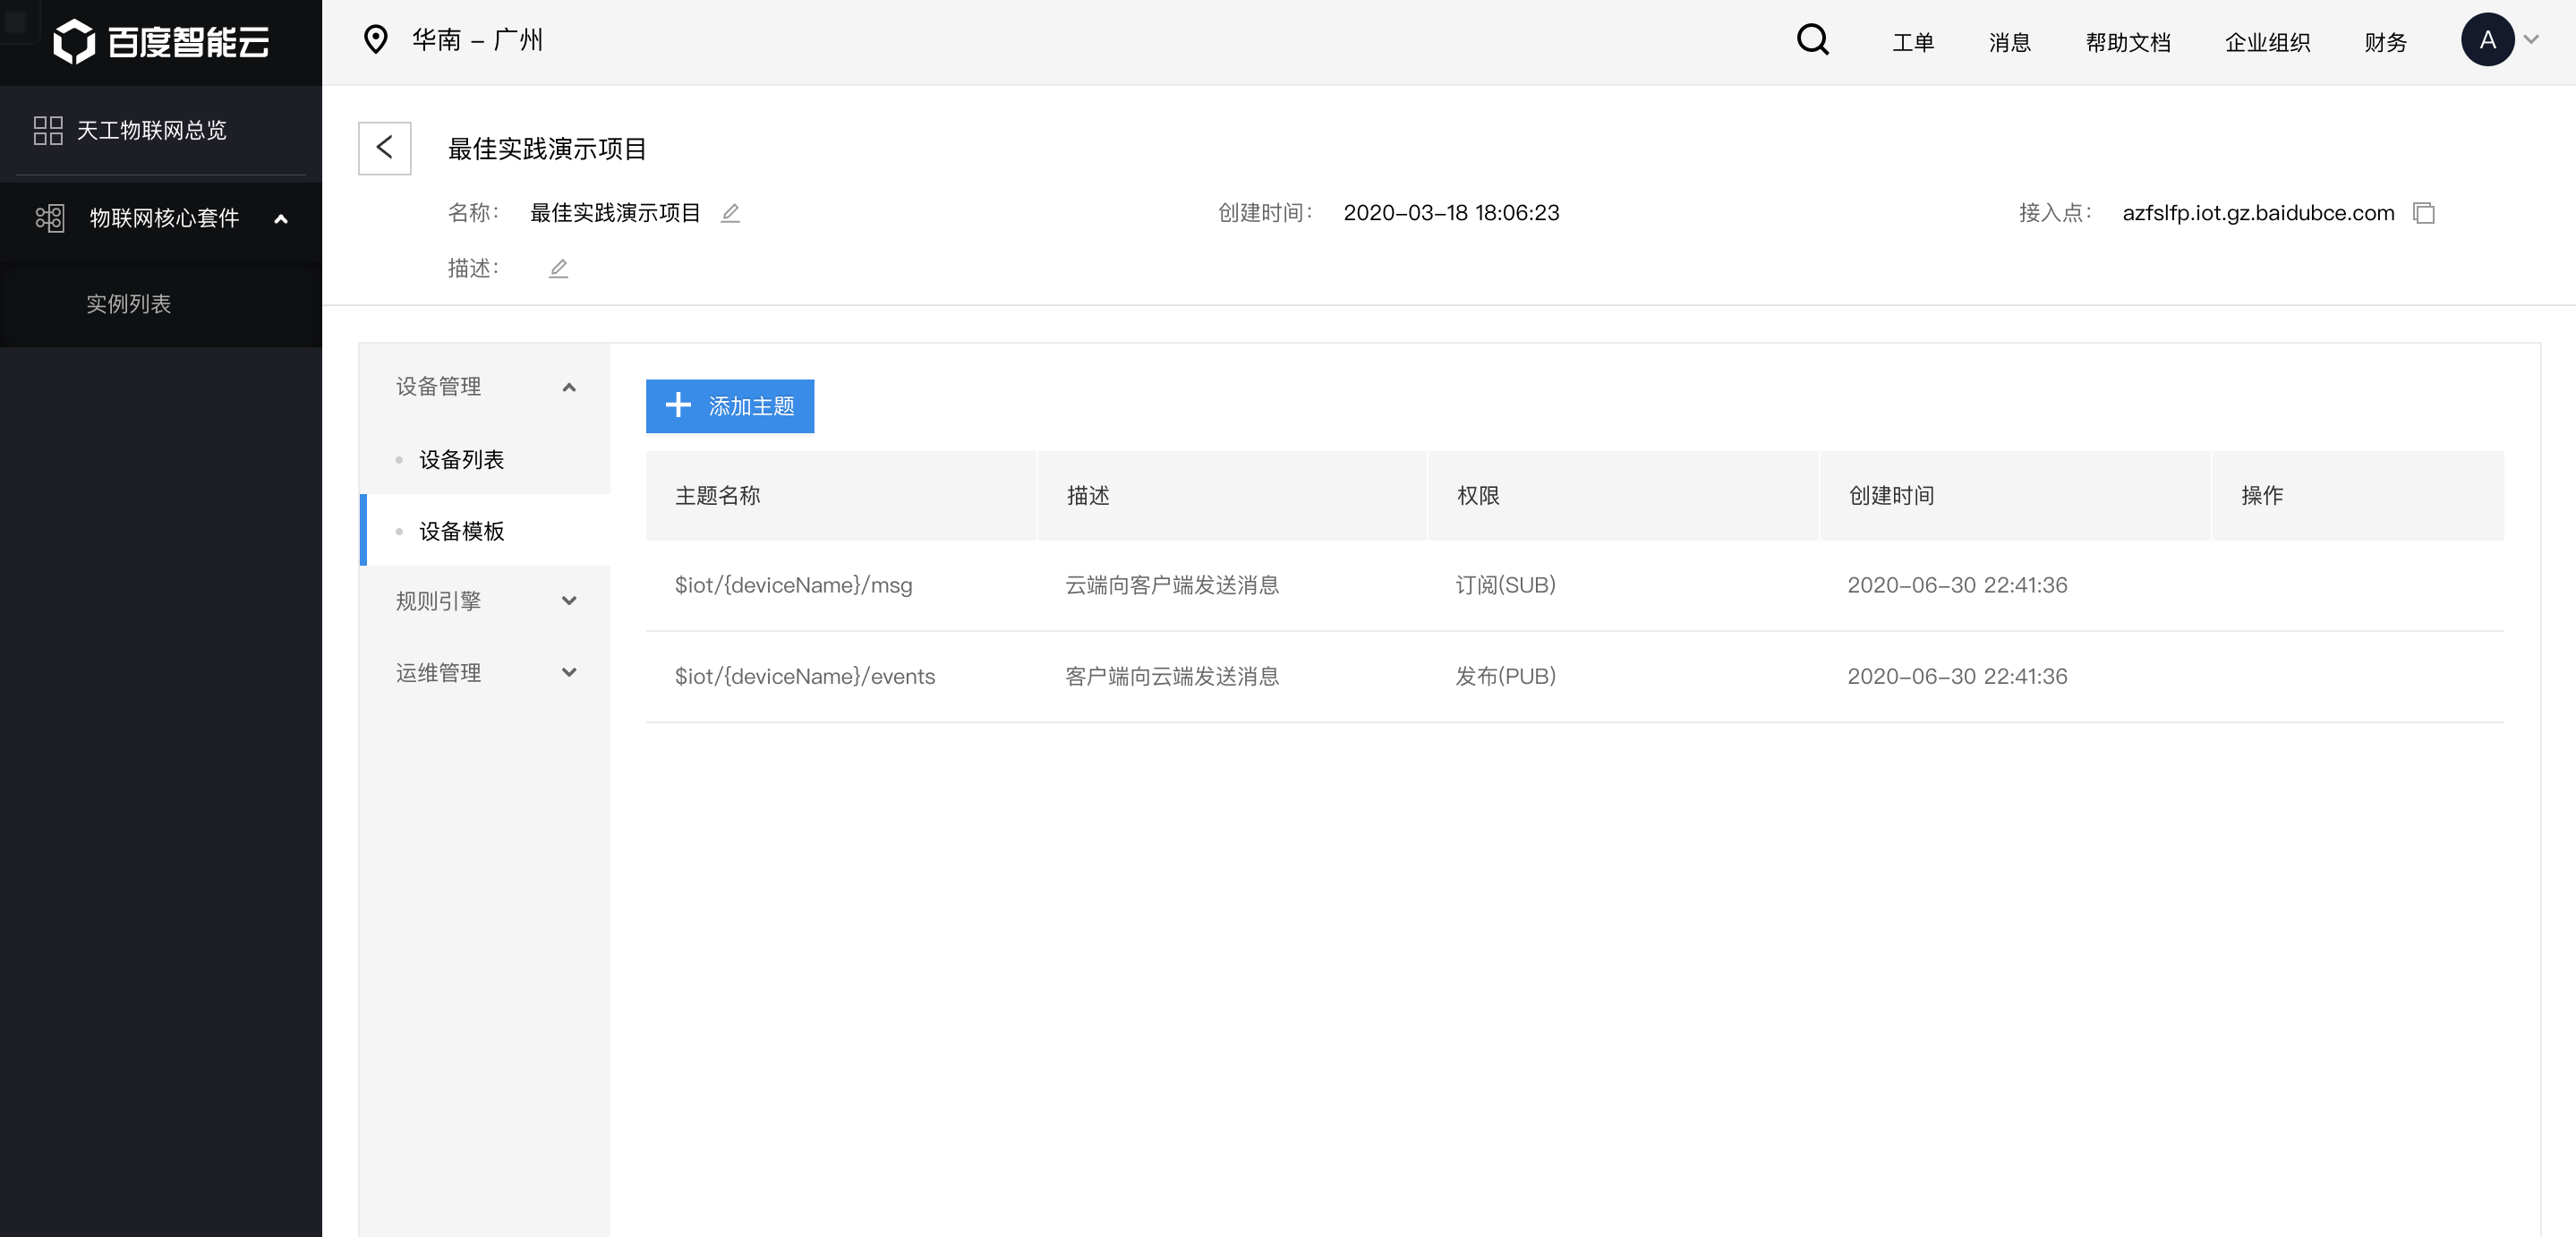
Create the device template that has been created just now in the list, enter the detailed page of device template, you can see the two topics pre-configured by the platform, among which deviceName is a placeholder, and shall be replaced with the device name in physical device.
Add equipment
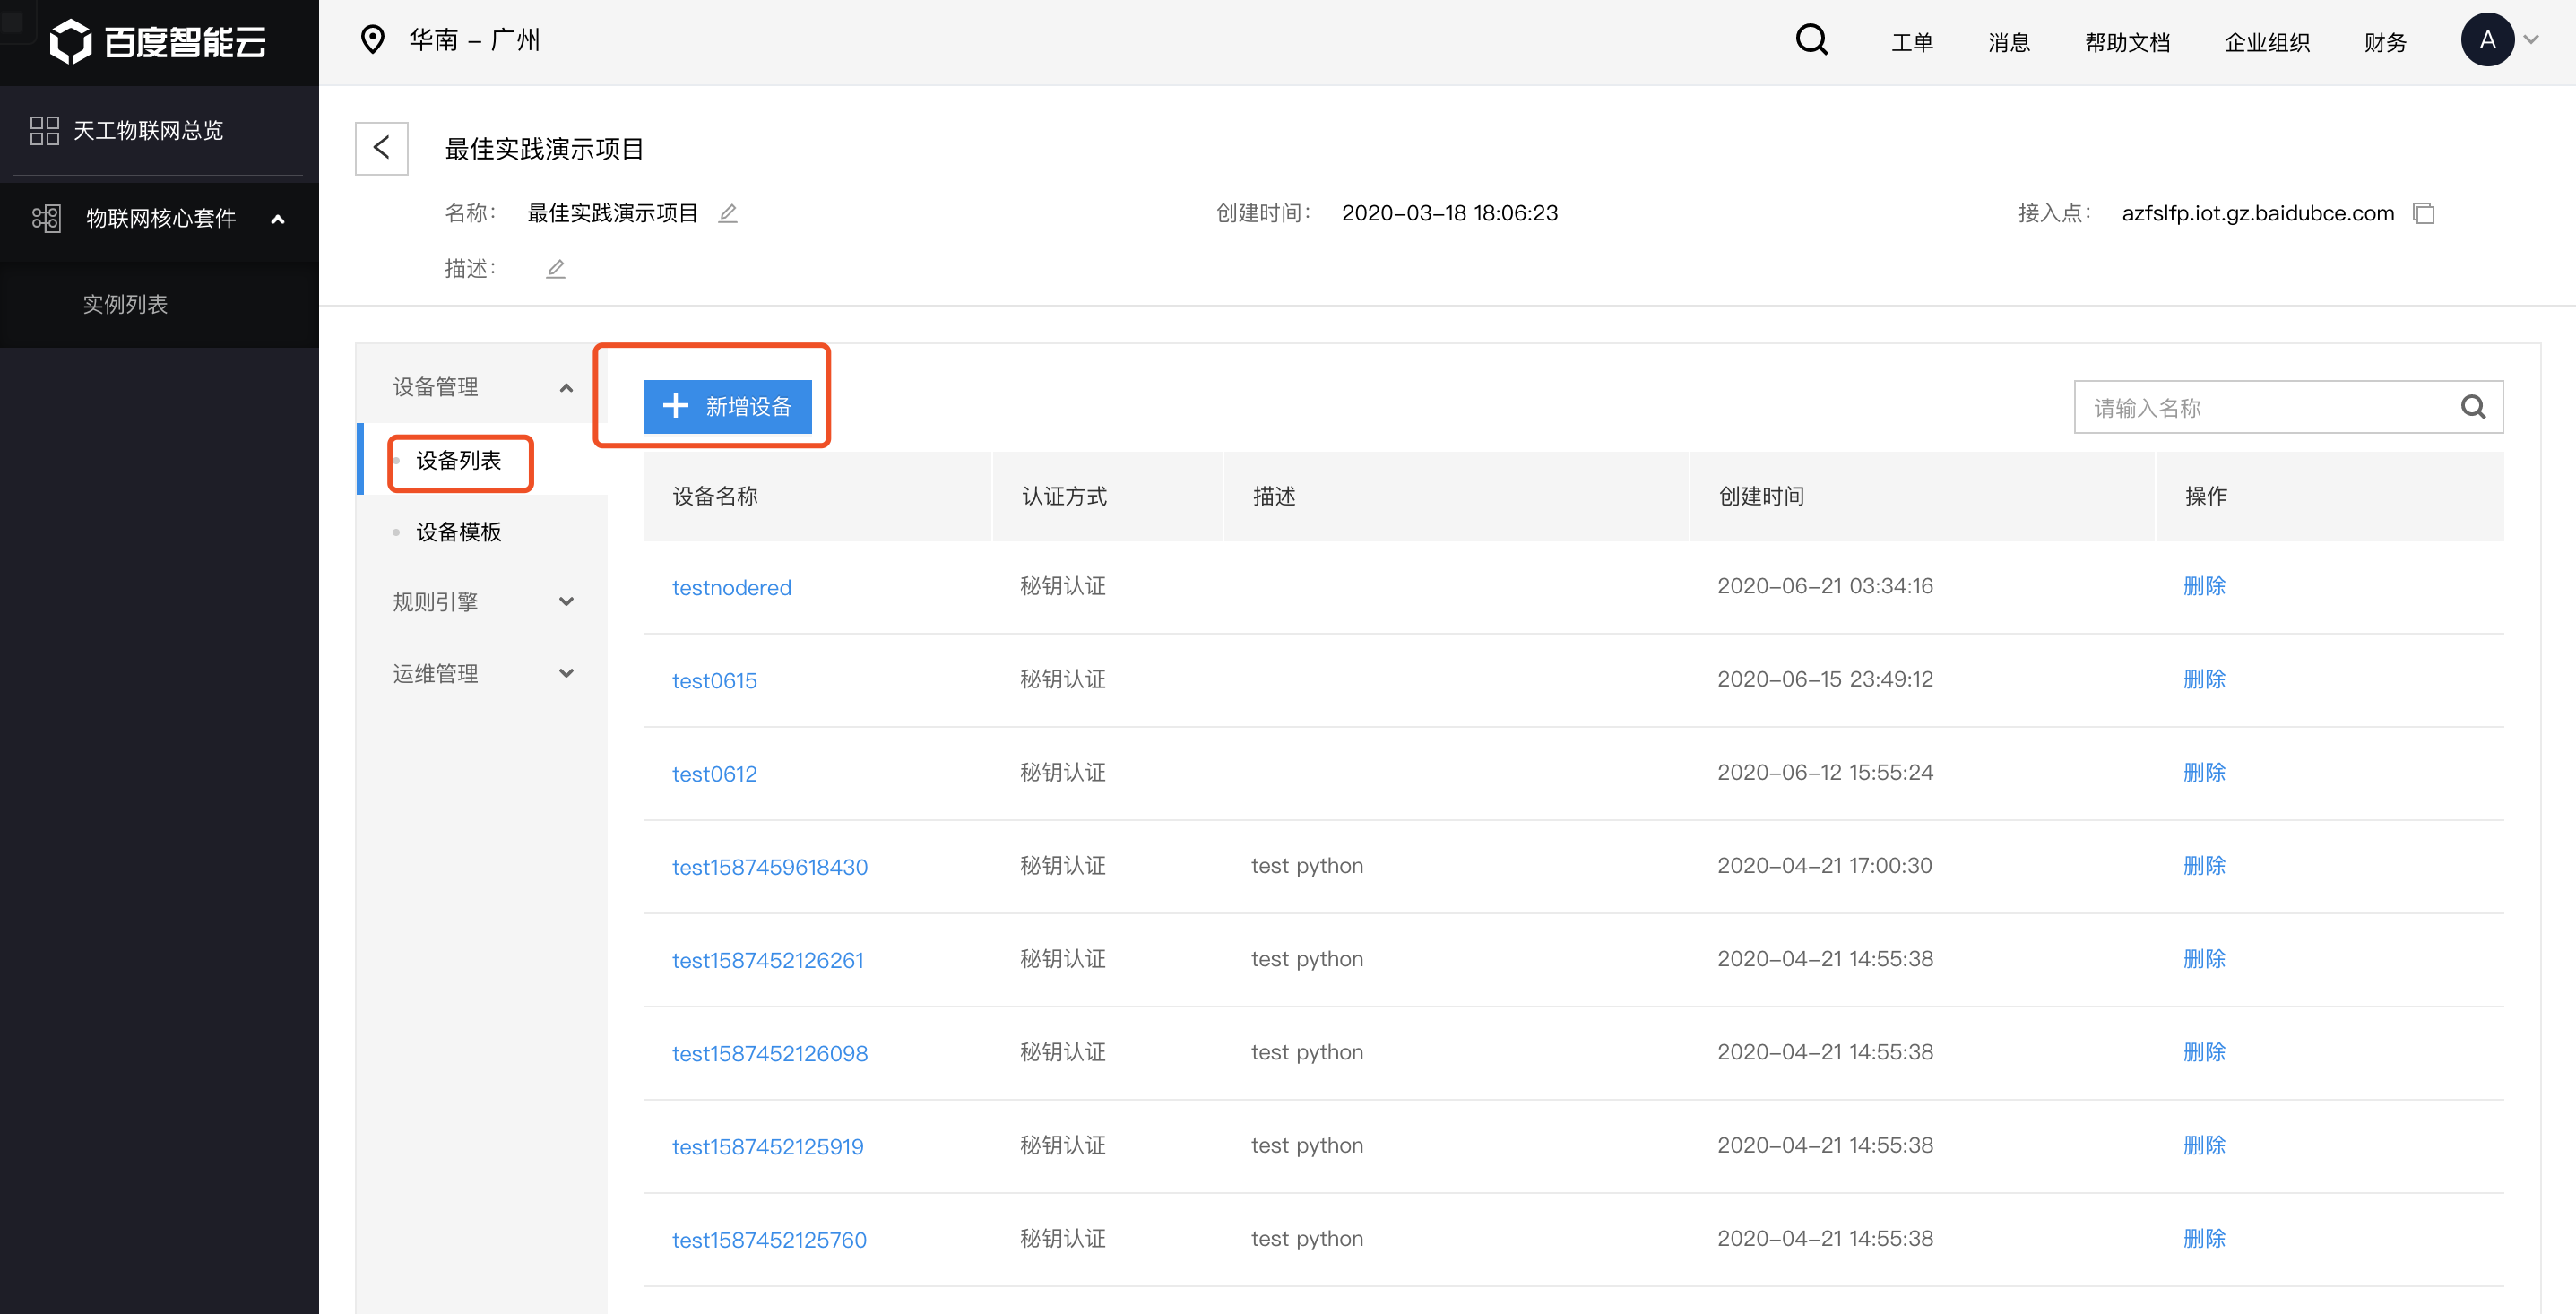
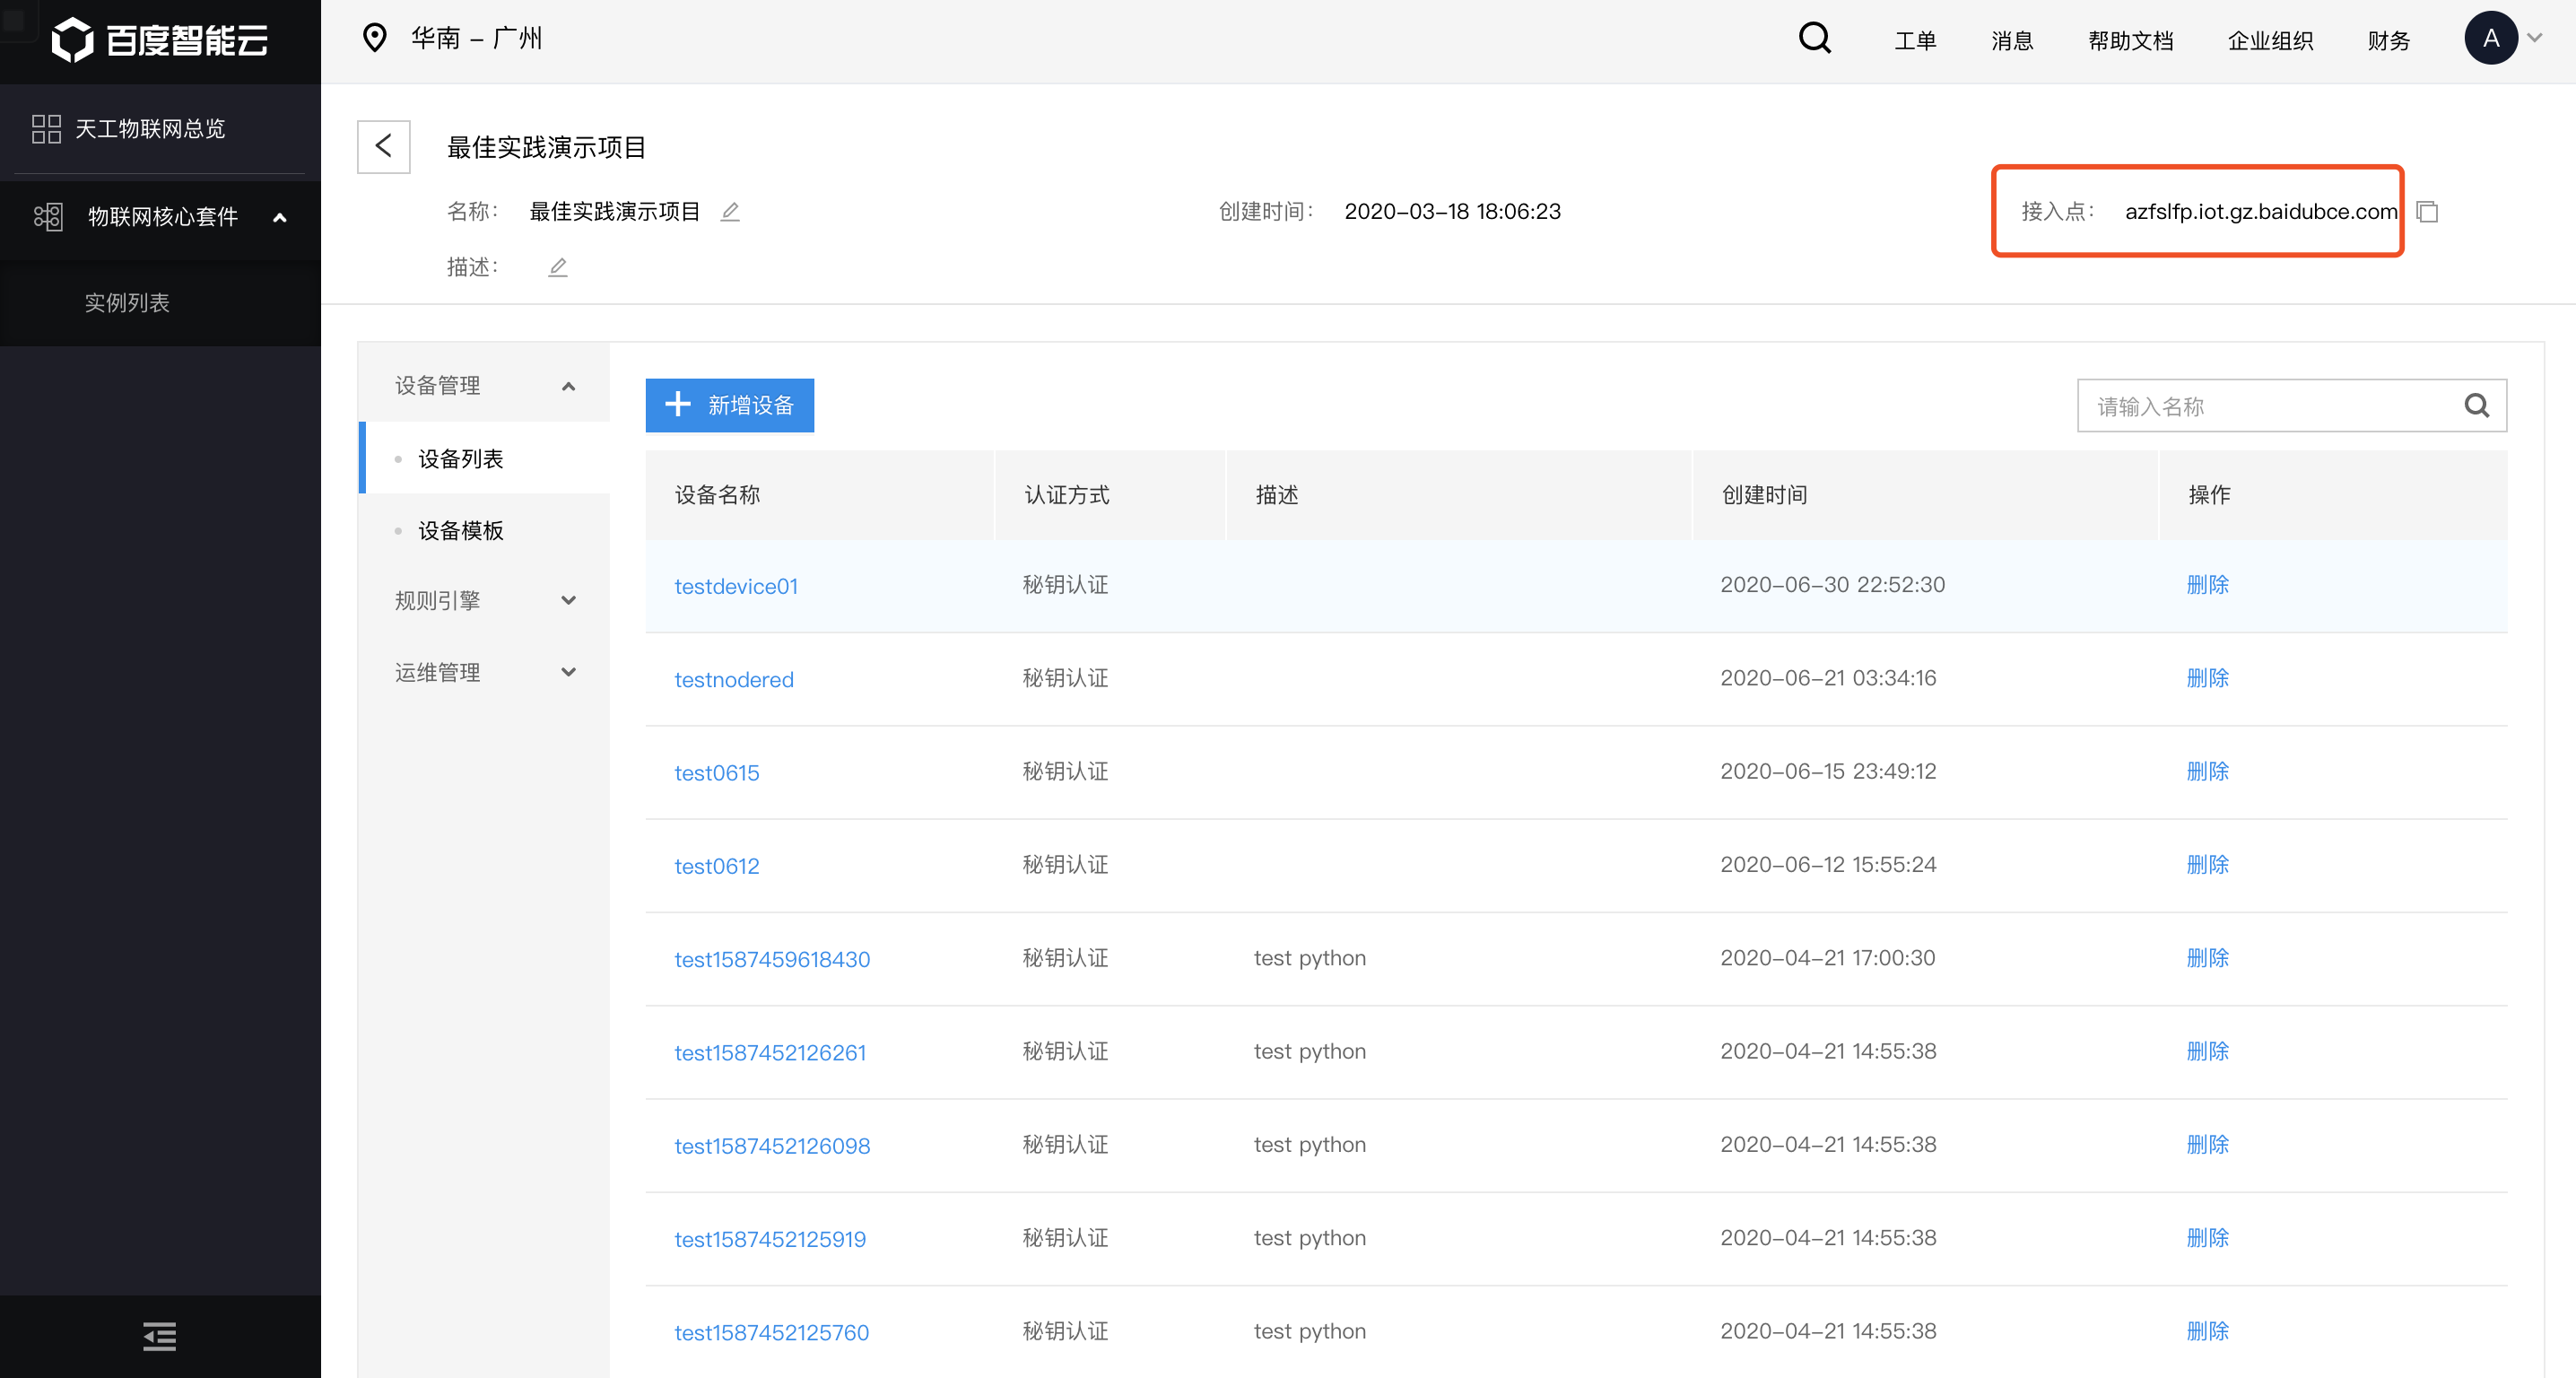
Click [Device List] menu on the left, and click [New Device] on the page of device list to add a device.
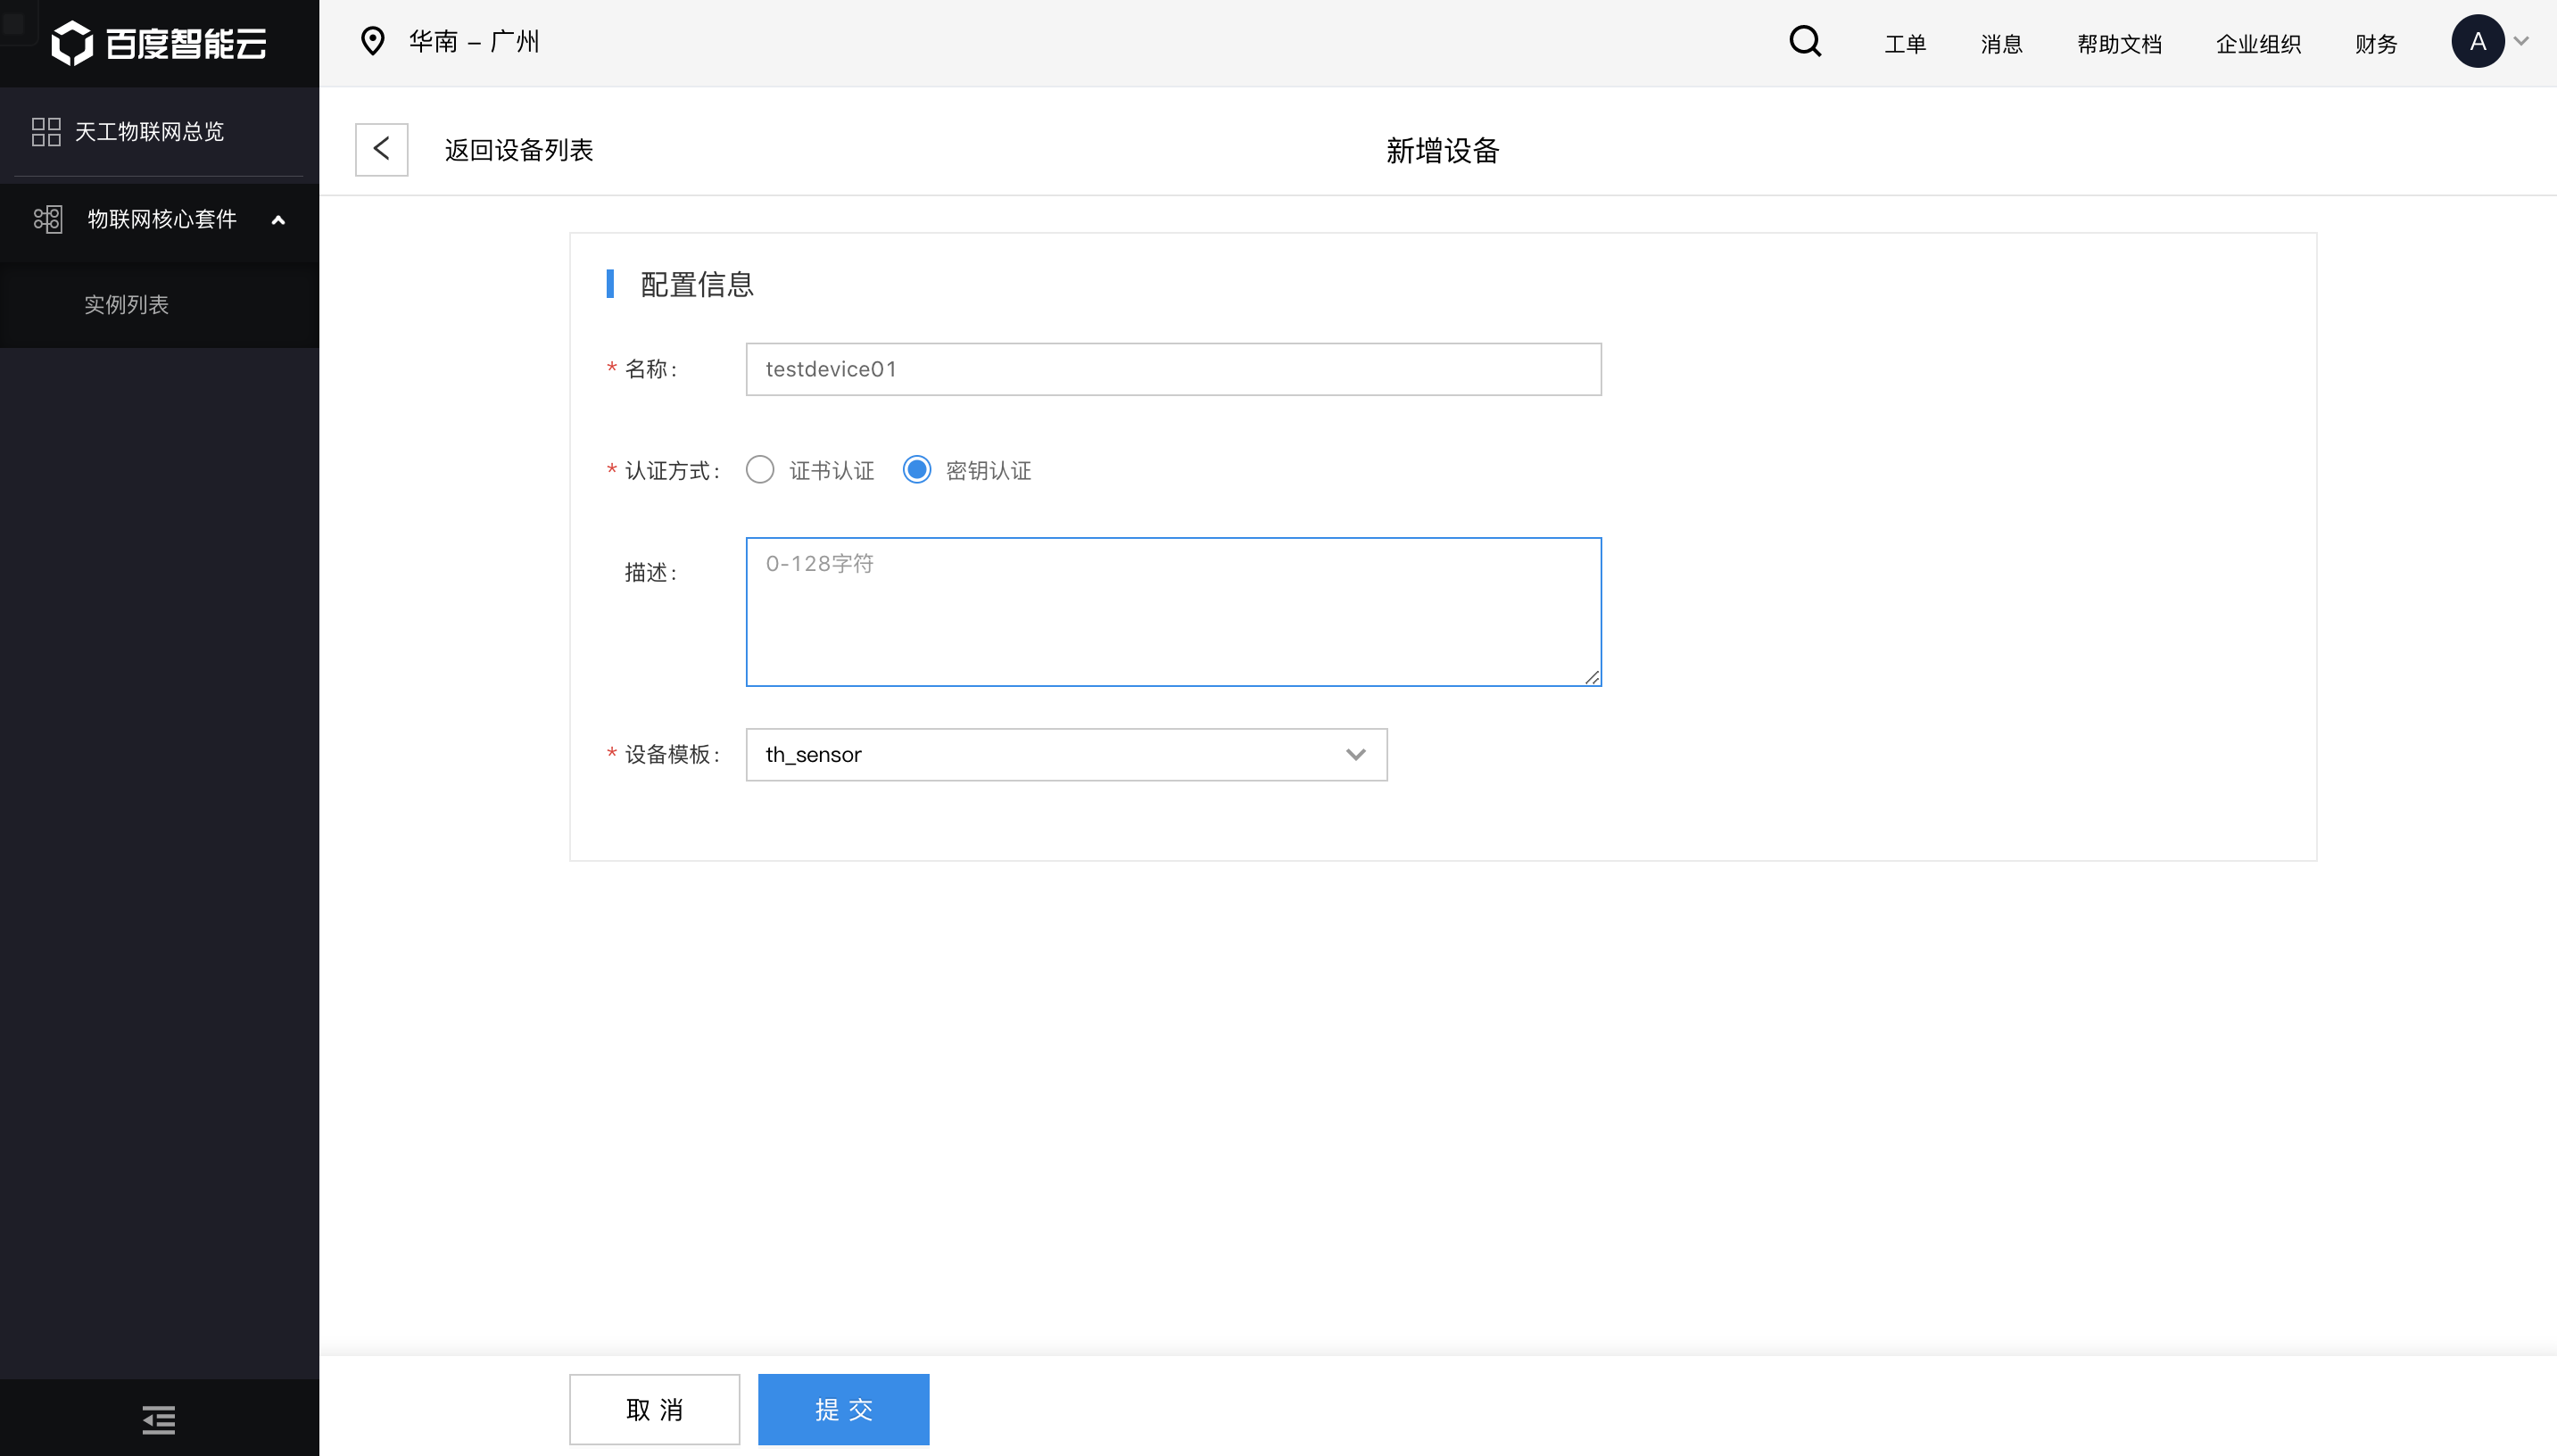
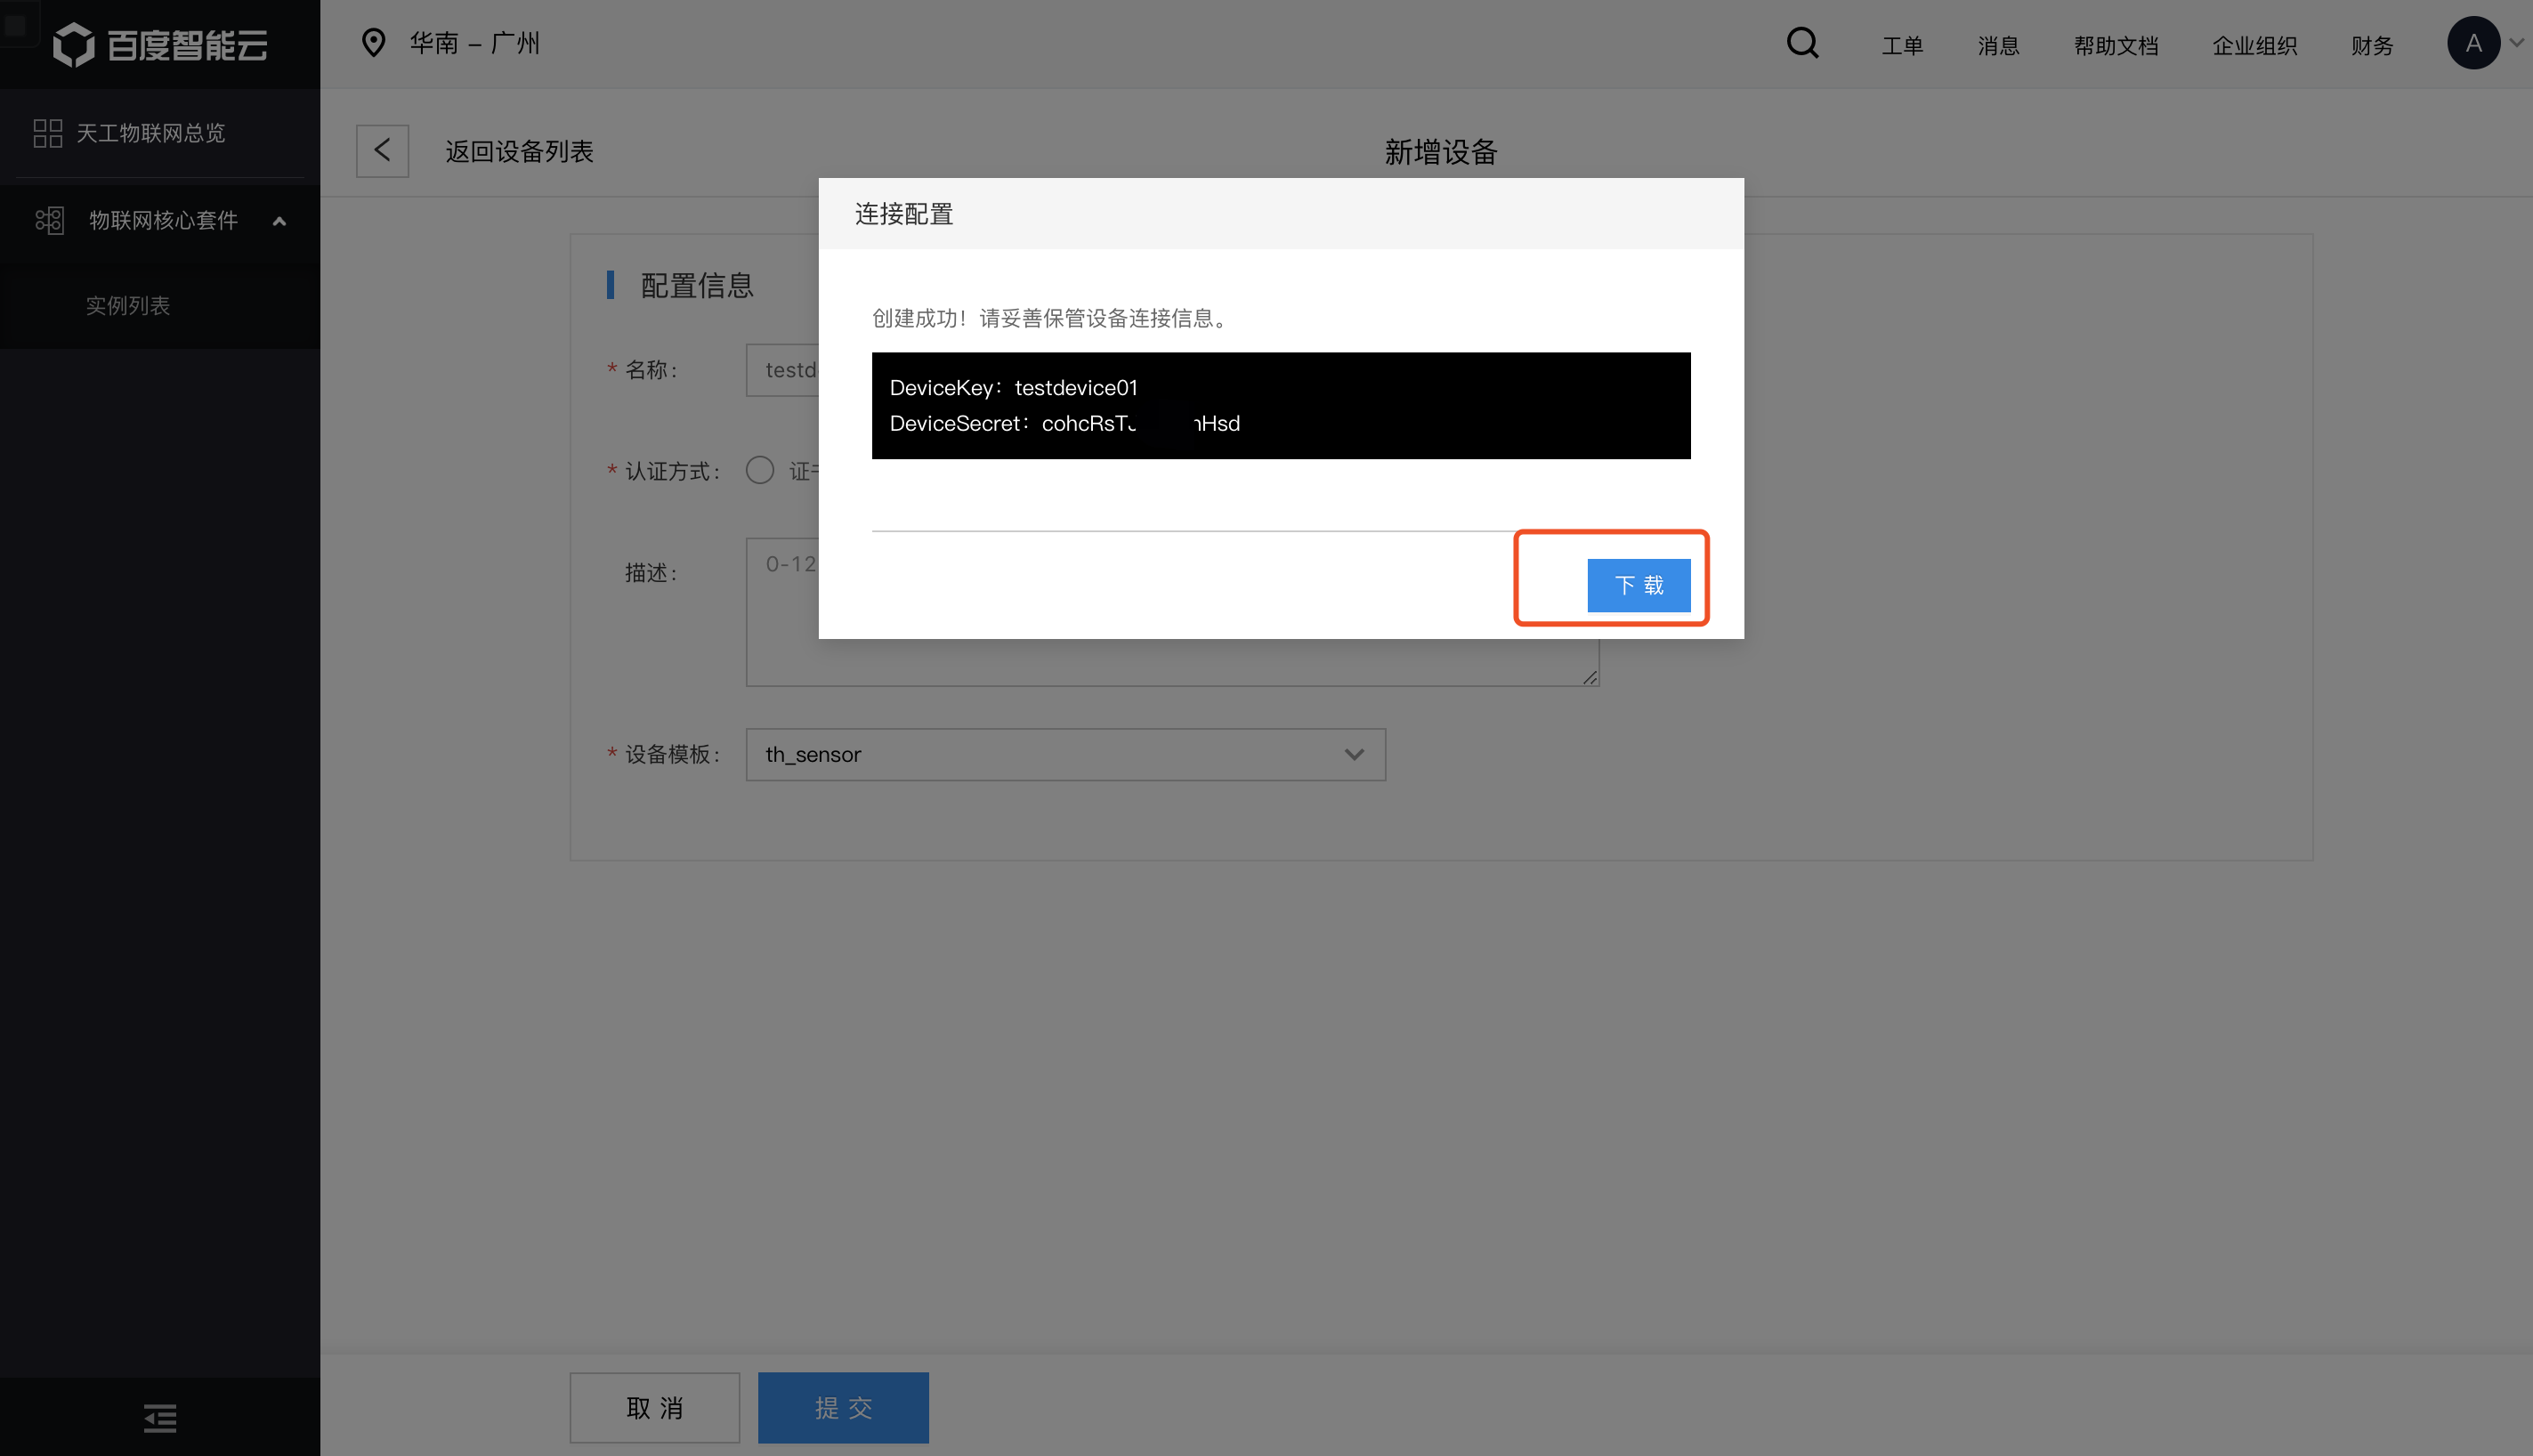
Add the device named testdevice01, tick [Secret Key Authentication] for authentication method, select the th_sensor device template created in the last step and submit to finish device creation.
After it is created successfully, it displays the device key. Click “download” to save the key record text.
Generate the device connection information
Use MQTT Connection Information Generator to generate the connection authorization information of the device, and record [Result (MQTT Connection Information)] for future use.
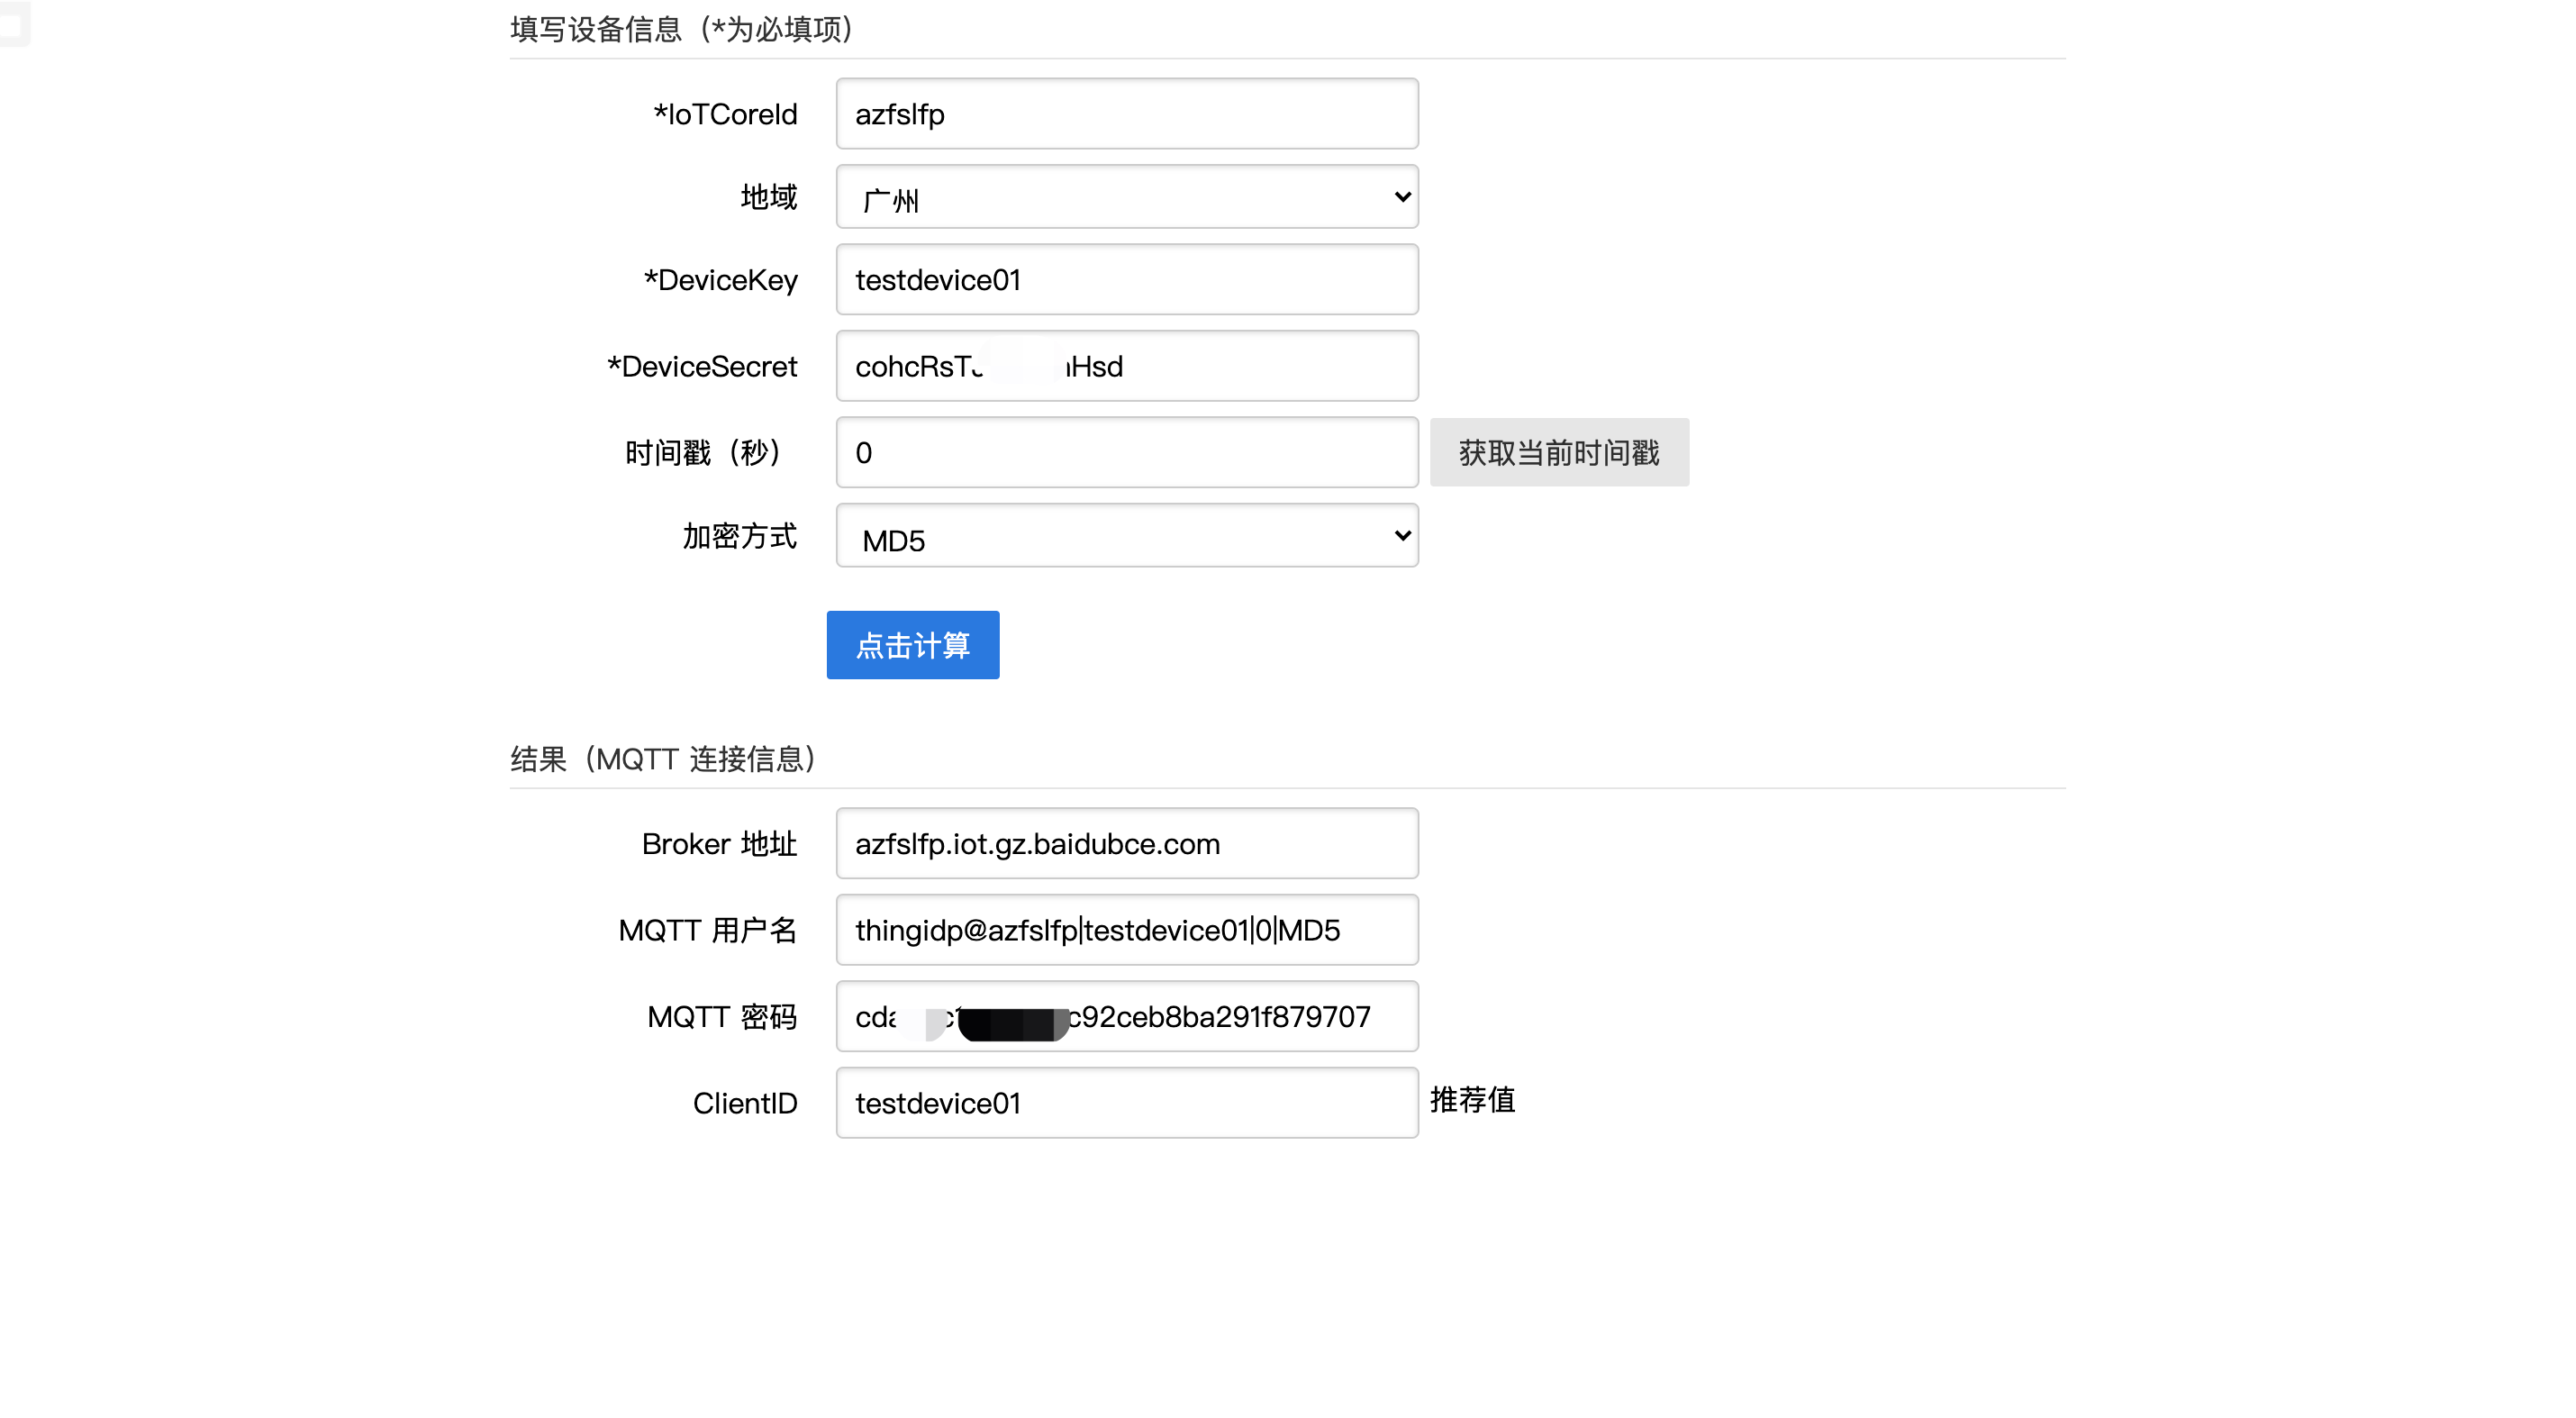
Note
- The timestamp is set to be 0, that is, the timestamp is not verified.
- IoTCoreId can be accessed from the access address in the top right corner of the detailed page.
Configure the rule engine
Create rules
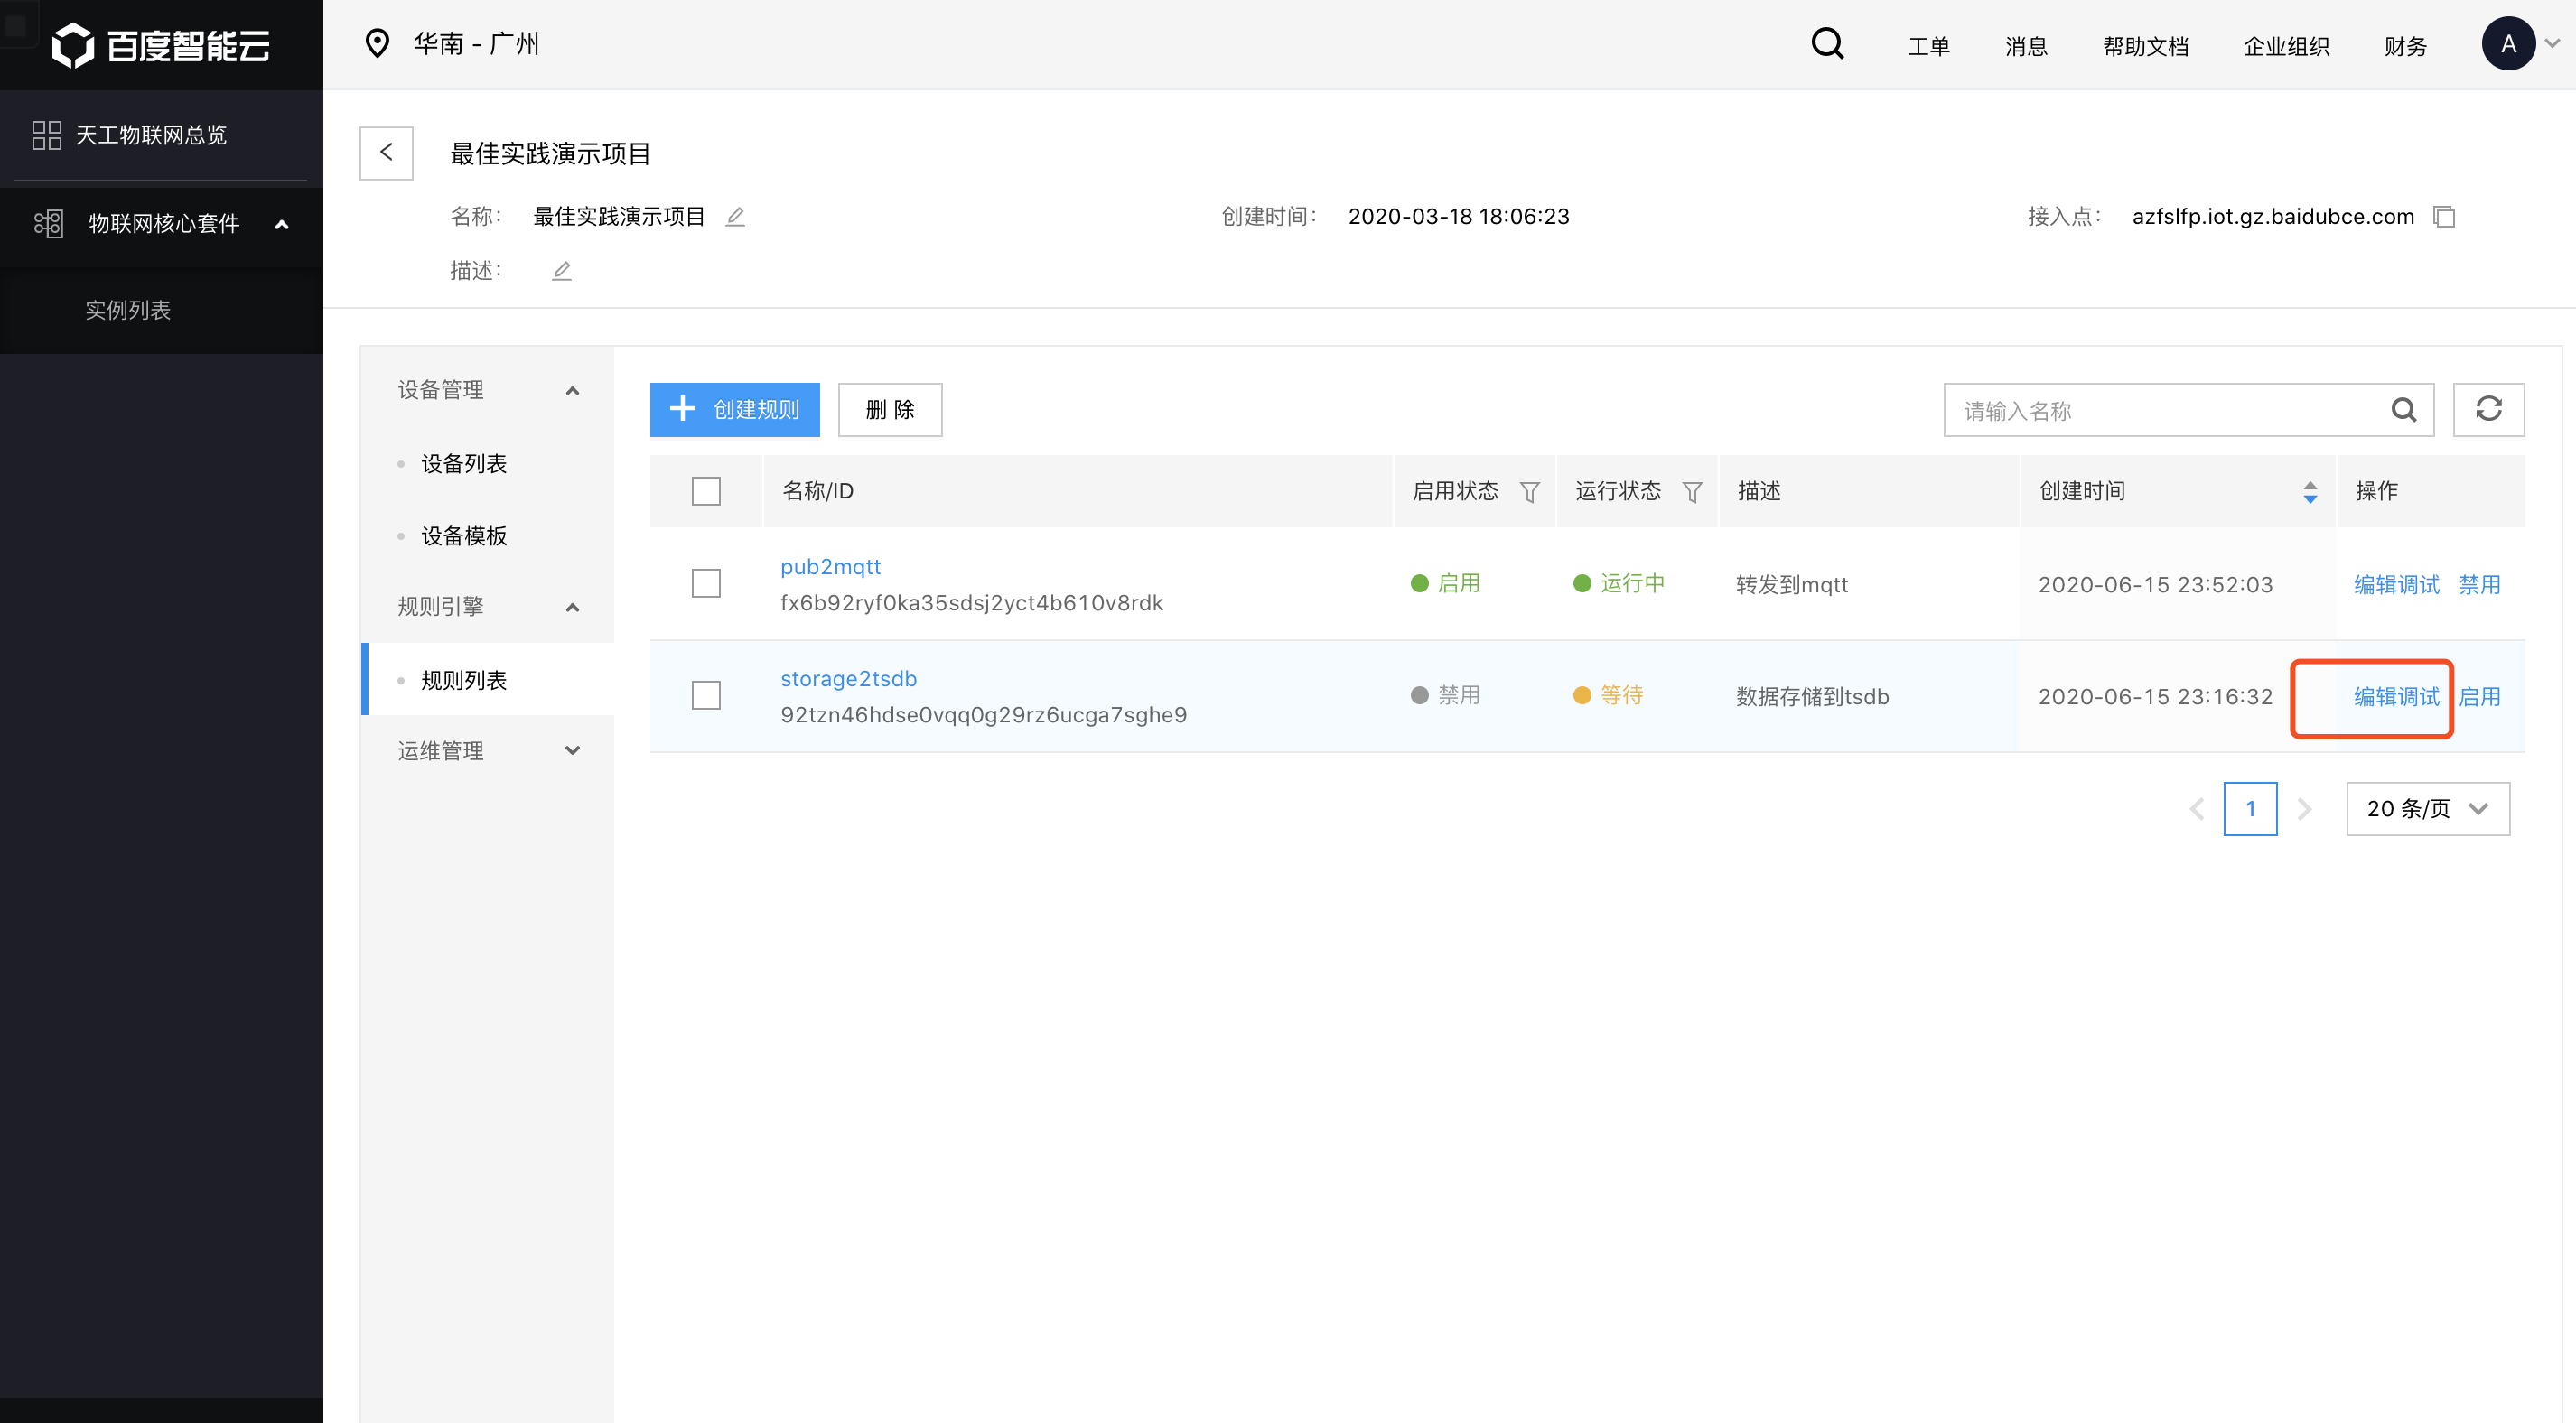
Click the [Rule Engine] menu on the left, enter the rule engine list page, click [Create Rules] to create a rule.
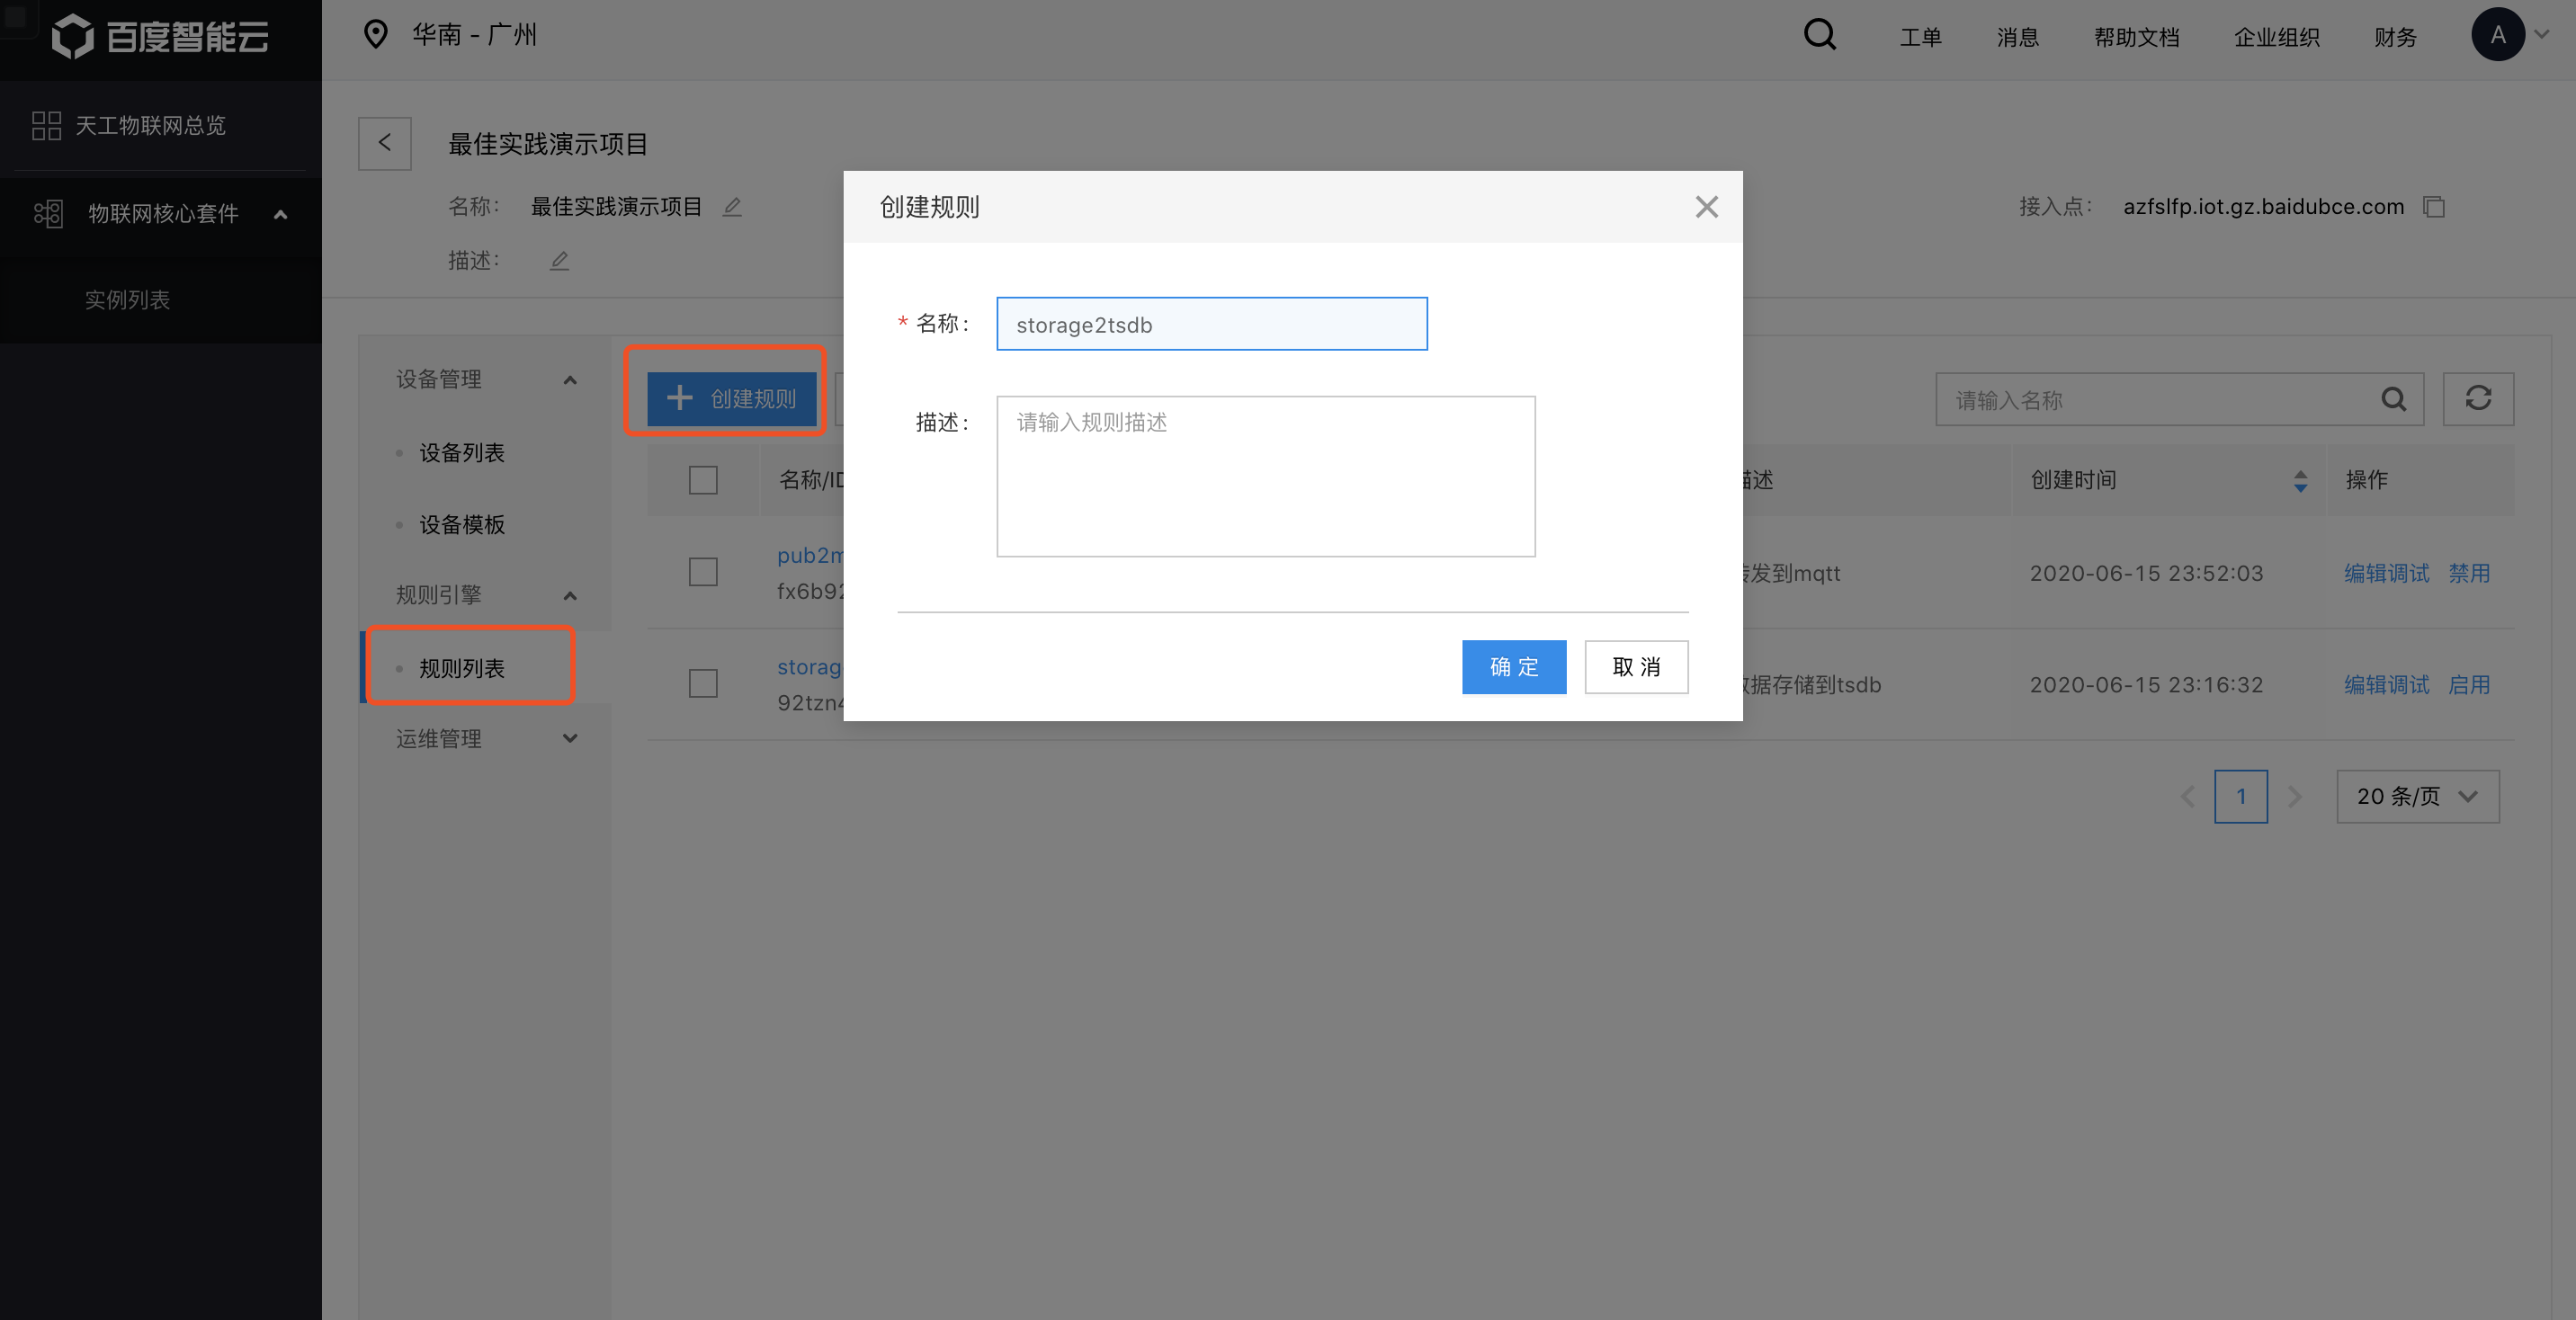
You can view it in the column after submission.
Configuration rules
Click [Edit Debugging] at the bottom of the rule list, and configure the rules.
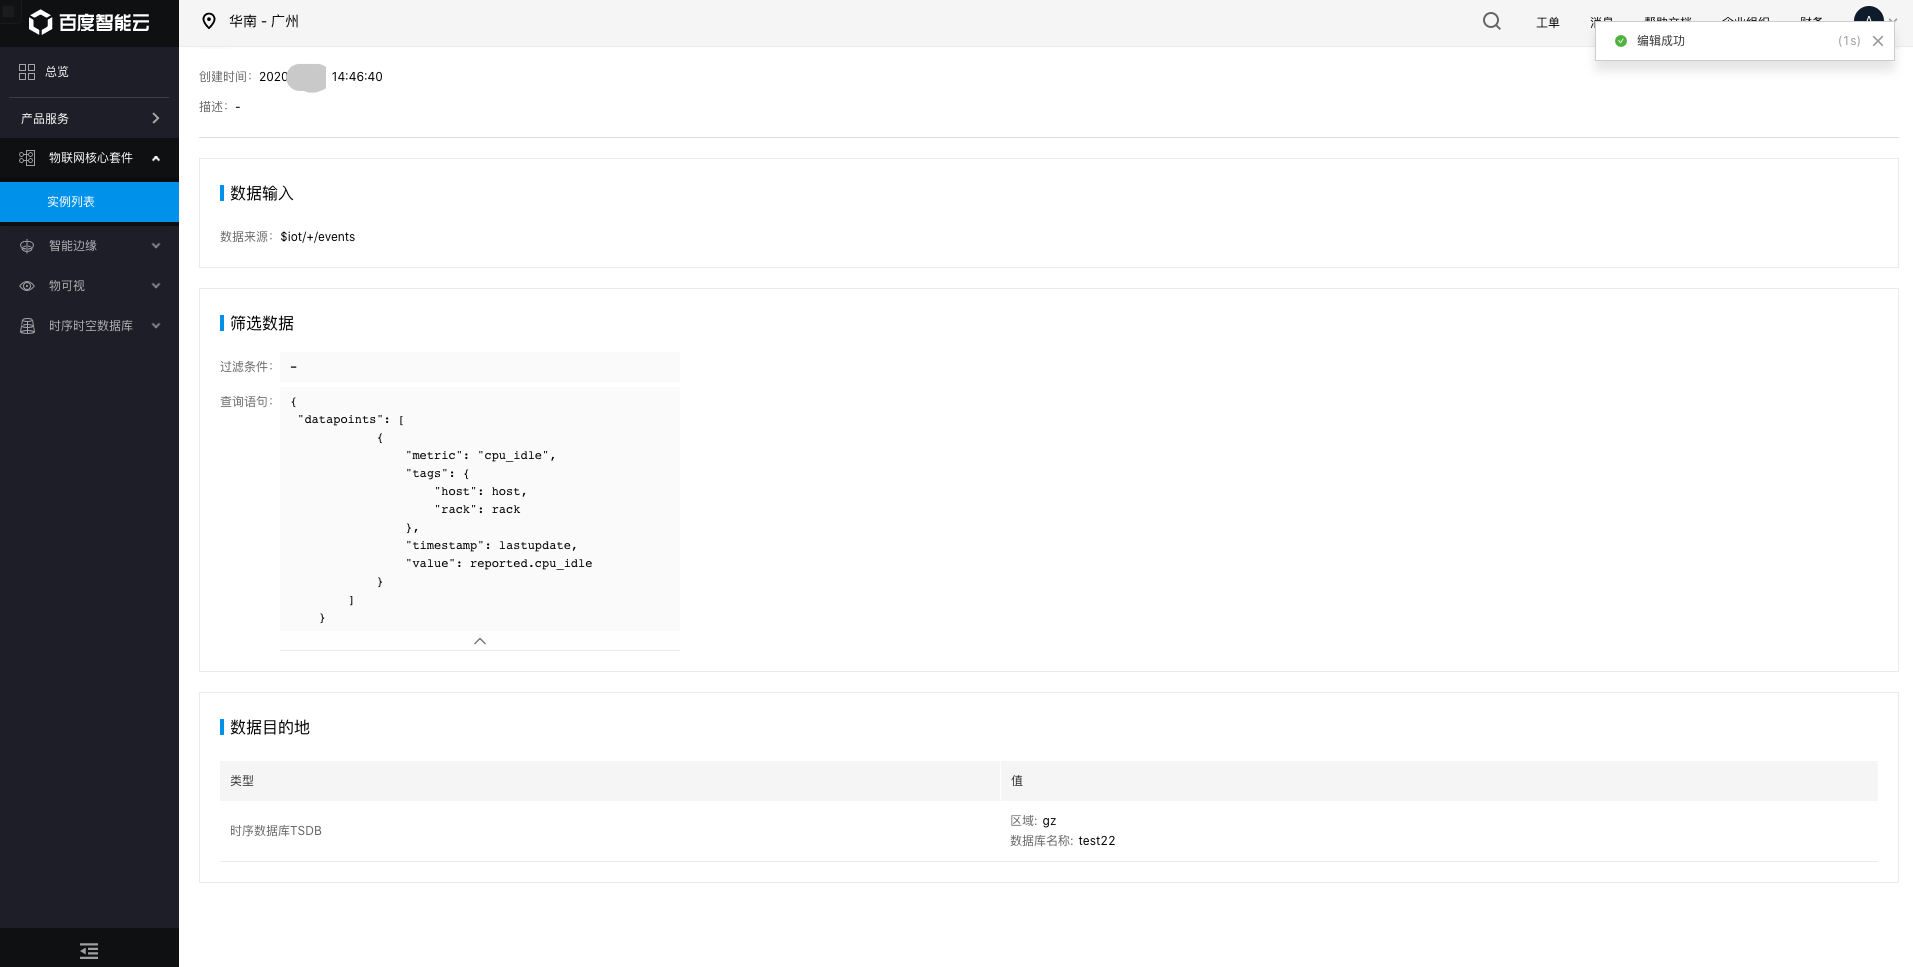
Set the data source topic to $iot/+/events (receive the status messages reported by the device).

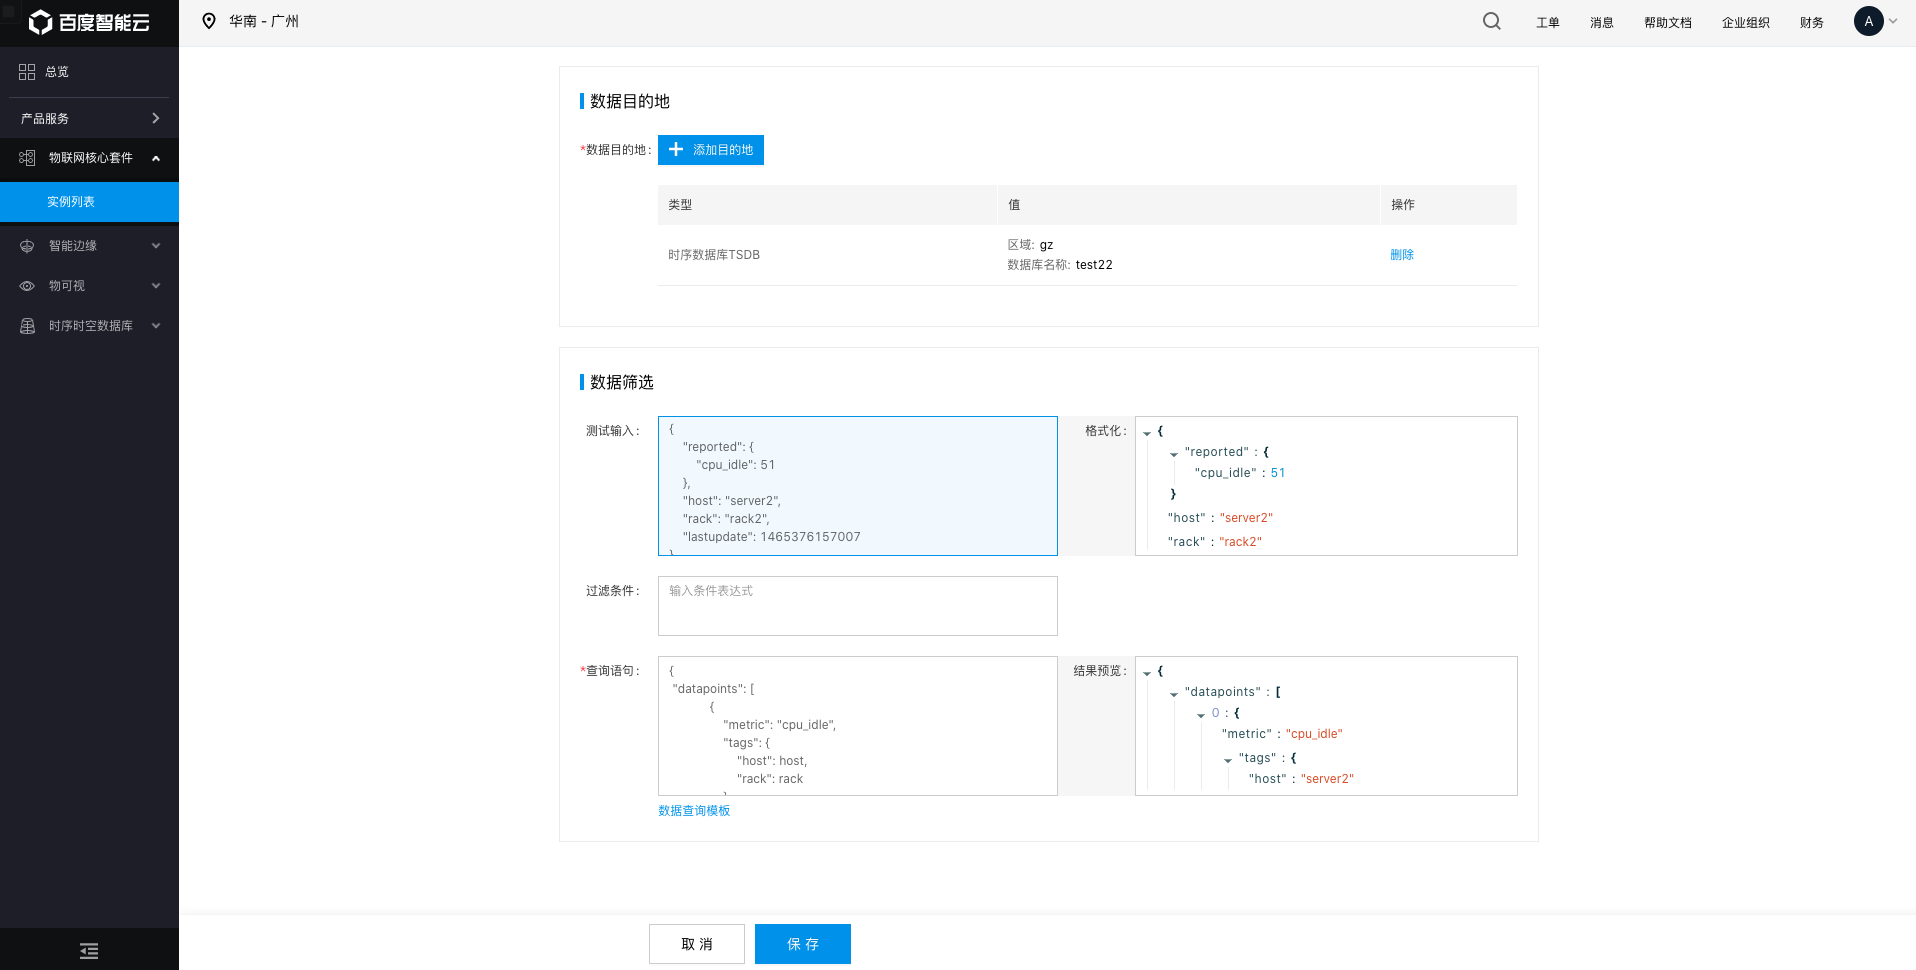
After adding the origin region, click [Add Destination] to select the destination type as [Time Series Database (TSDB)] and the region as [Southern China-Guangzhou], select the created TSDB instance, click [Create Time Series Database] button to create if the database instance is not created, and return to this page to click the refresh button on the right of [Database Name] to display after creating successfully.

Write the query statement
In the practice, the sample message we use is:
{
    "reqId":"442c1da4-9d3a-4f9b-a6e9-bfe858e4ac43",
    "method":"thing.event.post",
    "lastupdate":1465376157007,
    "properties":{
        "temperature":35,
        "humidity":25
    }
}
The configuration for query statement is:
{
 "datapoints": [
    {
     "metric": "temperature",
     "tags": {
            "devicename": "testdevice01",
            "product": "th_sensor"
             },
     "timestamp": lastupdate,
     "value": properties.temperature
    },
    {
     "metric": "humidity",
     "tags": {
             "devicename": "testdevice01",
            "product": "th_sensor"
             },
     "timestamp": lastupdate,
     "value": properties.humidity
    }]
 }
Saving the configuration information, after which you enter the detailed rule page and check if the rules are configured correctly, click the back button on the top left corner to return to the page of rule list.
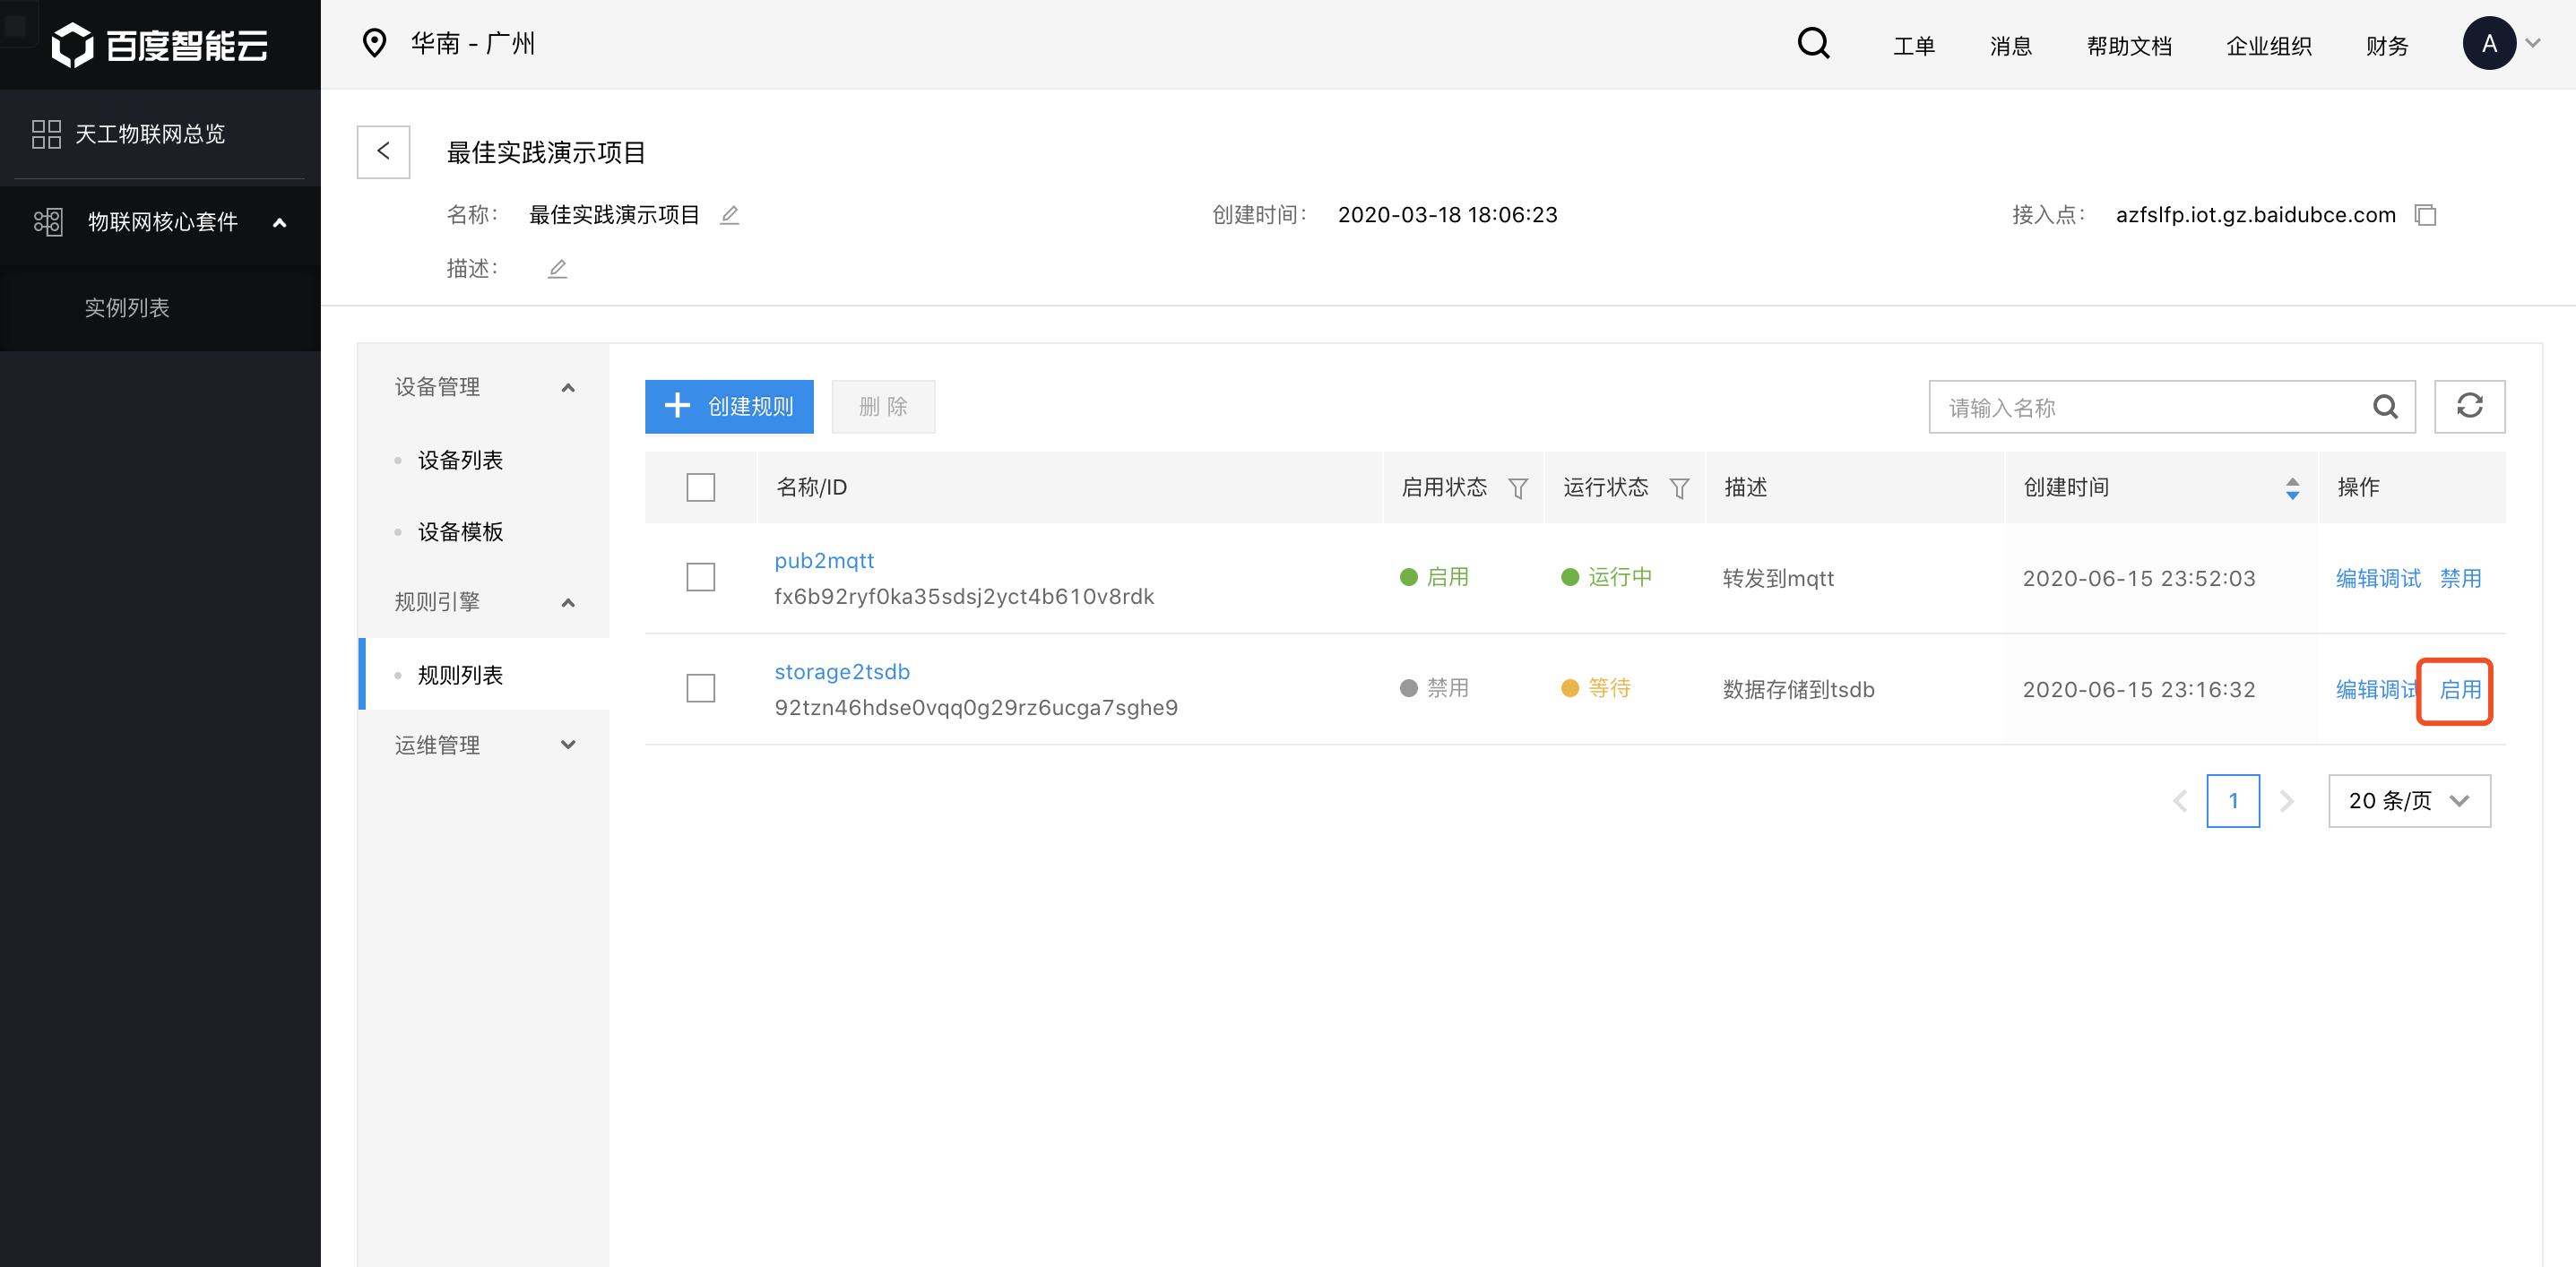
Enable the rules
Click the [Enable] button to the right of the rules on the list page to enable the rules.
The analog device reports the status data of temperature and humidity
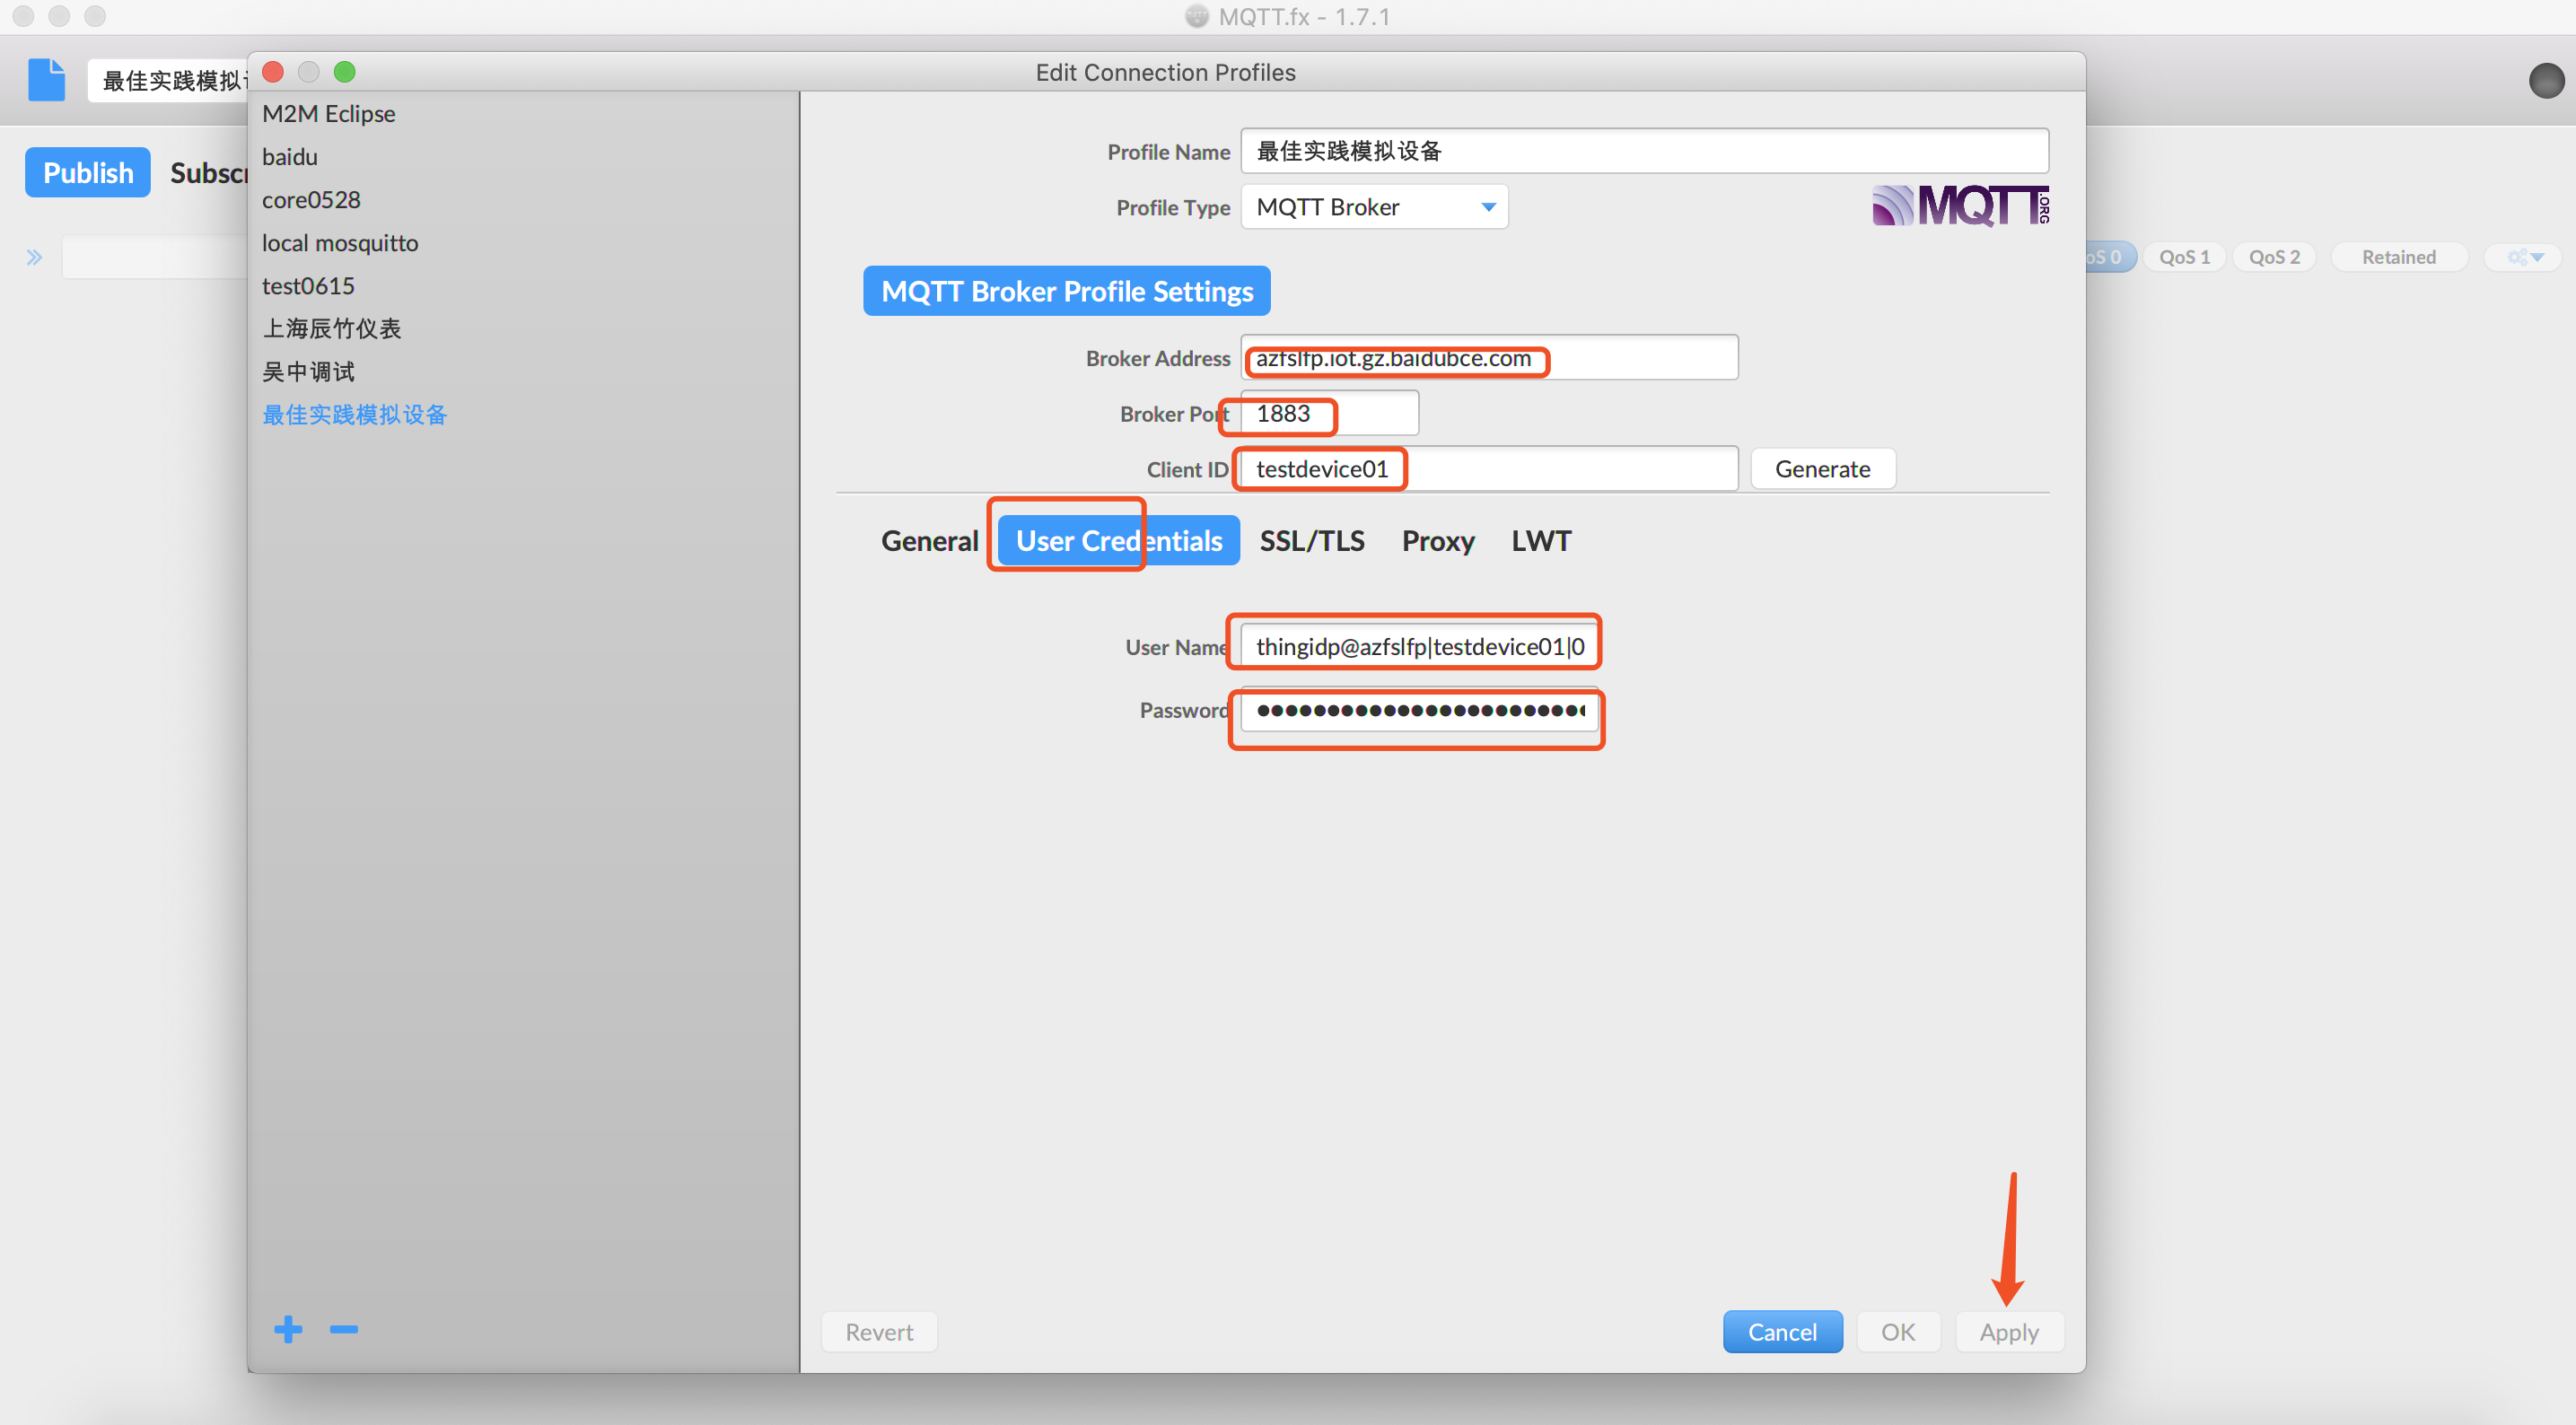
Configure MQTT.fx
Enter the MQTT connection information generated previously in MQTT.fx and store.
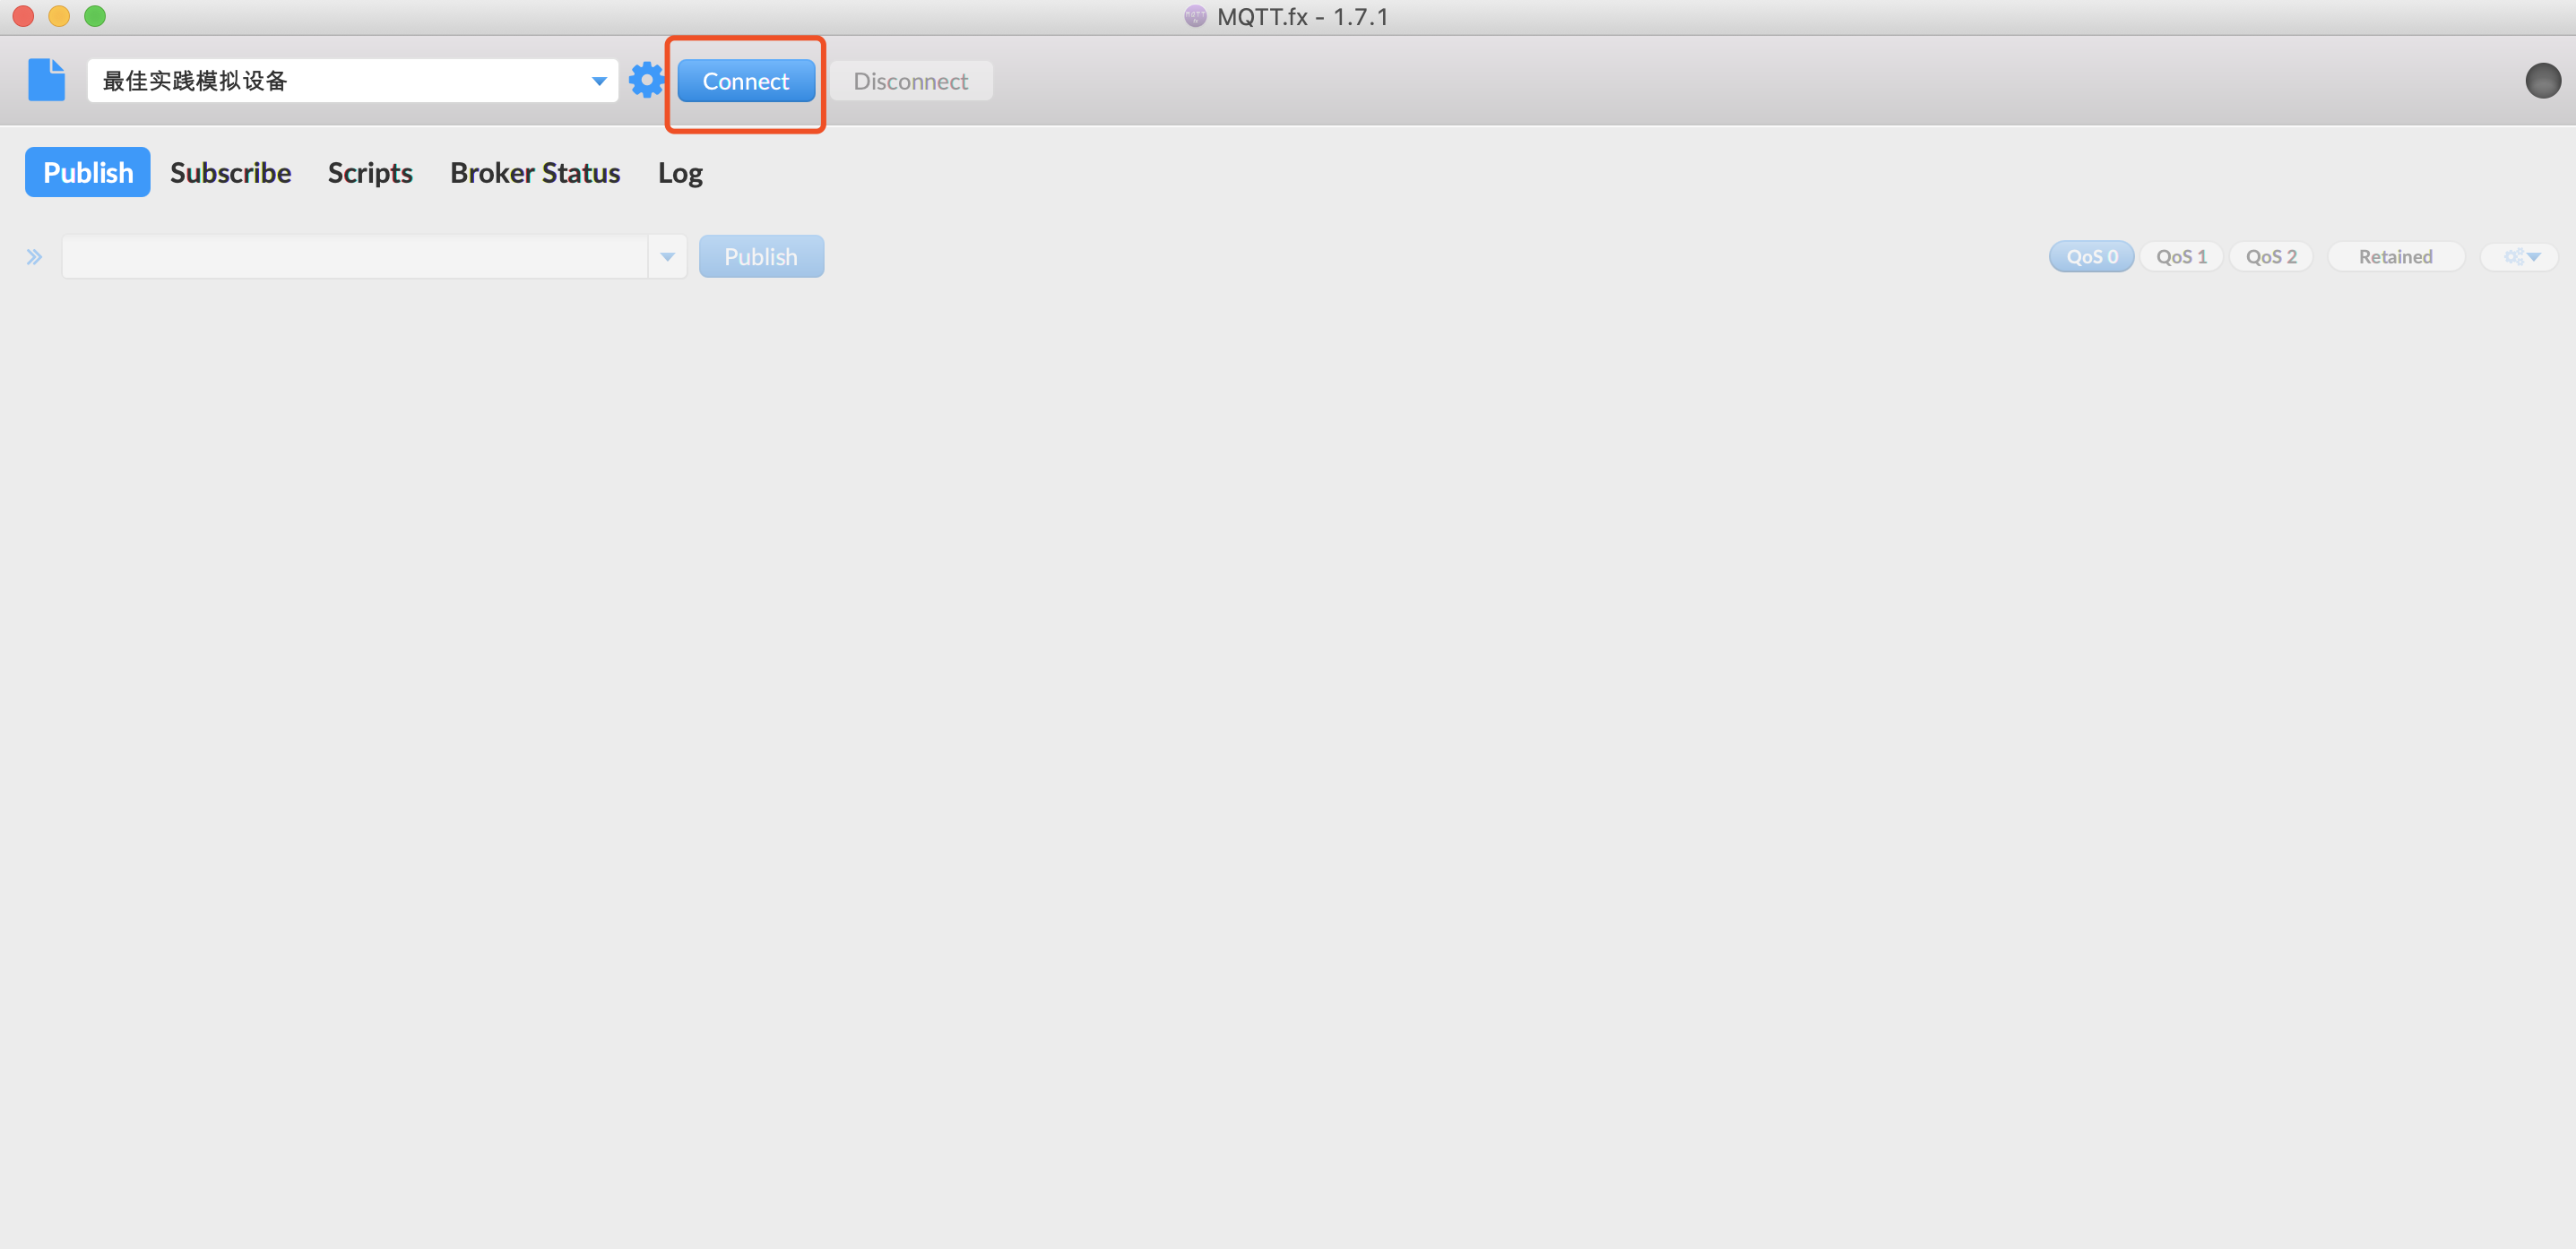
Return to the connection page, and the device connection comes online.
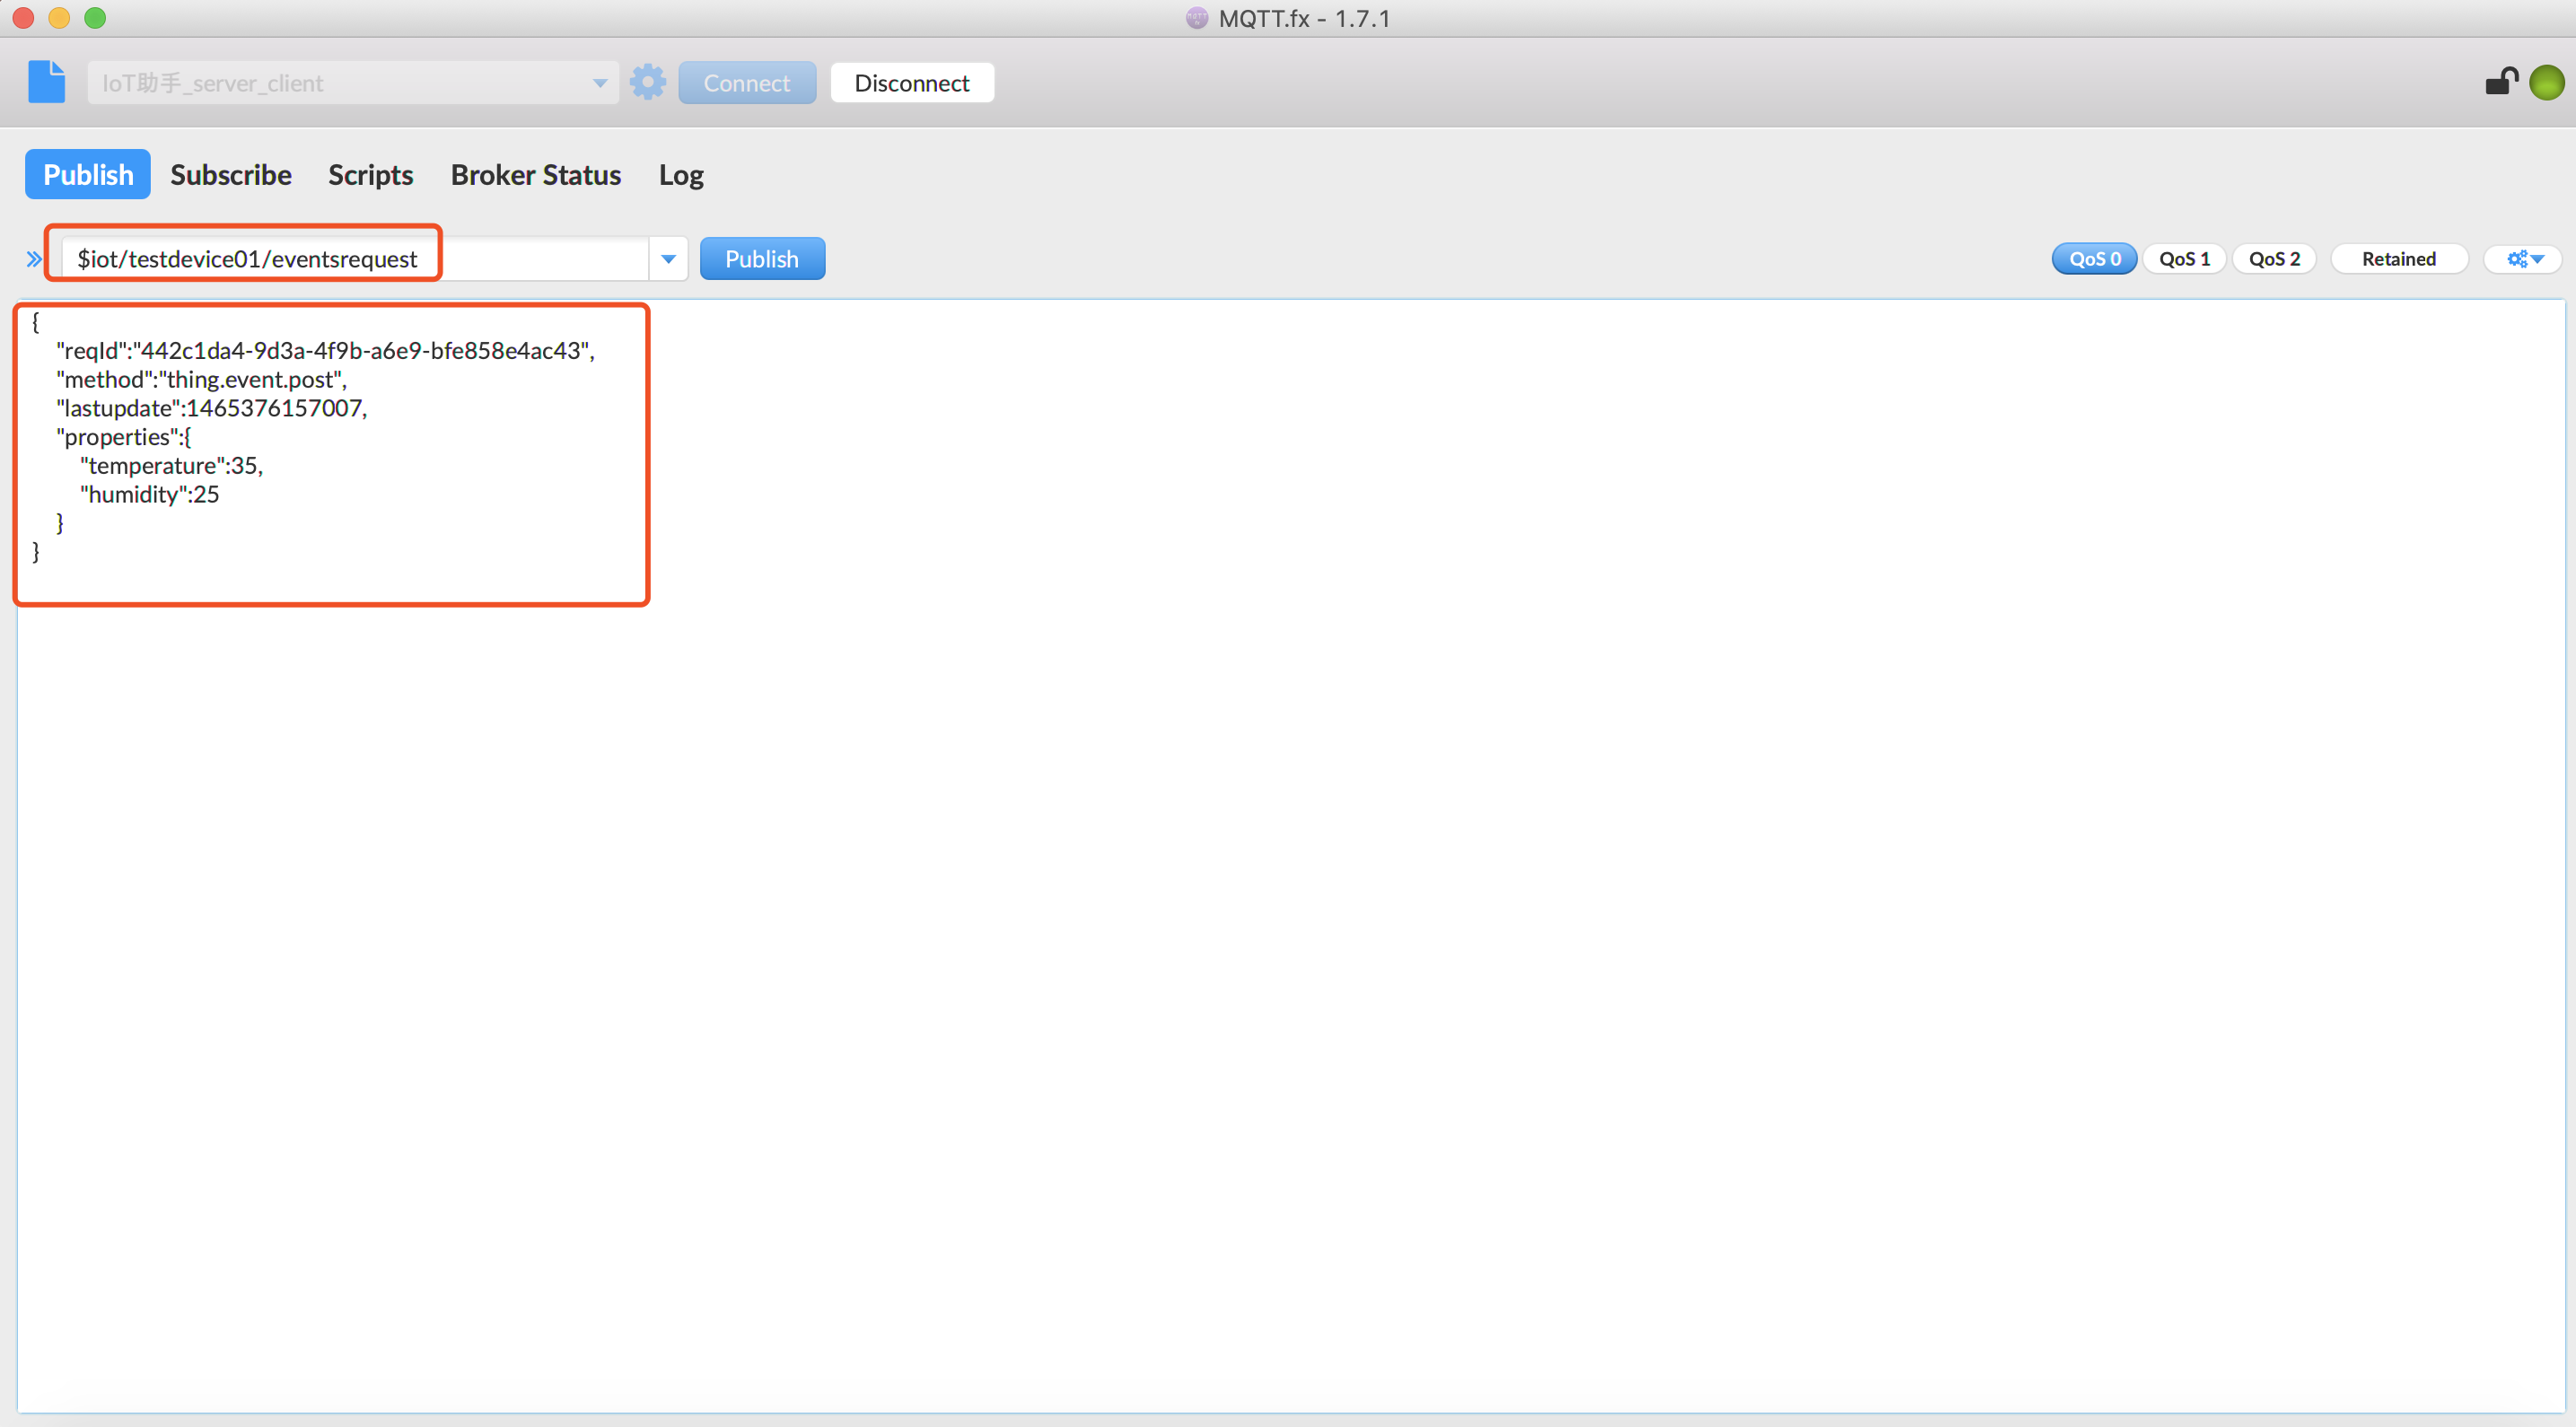
The device reports the message
Set the reported message topic as $iot/testdevice01/events and issue the following information.
{
    "reqId":"442c1da4-9d3a-4f9b-a6e9-bfe858e4ac43",
    "method":"thing.event.post",
    "lastupdate":1465376157007,
    "properties":{
        "temperature":35,
        "humidity":25
    }
}
Note: Here, the message format must be the data format supported by TSDB write-in interface. Please refer to TSDB Data API Interface Description for specific format.
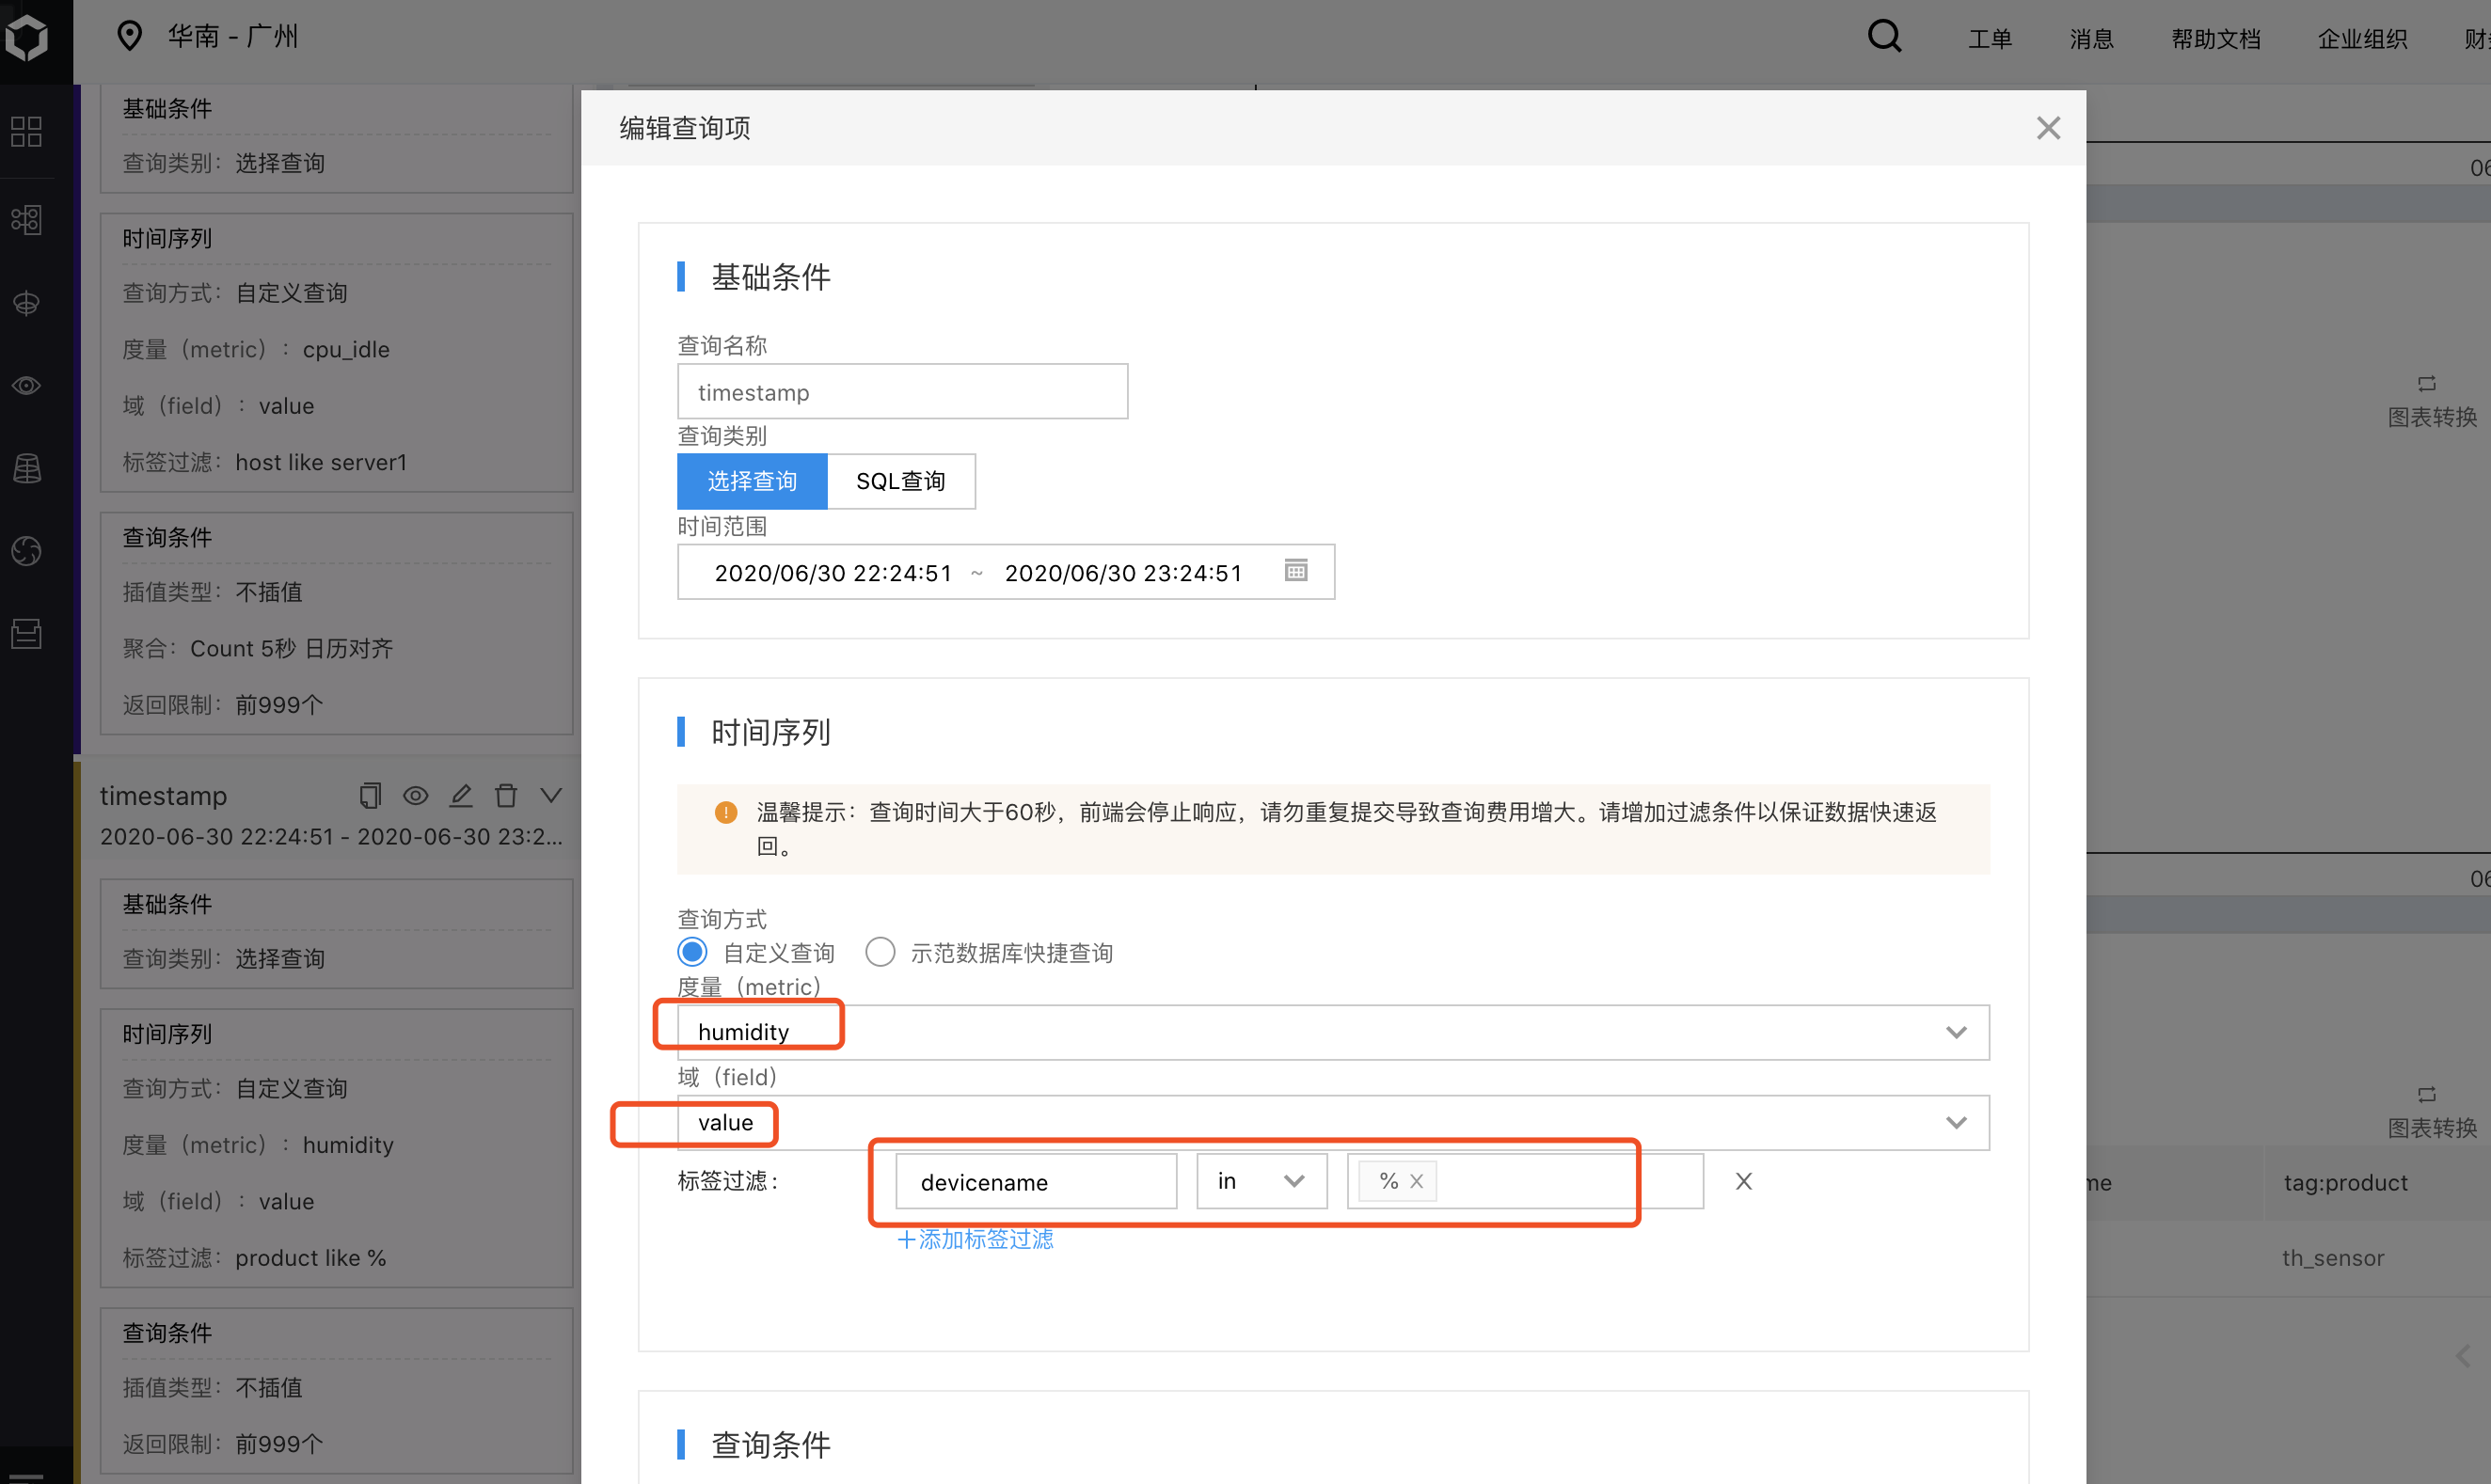
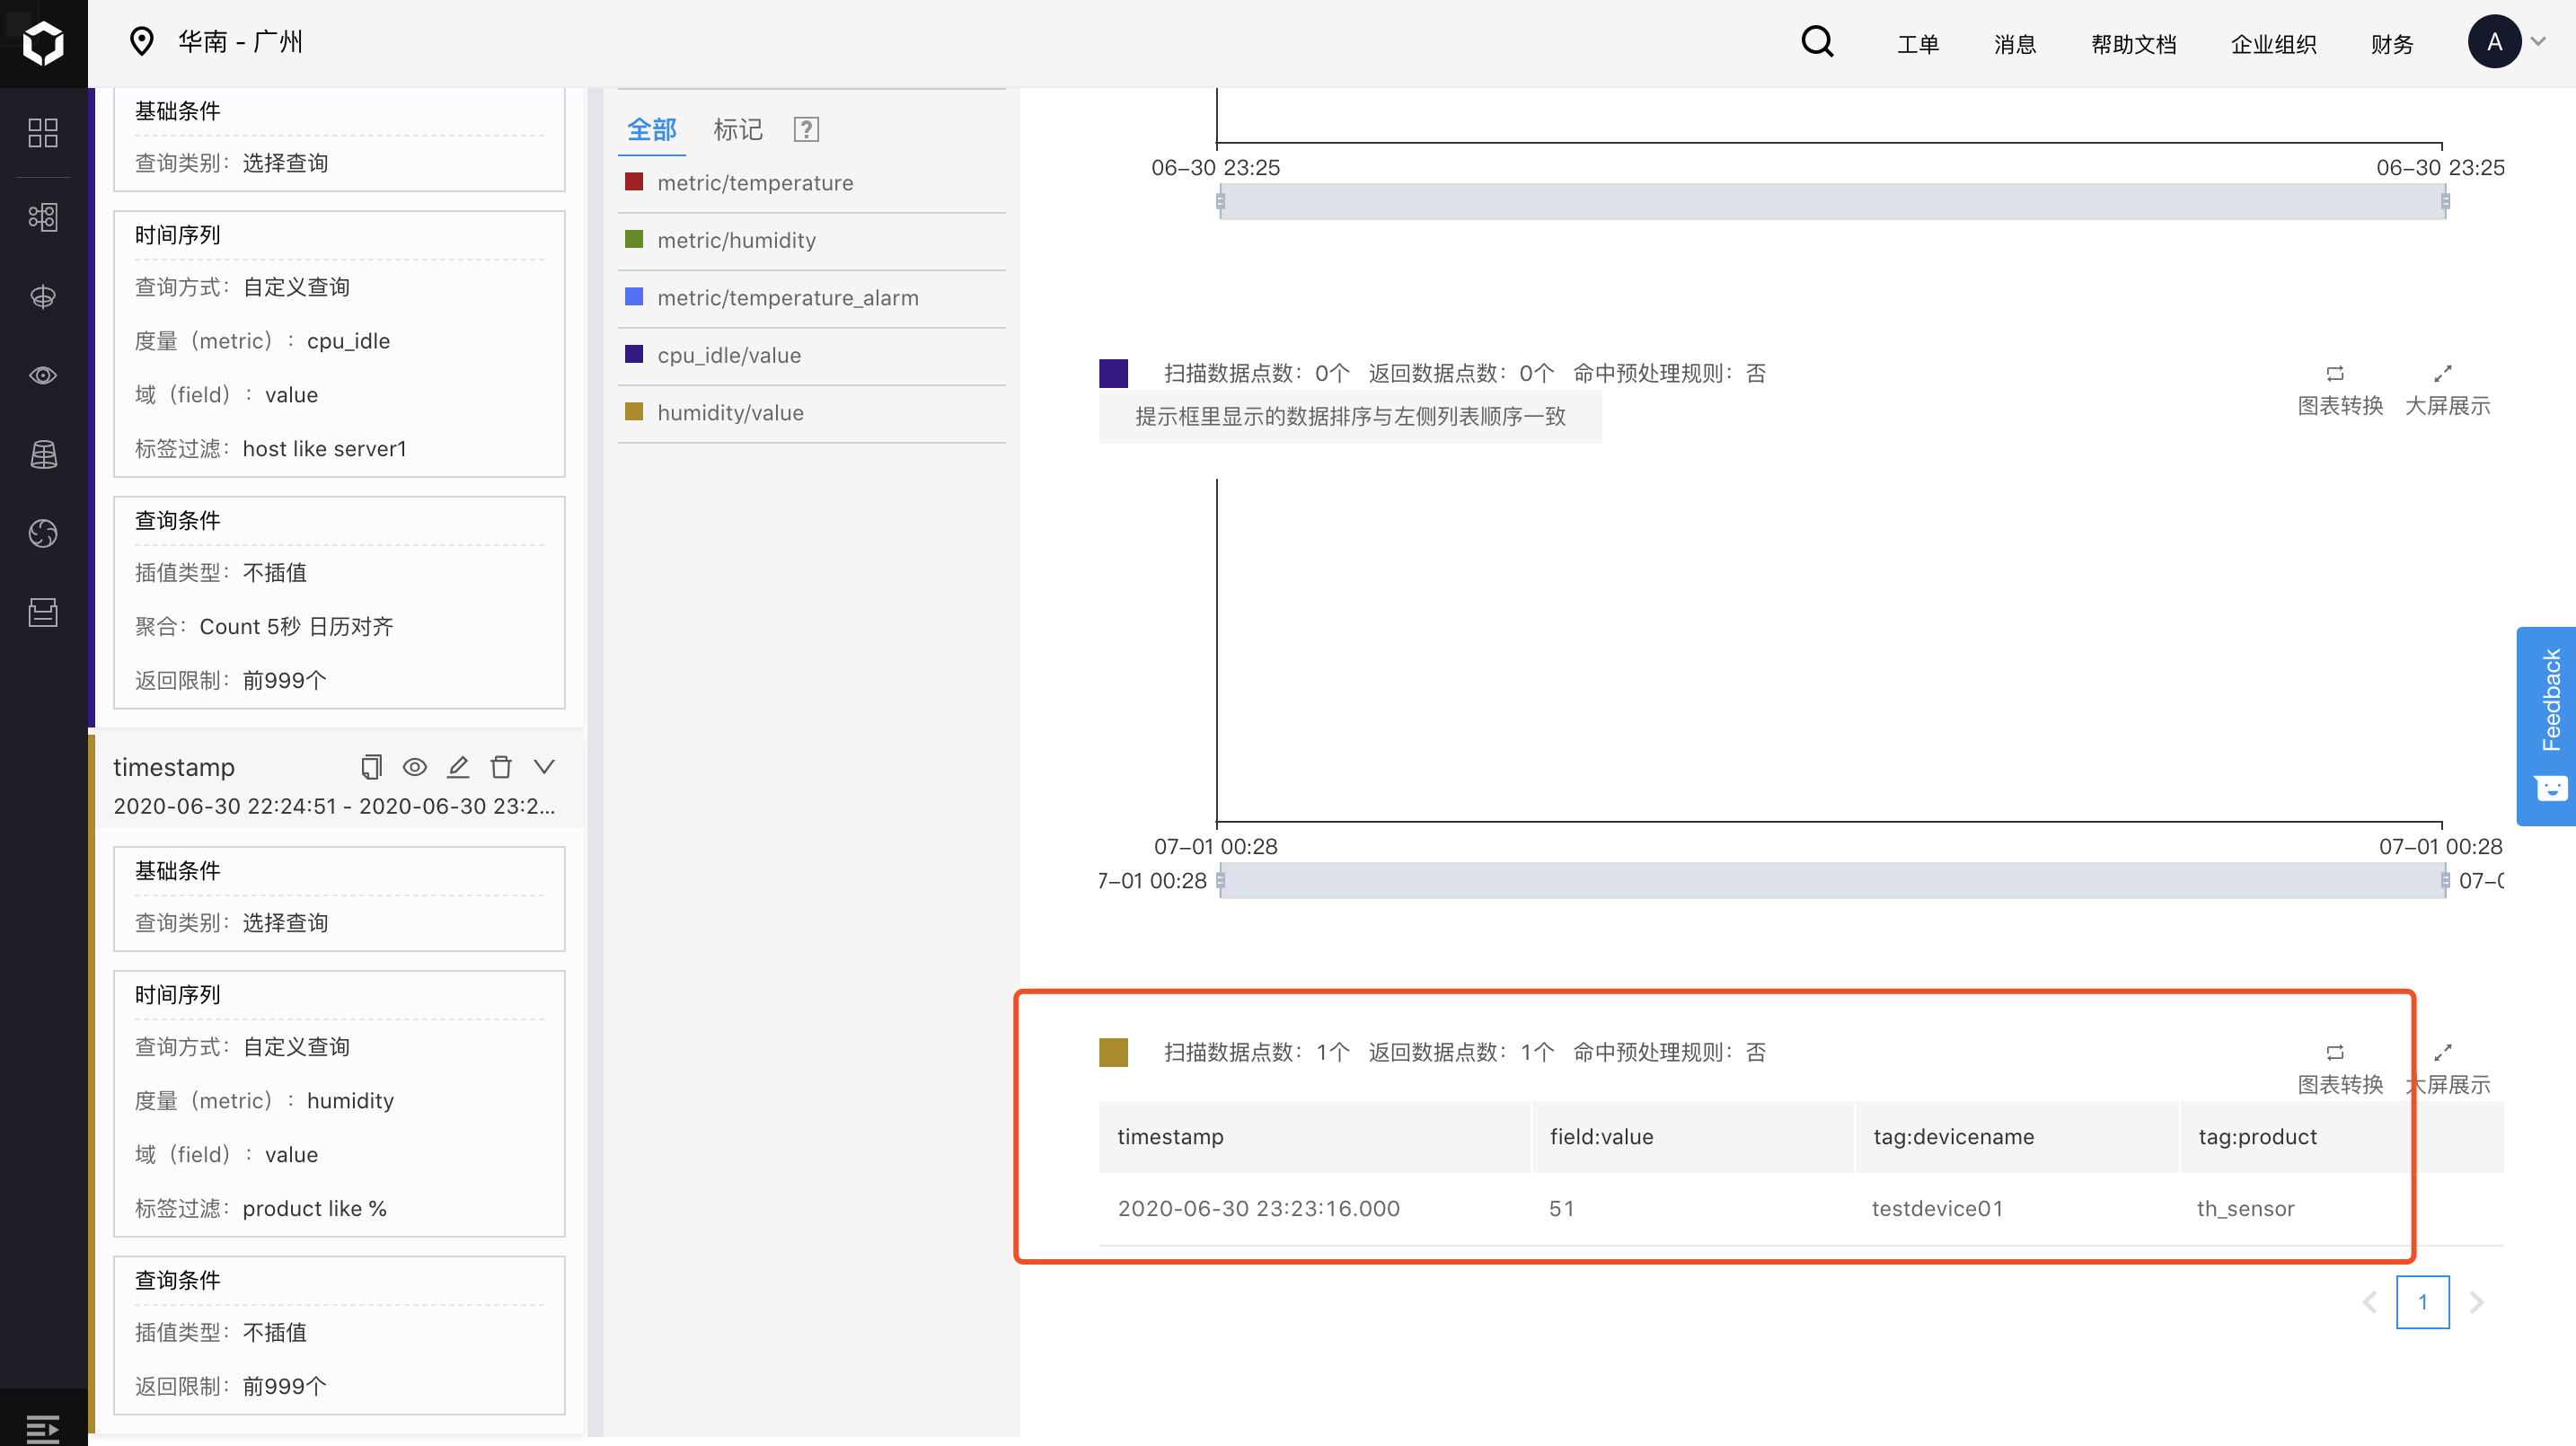
Query/view the device data in TSDB
View the data reported by the device just now from TSDB data query panel.
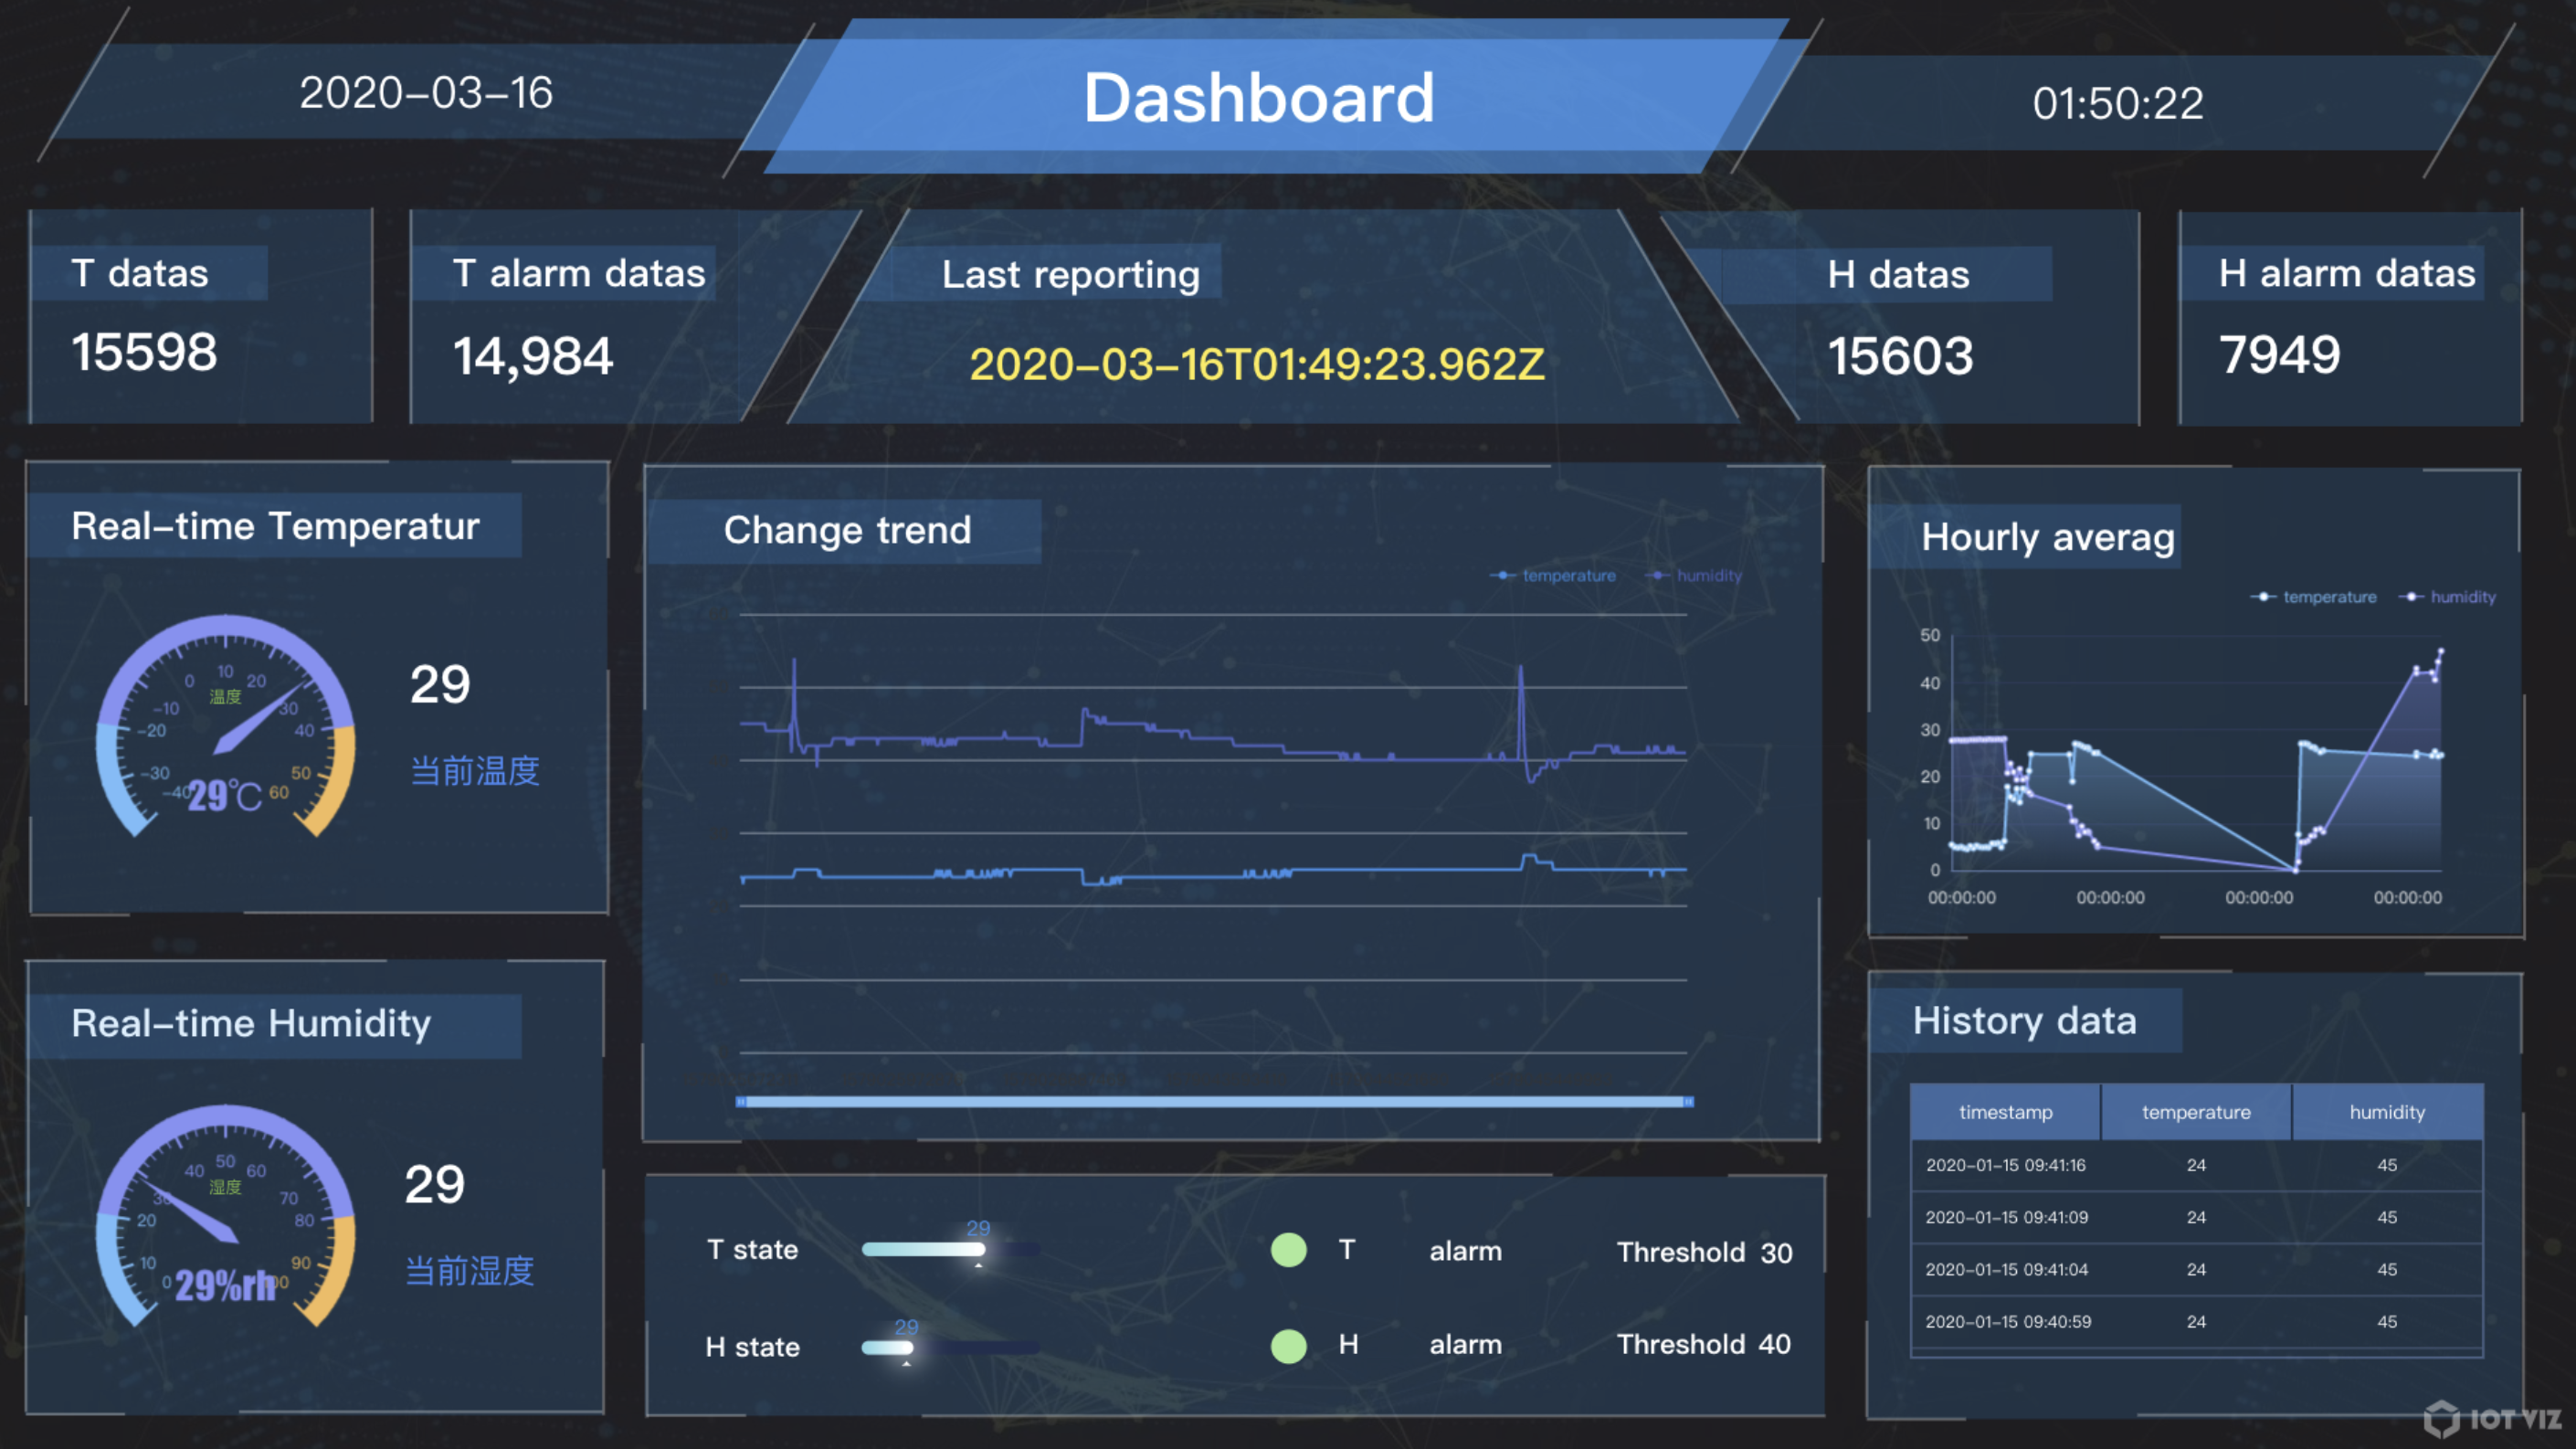
Display by IoT Visualization Screen
Use IoT Visualization screen to summarize and display the device data. Please refer to IoT Visualization-related documents for its use. Here, we will show the large-screen effect based on a single device by dragging the zero code, with more effects to be further explored.