快速入门
更新时间:2025-08-21
如果您需要快速创建一个能公网访问的负载均衡BLB(Baidu Load Balance)实例,并将来自客户端的访问请求转发至后端服务器,请参考本文操作。
部署思路
- 创建BCC实例并部署应用服务
- 创建公网访问的BLB实例
- 添加后端服务器
- 添加TCP监听器
- 公网访问后端服务
- 查看监控数据
创建BCC实例并部署应用服务
创建2个包年包月的BCC实例:
- 登录百度智能云官网。
- 登录百度智能云平台:
说明:
- 登录成功后,选择“产品>计算>云服务器 BCC”,点击“立即购买”。
4.根据页面提示,填写相关配置信息,详情参考创建BCC实例 。
说明: 创建BLB实例时可配置公网访问,所以创建BCC实例时不需要选择公网访问。
- 按步骤完成支付后,系统在后台进行云服务器的创建。
- 进入“实例列表”界面,查看创建实例的状态,创建成功后该实例状态显示为“运行中”。
- 实例创建成功后,系统将以短信形式提示用户。
- BCC实例创建成功后,可以使用SmartTerm远程连接该实例,这里以Centos系统为例,部署nginx应用服务参考命令如下:
Plain Text
1yum install -y nginx
2systemctl start nginx.service
创建公网访问BLB实例
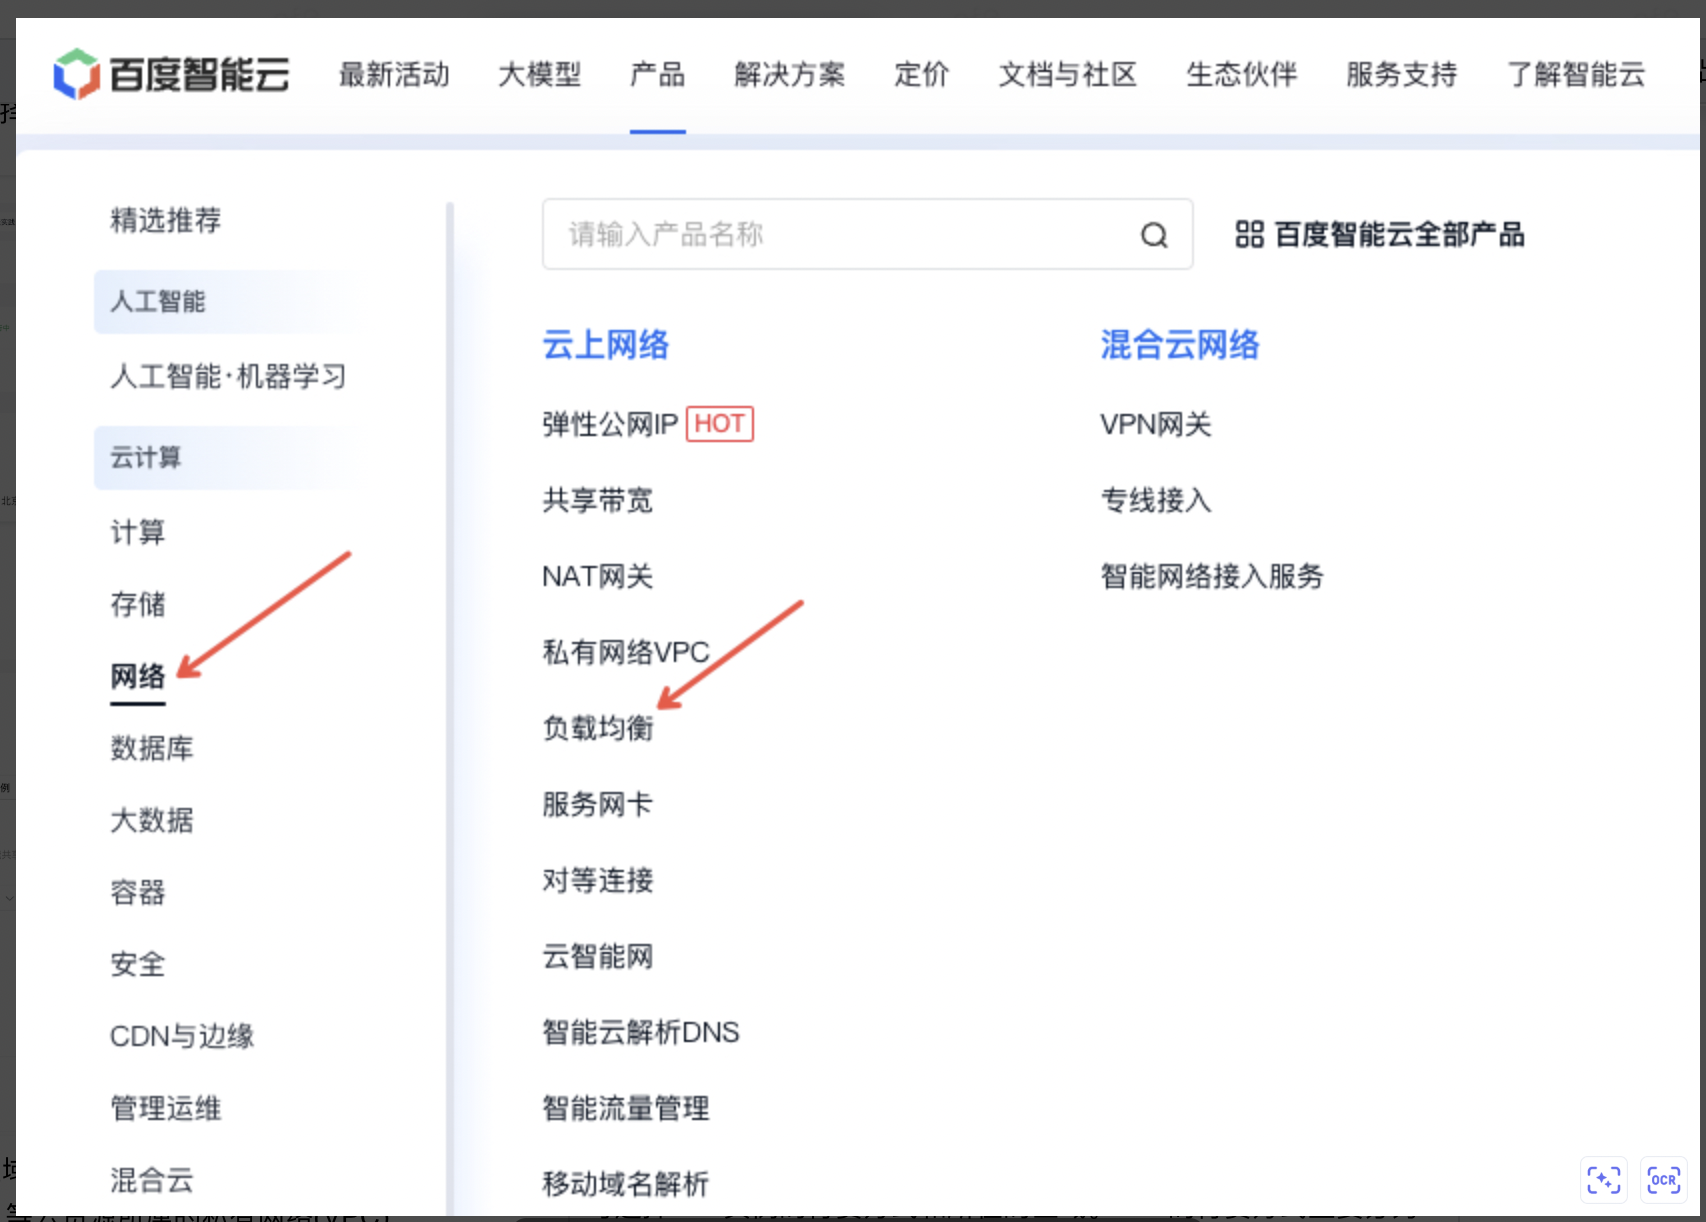
- 登录控制台,选择“产品>网络>负载均衡”,点击“立即购买”。
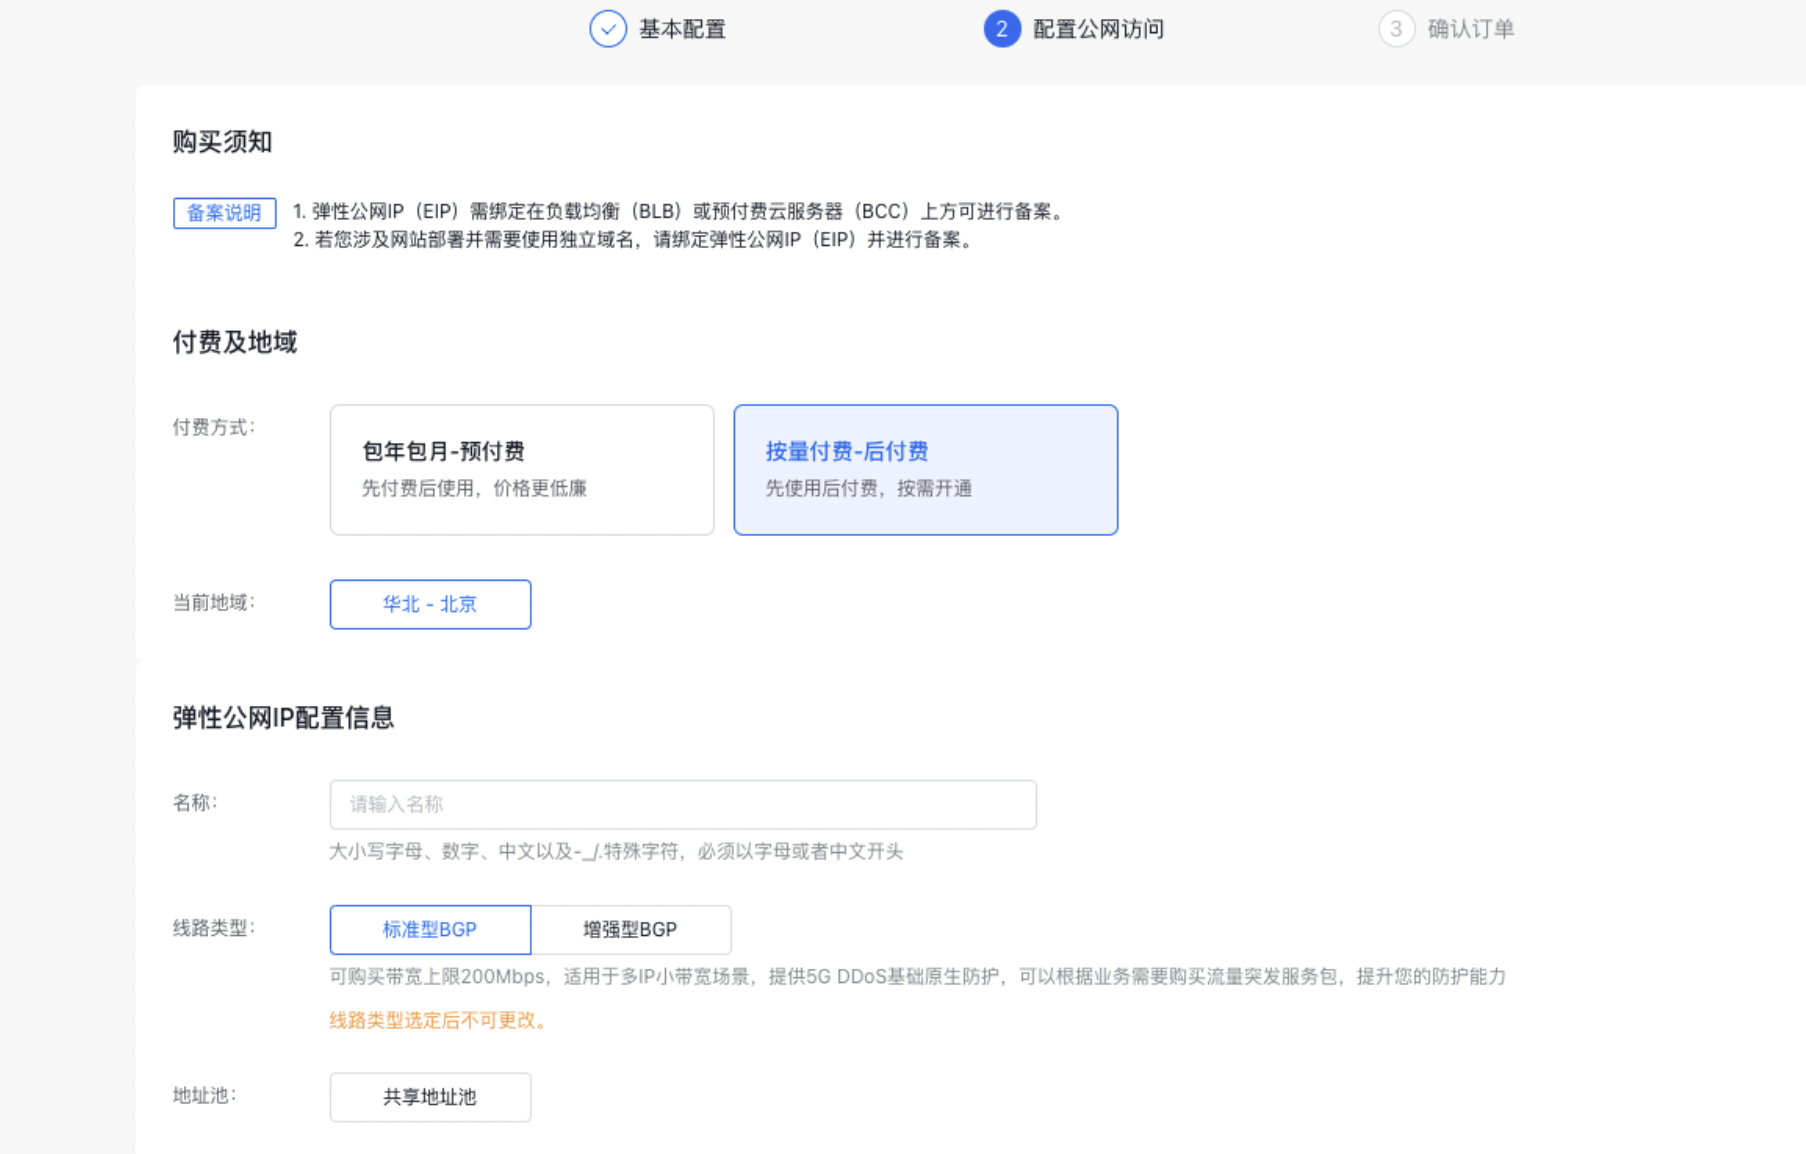
- 选择BLB实例的付费方式及所在地域。
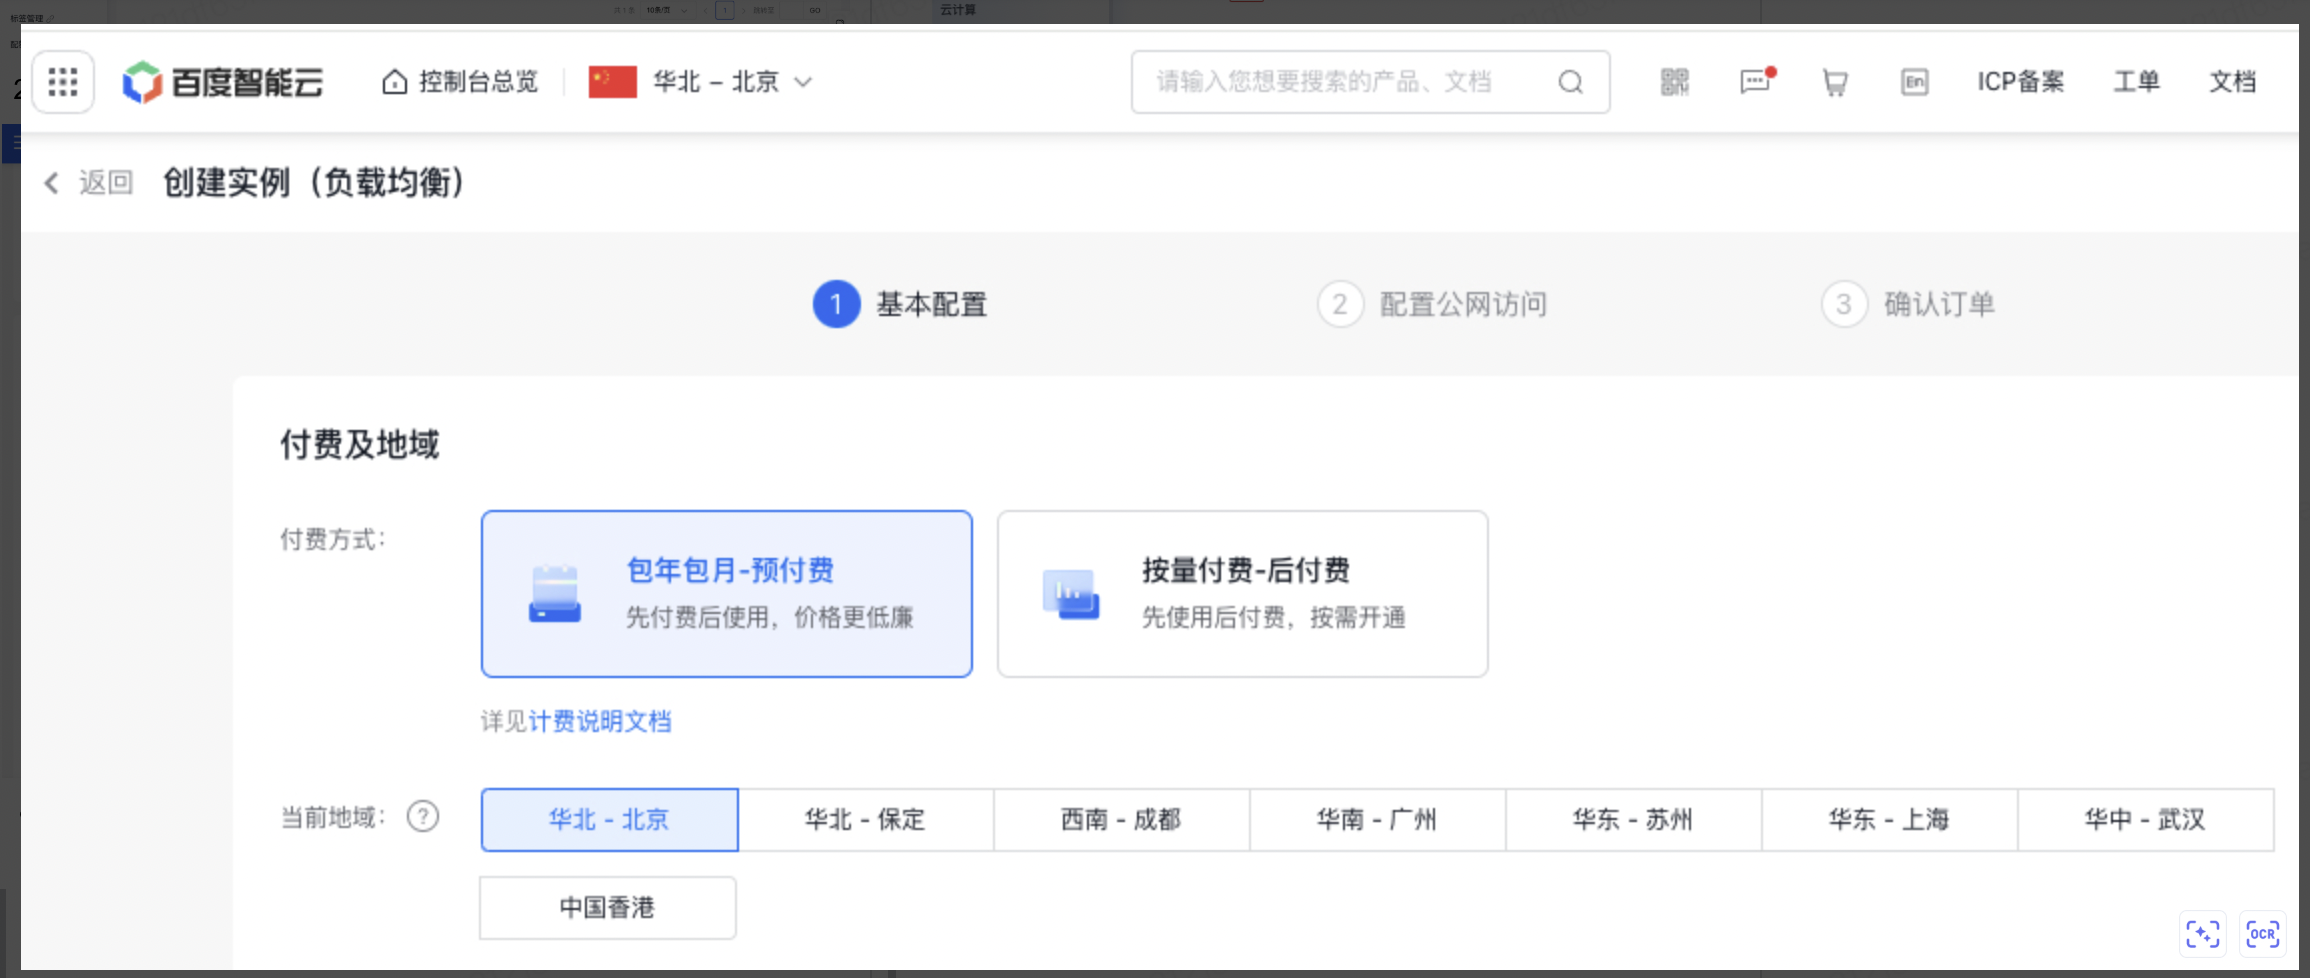 可选择BLB实例的付费方式和所在的区域。BLB的付费方式主要分为预付费和后付费,详见负载均衡实例计费。
说明:
- 通常情况下,推荐BLB实例和后端服务器购买在同一地域,这样配置简单快速且BLB实例与后端服务器的网络时延更低。
- 如有BLB跨地域挂载后端服务器的需求,则考虑购买应用型BLB实例,具体实践可参考使用IP组功能在跨地域VPC挂载后端服务器。
-
配置公网访问:可根据实际情况选择“启用”或“不启用”公网访问
- 如果选择“OFF”,不启用。表示在创建该BLB实例时不绑定公网IP,您可以在购买成功后根据需要绑定公网IP。
- 如果选择“ON”,启用。表示在创建该BLB实例时购买并绑定公网IP。
- 购买信息:选择购买数量,以及配置是否自动释放。
说明: 用户在创建BLB实例时,可直接进行BLB实例自动释放设置,BLB实例会在设定的时间进行自动释放。
3.选择BLB实例配置信息
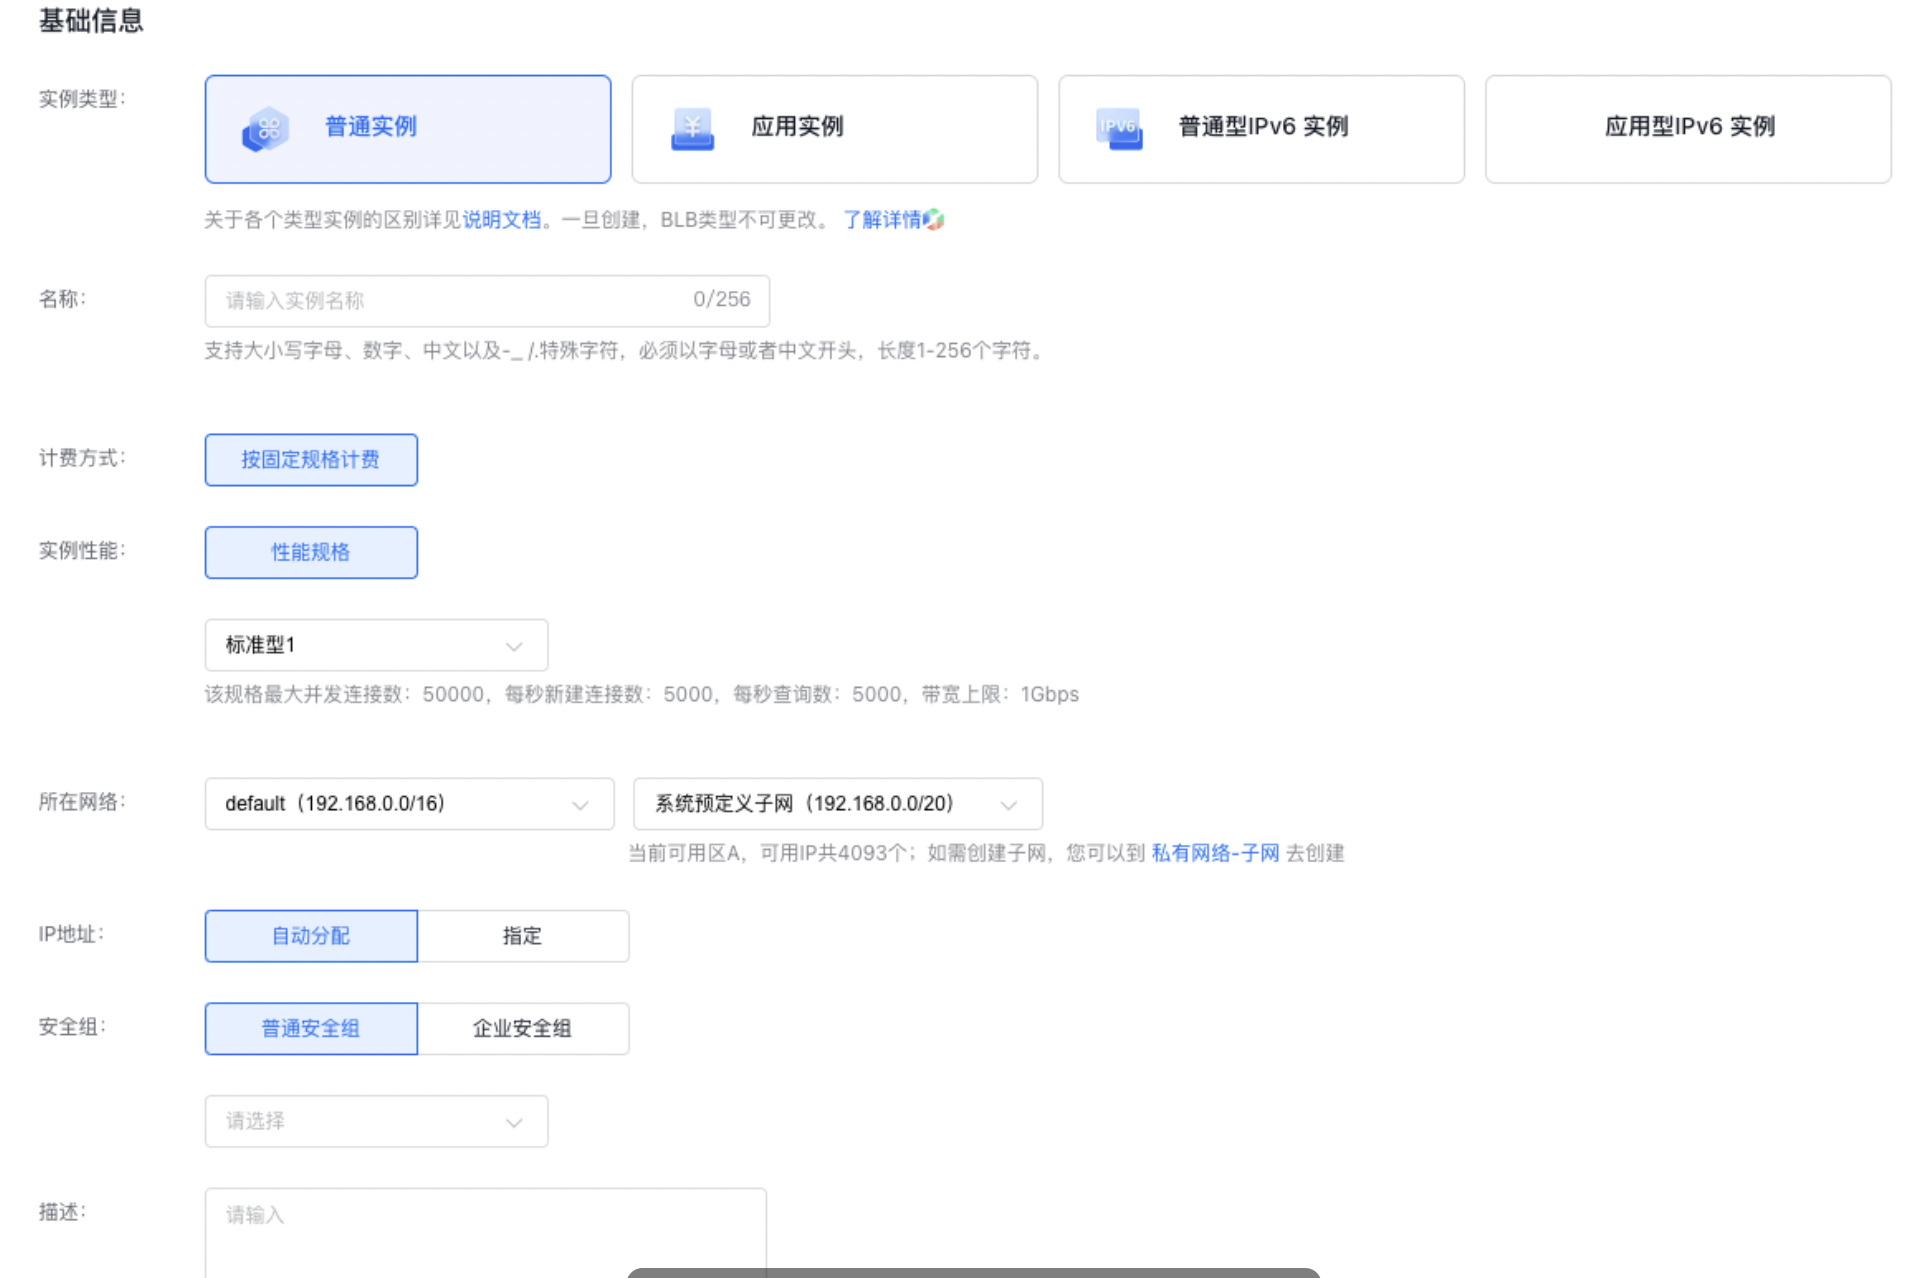
可填写实例名称,选择BLB实例类型、性能和所在网络等基础信息。
- 实例类型:BLB 各种类型实例的区别详见BLB选型指南,请注意一旦创建BLB实例类型不可更改。
- 所在网络:指当前创建的 BLB 和相应 BCC 等云资源所属的私有网络(VPC)。
-
选择其他信息(用户按需可选)
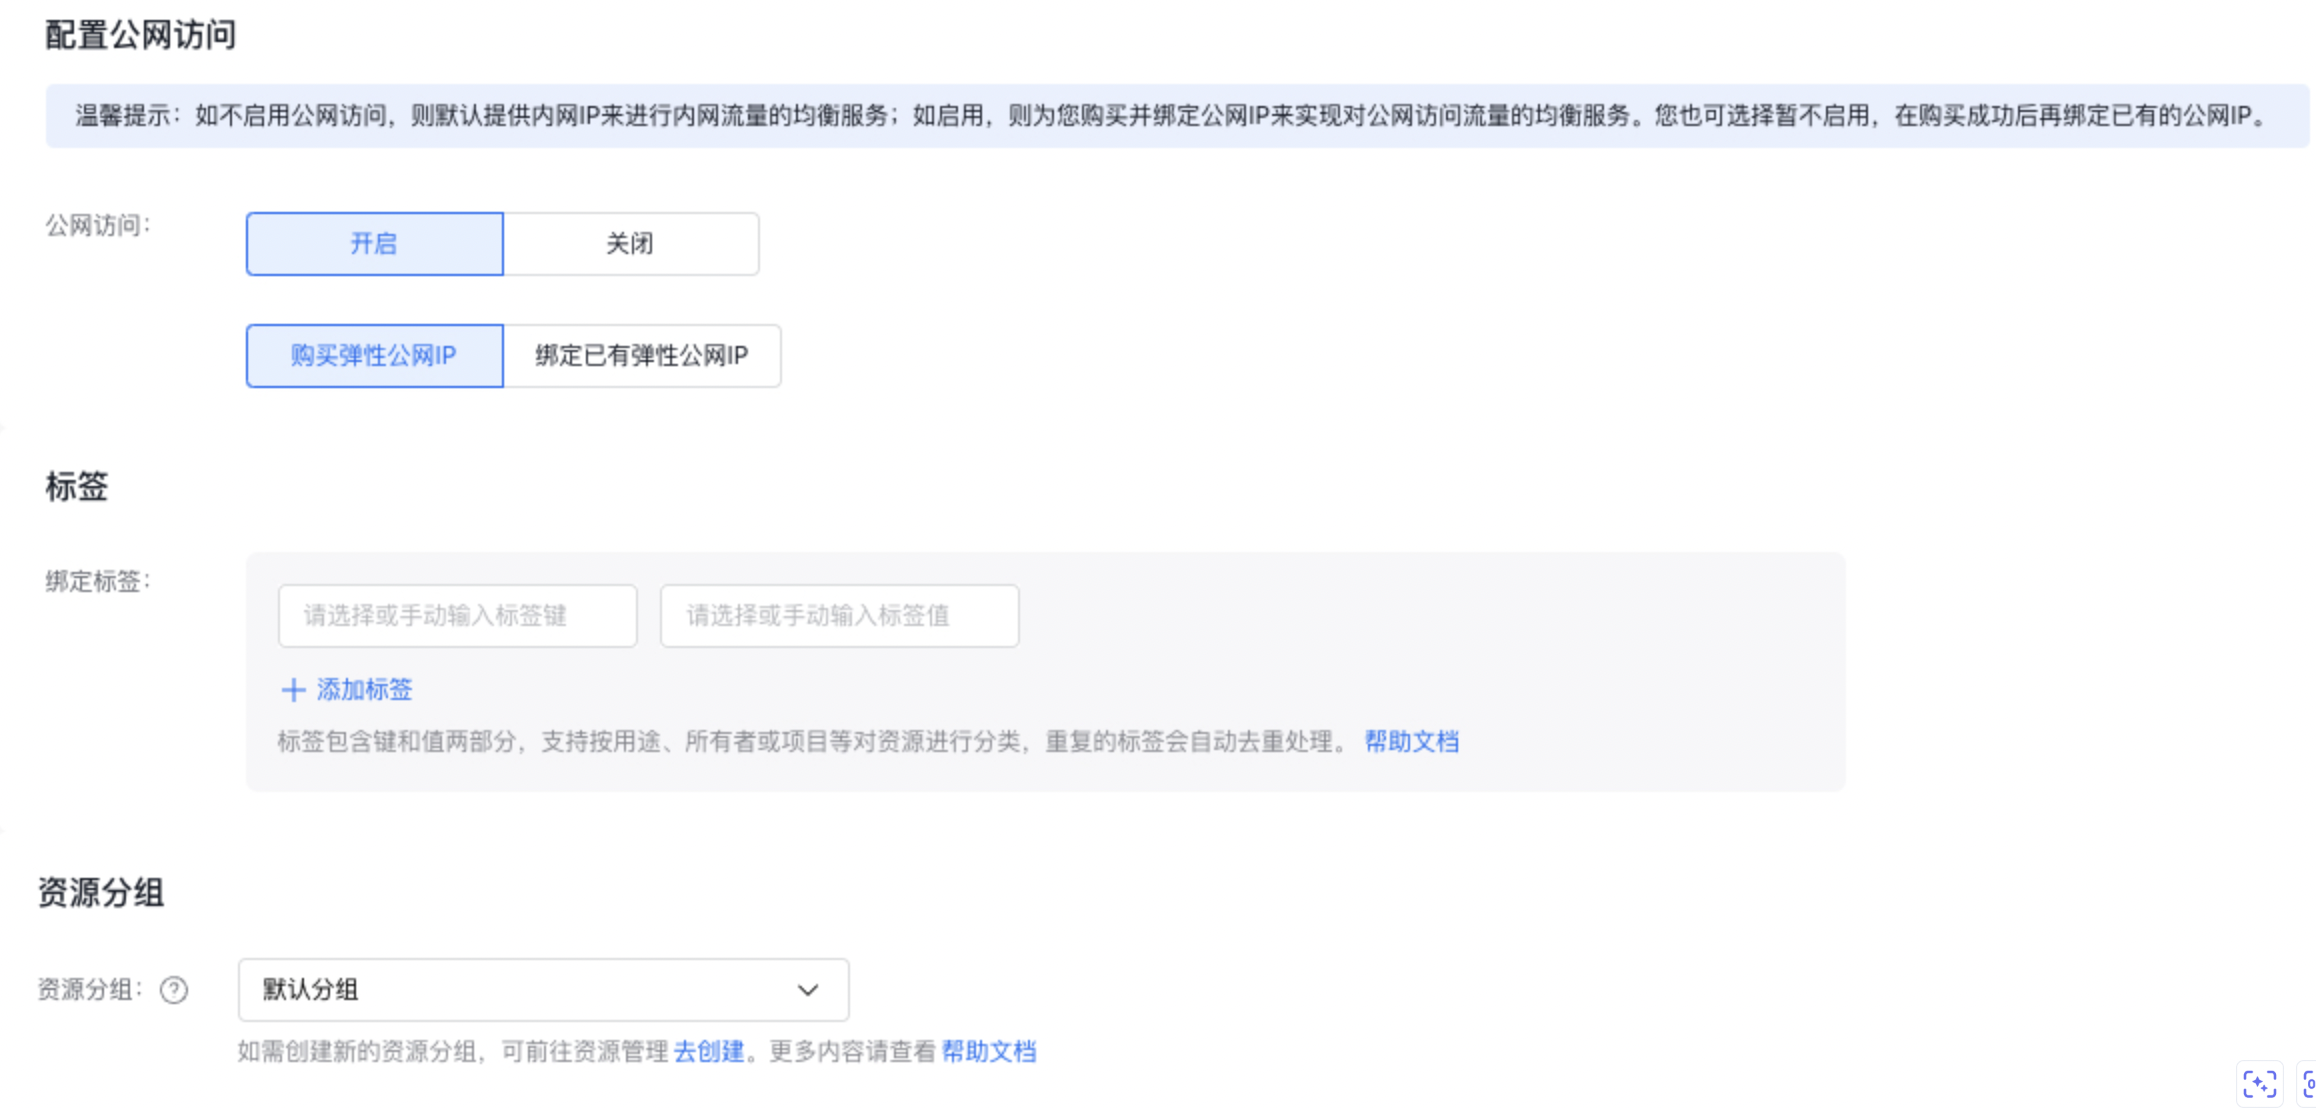 配置公网访问:用户可选,如果未启用公网访问,系统将自动跳过此步骤。另外用户选择开启公网访问后,还可选择购买弹性公网IP或者绑定已有弹性公网IP
说明:
- 选择购买弹性公网IP,创建BLB实例成功后系统会自动创建一个弹性公网IP并绑定到该实例,用户无需额外操作。
- 绑定已有弹性公网IP,适用于用户已有能被绑定的弹性公网EIP场景。
-
选择购买信息:选择购买的时长、实例数量,以及是否开启自动续费。
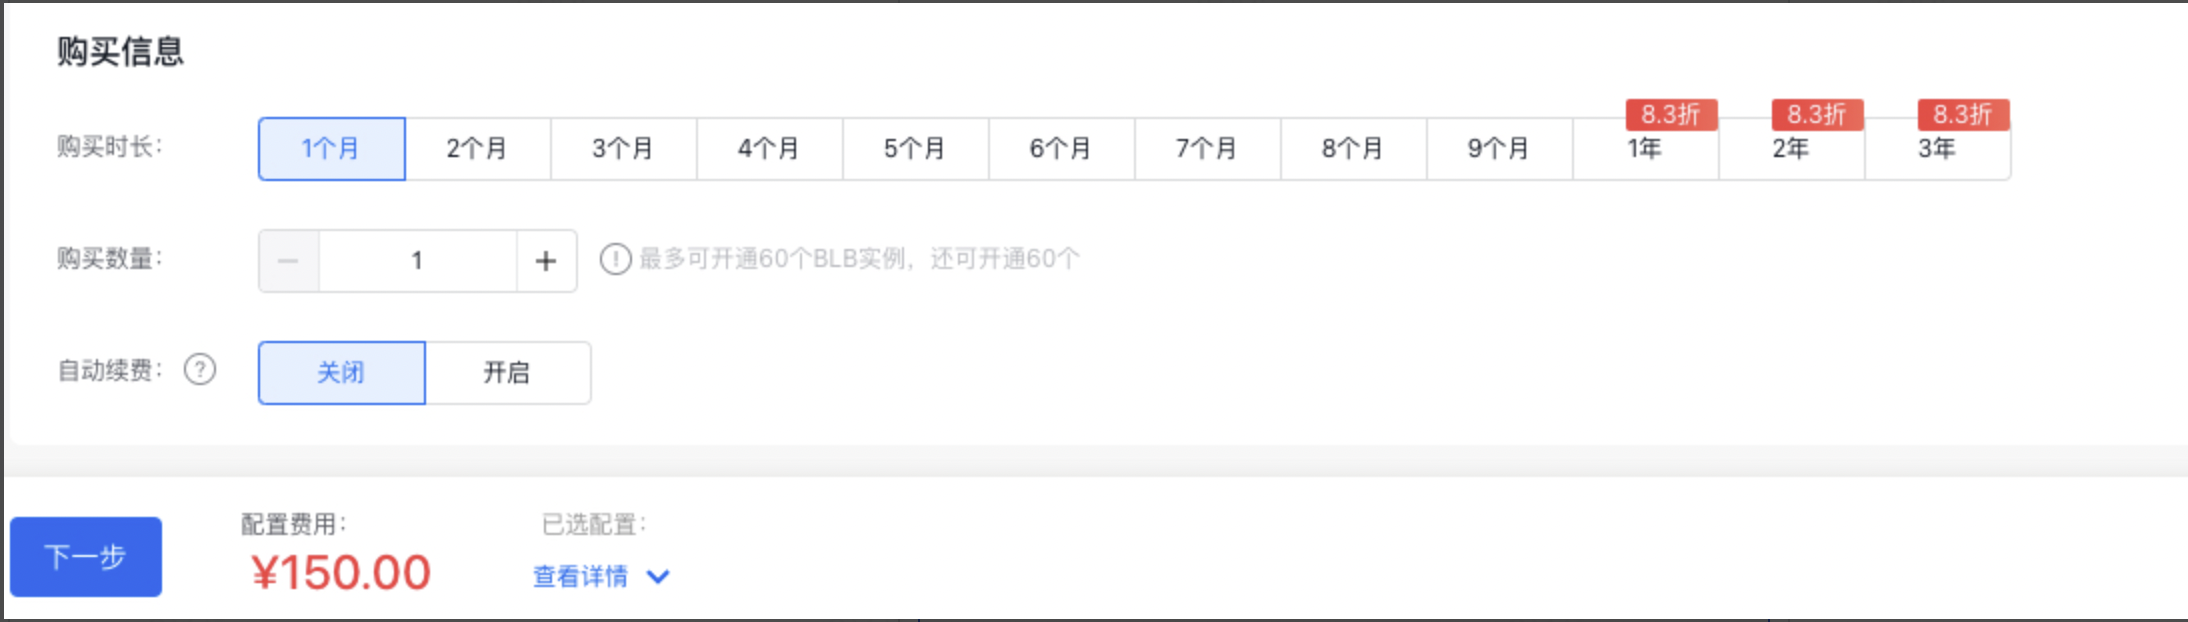
说明: *用户在创建BLB实例时,可直接进行BLB实例自动释放设置,BLB实例会在设定的时间进行自动释放。
- 配置公网访问(可选,如果未启用公网访问,系统将自动跳过此步骤) 配置EIP实例信息,有关EIP实例的配置方法,请参看创建EIP实例。
- 根据系统提示,完成订单确认及支付。创建成功后,用户将收到短信提示。
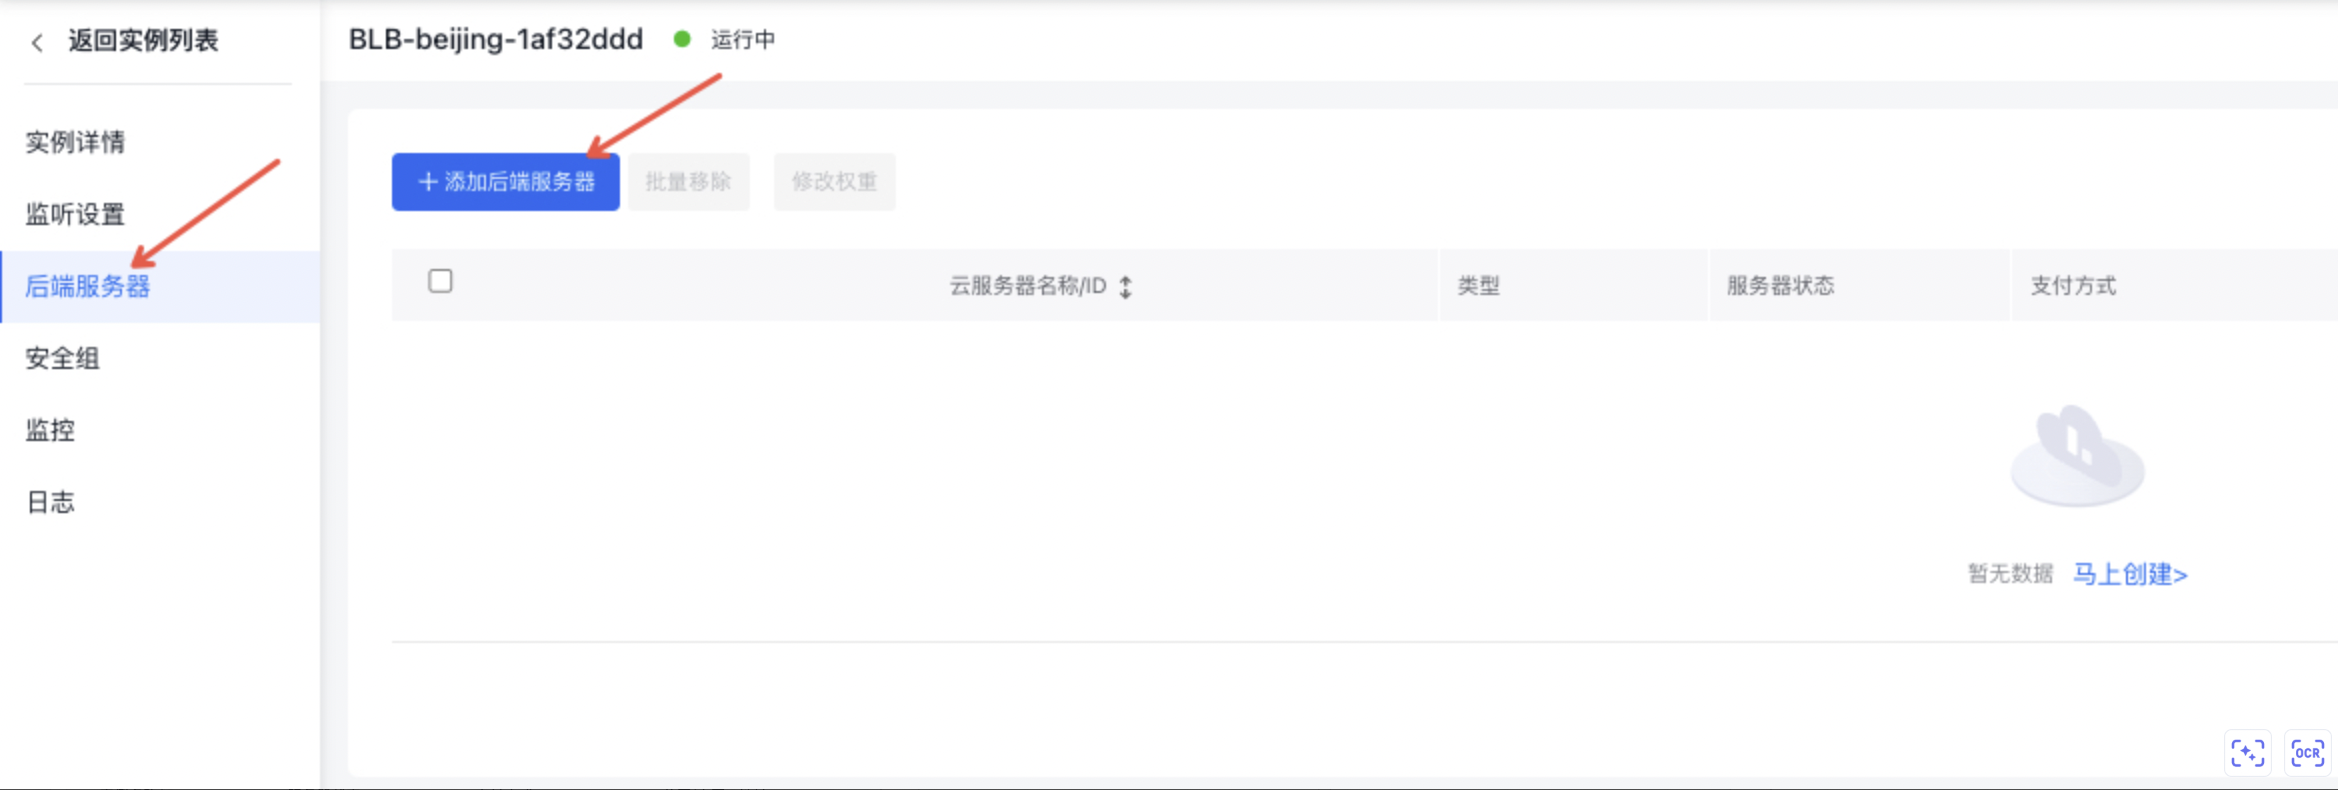
添加后端服务器
- 选择“产品服务>负载均衡BLB”,进入负载均衡BLB列表。
- 点击“负载均衡ID/名称”列的ID链接,进入实例详情页。
- 点击“后端服务器”页签,添加需要进行负载均衡的BCC服务器。
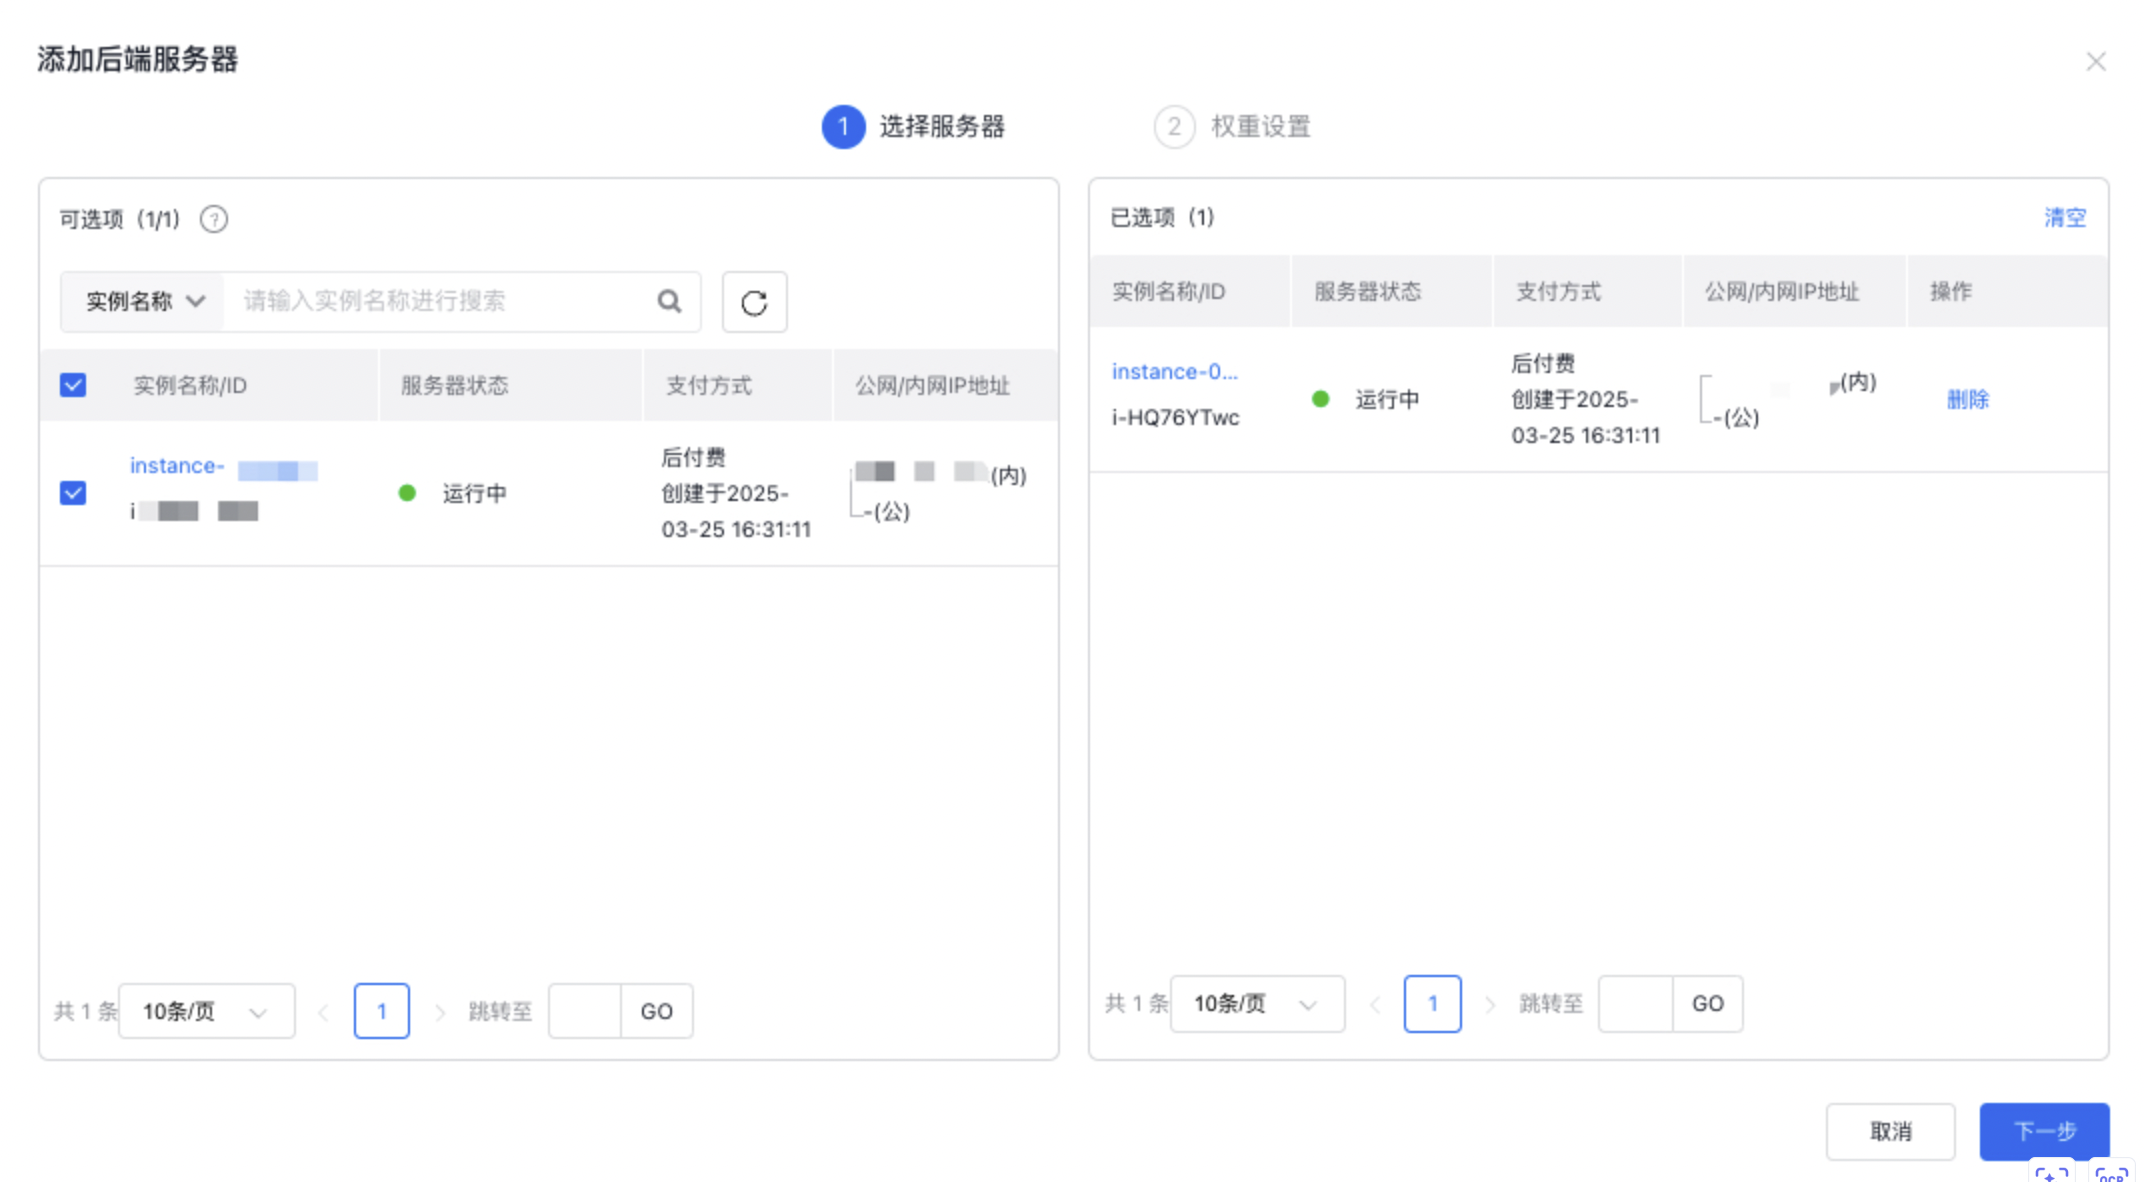
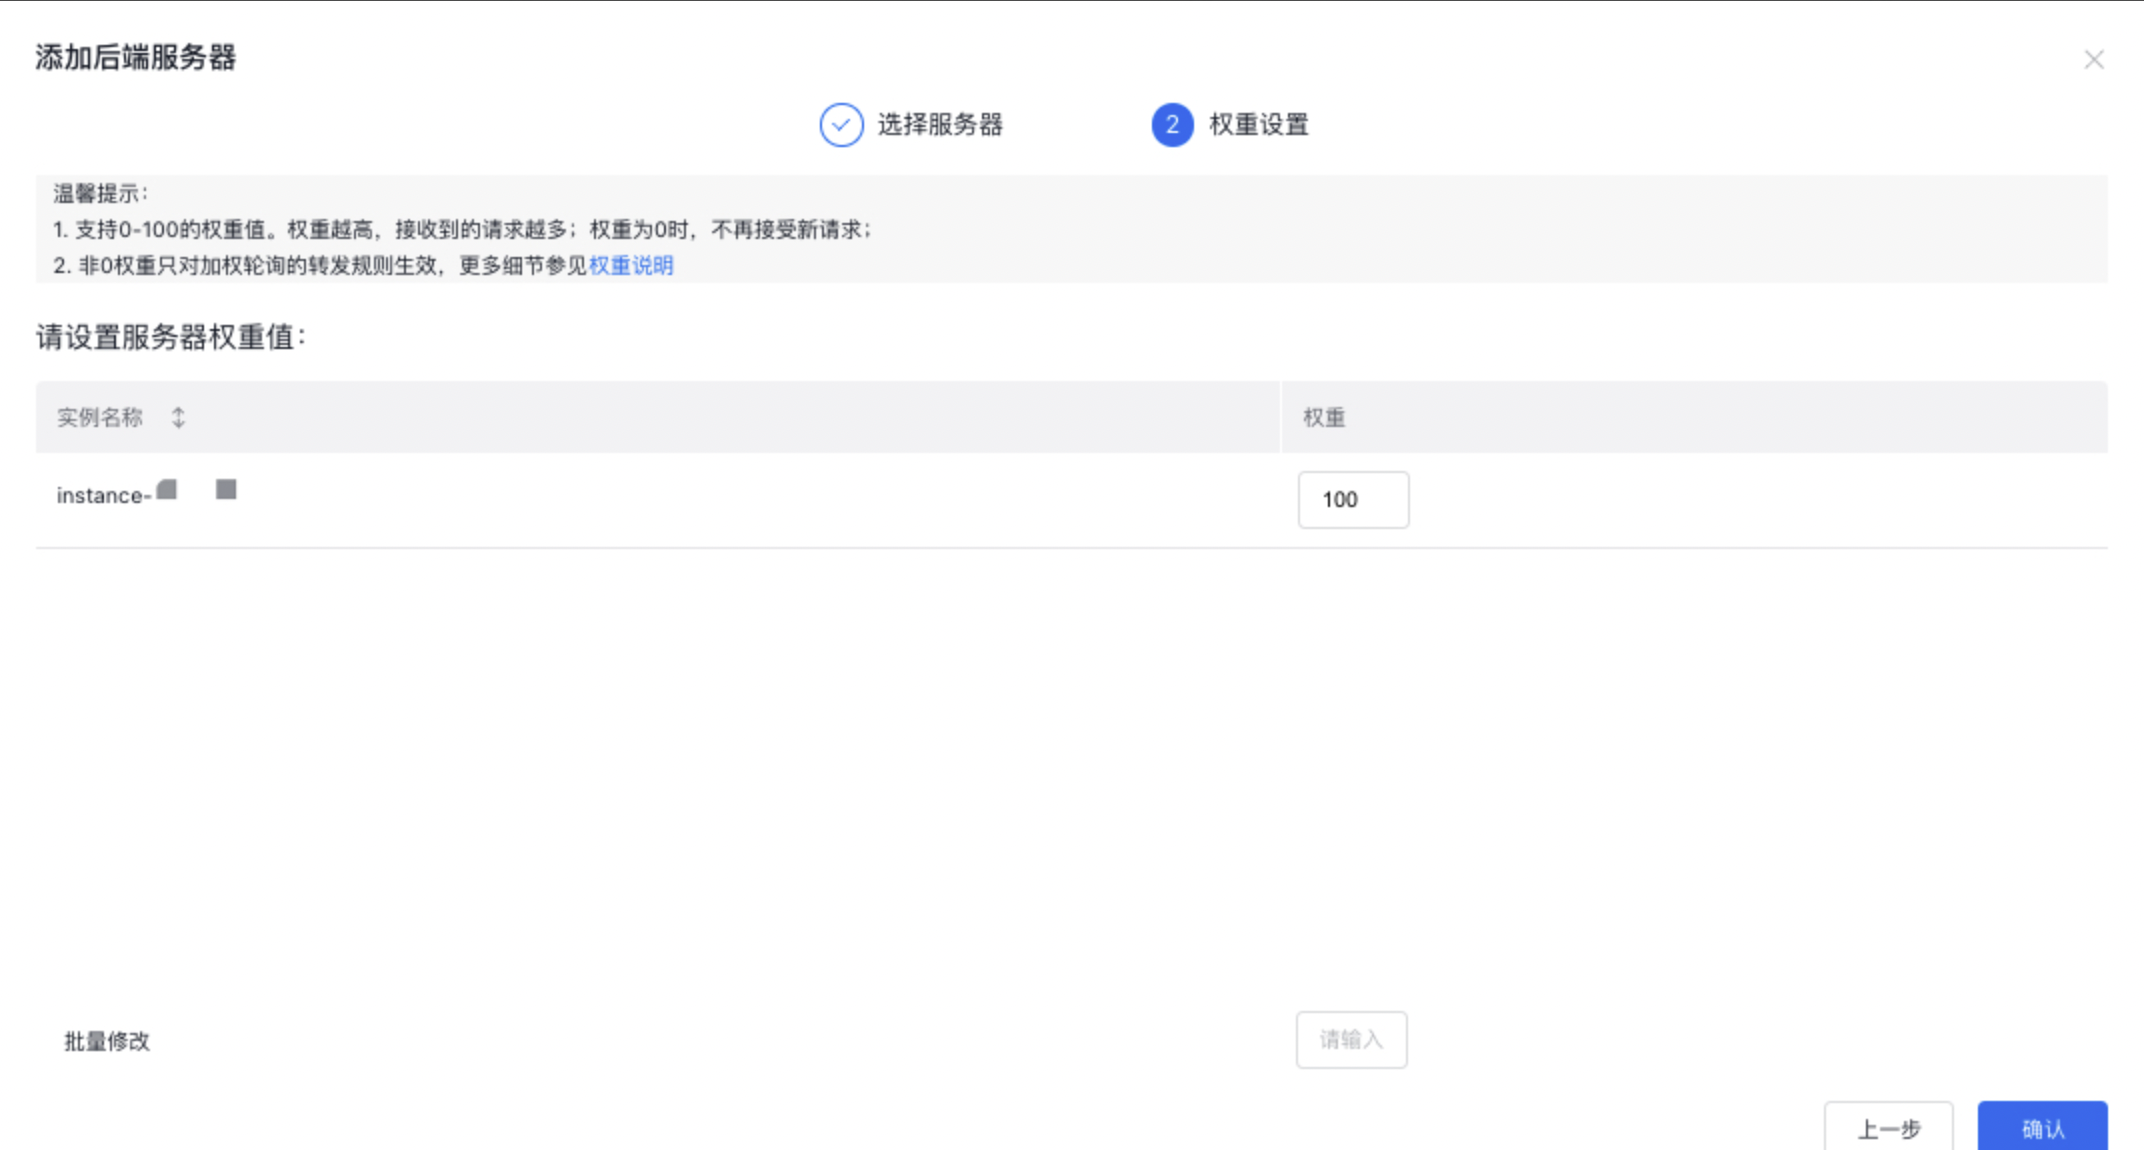
- 设置BLB实例中BCC服务器的权重。
权重是用来针对不同的后端服务器实例设置不同的请求转发比例。权重值是一个相对值,如果设置成相同数值,其转发比例是一样的。
添加TCP监听器
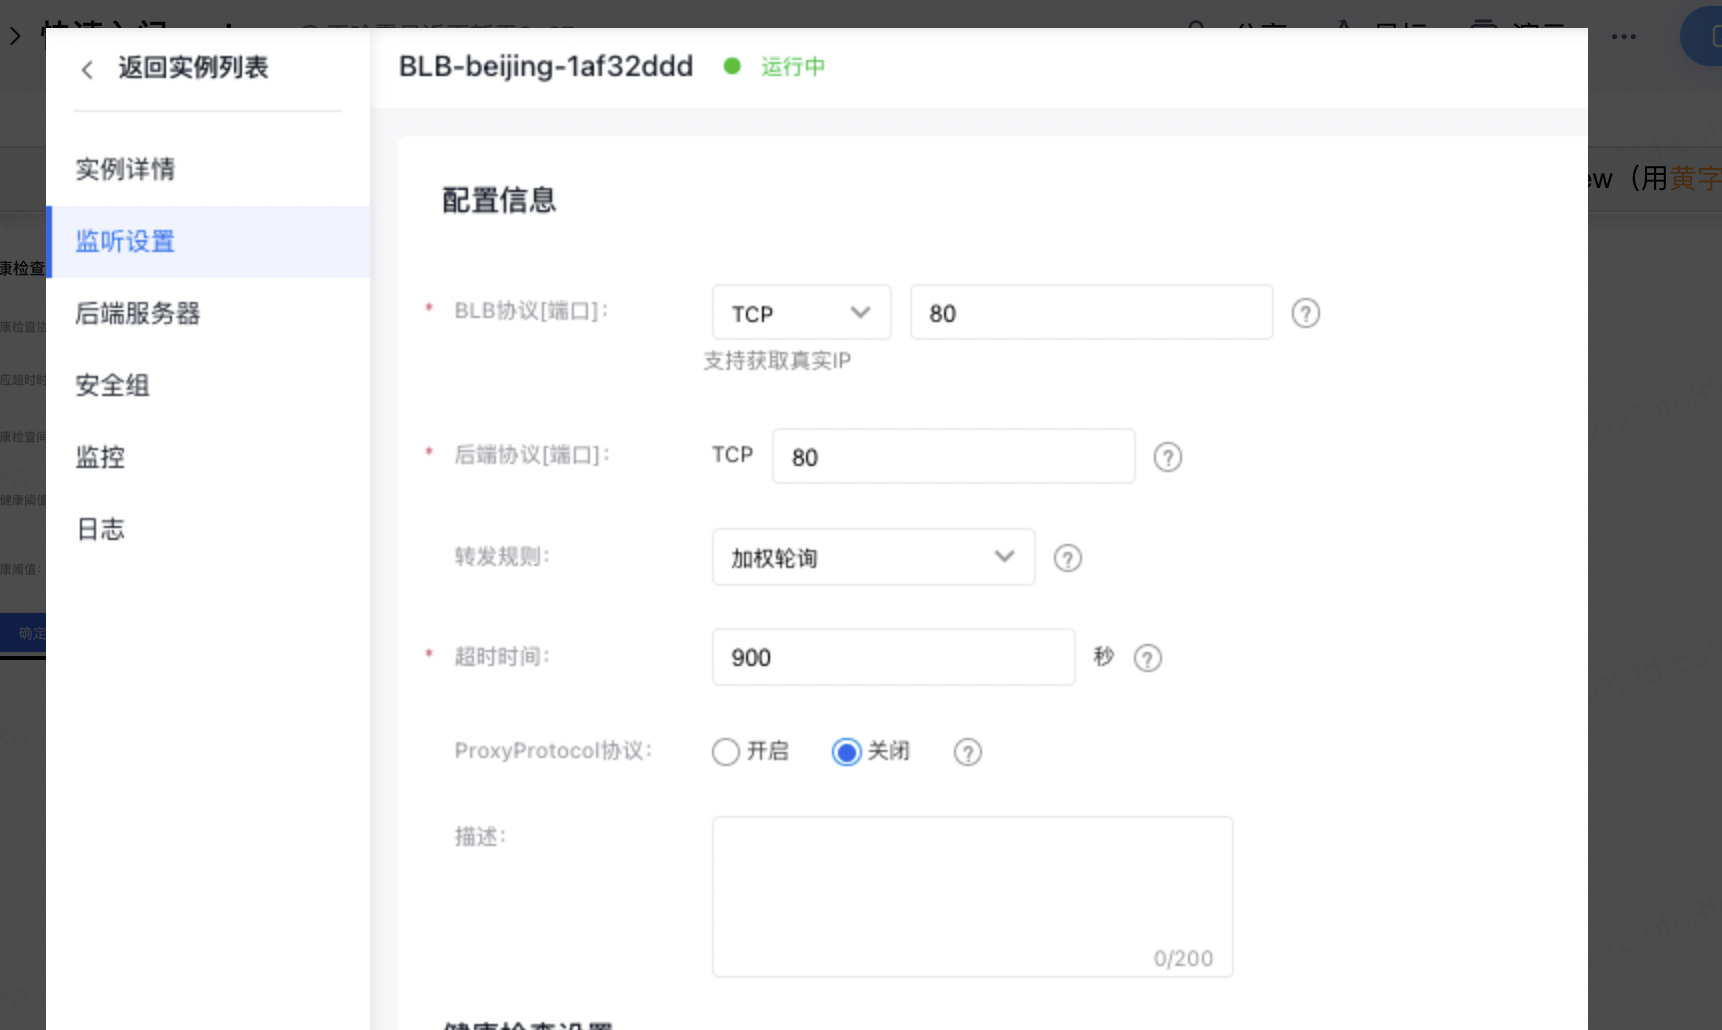
配置监听包括“配置信息”和“健康检查设置”两部分。
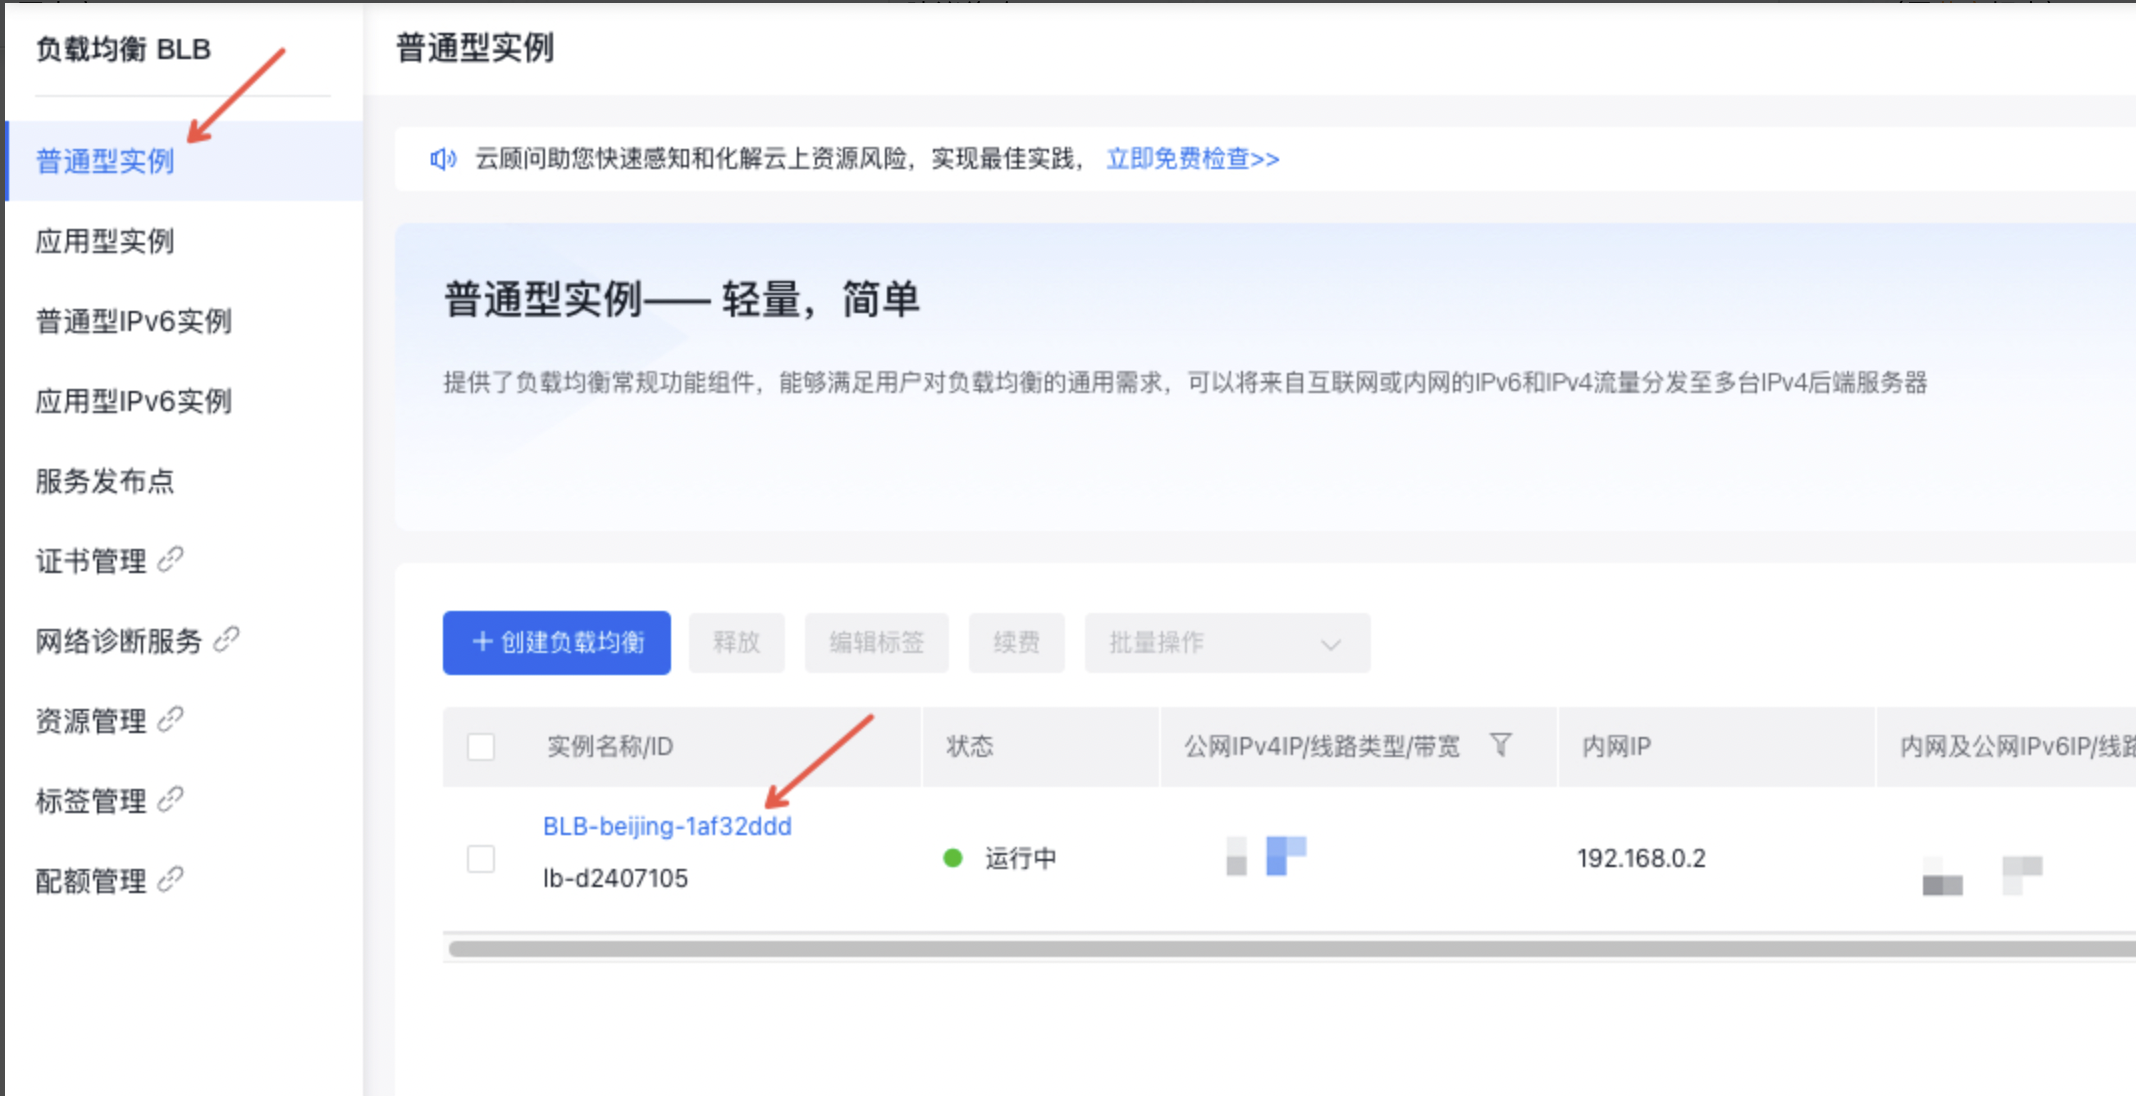
- 选择“产品>网络>负载均衡”,进入BLB控制台列表,下面以普通型BLB实例添加TCP监听为例进行配置演示。
- 首先在左边栏选择普通型实例,点击“负载均衡ID/名称”列的ID链接,进入实例详情页。
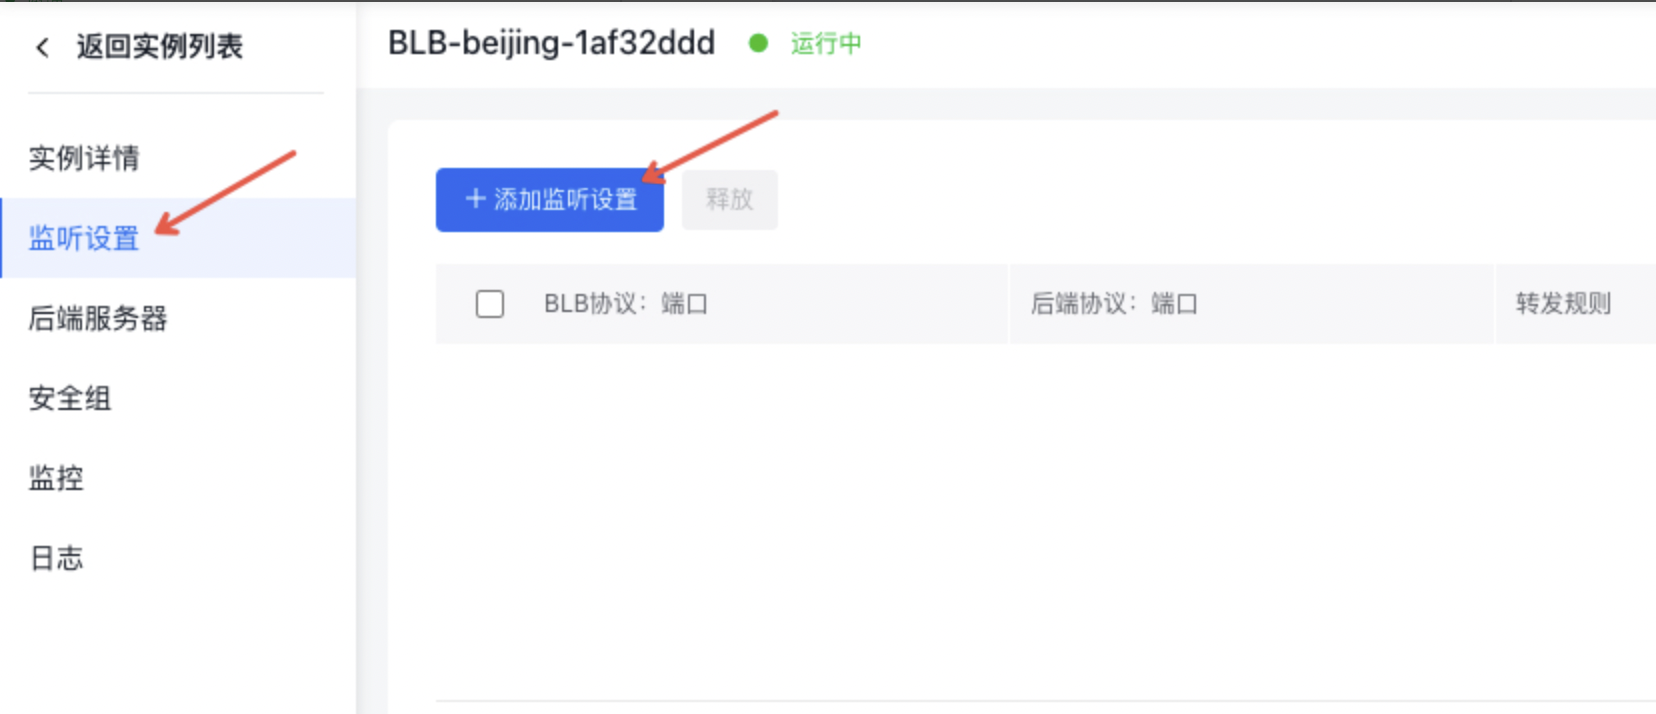
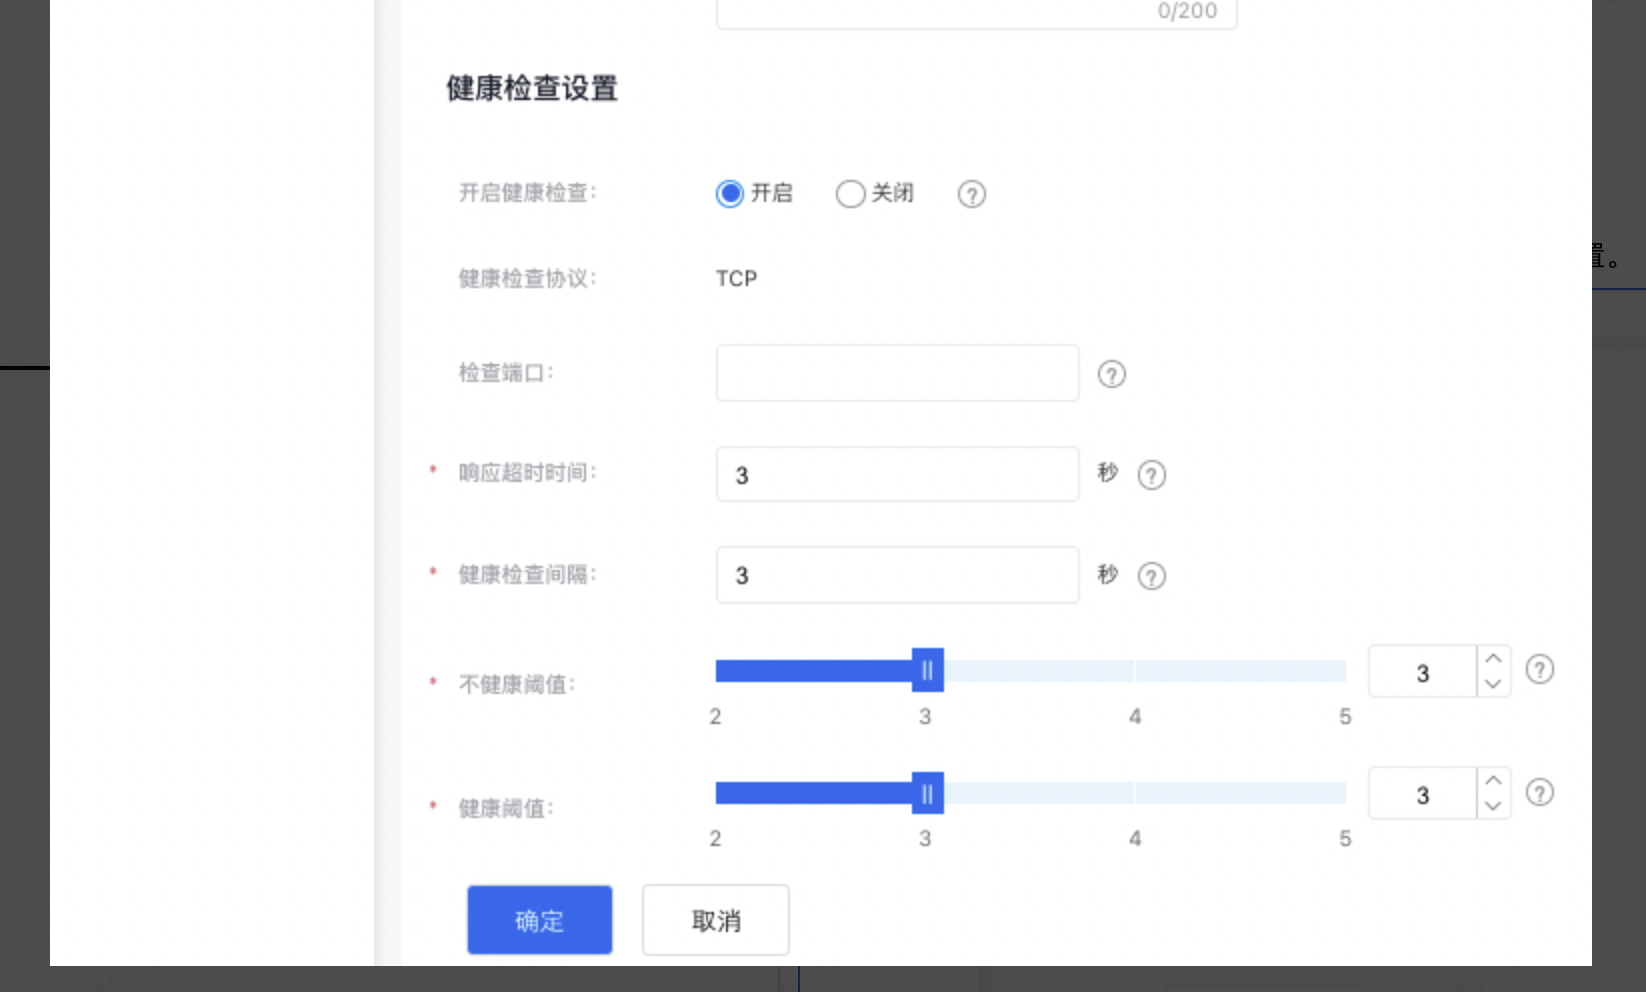
- 点击“监听设置”页签,点击“添加监听设置”按钮,下面以配置TCP监听器为例,进行监听器的基本设置和健康检查设置。
- 配置信息可根据页面提示进行监听器端口的相关设置。
- 健康检查设置可根据页面提示进行设健康检查的相关参数设置。
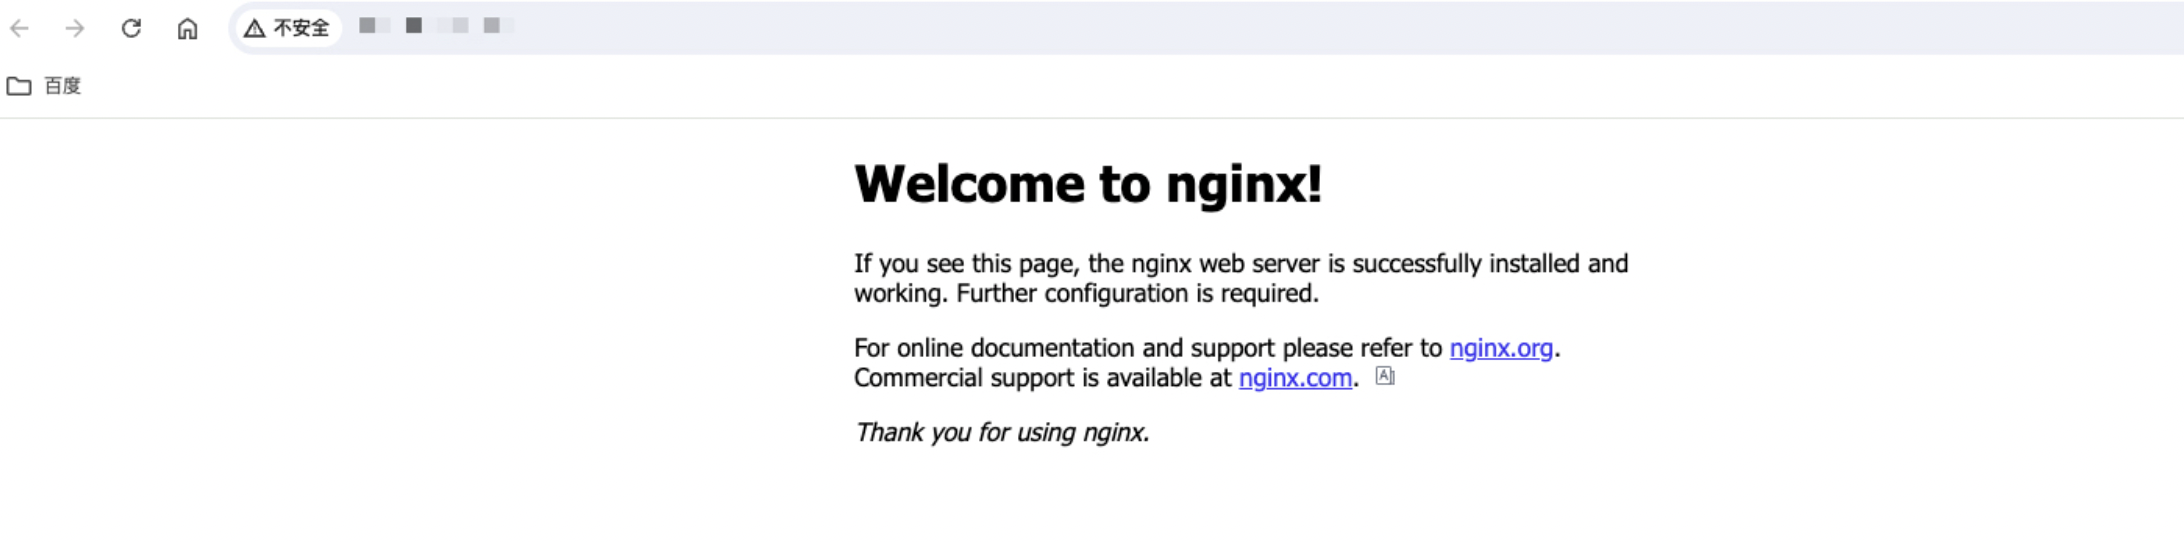
公网访问后端服务
此时可通过浏览器输入BLB绑定的公网EIP地址访问后端服务。
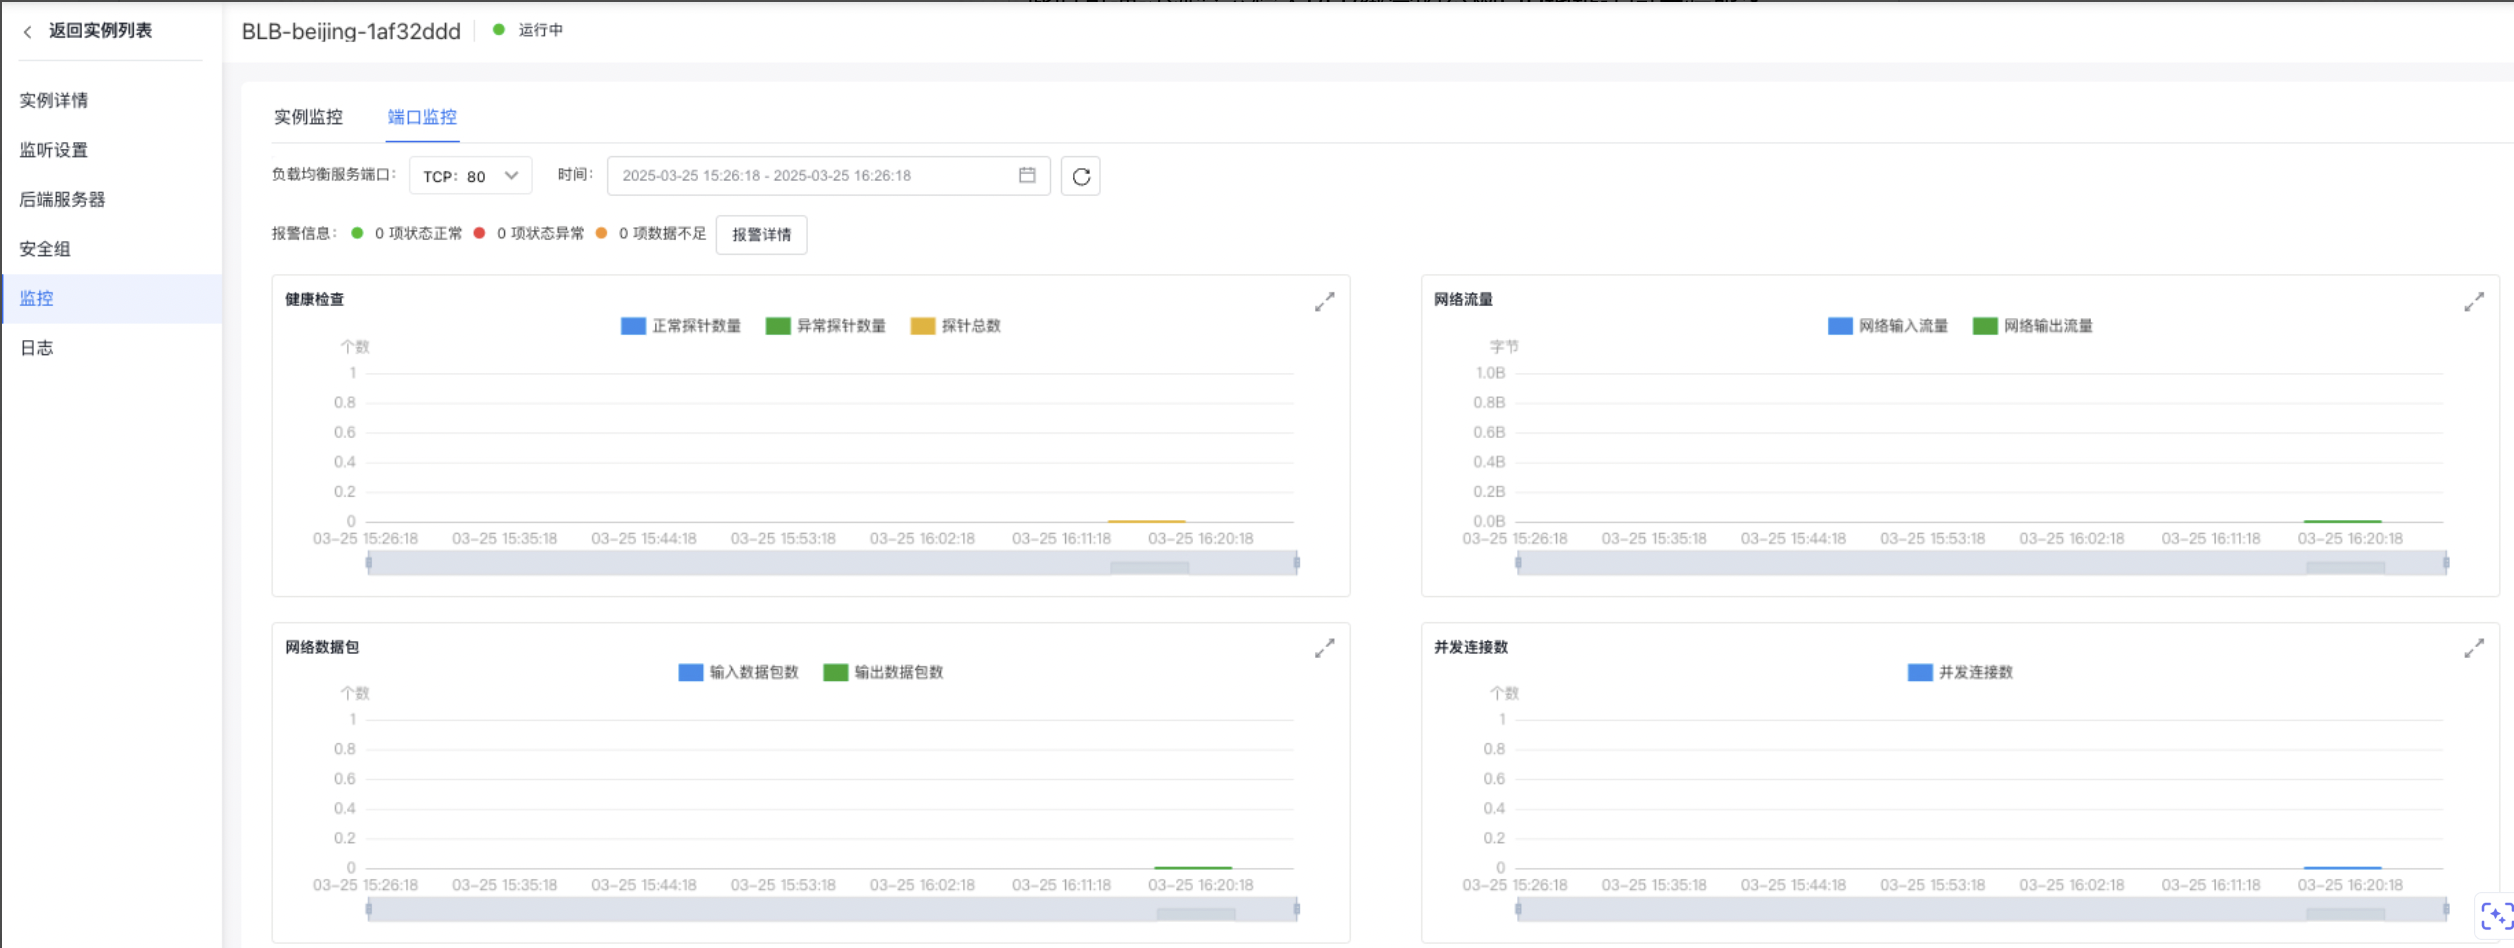
查看监控数据
完成BLB实例、后端服务器及监听器配置后可以查看BLB实例的监控数据。点击BLB的详情页的“实例监控”页签,就可以看到监控的各项图表数据。